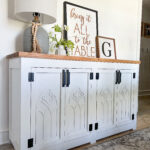
DIY Modern Farmhouse Fancy Door Cabinet
CLICK HERE to print the FREE plans!
Instructions
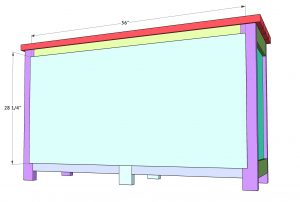
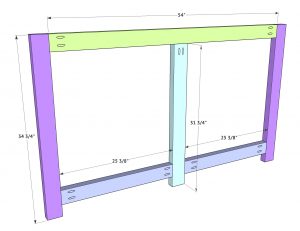
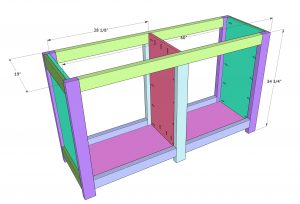
- The first step is to build your 2 face frames. These are made from 2x4 boards that I ripped to 3” wide each. Add 1.5” pocket holes where they are shown here and attach in place using wood glue and 2.5” pocket hole screws. The bottom horizontal boards will line up 2.5” from the base of the leg pieces.
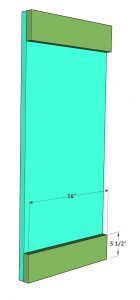
- Now you will build the sides of the cabinet. These are constructed with 3/4” hardwood plywood and 1x4 boards. Add 3/4” pocket holes down each long side on the back side of the panel.
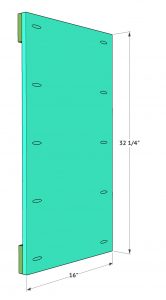
- Then, attach the 1x4 trim to the front of the panel using wood glue and 1.25” brad nails. You will build two of these that will be indentical.
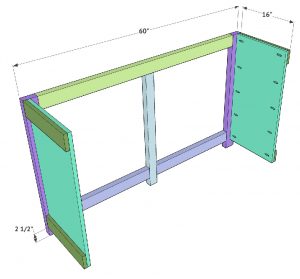
- Now attach the two side frames to the back face frame using wood glue and 1.5” Kreg pocket hole screws. You want the top of the side frames to be flush with the top of the back face frame which will leave a 2.5” space below the bottom of the side frames. You also want the outside of the trim boards to be flush with the outside edge of the face frame.
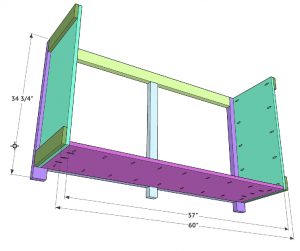
- The base of this cabinet is also 3/4” hardwood plywood. Add 3/4” pocket holes with the Kreg Jig along all 4 sides of this piece. Then, attach it to the back face frame and side frames using wood glue and 1.5” pocket hole screws.
- Attach the middle divider next. This is also 3/4” hardwood plywood cut slightly shorter than the side frames. Add pocket holes down both long sides and the bottom of one side of this board. Attach it to the base of the dresser and the middle leg of the face frame using wood glue and 1.25” pocket hole screws for the bottom and 1.5” pocket hole screws for the longer sides. Don’t forget to use wood glue too!
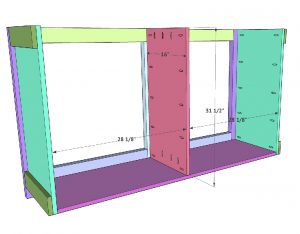
- Attach the front face frame next! Use wood glue and 1.5” Kreg pocket hole screws to go through the side frames and center divider and into the face frame. Just like the back face frame, you want the outsides and top flush with the outside edges of the face frame.
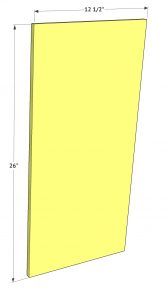
- At this point, I like to stop and build the doors before adding my top and back. These doors are constructed from 1/2” hardwood plywood. Cut each panel to size. I like to leave 1/8” gap all around each door. It’s best to measure and cut this part exact in case one of your doors is uneven.
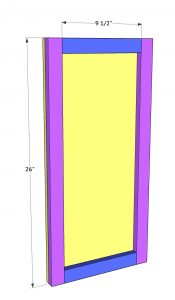
- Attach the door trim next! This is 2x4 boards cut to size. Measure and cut your longer vertical pieces first, and then measure and cut the shorter horizontal pieces. Attach the trim pieces using wood glue and 1”brad nails.
- Build the top of the cabinet next. These are 2x6 boards that. I ripped down to 5”wide each. Add 1.5” pocket holes down one side of 3 of the boards. Then, line them up flush and attach them using 2.5” pocket hole screws.
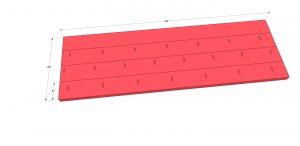
- Attach the top to the cabinet with 3.5” wood or Spax screws through the face frame and into the top.
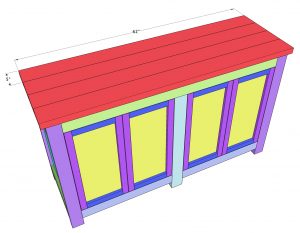
- Final step is adding your back! This is just 1/4” hardwood plywood cut to size. Attach it to the back of the dresser using wood glue and 1” staples or nails.