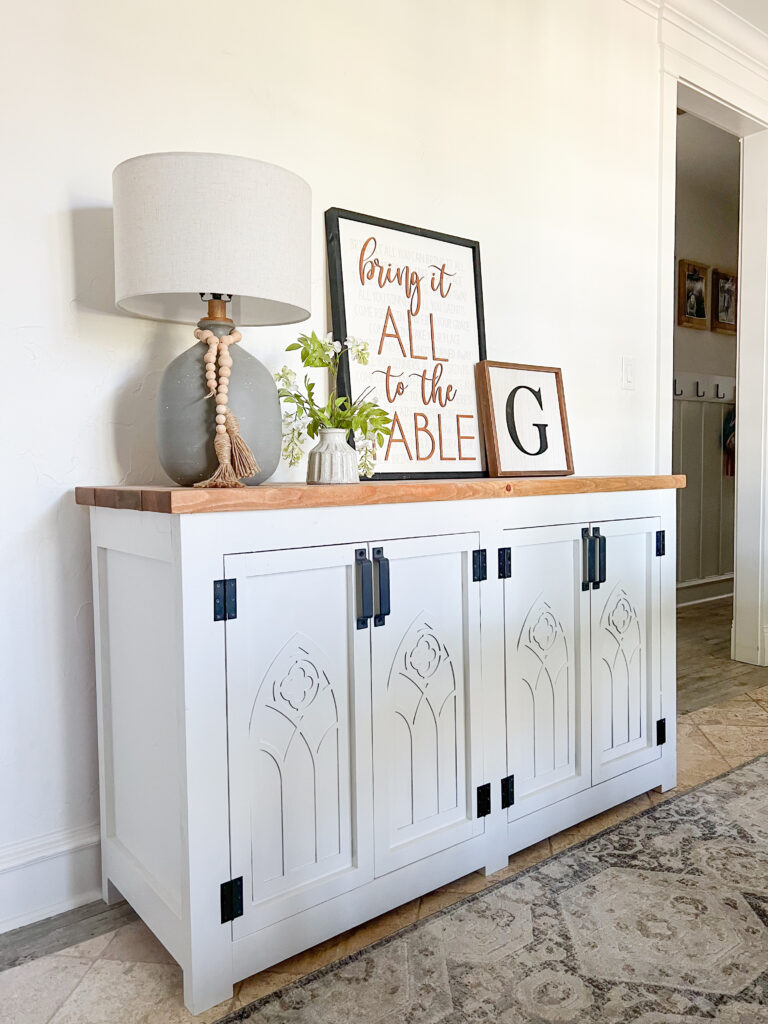
Building your own DIY buffet table or buffet cabinet can save lots of money! This DIY Buffet Table only takes a few hours and a few tools to build! Find out how with this tutorial!
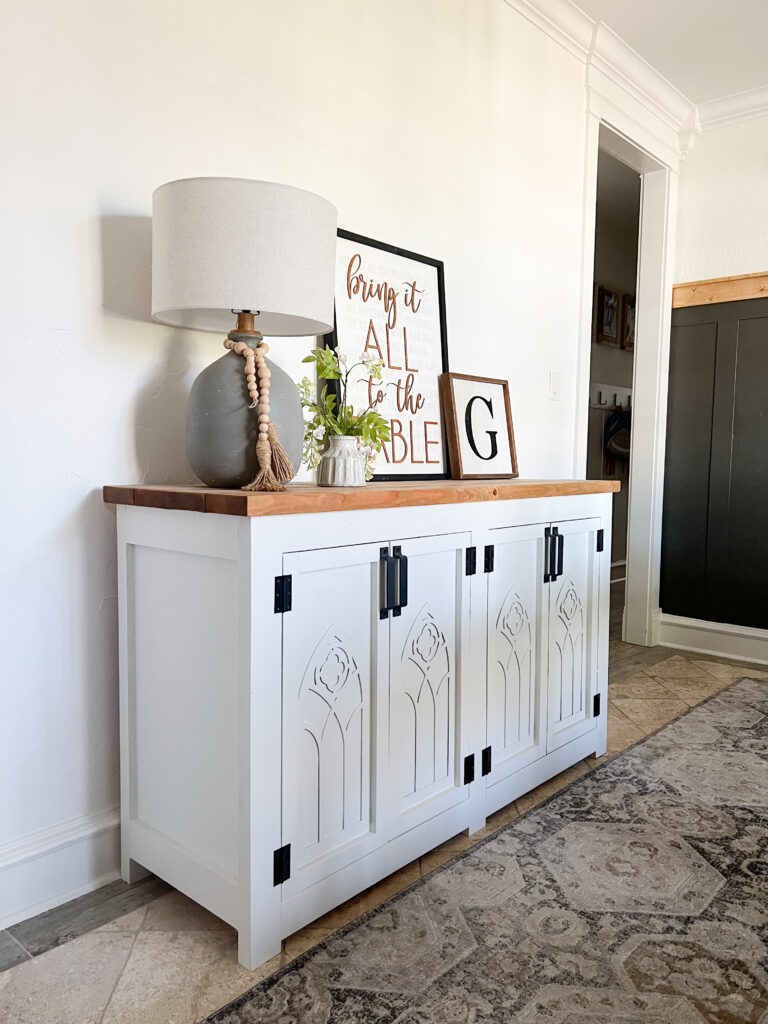
I recently built my new dining table, and I love it so much! I was in need of a buffet table, so I decided to build one myself. Isn’t she so cute?? I just love how it turned out so much! I love the detailing of the doors and how it adds storage and function to the room. You can grab the free plans and cut list at the bottom of this post!
Table of Contents
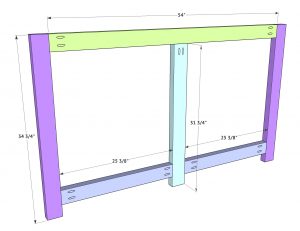
Build the face frames
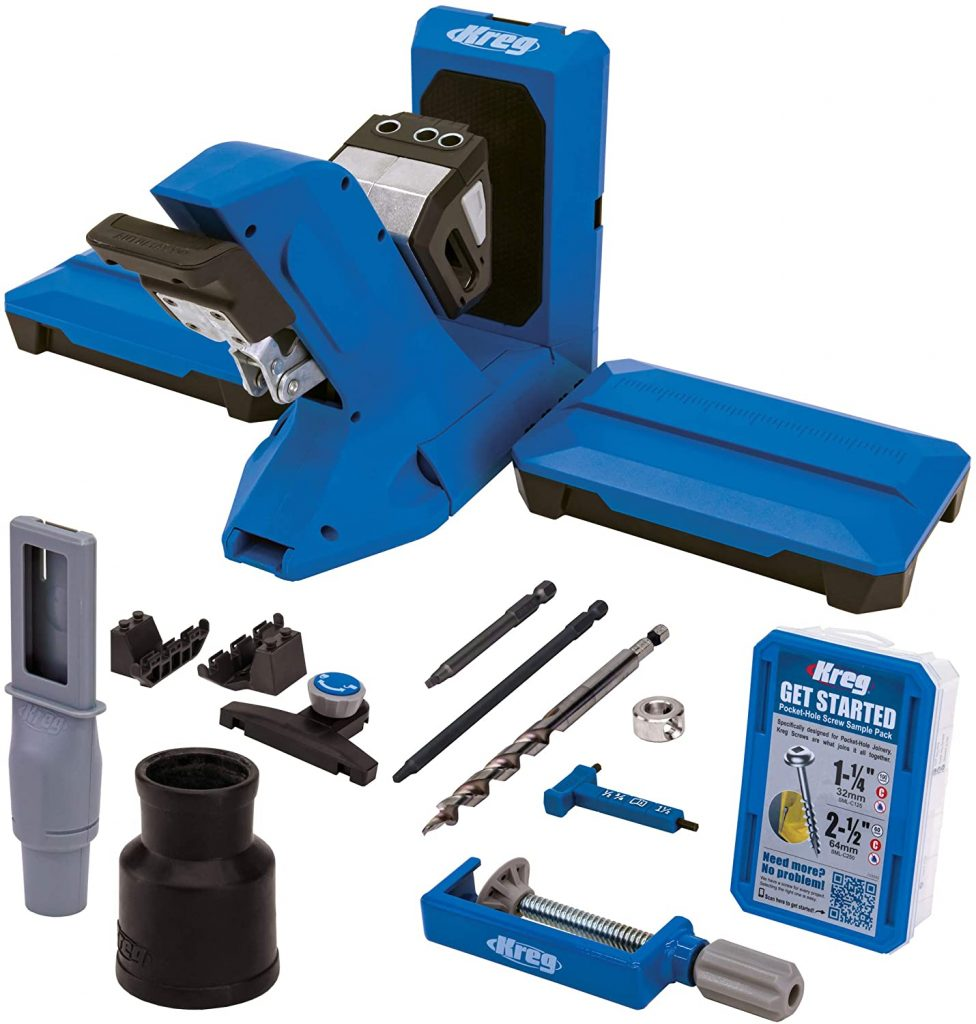
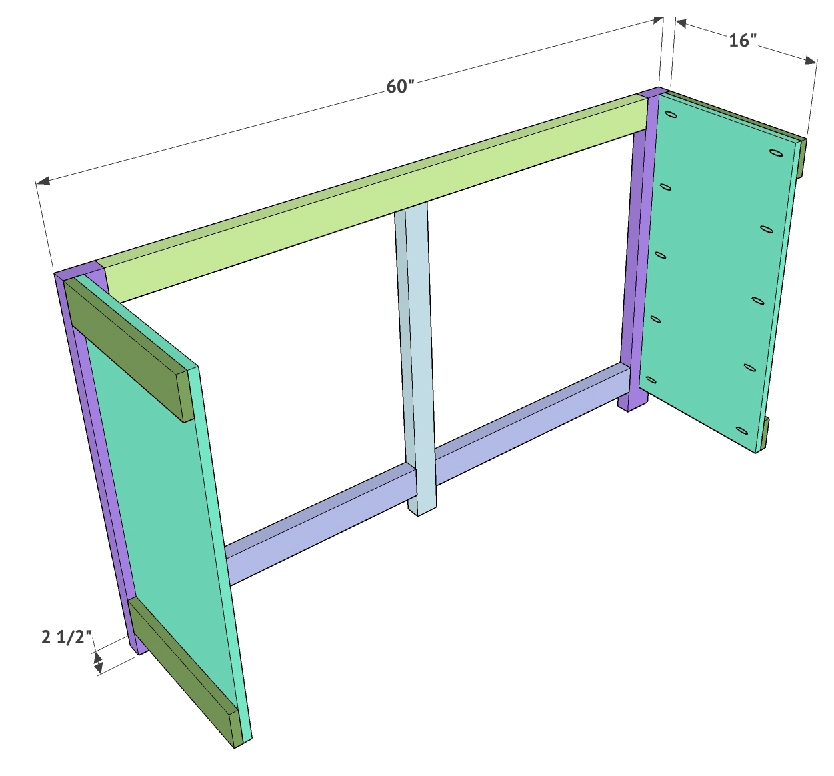
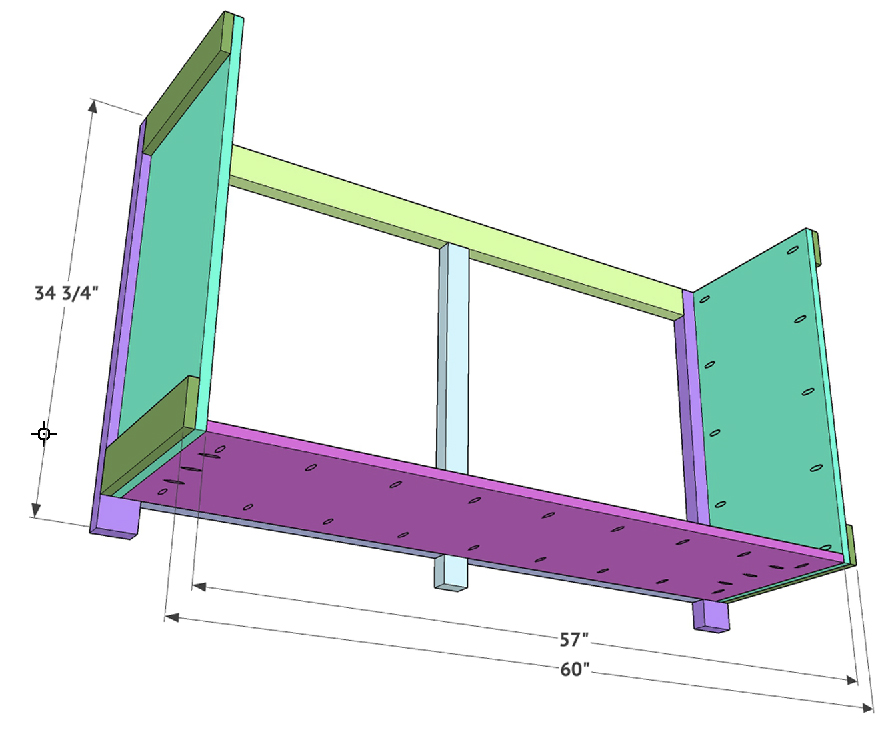
The first step is to build your 2 face frames. I used my new Kreg Jig 720 PRO for this build and I LOVE IT! You guys will love it too… definitely worth the upgrade for those of you that already own a different model. You can see it HERE on Amazon! We LOVE this pocket hole jig!
The face frames are made from 2×4 boards that I ripped to 3” wide each with my table saw. I made all of the cross cuts using my miter saw. Add 1.5” pocket holes where they are shown here and attach in place with your drill using wood glue and 2.5” pocket hole screws . The bottom horizontal boards will line up 2.5” from the base of the leg pieces.

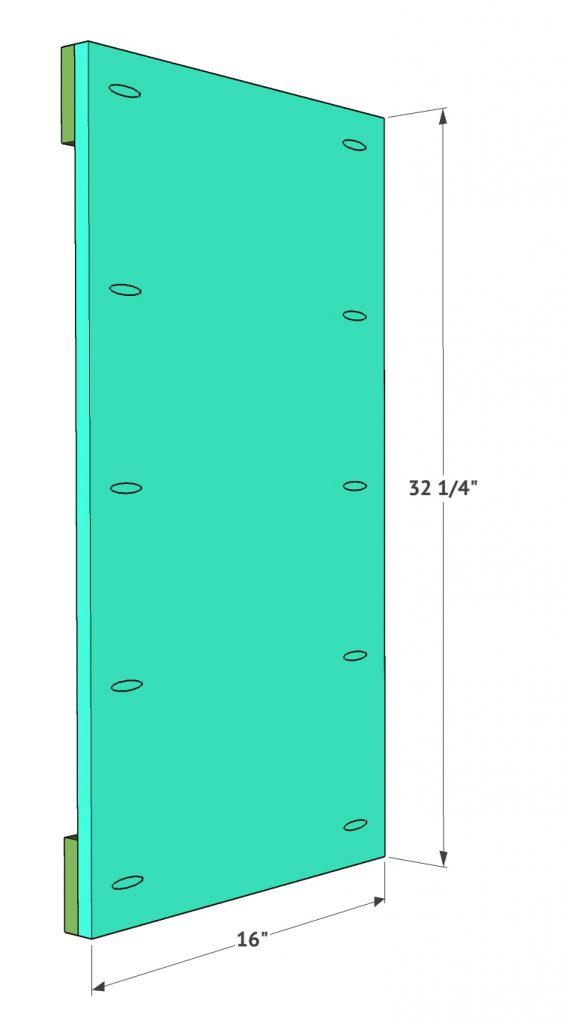
Build the sides of the cabinet
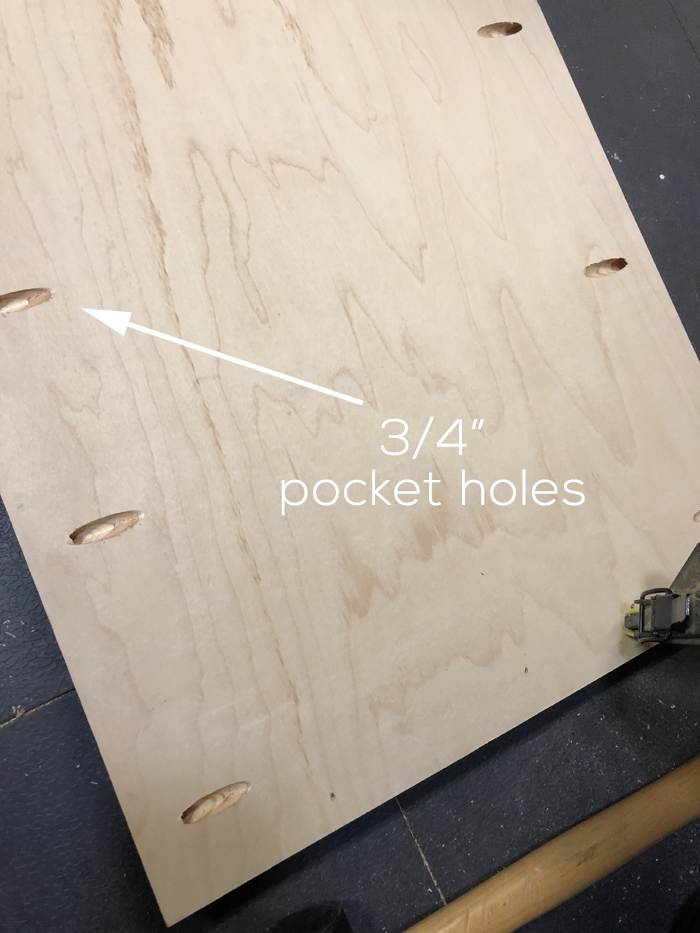
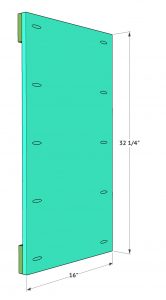
Now you will build the sides of the cabinet. These are constructed with 3/4” hardwood plywood and 1×4 boards. Add 3/4” pocket holes down each long side on the back side of the panel. Then, attach the 1×4 trim to the front of the panel using wood glue and 1.25” brad nails. You will build two of these that will be indentical.
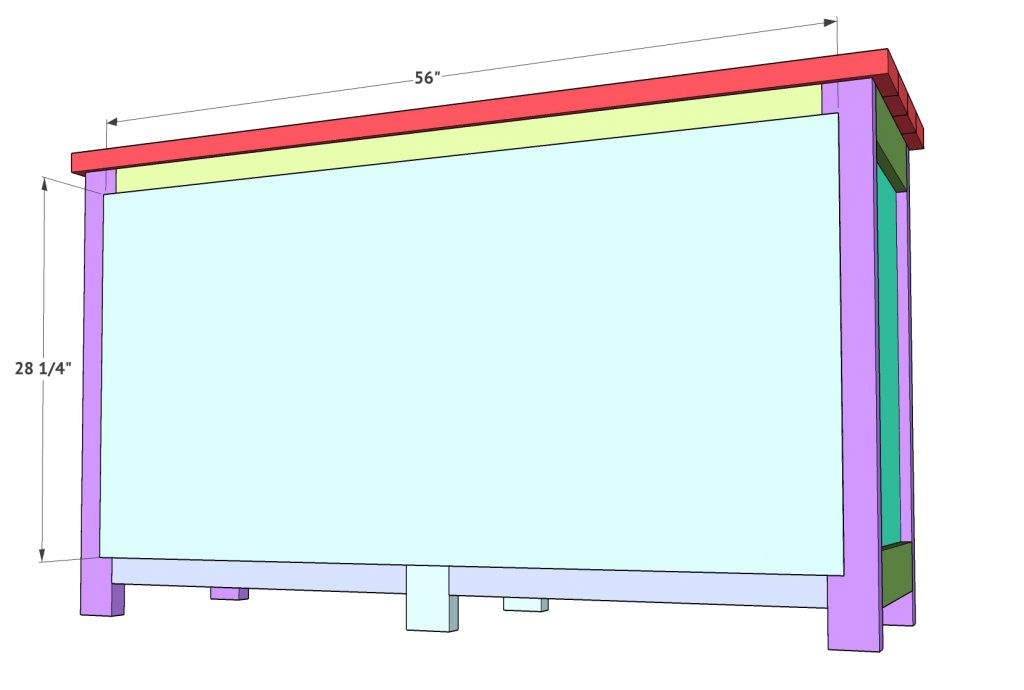
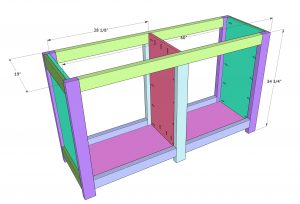
Attach the sides to the back face frame
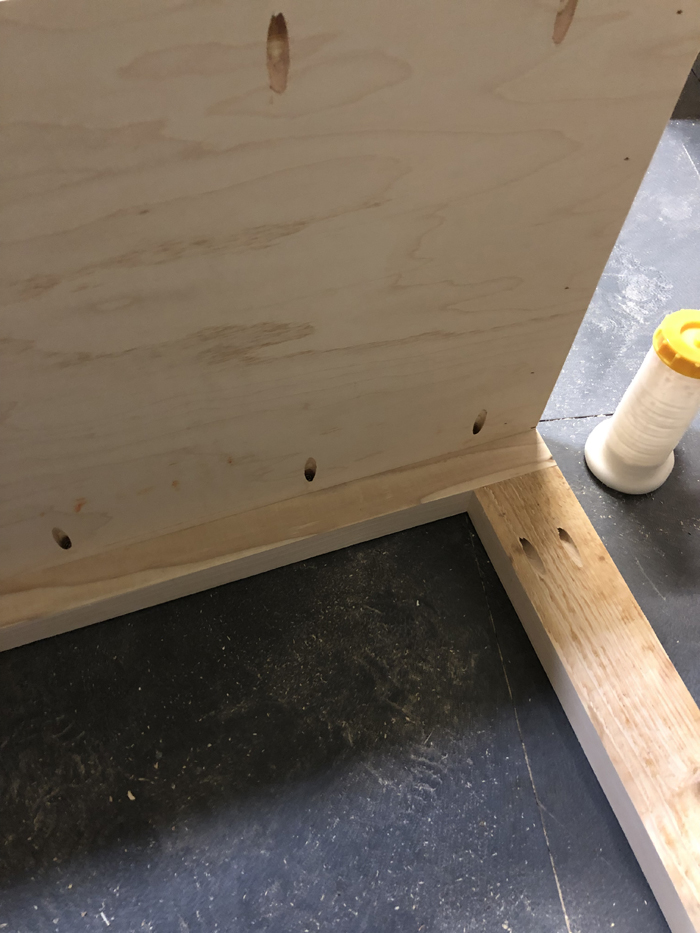
Now attach the two side frames to the back face frame using wood glue and 1.5” Kreg pocket hole screws. You want the top of the side frames to be flush with the top of the back face frame which will leave a 2.5” space below the bottom of the side frames. You also want the outside of the trim boards to be flush with the outside edge of the face frame.
Add the bottom of the cabinet
The base of this cabinet is also 3/4” hardwood plywood. Add 3/4” pocket holes with the Kreg Jig along all 4 sides of this piece. Then, attach it to the back face frame and side frames using wood glue and 1.5” pocket hole screws.

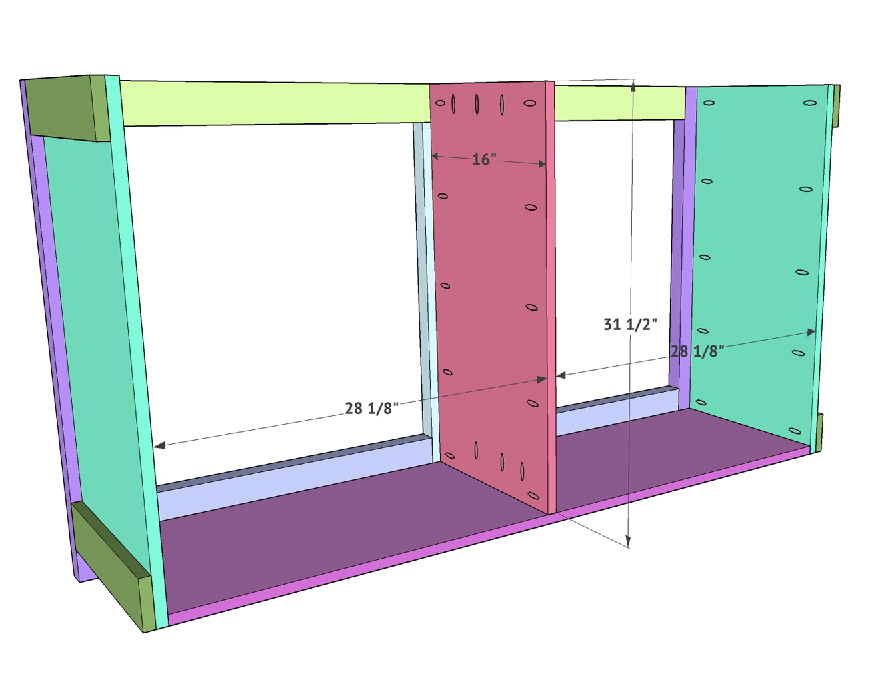
Attach the middle divider
Attach the middle divider next. This is also 3/4” hardwood plywood cut slightly shorter than the side frames. Add pocket holes down both long sides and the bottom of one side of this board. Attach it to the base of the dresser and the middle leg of the face frame using wood glue and 1.25” pocket hole screws for the bottom and 1.5” pocket hole screws for the longer sides. Don’t forget to use wood glue too!
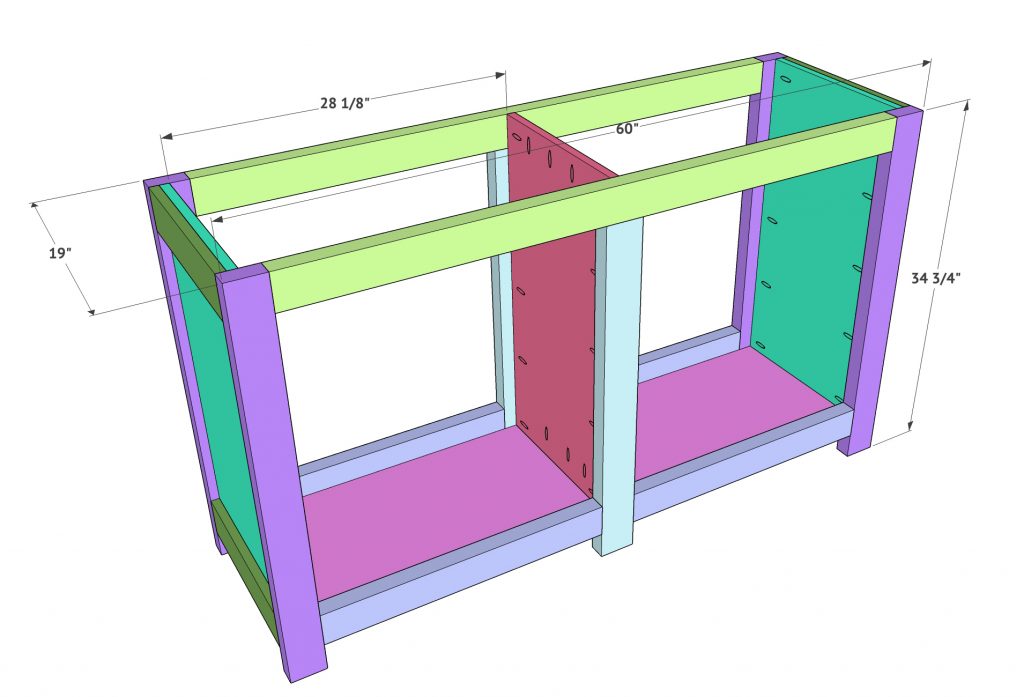
Attach the front face frame
Attach the front face frame next! Use wood glue and 1.5” Kreg pocket hole screws to go through the side frames and center divider and into the face frame. Just like the back face frame, you want the outsides and top flush with the outside edges of the face frame.
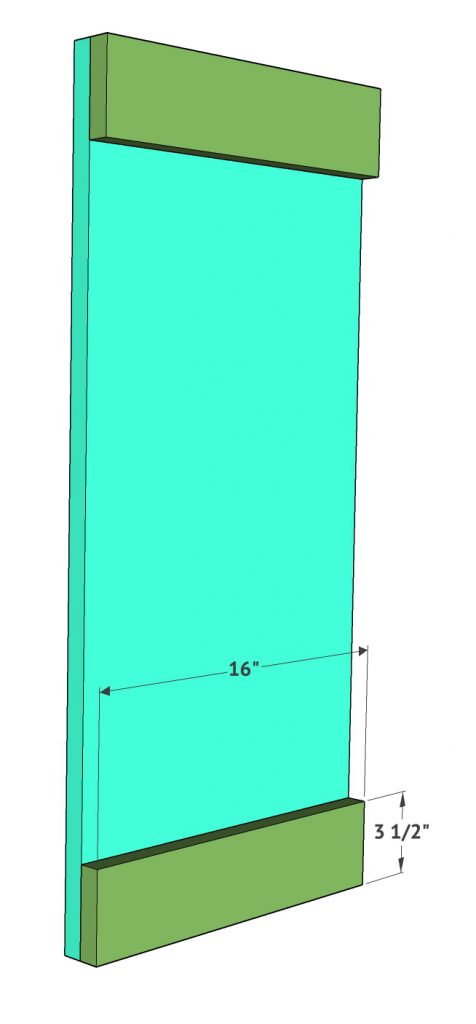
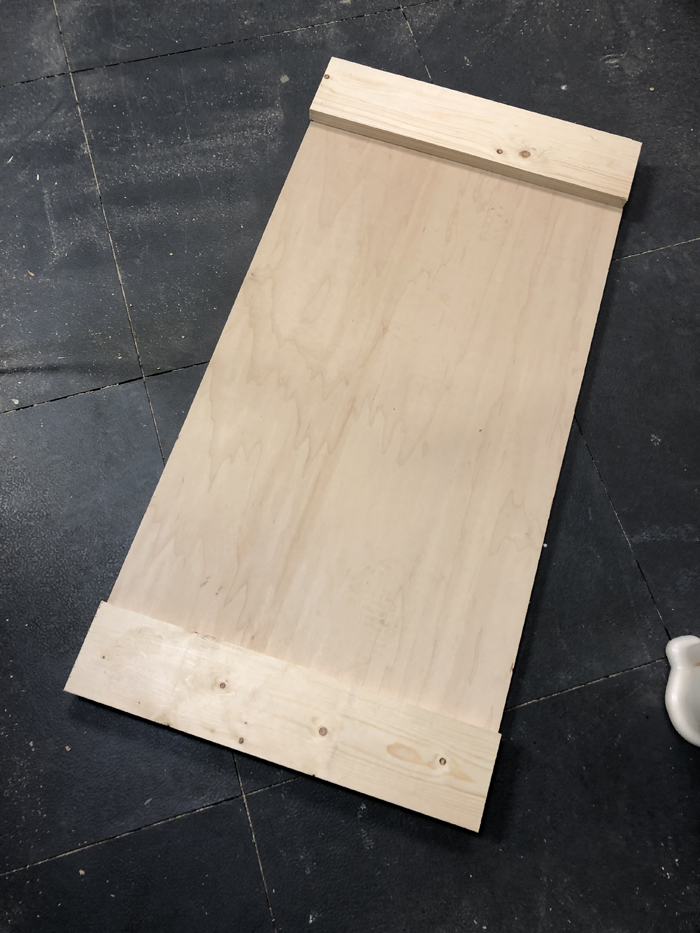
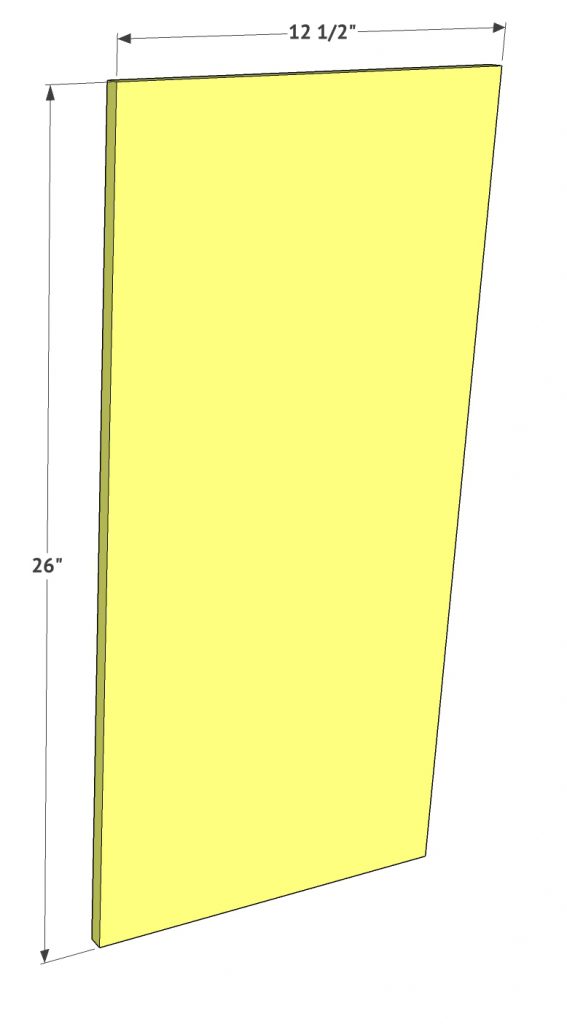
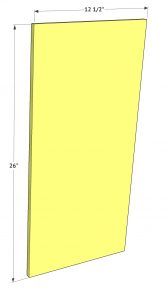
At this point, I like to stop and build the doors before adding my top and back. These doors are constructed from 1/2” hardwood plywood. Cut each panel to size. I like to leave 1/8” gap all around each door. It’s best to measure and cut this part exact in case one of your doors is uneven.
Attach the door trim next! This is 1×4 boards cut to size. Measure and cut your longer vertical pieces first, and then measure and cut the shorter horizontal pieces. Attach the trim pieces using wood glue and 1” brad nails.

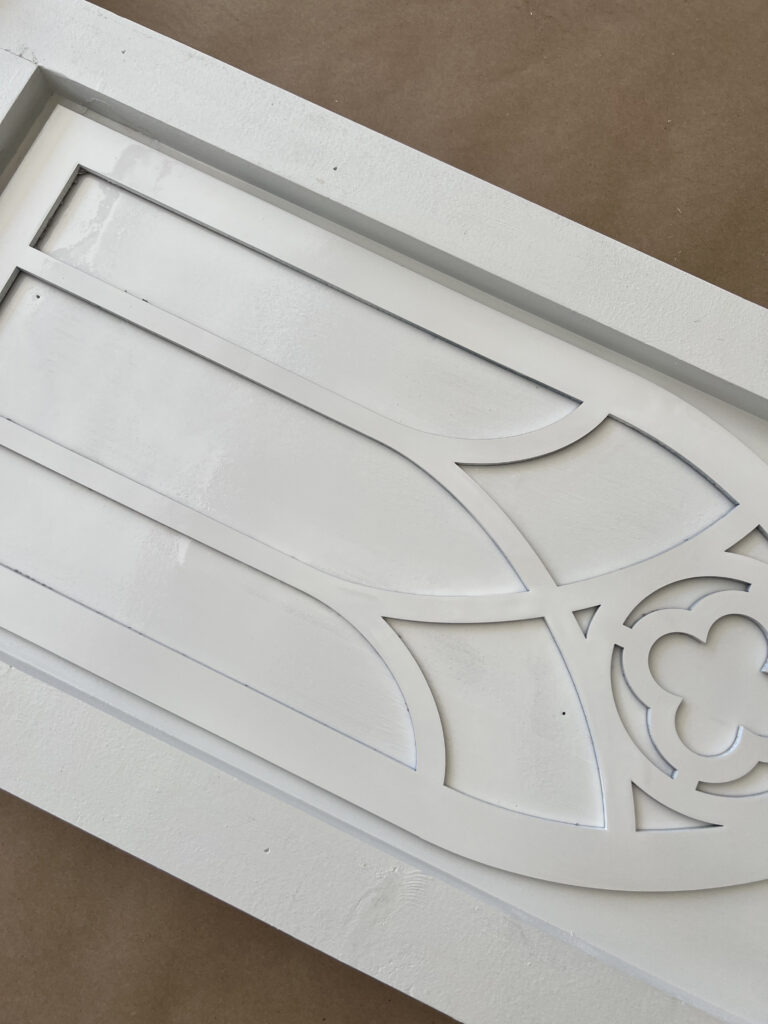
Decorative Arches for Doors
I wanted to do something fun with the doors of this buffet table. So, I decided to use my Glowforge to cut arches for each door. I found this SVG file on Etsy! I used this eucalyptus board from Home Depot and cut a panel on my Glowforge for each door. I used medium draftboard settings for the cut and I didn’t mask because it cleans up with a fiber cloth!
These doors are great blank just as the plans call for, or you can dress yours up to fit your style! There are so many options to make this piece your own.
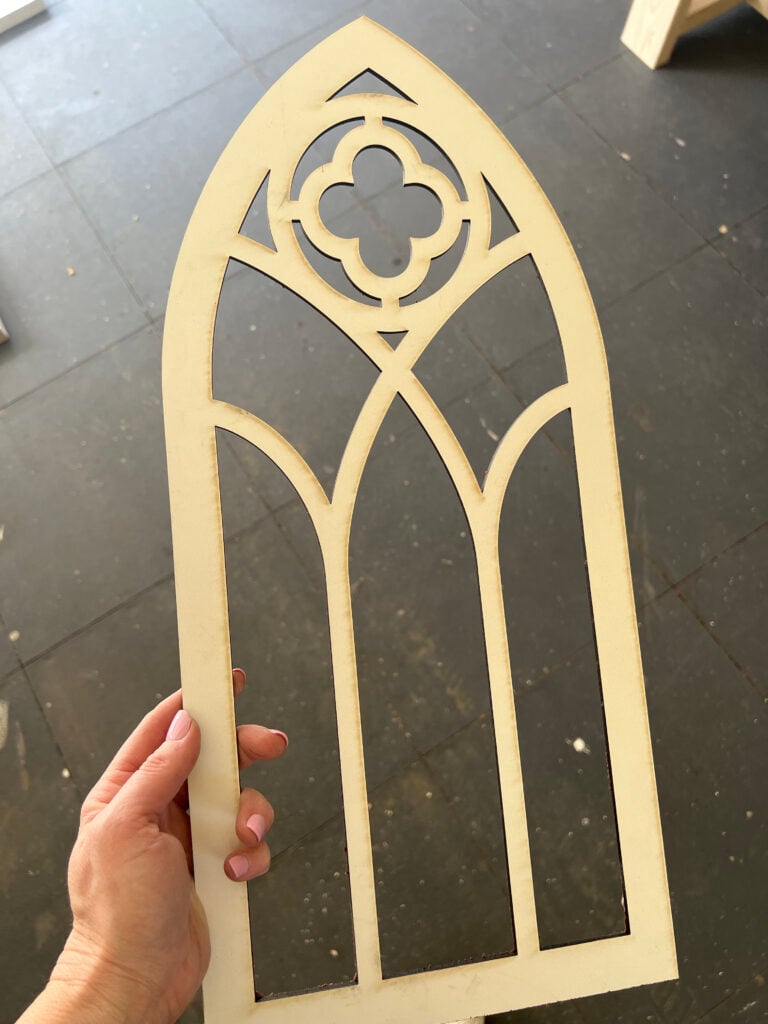
I attached each panel to the doors with Gorilla Clear Grip and let them dry. Love this stuff!
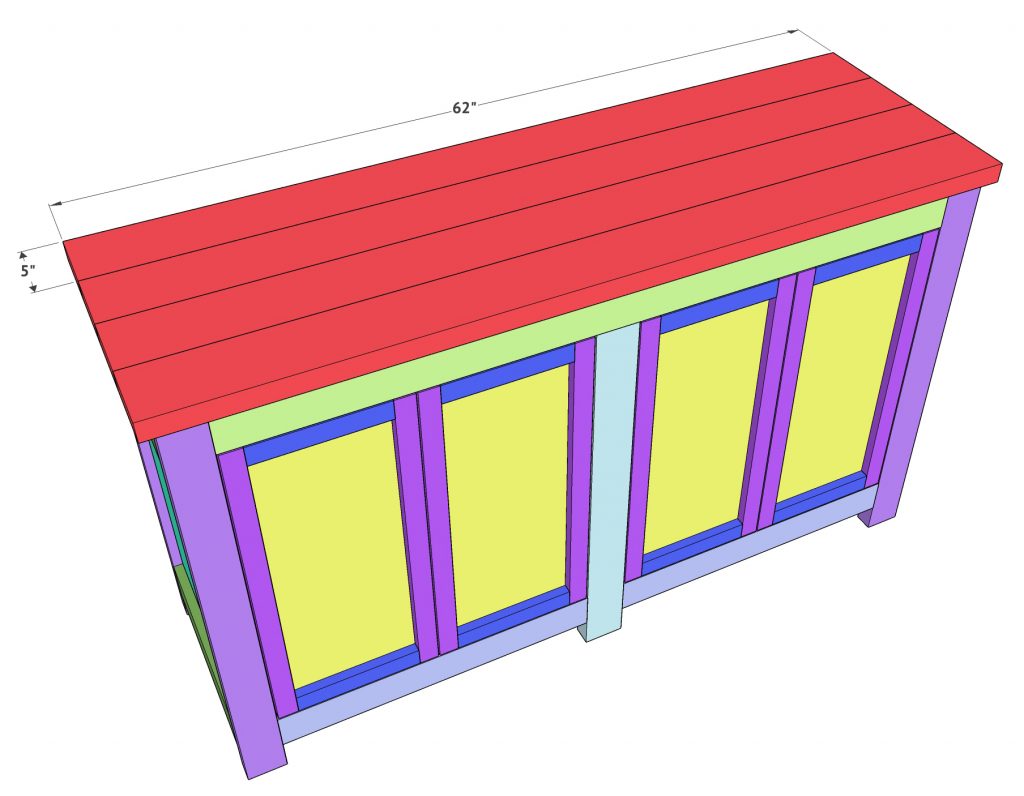
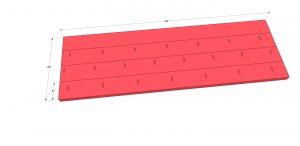
Build the planked top
Build the top of the cabinet next. These are 2×6 boards that. I ripped down to 5”wide each.
Add 1.5” pocket holes down one side of 3 of the boards. Then, line them up flush and attach them using 2.5” pocket hole screws.

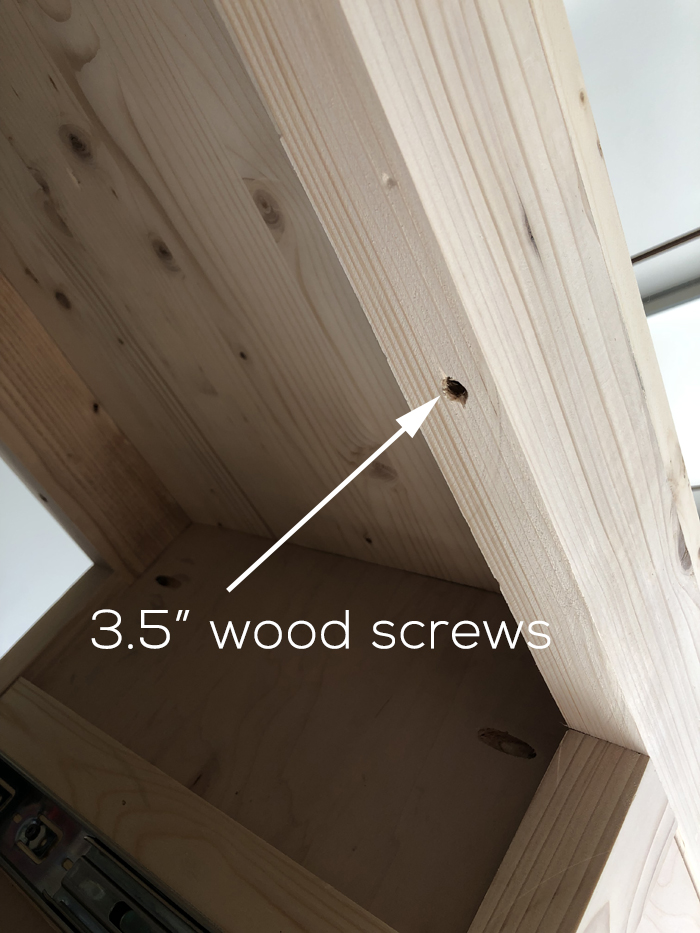
Attach top to base
Attach the top to the cabinet with 3.5” wood screws or Spax screws through the face frame and into the top.
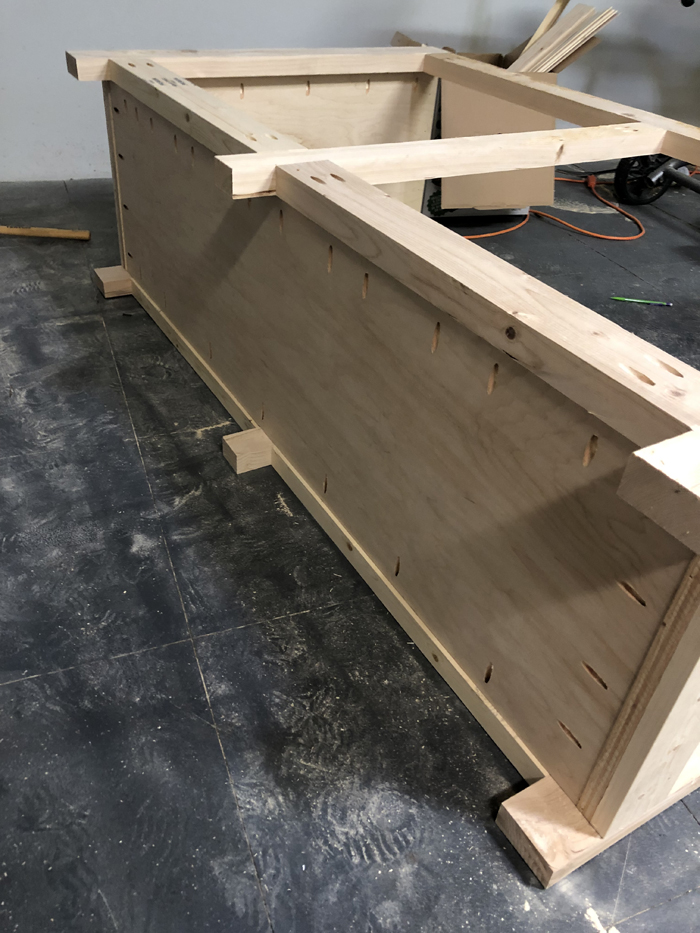
Attach plywood back
Final step is adding your back! This is cut from a 1/4” sheet of plywood. Attach it to the back of the dresser using wood glue and 1” staples or nails.
Painting the buffet table
Now let’s talk about the finish! I painted the doors and cabinet base with Sherwin-Williams Pure White in satin finish.
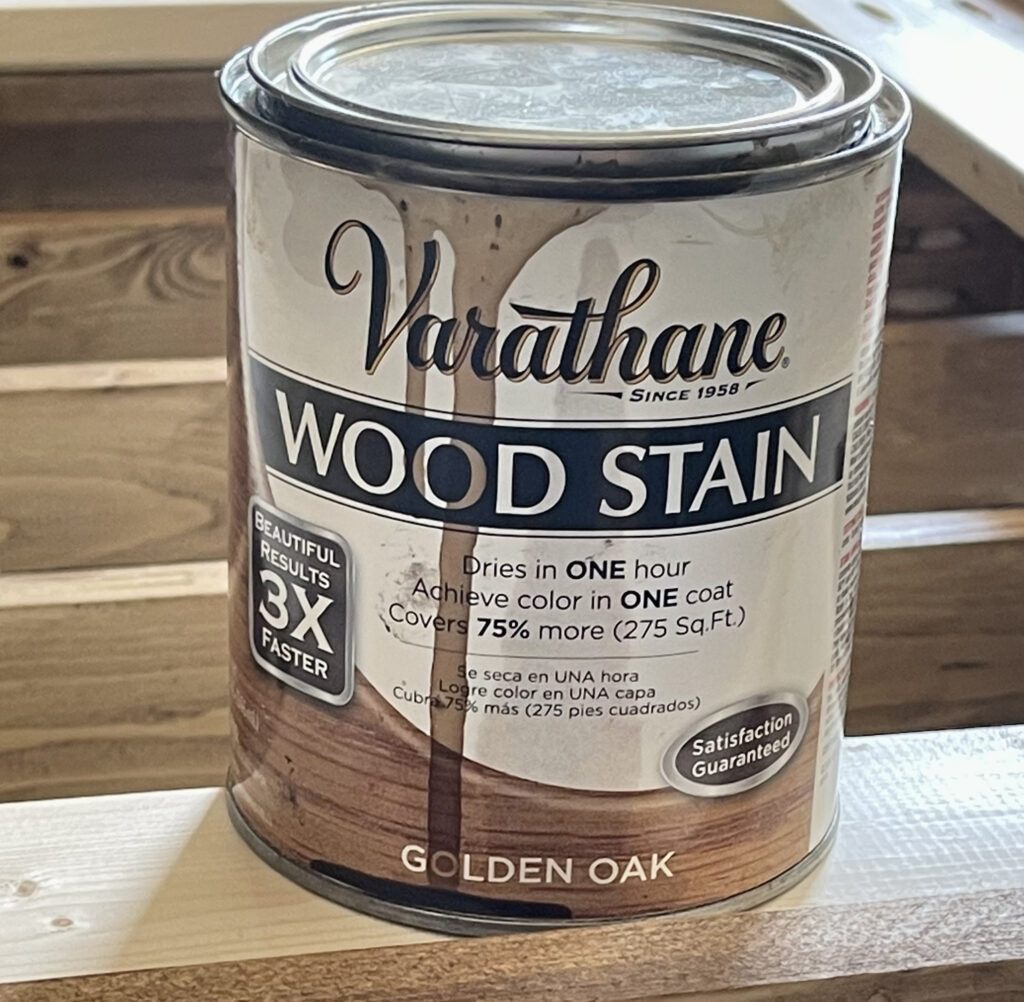
I stained the top using Varathane stain in Golden Oak. I love the combo of the two!
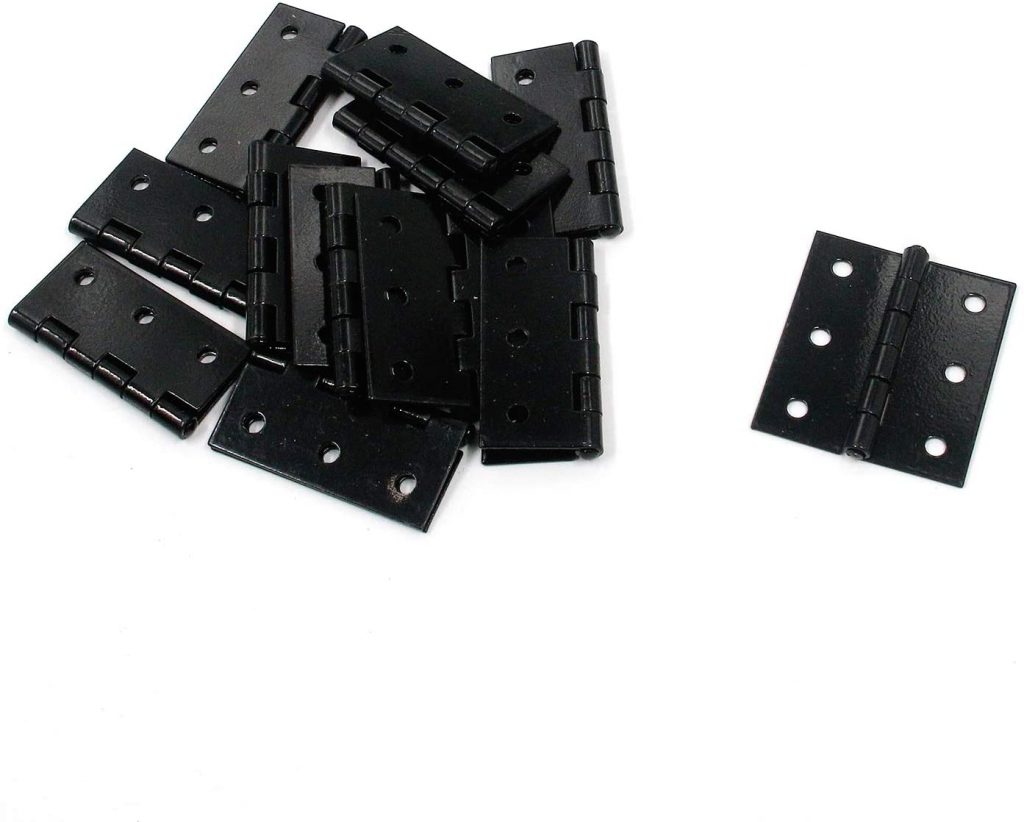
Attach the hardware
I found the best hinges on Amazon. You can find them HERE! Great price too!
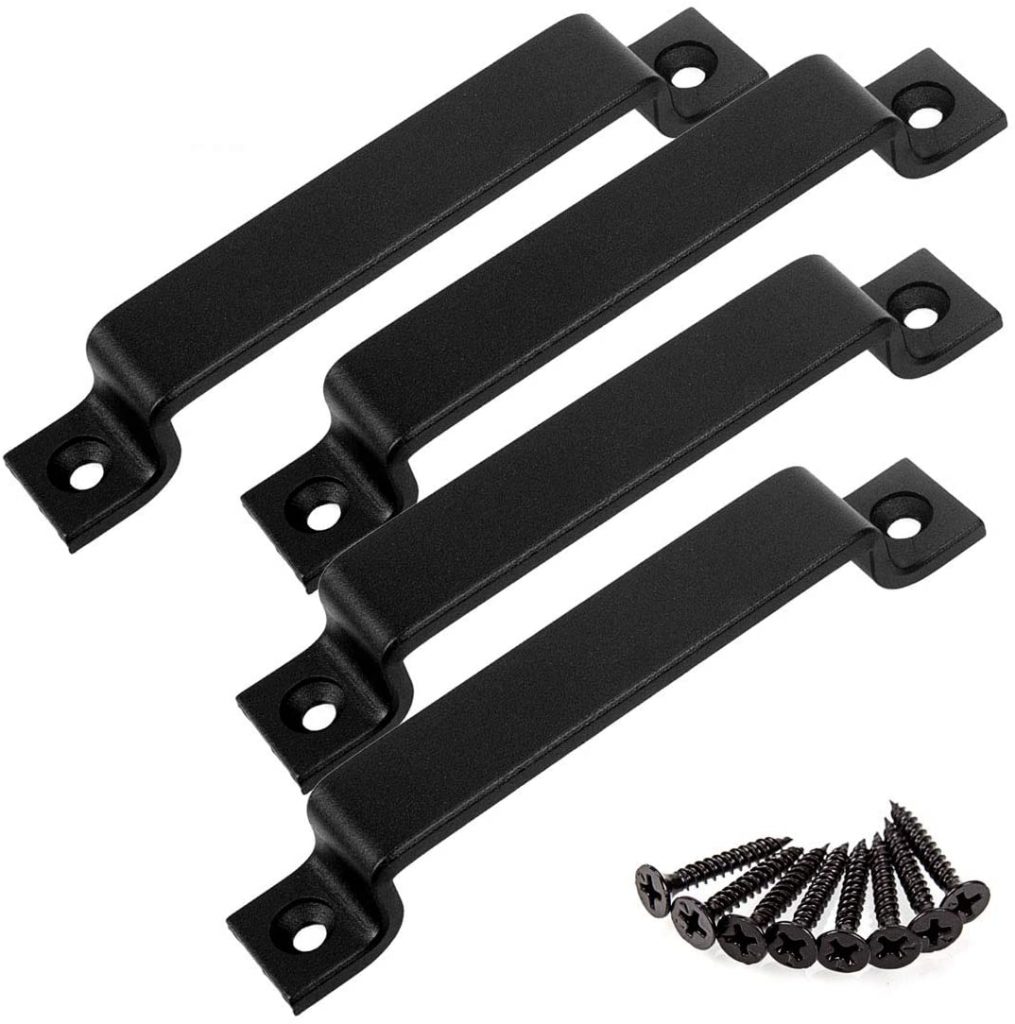
I love the door pulls! I have used them on several different builds. They are also a great price and ship super fast. You can find them HERE on Amazon!
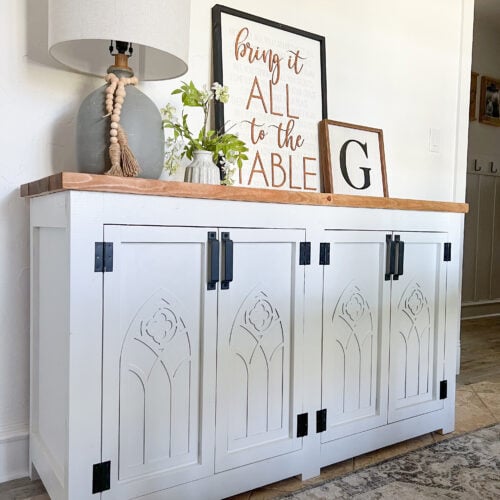
All Finished up!
I love how this DIY Buffet table turned out. I love the function and space it is added to my dining room and couldn’t be happier. You can grab the free plans below!
Free Printable Plans
DIY Modern Farmhouse Fancy Door Cabinet
Instructions
- The first step is to build your 2 face frames. These are made from 2×4 boards that I ripped to 3” wide each. Add 1.5” pocket holes where they are shown here and attach in place using wood glue and 2.5” pocket hole screws. The bottom horizontal boards will line up 2.5” from the base of the leg pieces.

- Now you will build the sides of the cabinet. These are constructed with 3/4” hardwood plywood and 1×4 boards. Add 3/4” pocket holes down each long side on the back side of the panel.

- Then, attach the 1×4 trim to the front of the panel using wood glue and 1.25” brad nails. You will build two of these that will be indentical.

- Now attach the two side frames to the back face frame using wood glue and 1.5” Kreg pocket hole screws. You want the top of the side frames to be flush with the top of the back face frame which will leave a 2.5” space below the bottom of the side frames. You also want the outside of the trim boards to be flush with the outside edge of the face frame.

- The base of this cabinet is also 3/4” hardwood plywood. Add 3/4” pocket holes with the Kreg Jig along all 4 sides of this piece. Then, attach it to the back face frame and side frames using wood glue and 1.5” pocket hole screws.

- Attach the middle divider next. This is also 3/4” hardwood plywood cut slightly shorter than the side frames. Add pocket holes down both long sides and the bottom of one side of this board. Attach it to the base of the dresser and the middle leg of the face frame using wood glue and 1.25” pocket hole screws for the bottom and 1.5” pocket hole screws for the longer sides. Don’t forget to use wood glue too!

- Attach the front face frame next! Use wood glue and 1.5” Kreg pocket hole screws to go through the side frames and center divider and into the face frame. Just like the back face frame, you want the outsides and top flush with the outside edges of the face frame.

- At this point, I like to stop and build the doors before adding my top and back. These doors are constructed from 1/2” hardwood plywood. Cut each panel to size. I like to leave 1/8” gap all around each door. It’s best to measure and cut this part exact in case one of your doors is uneven.
- Attach the door trim next! This is 2×4 boards cut to size. Measure and cut your longer vertical pieces first, and then measure and cut the shorter horizontal pieces. Attach the trim pieces using wood glue and 1”brad nails.

- Build the top of the cabinet next. These are 2×6 boards that. I ripped down to 5”wide each. Add 1.5” pocket holes down one side of 3 of the boards. Then, line them up flush and attach them using 2.5” pocket hole screws.

- Attach the top to the cabinet with 3.5” wood or Spax screws through the face frame and into the top.

- Final step is adding your back! This is just 1/4” hardwood plywood cut to size. Attach it to the back of the dresser using wood glue and 1” staples or nails.


This buffet table design is a great example of how functional storage furniture can also serve as a strong design element in a dining or living space. The clean structure and balanced proportions make it versatile enough to work in different interior styles, while still providing practical surface and storage space.
From an interior industry perspective, pieces like buffet tables are becoming increasingly important in residential and hospitality interiors where both aesthetics and functionality matter. Thoughtful material selection and solid woodworking techniques play a key role in creating furniture that is durable and visually appealing. We’ve also been following similar furniture and surface material trends across the interior industry here: https://plywoodbazar.com/
nice article
What type of plywood did you use?
Very simple and clear instructions, thanks for your work
I did not see a material list. Did I miss it or is it in with the directions?
When the next part of this blog comes out, let me know.