DIY Outdoor Couch for Only $60
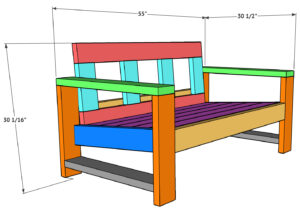
Learn how to build this DIY Outdoor Couch with only 8 boards, just a few basic tools, step-by-step instructions and free plans by Shanty2chic! Click here for the full set of free printable plans, including the supply list.
Equipment
- Miter Saw
- Drill
- Kreg Jig
- Sander
- Table Saw (optional)
Ingredients
- 8 2x6x8 Framing Lumber
- 2 1/2" Pocket Hole Screws
- 2 1/2" Outdoor Wood Screws
- Wood Glue
- Outdoor Finish
Instructions
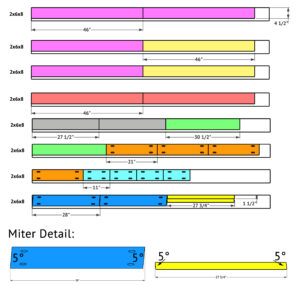
Cut List
- Cut List
Building the Arm Assemblies
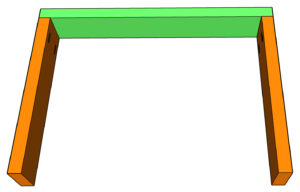
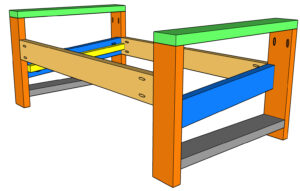
- Cut the legs and arms to size, drill 1 1/2" pocket holes at one end of each of the leg pieces and attach them to the arms with 2 1/2" pocket hole screws and wood glue. Build 2 arm assemblies.
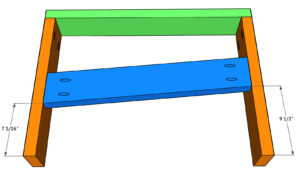
- Cut the side runner to size, drill 1 1/2" pocket holes at both ends and attach it between the legs with 2 1/2" pocket hole screws and wood glue.
- Cut the bottom runners to size and drill 1 1/2" pocket holes at both ends. Attach them at the bottom of each side with 2 1/2" pocket hole screws and wood glue.
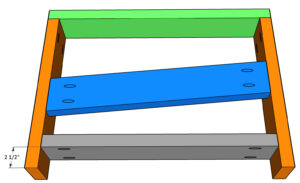
- Cut the cleats to size and attach them to the side, slat support with 2 1/2" wood screws and wood glue.
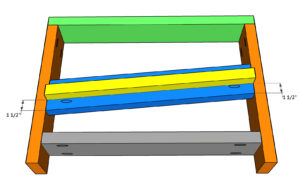
Connecting the Arm Assemblies Together
- Cut the back runner to size and drill 1 1/2" pocket holes at both ends. Attach it to the inside of one arm assembly with 2 1/2" pocket hole screws and wood glue.
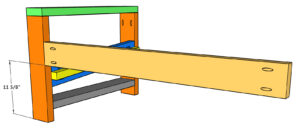
- Cut the front runner to size and drill 1 1/2" pocket holes at both ends. Attach it to the inside of the same arm assembly with 2 1/2" pocket hole screws and wood glue.
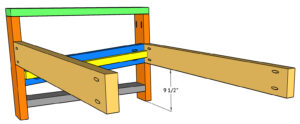
- Attach the second arm assembly to the front and back runners with 2 1/2" pocket hole screws and wood glue.
Adding the Seat Slats
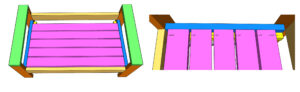
- Cut the seat slats to size, place them on top of the arm assembly cleats, according to the spacing below, and attach them to the cleats with 2 1/2" wood screws and wood glue.
Building the Back Support
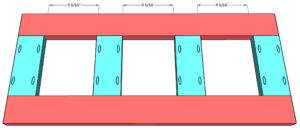
- Cut the back pieces to size. Drill 1 1/2" pocket holes at each end of the short pieces. Attach them to the long pieces with 2 1/2" pocket hole screws and wood glue.
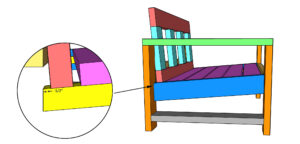
- To attach the back, rest it on the cleats, flush at the 5° angle of the cleats. Drive 2 1/2" screws from the bottom of the cleats into the back. Then, drive 2 1/2" screws from the back of the back runner into the back to secure.
The Finish!
- Fill in your exposed screw holes, sand the entire piece down and give it a finish and follow up with an outdoor protectant.Make sure to share your builds with us on social media and use #shanty2chic so we can share them too!Happy Building!