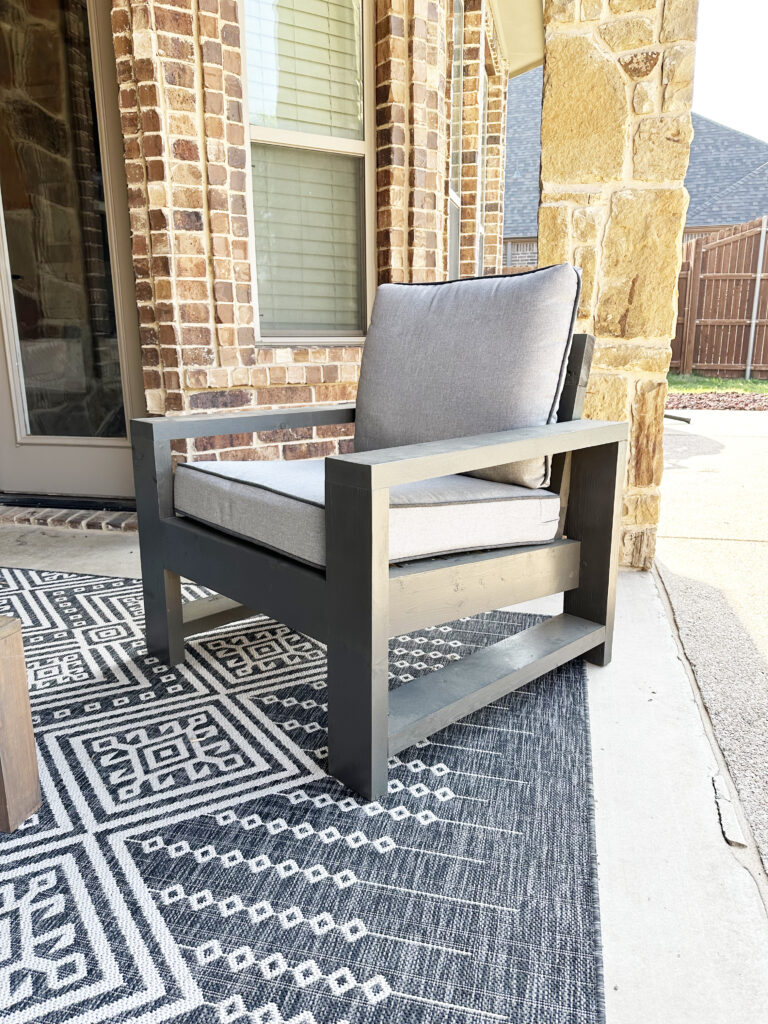
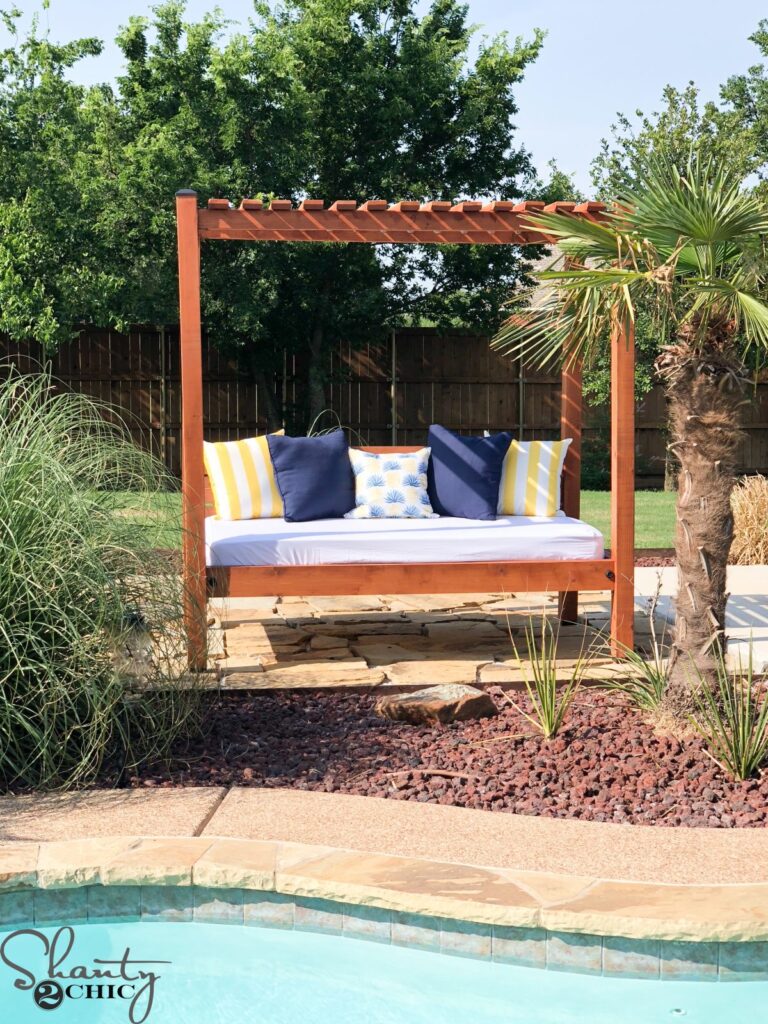
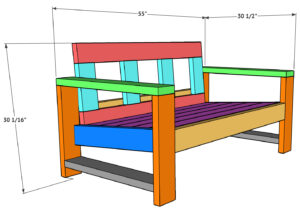
Learn how to build this DIY Outdoor Couch with only 8 boards, just a few basic tools, step-by-step instructions and free plans by Shanty2chic!
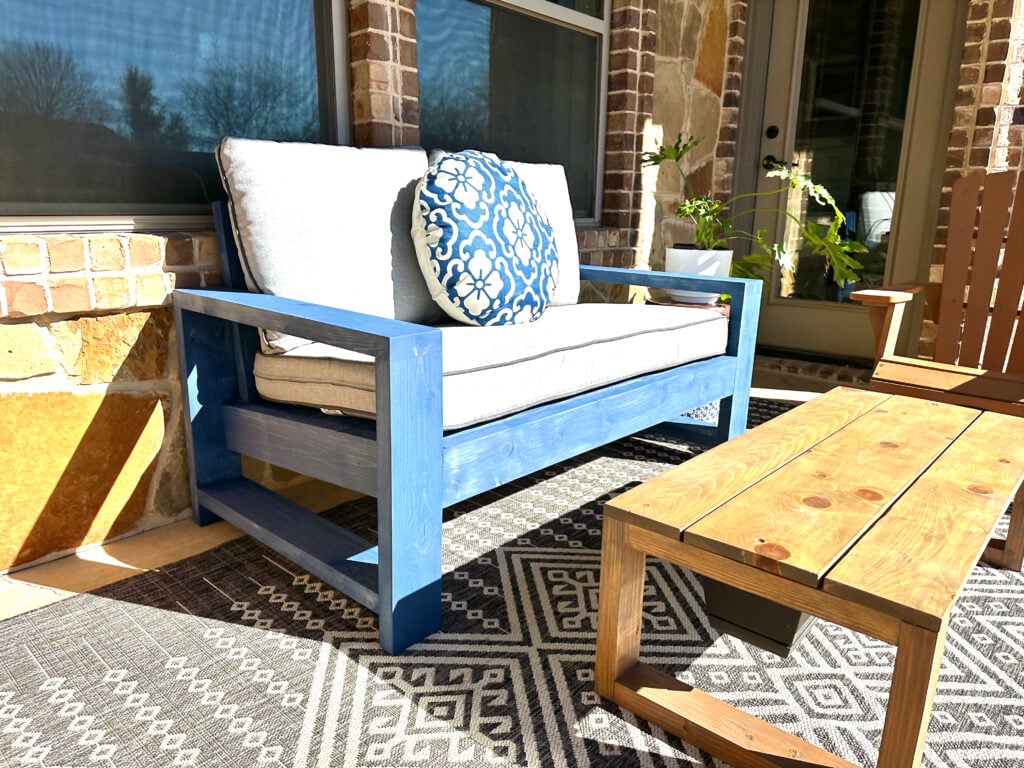
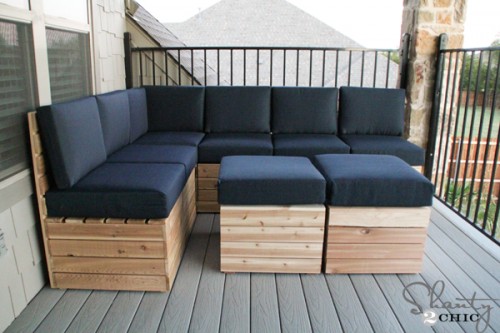
With the spring weather starting, I have been itching to revamp my outdoor patio! The wicker furniture, that I purchased a few years ago, was starting to fall apart so I used this opportunity to design and build a new, sturdy and beautiful set! The first piece I tackled was the outdoor couch! I was able to build it with only 8, 2×6 boards which makes the grand total for this couch only $60 in lumber, which gave me more budget for quality outdoor cushions!
So, let’s get to building it! Just follow the step-by-step tutorial below!
Click to Jump to the Free Printable PlansTable of Contents
How do you build a DIY Outdoor Sofa?
Tools:
Supplies:
What type of lumber should I use to build outdoor furniture?
We like to use framing lumber. It’s cost effective and if you use an outdoor finish and create spaces between any planks, the weathering shouldn’t be an issue. You can also use cedar boards but they are much more expensive.
Do I have to rip my boards?
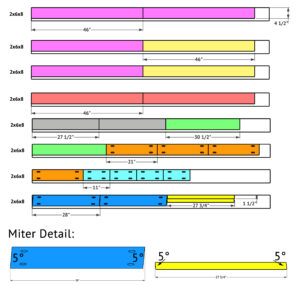
Ripping your boards is optional. We choose to do it because we like the clean look it gives a piece of furniture. If you choose not to rip your boards, just make sure to adjust the cut list accordingly, as the width of the boards will not be the same. I ripped all of the 2x6x8 boards, for this project, down to 4 1/2″.
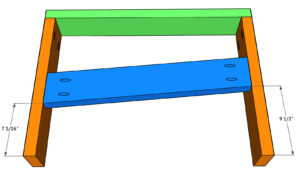
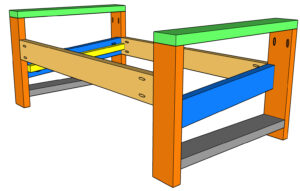
Building the Side Arm Assemblies
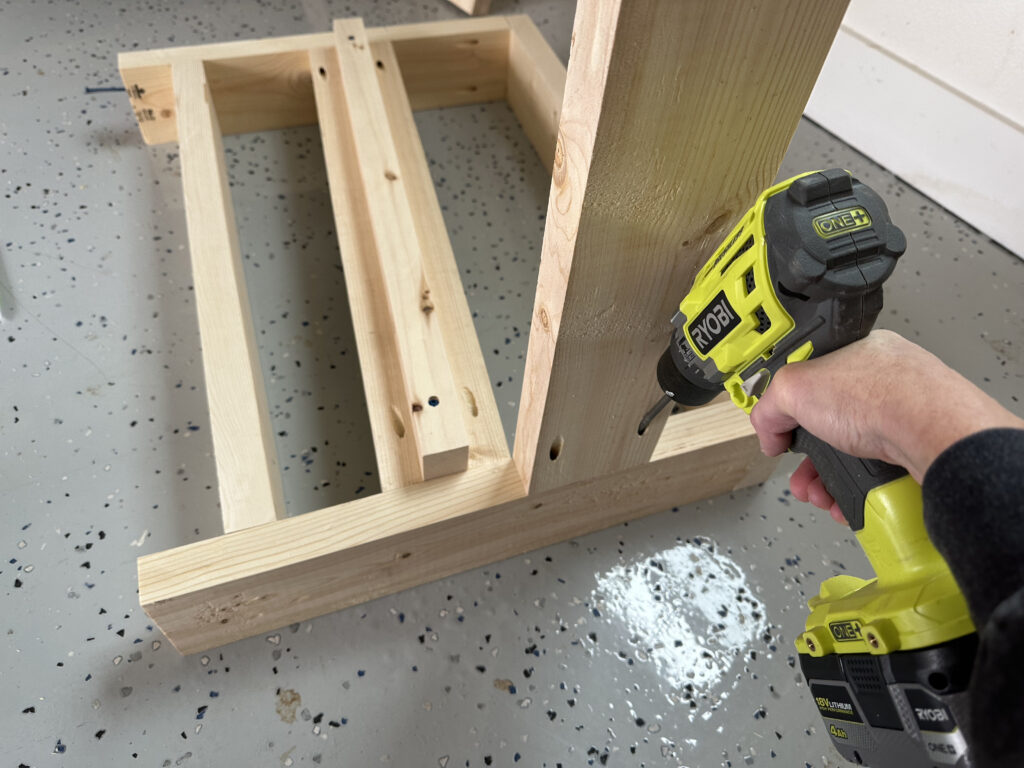
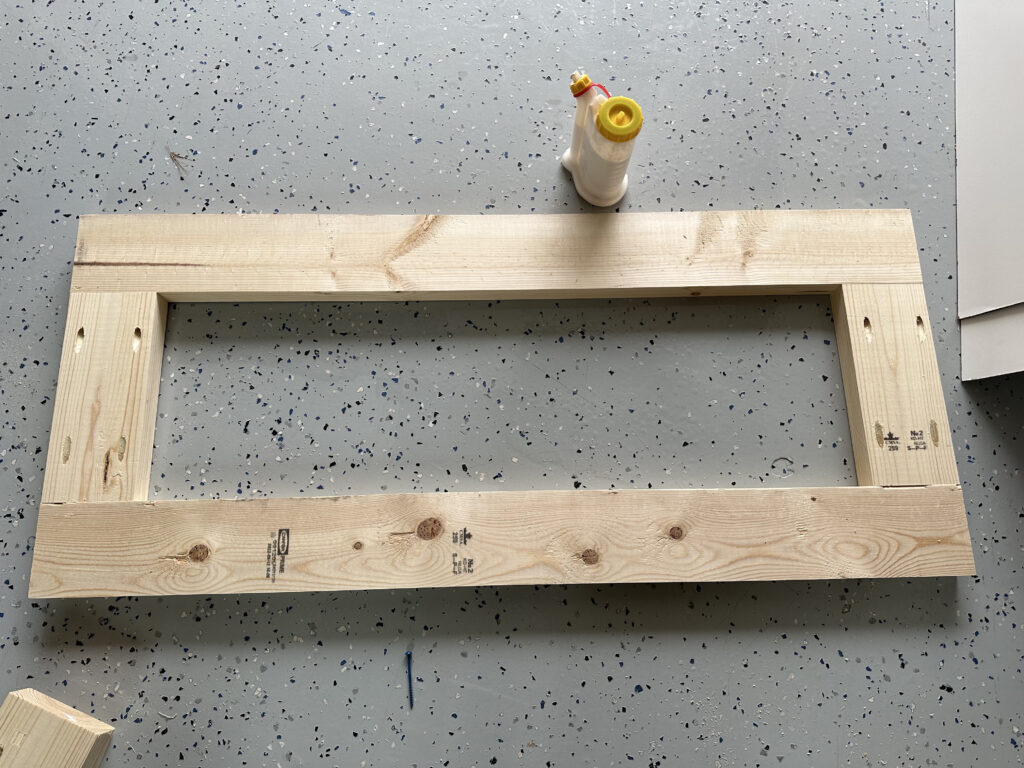
Step 1: Build the Frame of the Arms
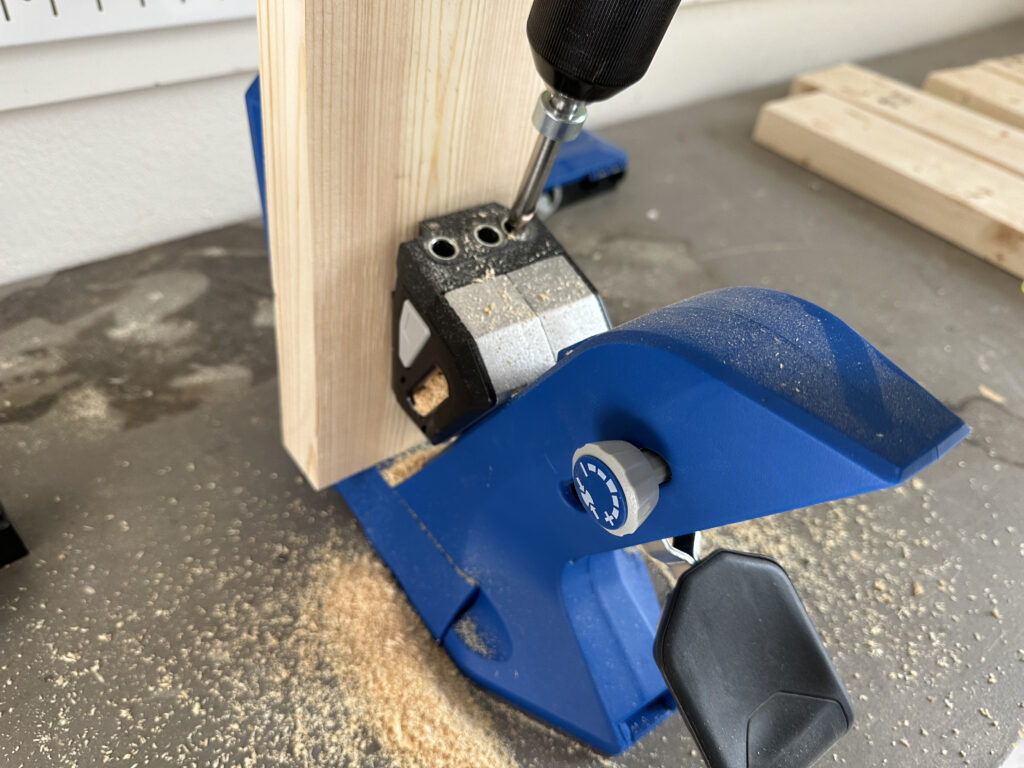
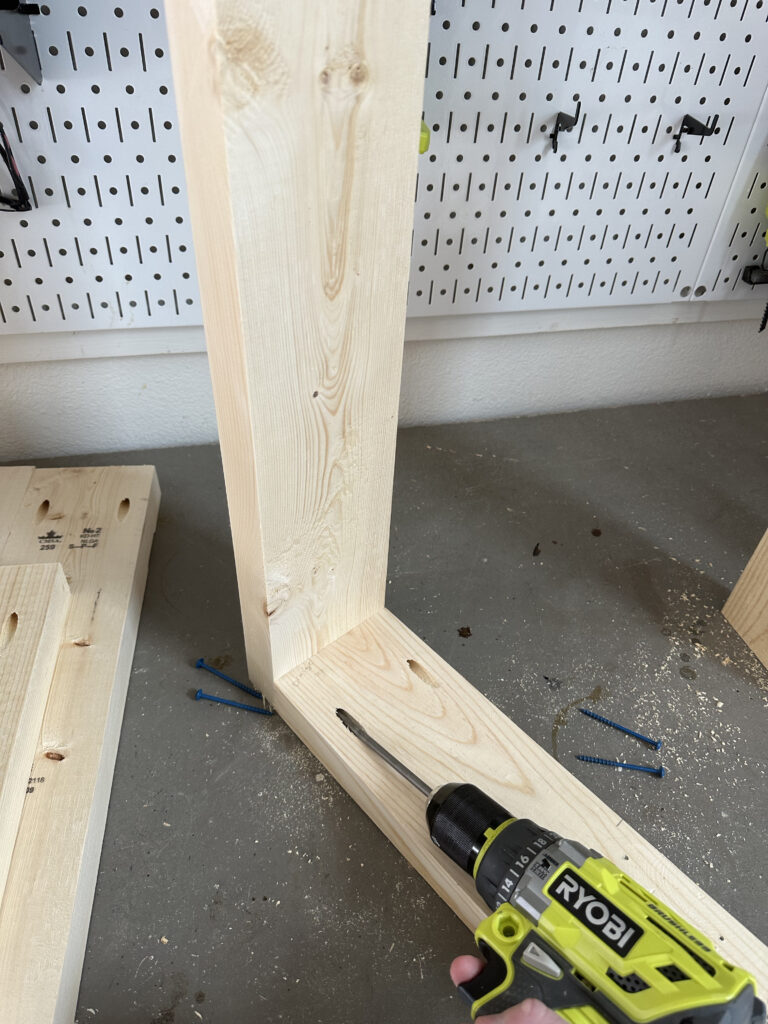
To start, cut the legs and arms to size, drill 1 1/2″ pocket holes at one end of each of the leg pieces and attach them to the arms with 2 1/2″ pocket hole screws and wood glue. Build 2 arm assemblies.
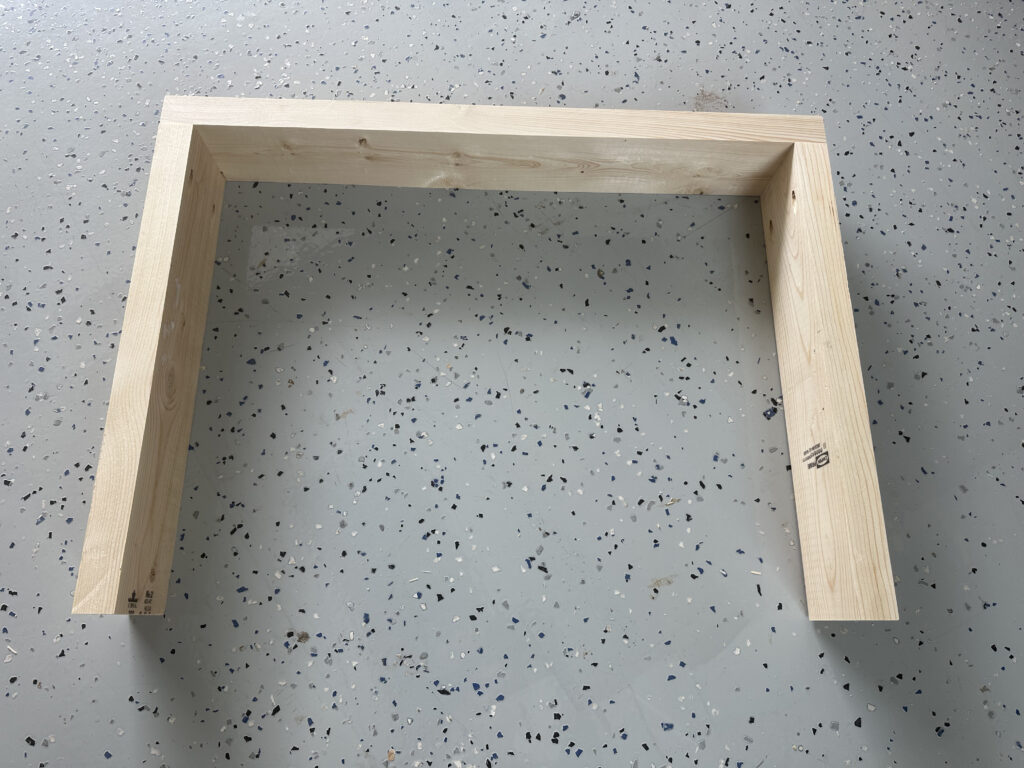
Step 2: Attaching the Side Runner
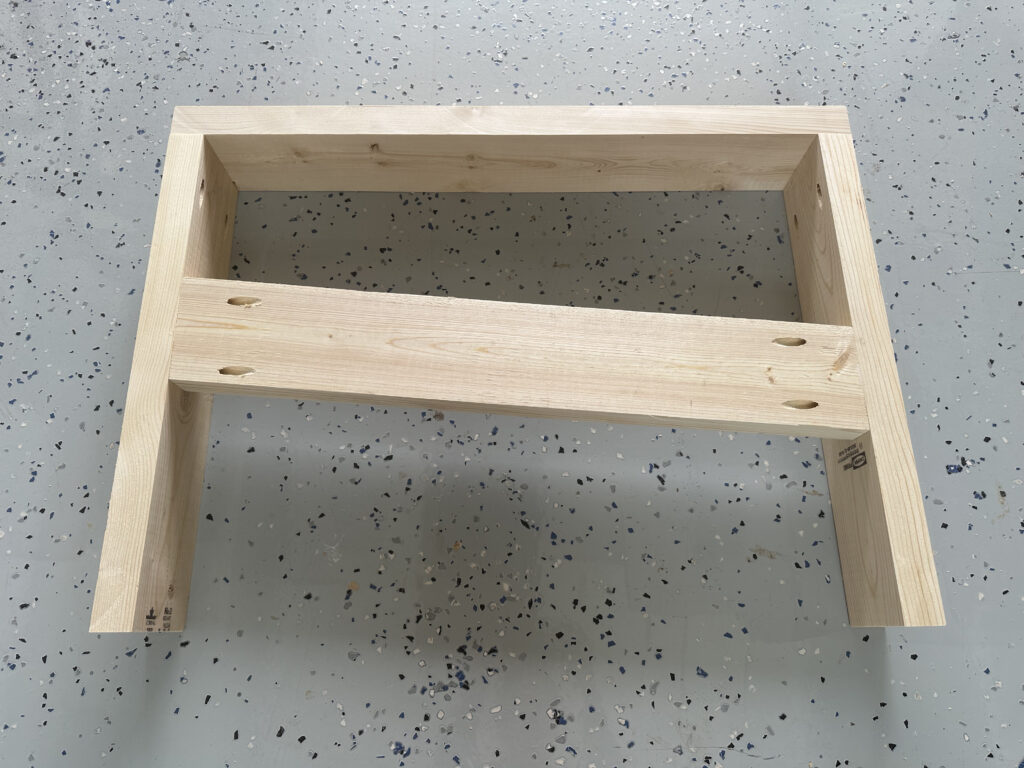
Next, cut the side runner to size, drill 1 1/2″ pocket holes at both ends and attach it between the legs with 2 1/2″ pocket hole screws and wood glue.
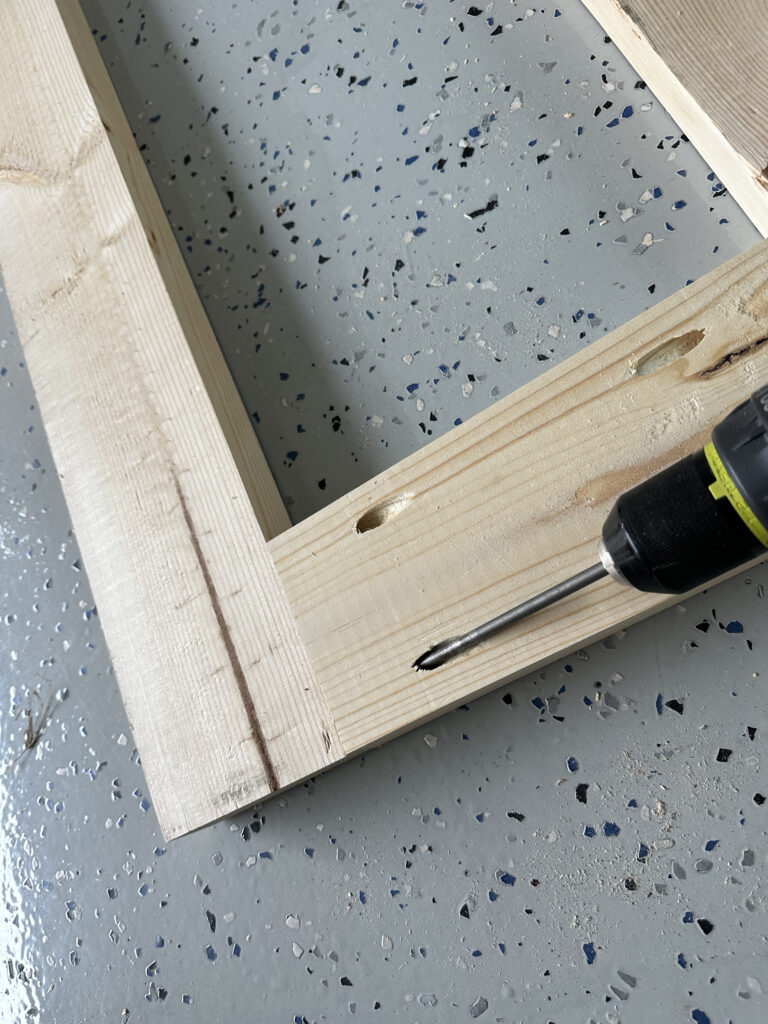
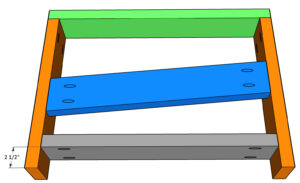
Step 3: Attaching the Bottom Runner
Once the side pieces are attached, cut the bottom runners to size and drill 1 1/2″ pocket holes at both ends. Attach them at the bottom of each side with 2 1/2″ pocket hole screws and wood glue.
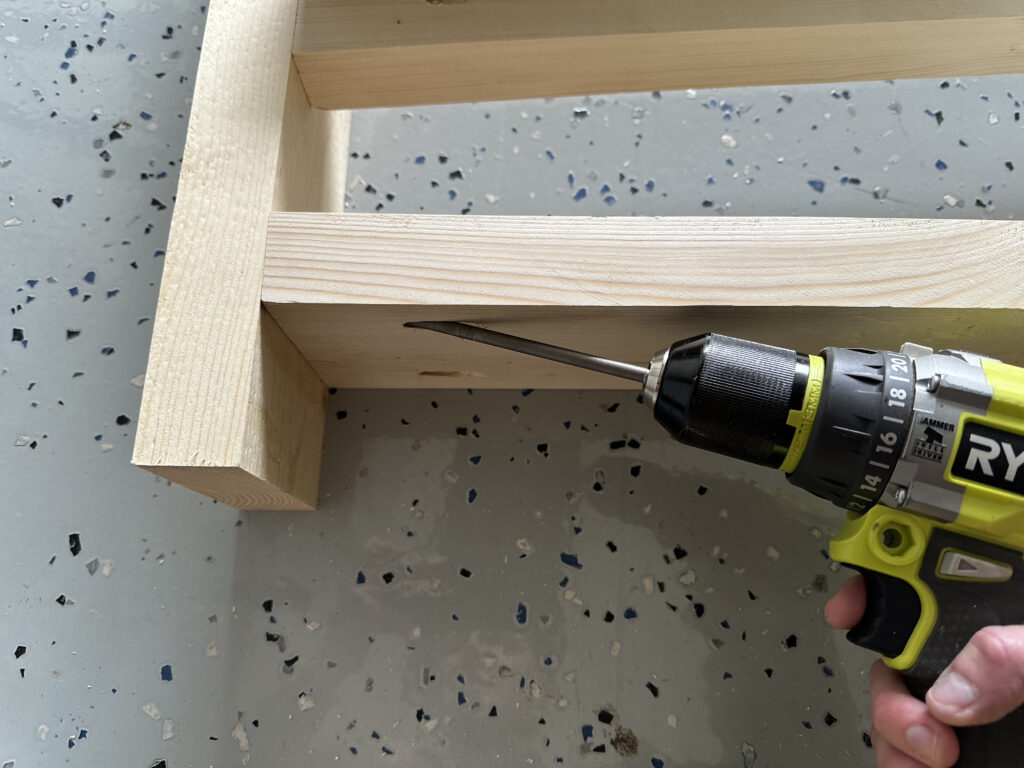
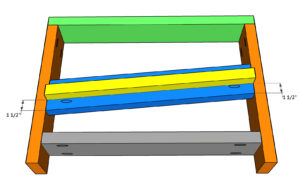
Step 4: Add the Cleats
Now, cut the cleats to size and attach them to the side, slat support with 2 1/2″ wood screws and wood glue.
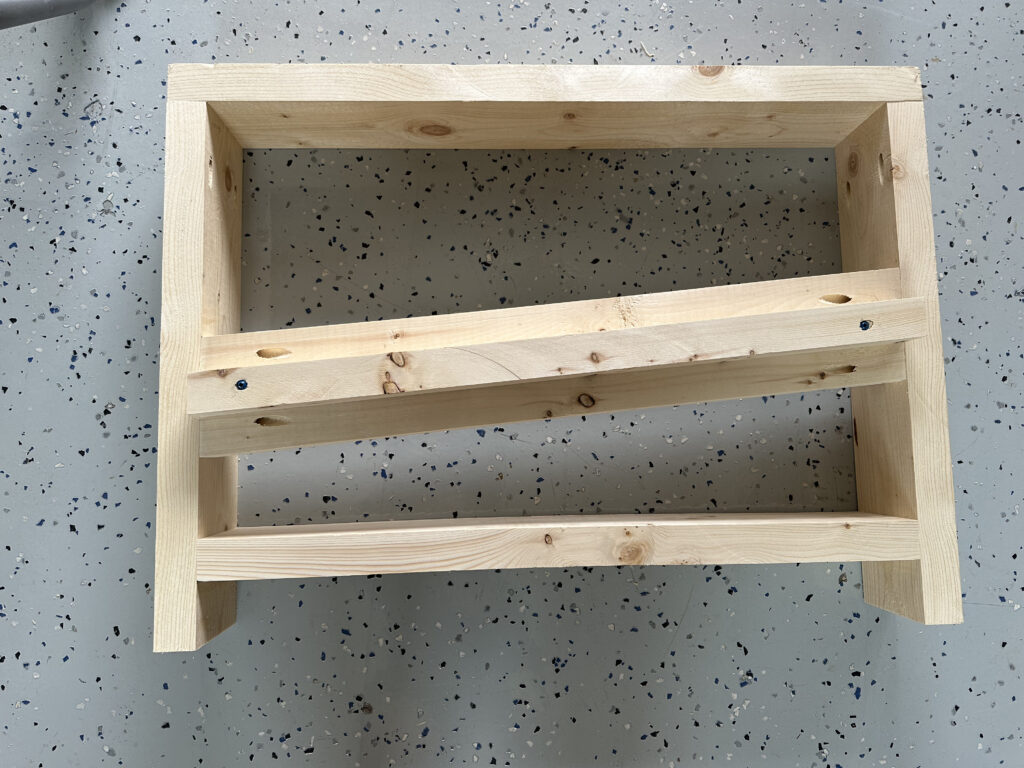
Connecting the Arm Assemblies Together
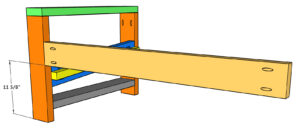
Step 5: Back Runner
To attach the sides together, cut the back runner to size and drill 1 1/2″ pocket holes at both ends. Attach it to the inside of one arm assembly with 2 1/2″ pocket hole screws and wood glue.
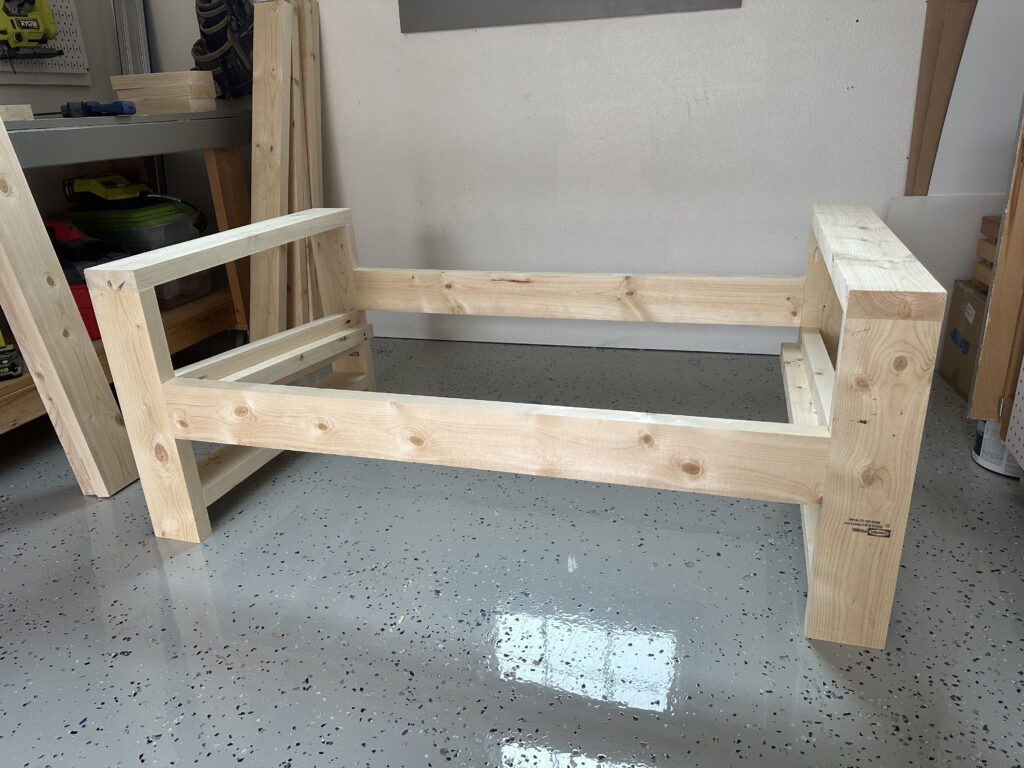
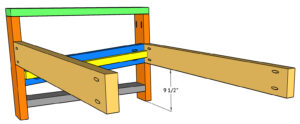
Step 6: Front Runner
Move to the front and cut the front runner to size and drill 1 1/2″ pocket holes at both ends. Attach it to the inside of the same arm assembly with 2 1/2″ pocket hole screws and wood glue.
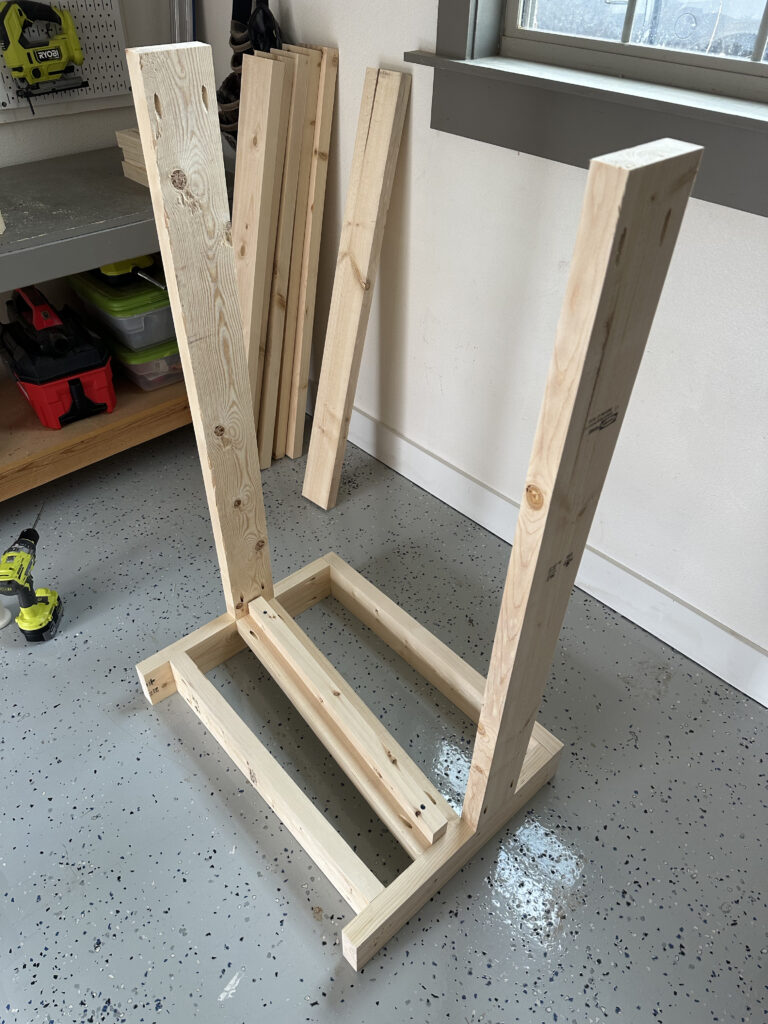
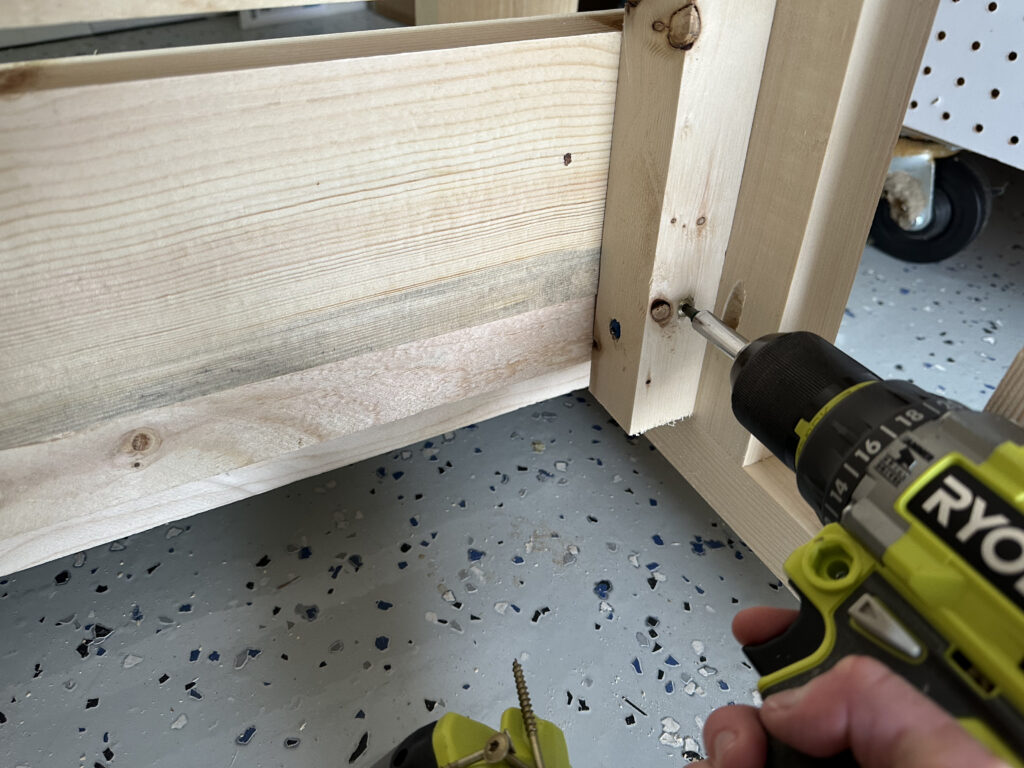
Step 7: Adding the Second Arm Assembly
Attach the second arm assembly to the front and back runners with 2 1/2″ pocket hole screws and wood glue.
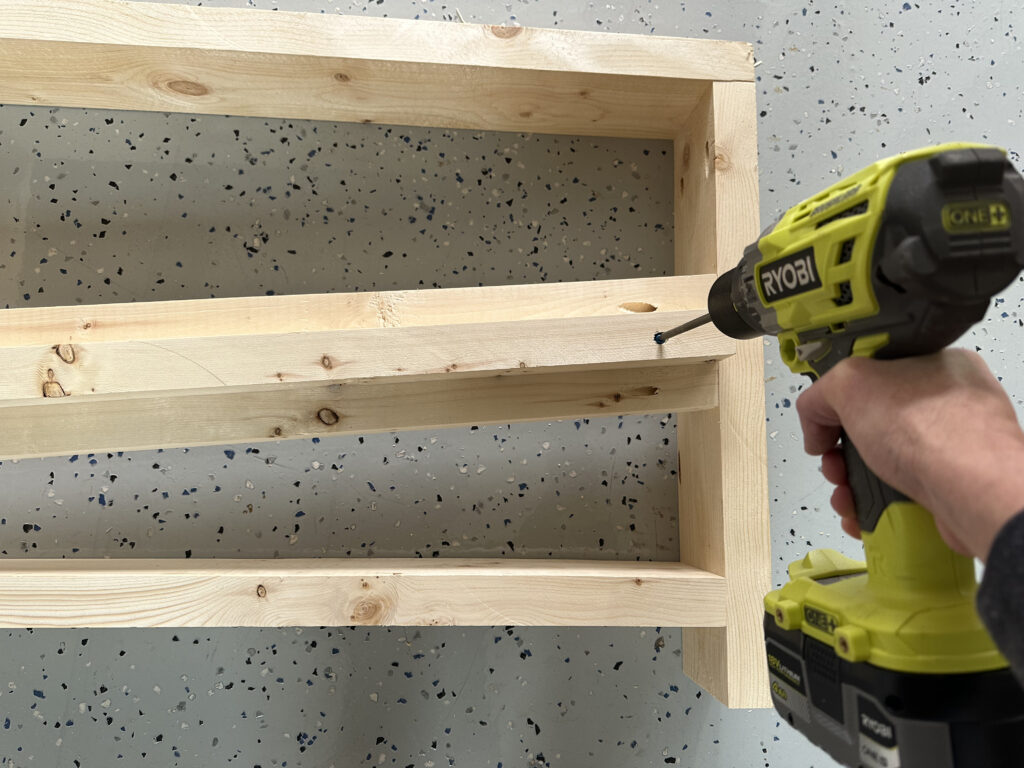
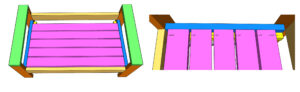
Add the Seat Slats
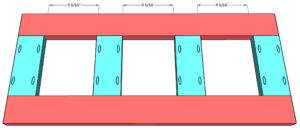
Step 8: Attach the seat Slats
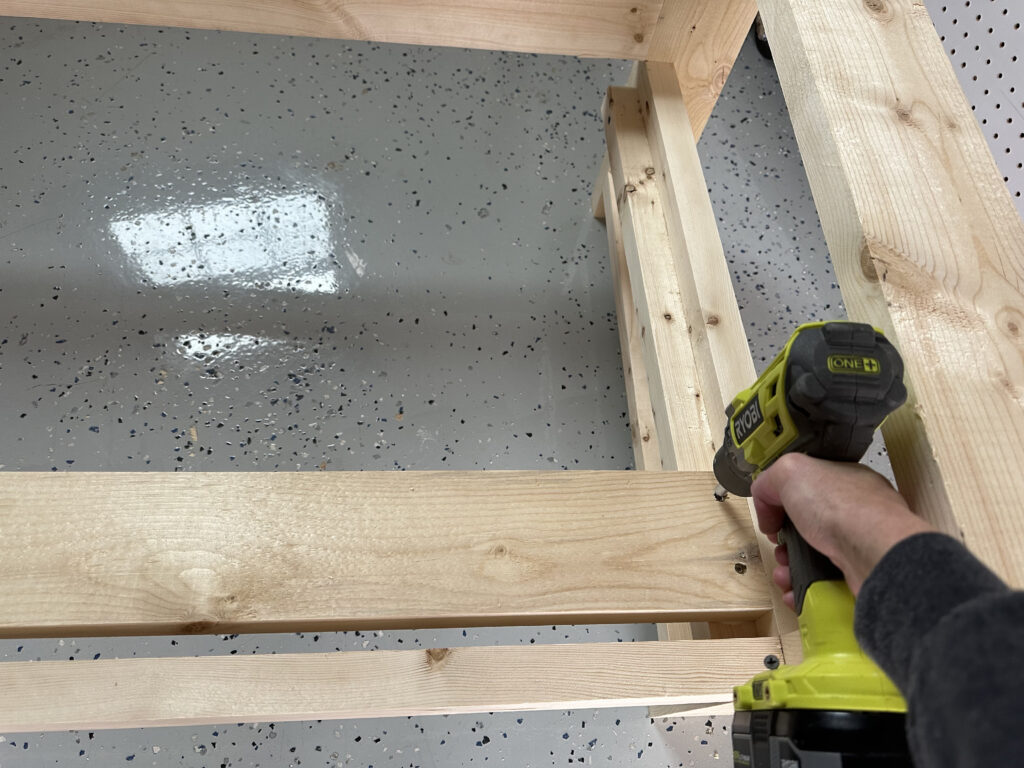
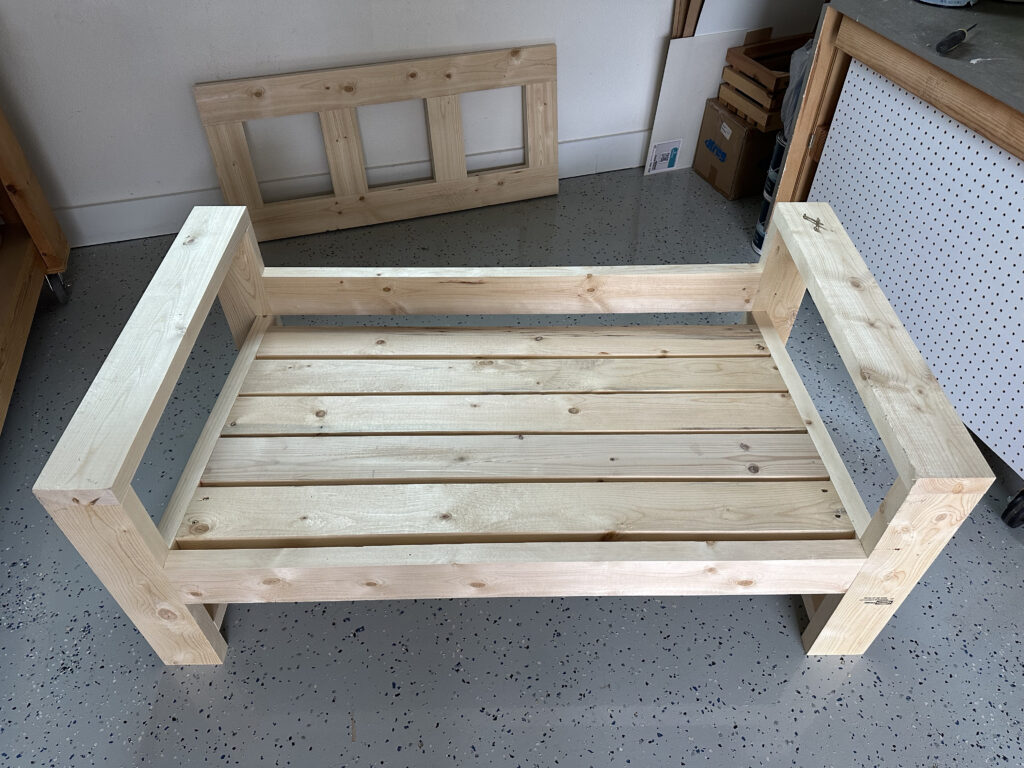
With the couch assembled, cut the seat slats to size, place them on top of the arm assembly cleats, according to the spacing in the plans, and attach them to the cleats with 2 1/2″ wood screws and wood glue. You can use the 2 1/2″ outdoor Kreg screws for this part.
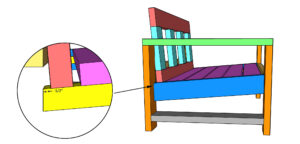
Building the Back Assembly
Step 9: Creating the Back of the Couch

Next, cut the back pieces to size. Drill 1 1/2″ pocket holes at each end of the short, back slats. Attach them to the long pieces with 2 1/2″ pocket hole screws and wood glue.
Step 10: Attach the Back Rest

To attach the back, rest it on the cleats, flush at a 5° angle of the cleats. Drive 2 1/2″ screws from the bottom of the cleats into the back. Then, drive 2 1/2″ screws from the back of the back runner into the back to secure.
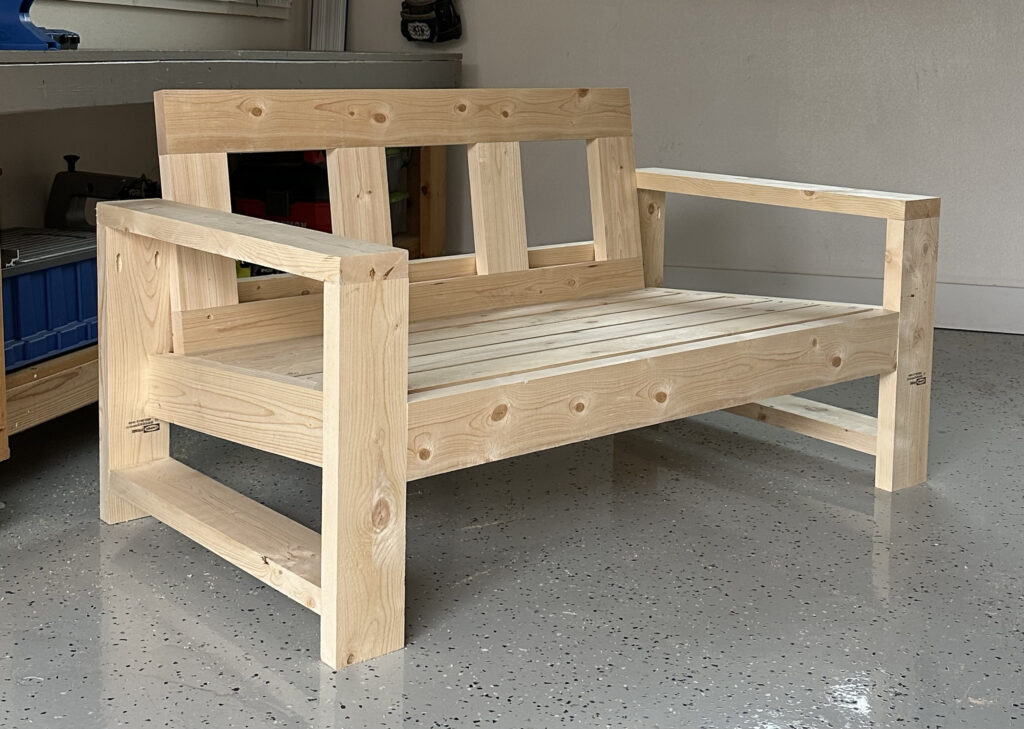
Here she is ready for a finish!
The Finish
Step 11: How do you hide exposed screw holes?
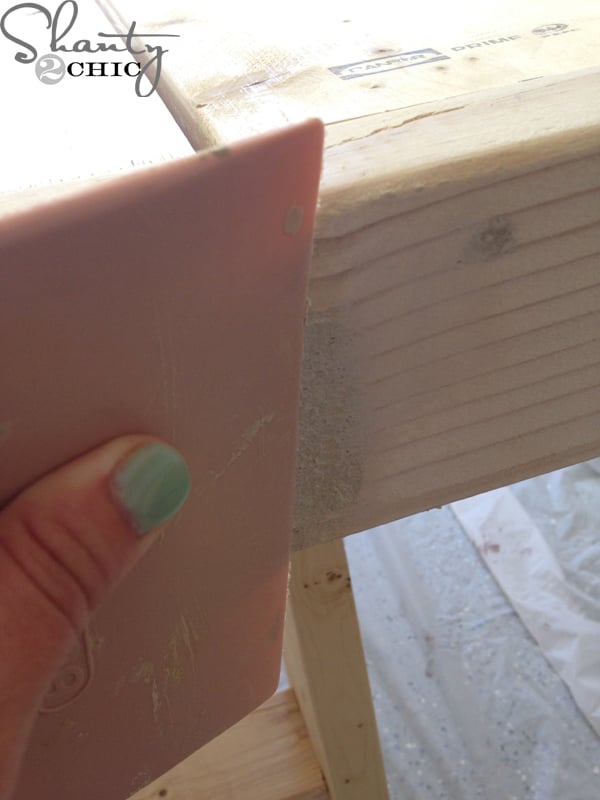
Use an outdoor wood filler to fill all of the exposed screws. I like to use a putty knife to apply mine.
Step 12: Sand the Entire Piece
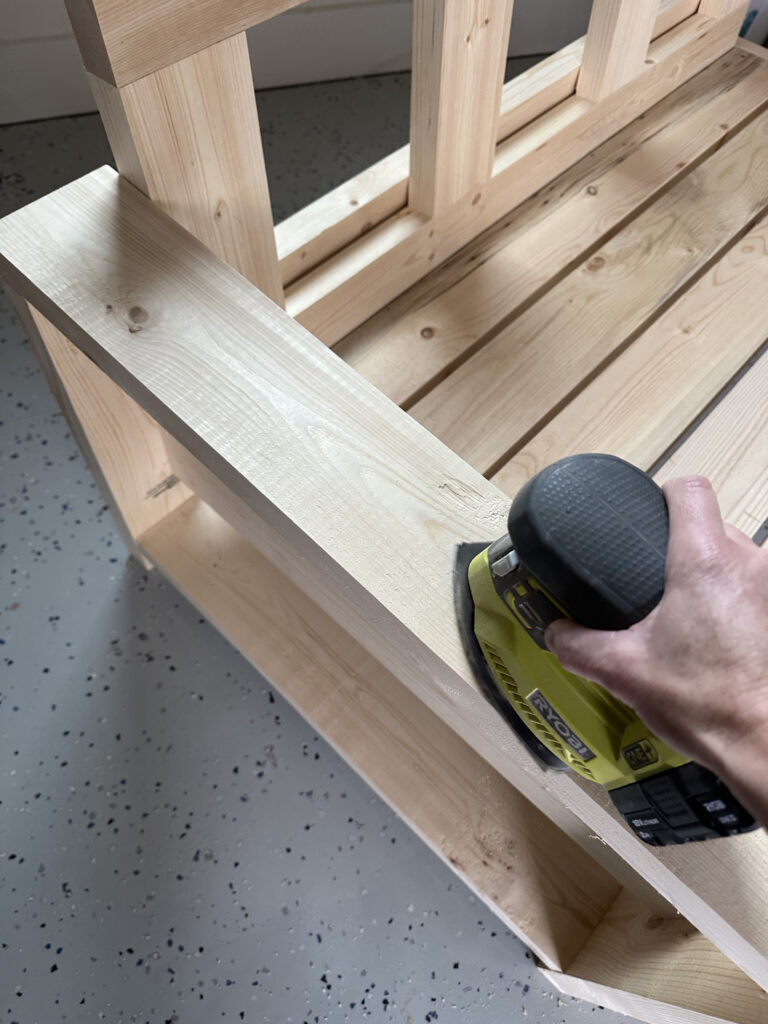
Once the wood filler is dry, sand down the entire piece. First with a 120-grit sandpaper, followed by a 220-grit. I used my corner cat sander to sand the couch down but you can use an orbital sander, as well.

I had to try the cushions on for size! Perfect fit and they are so comfortable!
Step 13: Add a finish!
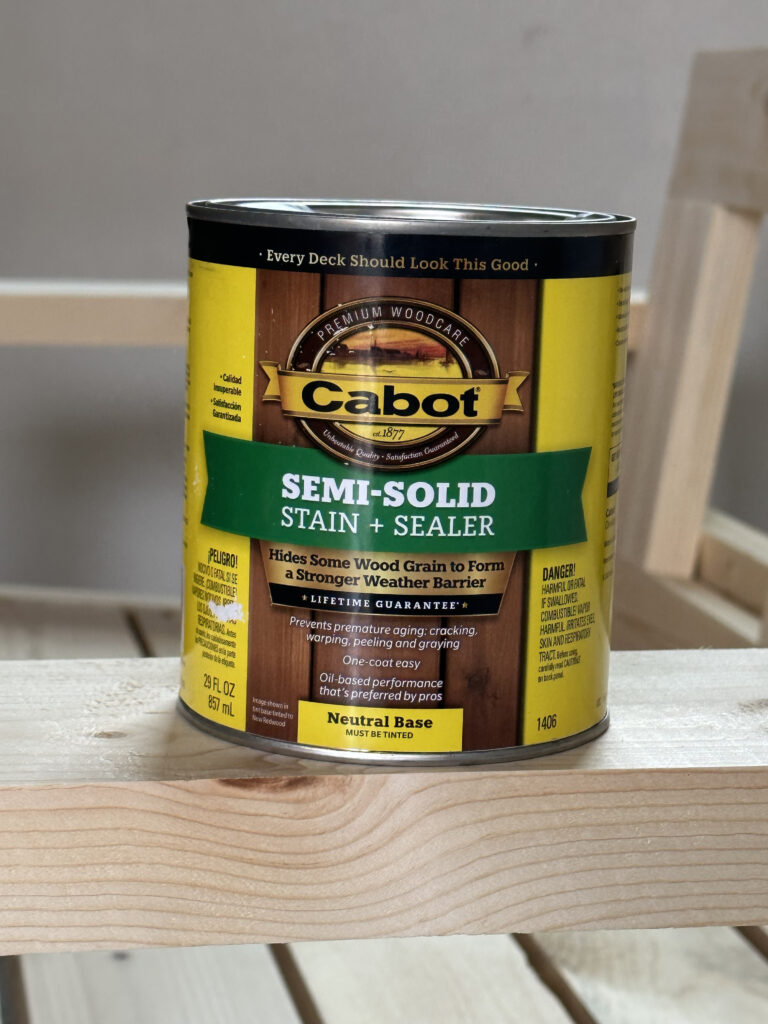
I chose to use an outdoor wood stain to finish my piece. If you use an indoor stain, make sure to apply an outdoor protective finish, as well! This Cabot Stain and Sealer can be tinted to any color!

That’s it! I love how my outdoor space is shaping up! These chairs are so solid and I love the added comfort of the sofa cushions!
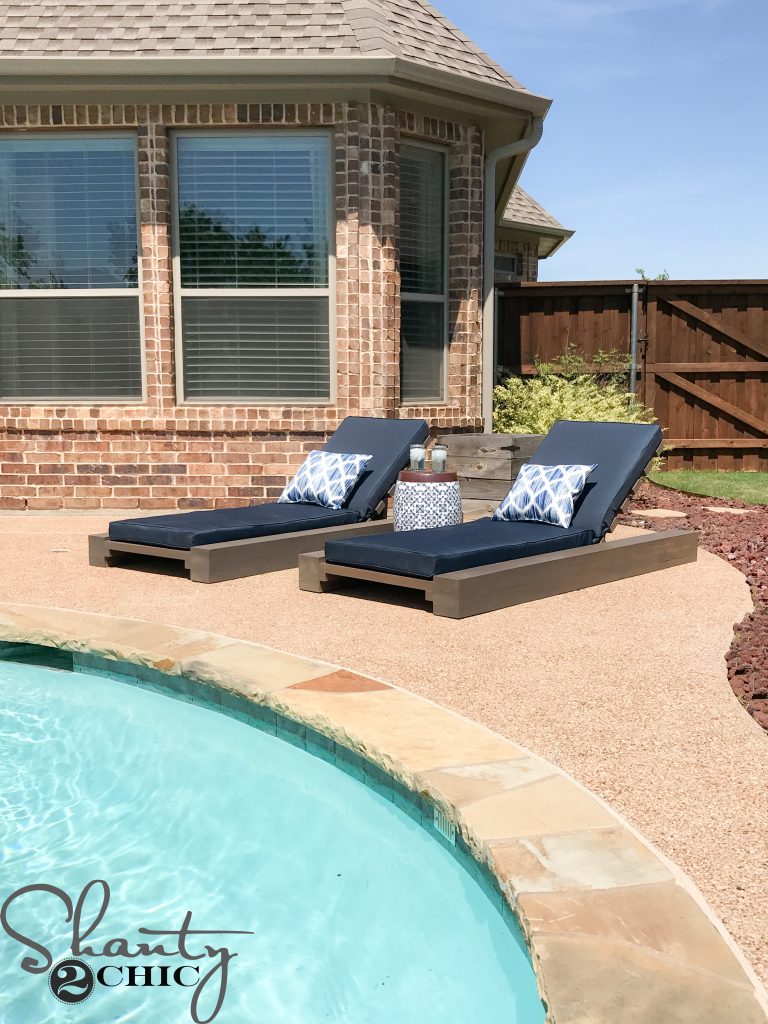
You can find the free plans to my DIY Cooler Coffee Table here.
Update: I decided to design and build a matching set of outdoor chairs and repainted the entire set gray. You can find the free plans and how-to video to build your own DIY Outdoor Chairs below!
Make sure to share your builds with us on social media and use #shanty2chic so we can share them too!
Happy Building!
Check out some of our other outdoor projects!

DIY Outdoor Couch for Only $60
Tools
- Miter Saw
- Drill
- Kreg Jig
- Sander
- Table Saw (optional)
Supplies
- 8 2x6x8 Framing Lumber
- 2 1/2" Pocket Hole Screws
- 2 1/2" Outdoor Wood Screws
- Wood Glue
- Outdoor Finish
Instructions
Cut List
- Cut List

Building the Arm Assemblies
- Cut the legs and arms to size, drill 1 1/2" pocket holes at one end of each of the leg pieces and attach them to the arms with 2 1/2" pocket hole screws and wood glue. Build 2 arm assemblies.

- Cut the side runner to size, drill 1 1/2" pocket holes at both ends and attach it between the legs with 2 1/2" pocket hole screws and wood glue.

- Cut the bottom runners to size and drill 1 1/2" pocket holes at both ends. Attach them at the bottom of each side with 2 1/2" pocket hole screws and wood glue.

- Cut the cleats to size and attach them to the side, slat support with 2 1/2" wood screws and wood glue.


Connecting the Arm Assemblies Together
- Cut the back runner to size and drill 1 1/2" pocket holes at both ends. Attach it to the inside of one arm assembly with 2 1/2" pocket hole screws and wood glue.

- Cut the front runner to size and drill 1 1/2" pocket holes at both ends. Attach it to the inside of the same arm assembly with 2 1/2" pocket hole screws and wood glue.

- Attach the second arm assembly to the front and back runners with 2 1/2" pocket hole screws and wood glue.

Adding the Seat Slats
- Cut the seat slats to size, place them on top of the arm assembly cleats, according to the spacing below, and attach them to the cleats with 2 1/2" wood screws and wood glue.

Building the Back Support
- Cut the back pieces to size. Drill 1 1/2" pocket holes at each end of the short pieces. Attach them to the long pieces with 2 1/2" pocket hole screws and wood glue.

- To attach the back, rest it on the cleats, flush at the 5° angle of the cleats. Drive 2 1/2" screws from the bottom of the cleats into the back. Then, drive 2 1/2" screws from the back of the back runner into the back to secure.

The Finish!
- Fill in your exposed screw holes, sand the entire piece down and give it a finish and follow up with an outdoor protectant.Make sure to share your builds with us on social media and use #shanty2chic so we can share them too!Happy Building!


This outdoor couch is a great example of achieving a functional and stylish build on a budget. For outdoor furniture like this, material selection and proper finishing are crucial to handle weather exposure and daily use. Using well-treated or moisture-resistant boards can help maintain strength and durability over time. We’ve come across useful material insights on platforms like https://plywoodbazar.com/
for similar outdoor and interior applications. Very practical and well-executed project!
This article is truly superb! I appreciate every detail, from the well-presented facts to the stunning visual style.
Inspiration is what you guys give people. Continue the great work!, Love it
while making the stuff i love to drink some starbucks coffee
If I had to choose a game to play I would choose heardle, it’s great to play this game every day, my life is no longer boring.
So much money was saved..and we had so much fun making these couches 🙂
It’s so much better than what I expected
Love this plan so much that I made 2! Just a small update to the cut list, you actually need 9 46″ pieces instead of 8.
Nothing to say but it’s awesome