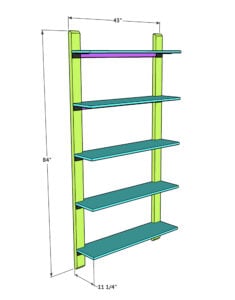
DIY Plant Shelf
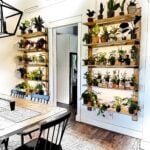
I designed these plant shelves to make use of the vertical space on an empty wall without taking up any floor space. I built two matching units, but you could build just one if you are working with a smaller space.Each five-shelf unit costs about $150 to build. The finished shelves can also be used for books, plates, framed pictures, or other decor.Click here for the free printable plans with shopping list included!
Equipment
- Kreg Jig
- Miter Saw
- Drill
- Jigsaw
- Sander
- Brad Nailer (optional)
- Table Saw (optional)
- Kreg Project Blocks (optional)
- Kreg Stud Finder (optional)
- Tape Measure
Ingredients
- 3 2x6x8
- 3 1x12x8
- 5 Shelf Brackets
- 2 1/2" Pocket Hole Screws
- Wood Glue
- 2" Brad Nails (optional)
- Stain, paint, or another wood finish
- 3" Wood Screws for Drywall Mounting
Instructions
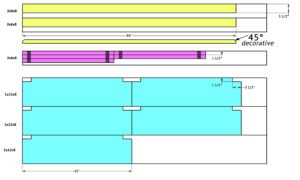
Cut List
- Cut List
Building the Frame
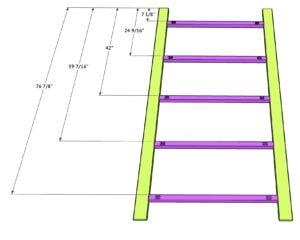
- Cut the rails to size and make a 45° off the top corner of each end. This will create a decorative cut and is not structural.

- Cut the cleats to size. Drill 1 1/2" pocket holes at both ends of each cleat and attach them to the rails with 2 1/2" pocket hole screws and wood glue. The decorative 45° cuts should be face down with pocket holes facing up for assembly.
Shelf Assembly and Mounting
- Cut the shelf pieces to size and notch out the back corners with a jig saw.
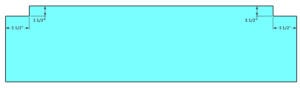
- At this point, it is best to add a finish and attach the assembly to the wall. Check out the post on our site for detailed instructions on how I mounted it to the wall. Once it is attached to the wall, secure a shelf on top of each cleat. I used 2" brad nails to temporarily attach each shelf.
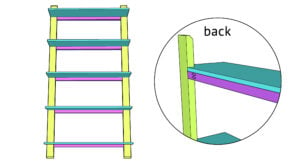
Installing the Brackets
- Once each shelf is secure, follow up with a shelf bracket under each shelf end. Follow manufacturer instrucions for bracket installation. You can find the brackets I used in the post on our site.
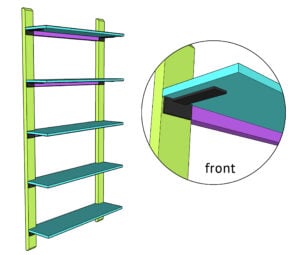
The Finish
- That's it! Now just fill it up with your houseplants or other decor!Make it your own and makesure to share it on social media and use #shanty2chic so we can share them too!Happy Building!