DIY Rolling Workbench
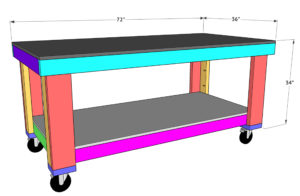
This DIY rolling workbench is the perfect build for beginners. You only need the 3 basic tools to build it. Make sure to click the link below to download and print the full set of plans, including the supply list!https://www.shanty-2-chic.com/wp-content/uploads/2018/03/Large-Workbench-Plans.pdf
Servings: 1
Ingredients
- 2 2x6x8 Pine or Framing Lumber
- 7 2x4x8 Pine or Framing Lumber
- 2 4'x8'x34" MDF
- 4 5" Locking Swivel Casters Link in Post
- 2" Brad Nails
- 2 1/2" Wood Screws
- 2 1/2" Pocket Hole Screws
Instructions
- Cut List 1

- Cut List 2

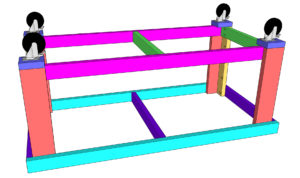
- After making all of the cuts, drill 1 1/2" pocket holes into the short pieces of the frames. Build the top and bottom frame by attaching the short pieces to the long pieces with 2 1/2" pocket hole screws and wood glue.

- Drill 1 1/2" pocket holes into the 2x4 leg pieces and attach them to the 2x6 pieces with 2 1/2" pocket hole screws and wood glue. Do this for all 4 legs.

- Attach the legs to the outside corners of the bottom shelf with 2 1/2" wood screws and wood glue, from the inside of the frame, into the legs. The bottom of the legs should be flush with the bottom of the frame.
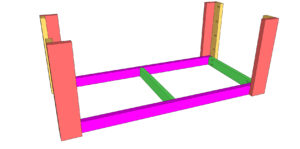
- Flip the bench over and slide the top frame over the legs. Attach them with 2 1/2" wood screws and wood glue, through the legs and into the frame. The top of the legs should be flush with the top of the frame.
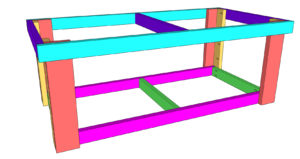
- Attach the feet to the bottom of the frame with 2 1/2" wood screws and wood glue.

- Attach the casters to the center of each foot.
- Attach the bottom and top shelves with wood glue and 2" brad nails.All finished! At this point you can add a finish or leave it bare. Make it your own and be sure to share your builds with us on social media and use #shanty2chic so we can share them too! Happy Building!