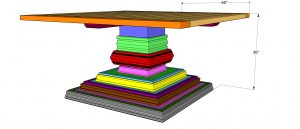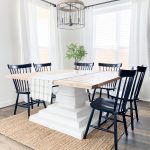
DIY Square Dining Table
Learn how to build this DIY Square Dining Table with free plans by Shanty2Chic! This table is large enough to seat 8 people making it functional and a beautiful piece for your home!Click below for the free printable plans!Click here for Part 1Click here for Part 2Click here for Part 3
Equipment
- Miter Saw
- Drill
- Kreg Jig
- Nailer
- Table Saw (optional)
- Sander
Ingredients
- 13 2x6x8 Framing Lumber
- 6 2x4x8 Framing Lumber
- 7 Sticks of Trim
- 3/4"x48"x96" Hardwood Plywood (Birch)
- 1 1/4" pocket hole screws
- 2 1/2" pocket hole screws
- 1 1/4" brad nails
- 2" brad nails
- 2 1/2" wood screws
- wood glue
Instructions
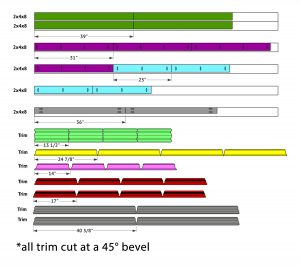
Cut Lists
- Cut List 1
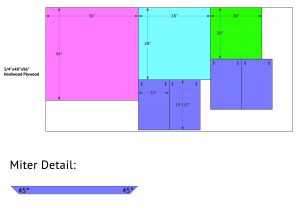
- Cut List 2
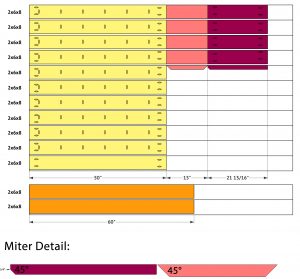
- Cut List 3
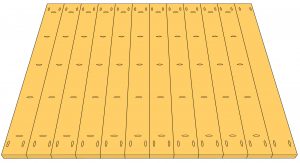
Building the Table Top
- The first step is to plank the table top. Cut the planks to size and drill 1 1/2" pocket holes down one edge of all but one of the boards and at the ends of each board. Attach them together with 2 1/2" pocket hole screws.
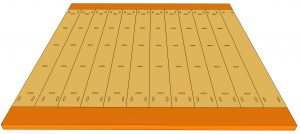
- Measure and cut the breadboards to size. Attach them to the ends of the table top planks with 2 1/2" pocket hole screws.
Building the Bases
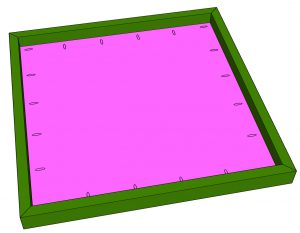
- Cut the base plywood to size and drill 3/4" pocket holes around the edges. Cut the base frame pieces to size and attach them to the plywood with 1 1/2" pocket hole screws and wood glue. The top of the plywood should be flush with the top of the frame pieces.
- Cut the bottom support pieces to size and drill 1 1/2" pocket holes at the ends of each board. Attach them to the bottom of the bottom base with 2 1/2" pocket hole screws and wood glue.
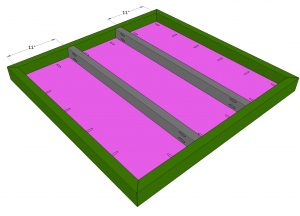
- Cut the casing to size and attach it to the base frame with 1 1/4" brad nails and wood glue.
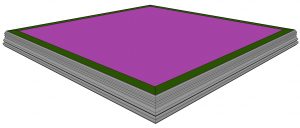
- Cut the second base plywood to size and drill 3/4" pocket holes along the edges. Cut the frame pieces to size, drill 3/4" pocket holes on the front edges and attach them to the plywood with 1 1/4" pocket hole screws and wood glue.
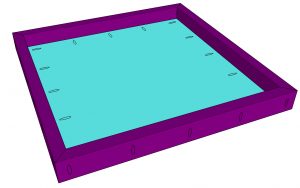
- Center the second base on top of the first base and attach it to the plywood with 1 1/4" pocket hole screws and wood glue.
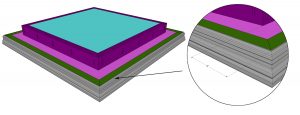
- Cut the trim to size and attach it to the second base frame with 1 1/4" brad nails and wood glue.
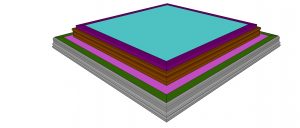
- Cut the third base plywood to size and drill 3/4" pocket holes around the edges. Cut the frame pieces to size, drill 3/4" pocket holes along one edge of each board and attach them to the plywood with 1 1/4" pocket hole screws and wood glue.
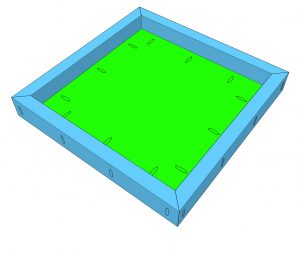
- Center the third base on the pedestal and attach it to the second base plywood with 1 1/4" pocket hole screws and wood glue.
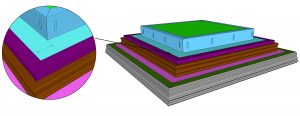
- Cut the trim pieces to size and attach them to the third base frame with 1 1/4" brad nails and wood glue.
Building the Trunk
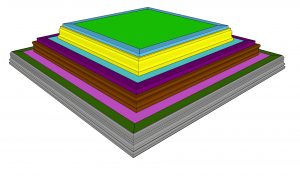
- Cut the trunk pieces to size. Rip the edges at 45° angles with a table saw or miter saw. Attach the pieces together with 1 1/4" brad nails and wood glue.

- Center the trunk on the third base and attach it to the plywood with 1 1/4" pocket hole screws and wood glue.
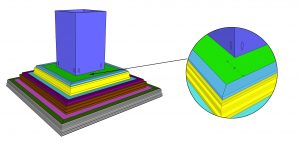
- Cut the first row of trim to size and attach it with 1 1/4" brad nails and wood glue.
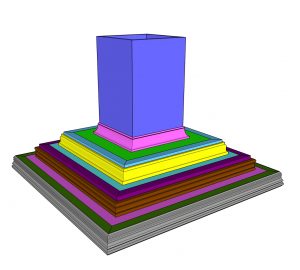
- Cut the second trim row to size and attach it ot the trunk with 2" brad nails and wood glue.
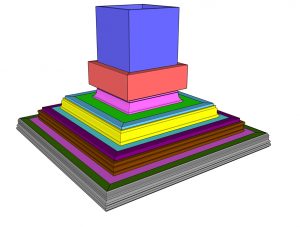
- Cut the third row of trim to size and attach it ot the second row of trim with 1 1/4" brad nails and wood glue.
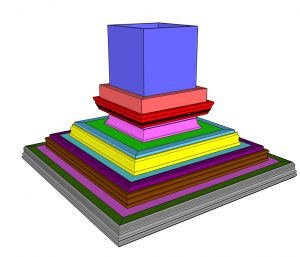
- Cut the fourth row of trim to size and attach it to the second row of trim with 1 1/4" brda nails and wood glue.
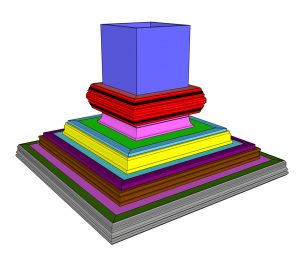
- Cut the top trim to size and attach it to the trunk with 1 1/4" brad nails and wood glue.

Attaching the Table Top
- Cut the top arm supports to size, drill 1 1/2" pocket holes on the square ends of each board. Center them on the trunk and attach them with 2 1/2" pocket hole screws and wood glue.
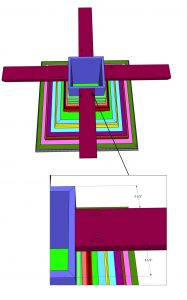
- Attach the table top to the arm supports with 2 1/2" wood screws from the bottom of the supports and into the table top.
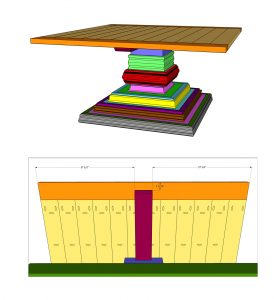
- Now, fill your nail holes, sand it down and add a finish! You can get creative with the trim and make it your own! Make sure you share your builds with us on social media and use #shanty2chic so we can share them too! Happy building!