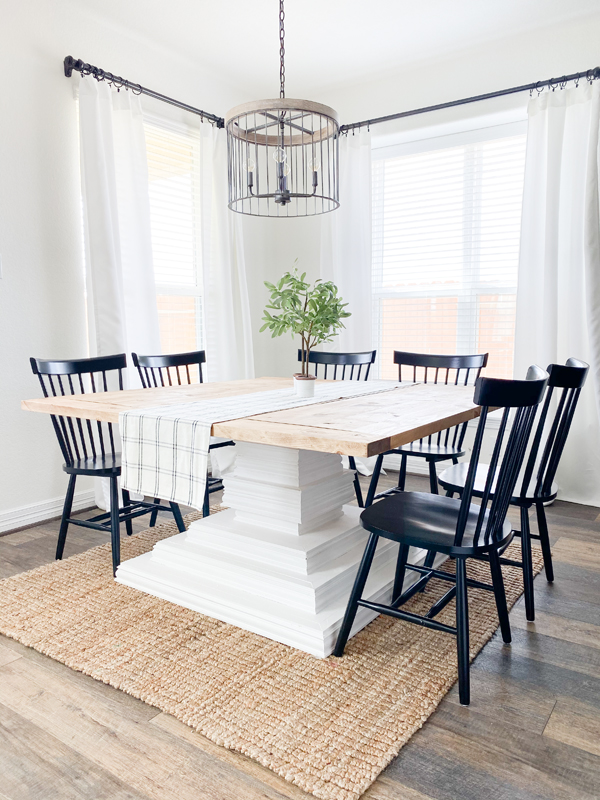
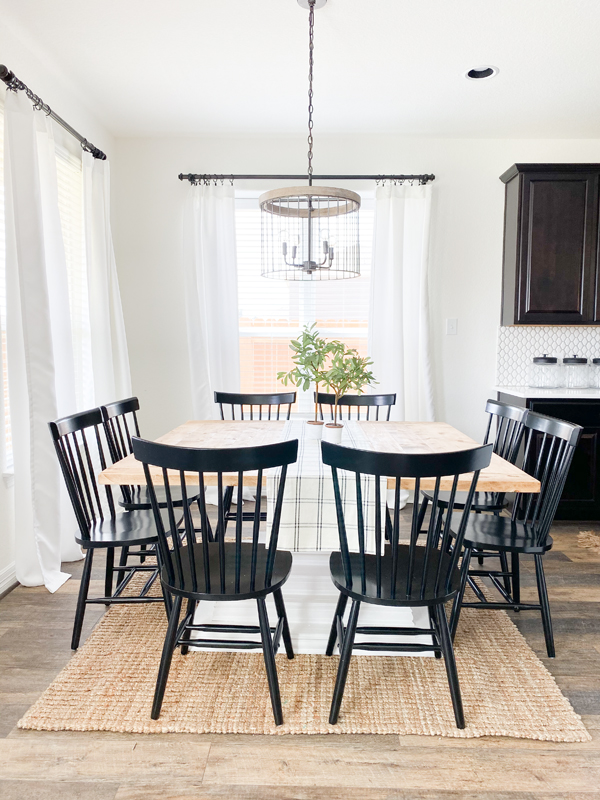
We have built so many dining tables over the last 10 years but one thing that we get so many requests for is a DIY Square Dining Table!

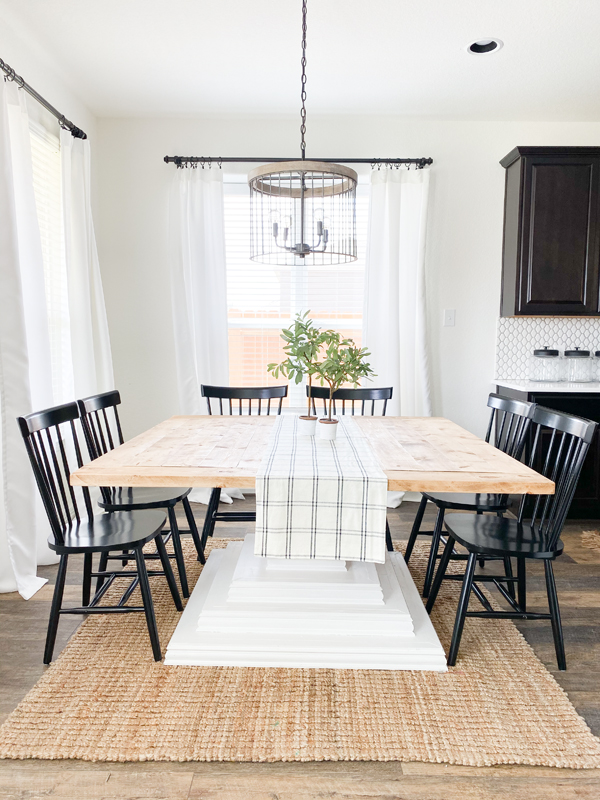
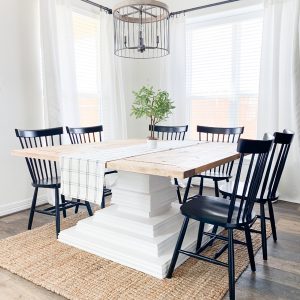
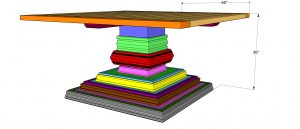
We drove to Houston, TX to crash our sisters new house and one of her requests was a square dining table for her kitchen! This table seats 8 people and it’s built with mostly framing lumber! So, let’s build it! Just click the box below to watch this DIY Square Dining Table tutorial!
How fun was that?! As always, we’ve got the free printable plans for you to build it and you can follow along in the step-by-step build below!
CLICK HERE TO JUMP TO THE FREE PRINTABLE PLANSTable of Contents
Supplies
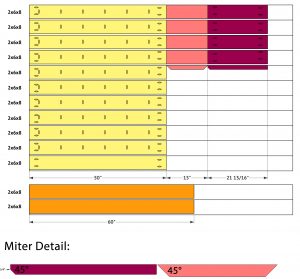
- 13 – 2x6x8
- 7 – 2x4x8
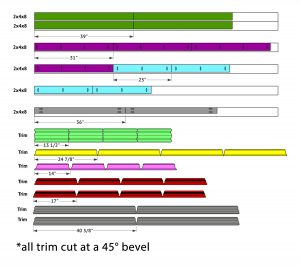
- 7 – Sticks of Trim
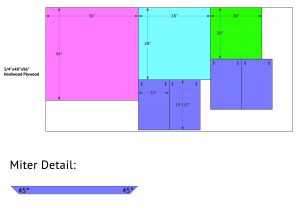
- 1 – 3/4″x48″x96″ Hardwood Plywood
- 1 1/4″ pocket hole screws
- 2 1/2″ pocket hole screws
- 1 1/4″ brad nails
- 2″ brad nails
- 2 1/2″ wood screws
- wood glue
Tools
Building the Table Top
Note: We ripped the round edges off of all of the 2x boards. This made the 2×6 boards 5″ wide and the 2×4 boards 3″ wide. This is not a necessary step but if you choose to not rip your boards be sure to adjust the plans accordingly.
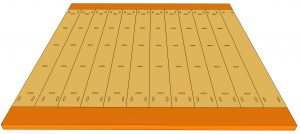
Step 1: Attach the Planks
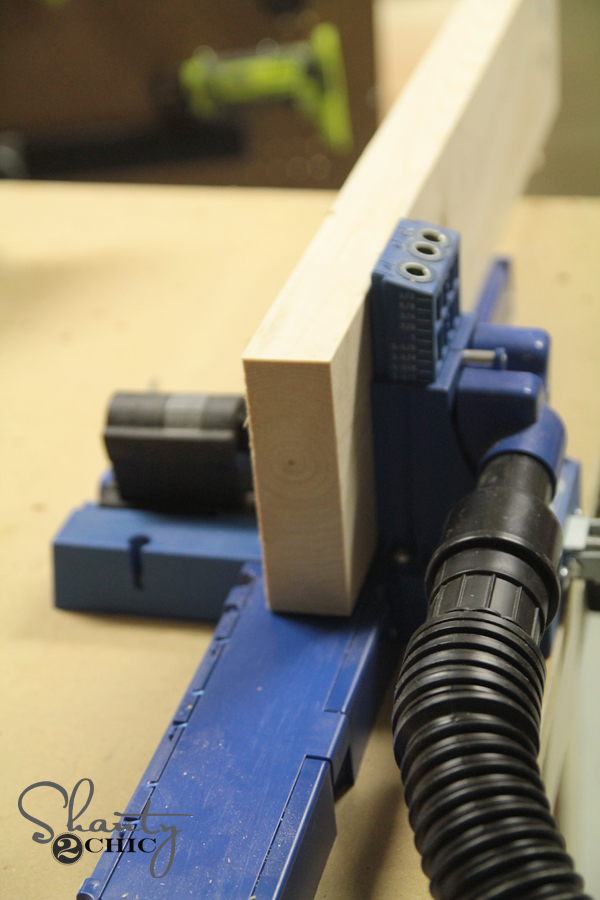
The first step of building is to build the table top! We cut the planks to size and used our Kreg Jig to drill 1 1/2″ pocket holes down one edge of all but one of the boards and at the ends of each board.
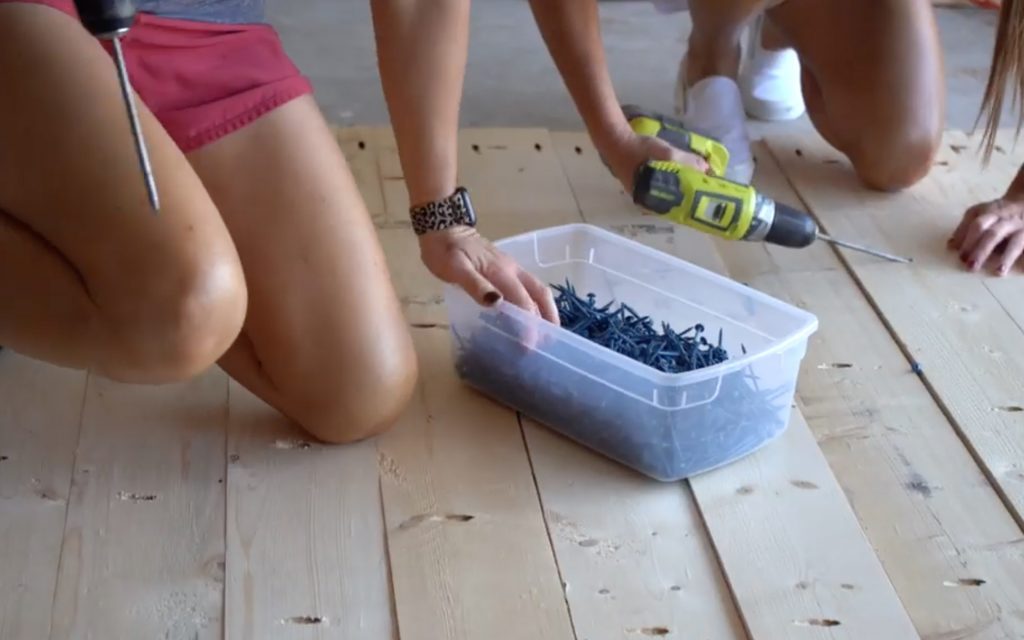
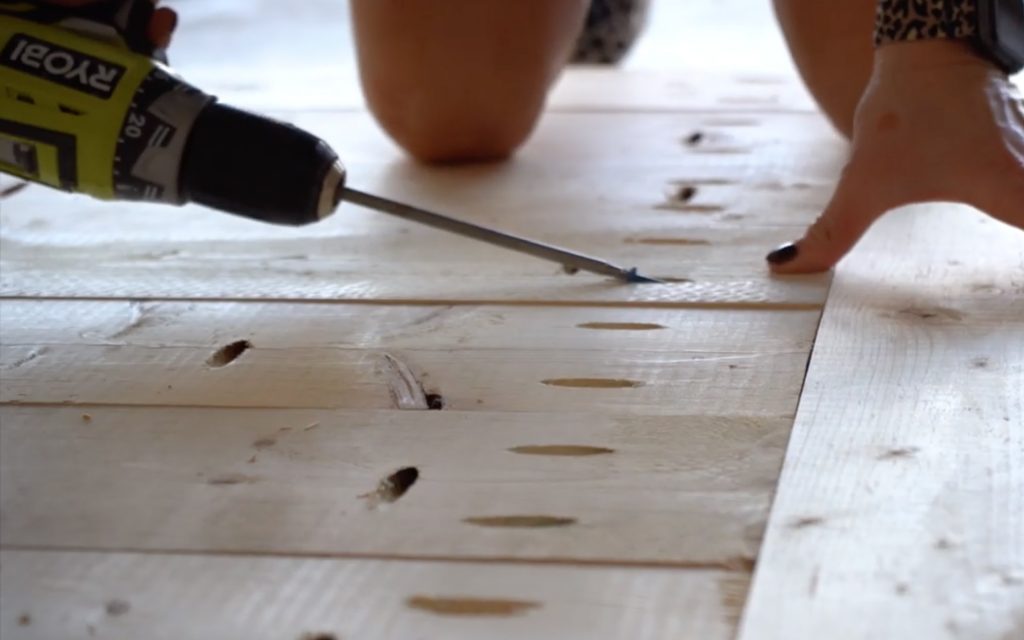
We attached them together with 2 1/2″ pocket hole screws.
Step 2: Attaching the Breadboards
We measured and cut the breadboards to size. Then, we attached them the ends of the table top planks with 2 1/2″ pocket hole screws.
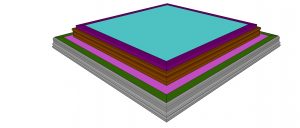
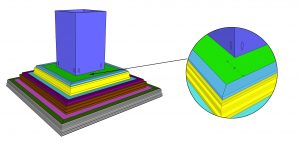
Building the Bases
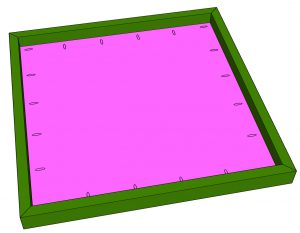
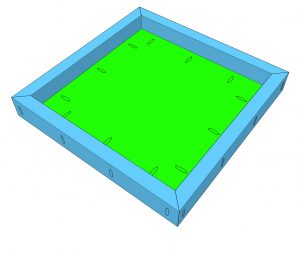
Step 1: The Bottom Base
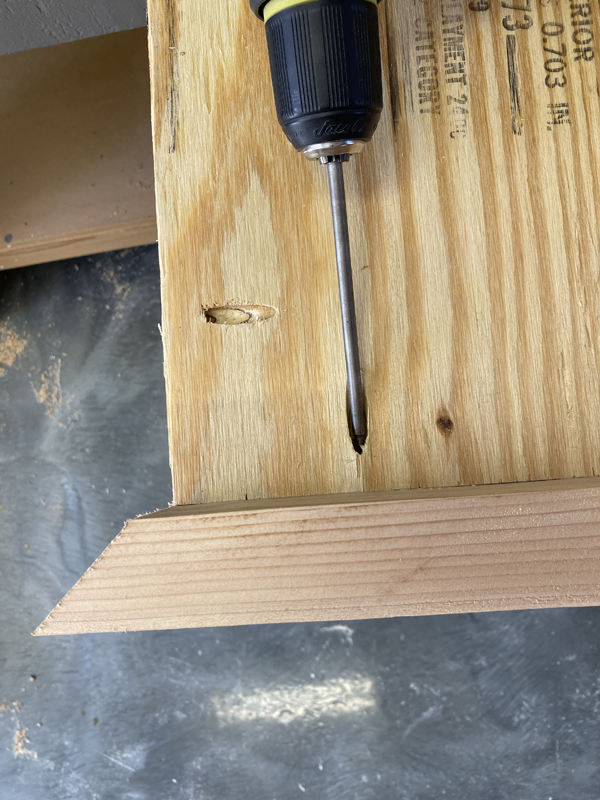
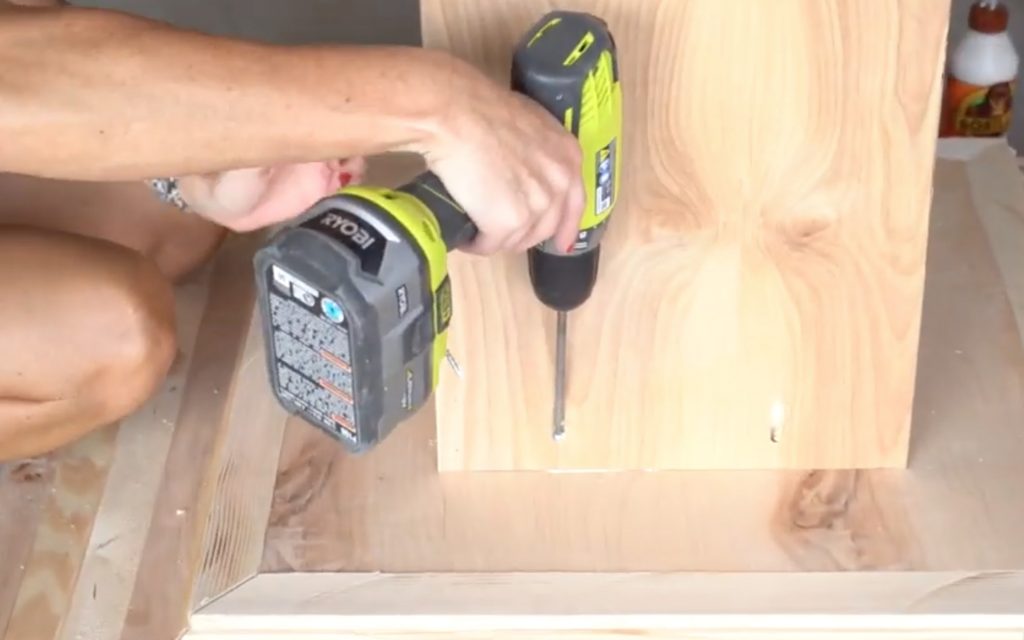
We cut the base plywood to size and drilled 3/4″ pocket holes around the edges. Cut the base frame pieces to size and attach them to the plywood with 1 1/2″ pocket hole screws and wood glue. The top of the plywood should be flush with the top of the frame pieces.
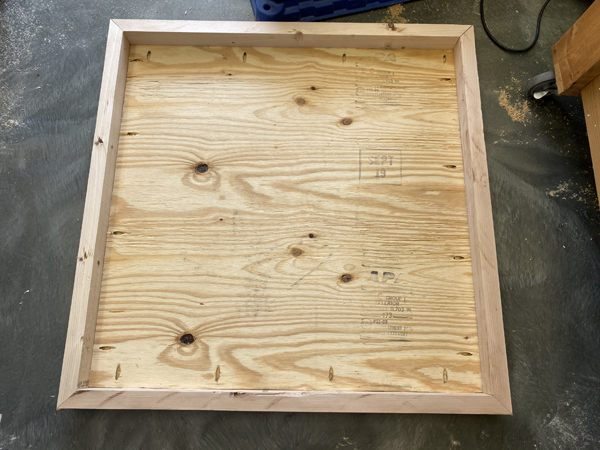
Here is the bottom base, upside down, with all of the frame pieces attached.
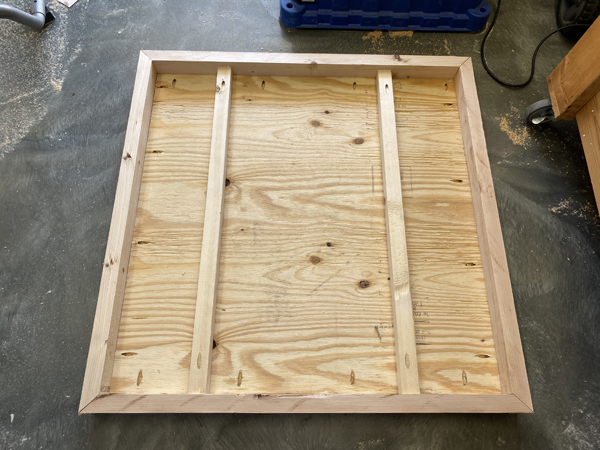
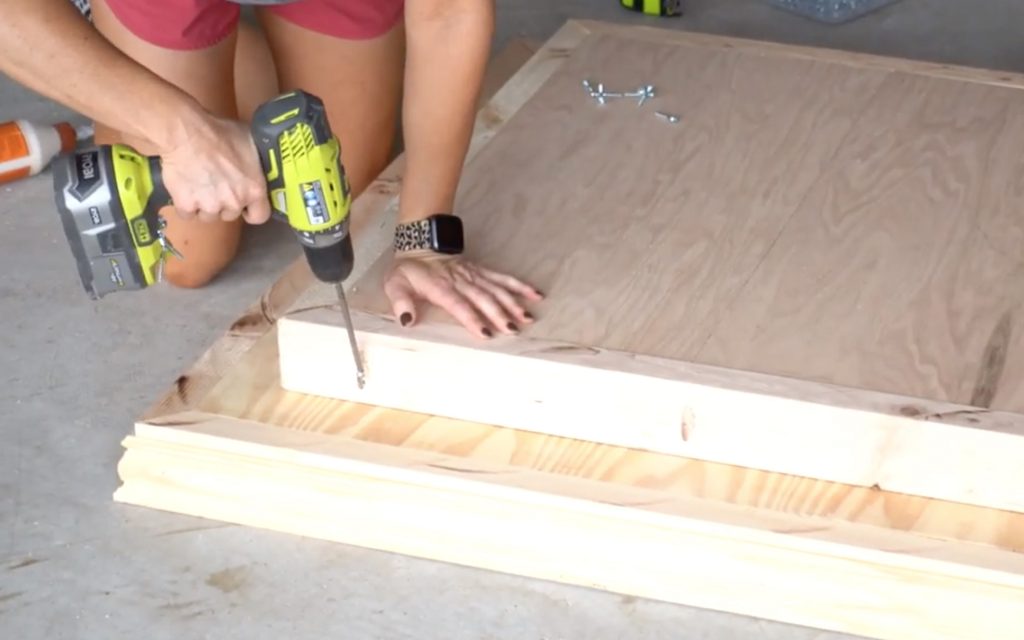
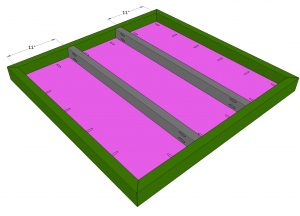
We cut the bottom support pieces to size and drill 1 1/2″ pocket holes at the ends of each board. Then, we attached them to the bottom of the bottom base with 2 1/2″ pocket hole screws and wood glue.
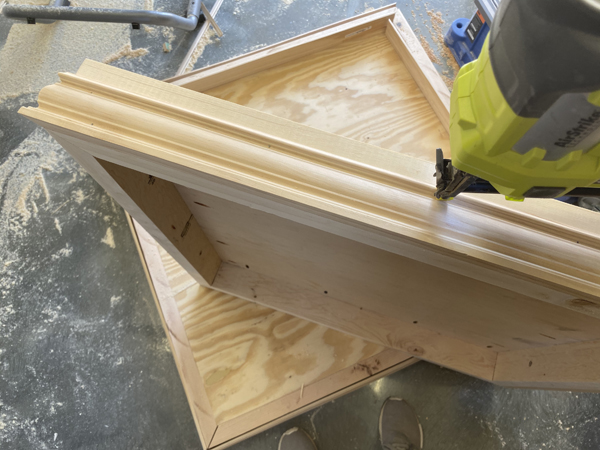
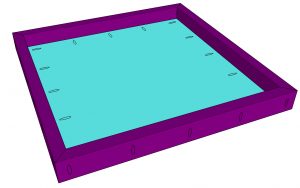
We cut the casing to size and attached it to the base frame with 1 1/4″ brad nails and wood glue.
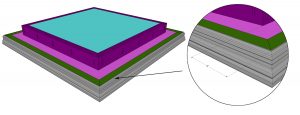
Step 2: Second Base
We cut the second base plywood to size and drilled 3/4″ pocket holes along the edges. Then, we cut the frame pieces to size, drilled 3/4″ pocket holes on the front edges and attached them to the plywood with 1 1/4″ pocket hole screws and wood glue.
Once the base was complete, we centered it on top of the first base and attached it to the plywood with 1 1/4″ pocket hole screws and wood glue.
We cut the trim to size and attached it to the second base frame with 1 1/4″ brad nails and wood glue.
Step 3: Third Base
We cut the third base plywood to size and drilled 3/4″ pocket holes around the edges. Then, we cut the frame pieces to size, drilled 3/4″ pocket holes along one edge of each board and attached them to the plywood with 1 1/4″ pocket hole screws and wood glue.

After building the third base, we centered it on the pedestal and attached it to the second base plywood with 1 1/4″ pocket hole screws and wood glue.

We cut the trim pieces to size and attached them to the third base frame with 1 1/4″ brad nails and wood glue.
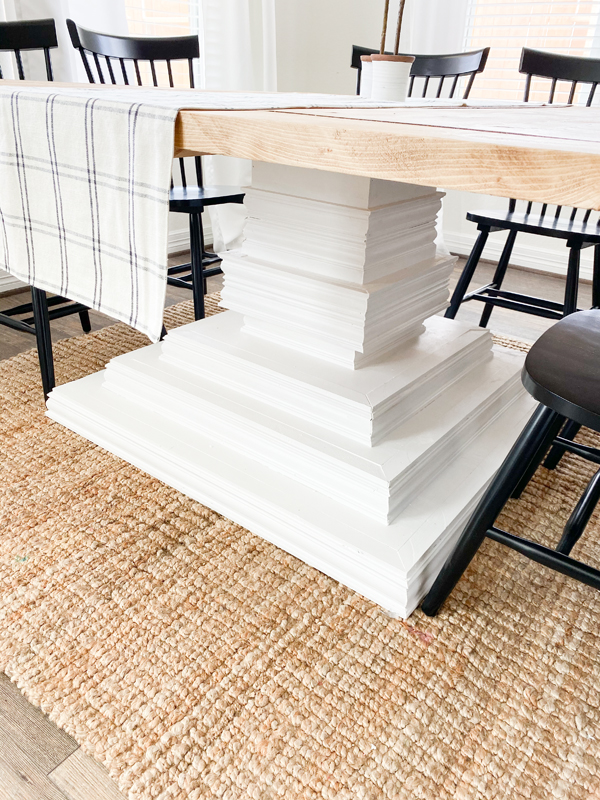
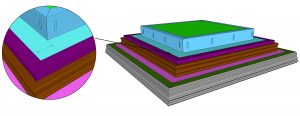
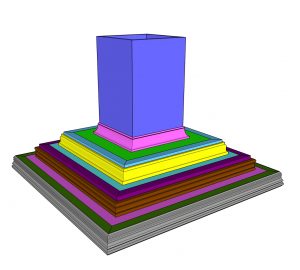
Assembling the Trunk
Step 1: Building the Trunk
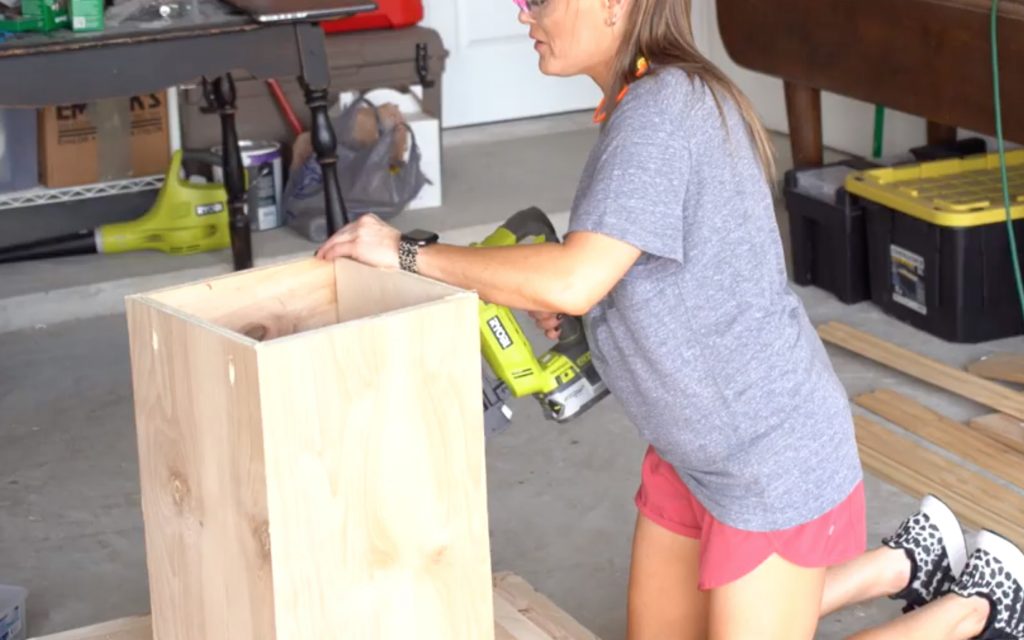
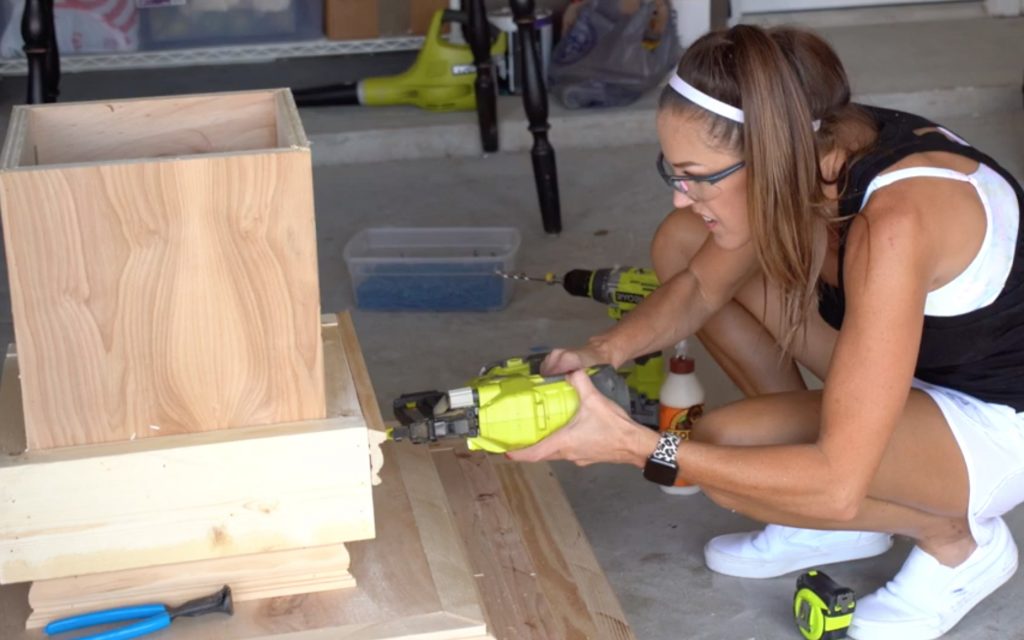
We cut the trunk pieces to size. Then, we ripped the edges at a 45° angle with our table saw (you can use a miter saw too). Once the edges were ripped, we attached the pieces together with 1 1/4″ brad nails and wood glue.
Next, we centered the trunk on the third base and attached it to the plywood with 1 1/4″ pocket hole screws and wood glue.
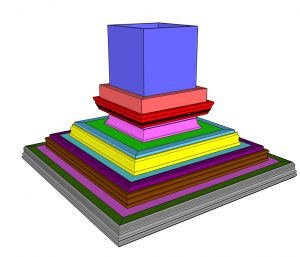
Step 2: Attaching the Trim
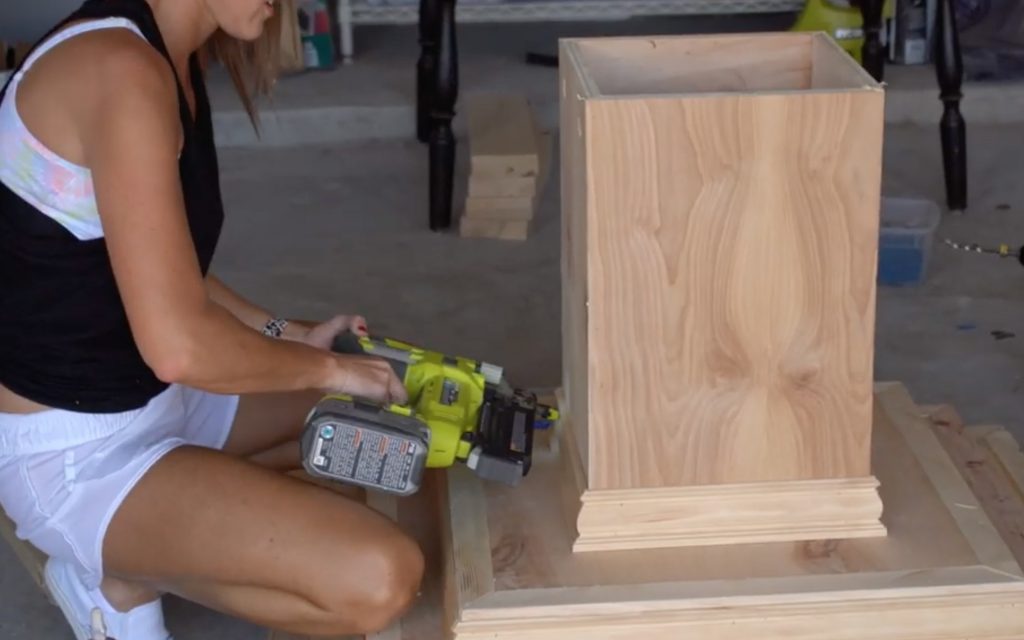
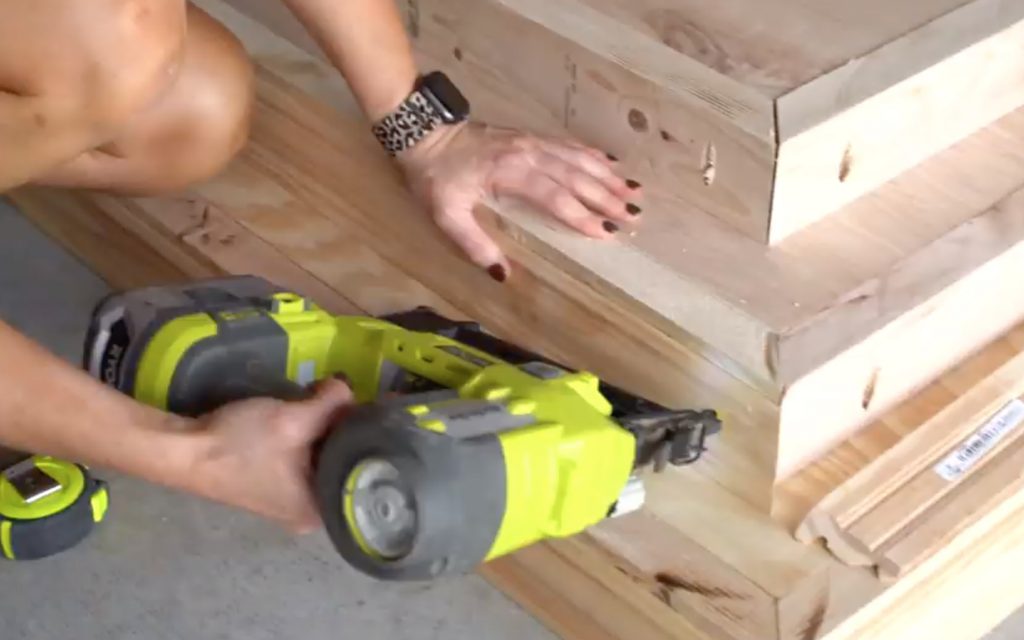
Time for trim. We cut the first row of trim to size and attached it with 1 1/4″ brad nails and wood glue.
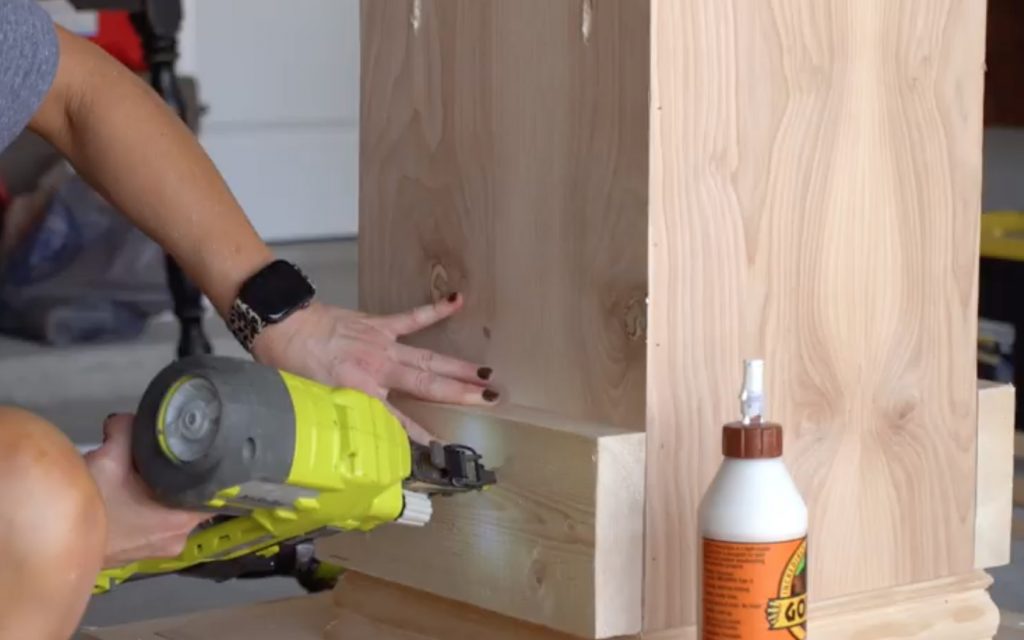
Then, we cut the second trim row to size and attached it to the trunk with 2″ brad nails and wood glue.
Next, we cut the third row of trim to size and attached it to the second row of trim with 1 1/4″ brad nails.
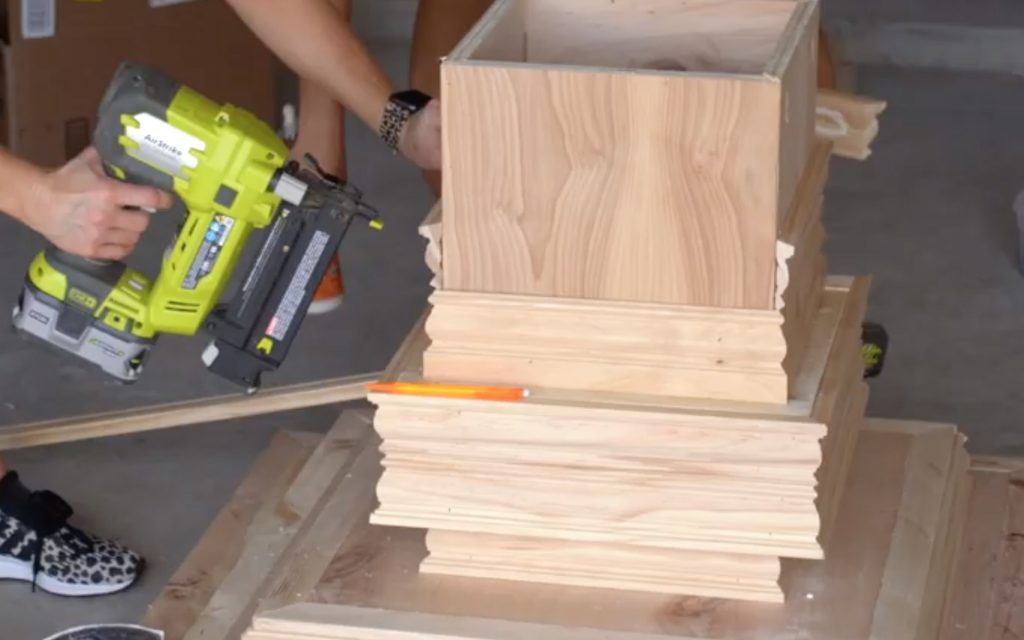
We followed up with the fourth and fifth rows of trim, attaching them the same way, with 1 1/4″ brad nails and wood glue. You can get creative with the trim and stack however you like to create the design you want!
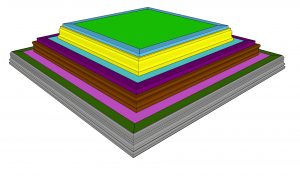
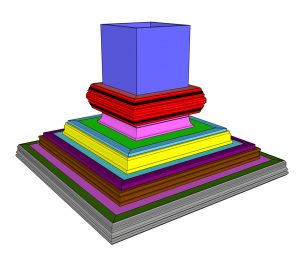
Attaching the Table Top
Step 1: Attaching the Top Supports
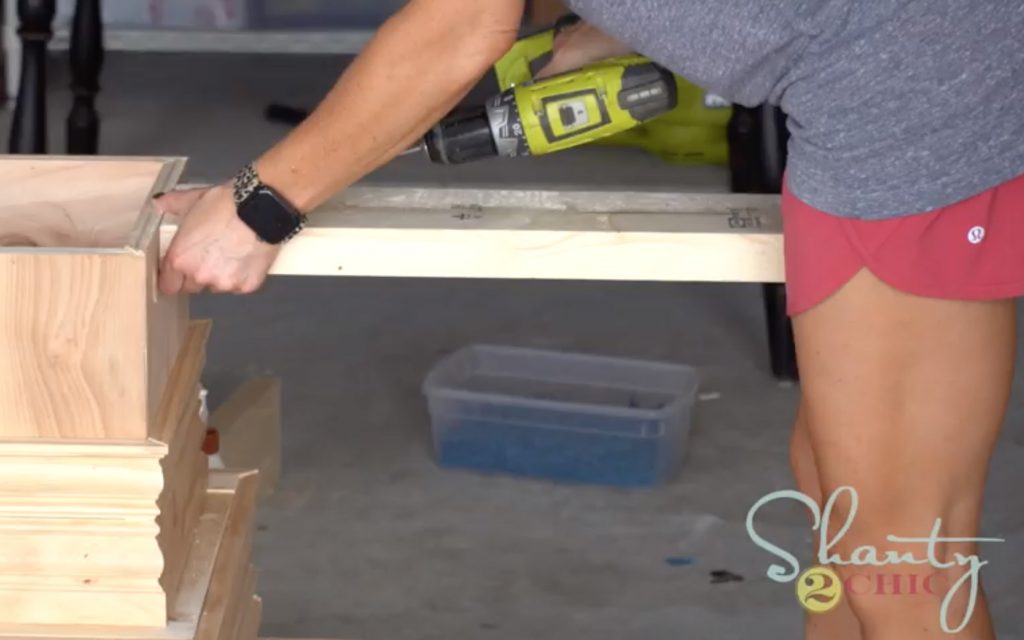
Once the entire base was assembled we moved on to the table top! We cut the top support arms to size and drilled 1 1/2″ pocket holes on the square ends of each board. Then, we centered them on the trunk and attached them with 2 1/2″ pocket hole screws and wood glue.
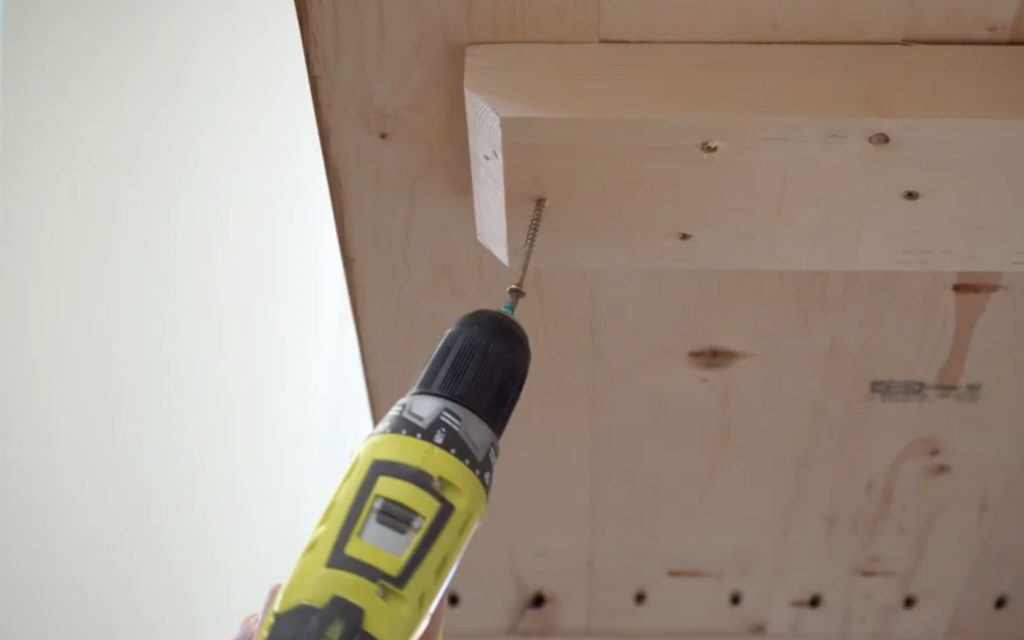
Once the supports were attached, we centered the table top over the supports and attached it to the arm supports with 2 1/2″ wood screws, from the bottom of the supports and into the table top.
Now, just fill your nail holes, sand it down and give it a finish!
- You can find the stain that we used here!
- You can find the poly that we used here!
- You can find the paint that we used here!
You can get creative with the stain, paint and trim to really make this DIY square dining table your own! Don’t forget to share your builds with us on social media and use #shanty2chic so we can share them too!
Happy Building!
More DIY Dining Table Plans

DIY Square Dining Table
Tools
- Miter Saw
- Drill
- Kreg Jig
- Nailer
- Table Saw (optional)
- Sander
Supplies
- 13 2x6x8 Framing Lumber
- 6 2x4x8 Framing Lumber
- 7 Sticks of Trim
- 3/4"x48"x96" Hardwood Plywood (Birch)
- 1 1/4" pocket hole screws
- 2 1/2" pocket hole screws
- 1 1/4" brad nails
- 2" brad nails
- 2 1/2" wood screws
- wood glue
Instructions
Cut Lists
- Cut List 1

- Cut List 2

- Cut List 3

Building the Table Top
- The first step is to plank the table top. Cut the planks to size and drill 1 1/2" pocket holes down one edge of all but one of the boards and at the ends of each board. Attach them together with 2 1/2" pocket hole screws.

- Measure and cut the breadboards to size. Attach them to the ends of the table top planks with 2 1/2" pocket hole screws.


Building the Bases
- Cut the base plywood to size and drill 3/4" pocket holes around the edges. Cut the base frame pieces to size and attach them to the plywood with 1 1/2" pocket hole screws and wood glue. The top of the plywood should be flush with the top of the frame pieces.

- Cut the bottom support pieces to size and drill 1 1/2" pocket holes at the ends of each board. Attach them to the bottom of the bottom base with 2 1/2" pocket hole screws and wood glue.

- Cut the casing to size and attach it to the base frame with 1 1/4" brad nails and wood glue.

- Cut the second base plywood to size and drill 3/4" pocket holes along the edges. Cut the frame pieces to size, drill 3/4" pocket holes on the front edges and attach them to the plywood with 1 1/4" pocket hole screws and wood glue.

- Center the second base on top of the first base and attach it to the plywood with 1 1/4" pocket hole screws and wood glue.

- Cut the trim to size and attach it to the second base frame with 1 1/4" brad nails and wood glue.
- Cut the third base plywood to size and drill 3/4" pocket holes around the edges. Cut the frame pieces to size, drill 3/4" pocket holes along one edge of each board and attach them to the plywood with 1 1/4" pocket hole screws and wood glue.

- Center the third base on the pedestal and attach it to the second base plywood with 1 1/4" pocket hole screws and wood glue.

- Cut the trim pieces to size and attach them to the third base frame with 1 1/4" brad nails and wood glue.


Building the Trunk
- Cut the trunk pieces to size. Rip the edges at 45° angles with a table saw or miter saw. Attach the pieces together with 1 1/4" brad nails and wood glue.

- Center the trunk on the third base and attach it to the plywood with 1 1/4" pocket hole screws and wood glue.

- Cut the first row of trim to size and attach it with 1 1/4" brad nails and wood glue.

- Cut the second trim row to size and attach it ot the trunk with 2" brad nails and wood glue.

- Cut the third row of trim to size and attach it ot the second row of trim with 1 1/4" brad nails and wood glue.

- Cut the fourth row of trim to size and attach it to the second row of trim with 1 1/4" brda nails and wood glue.
- Cut the top trim to size and attach it to the trunk with 1 1/4" brad nails and wood glue.


Attaching the Table Top
- Cut the top arm supports to size, drill 1 1/2" pocket holes on the square ends of each board. Center them on the trunk and attach them with 2 1/2" pocket hole screws and wood glue.

- Attach the table top to the arm supports with 2 1/2" wood screws from the bottom of the supports and into the table top.

- Now, fill your nail holes, sand it down and add a finish! You can get creative with the trim and make it your own! Make sure you share your builds with us on social media and use #shanty2chic so we can share them too! Happy building!


Check out our complete collection over 25 free DIY dining table designs!


What are the measurements for the top and bottom base? And the overall height?
What is the measurements of this table?
I am so bummed! There was a guy building this table for me but he got shut down over the weekend for operating without a business license! Desperately looking for someone to make it!!
Looking to build this table. What height are the different trims? Looks like you have a few different ones. Thanks.
I love your youtube channel! I just stumbled on your channel maybe three weeks ago, and I have already completed two of your projects. I love the way this square table looks. Do you have the final dimensions? I’m wondering if it would fit in my space. Thank you!
How would you modify the plans for a table for 12?
Hi! I love this table and am considering building it! Do you have a ball park of how much all the materials costs when it was all said and done assuming I have the tools already?
Did you ever find out about this?
Download Link doesn’t work properly. When clicked on. Comes up part 2 instead of part 1.
When planking the tabletop do you glue the strips together? What is the reason not add adhesive on top boards? Love the plan thank you for my next project.
Gorgeous as usual!
Love this! I wish you would crash my home and make a dining table. My hubby is going to make the angle table but he doesn’t know we are going to eat on it for his retirement party!!
You girls are amazing. And lucky Texas sister to have builders as your sisters. And girls it is so nice to seeing sisters work together as you do. That table is a sight to behold.