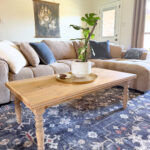
DIY Turned Leg Coffee Table
Learn how to build this DIY turned leg coffee table for under $100! This beautiful coffee table features turned legs, beaded wood trim, and a timeless design. Download the free printable plans and follow along with the step-by-step tutorial.
Servings: 1 Coffee Table
Cost: $100
Equipment
- Miter Saw
- - Kreg Jig 720PRO
- - Drill/driver
- Brad Nailer
- - Orbital sander
- - Clamps
- Tape Measure
- - Speed Square
Ingredients
- 1 24" x 48" edge-glued wood panel
- 2 1x3 boards
- 2 1x2 boards
- 4 16" turned legs
- Approximately 8' beaded wood trim
- 1-1/4" pocket hole screws
- 1-1/4" brad nails
- 3/4" brad nails
- Wood glue
- Wood filler
- Stain or paint
- Protective topcoat
Instructions
- Cut all apron boards to size according to the plans. Drill 3/4" pocket holes in both ends of each apron board and along the top edge for attaching the tabletop.
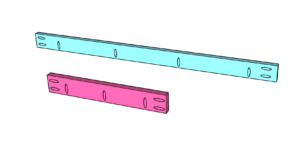
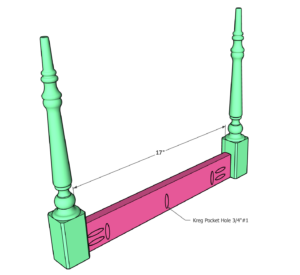
- Mark each turned leg 1/2" in from the inside edge. Attach the short apron boards to the legs with wood glue and 1-1/4" pocket hole screws. Repeat to build the second leg assembly.
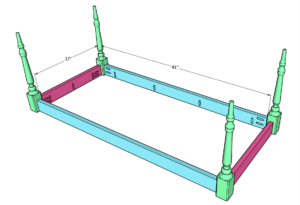
- Connect both leg assemblies with the long apron boards using wood glue and 1-1/4" pocket hole screws. Check the base for square before tightening all of the screws.
- Center the completed base on the underside of the tabletop, leaving a 1" overhang on all four sides. Clamp it in place and attach it using the pocket holes in the apron.
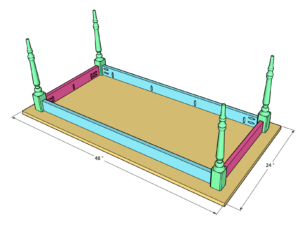
- Measure the assembled tabletop before cutting the trim. Cut the 1x2 trim with 45° mitered corners, then attach it flush with the tabletop using wood glue and 1-1/4" brad nails.
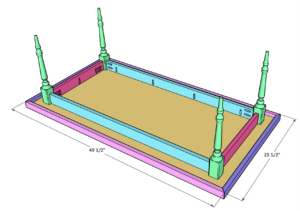
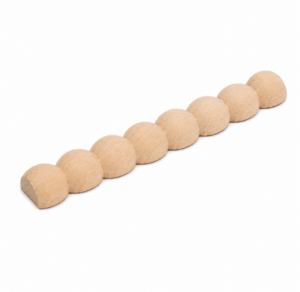
- Cut the beaded wood trim to fit each side of the 1x2 trim. Attach it with wood glue and 3/4" brad nails.
- Fill all nail holes with wood filler, sand the entire table smooth, then apply your stain or paint followed by a protective topcoat.
Notes
- Measure the tabletop before cutting the trim for the best fit.
- Check the base for square before attaching the tabletop.
- Use wood glue on every joint for added strength.
- Allow the finish to dry completely between coats.
- Check the base for square before attaching the tabletop.
- Use wood glue on every joint for added strength.
- Allow the finish to dry completely between coats.