
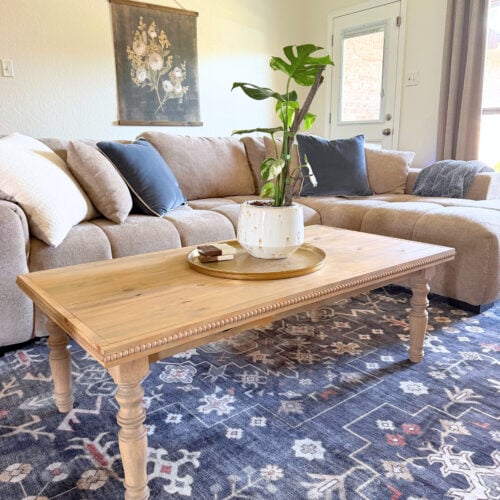
I’ve been wanting a coffee table with turned legs for a while, but every one I loved came with a price tag that I didn’t. So, I decided to build my own, and I couldn’t be happier with how it turned out. This DIY turned leg coffee table has a classic look, comes together with only a few boards, and cost me less than $100 to build.
The beaded trim gives it just enough detail to make it feel custom, and those turned legs completely change the look without adding a lot of extra work. If you’ve been looking for a coffee table that gives you a high-end look without the high-end price, this is such a fun one to build.
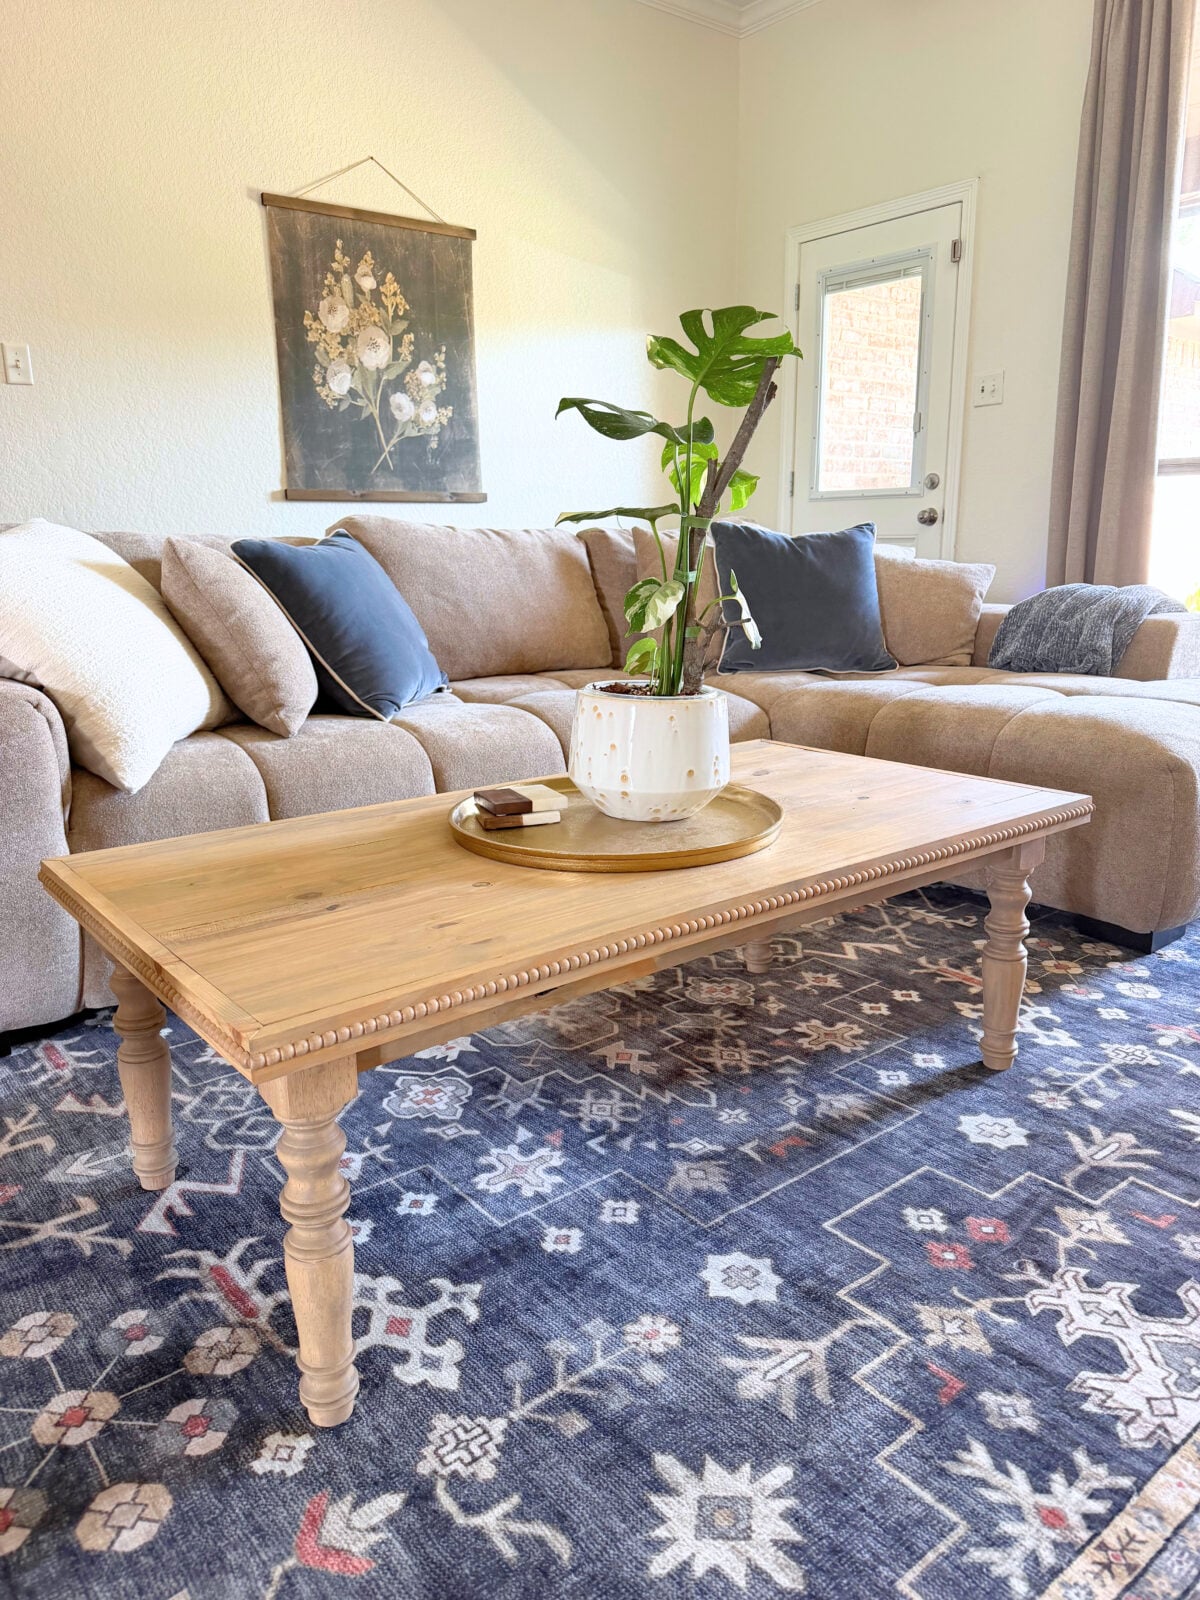
Table of Contents
Why I Love This DIY Coffee Table
This table gave me exactly the look I wanted for my living room without spending a ton of money.
- It cost less than $100 to build.
- It only requires a few boards and straightforward joinery.
- The turned legs give it the look of a custom furniture piece.
- The beaded trim adds a pretty detail without adding a complicated step.
- The tabletop is made from an inexpensive edge-glued wood panel.
- The finish can be customized with paint or stain.
- Free printable plans and a full how-to video are included.
Key Supplies and Tools
Turned Coffee Table Legs. These turned legs completely make the table. I found a set of four on Amazon for around $38, which works out to less than $10 per leg. They gave me the classic furniture look I wanted while keeping the entire project under budget. You can find them on Amazon HERE!
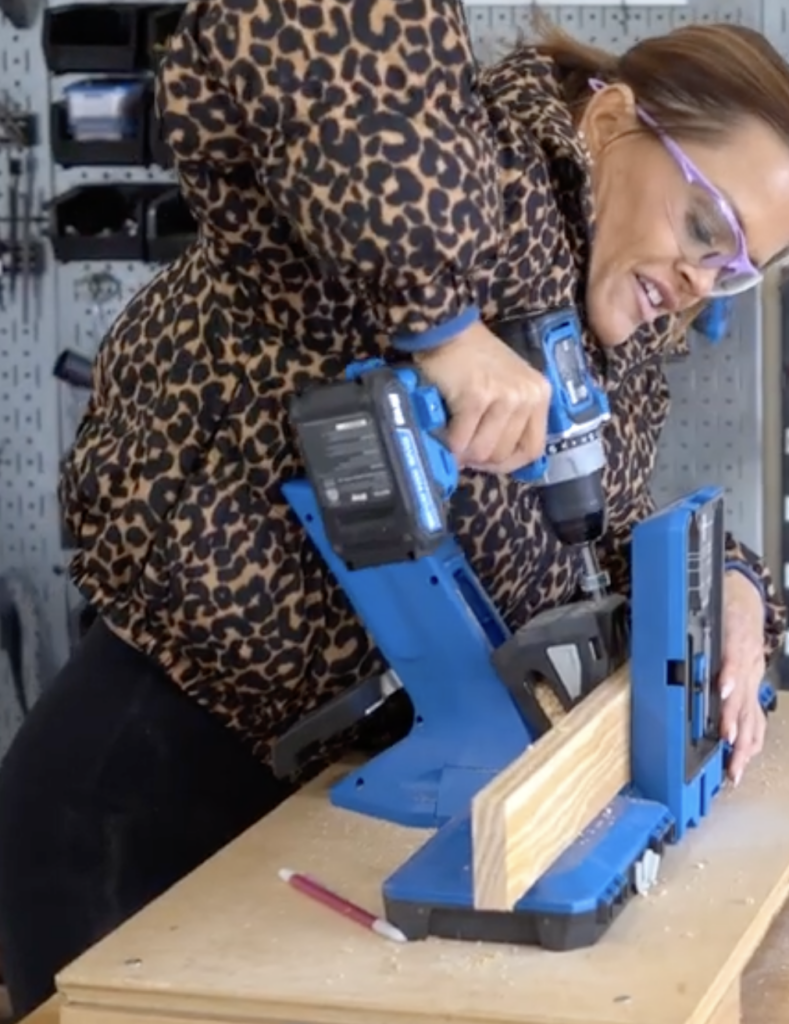
Kreg Jig 720PRO. We used our Kreg Jig 720PRO to build this DIY turned leg coffee table, and it’s one of those tools we grab for just about every furniture project.
Pocket hole joinery is our favorite way to build because it’s fast, incredibly strong, and leaves you with clean-looking joints without a lot of complicated assembly. On this coffee table, we used it to build the apron and securely attach the base to the tabletop, making the entire project come together quickly and accurately.
A few of our favorite features of the Kreg Jig 720PRO:
- One-motion clamping automatically adjusts to your material, making setup quick and easy.
- Built-in support wings help keep longer boards level while drilling pocket holes.
- Simple material thickness adjustments let you switch between different lumber sizes in just a few seconds.
- Strong, hidden joints are perfect for furniture projects like coffee tables, dining tables, consoles, and more.
- Beginner-friendly design takes much of the guesswork out of creating sturdy woodworking joints.
We’ve built countless furniture pieces with our Kreg Jig over the years, and it’s still one of the hardest-working tools in our shop. If you’re looking for a pocket hole jig that makes furniture building faster and more enjoyable, the Kreg Jig 720PRO is one we reach for again and again.
You can find the Kreg Jig 720PRO on Amazon!
Edge-Glued Wood Panel. I used a 24-inch by 48-inch edge-glued wood panel for the tabletop. These panels are inexpensive, easy to work with, and I love the way they look with stain. Using a ready-made panel also saves the time of joining several individual boards together to create the top.
How to Build a DIY Turned Leg Coffee Table
You can watch the full how-to video below and download the free printable plans at the bottom of this post.
Check out the video HERE!
The complete supply list, cut list, and printable plans are below, but I’ll walk you through the entire build first.
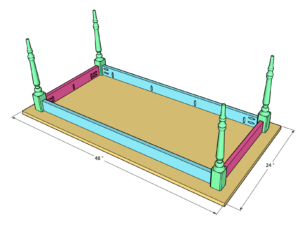
Cut the Apron Boards
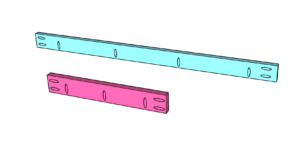
Start by cutting the 1×3 apron boards. You will need:
Two apron boards at 17 inches
Two apron boards at 41 inches
These four boards will create the frame that connects the turned legs and supports the tabletop.
Drill the Pocket Holes
Set your Kreg Jig for 3/4-inch material. Drill two pocket holes into each end of all four apron boards.
Next, drill additional pocket holes along the top edge of the apron boards. These pocket holes will be used later to attach the table base to the underside of the tabletop.
Make sure these pocket holes face upward. Once the tabletop is attached, all of the screws will be hidden underneath the table.
Attach the Short Aprons to the Legs
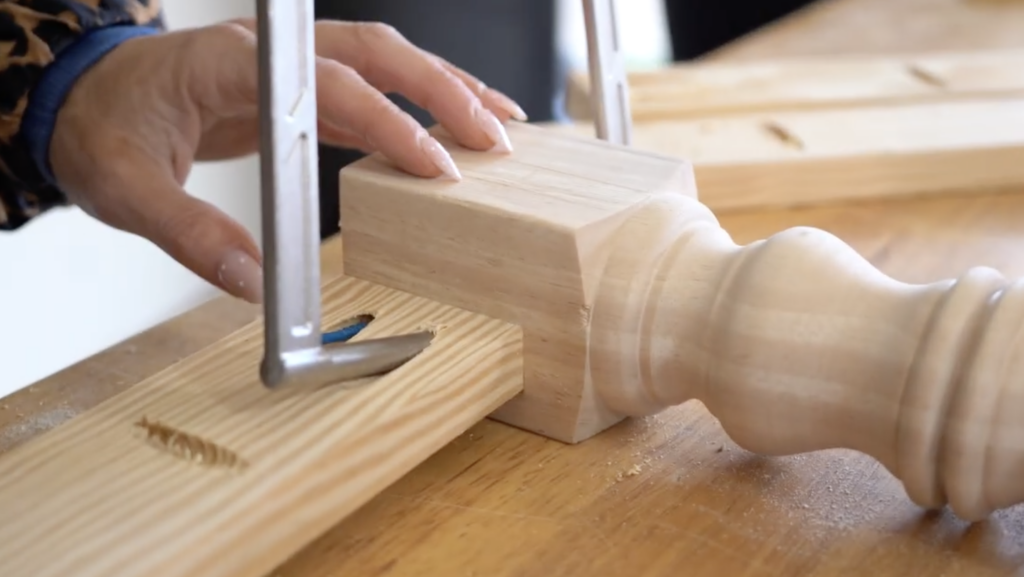
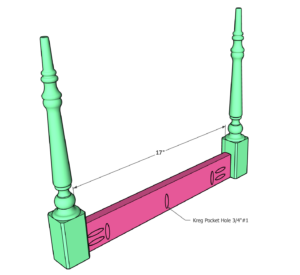
Measure and mark 1/2 inch in on each turned leg. This mark will show you where to position the apron boards and create a consistent setback around the entire table base.
Apply wood glue to the end of one short apron board, line it up with the mark on the leg, and clamp it in place. Attach the apron board to the leg through the pocket holes.
I used my Kreg right-angle clamp for this step. It fits inside one of the pocket holes and holds the apron in place while I drive the first screw. It really is like having an extra hand when you’re working with awkward angles.
Repeat this process to attach the second leg to the other end of the apron board. Build a second matching leg assembly with the remaining short apron board and two legs.
Finish Assembling the Table Base
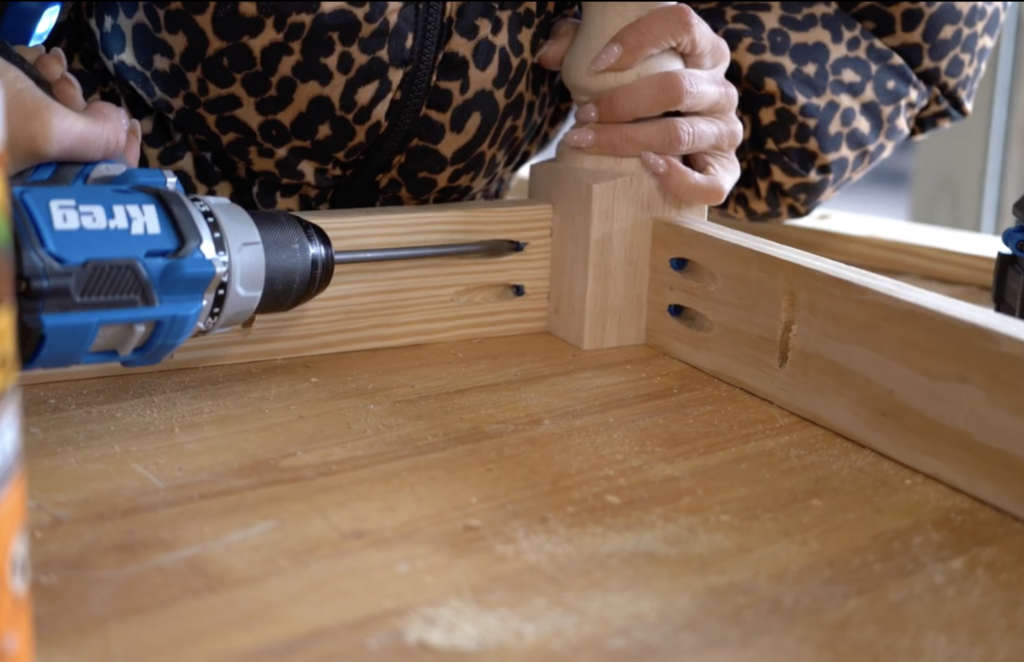
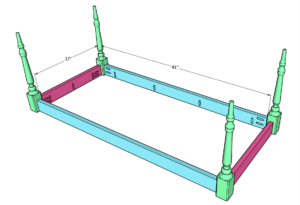
Stand the two short leg assemblies upright and connect them with the two 41-inch apron boards.
Apply wood glue to each joint, clamp the boards in place, and attach them with pocket-hole screws.
Before driving all of the screws, check that the base is square. Measure diagonally from corner to corner in both directions. The two measurements should match. Adjust the frame as needed before tightening the remaining screws.
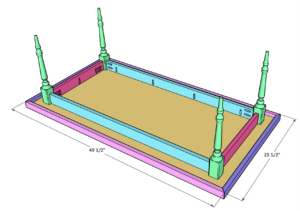
Position the Table Base on the Top
Place the 24-inch by 48-inch edge-glued panel facedown on a clean, protected work surface. Decide which side of the panel you want to use as the top before positioning the base.
Apply wood glue along the top edges of the apron boards. Turn the completed table base upside down and center it on the underside of the wood panel.
The base should have approximately a 1-inch overhang on all four sides. Measure each side before attaching it so the tabletop is evenly positioned.
Clamp the table base securely to the panel so it does not shift while you add the screws.
Attach the Tabletop
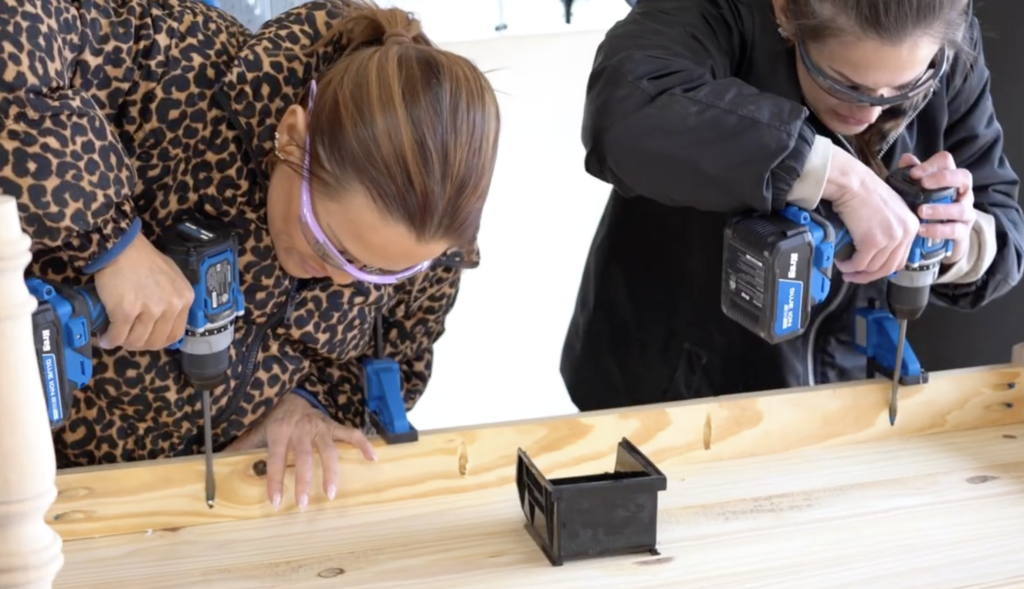
Attach the table base to the underside of the tabletop with 1 1/4-inch pocket-hole screws. Drive the screws through the pocket holes along the top edge of each apron board and into the wood panel.
Continue around all four sides of the base until the tabletop is fully secured.
Double-check your screw length before attaching the top. The screws need to be long enough to hold securely without coming through the finished surface of the tabletop.
Measure and Cut the Trim
I waited until the table was assembled before cutting the 1×2 trim pieces. Even when the plans give you a measurement, small variations during assembly can affect the final fit.
Measure each side of the tabletop and cut the trim pieces to fit. The two long trim boards should be approximately 48 inches from short point to short point, but I recommend measuring your assembled tabletop before making the final cuts.
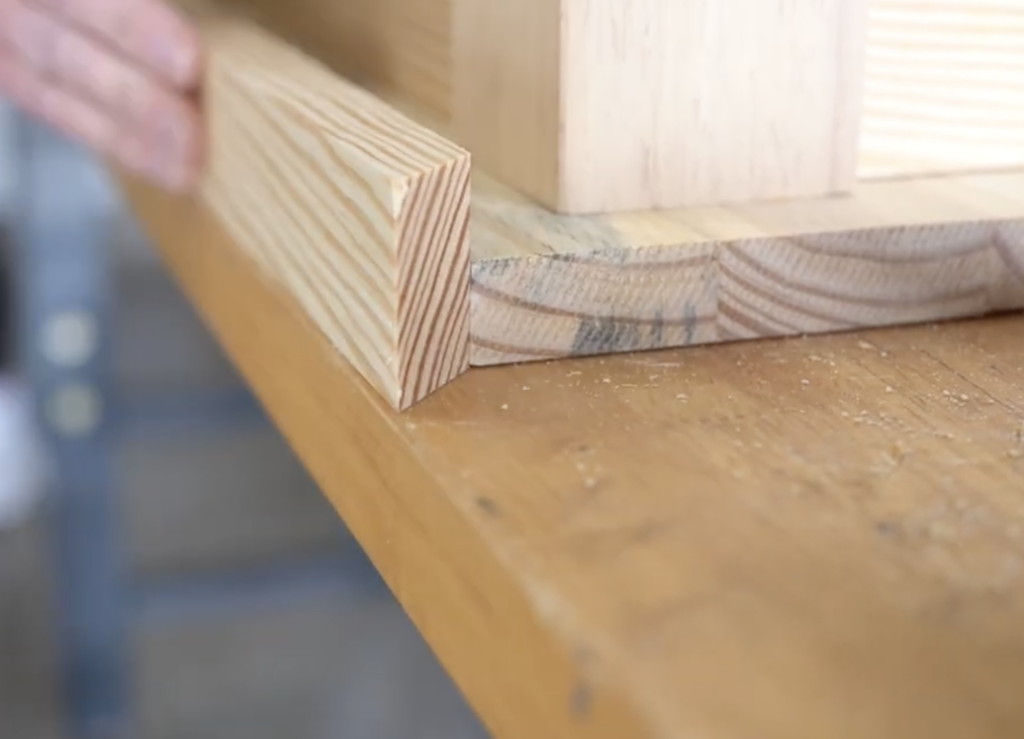
Cut a 45-degree miter on each end of the trim boards to create clean, finished corners.
Step 8: Attach the Trim
Apply a thin line of wood glue along the upper edge of the first trim board. Position it so the top edge of the trim sits flush with the top of the coffee table.
Attach the trim to the edge of the tabletop with 1 1/4-inch brad nails.
Repeat the same process with the remaining trim pieces. I also like to add a small amount of wood glue inside each mitered corner before nailing it together. This helps keep the corners tight and gives the joints a cleaner finished look.
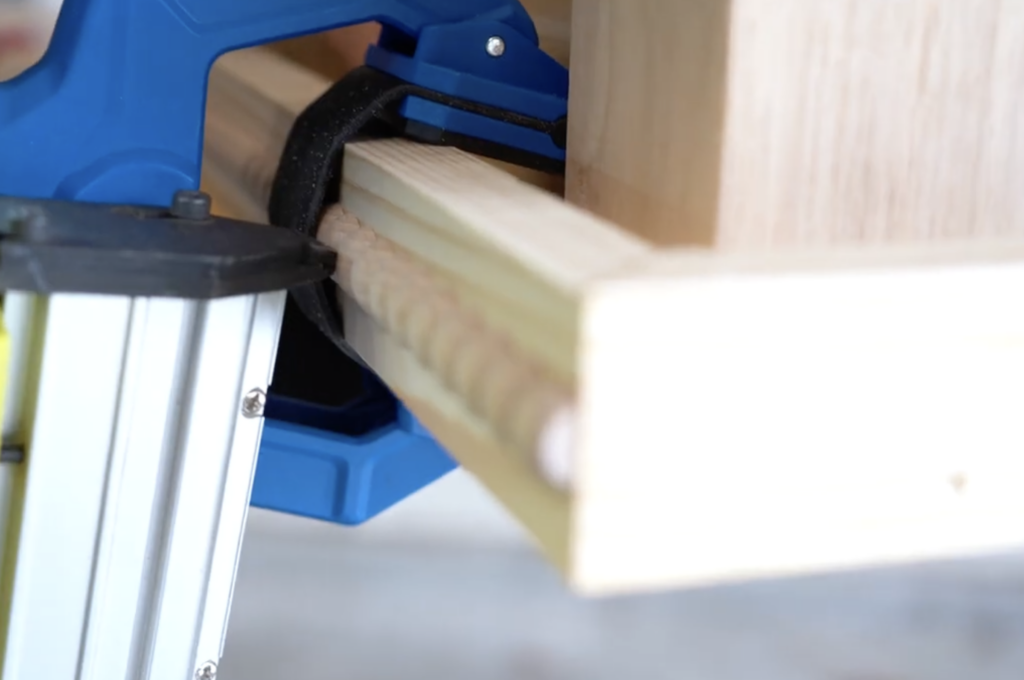
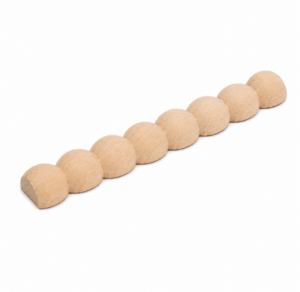
This is the step that really gives this coffee table its custom, high-end look. After attaching the 1×2 trim around the tabletop, cut the beaded wood trim to fit each side. Apply a thin bead of wood glue to the back, position it flush against the side of the 1×2 trim, and secure it with 3/4″ brad nails.
Take your time lining up each piece before nailing it in place. The beaded trim is a small detail, but it adds so much character and really makes the finished table look like a designer piece.
You can find the trim HERE on Amazon!
Fill, Sand, and Finish
Fill the brad nail holes, cracks, and any small imperfections with wood filler. Let the filler dry completely according to the manufacturer’s instructions.
Sand the entire coffee table smooth, working through the appropriate sanding grits for your chosen lumber and finish. Remove all of the sanding dust before applying paint or stain.
I chose a stained finish because I loved the grain of the edge-glued wood panel. You can also paint the entire table or create a two-tone finish with a stained top and painted base.
Once the color is completely dry, apply a protective topcoat. Coffee tables get a lot of daily use, so a durable protective finish will help protect the surface from spills, scratches, and water rings.
Expert Tips
These are a few small things that made the build go much more smoothly.
- Measure the trim after assembling the tabletop instead of relying only on the written cut list.
- Make sure the tabletop attachment pocket holes face upward before assembling the base.
- Use wood glue at every apron and trim joint for added strength.
- Check the table base for square before driving the remaining screws.
- Clamp the base securely before attaching it to the tabletop.
- Add a small amount of glue inside the mitered corners to help keep the seams tight.
- Check the length of the tabletop screws before driving them into the wood panel.
Ways to Customize the Coffee Table
This design is easy to customize to match your room and furniture style.
- Create a two-tone finish: Paint the base and stain the tabletop.
- Change the wood species: Use oak, maple, or another furniture-grade wood for a different grain and finish.
- Swap the legs: Choose a different turned-leg profile or use a more streamlined leg for a modern look.
- Adjust the dimensions: The length or width can be changed, but the apron measurements, tabletop size, and trim cuts will also need to be adjusted.
Frequently Asked Questions
You can use another furniture joinery method, but a pocket-hole jig is the simplest way to recreate the construction shown in these plans. It also keeps the screws hidden on the inside and underside of the table.
Yes. I chose an edge-glued panel because it was inexpensive and saved time, but you can join individual boards to create the tabletop. Make sure the completed top stays flat and account for the finished tabletop dimensions when cutting the trim.
Small variations in the tabletop or assembly can change the exact finished measurement. Cutting each trim piece to fit the assembled table helps create tighter mitered corners.
Yes. You can paint the entire table or combine a painted base with a stained tabletop. Use a primer that is compatible with your paint and let each coat dry completely before adding the next one.
A brad nailer makes attaching the trim faster and helps hold the boards in position while the glue dries. Another secure trim-attachment method may work, but be careful not to split the narrow trim or leave fasteners that are difficult to conceal.
More DIY Coffee Table Ideas
If you enjoyed building this turned leg coffee table, you may also like our DIY square coffee table, DIY modern coffee table, or DIY Mahjong table. Each one has a different style, but they all use straightforward construction methods that can be customized for your home.
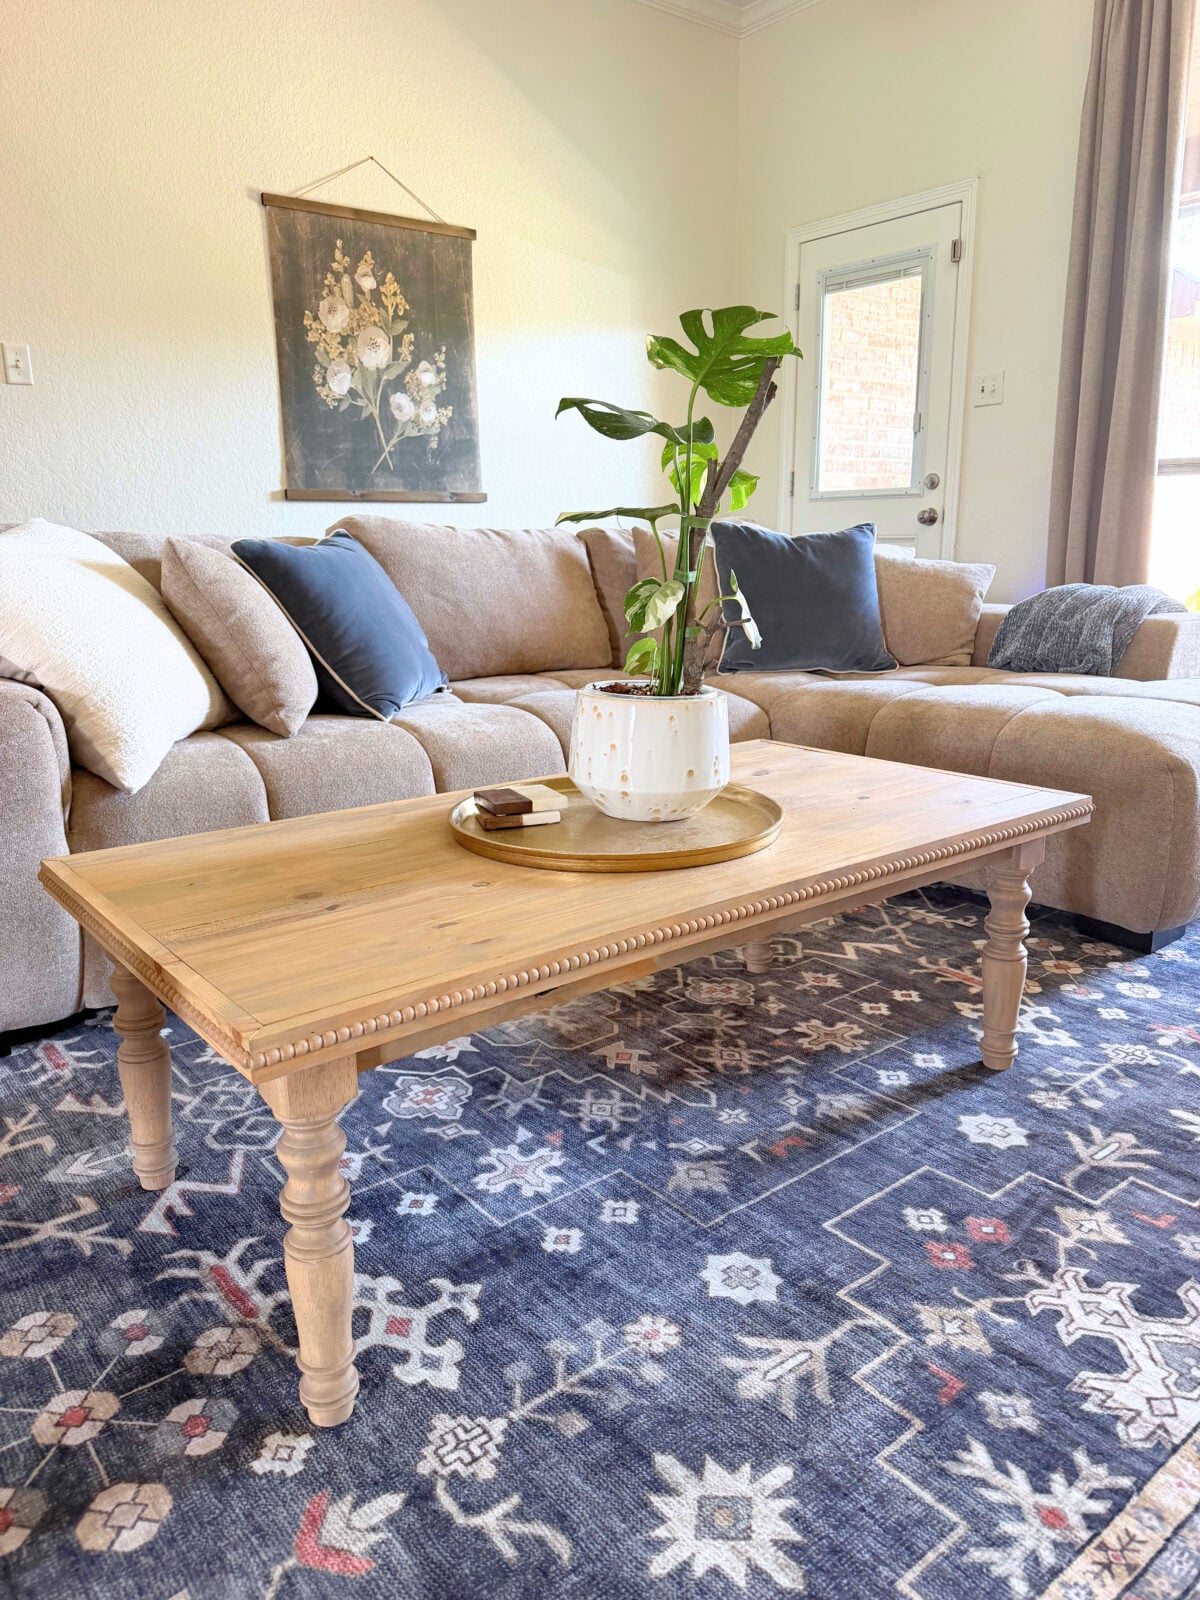
I love how this coffee table turned out. The turned legs and beaded trim give it the look of a custom furniture piece, and I was able to build the entire table for less than $100.
If you build your own, we would love to see it. Share a photo and tag @shanty2chic on Instagram or use #shanty2chic so we can check it out.
Leave any questions in the comments below, and don’t forget to rate the project if you use the printable How-To Card.
Printable Tutorial
DIY Turned Leg Coffee Table
Tools
- Miter Saw
- – Kreg Jig 720PRO
- – Drill/driver
- Brad Nailer
- – Orbital sander
- – Clamps
- Tape Measure
- – Speed Square
Supplies
- 1 24" x 48" edge-glued wood panel
- 2 1×3 boards
- 2 1×2 boards
- 4 16" turned legs
- Approximately 8' beaded wood trim
- 1-1/4" pocket hole screws
- 1-1/4" brad nails
- 3/4" brad nails
- Wood glue
- Wood filler
- Stain or paint
- Protective topcoat
Instructions
- Cut all apron boards to size according to the plans. Drill 3/4″ pocket holes in both ends of each apron board and along the top edge for attaching the tabletop.

- Mark each turned leg 1/2″ in from the inside edge. Attach the short apron boards to the legs with wood glue and 1-1/4″ pocket hole screws. Repeat to build the second leg assembly.

- Connect both leg assemblies with the long apron boards using wood glue and 1-1/4″ pocket hole screws. Check the base for square before tightening all of the screws.

- Center the completed base on the underside of the tabletop, leaving a 1″ overhang on all four sides. Clamp it in place and attach it using the pocket holes in the apron.

- Measure the assembled tabletop before cutting the trim. Cut the 1×2 trim with 45° mitered corners, then attach it flush with the tabletop using wood glue and 1-1/4″ brad nails.

- Cut the beaded wood trim to fit each side of the 1×2 trim. Attach it with wood glue and 3/4″ brad nails.

- Fill all nail holes with wood filler, sand the entire table smooth, then apply your stain or paint followed by a protective topcoat.
Notes
– Check the base for square before attaching the tabletop.
– Use wood glue on every joint for added strength.
– Allow the finish to dry completely between coats.
Happy Building!
