Easy DIY Barn Doors
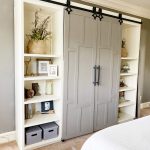
Learn how to build these Easy DIY Barn Doors with free plans and a how-to video by Shanty2Chic! Download the full set of Free Printable Plans HERE!
Equipment
- Miter Saw
- Table Saw (optional)
- Drill
- Kreg Jig
- Pin Nailer (optional)
- Stapler (optional)
- Brad Nailer
- Sander
Ingredients
- 4 1x4x8 Whitewood or Common Boards
- 3 1x2x8 Whitewood or Common Boards
- 9 1/4"x3x48" Craft Boards (poplar or similar)
- 1 1/4x48"x96" Hardwood Plywood
Instructions
Cut List
- Cut List 1
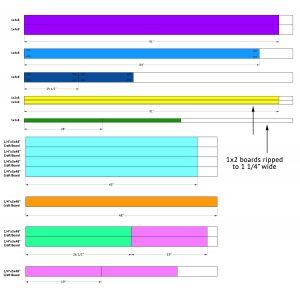
- Cut List 2
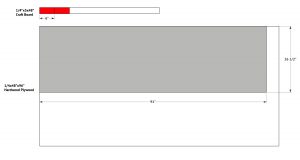
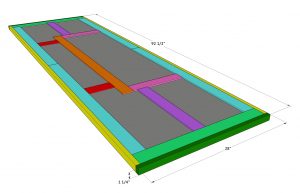
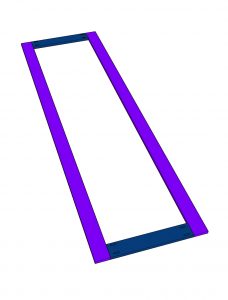
- Cut the back frame boards to size and drill 3/4" pocket holes at both ends of the short frame boards. Attach the long frame boards to the short frame boards with 1 1/4" pocket hole screws and wood glue.
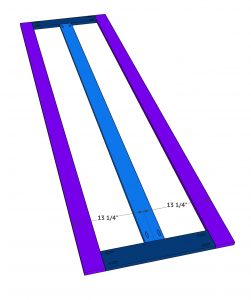
- Cut the middle frame board to size. Drill 3/4” pocket holes at both ends and attach it to the center of the short frame boards with 1 1/4” pocket hole screws and wood glue.
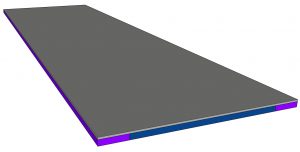
- Cut the plywood to size, flip the frame over and attach the plywood to the frame with 5/8" staples and wood glue.
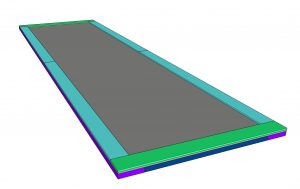
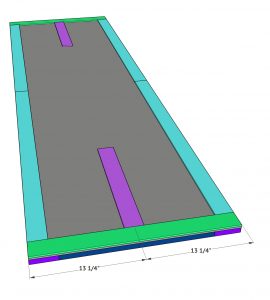
- Cut the front outside trim pieces to size and attach them to the front of the plywood with 3/4" pin nails and wood glue.
- Cut the purple trim pieces to size and attach them to the center of the plywood with 1/2" pin nails and wood glue.
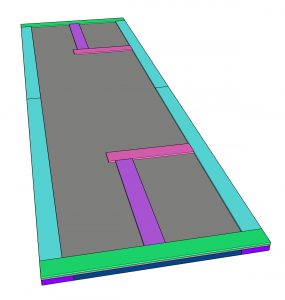
- Cut the pink trim pieces to size and attach them to the ends of the purple pieces with 1/2" pin nails and wood glue.
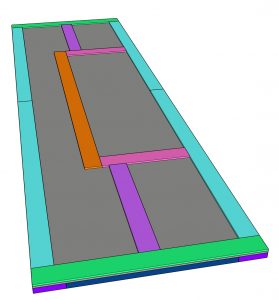
- Cut the orange trim to size. Attach it to the ends of the pink trim pieces with 1/2" pin nails and wood glue.
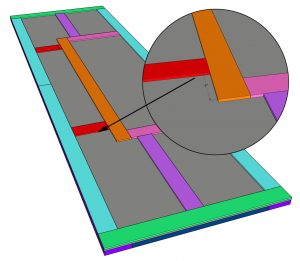
- Cut the red trim pieces to size and attach them 4" from the ends of the orange trim piece. Attach them with 1/2" pin nails and wood glue.
- Cut the side trim pieces to size. Attach them to the sides of the barn door with 1 1/4" brad nails and wood glue. The front of the trim pieces should be flush with the front of the barn door trim.
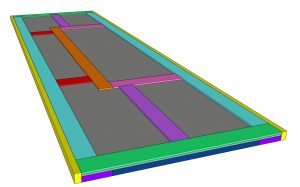
- Cut the top and bottom trim pieces to size and attach them to the ends of the barn door with 1 1/4" brad nails and wood glue. The end trim boards should be flush with the side trim boards.
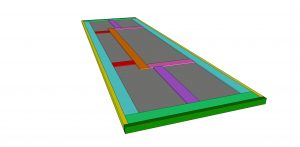
- Now it's time to fill all of the nail and staple holes with wood filler. I also added wood filler to the cracks where the trim boards were touching. Sand it down and give it a finish!Make sure to share your builds with us on social media and use #shanty2chic so we can share them too!