Learn how to build this set of Easy DIY Barn Doors with free how-to video and easy-to-follow plans by Shanty2Chic!
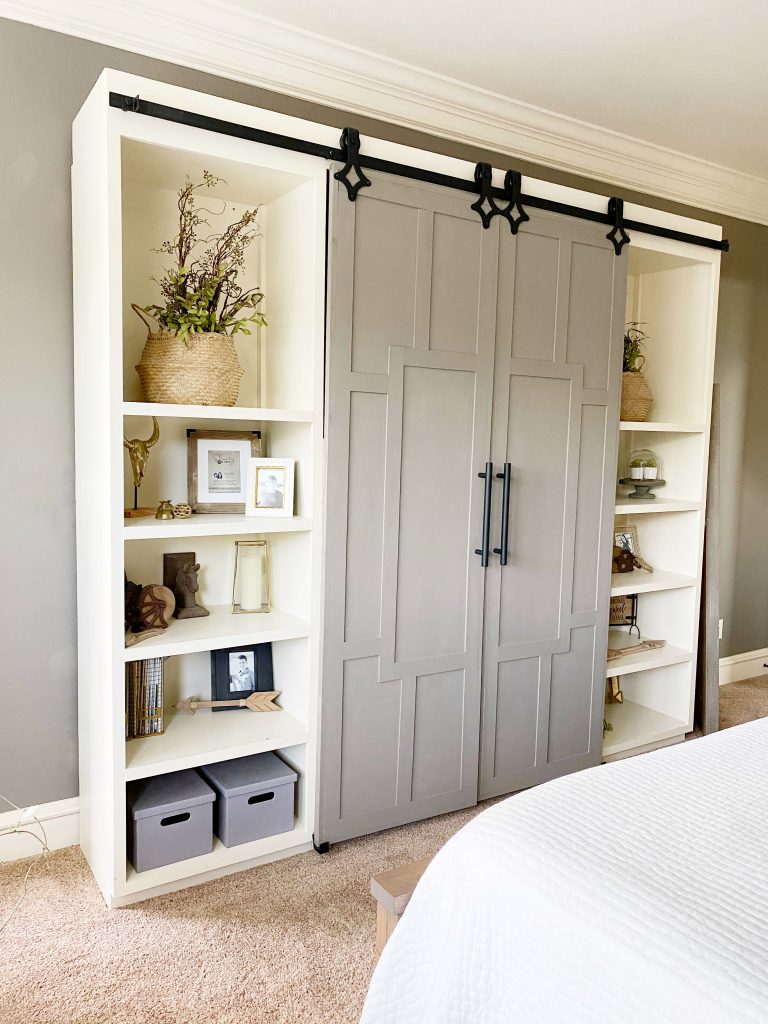
Being at home a lot lately, has me wanting to redo lots of things in my house! One of the first is the old set of barn doors that I built for the media console I designed a few years ago. The doors were beautiful but I think with the weight, over the years, one of the wheels stopped spinning. I was ready for a refresh so it was a good excuse to build a lighter-weight, new set of doors. I am LOVING the new look of my Easy DIY Barn Doors and I’ve got the how-to video and free plans for you to build your own! This is a very simple build, you only need a few tools and it is easy to customize to fit any space in your home! Now, let’s get to building! You can watch the how-to video by clicking in the box below and follow along with the how-to tutorial!
Table of Contents
How to Build Easy DIY Barn Doors
Tools:
- Miter Saw
- Table Saw (optional)
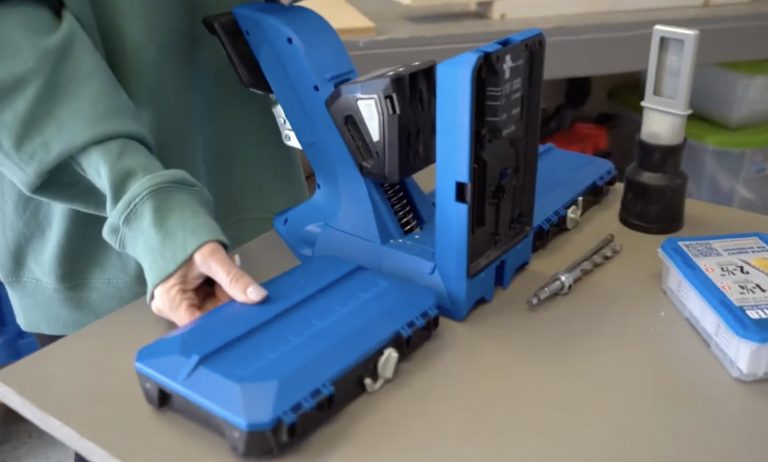
- Kreg Jig
- Drill
- Brad Nailer
- Pin Nailer (optional)
- Stapler (optional)
Supplies
- 4 – 1x4x8 boards
- 3 – 1x2x8 boards
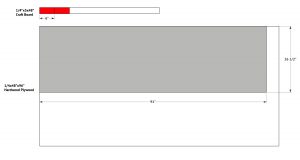
- 9 – 1/4″x3x48″ craft boards
- 1 – 1/4″x48″x96″ hardwood plywood
- 1 1/4″ brad nails
- 1/2″ pin nails
- 5/8″ staples
- 1 1/4″ pocket hole screws
- wood glue
- barn door hardware
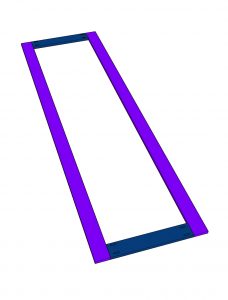
Step 1: Building the Frame
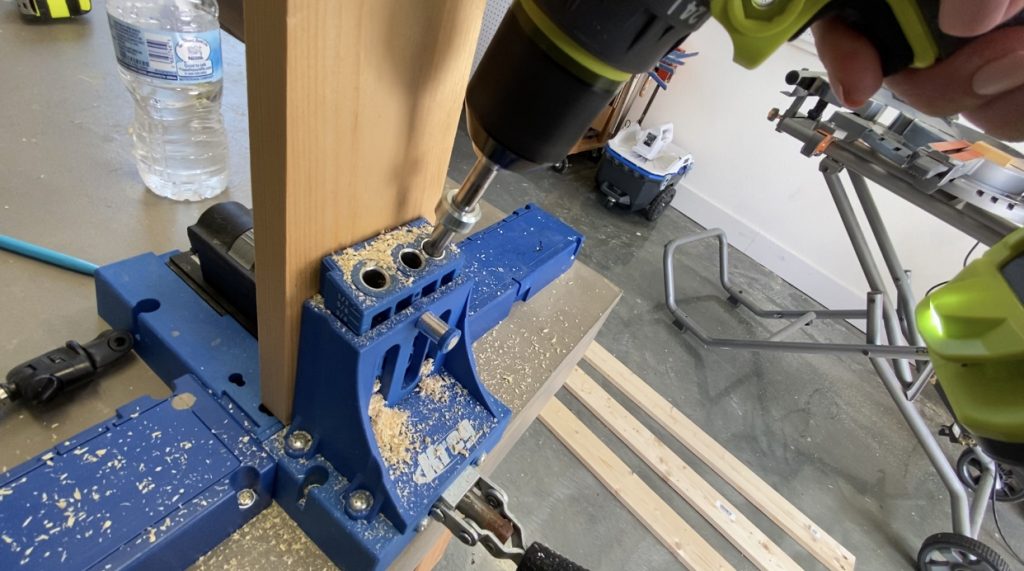
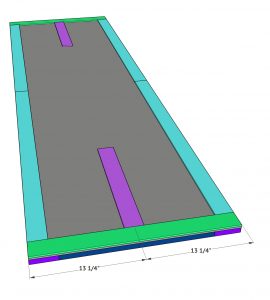
Cut the back frame boards to size and use a Kreg Jig to drill 3/4″ pocket holes at both ends of the short frame boards.

Attach the long frame boards to the short frame boards with 1 1/4″ pocket hole screws and wood glue.

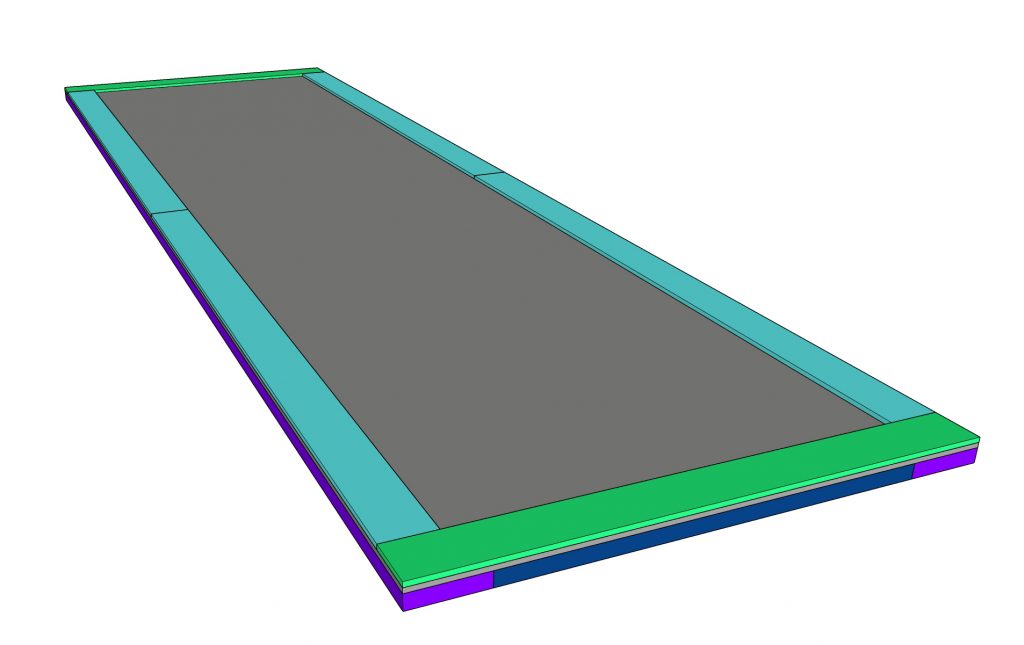
The outside frame should look like this now.

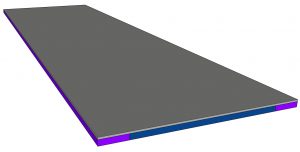
Cut the middle frame board to size. Drill 3/4″ pocket holes at both ends and attach it to the center of the short frame boards with 1 1/4″ pocket hole screws and wood glue.

Cut the plywood to size, flip the frame over and attach the plywood to the frame with 5/8″ staples and wood glue.
Step 2: Adding the Decorative Trim
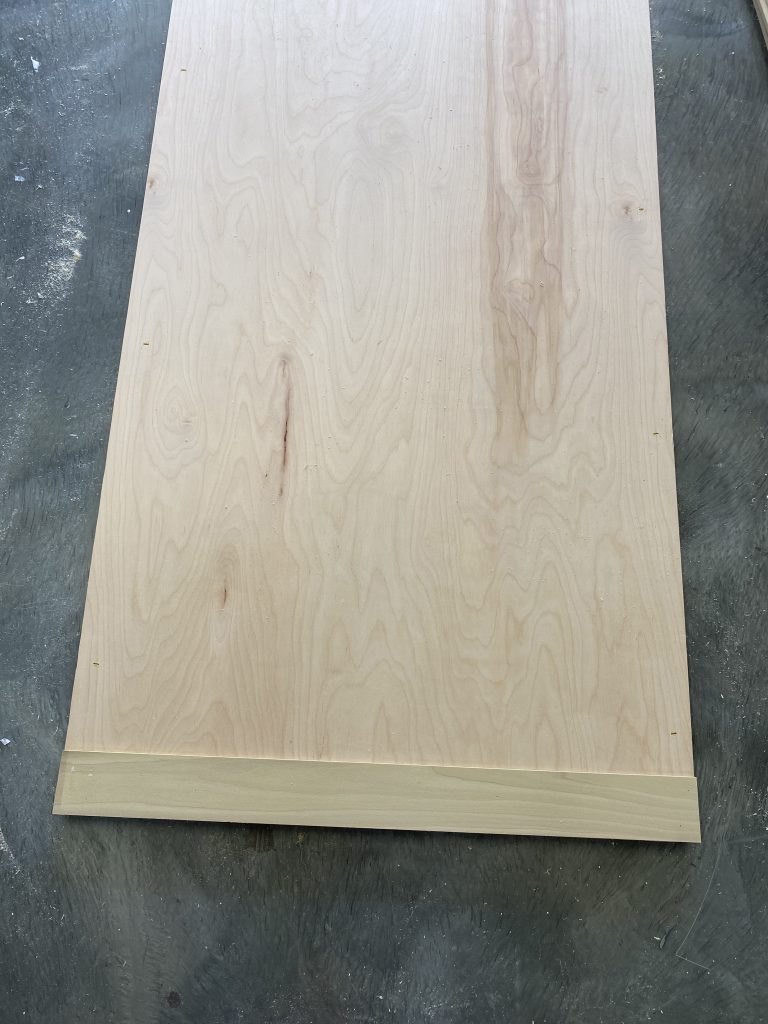
Cut the front outside trim to size and attach them to the front of the plywood with 1/2″ pin nails and wood glue.
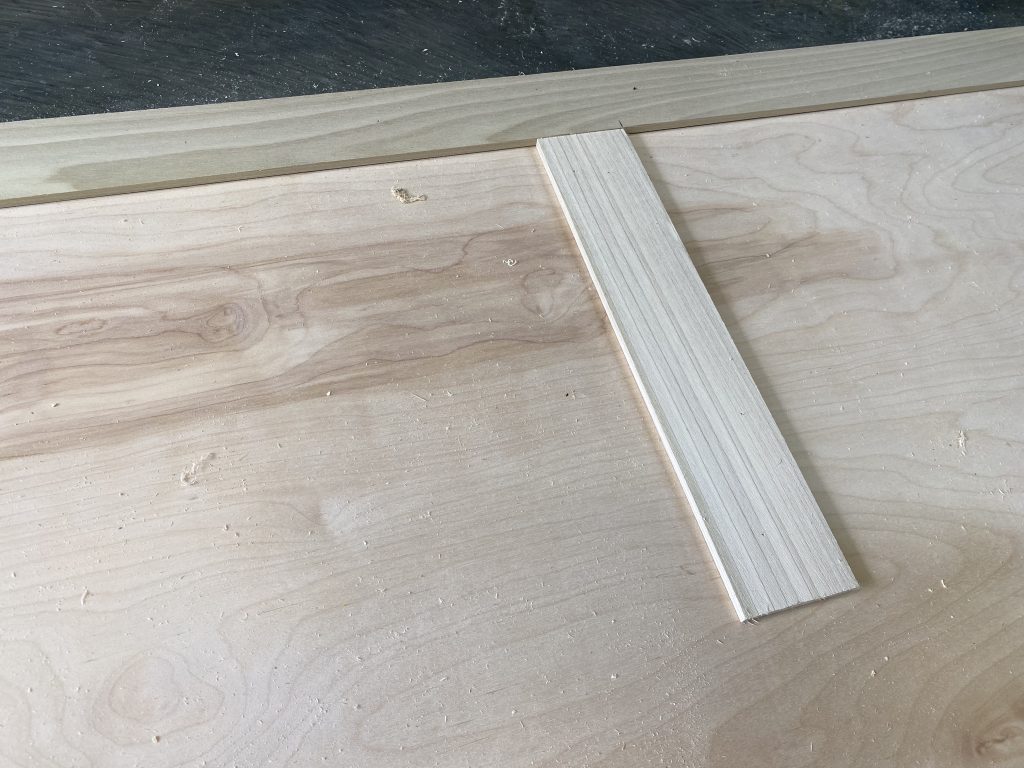
Cut the top and bottom, middle pieces of trim. Center them on the door and attach them with 1/2″ pin nails and wood gluel
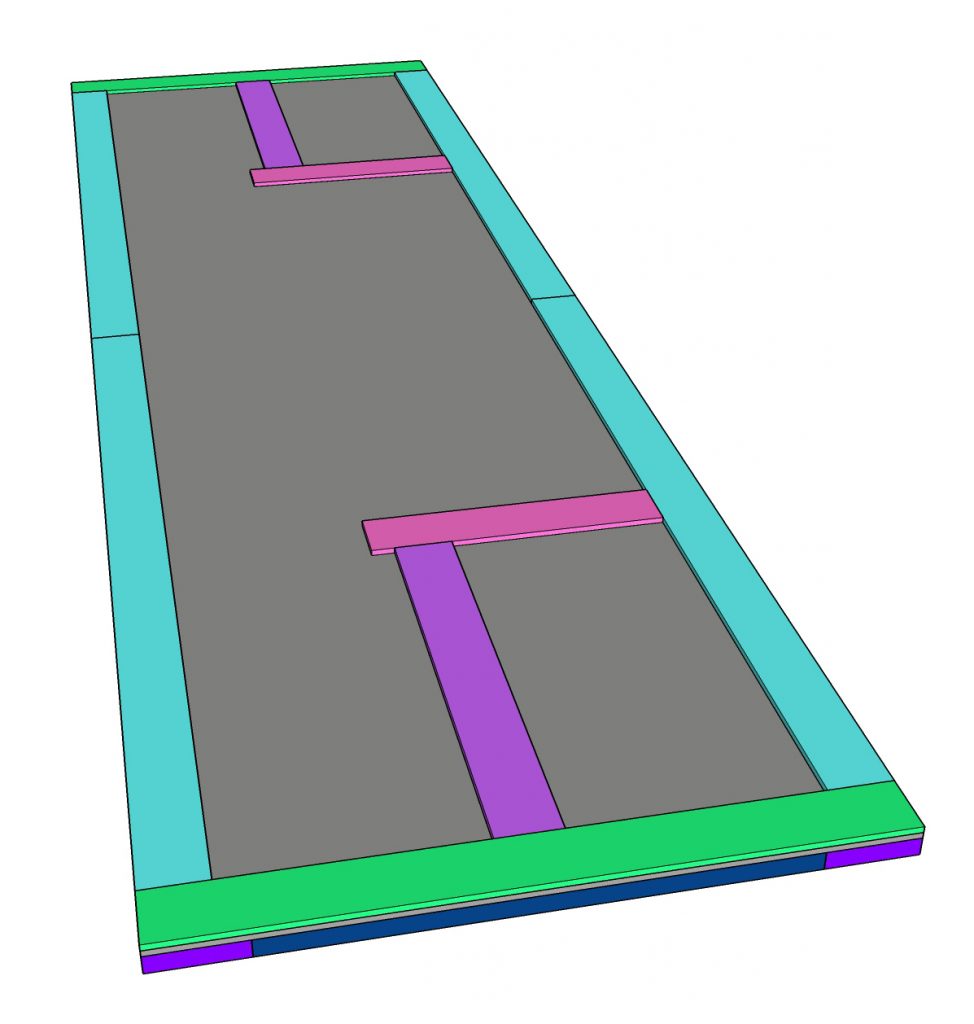
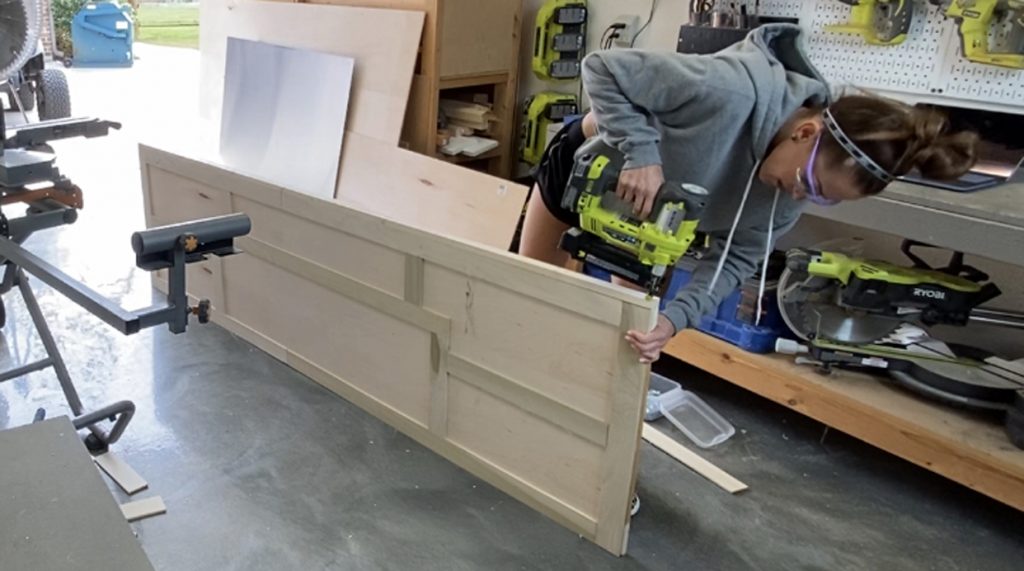
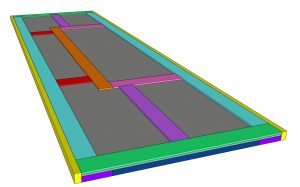
Cut the short horizontal trim pieces to size. Attach them at the top of the vertical pieces with 1/2″ pin nails and wood glue.
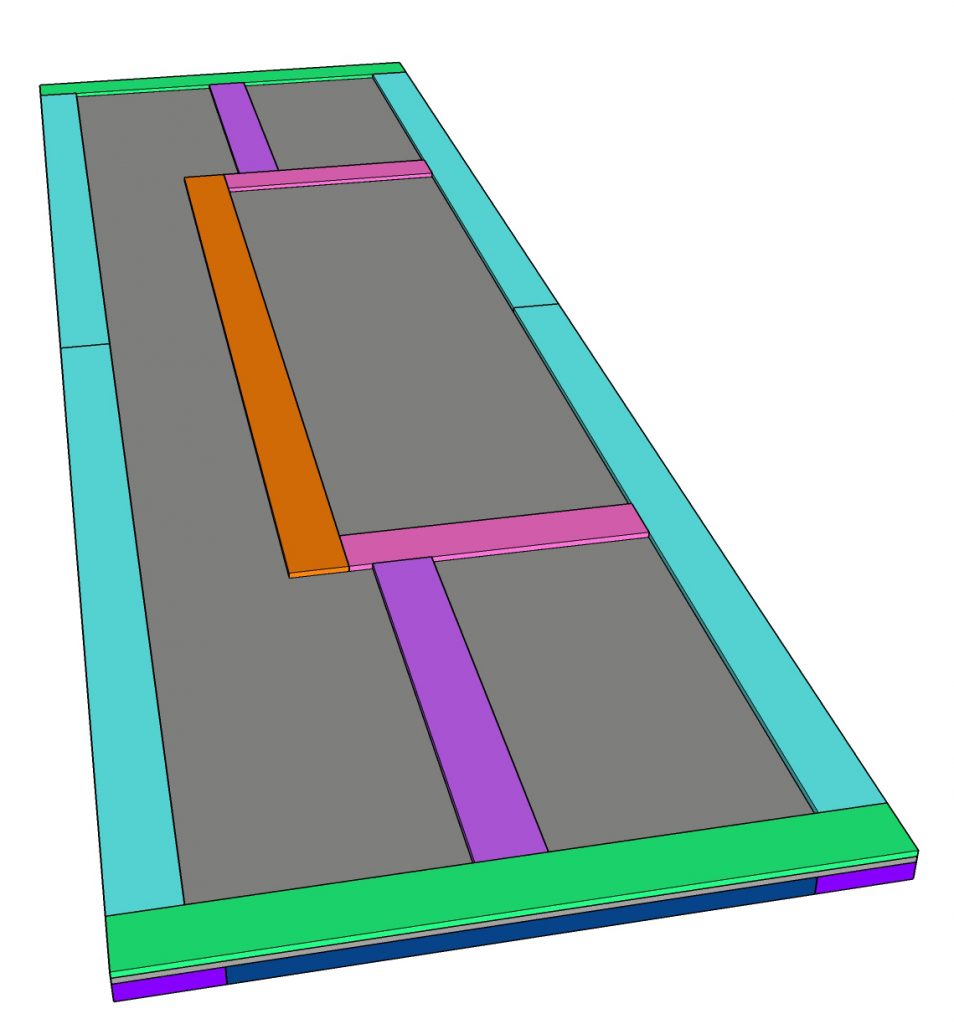
Cut the long vertical trim piece to size and attach it at the ends of the horizontal pieces with 1/2″ pin nails and wood glue.
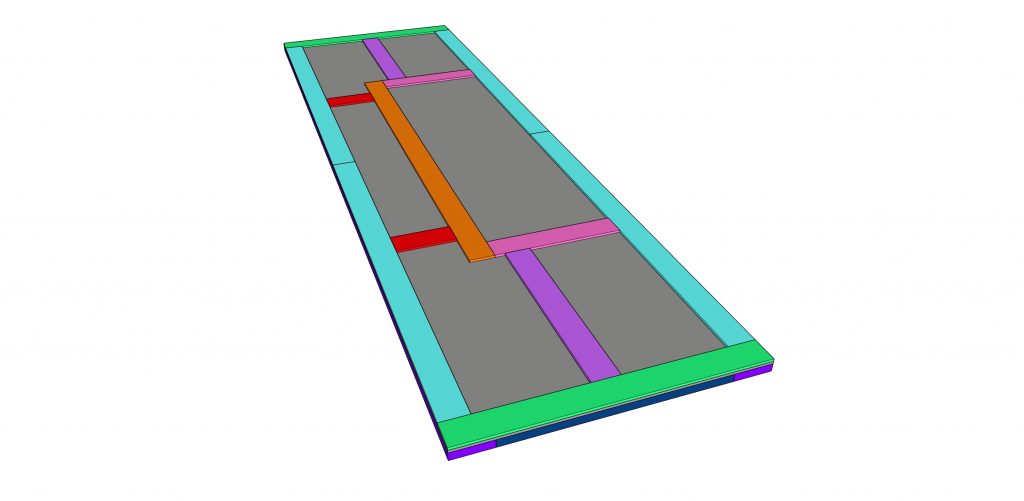
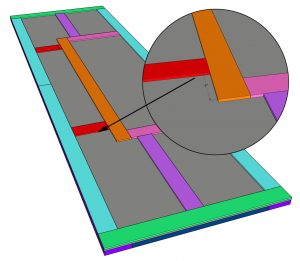
Cut the short horizontal trim pieces to size and attach them 4″ from the ends of the long vertical piece. Use 1/2″ pin nails and wood glue.
This is what the door should look like once all of the decorative trim is attached!
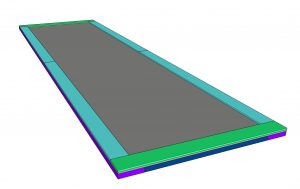
Step 3: Attaching the Outside Trim
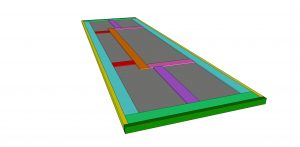
Cut the side trim pieces to size. Attach them to the sides of the barn door with 1 1/4″ brad nails and wood glue. The front of the trim pieces should be flush with the front of the trim on the barn door.

Cut the top and bottom trim pieces to size. Attach them to the ends of the barn door with 1 1/4′ brad nails and wood glue. The bottom and top trim boards should be flush with the side trim boards.
Step 4: The Finish
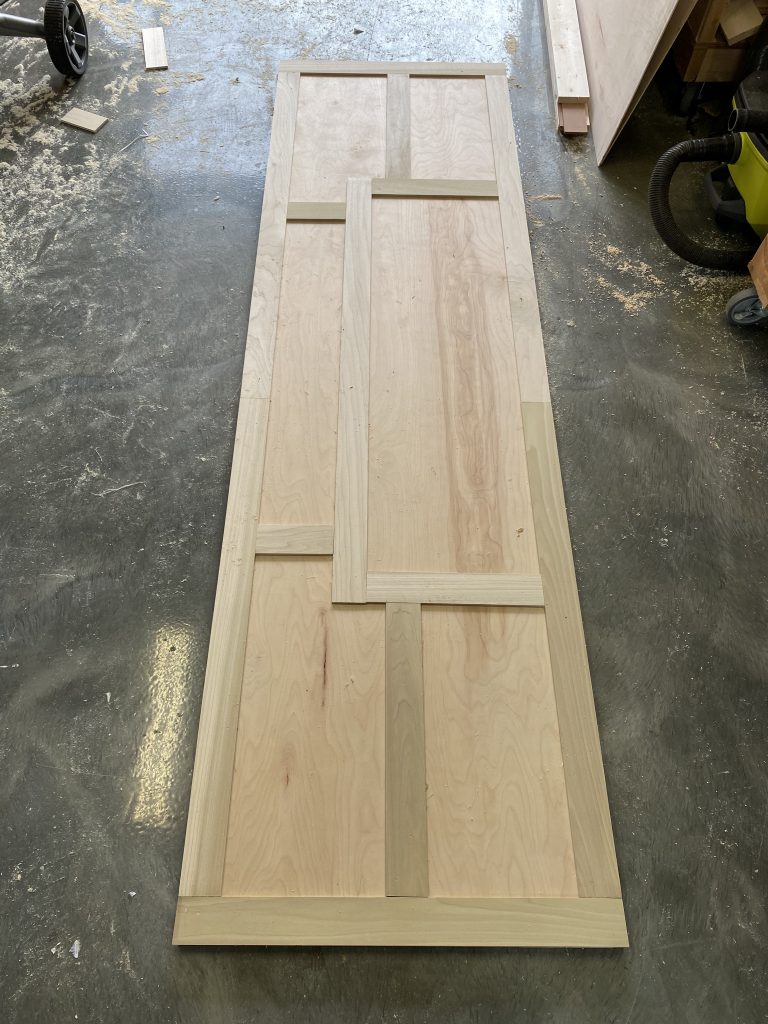
I built the second door, filled my nail holes and gave them both a good sanding!
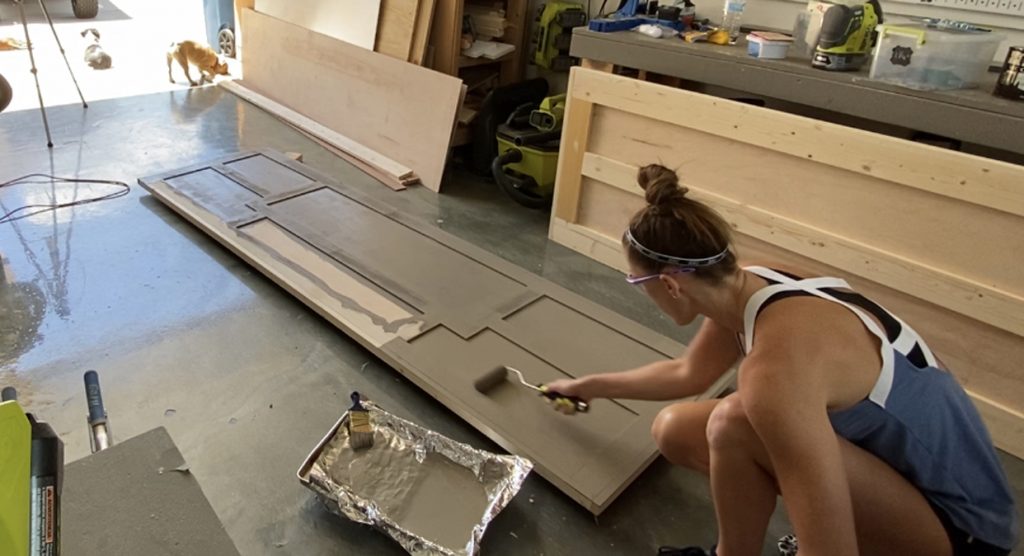
Once I filled the nail holes and sanded the doors down, I applied two coats of paint!
- I used Seine by Valspar for the paint!
Step 4: Hang the Doors
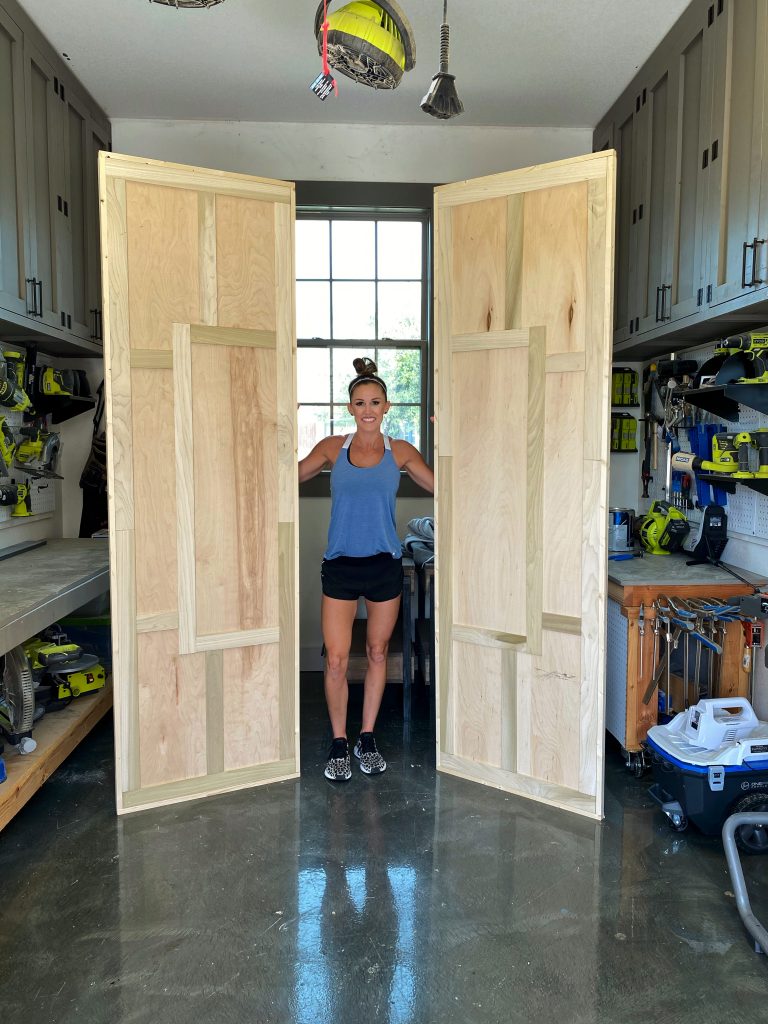
I left the original barn door track, guides and handles but added new wheels!
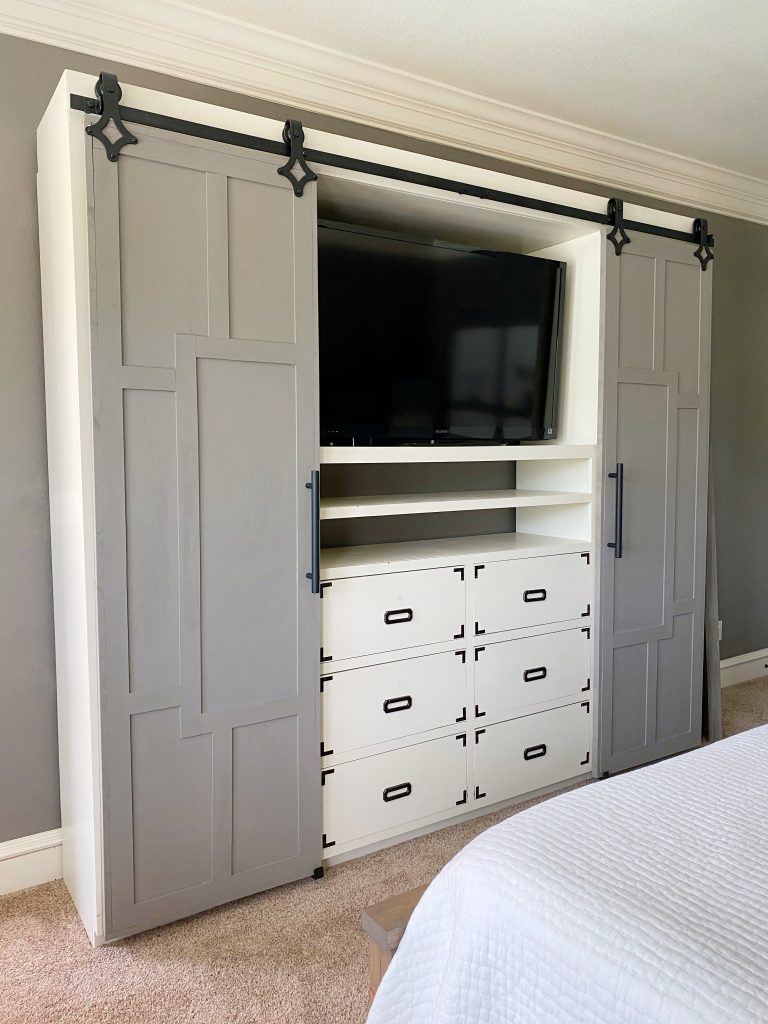
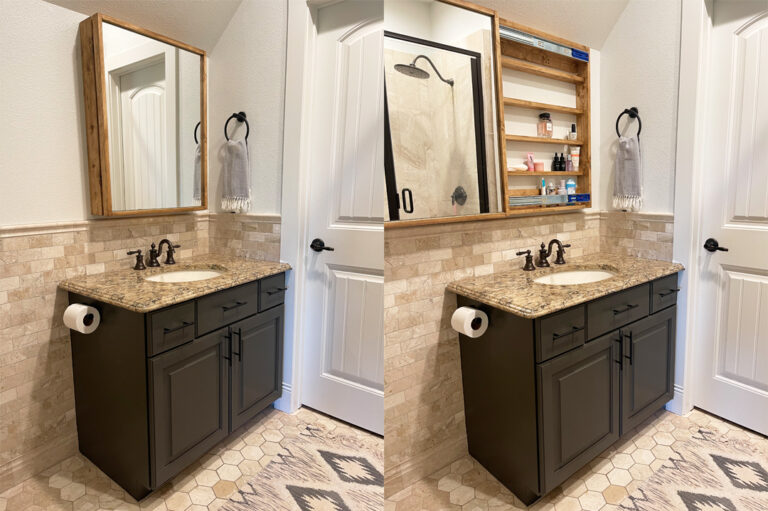
I am LOVING how the new doors look on my media console! I love the added modern touch and the contrast of the gray paint!
Make sure to share your builds with us on social media and use #shanty2chic so we can share them too!
Easy DIY Barn Doors
Tools
- Miter Saw
- Table Saw (optional)
- Drill
- Kreg Jig
- Pin Nailer (optional)
- Stapler (optional)
- Brad Nailer
- Sander
Supply List
- 4 1x4x8 Whitewood or Common Boards
- 3 1x2x8 Whitewood or Common Boards
- 9 1/4"x3x48" Craft Boards (poplar or similar)
- 1 1/4×48"x96" Hardwood Plywood
Instructions
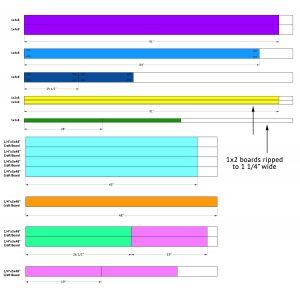
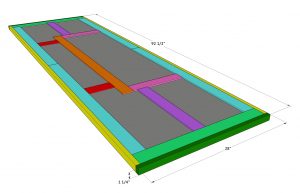
Cut List
- Cut List 1

- Cut List 2

- Cut the back frame boards to size and drill 3/4" pocket holes at both ends of the short frame boards. Attach the long frame boards to the short frame boards with 1 1/4" pocket hole screws and wood glue.

- Cut the middle frame board to size. Drill 3/4” pocket holes at both ends and attach it to the center of the short frame boards with 1 1/4” pocket hole screws and wood glue.

- Cut the plywood to size, flip the frame over and attach the plywood to the frame with 5/8" staples and wood glue.

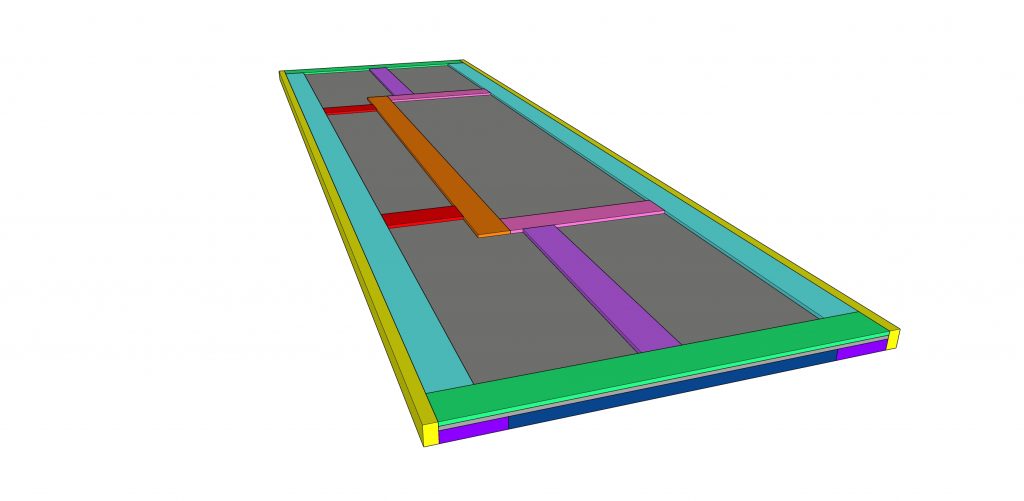
- Cut the front outside trim pieces to size and attach them to the front of the plywood with 3/4" pin nails and wood glue.

- Cut the purple trim pieces to size and attach them to the center of the plywood with 1/2" pin nails and wood glue.

- Cut the pink trim pieces to size and attach them to the ends of the purple pieces with 1/2" pin nails and wood glue.

- Cut the orange trim to size. Attach it to the ends of the pink trim pieces with 1/2" pin nails and wood glue.

- Cut the red trim pieces to size and attach them 4" from the ends of the orange trim piece. Attach them with 1/2" pin nails and wood glue.

- Cut the side trim pieces to size. Attach them to the sides of the barn door with 1 1/4" brad nails and wood glue. The front of the trim pieces should be flush with the front of the barn door trim.

- Cut the top and bottom trim pieces to size and attach them to the ends of the barn door with 1 1/4" brad nails and wood glue. The end trim boards should be flush with the side trim boards.

- Now it's time to fill all of the nail and staple holes with wood filler. I also added wood filler to the cracks where the trim boards were touching. Sand it down and give it a finish!Make sure to share your builds with us on social media and use #shanty2chic so we can share them too!


Thank you ladies, I love watching your work! Carolyn B. Also, is the wall color the same as door fronts? That’s a beautiful color!I love your work, and I was interested in building a full size Murphy bed for my office. This project would be fantastic and practical as a Murphy bed. Have you done this, or have any plans in the near future for a Murphy bed? That would be amazing. They are so expensive on line.
I’ve always liked barn doors and these look great! Thanks for all the step-by-step directions
Is it possible to put doors like this in an area without the header?. Like a hallway, where the opening is floor to ceiling. Would the track hold if it was only attached on either side ofthe opening?
I’ve been considering a similar thought for an open closet I have. My closet is double door length. I’ve decided that it would probably be best to throw up a nice piece of lumber and frame a header. You could go over it with drywall if needed. Even if the track can hold the weight (and these doors are light it might) it would look very tacky.
Home run – thank you for walking us through each step.
Are the supplies for one door or two? From the plans it seems like it’s only for a single door? I’m actually using these on the Hidden Study, so will be modifying them cuts to fit that project.
Oh my goodness! I absolutely adore these – the height is everything. Thank you for sharing!
I love your work, and I was interested in building a full size Murphy bed for my office. This project would be fantastic and practical as a Murphy bed. Have you done this, or have any plans in the near future for a Murphy bed? That would be amazing. They are so expensive on line. Thank you ladies, I love watching your work! Carolyn B. Also, is the wall color the same as door fronts? That’s a beautiful color!
So excited about this! I’ve done steps 1&2 on the console for my craft room desk, but hadn’t started on the doors yet. I’ve even already purchased the hardware. I’m totally building these next week now – and I love the grey! Will share pics when done!