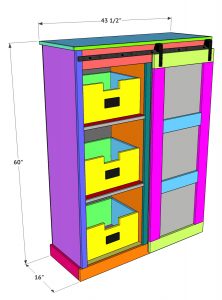
Sliding Barn Door Utility Cabinet
Learn how to build this DIY Sliding Barn Door Utility Cabinet with free plans and a how-to video by Shanty2Chic!Click here to download the full set of free plans including the supply list!
Equipment
- Miter Saw
- Drill
- Kreg Jig
- Brad Nailer
- Sander
- Stapler (optional)
Ingredients
- 1 1x10x6 Pine or Common Board
- 1 1x5x8 Pine or Common Board
- 3 1x4x8 Pine or Common Board
- 3 1x2x8 Pine or Common Board
- 1 1/2"x3/4"x80" Trim
- 1 1/2"x3/4"x40" Trim
- 2 3/4"x48"x96" Hardwood Plywood
- 2 1/4"x48"x96" Hardwood Plywood
- 1 1/4" Pocket Hole Screws
- 5/8" Brad Nails or 3/4" Staples
- 1 1/4" Brad Nails
- Wood Glue
- Drawer Slides
- Barn Door Hardware
Instructions
Cut List
- Cut List 1
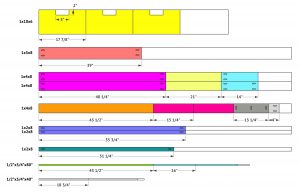
- Cut List 2
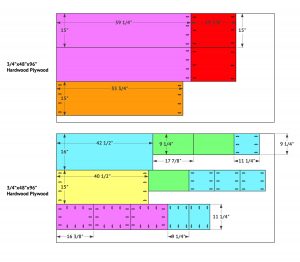
- Cut List 3
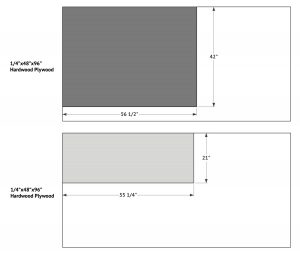
Cabinet Frame
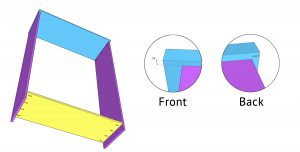
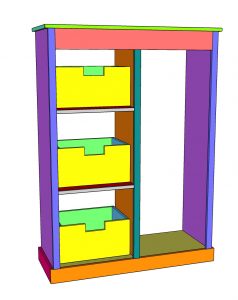
- Cut the frame pieces to size and drill 3/4" pocket holes at the top end of both side pieces and both ends of the bottom piece. Attach the boards together with 1 1/4" pocket hole screws and wood glue. The top should over hang the cabinet 3/4" on the front and 1/4" on the sides and back.
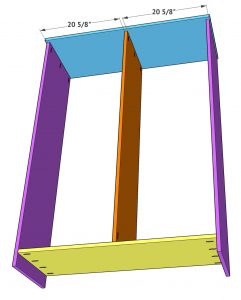
- Cut the middle divider to size and drill 3/4" pocket holes at both ends. Center it inside the cabinet and attach it with 1 1/4" pocket hole screws and wood glue.
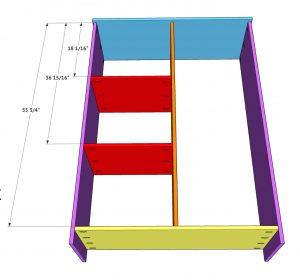
- Cut the shelf pieces to size and drill 3/4" pocket holes on both ends of the boards. Attach them to the inside of the cabinet with 1 1/4" pocket hole screws and wood glue.
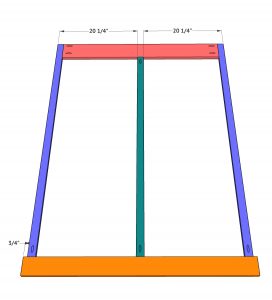
- Cut the face frame pieces to size and drill 3/4" pocket holes in the top, sides and middle boards. Attach them together with 1 1/4" pocket hole screws and wood glue.
- Attach the face frame to the front of the cabinet with 1 1/4" brad nails and wood glue. The face frame should sit just under the top of the cabinet, the sides should be flushand the bottom should over hang on the sides 3/4".
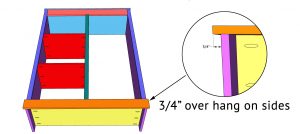
- Cut the side trim pieces to size and attach them to the bottom of the cabinet with 1 1/4" brad nails and wood glue. There should be a 1/4" over hang off the back of the cabinet.
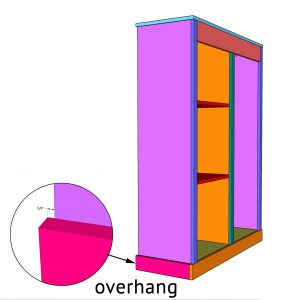
- Cut the top, side trim pieces to size and attach them to the sides of the top with wood glue and 5/8" brad nails. Cut the front trim piece to size and attach it the same way.

- Cut the shelf trim pieces to size and attach them to the front of the shelves with 1 1/4" brad nails and wood glue. The shelf trim will sit back from the face frame 1 1/4".
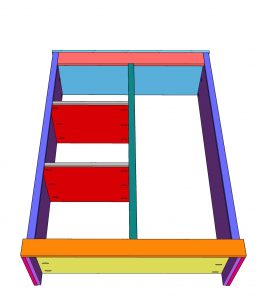
Drawers
- Cut the drawer pieces to size. Drill 3/4" pocket holes at both ends of the side pieces and all around the bottom piece. Attach everything with 1 1/4" pocket hole screws and wood glue.
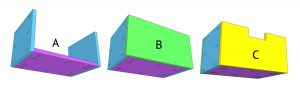
- Install the drawers with drawer slides.
Hand Vac Holder
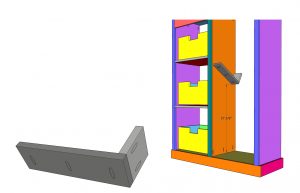
- Cut the hand vac holder pieces to size and drill 3/4" pocket holes along one edge of the long piece and one end of the short piece. Attach them together with 1 1/4" pocket hole screws and wood glue. Attach it to the inside of the cabinet the same way.
BarnDoor
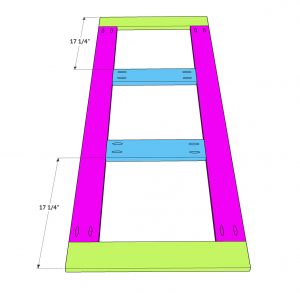
- Cut the barn door pieces to size. Drill 3/4" pocket holes in the vertical and middle boards. Attach the pieces together with 1 1/4" pocket hole screws and wood glue.
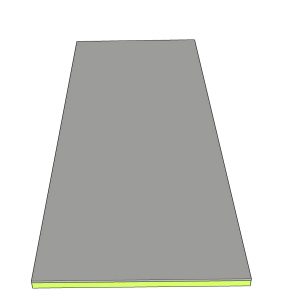
- Cut the barn door panel to size and lay it on the back of the barn door frame. Attach it with 5/8" brad nails or 3/4" staples and wood glue from the back of the panel and into the frame.
Back
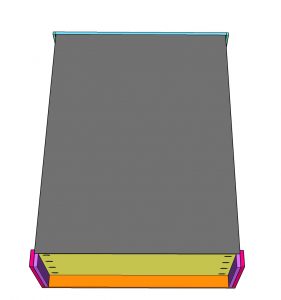
- Cut the back panel board to size and attach it to the back of the cabinet with 5/8" brad nails or 3/4" staples from the back panel into the cabinet.
The Finish
- Give it a finish and attach the barn door hardware!Have fun with it and make it your own!Make sure to share your builds with us on social media and use #shanty2chic so we can share them too!Happy Building!