Hey friends! So glad you found us here! To keep up with all of our DIY projects, be sure to follow us on Instagram and Pinterest!
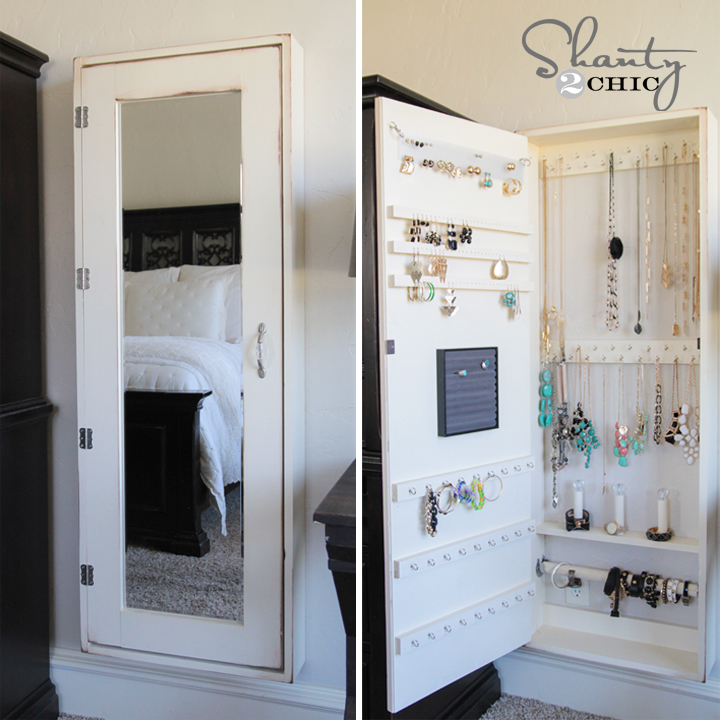
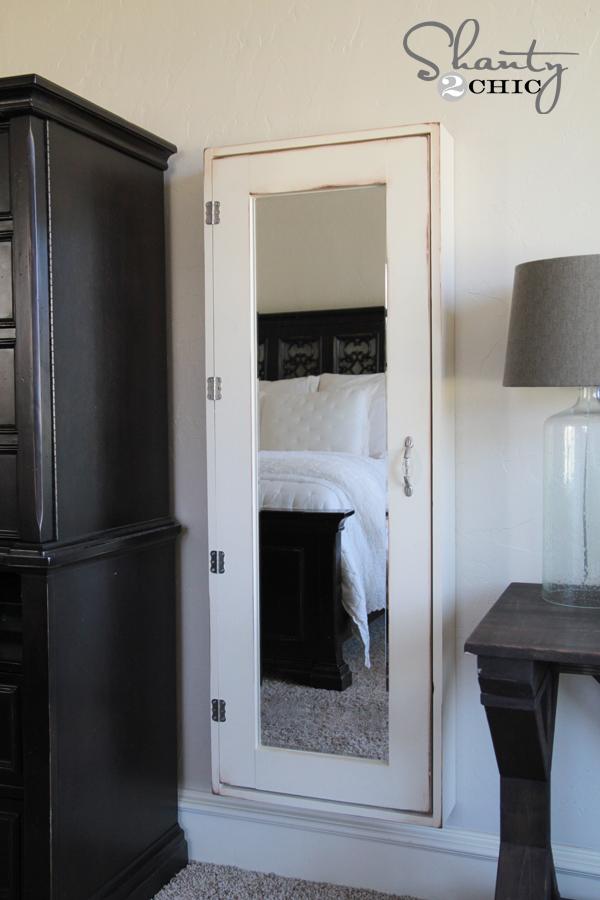
I am so CRAZY excited about how this project turned out! I have had it in my head since before I shared my bathroom storage cabinet, but wanted to fine tune all the details before I built it. It was funny seeing how many of you commented that the bathroom storage cabinet would make great jewelry storage… Great minds think alike friends! This one is smaller in size, and super functional! Check out how my DIY Jewelry Organizer turned out!
Ahhh… I love it! Makes me happy every time I look at it 🙂
This is very similar to the DIY bathroom organizer I shared a little over a week ago. I would call this a beginner Kreg Jig ![]()
build… There aren’t any funky angles. Just be sure to find really straight wood and measure really good on your cuts!
Here we go!
DIY Jewelry Organizer Supply List –
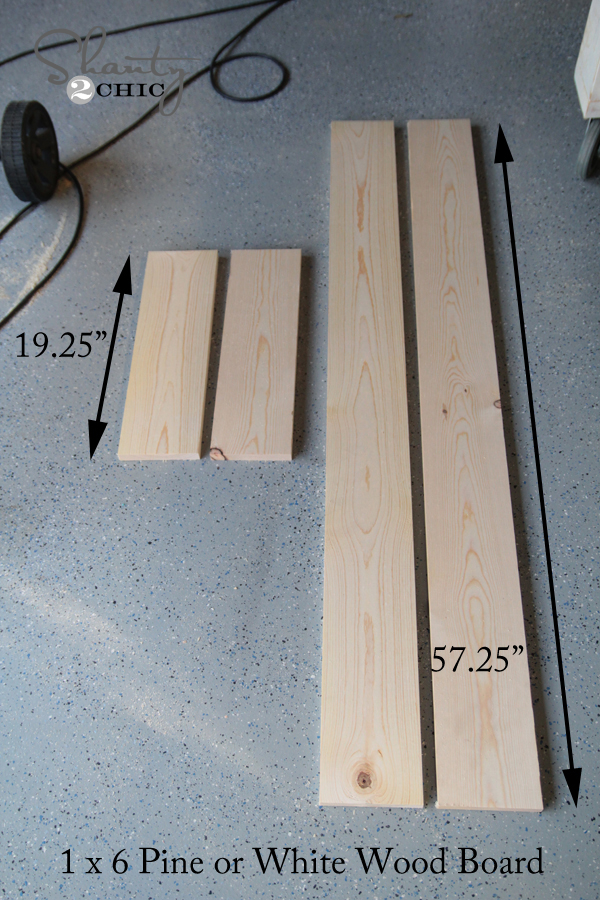
2 – 1 x 6 x 8 pine or white wood boards
2 – 1 x 4 x 8 pine or white wood boards
1 – 1 x 2 x 6 pine or white wood board
1 – 1 x 3 x 6 pine or white wood board
Frameless Beveled mirror from Target ($14.99)
1/4″ hardwood plywood piece cut 19″ by 55″ (I had Home Depot cut mine)
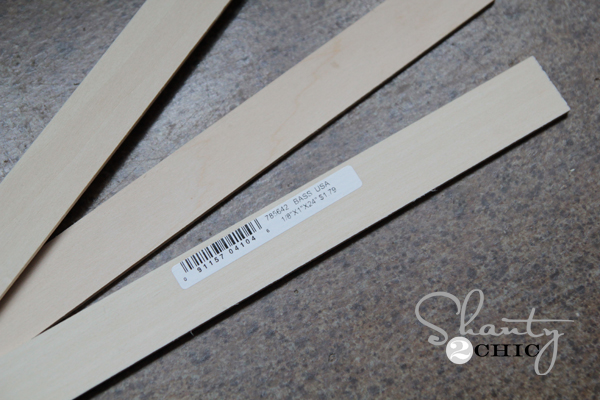
3 – 1/8″ x 24″ bass wood strips (about $1 a piece at a craft store)
1″ dowel (optional for bracelet storage)
1.5″ dowel (optional for bracelet storage)
closet rod hanger (optional for bracelet storage)
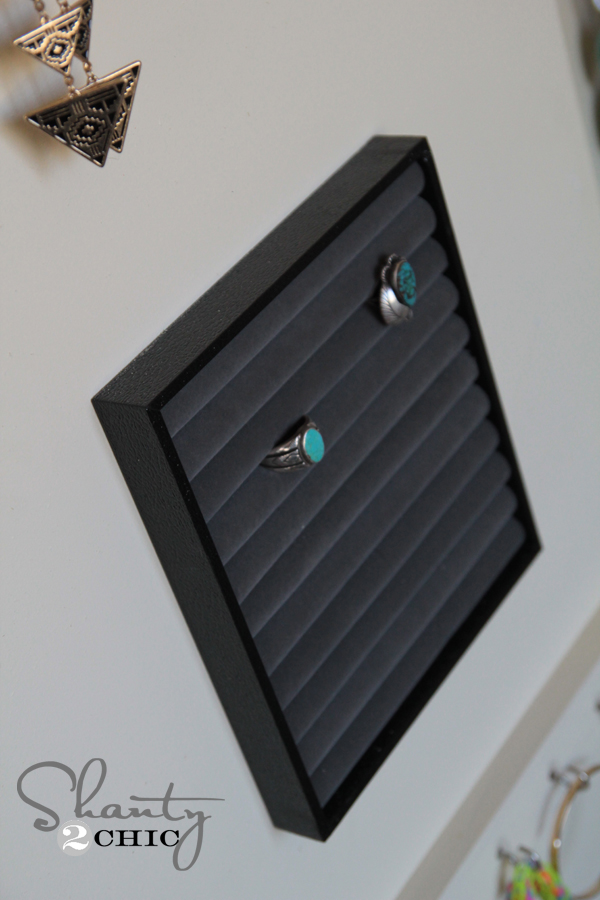
Ring Tray (I found mine at Container Store for $12)
For every bell and whistle you see here, I spent just under $100!
You will see lots of optional stuff here… I will show you how I put mine together, but you really can finish yours to fit your own needs. I know we all wear different jewelry, and that’s what is so great about DIY. You can customize your own!
I started by building the door to the case. For this I used the 1×4 white wood boards. I used my saw to cut them to size.
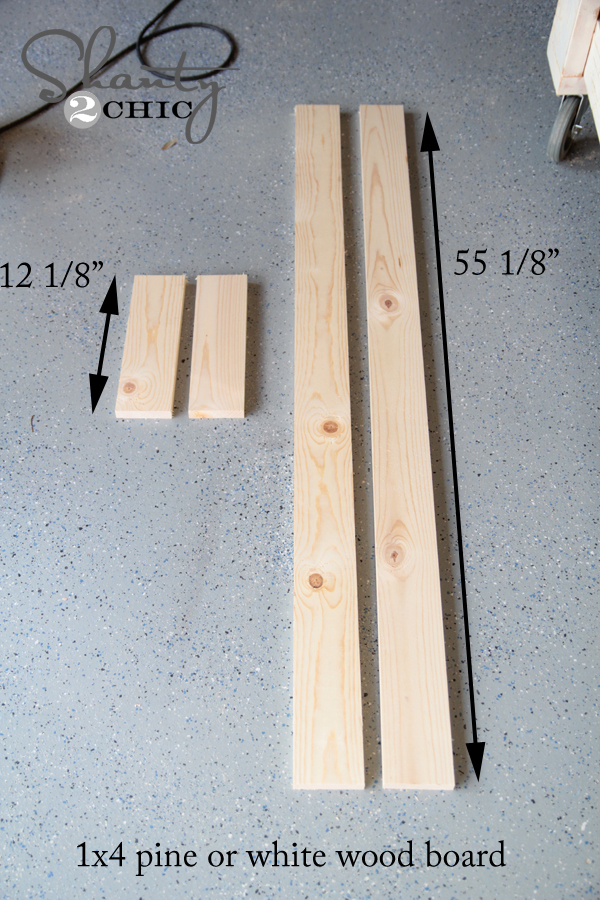
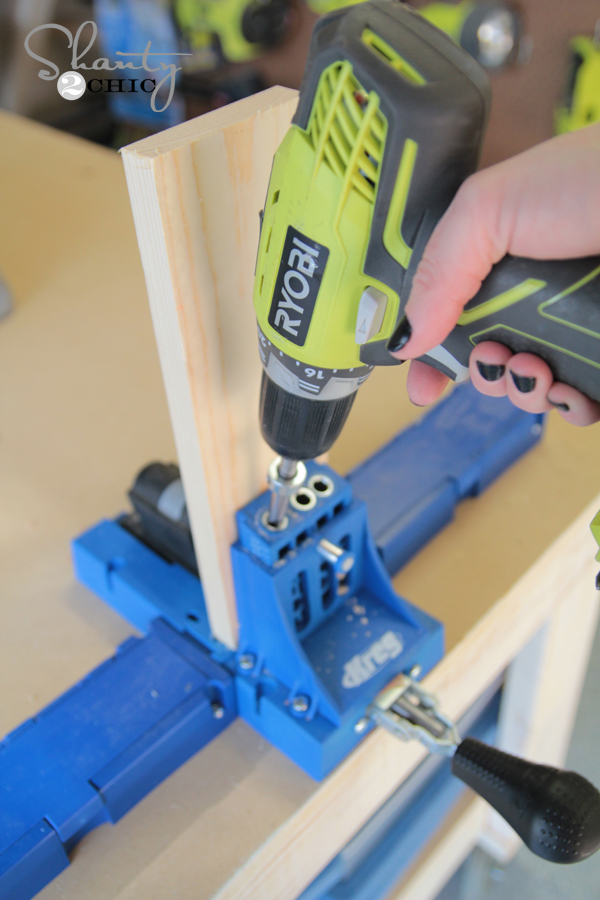
I used my Kreg Jig to add pocket holes to my smaller pieces. Both Ash and I use the K5 Kreg Jig ![]()
model… For those of you considering purchasing one, this is the one I would get! If you are currently using another model, I would totally add the K5 to your wish list. It has some really great upgrades and features making it even easier and faster to use.
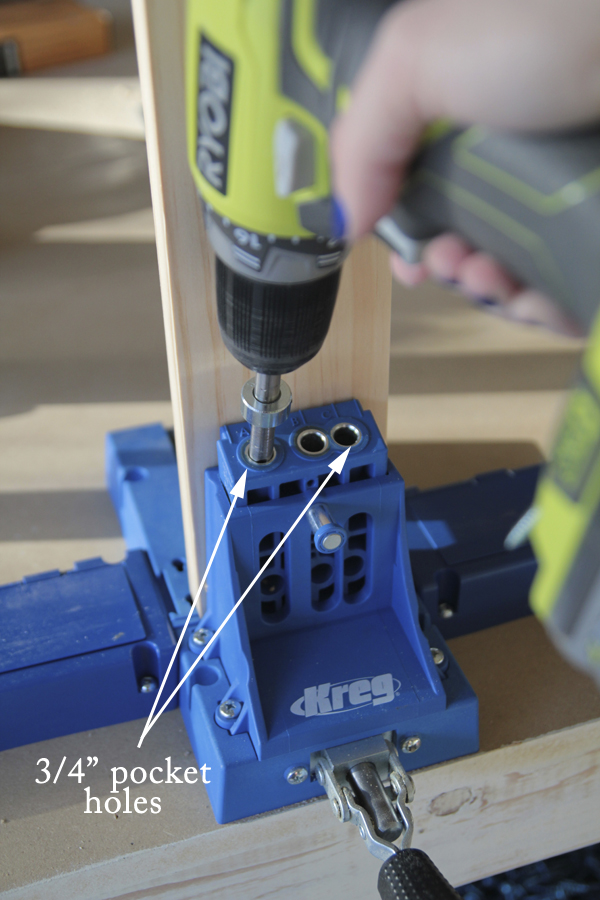
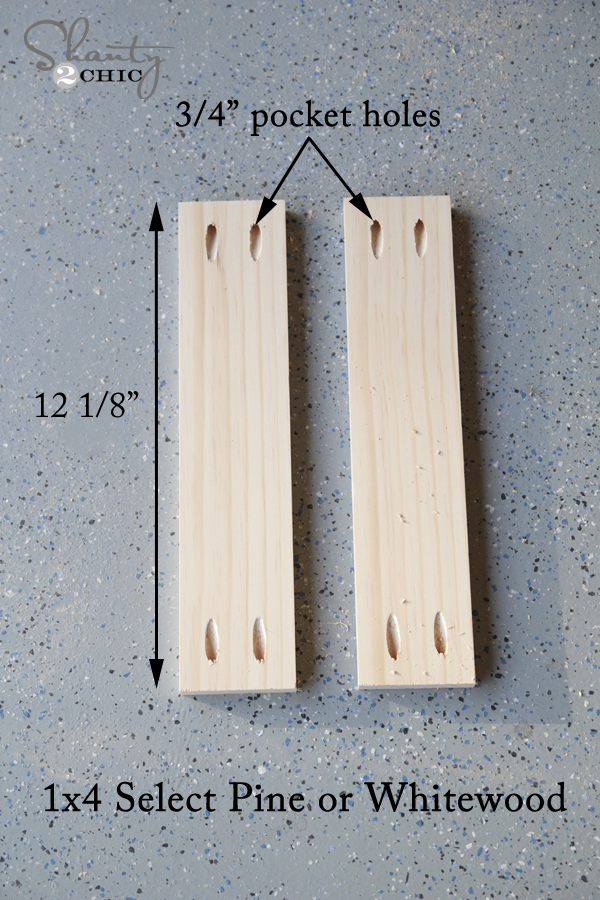
This is what your smaller boards should look like at this point…
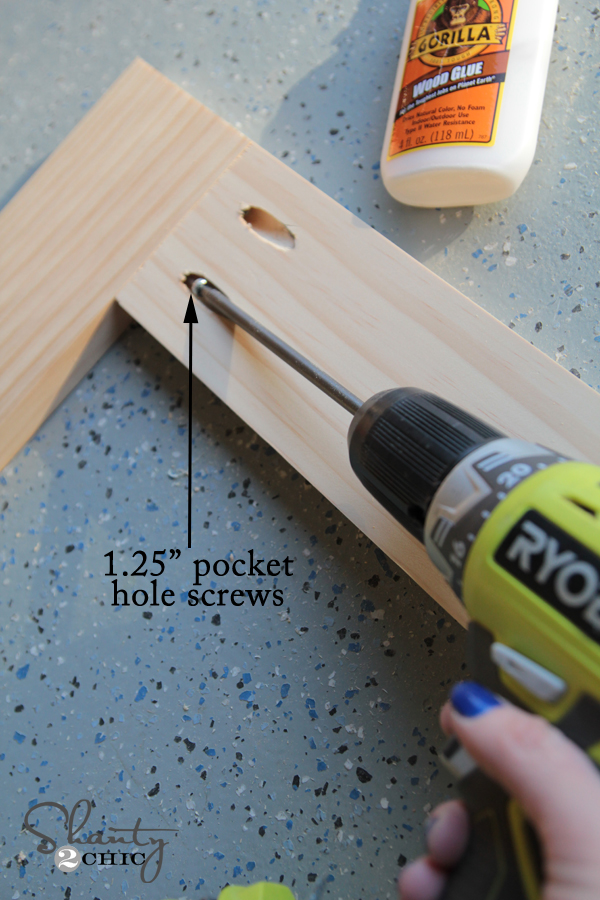
Next, I used my Kreg driver bit (comes with the jig) to attach my short pieces to my long pieces using 1.25″ pocket hole screws.
Once I had all of my sides attached, it looked like this.
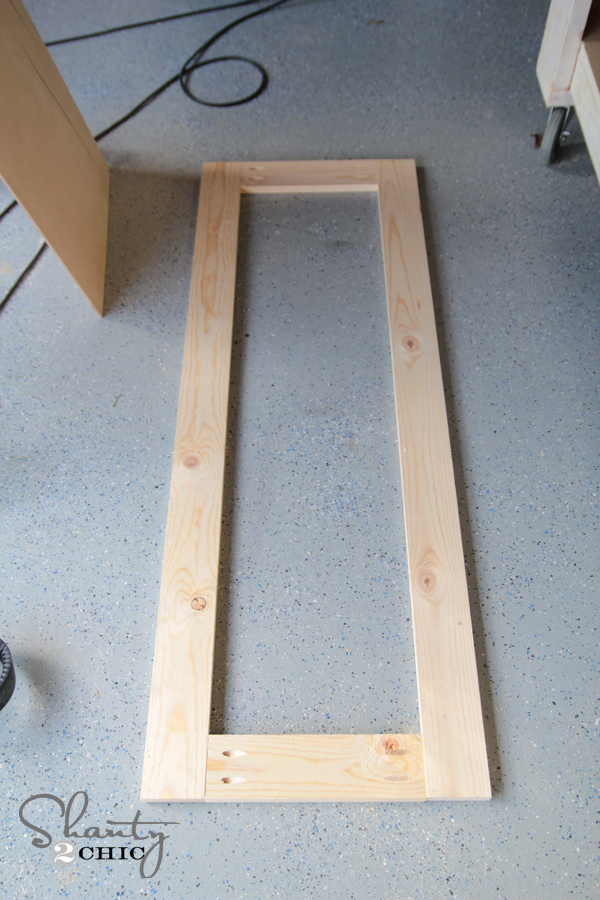
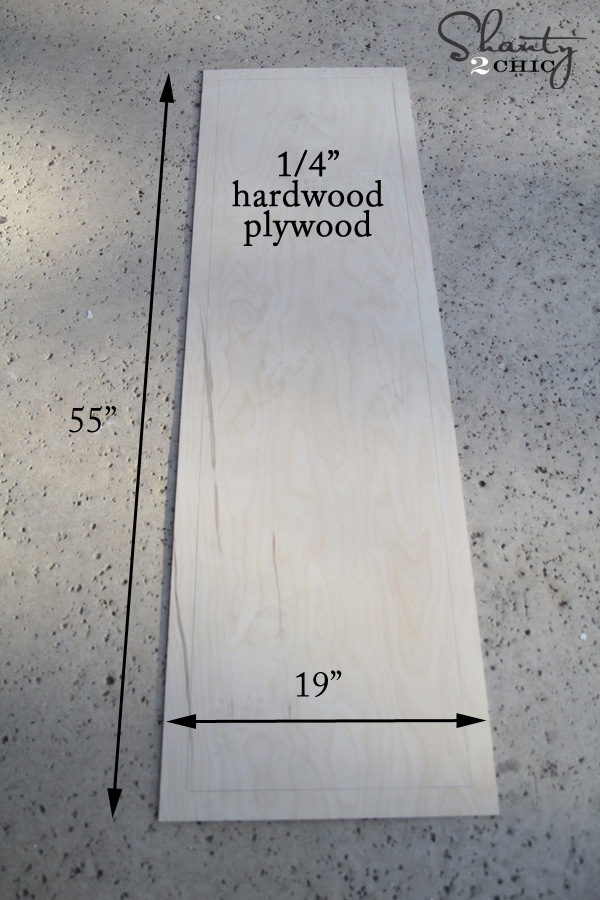
I added wood glue to the back of this frame and placed my 1/4″ plywood piece on top of it. These are the measurements of that piece. I had Home Depot cut mine for me to make is easier to get home. It also saves me a step 😉
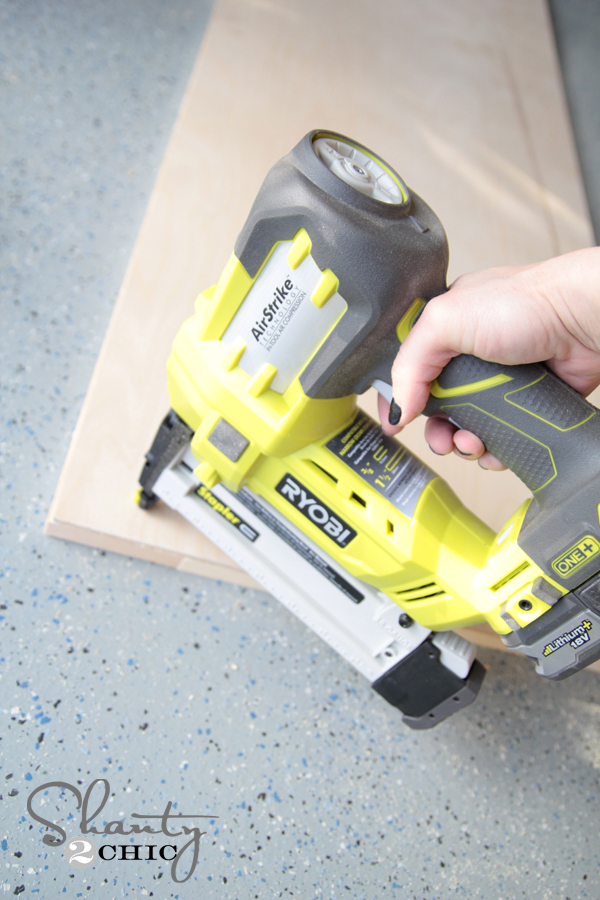
I used my new totally AMAZING Ryobi Airstrike Stapler to attach the wood to the frame using 3/4″ staples. Yes… This is an 18 gauge stapler that is cordless people! Go read the reviews for yourself… I love this tool!
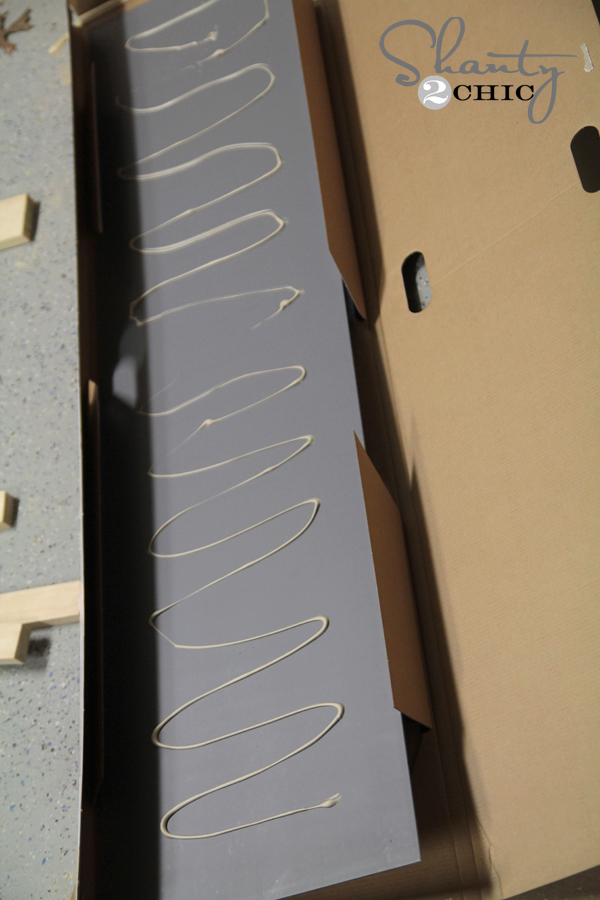
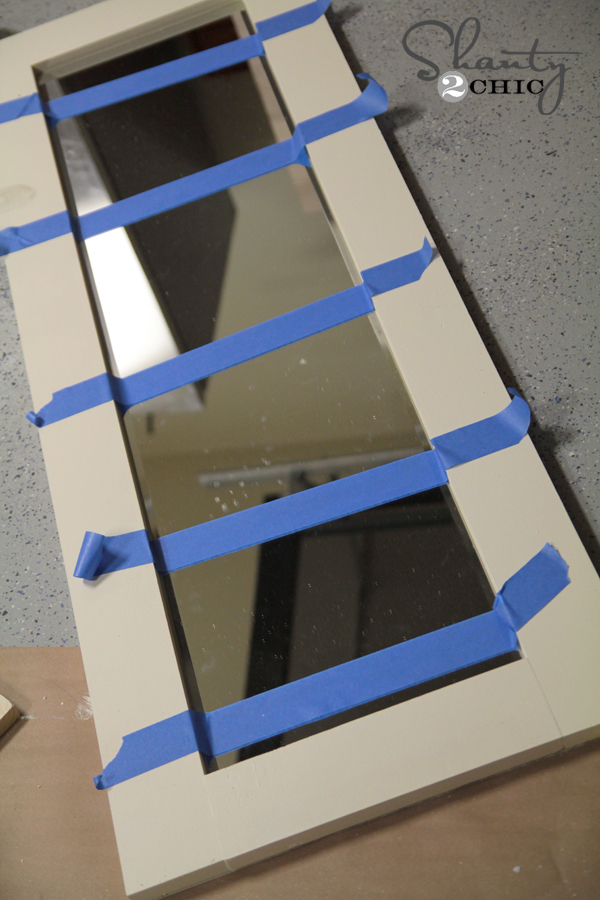
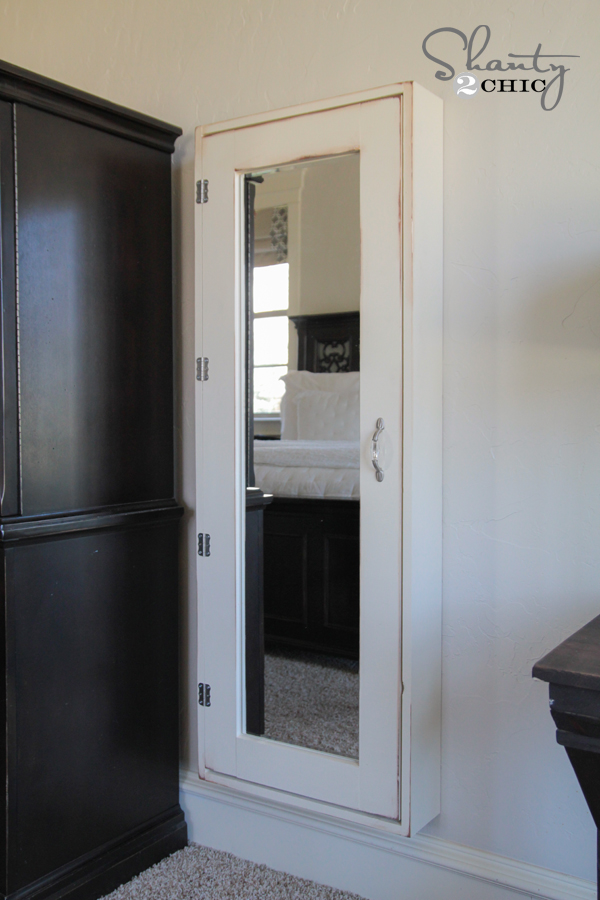
After I had that attached, I flipped it over and painted the whole thing. I used a cream color paint that matches my trim color. Once that was dry I attached my mirror so it could set while I worked on the rest of the case. I used mirror adhesive to attach it. This comes in a caulk canister, and you apply it with a caulk gun. You can usually find it in the mirror aisle at the hardware store. I applied it to the back of the mirror in a thin, continuous bead like this.
Next, I flipped it over and taped it in place on the frame.
Moving on to the case! I cut my wood first. I used the 1×6 boards for the frame of the case. Here are my cuts.
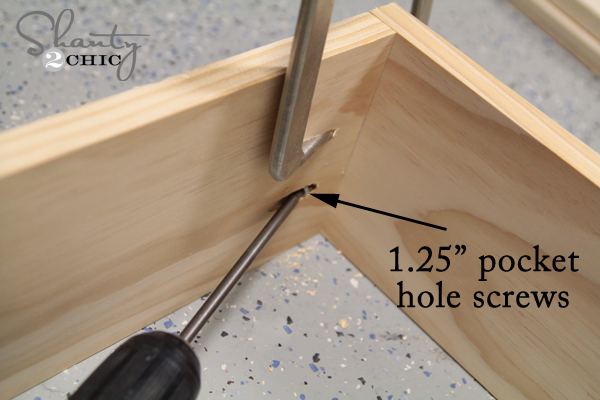
I used my Kreg Jig to make pocket holes in each of my small pieces again. While attaching them, I held the frame together using my Kreg right angle clamp. If you have a Kreg Jig, you should check this one out. I use it all the time. It’s like having an extra set of hands while you are building.

I used 1.25″ pocket hole screws on this part.
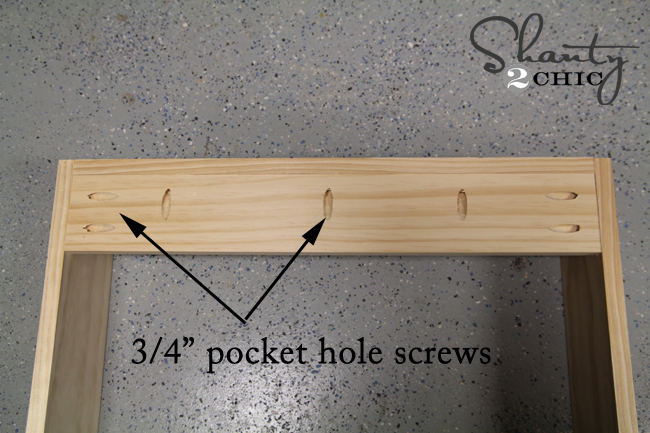
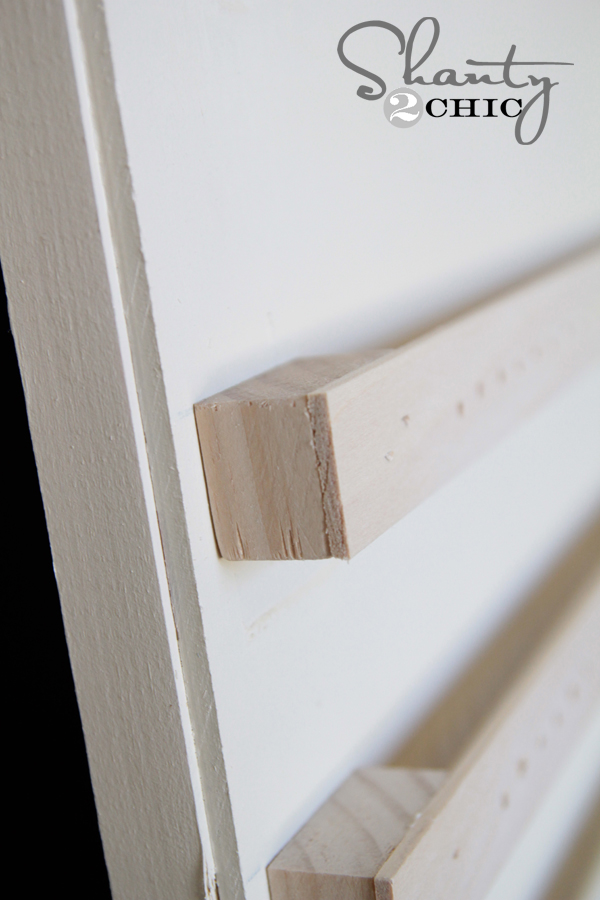
After the whole frame was assembled, I added my top and bottom 1×4 pieces. These will be used to attach the case to the wall. They are also 19.25″ long. You can see here where I added pocket holes to attach it to the case.
Now for all the ‘optional’ parts! I will show you what I did, but your options are really endless here!
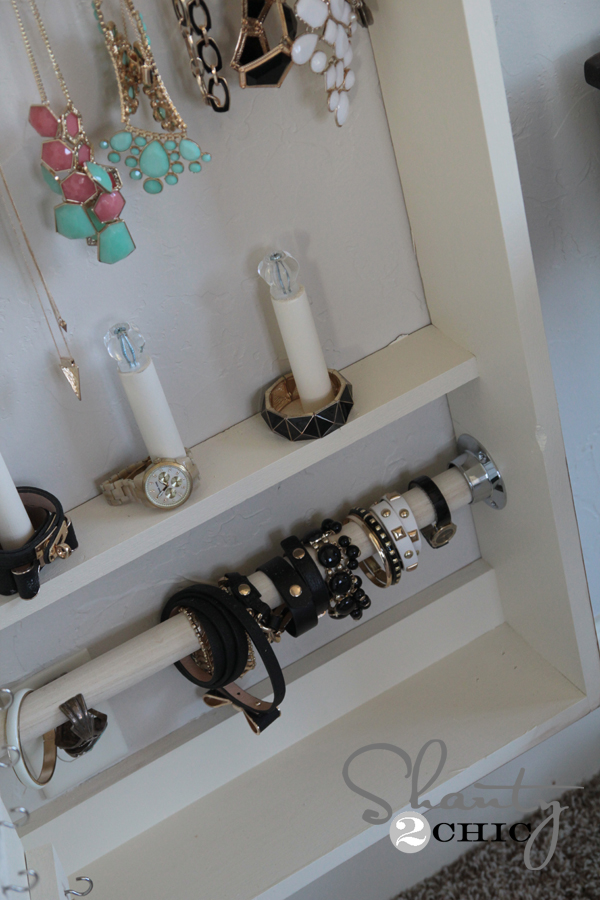
I am a bracelet girl, so I decided to make lots of places for mine. I have the three dowels in the middle to put bracelets I use pretty regularly. This is an easy shelf to make! I started with a 1×3 cut to 19.25″. I added pocket holes to the bottom of the shelf first. Next I cut holes for the dowel. I used a 1″ forstner bit for this part. Ryobi sells a whole box of these bits super cheap. They are super handy and precise! The tip looks like this…
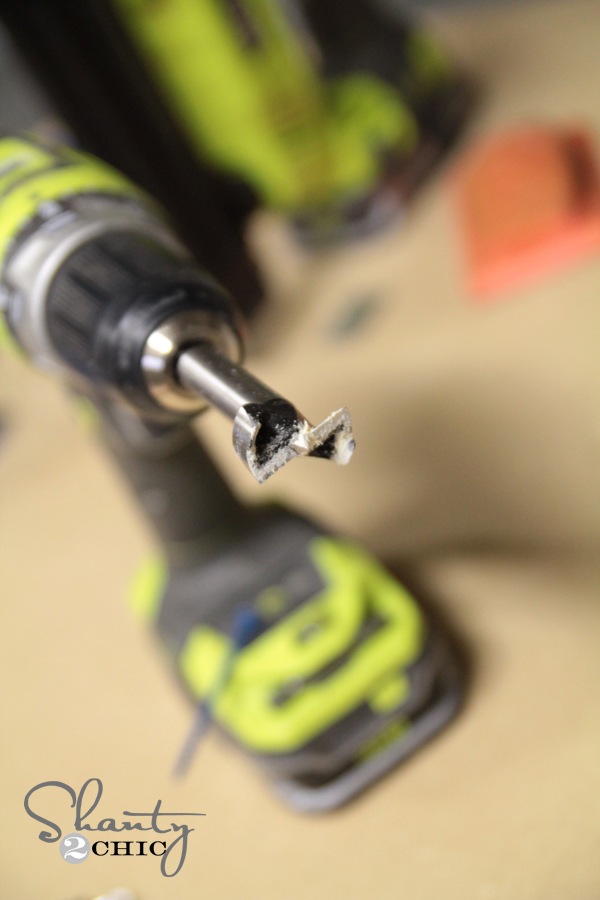
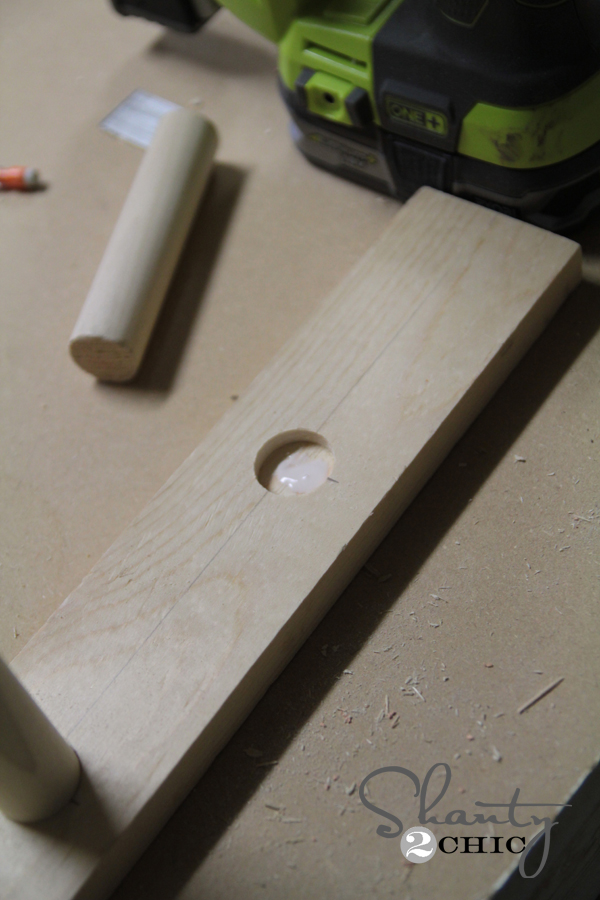
You just mark a dot where you want your dowel to go. Next, push the point down on the dot with your drill before actually drilling. These bits will give you a circle cut with a flat bottom surface… Very cool!

Next, I just added some wood glue into each hole and placed my dowels inside. Each of my dowel pieces are 4.5″ long.
Once I had all the dowels on, I attached this shelf using 1 1/4″ pocket hole screws from the bottom of the board.
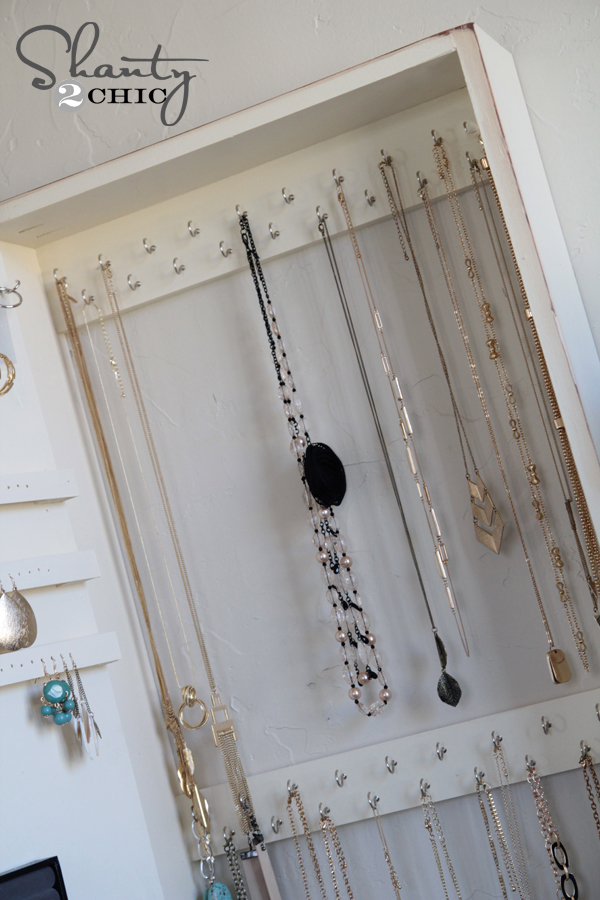
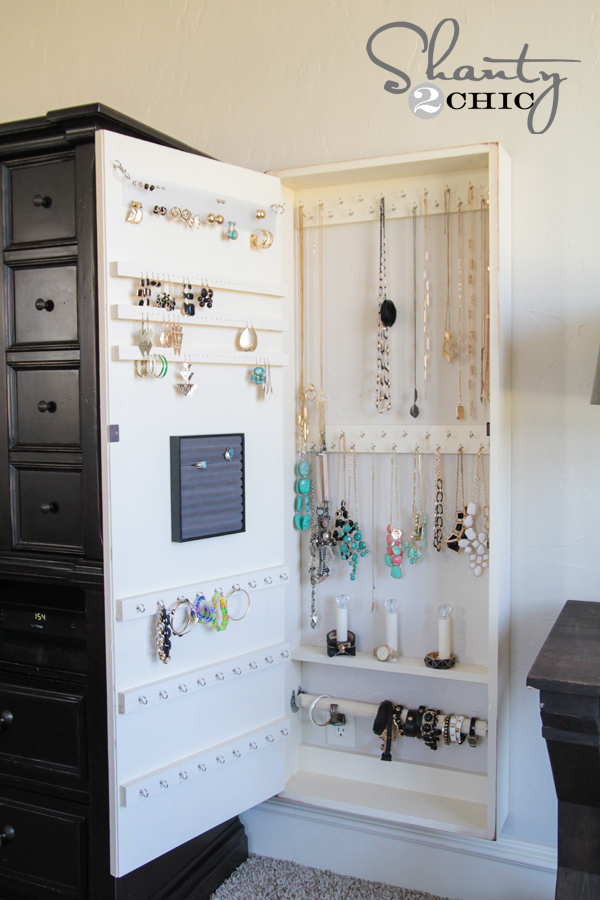
I also added another piece of 1×4 to the cabinet… This one I placed 18″ below my top 1×4 brace piece. This will be used as necklace storage. Once I had all of these things in place, I painted the entire case the same as my door and let it dry.
Now to finish it up and get it on the wall!
While the case was drying, I finished up the back of the door. I started by adding 3 – 1×2 pieces each at 18″ long. I used wood glue and my Ryobi nailer to attach the pieces. *ONLY nail at the end of each board where they meet the 1×4 and not in the middle where your mirror is, or you will be buying a new mirror! 😉 I painted all of the boards before attaching my eye screws.
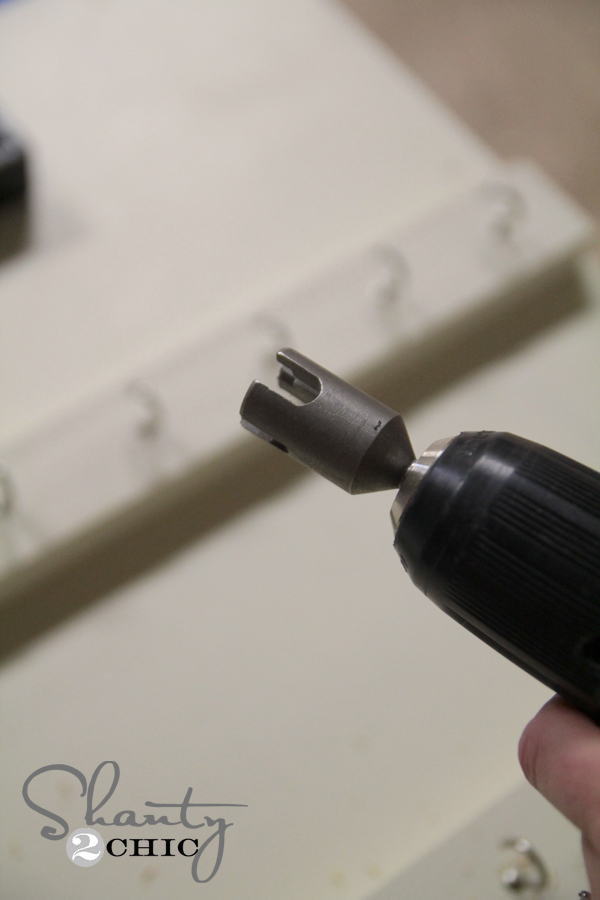
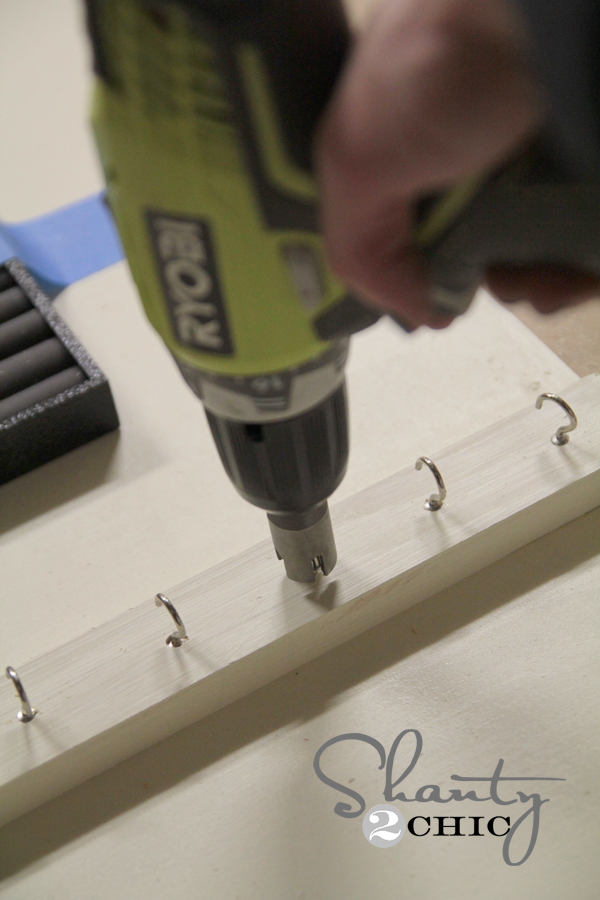
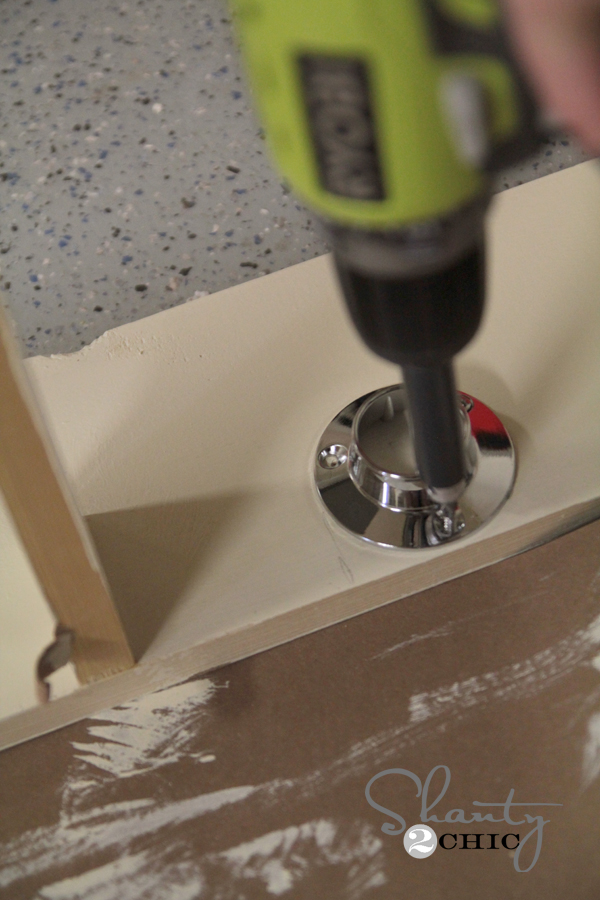
To attach all of the cup hooks I used this handy driver from Ryobi. This thing is super cheap and so darn smart. It saved me SO much time getting all of these eye hooks in. It’s called and eye and hook bolt driver and you get it at Home Depot.

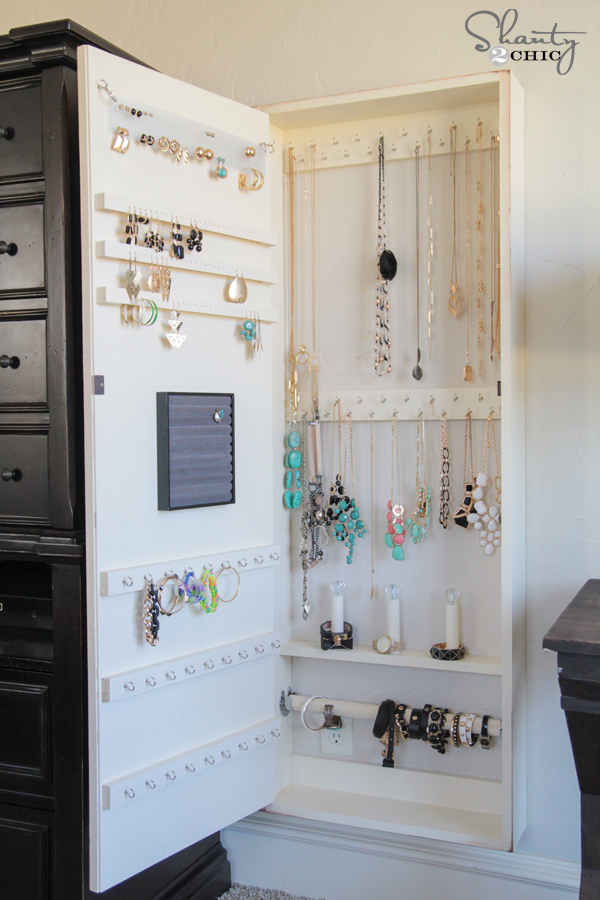
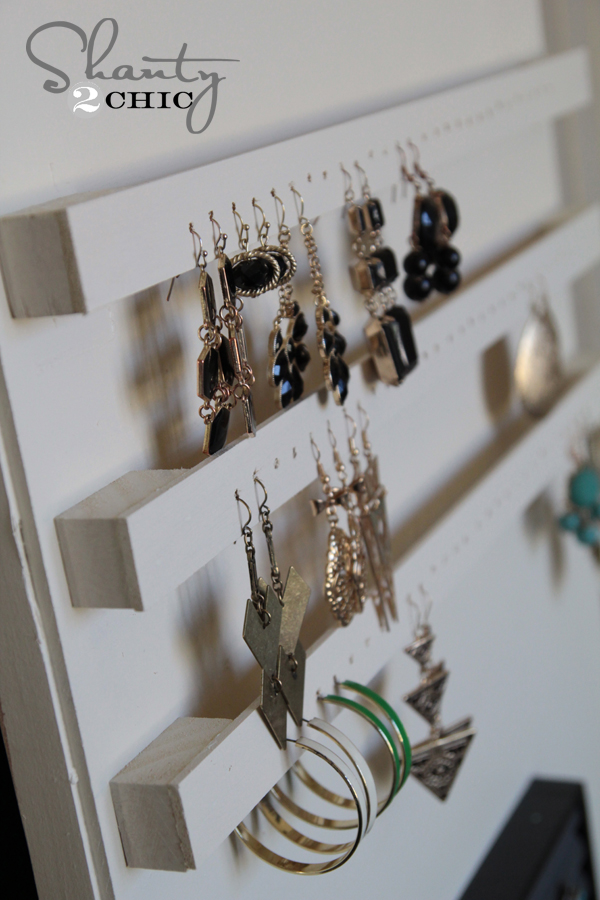
For the earring storage I glued this ring holder I found at the Container Store using epoxy to the center of the door.
For the earring storage, I used the bass wood strips cut to 18″ each. I found mine at Hobby Lobby.
I used a small drill bit to place holes every 1/2″ like this.

Then, I cut 6 pieces of 1×2 at 1″ to go under the strips.
Finally, I used my Ryobi nail gun to attach them to the door.
I painted these after I attached them to the door. These hold my dangle earrings.
I wanted some serious function for my studs. I love wearing stud and post earrings, and my original plan for these was a big fail. So, I decided to use quilters template plastic instead. I found mine at Hobby Lobby for around $2, and I used small hole punch to make holes every 1/2″. I drilled a bigger hole in each top corner and hung it from cup hooks and metal rings. It’s not beautiful, but I LOVE the function. It works perfect and it easily stores my studs without annoying me. I can lift it up easily if I need to and see through it when I am trying to put the back on. Works like a charm baby!

For the case, I also added cup hooks to the top and middle 1×4 pieces. The top holds my longer necklaces, and the bottom holds shorter ones. Mine are staggered in height, and are spaced every inch.
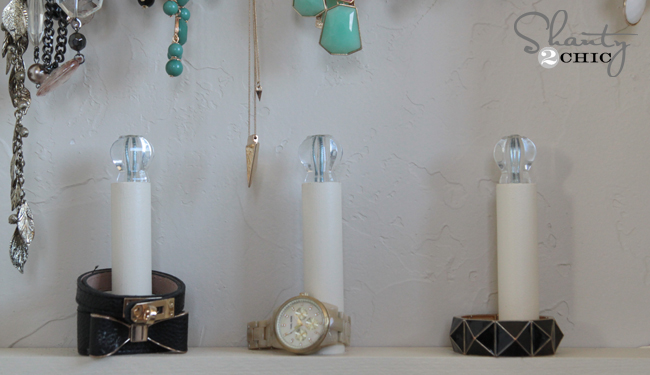
I loved Beckie’s idea of adding knobs to the dowels… Add a little cute to the function. So, I added these from Home Depot to mine.
The bottom bracelets are a cheap closet rod holder from Home Depot with a 1.5″ dowel. I just attached the rod holder and strung the bracelets on… LOVE.
Whew… That just about covered it!
I hung this the exact same way I hung my DIY Bathroom Storage Cabinet. Check out that post HERE to see how to hang yours!
Here are a few final shots of this bad boy in action!
What do you think? I am in LOVE! This thing is full of function and I gained a great amount of space in my closet back as well. I hope you love it too! I would LOVE for you to share and pin this with all your friends! Thanks so much for stopping by!
~Whitney

This is genius! Love that you’ve taken care of a place for fastened bracelets as well as bangles. I will definitely be making one of these this summer. Thanks so much for sharing.
Fabulous! as always! love that it does not take up floor space!
This is exactly what I was thinking of when I saw the bathroom storage cabinet. I’m planning to use window screen material for earrings – super easy for hanging wire earrings – not so much for posts/studs, but I don’t have as many of those. I absolutely can’t wait to have ALL my jewelry in one place!
Love it and what a great jewelry organizer it makes.
Can you come to my house and build some stuff?! I have a list!!!!
This is gorgeous. I love it.
Wow! You’re too clever for words! I love this!! Jeez my Pinterest board is just full to bursting with all your handiwork 🙂
I was JUST trying to figure out the best way to hack your bathroom storage mirror into one of these! Cannot wait to build this!
Building something like this has been on my list of things to do, perfect timing!
Yeah!! Happy to hear it!!
What size cup hooks did you use?
Where can I print the plans for this??
You timing on this couldn’t be more perfect. I am in the process re-vamping my 15 yo daughter’s room.. paint, flooring, etc. She has a cheapo full length mirror that I was looking to update with wood to make it more pleasing to the room. With your idea, I can update it and add more functionality. What teenage girl doesn’t have more bling than a rap star?!?!
Great timing! Both my girls have already begged me for one! 🙂 Good luck!
ah-mazing!!!!!
Thank you!! 🙂
WOW girls must have super like
Thank you May!! 🙂
Holy cow that is awesome Whit! I am going to make a bigger one someday. I did one similar out of a crib. But sadly I need more room.
Thank you friend… And can I just say there is nothing sad about needing more storage space for jewelry 😉 !?
WOW! Just wow. That is so cute! Great job!
Thank you Sarah!!
WOW!! this will be my first build and I’ll be doing this for my daughters.. Getting my kreg jig and tools this weekend
Woohooooo this makes me super happy to hear!! 🙂
amazing function. great build as always.
Thank you Kim!! 🙂