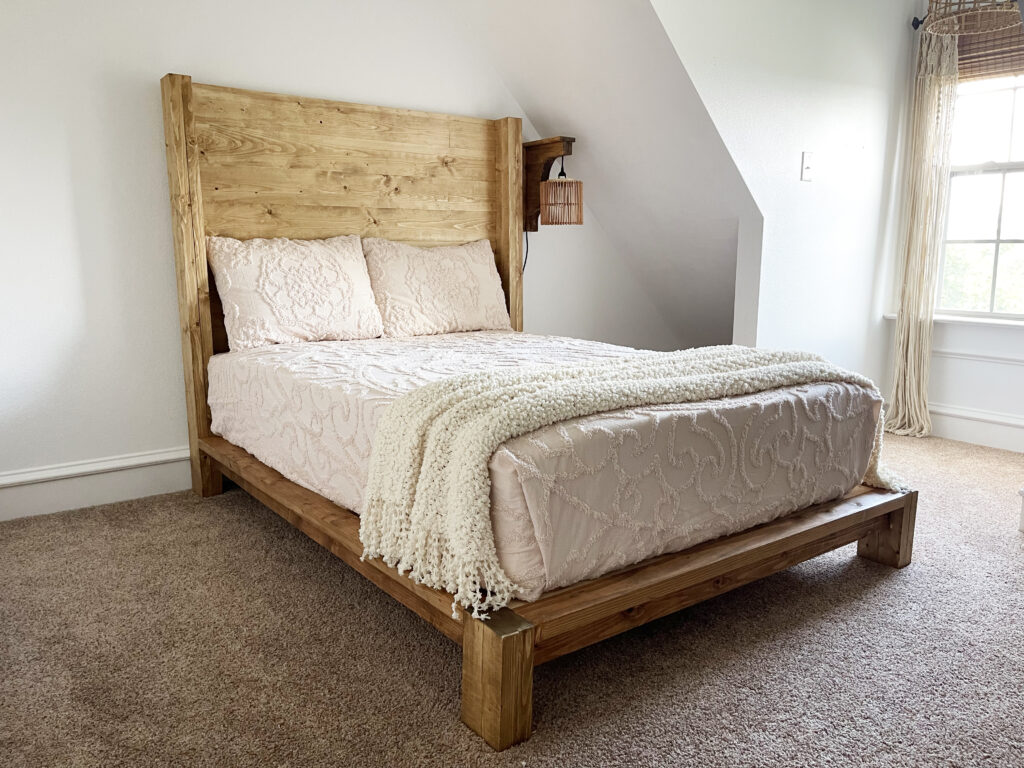
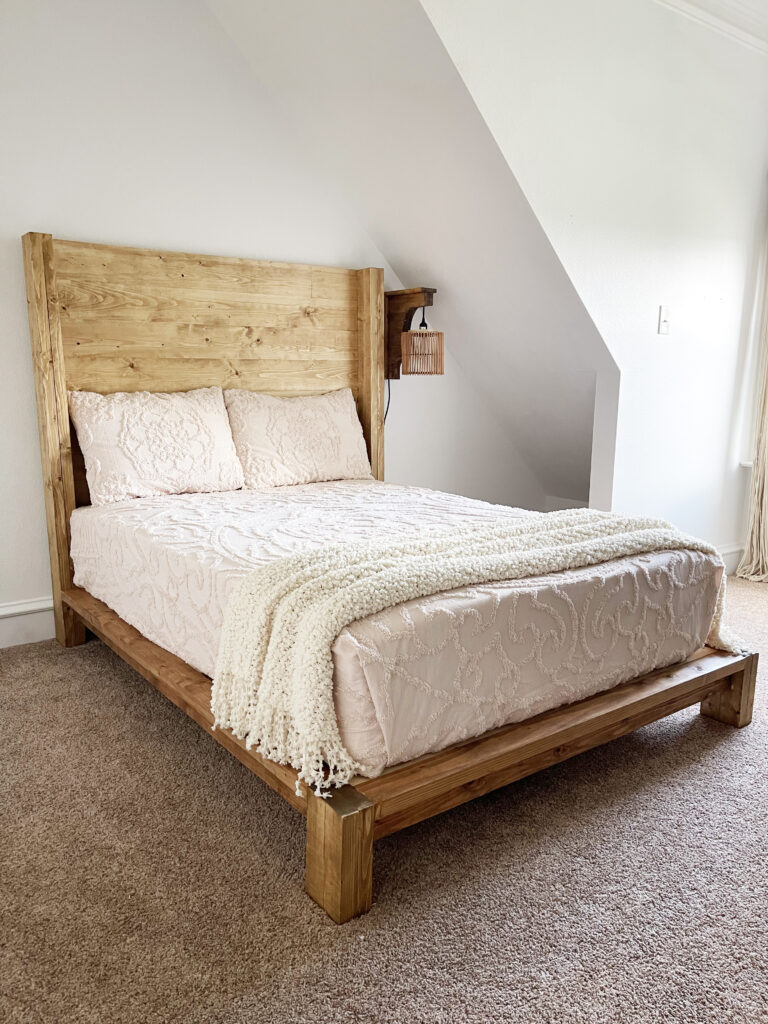
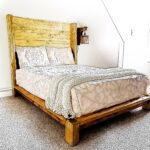
Learn how to build this DIY Bed Frame and wood Headboard with free plans and a step-by-step tutorial by Shanty 2 Chic!
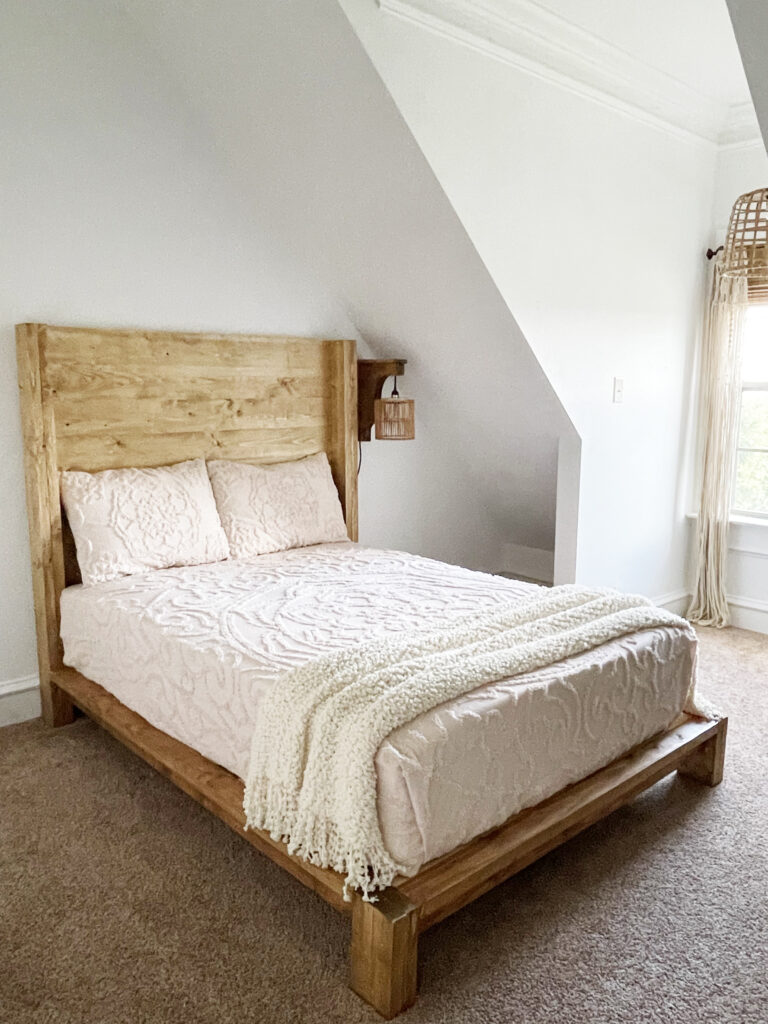
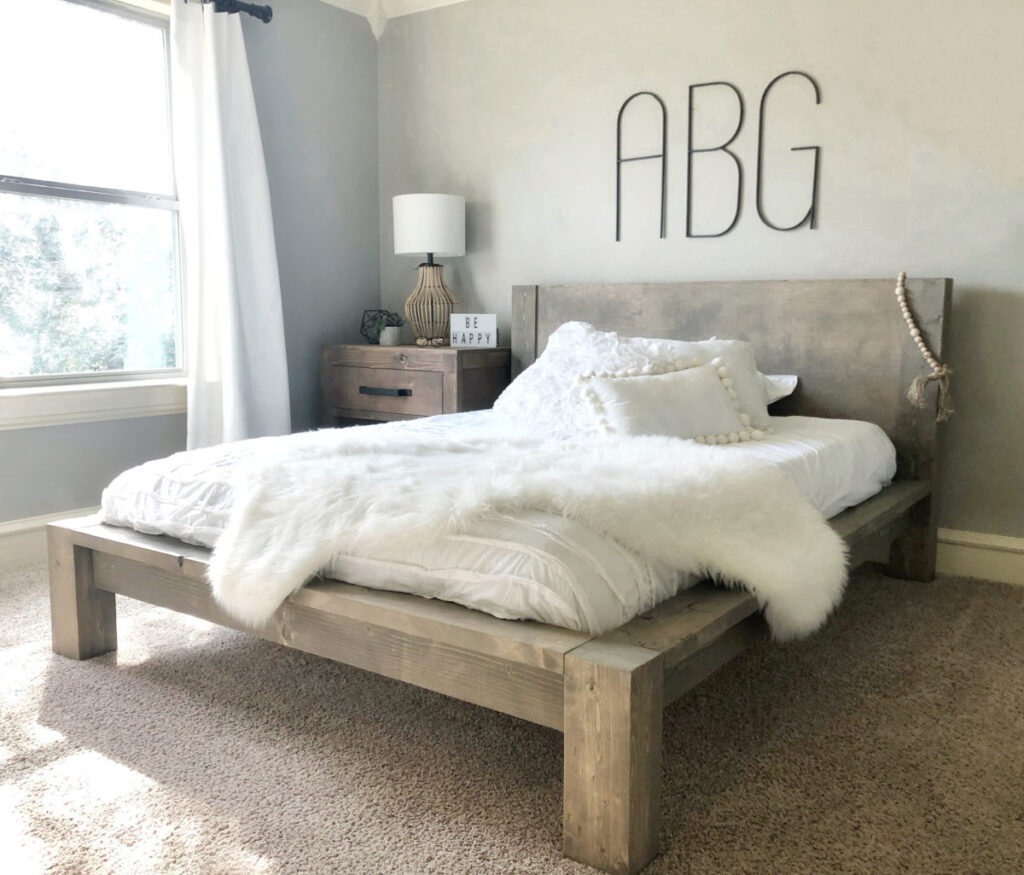
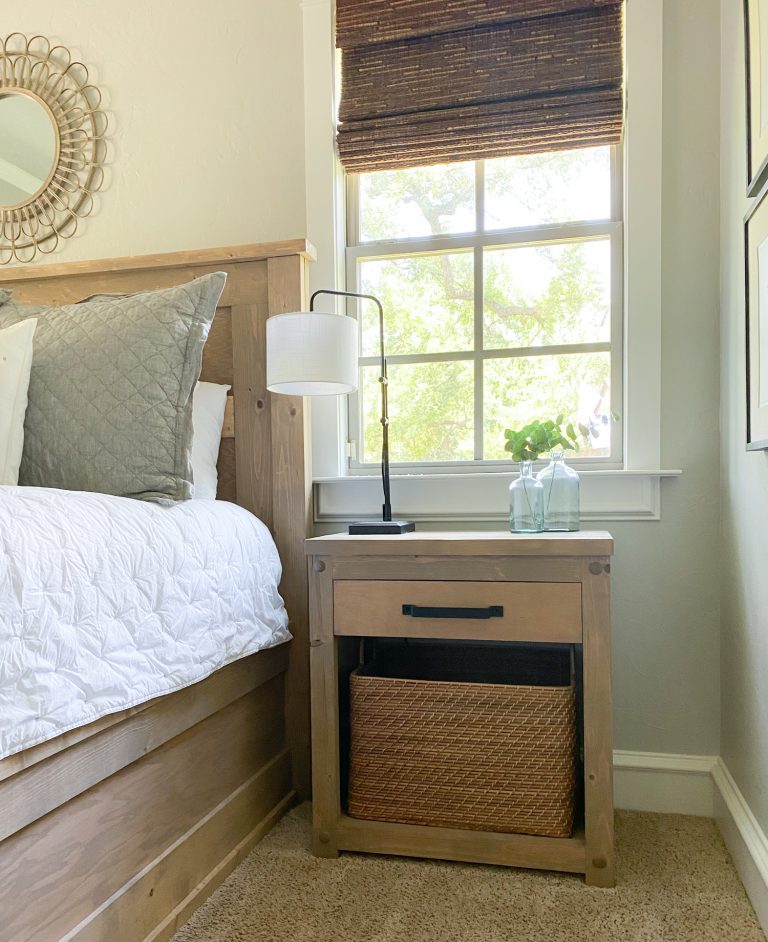
I built my daughter a DIY Loft Bed a few years ago, when we found out she would be remote learning. She loved the bed and it was perfect for our at-home learning situation. She’s now in middle school and didn’t want to climb a ladder to get in her bed anymore. So, she asked me to build her a new bed that was more “grown up” looking. I let her scour Pinterest to give me some ideas of what style she was wanting and then I got busy designing, made a trip to Home Depot for woodworking supplies and began building her new, grown up, modern bed frame!
This is a very easy DIY Project and it won’t break the bank! As always, we’ve got the free printable plans for you and a step-by-step instructions to follow along, below!
You can click here to jump to the printable plans!Table of Contents
How to Build a DIY Wood Bed Frame and Headboard
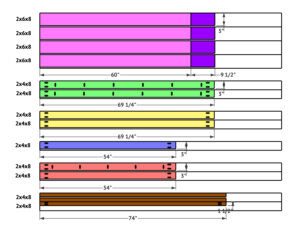
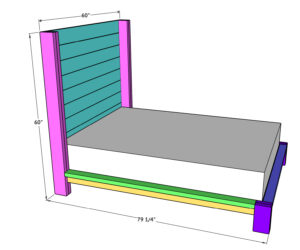
This set of plans is designed for a full size mattress.
Tools:
- Miter Saw
- Drill
- Kreg Jig
- Brad Nailer
- Sander
- Table Saw (optional)
Supplies:
- 4 – 2x6x8 Framing Lumber
- 9 – 2x4x8 Framing Lumber
- 9 – 1x6x8 Framing Lumber
- 11 – 1x4x8 Furring Strips
- 1 1/4″ Pocket Hole Screws
- 2 1/2″ Pocket Hole Screws
- 1 1/4″ Wood Screws
- 2 1/2″ Wood Screws
- 2″ Brad Nails
- Wood Glue
Building the Headboard
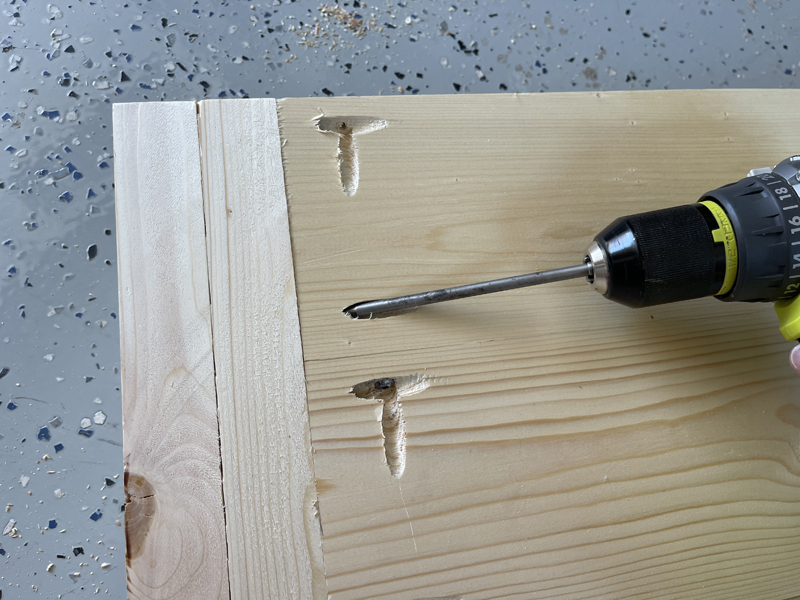
Step 1:
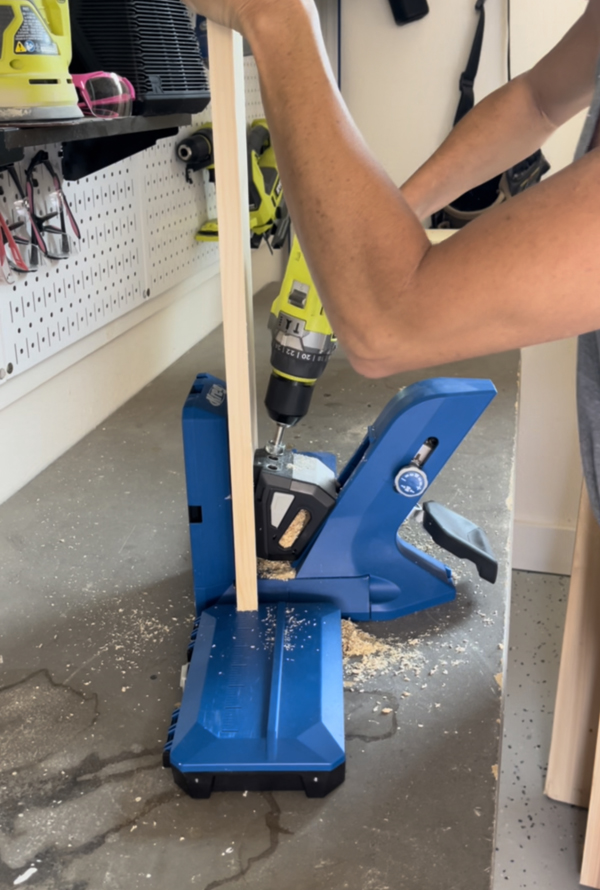
Cut the planks to size and drilled 3/4″ pocket holes according to the cut list. I used our favorite Kreg Jig model to make my pocket holes.
Attach the planks together with 1 1/4″ pocket hole screws.
Step 2:
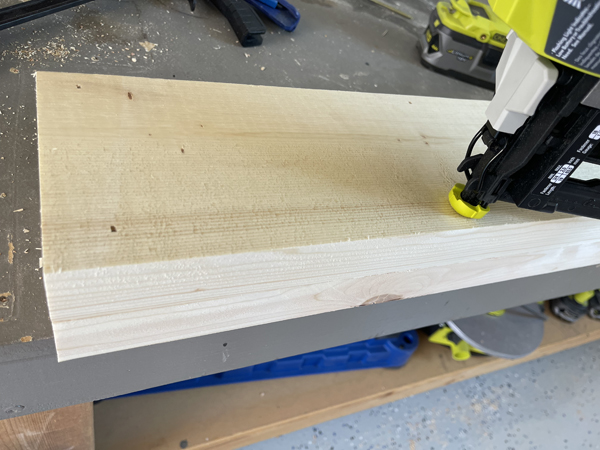
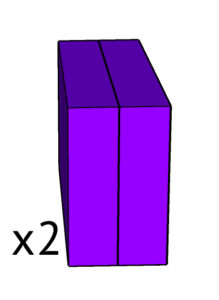
Cut the leg pieces to size and stack two legs on each other. Attach them with wood glue and 2″ brad nails.
Build two leg assemblies.
Step 3:
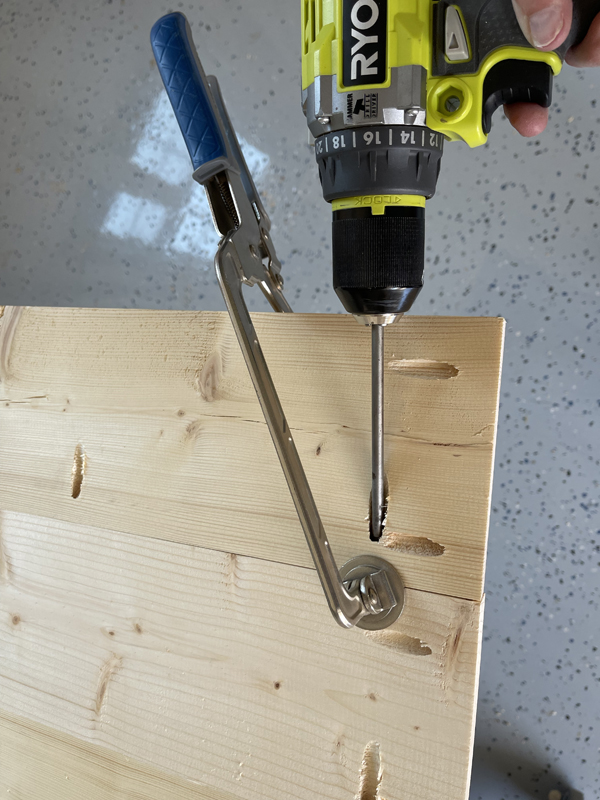
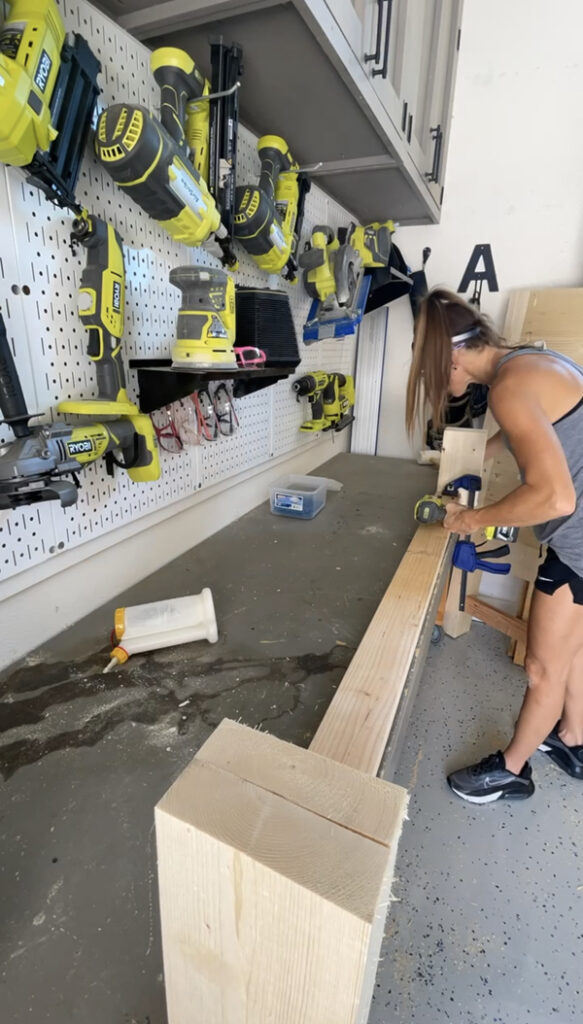
Attach each leg assembly to the headboard planks with 1 1/4″ pocket hole screws and wood glue. The back and top of the planks should be flush with the back and top of the legs.
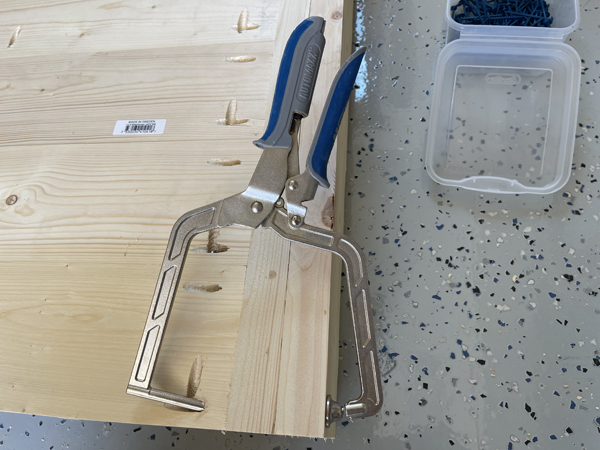
I like to use the Kreg Right Angle Clamp to start. It holds the boards in place while you are attaching through other pocket holes. It works as an extra hand.
- You can find the right angle clamp we use here
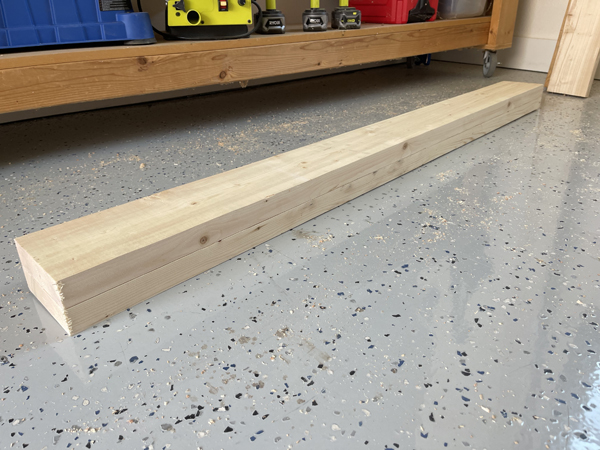
This is what your headboard should look like at this point.
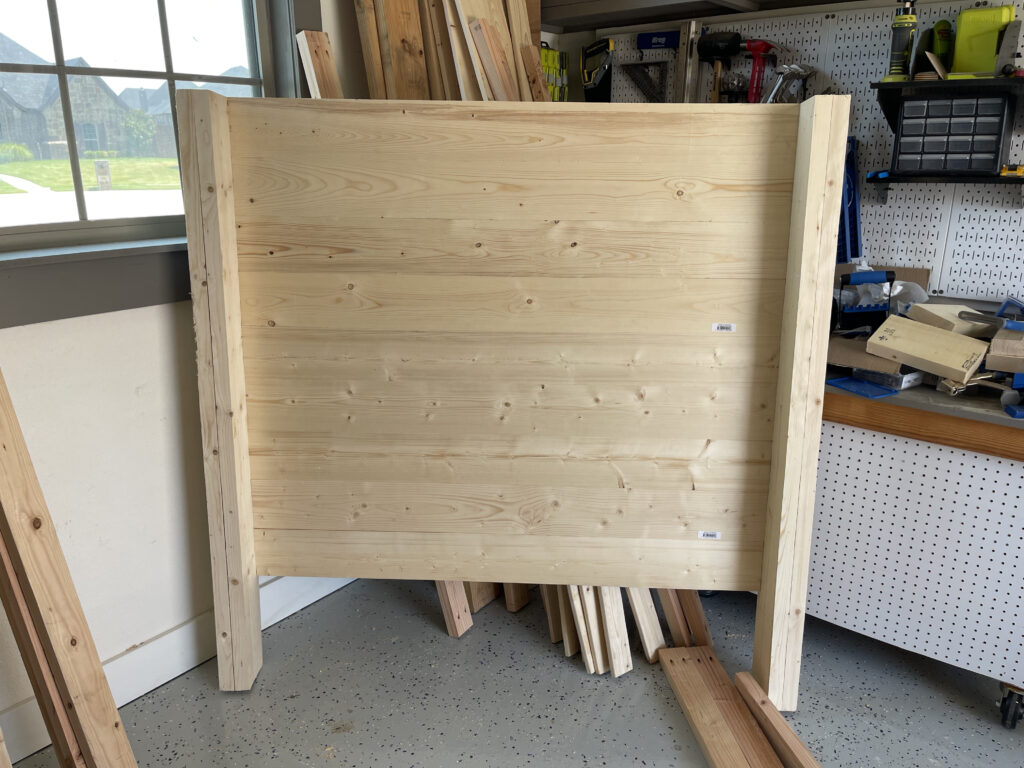
Step 4:
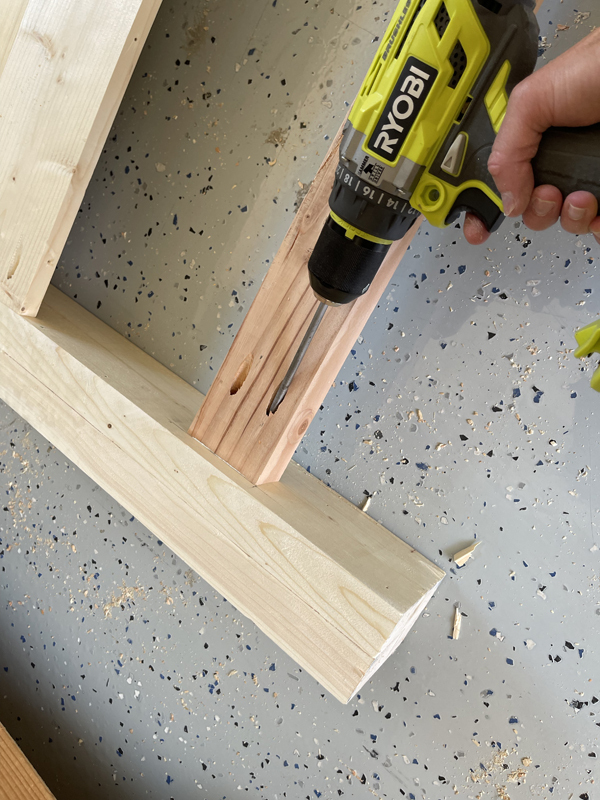
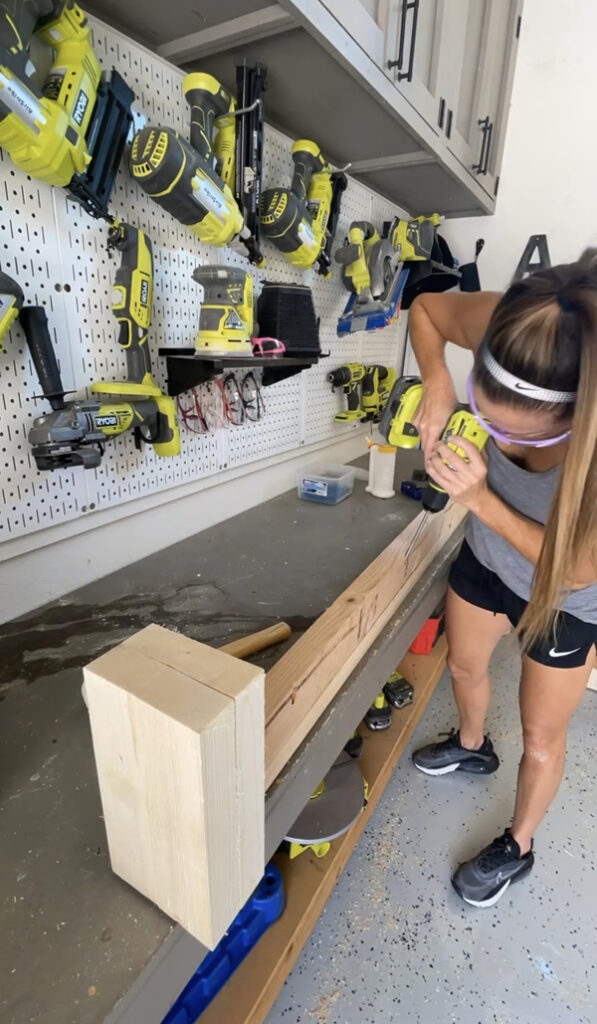
Cut the headboard stretcher to size and drill 1 1/2″ pocket holes at both ends. Attach it to the headboard legs with 2 1/2″ pocket hole screws and wood glue.

This is what the hardwood headboard should look like now.
Building the Wooden Bed Frame
Step 1:
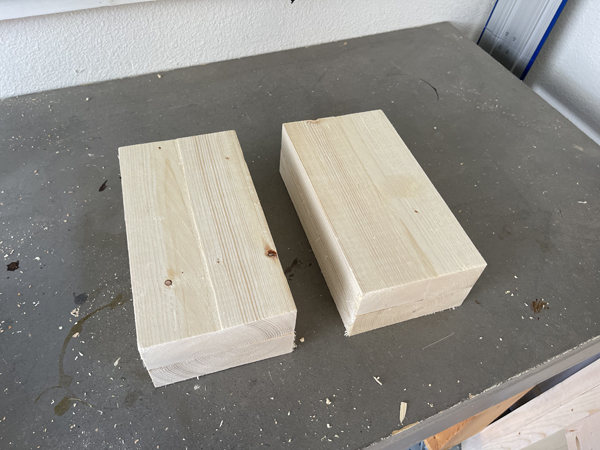
Cut the foot pieces to size and stack two pieces together with 2″ brad nails and wood glue. Build two foot assemblies.
Step 2:
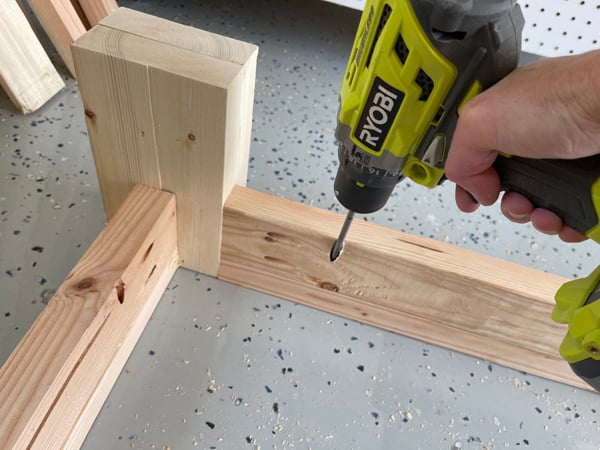
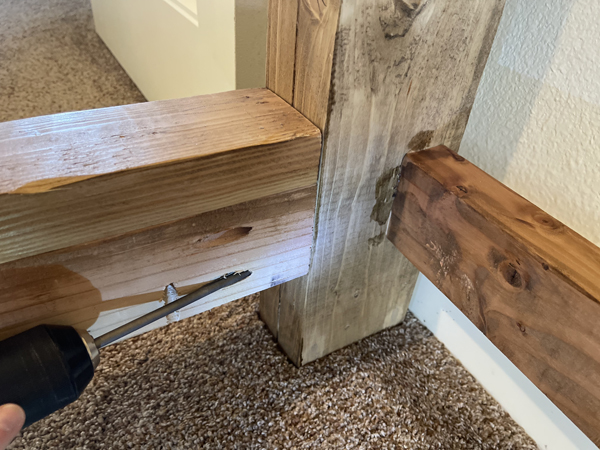
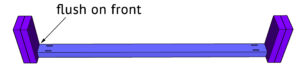
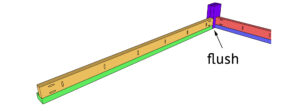
Cut the footboard trim to size and drill 1 1/2″ pocket holes at both ends. Attach it to the feet with 2 1/2″ pocket hole screws and wood glue. The front and top of the trim should be flush with the front and top of the feet. I used a few clamps to keep the joints flush while I attached them.
Step 3:
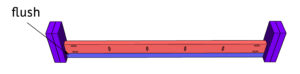
Cut the footboard rail to size and drill 1 1/2″ pocket holes along one edge and both ends. Attach it to the trim and feet with 2 1/2″ pocket hole screws and wood glue. The back of the rail should be flush with the back of the trim.
Step 4:
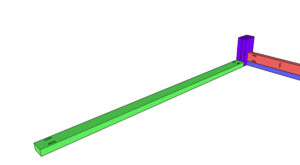
Cut the side trim pieces to size and drill 1 1/2″ pocket holes at both ends. Attach the trim to the foot with 2 1/2″ pocket hole screws and wood glue. Do this for both sides of the bed frame.
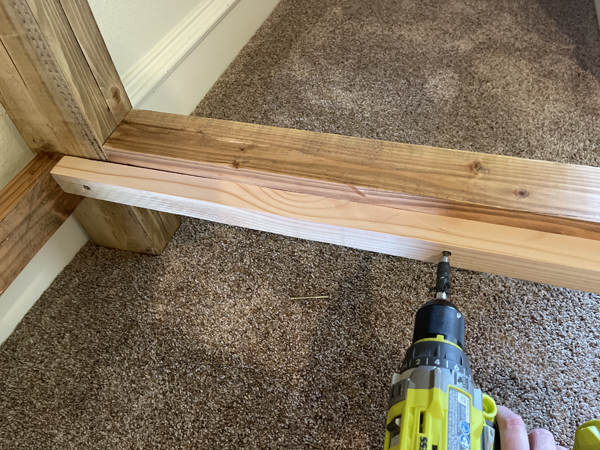
Step 5:
Cut the side rails to size and drill 1 1/2″ pocket hole screws along one edge and both ends. Attach the rails to the trim and feet with 2 1/2″ pocket hole screws and wood glue. The back of the rail should be flush with the back of the trim and inside of the feet.
Assembling the DIY Bed
I completely assembled the bed before I stained it, for demonstration purposes, then broke it down to bring it inside but now is a great time to add a finish!
Step 1:
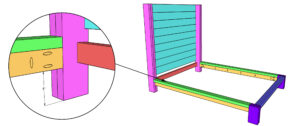
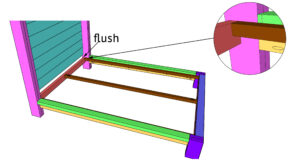
Attach the bed frame to the headboard with 2 1/2″ pocket hole screws through the side rails and into the headboard legs. The inside of the rails and trim should be flush with the inside of the headboard legs.
Step 2:
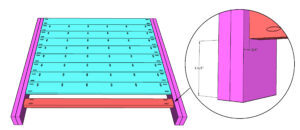
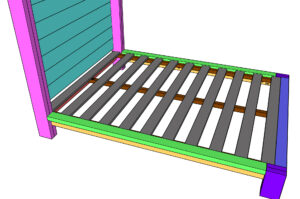
Cut the cleats to size and drill 1 1/2″ pocket holes at both ends of one of the cleats. Attach a cleat to each side rail with 2 1/2″ wood screws. Center the final cleat up and attach it with 2 1/2″ pocket hole screws.
Step 3:
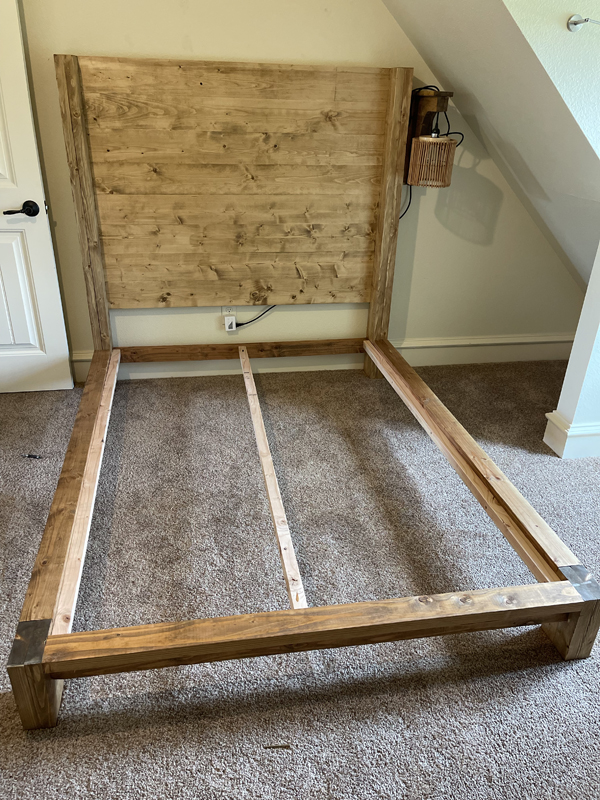
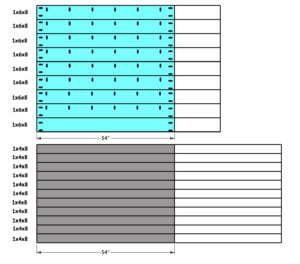
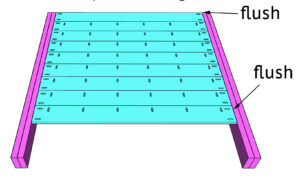
We always add slats to the bottom of our DIY Beds. These serve as a box spring but you can also drop the cleats and slats down a bit and use a box spring with the mattress. Cut the slats to size and space them out evenly on the cleats. The top and bottom slats should be flush with the headboard and footboard rails. Attach them to the cleats with 1 1/4″ wood screws.
The Finish
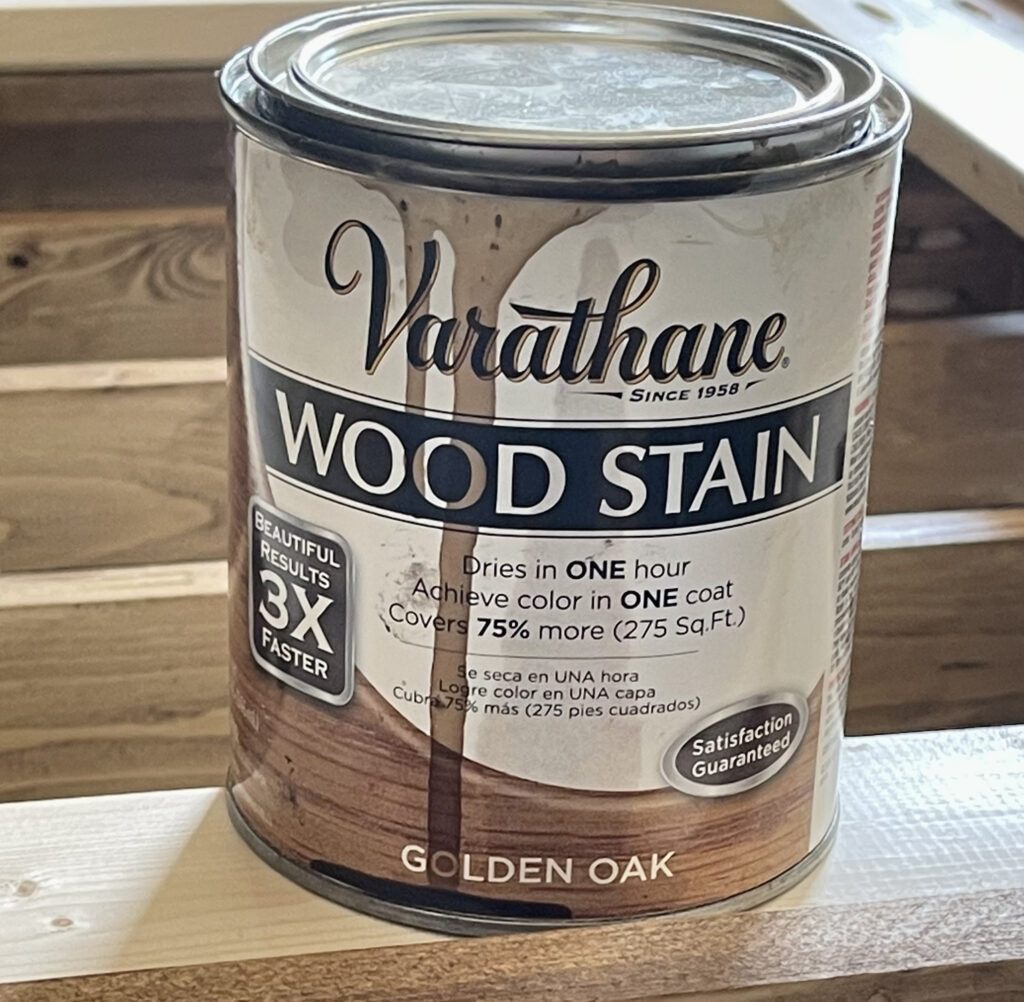
After sanding the entire bed down, I applied one coat of stain and that was it!
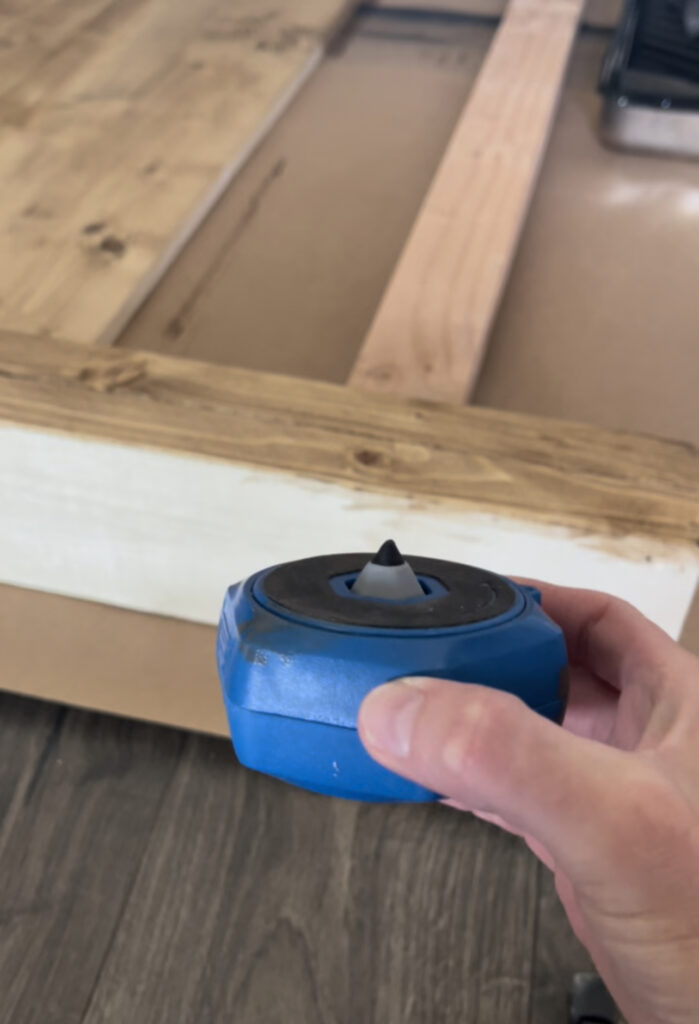
These Kreg Project Blocks are a must-have for finishing! They come in a pack of 4 and the tip pops up to elevate your projects off the ground while you apply the finish!
I let my daughter pick out her bedding and I LOVE this quilt that she picked! It’s very affordable and I love the quality!
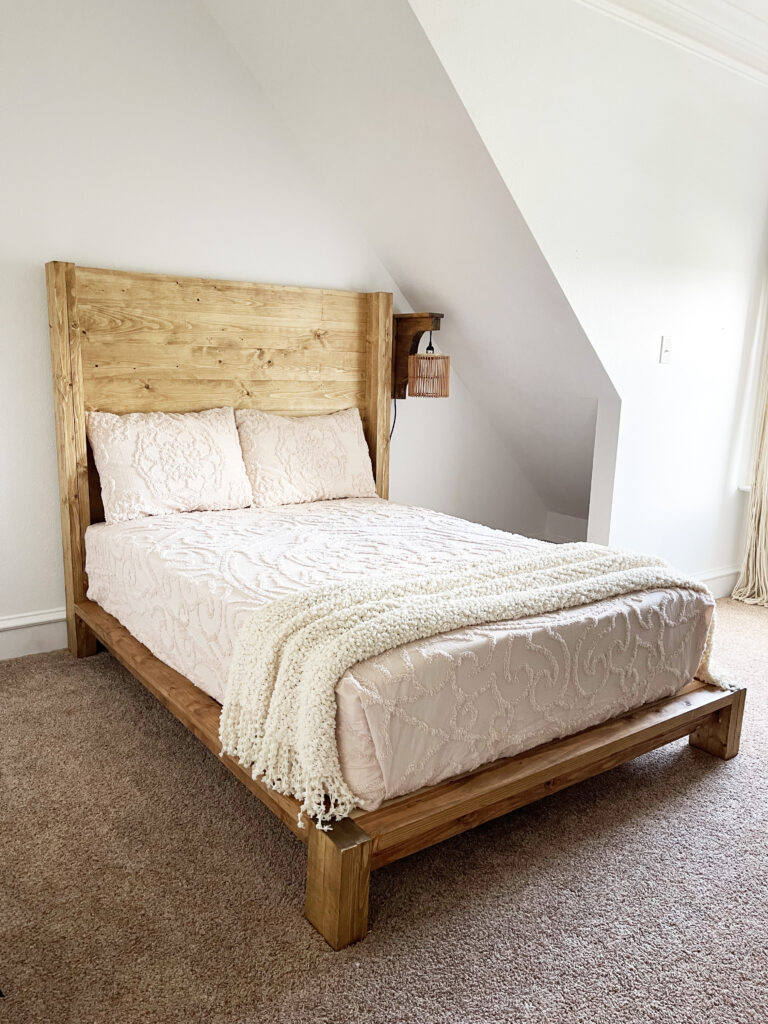
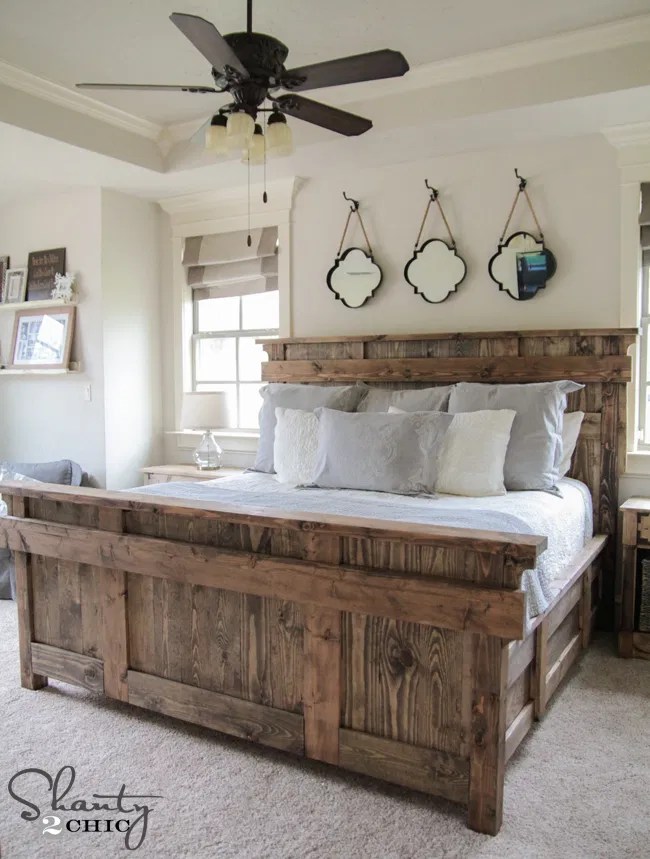
I’ve built her a lot of beds in her 11 years but I think this is my absolute favorite!
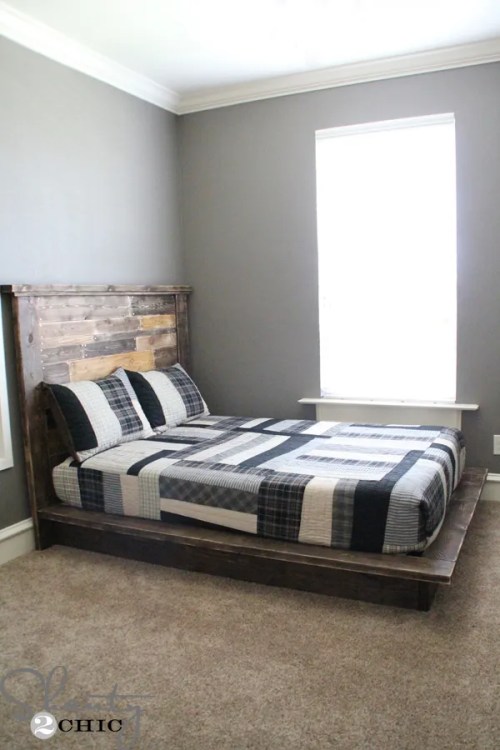
If you need plans for a different size bed, that is a very easy modification. Here are the dimensions for each size mattress.
Twin – 75″Lx38″W
Full (this plan) – 75″Lx54″W
Queen – 80″Lx60″W
King – 80″Lx76″W
You will modify the width and the length of the boards depending on what size mattress you are building.
For example, for a twin bed you would subtract 6″ from the headboard planks, headboard and footboard rails and trim and well as the slats that run the width of the bed.
For a queen-sized mattress, you would add 5″ to the side rails, trim and cleats as well as add 6″ to the boards that run the width.
For a King Size, you would also add 5″ to the boards that run the length of the bed and 12″ to the boards that run the width.
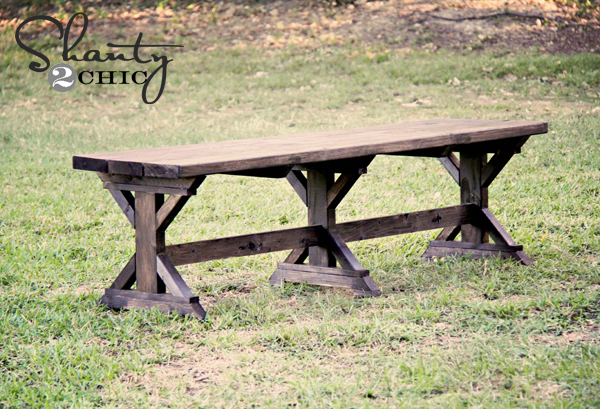
Check out some of the other bed frame project we’ve designed!

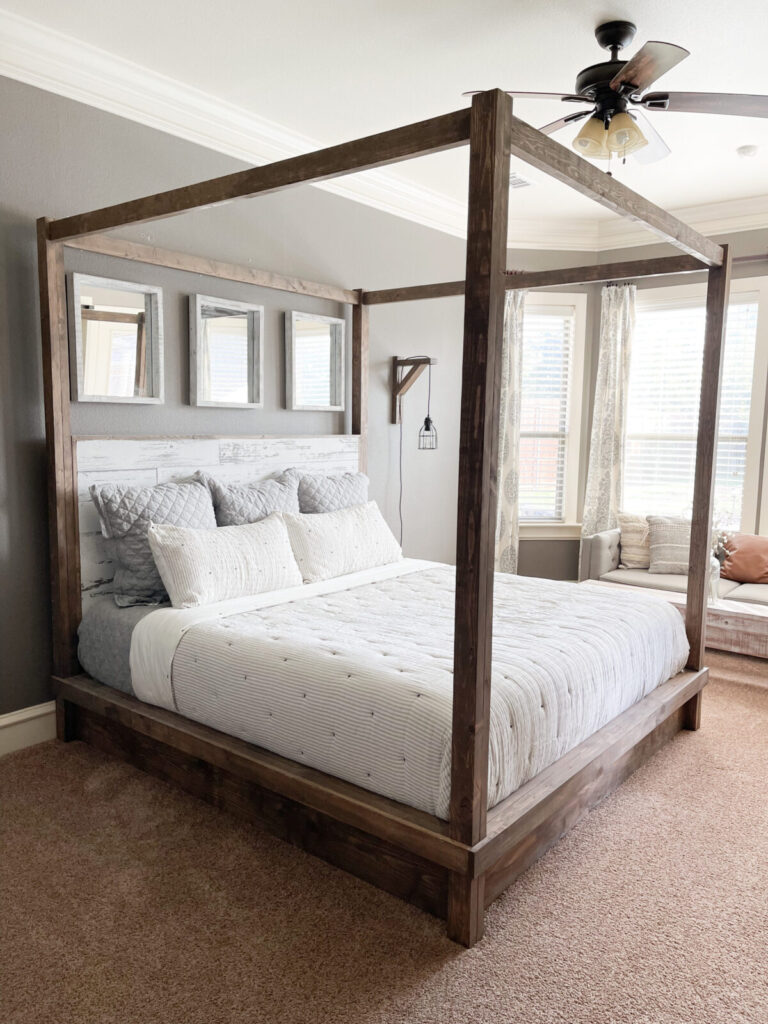
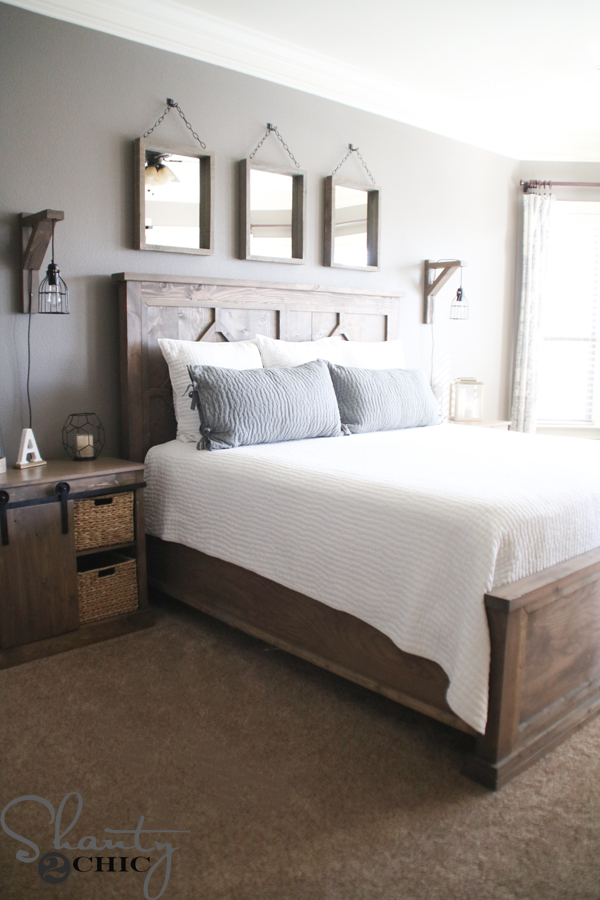

Full Bed with Metal Hardware and and Drawers
DIY Bed Frame
Tools
- Miter Saw
- Drill
- Kreg Jig
- Brad Nailer
- Sander
- Table Saw (optional)
Supply List
- 4 2x6x8 Framing Lumber
- 9 2x4x8 Framing Lumber
- 9 1x6x8 Pine or Common Boards
- 11 1x4x8 Furring Strips
- 1 1/4" Pocket Hole Screws
- 2 1/2" Pocket Hole Screws
- 1 1/4" Wood Screws
- 2 1/2" Wood Screws
- 2" Brad Nails
- Wood Glue
Instructions
Cut List
- Cut List 1 (Note: I ripped the round edges off the 2×6 and 2×4 boards (noted on the cut list). This is not a necessary step but if you choose not to rip your boards, adjust the plans accordingly.

- Cut List 2

Building the Headboard
- Cut the planks to size and drill 3/4" pocket holes, according to the cut list. Attach the planks together with 1 1/4" pocket hole screws.

- Cut the leg pieces to size and stack 2 legs on each other. Attach them with wood glue and 2" brad nails. Build two leg assemblies.

- Attach each leg assembly to the headboard planks with 1 1/4" pocket hole screws and wood glue. The back and top of the planks should be flush with the back and top of the legs.

- Cut the headboard stretcher to size and drill 1 1/2" pocket holes at both ends. Attach it to the headboard legs with 2 1/2" pocket hole screws and wood glue.


Building the Bed Frame
- Cut the foot pieces to size and stack 2 pieces together with 2" brad nails and wood glue. Build 2 foot assemblies.

- Cut the footboard trim to size and drill 1 1/2" pocket holes at both ends. Attach it to the feet with 2 1/2" pocket hole screws and wood glue. The front and top of the trim should be flush with the front and top of the feet.

- Cut the footboard rail to size and drill 1 1/2" pocket holes along one edge and both ends. Attach it to the trim and feet with 2 1/2" pocket hole screws and wood glue. The back of the rail should be flush with the back of the trim.

- Cut the side trim pieces to size and drill 1 1/2" pocket holes at both ends. Attach the trim to the foot with 2 1/2" pocket hole screws and wood glue. Do this for both sides of the bed frame.

- Cut the side rails to size and drill 1 1/2" pocket hole screws along one edge and both ends. Attach the rails to the trim and feet with 2 1/2" pocket hole screws and wood glue. The back of the rail should be flush with the back of the trim and inside of the feet.

Assembling the Bed
- Attach the bed frame to the headboard with 2 1/2" pocket hole screws through the side rails and into the headboard legs. The inside of the rails and trim should flush with the inside of the headboard legs.

- Cut the cleats to size and drill 1 1/2" pocket holes at both ends of one of the cleats. Attach a cleat to each side rail with 2 1/2" wood screws. Center the final cleat up and attach it with 2 1/2" pocket hole screws.

- Cut the slats to size and space them out evenly on the cleats. The top and bottom slats should be flush with the headboard and footboard rails. Attach them to the cleats with 1 1/4" wood screws.

The Finish
- Sand down the entire bed and add a finish!Make sure to share your builds with us on social media and use #shanty2chic so we can share them too!Happy Building!


This is a beautiful and practical bedroom furniture project. The combination of a sturdy bed frame with a wood headboard creates a warm and timeless focal point for the room. I appreciate how the plans make a custom furniture build feel approachable and achievable. It’s always inspiring to see bedroom design ideas alongside broader furniture and material trends here: https://plywoodbazar.com/
A stylish and well-crafted DIY build.
This bed frame and wood headboard design is a great example of how simple woodworking can create a strong visual focal point in a bedroom. The natural wood texture combined with the clean structure gives the piece a timeless appeal that can work across many interior styles. The step-by-step approach also makes the build process much easier to follow.
From an interior industry perspective, wooden bed frames with statement headboards continue to be a popular choice because they bring warmth and durability to bedroom interiors. Projects like this also highlight how thoughtful material selection and solid construction techniques can result in furniture that lasts for years. We’ve also been following similar furniture and interior material trends across the industry here: https://plywoodbazar.com/
Hi Ladies,
I used your plans to build two beds the one you listed as a Queen above (I made it a king size) and the first bed in the pictures. They come out great keep up the good work your plans and designs are awesome Thank You!
Pat
RACKING SHELVING PROVIDER IN UAE
The bed frame and wood headboard showcased in this post are simply stunning! The craftsmanship and attention to detail are remarkable. Appreciate the inspiration and guidance shared. Thanks!
Maybe I’ll have to build a bed for my daughter because she’s going away from school too.
Will you be adding a King version of these plans?
HeSays is a platform designed to offer support, advice, and guidance, particularly tailored to men’s health and well-being. It focuses on topics such as mental health, physical fitness, relationships, and personal development. HeSays aims to create a safe space where men can share experiences, seek advice, and find resources to improve their overall quality of life. Through articles, discussions, and expert insights, the platform encourages open dialogue and promotes positive growth for men in various aspects of life.
https://hesays.pk/