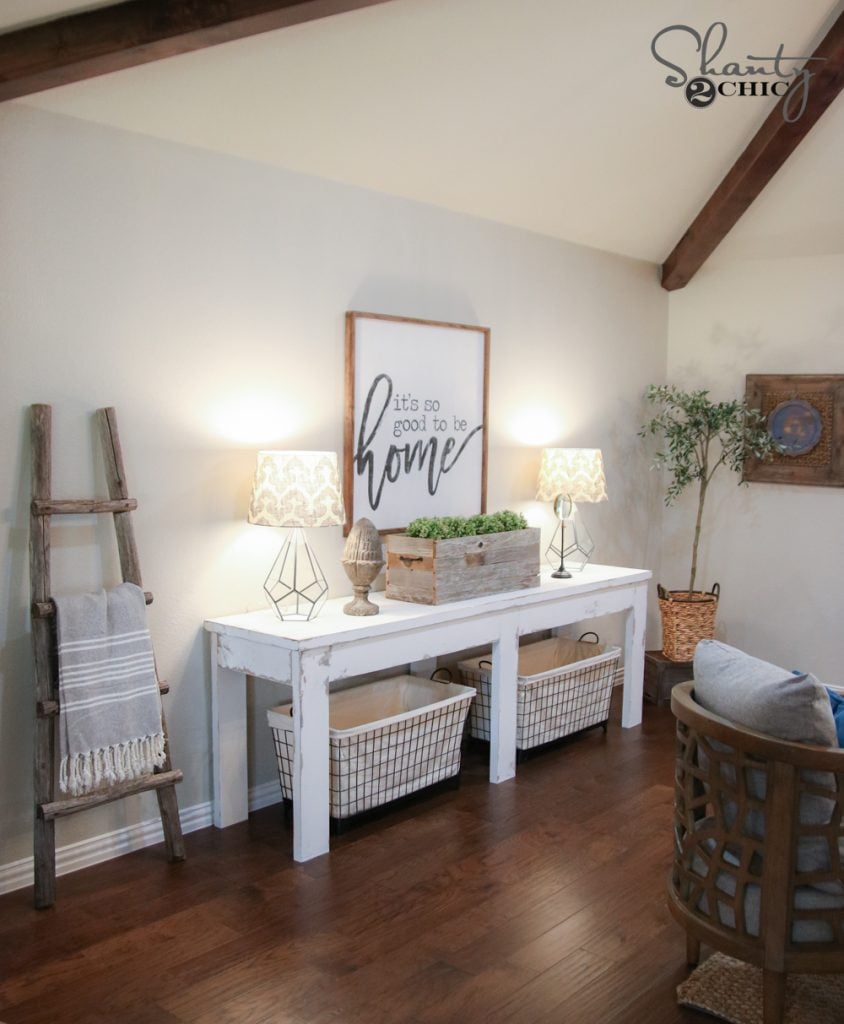
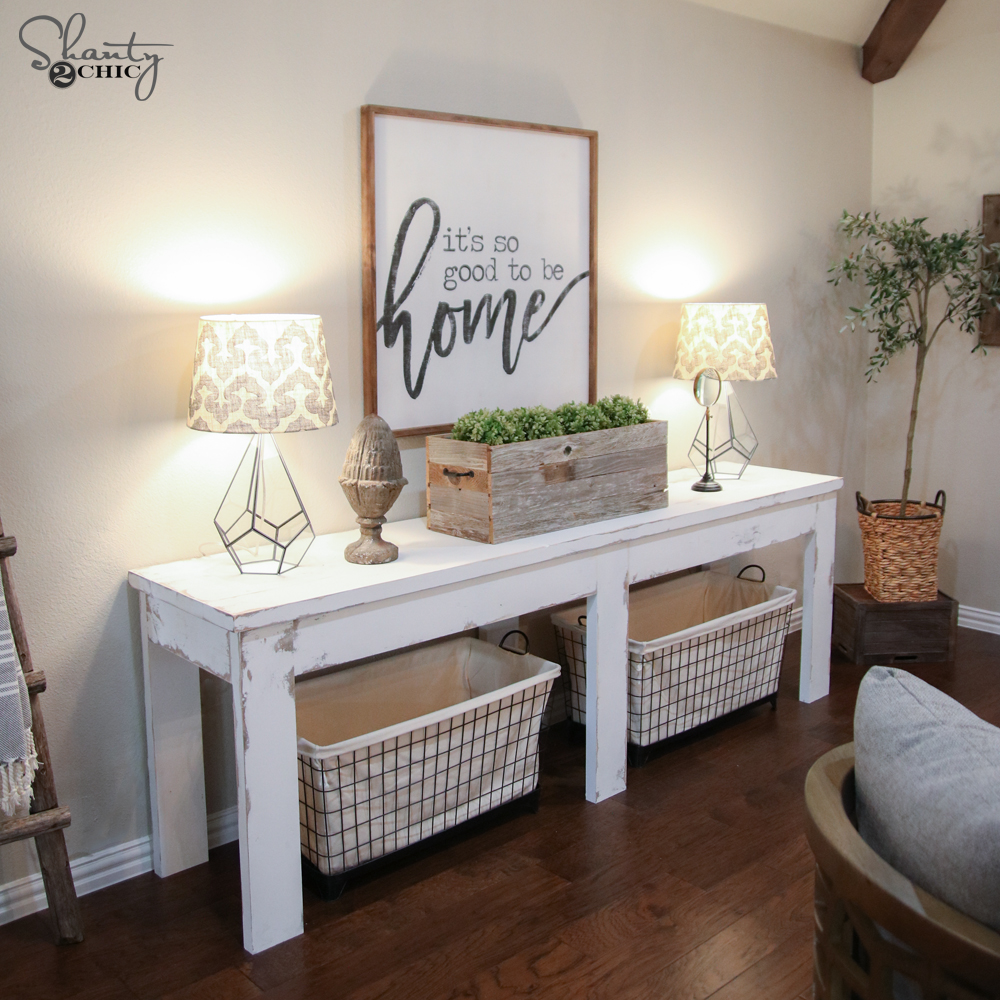
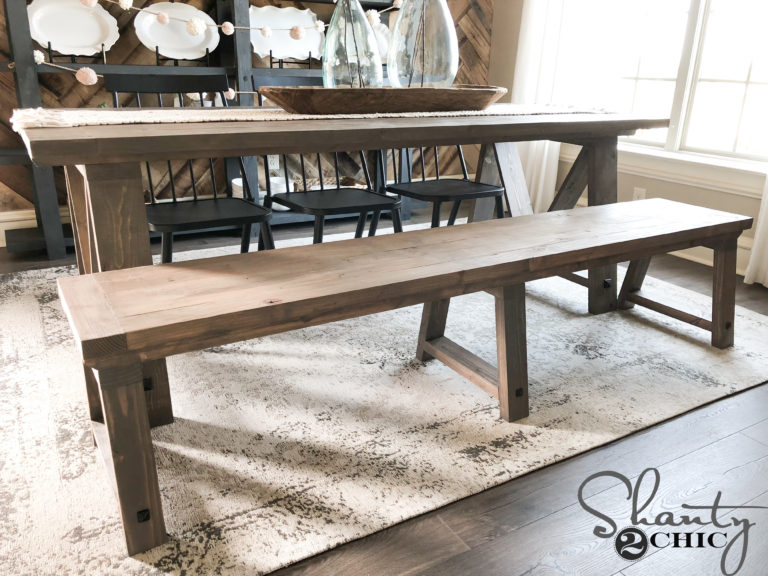
This DIY Farmhouse Console Table only cost $40 to build and it’s great for beginners! Free plans and full tutorial by www.shanty-2-chic.com! We built this for the Davis family on our 3rd episode of Open Concept on HGTV. They were in serious need of some love in this room and this design fit the need… And the bill! The best part of this table… 8 2×6 boards is all you need to build it! Yep… Not bad right???
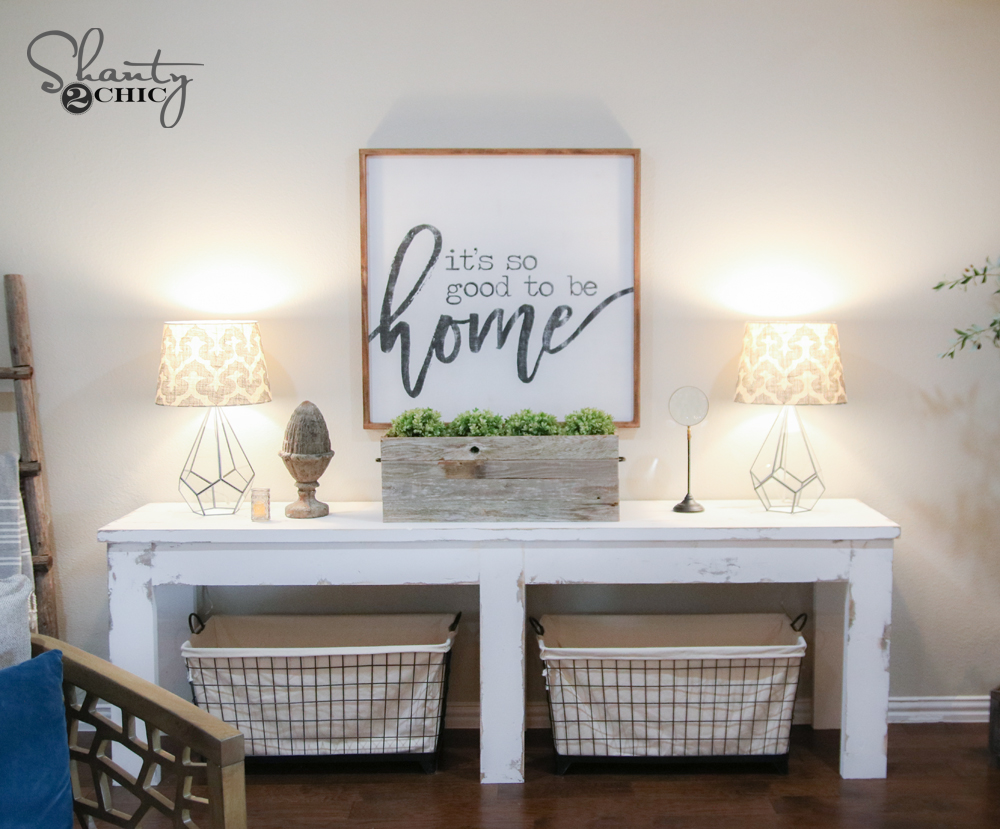
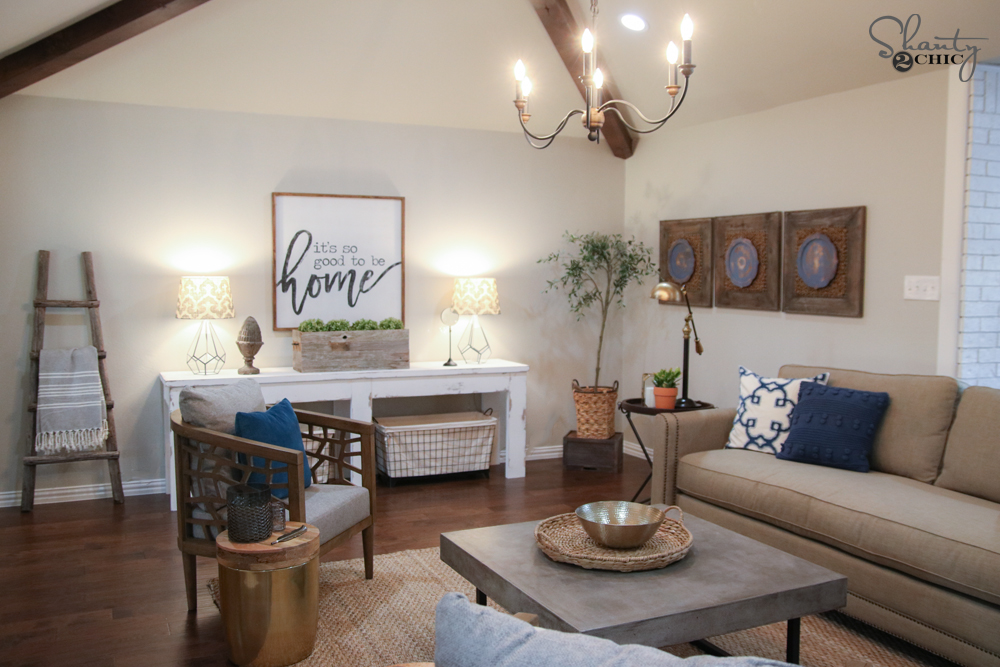
Here she is all finished up!
Oh I just love this table. It’s truly a great beginner design and project.
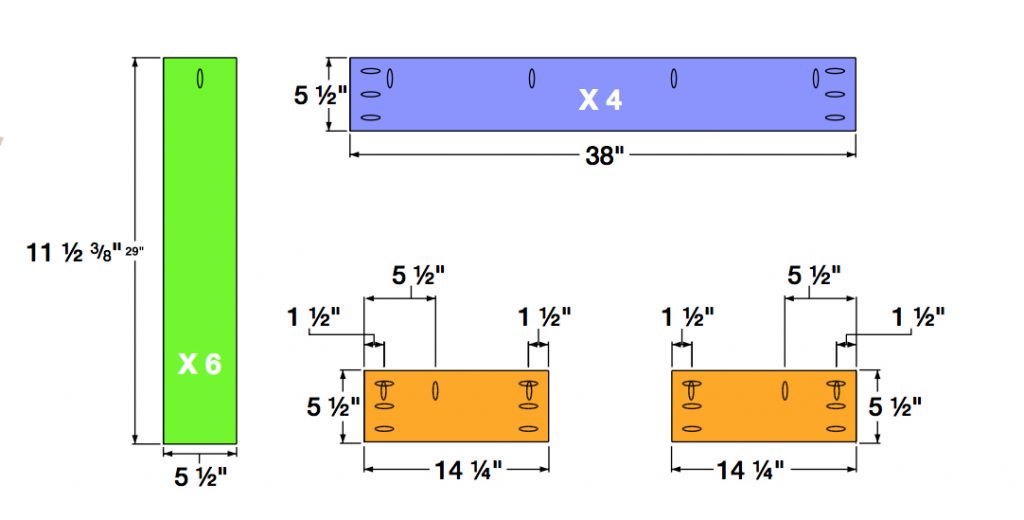
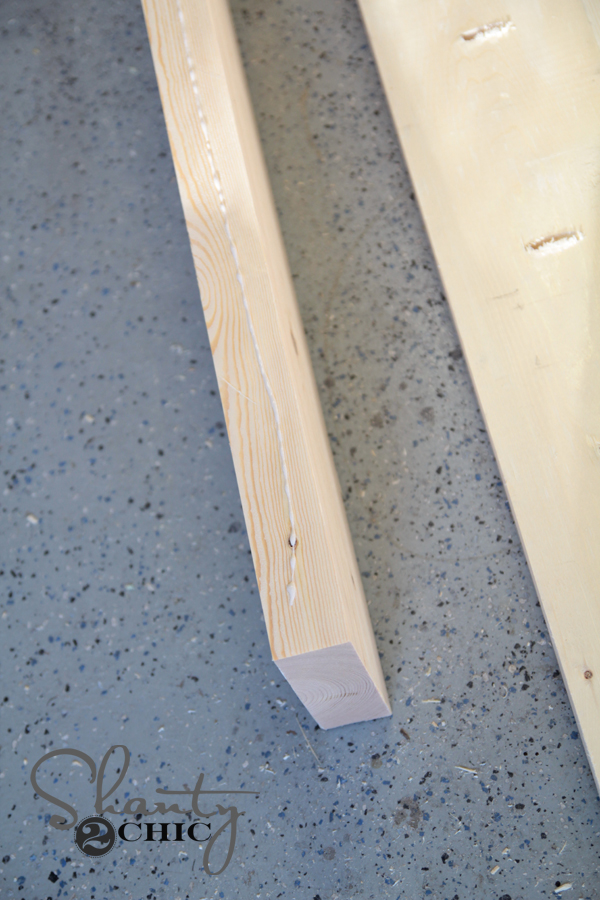
The first step I did was ripping down all of my 2×6 boards to 5″ wide each. THIS IS AN OPTIONAL STEP! Why do we do it? We love the look of the very straight edges that this gives the pieces. Some people actually prefer the look of the rounded edges… Take your pick! The only thing that this will alter is the overall length of the table and width of the top. If you choose to not rip your edges, your table will be slightly wider on the top and longer overall.
First step is making all your cuts. I used my Ridgid miter saw for this part. I cut all of my pieces before on this table. Because of the design, you don’t need to measure as you go, but you can if you want!
Farmhouse Console Table
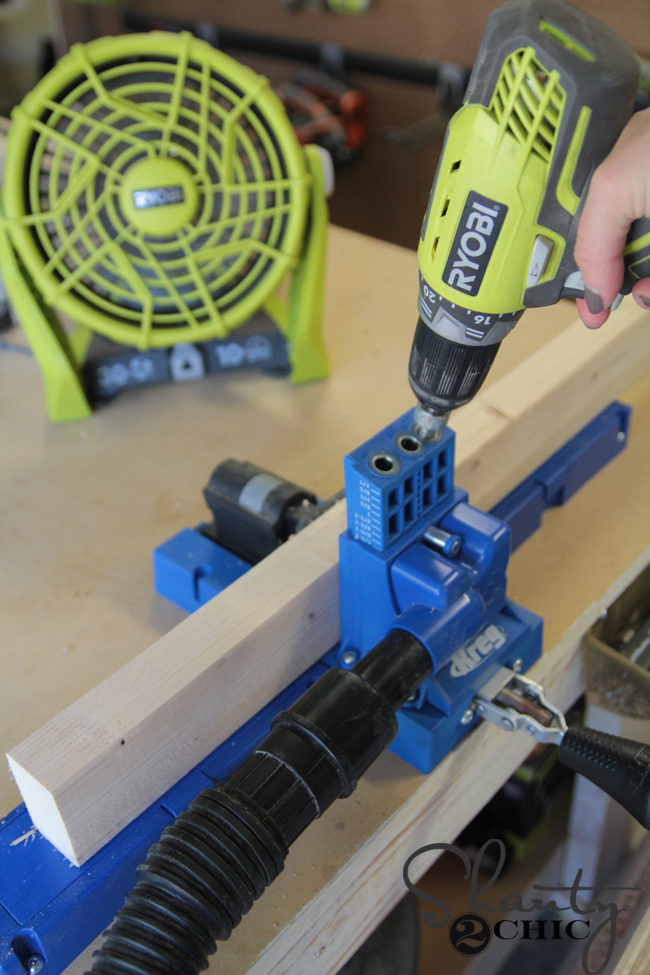
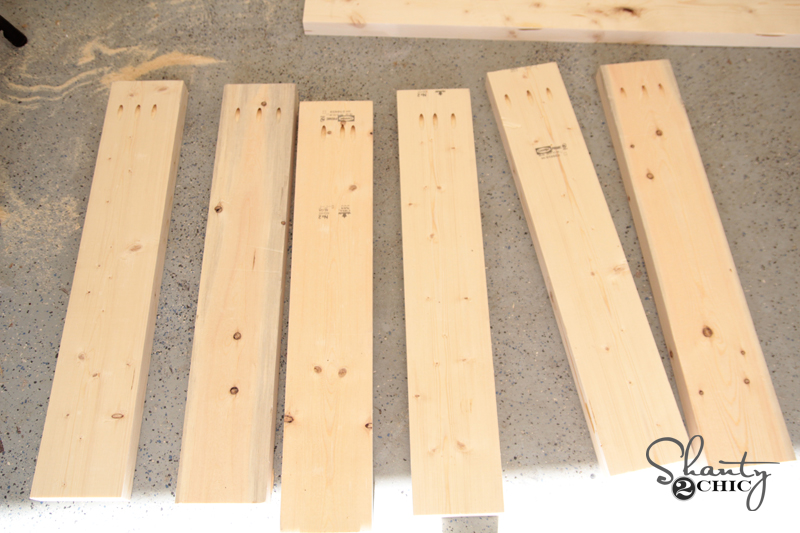
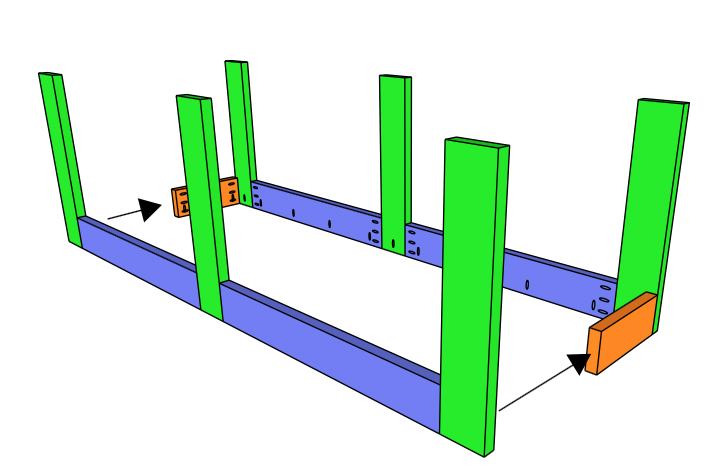
After making cuts, I added all of my 1.5″ pocket holes using my Kreg Jig K5.
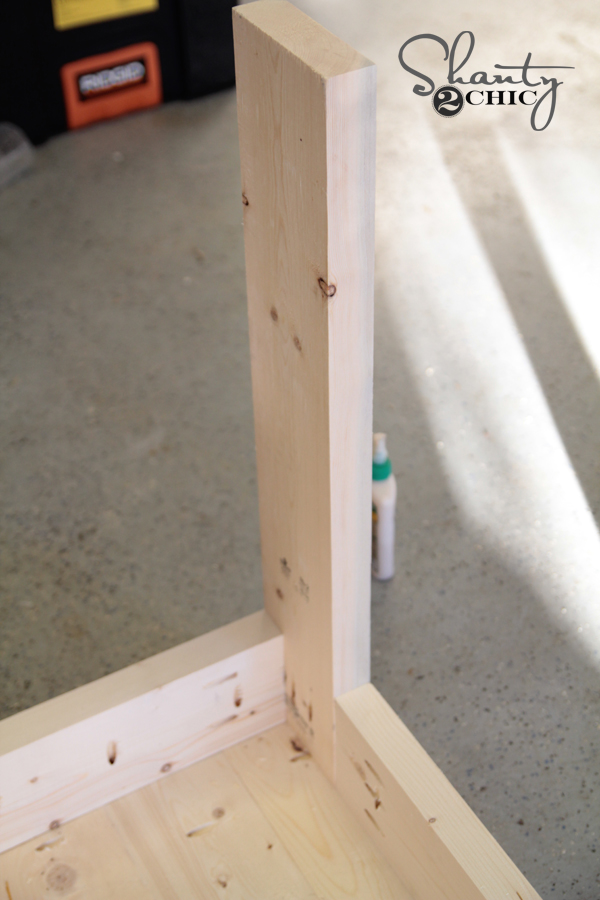
Here are my 6 legs ready to go.
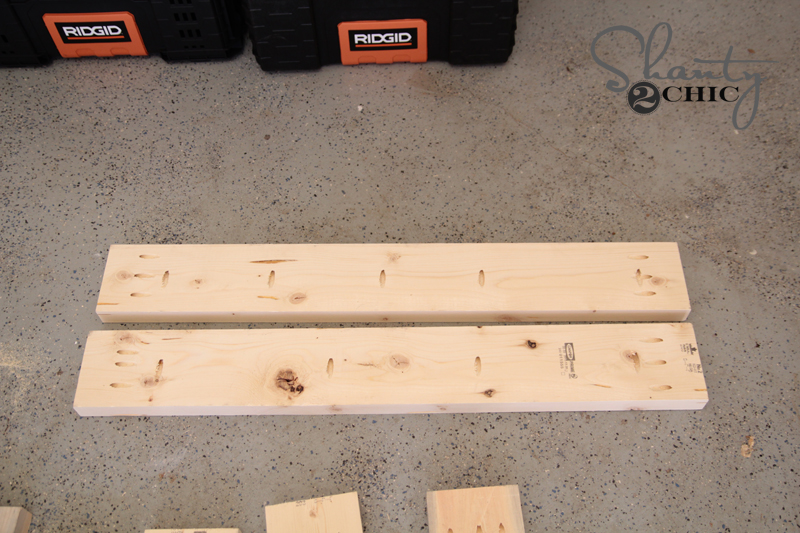
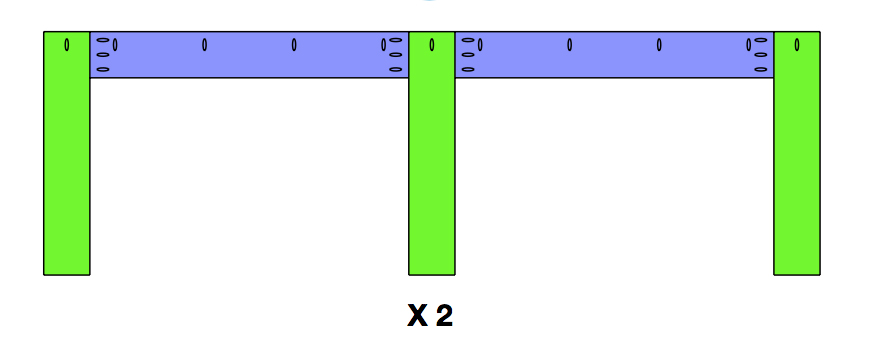
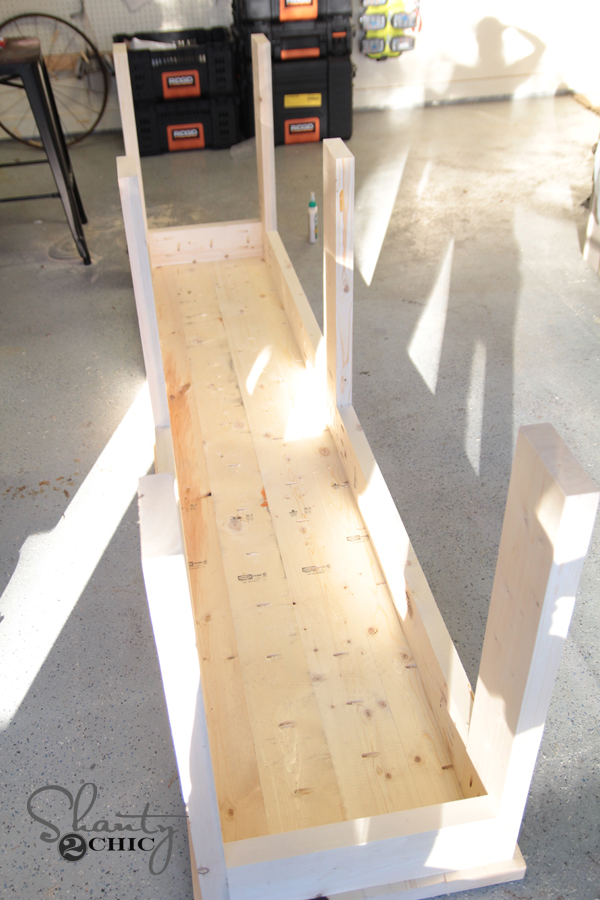
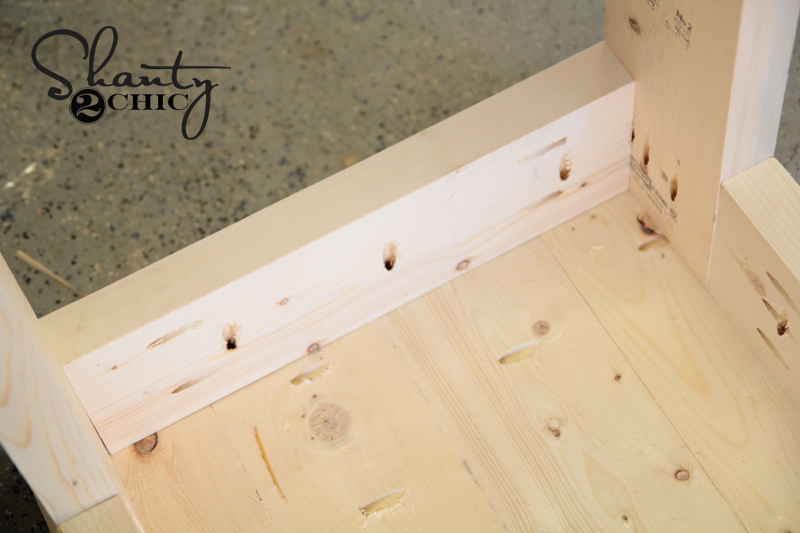
I assembled two sides separately to start. This uses 3 legs and 2 longer aprons. Make sure that your pocket holes on all your aprons are facing up. We will use these to attach the table top in a later step.
I used my Kreg Jig to drill pocket holes then, I attached everything using wood glue and 2.5″ pocket hole screws. You can check out our How to Use a Kreg Jig Video HERE!
At this point, you should have two side assemblies that look like this…
Next I attached the shorter aprons to one of my sides. These are also attached with wood glue and 2.5″ pocket hole screws. You will then attach the other side to the aprons and you will have your base complete.
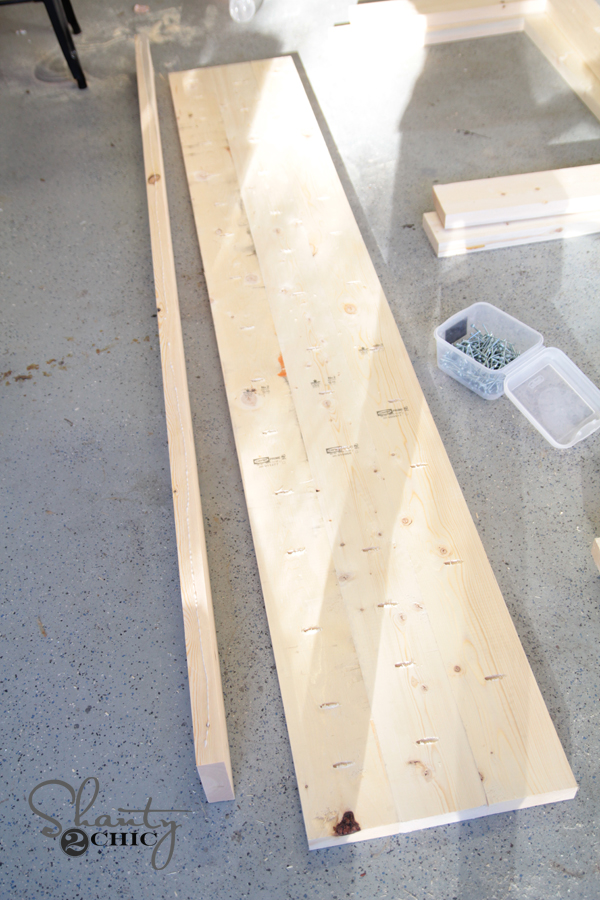
I assembled my planked top next. I used wood glue and 2.5″ pocket hole screws to attach all the boards side by side.
Next, I set the bottom of the table on top of the table top and attached the base using 2.5″ pocket hole screws through the aprons and legs and into the top.
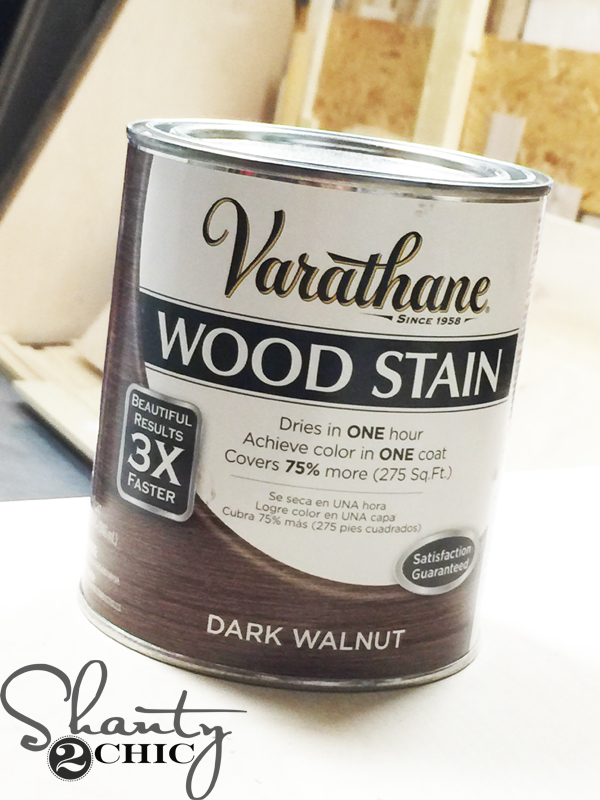
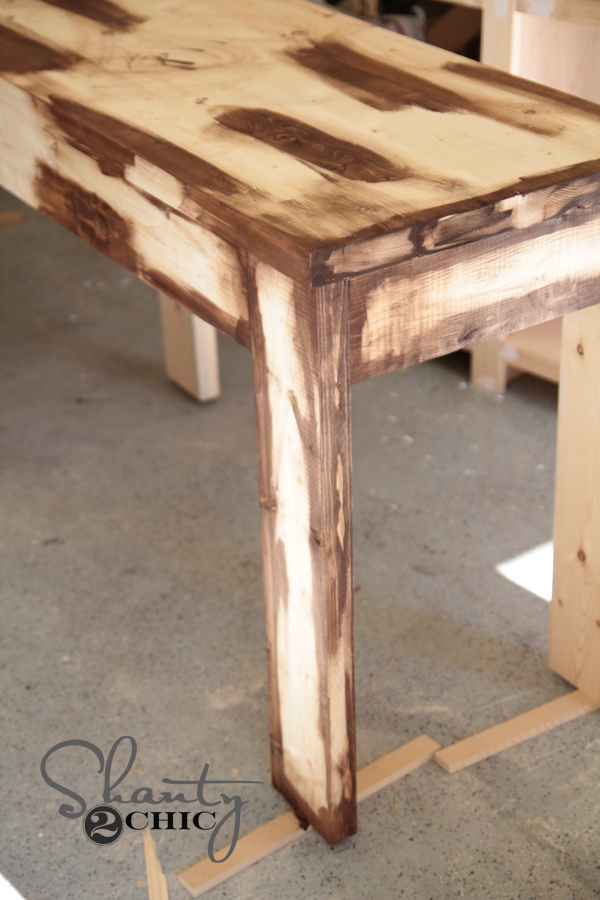
Table finished! So easy. Now to make it pretty! I started by rubbing some Varathane Dark Walnut wood stain on my joints and corners.
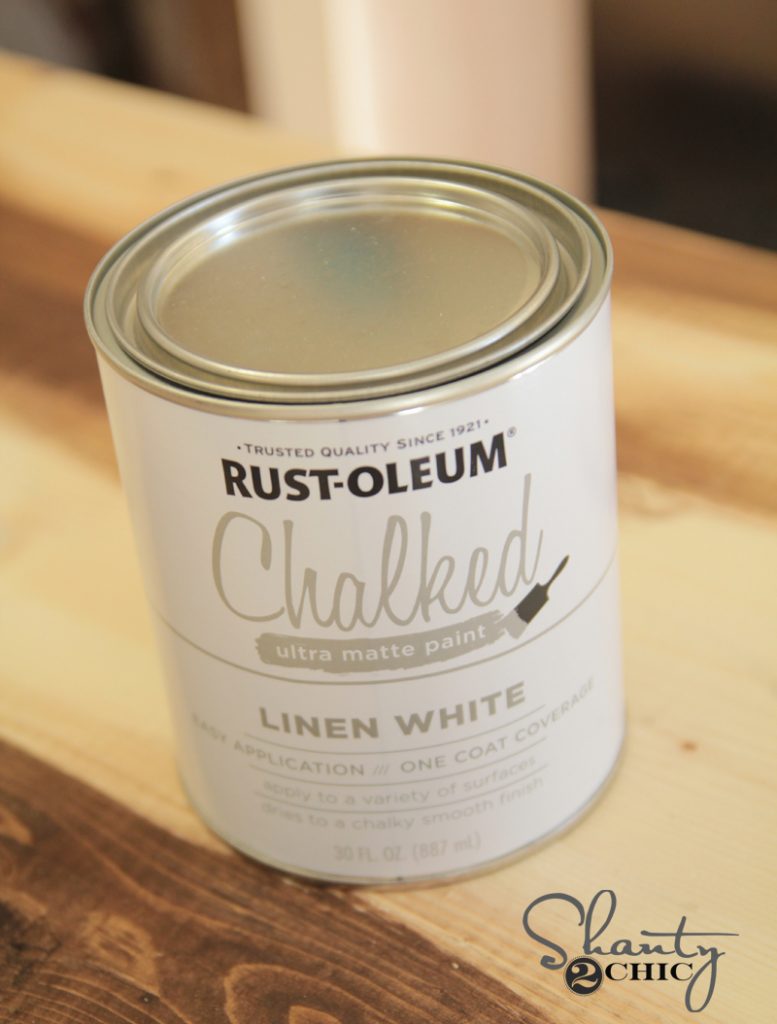
Next, I added vaseline in spots to keep the top coat from sticking in those spots.
yes, this would be good to know – Shanty-2-Chic; can you please help us understand the11 1/2 3/8” number next to the 29″ dimension? also, can we please have one of your great videos on this project? thank you!
Use the plans at www. WoodworkPlans.info for this project like I did – highly recommended you check those out too. They are detailed and super easy to read and understand unlike several others I found online. The amount of plans there is mind-boggling… there’s like 16,000 plans or something like that for tons of different projects. Definitely enough to keep me busy with projects for many more years to come haha
We are making a similar table and I would love some of those baskets like you have to put on the floor underneath. I didn’t see links to those above. Where are they from?
Beautiful table! Is the table truly 94.5in long and 30.5in high?? It doesn’t look that long in the pic and also looks taller. Waning to build it this weekend. Please help!
I’m going to be attempting the table but in the meantime, where did you get the lamp shades? I found the lamps but not the shades at World Market. Thanks!
Oh, wow! This looks easy to do and so nice! I recently got a Kreg Jig and would love to try this project to fill up space on a large wall in my kitchen. Thanks for sharing!


anyone know where else i can find these baskets? I couldnt find them at hobby lobby
Does anyone know the dimensions of these baskets? Hasn’t anyone found these similar
I love the baskets but I couldn’t find it in Hobby lobby. If you can send me the link with the basket I would appreciate it.
Can anyone explain the 11 1/2 3/8” measurement on the parts layout next to the 29” measurement?
yes, this would be good to know – Shanty-2-Chic; can you please help us understand the11 1/2 3/8” number next to the 29″ dimension? also, can we please have one of your great videos on this project? thank you!
Has anybody gotten a response to this question yet because I’m not understanding it either…..
Has anybody gotten a response to this question yet because I’m not understanding it either…..
where are the wire baskets from that are under the table – i love the whole design of the table and decor.
where is the sign from above the table ?
From the store called “at home”
Hi, Can you tell me the color of your walls? It’s beautiful!
✨?✨????????✨?✨
Use the plans at www. WoodworkPlans.info for this project like I did – highly recommended you check those out too. They are detailed and super easy to read and understand unlike several others I found online. The amount of plans there is mind-boggling… there’s like 16,000 plans or something like that for tons of different projects. Definitely enough to keep me busy with projects for many more years to come haha
✨?✨????????✨?✨
We are making a similar table and I would love some of those baskets like you have to put on the floor underneath. I didn’t see links to those above. Where are they from?
Right above the last set of pictures it says the baskets came from Hobby Lobby.
Am I doing something wrong the plans say the length is longer then then the 2x6x8
Love this table! Just what I need to make. Thank you. 🙂 I’d also like to ask where you got that “It’s so good to be home” sign? I’d love to make one
Right above the last set of pictures it shows the sign came from an Etsy store, Vine and Branches.
Beautiful table! Is the table truly 94.5in long and 30.5in high?? It doesn’t look that long in the pic and also looks taller. Waning to build it this weekend. Please help!
I’m going to be attempting the table but in the meantime, where did you get the lamp shades? I found the lamps but not the shades at World Market. Thanks!
Oh, wow! This looks easy to do and so nice! I recently got a Kreg Jig and would love to try this project to fill up space on a large wall in my kitchen. Thanks for sharing!
Why do you put stain only on the joints and corners?