We LOVE succulents. They are low maintenance and oh so cute! I have a blank wall in my dining room that is a narrow space and I haven’t known exactly what I wanted to put there. As soon as the weather warmed up and I saw succulents at my hardware store I got an idea!
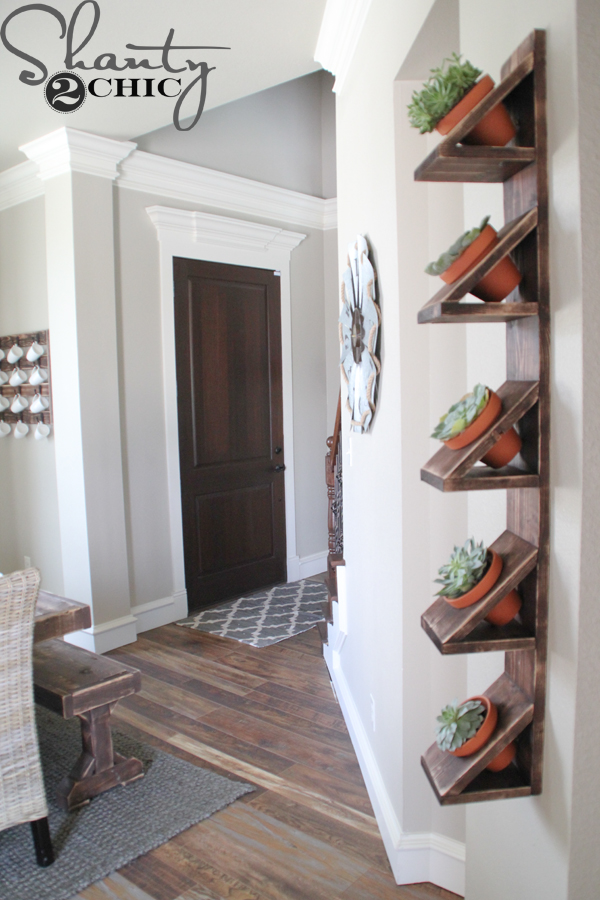
I came up with this cute Succulent Wall Planter and I built it for about $10 (the cost of 1 1x6x10)! What’s great about this piece is that it is totally customizable and easy to make as long or as short as you want!
Here’s how!

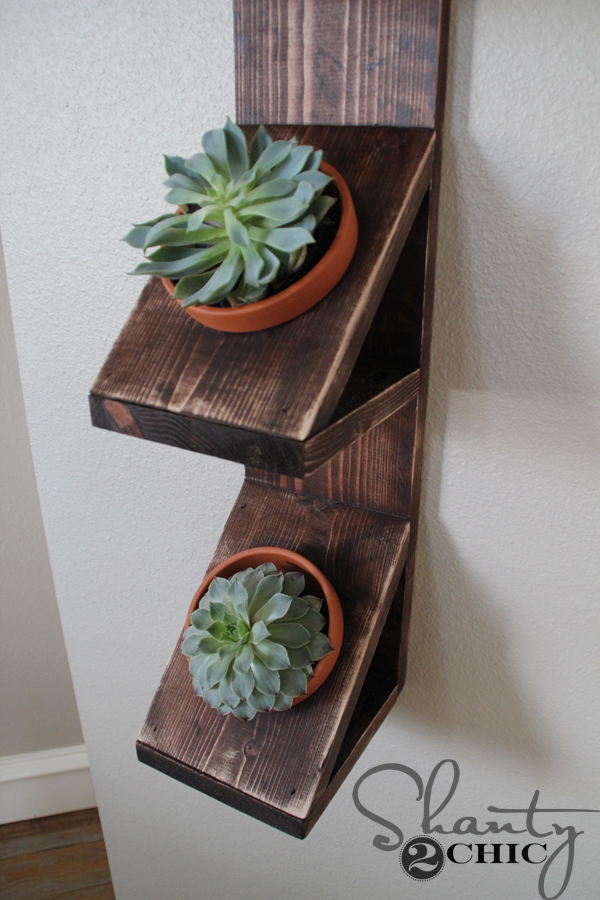
I started with 1 – 1x6x10 and cut 1 piece at 48″. Then, I cut 5 pieces at 8″ long point to long point, mitered at 45 degrees on each end, not parallel.
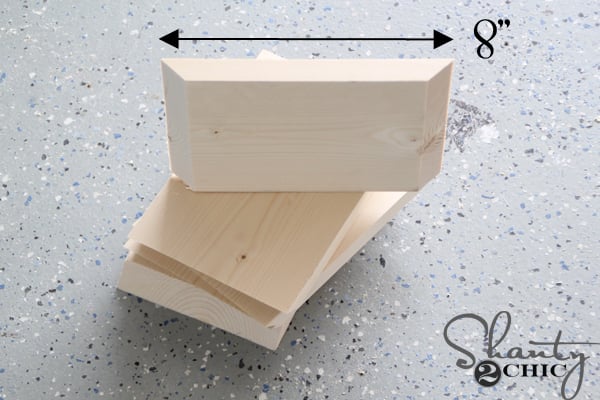
So, they will look like this once they are cut.
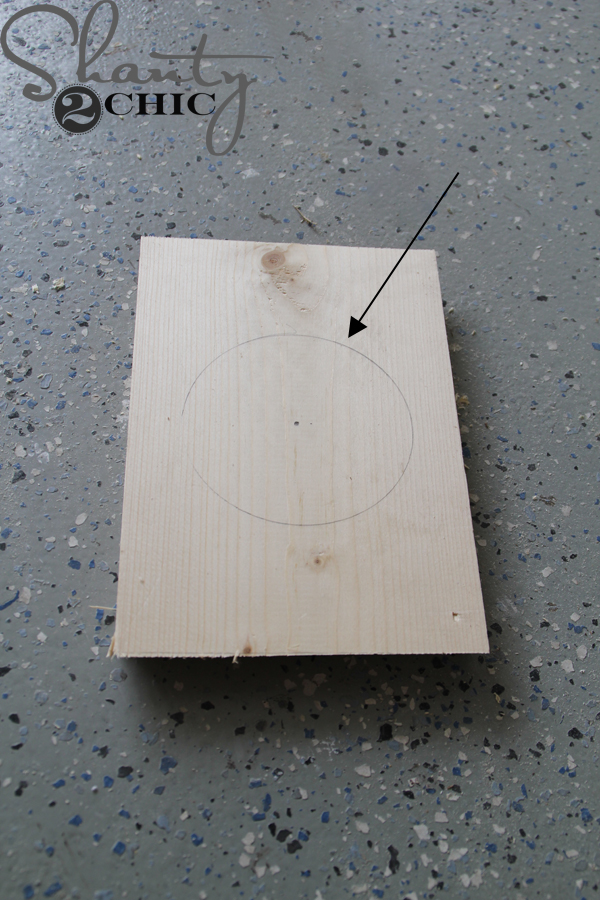
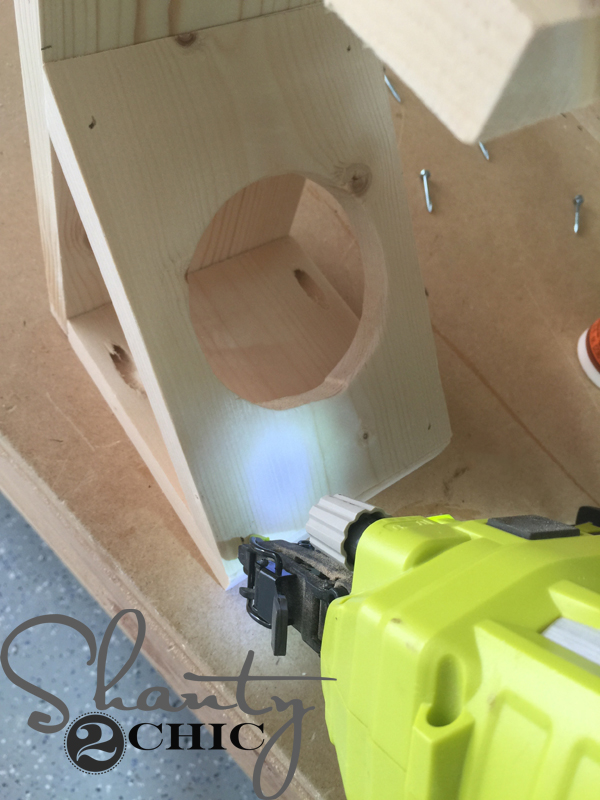
Next, I drew a 4″ circle. I found something round and traced around it. (This circle will need to be big enough to accommodate the pots that you pick so measure the top of the pot (right under the rim) so that it sits in the hole.
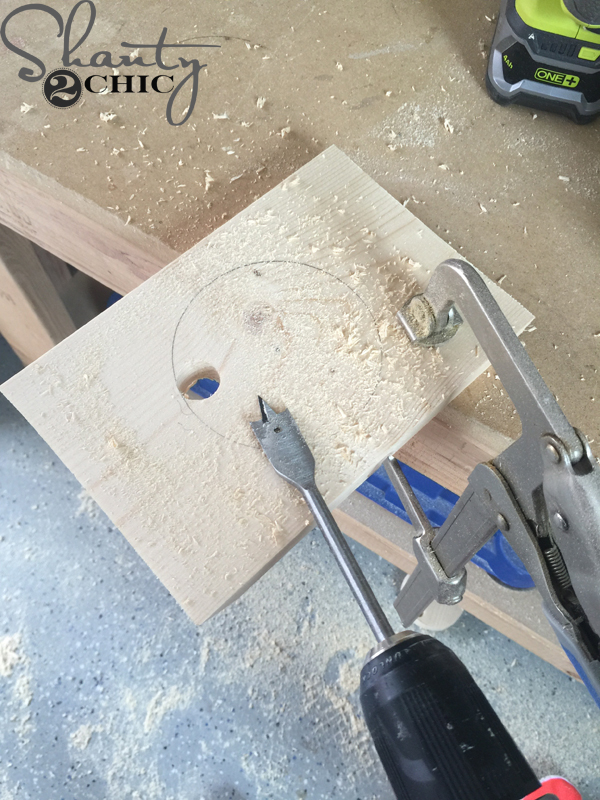
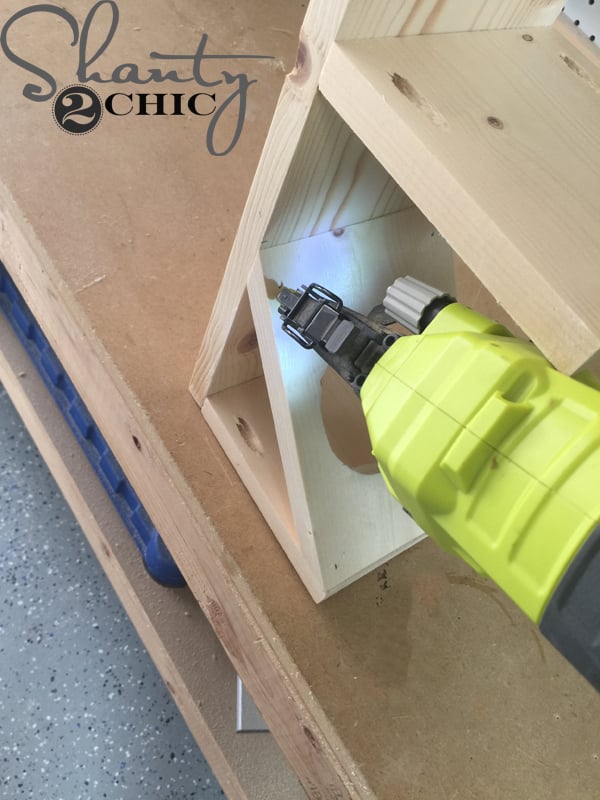
I clamped the piece to my workbench then drilled a pilot hole inside the circle. This will give me a spot to insert your jigsaw to cut the circle out.
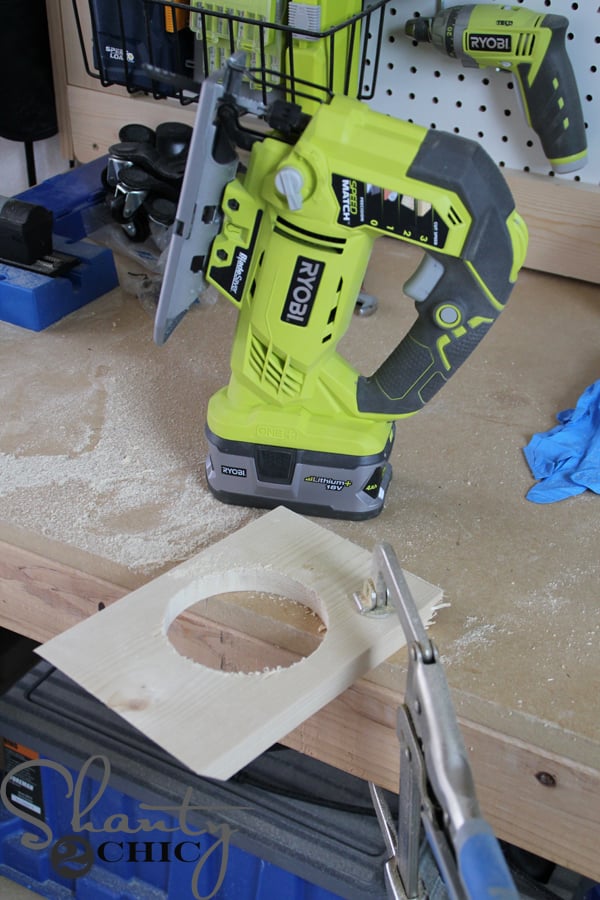
Then, I just cut the circle out with my jigsaw.
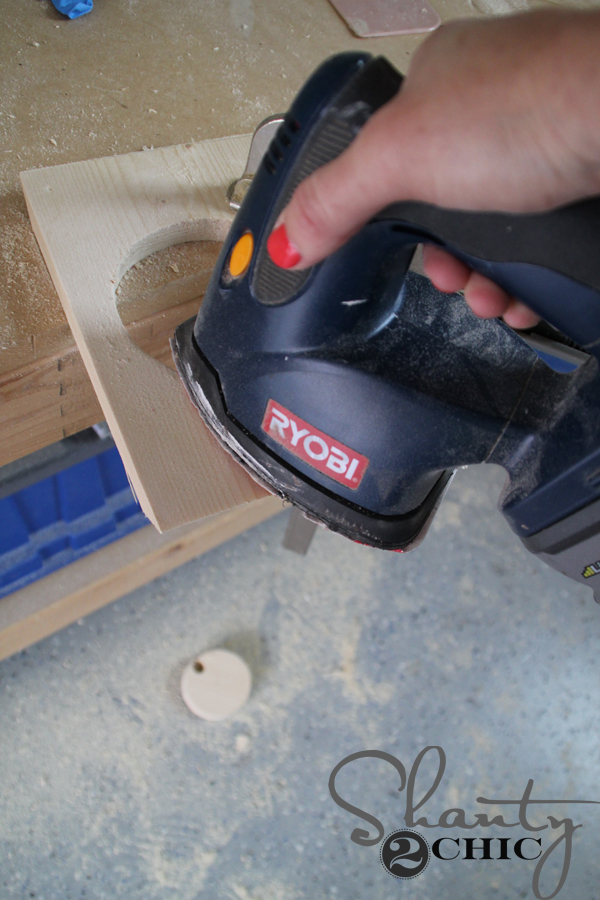
The edges were rough so I used my Corner Cat Sander to smooth them out. I used an 80-grit sanding pad.
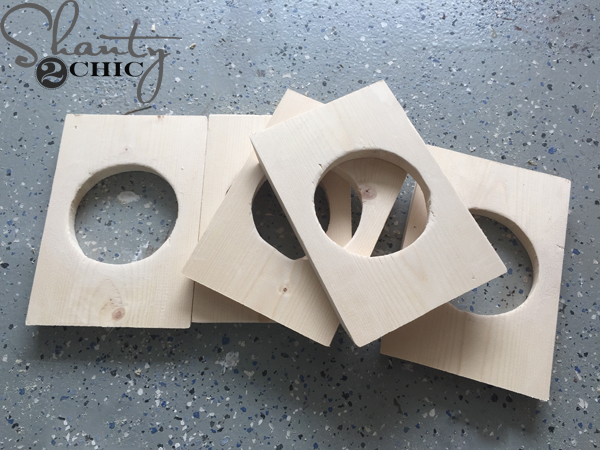
I followed by cutting holes in the other four pieces.
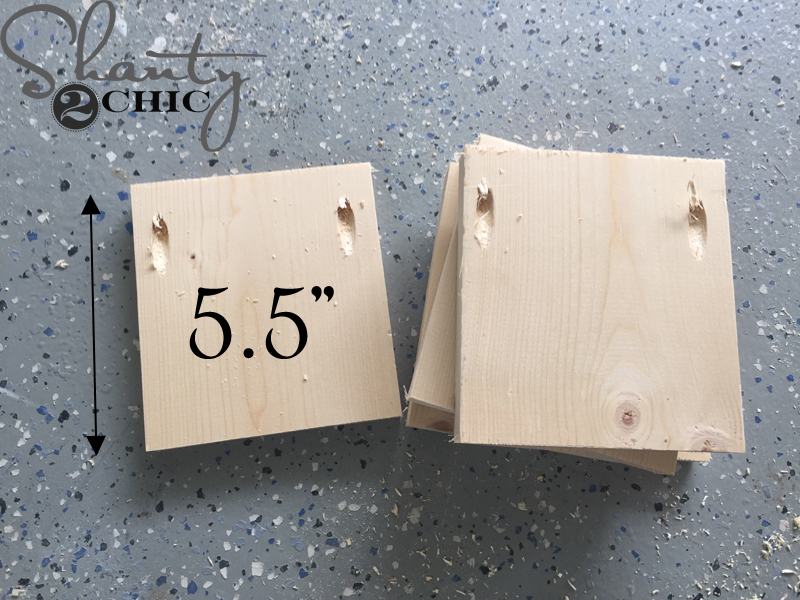
Next, I cut 5 pieces of 1×6 at 5.5″

and drilled 2 pocket holes on one end of each piece.
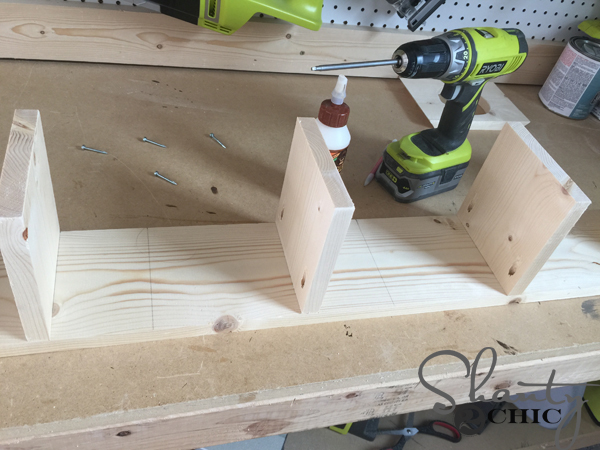
Then, I attached the 5.5″ pieces to the 48″ board with 1 1/4″ pocket hole screws and wood glue.
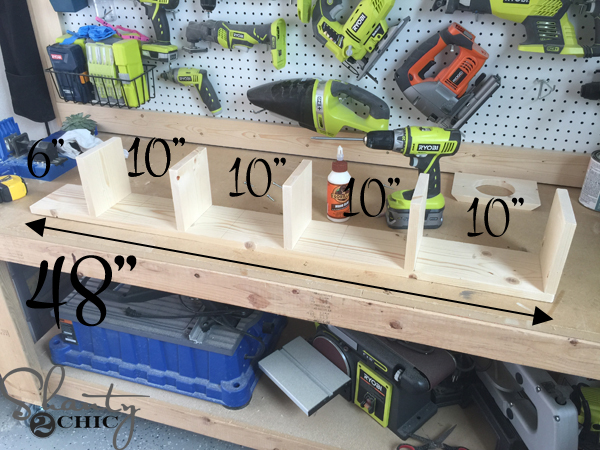
I started on one end and spaced the boards 10″ apart.
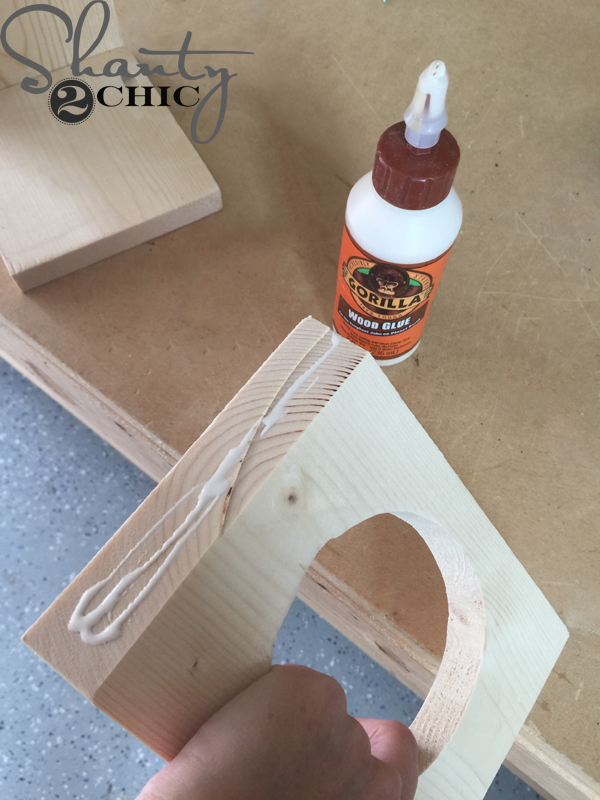
To attach the circle pieces, I applied Gorilla Glue wood glue to both ends
and used my Ryobi 18 gauge brad nailer to attach the piece to the bottom of each 5.5″ piece
and then at the top, to the 48″ piece. ( I used 3/4″ brad nails).
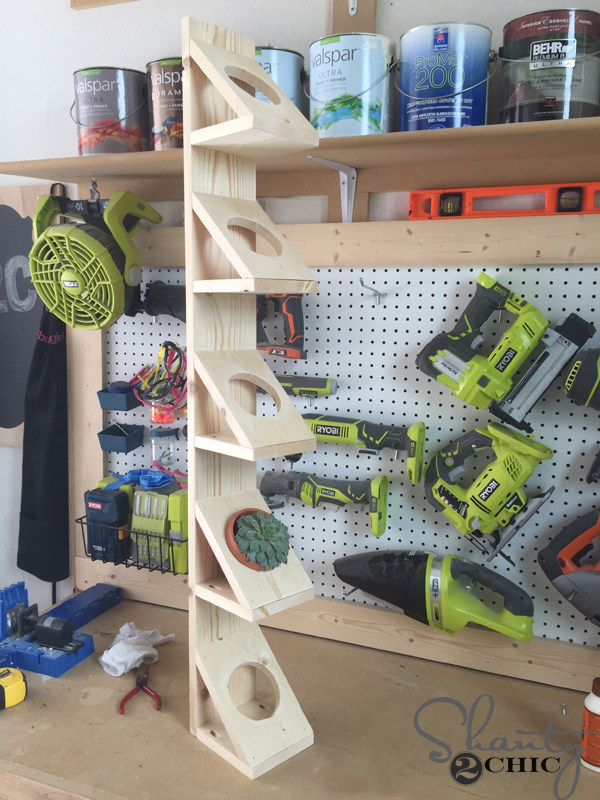
Here it is fully assembled!
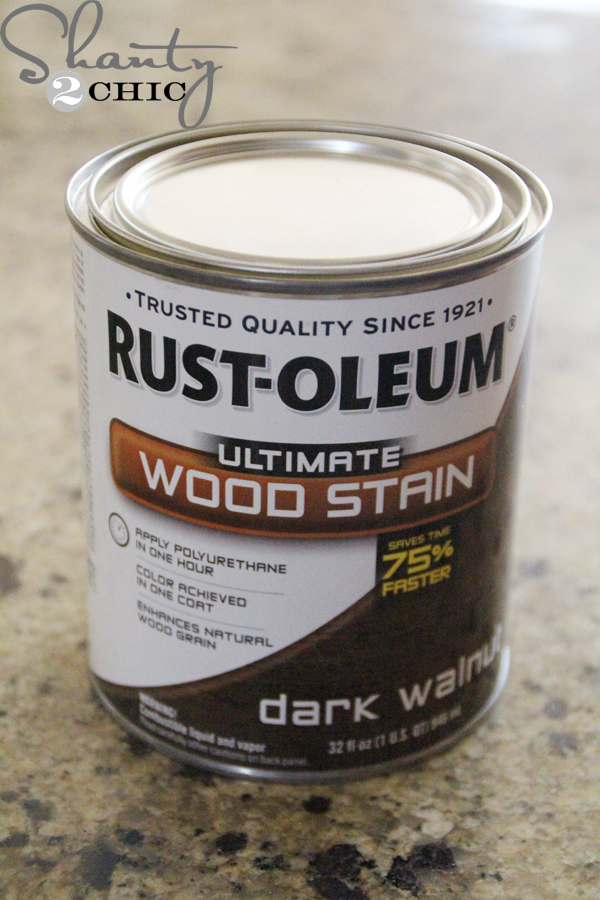

Finally, I applied one coat of Rust-Oleum Dark Walnut stain to the entire piece. I wiped it on with a clean cloth, let it sit for 5 minutes then blended the stain in with another clean cloth.
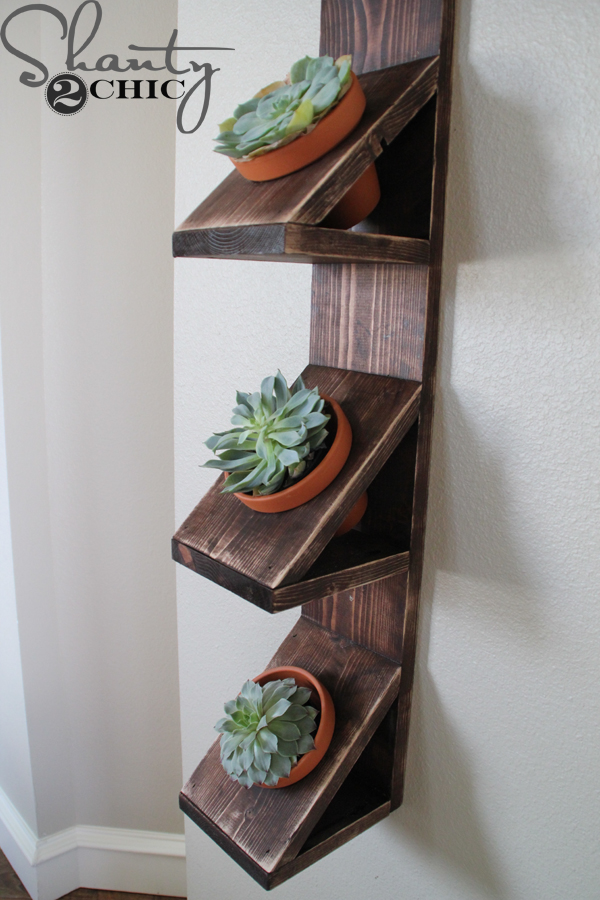
That was it! To hang it, I installed anchors into the wall and drove 2″ screws into the back of the piece. I added medium sized succulents that I found at Home Depot (about $5 each) and put them inside of the medium sized clay pots (about $1 each).
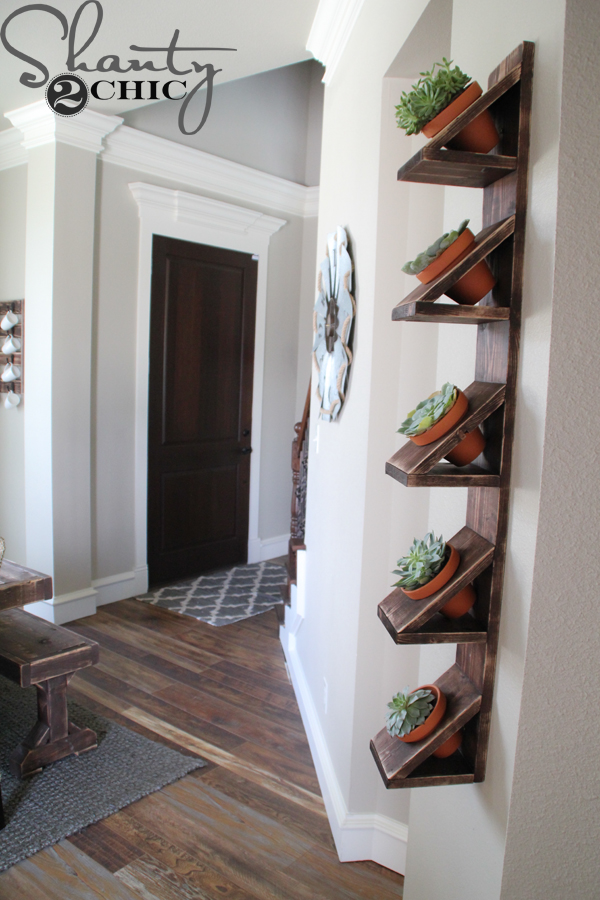
I love what it adds to this room and it was so easy and inexpensive to make!
Thanks so much for stopping by!
~Ashley

Is there a special way you water them? Wouldn’t the water warp the wood or do you take them out to water periodically?
I dont know about them, but most of the time succulents don’t need much water and depending on which types you get, a spray bottle would suffice. But yes, you could also remove them.
I love this. Going to make it this weekend. A question though.. The whole purpose of pocket screws is to try to hide them. Why not screw the BOTTOM of the shelves, instead of the top? Is there a reason I am missing?
Get the free Fowl Magnet Hedgerow landscaping plan.
Just brilliant!! I love how it matches w/your floors and bench too!!
Do you ever use a finish over your stained then distressed pieces? If so what type of finish do you use?
As usual another great project, I can’t wait to build this 🙂
I love all of your amazing projects. I’ve been able to do some of them! Love love your wood floor and crown molding – such a beautiful and warm home!