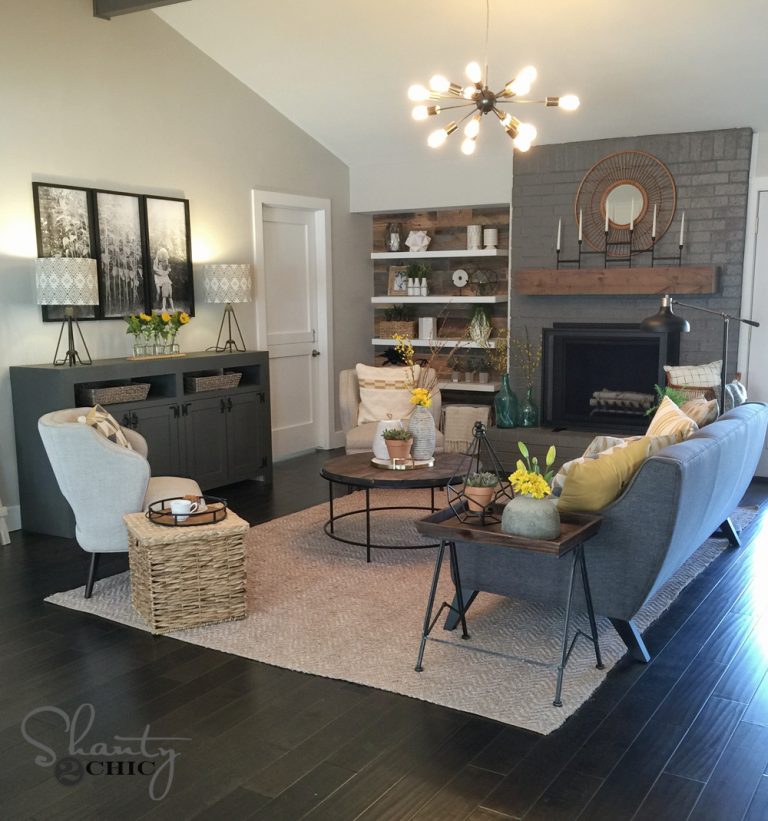
Hey friends! I am so excited about how this piece I’m sharing today turned out! We renovated the Berry’s home for them on HGTV, and one of the problems they had was limited space to store their kids toys as well as TV equipment. We wanted to give them a piece that solved both issues, and this Modern Farmhouse Media Console Table is what we came up with!

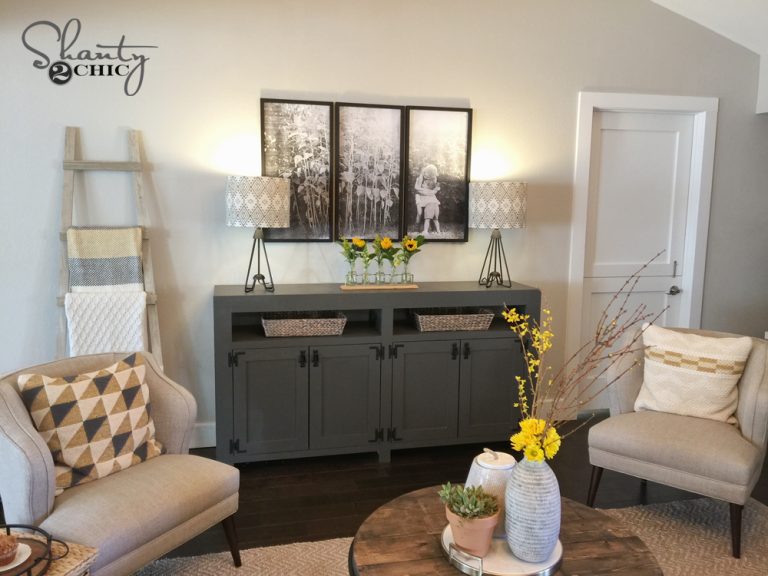
I love everything about this piece, from the hardware to the design and that paint color!
Before we get started, be sure to download and print the FREE PLANS by clicking HERE!
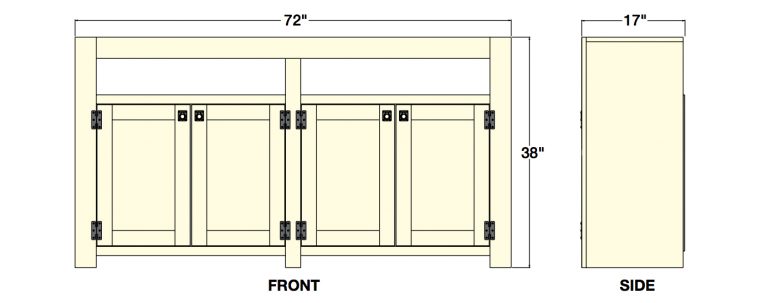
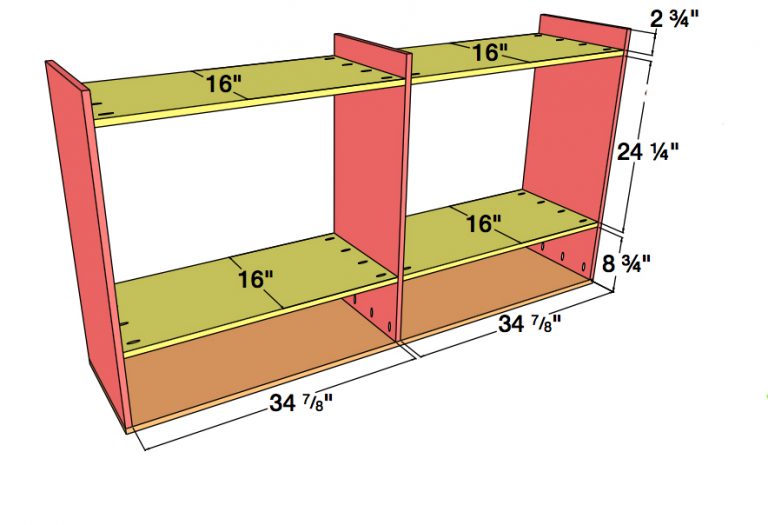
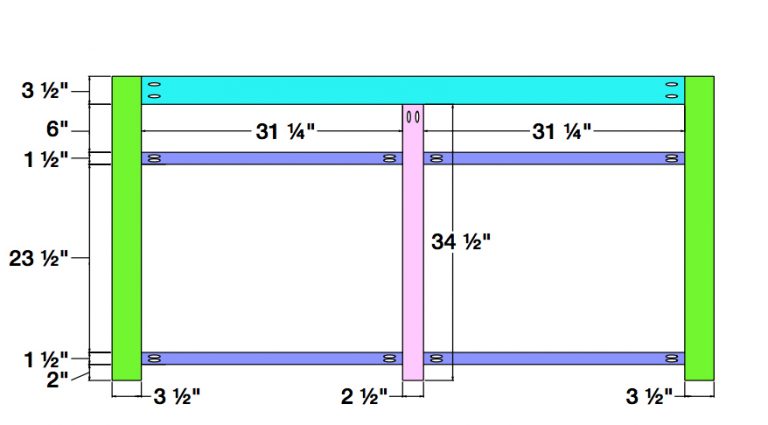
Here are the overall dimensions for this piece…
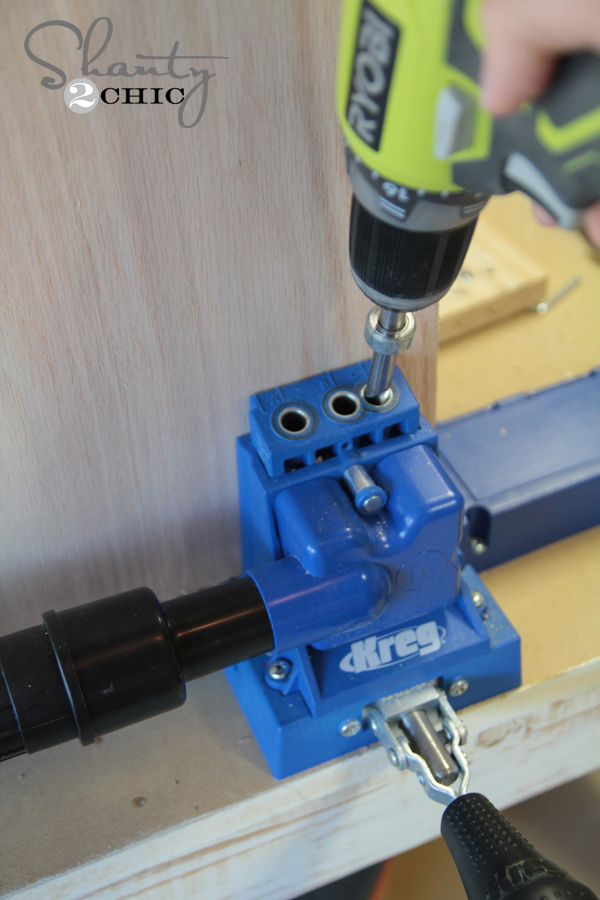
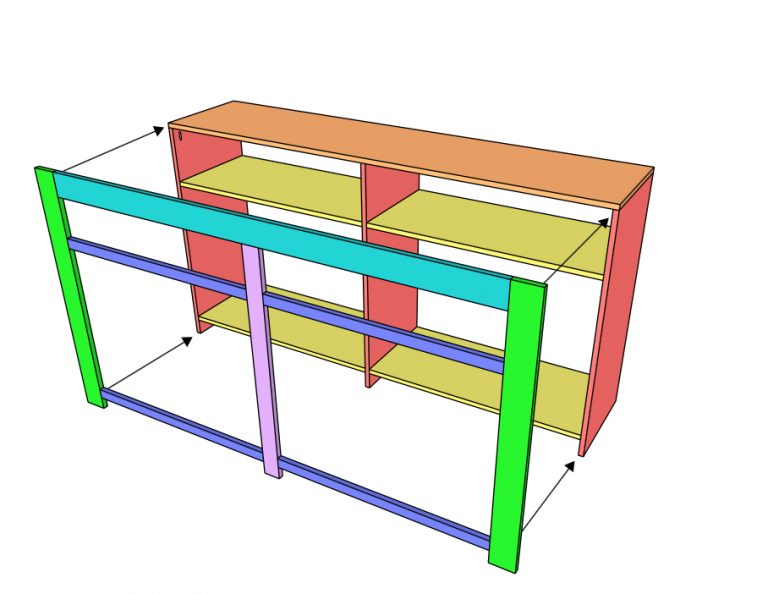
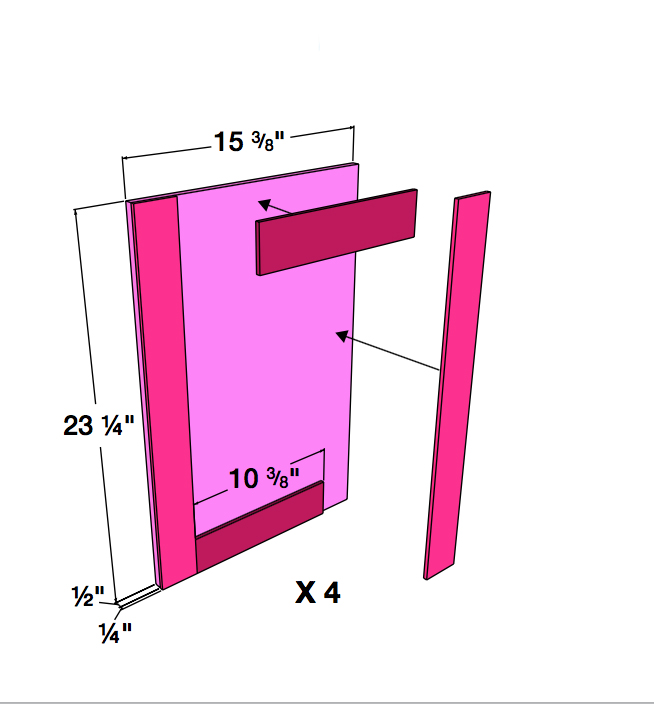
The first step to building this console is assembling the box of the piece. The majority of this table is built using PureBond hardwood plywood in Birch from Home Depot. We typically have the guys at Depot rip ours down, and we make the precise smaller cuts at home. To assemble this part, I used 3/4″ pocket holes and 1.25″ pocket hole screws using our K5 Kreg Jig. This is by far our FAV modelPeople often ask which Kreg Jig to start with. and will build small to huge projects. We have used the same model for years. You won’t regret it!
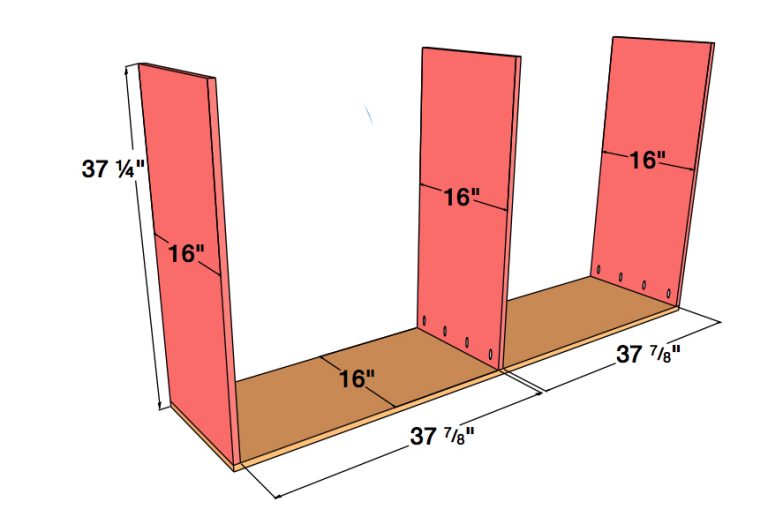
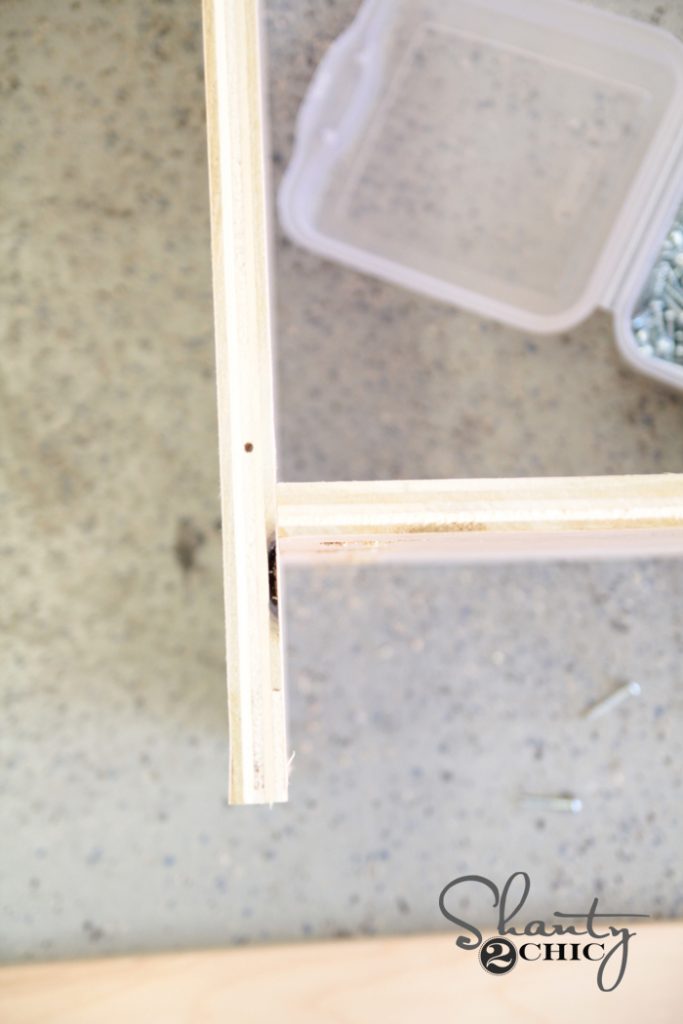
Now line up the middle shelf and base shelf using wood glue and 1.25″ pocket hole screws.

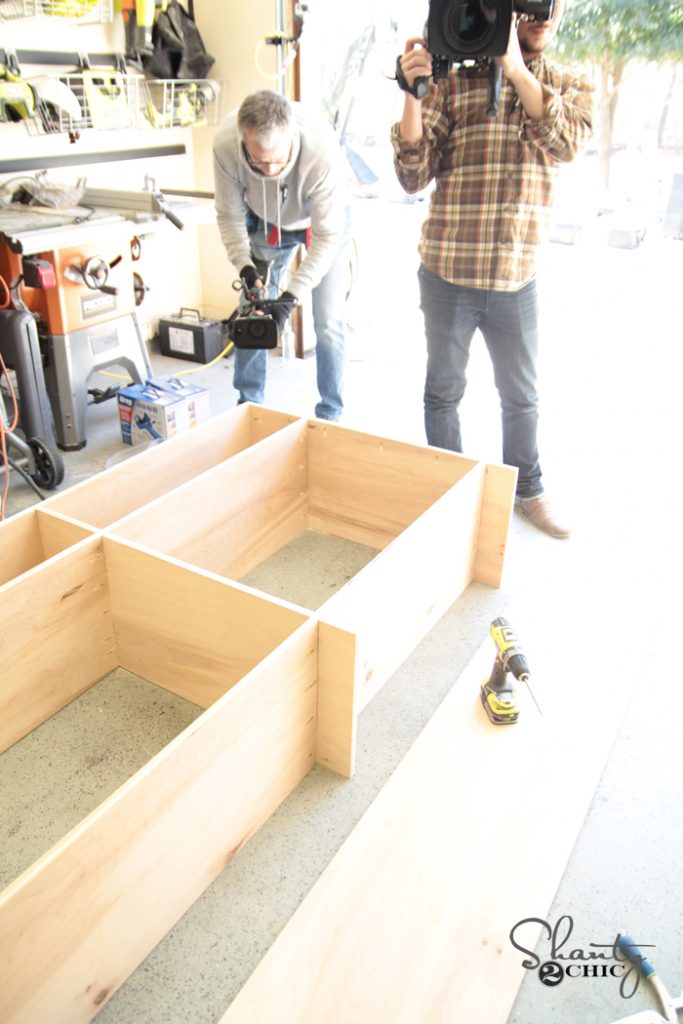
Say hi to Andrew and Stephen 🙂
You can see here how that bottom shelf is lined up from the base of the side and middle pieces.
After the base is assembled, build the front face frame of the table. This is built using 1x boards and connecting everything using wood glue and 1.25″ pocket hole screws.
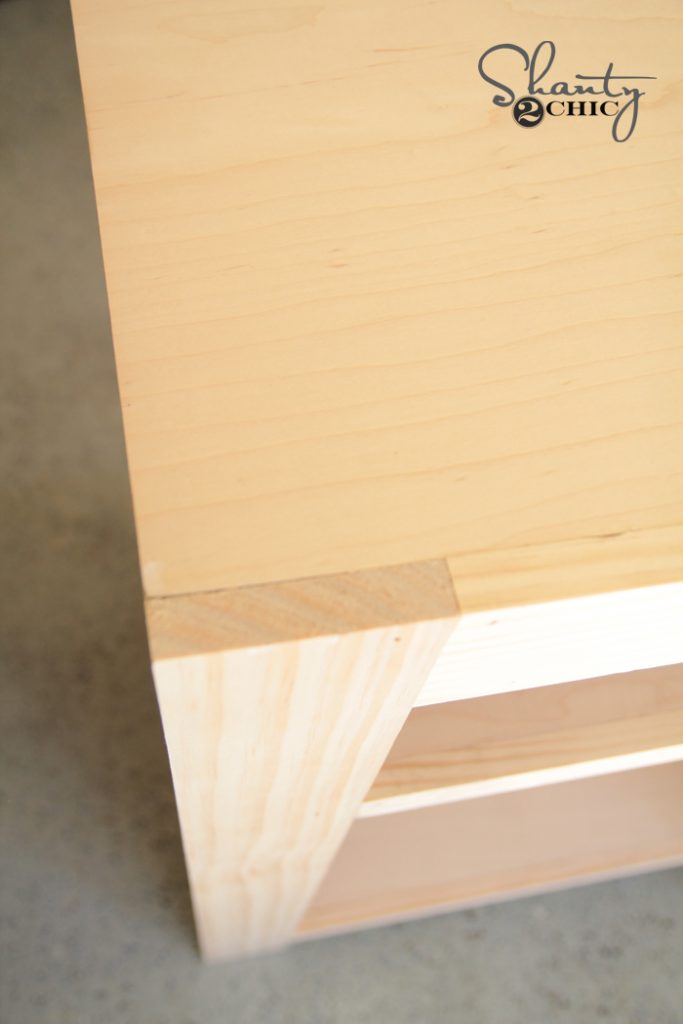
Now, attach the face frame to the box of the table using wood glue and 1.25″ pocket hole screws.

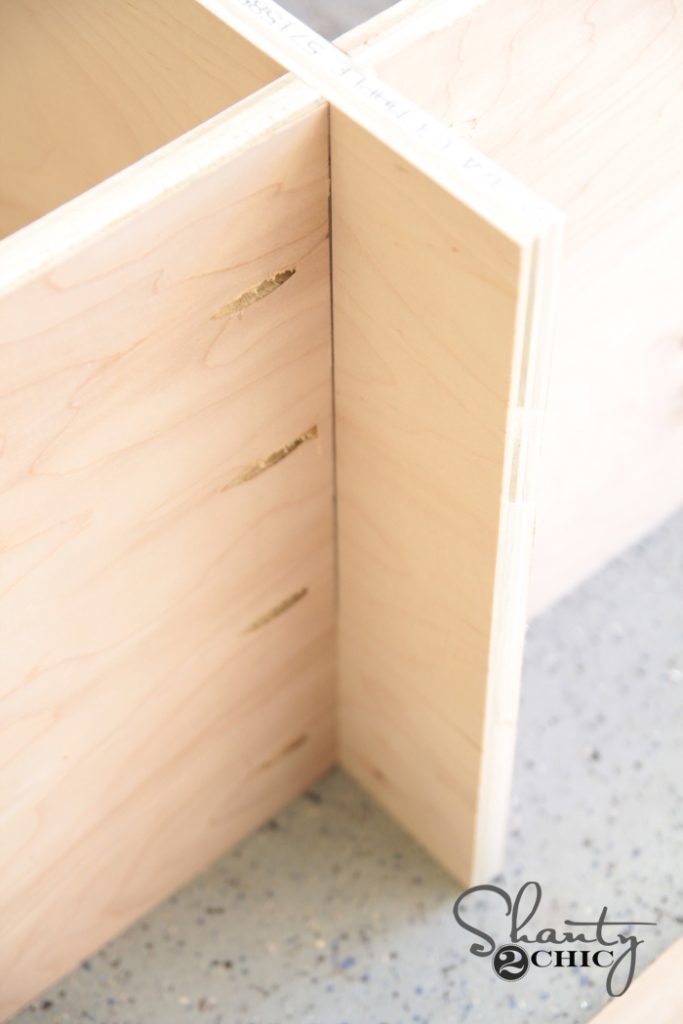
This is what the top of the corner should look like…
The top sides will show exposed hardwood plywood, but I filled mine with wood putty and sanded it down a bit before painting to give it a really smooth finish.

The back of the console is 1/4″ hardwood plywood cut to fit behind the cabinet portion. I kept the top open to allow cords to be run behind the piece. Attach the back with 1″ staples.
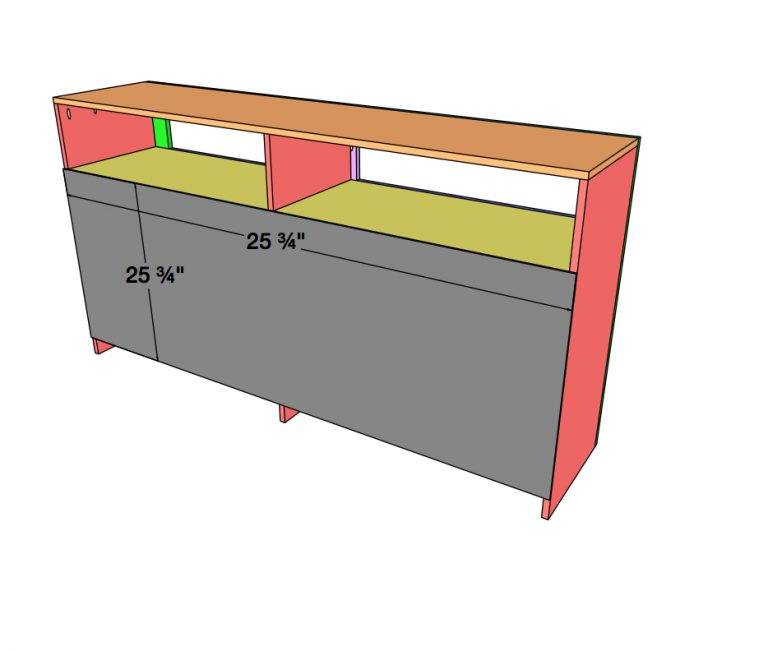
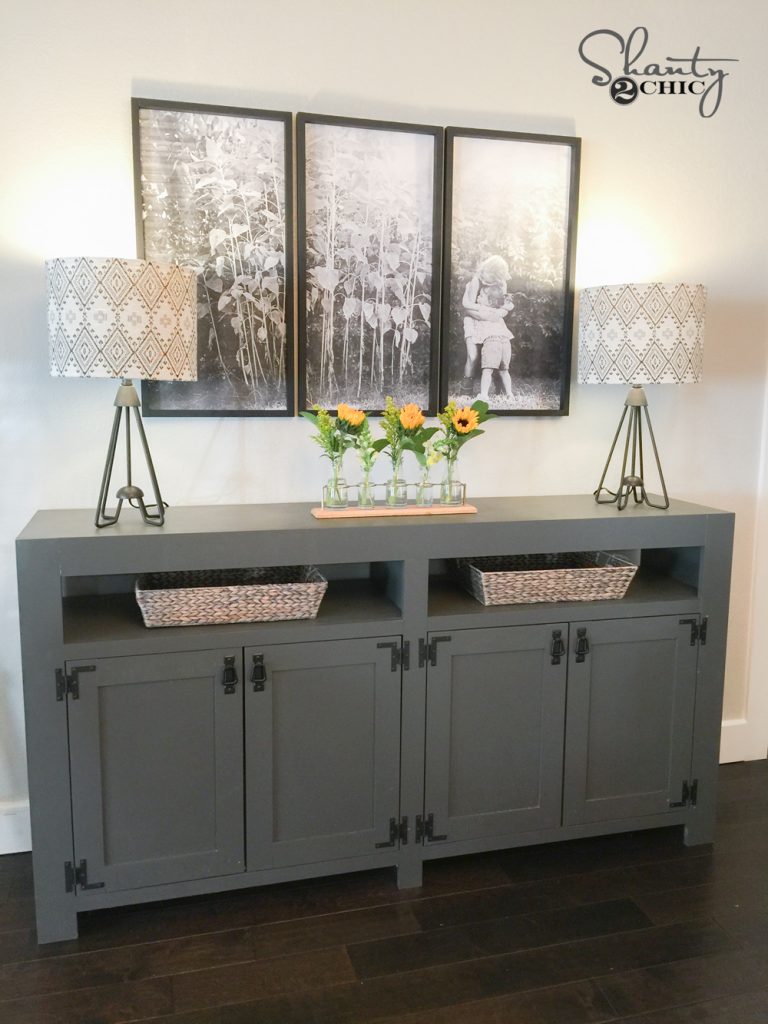
Final step is doors! These are created using panels cut to size and then trimmed in small wood pieces. It gives the piece a really modern feel and they are super easy to build too. I used 1/2″ brad nails and glue to attach the door trim.
Once that was finished, I filled all my nail holes and painted the entire thing with Urbane Bronze by Sherwin-Williams. I am a bit obsessed with this color 🙂
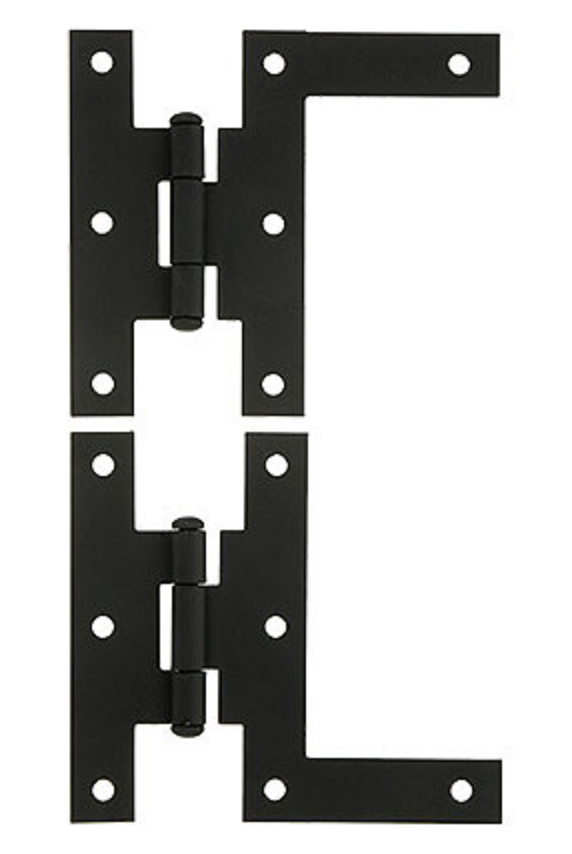
After that dried, I added the hardware. I really wanted hardware that would make this piece pop, and I found a company online that sells different and antique style hardware and fell in LOVE. It’s called House of Antique Hardware. Check them out and try not to love everything.
These are the hinges I used for the doors.
These are the pulls I used on the cabinet doors.

That sums it up guys!
I hope you love it as much as we did when we got it in their house! I almost wanted to keep it myself 😉
Here it is all finished up!
Let us know if you have any questions at all! Happy building!

This media console table has a great balance of clean design and practical functionality—the farmhouse style works really well here. For pieces like this, maintaining structural stability and finish quality over time really depends on the choice of core materials and construction approach. Using well-engineered boards like quality plywood can help ensure durability while keeping the build consistent. We’ve come across useful material insights on platforms like https://plywoodbazar.com/
for similar furniture and cabinetry applications. Excellent build and very well explained!
This is beautiful- too bad I’d have nowhere to put one… urbane bronze is my favorite- I used it in my bathroom vanity
Where did you find the 1/4×3 for the door panel trim?
How much did it cost to build this media cabinet??
Where did you buy the lamps?
Also curious what paint color you used! Love the piece!
It says in the blurb.. urbane bronze
What paint did you use to paint it? really loving that color.
Interested in building this media console table, but would like to change the dimensions. If I was to 10-12” longer will I have problems with the doors staying shut because they will be longer?
In the last picture of the whole living room where did that little side table come from that’s by the couch?