DIY King Size Bed Free Plans
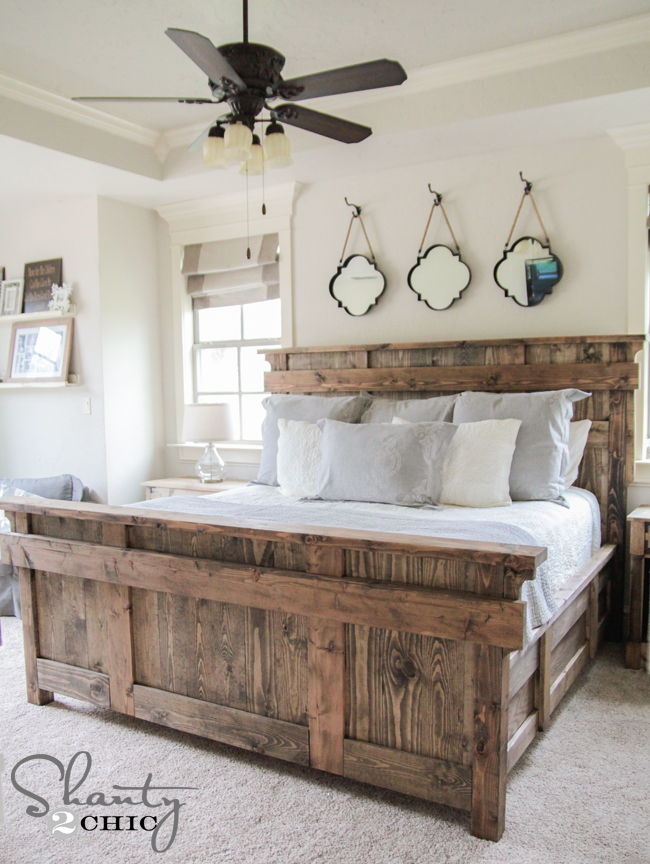
Holy guacamole. This is a big darn bed. I’m so glad I finally get to reveal it to you!
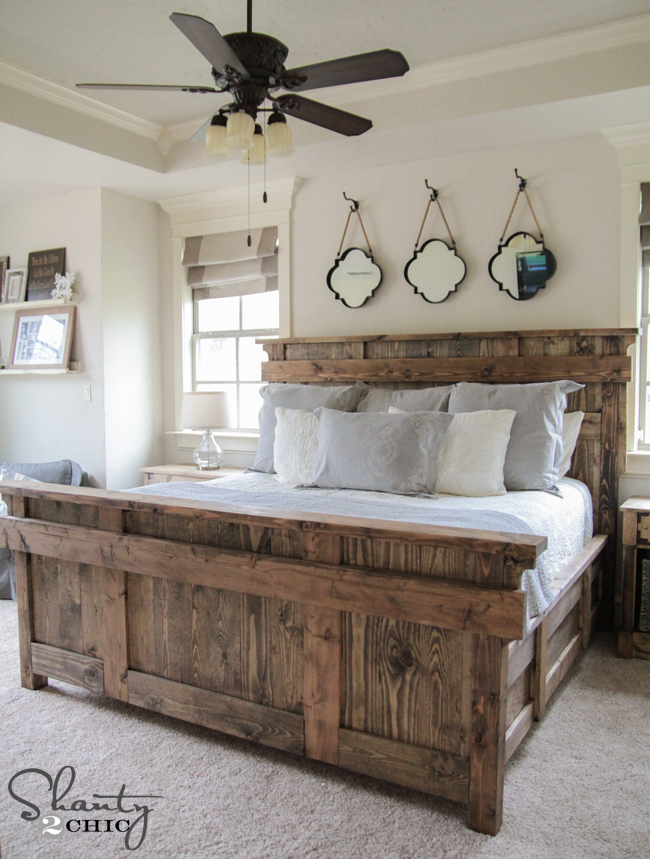
I have been wanting to build my own bed for years now. I had a beautiful store bought bed prior to this albatross. I loved it, but have always had the itch to create one myself. I ran across my inspiration at a store called Arhaus. The store is full of inspiration… As well as very hefty price tags. The original bed before shipping and tax for them was $3699.00. Nope, that was not a typo. I am happy to say that I built my version for under $400. (Insert happy dance) Check it out… My new DIY King Size Bed Free Plans!
Yah. I love it. A whole lot.
As always, I will walk you through this entire build here (with 42 photos… you have been warned) and you can also download and print the free plans at the bottom of this post!
Let’s get started! I imagine writing this tutorial is going to take longer than actually building the bed, so let’s get a move on.
DIY King Size Bed Free Plans
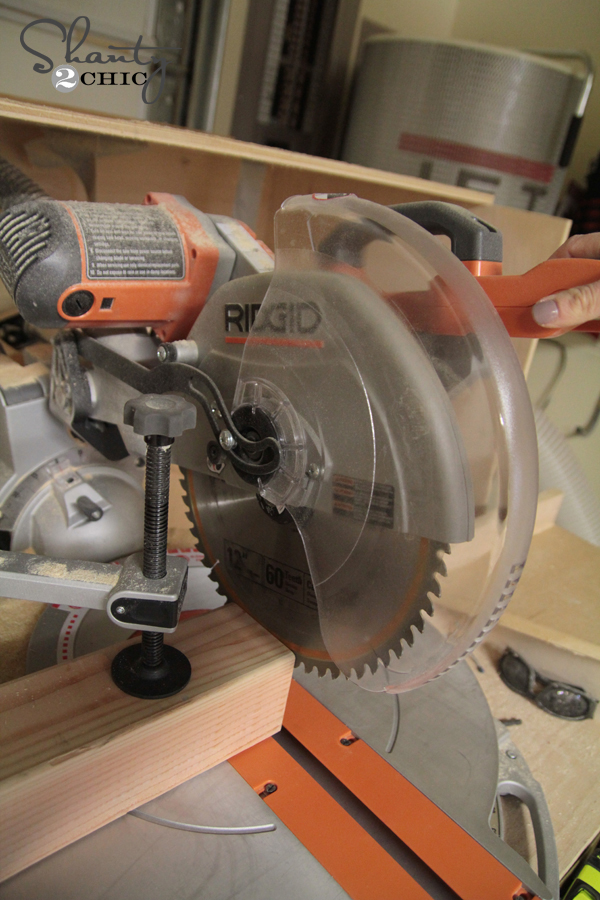
The posts of this bed are 4×4. These are untreated boards and can be found at both big hardware stores. You won’t be able to cut through a 4×4 without a 12″ miter saw. So, if yours is smaller, you can have the hardware store make these few cuts. You can also use a hand saw with a little elbow grease. Or, upgrade your saw! I use Ridgid’s 12″ sliding compound miter saw, but I am so pumped to try out Ryobi’s new 12″ sliding miter that comes out in a few weeks!
Watch our How to Use a Miter Saw video HERE!
I decided to attach all of the planks before building the actual headboard support so I could get an exact measurement. I used white wood boards to keep the cost down, and I love how rustic they look when stained. I used my Kreg Jig for this entire build. I use the K5, but I also own the K4 and the new Foreman. I love every single one of them for different reasons. If you are looking to invest and get one, I would go for the K5. It’s a small amount more than the K4, but I find that it’s much more user friendly and has lots of upgrades that make it my fav. And, it’s easy enough for a beginner. In fact, I would suggest beginning with a Kreg Jig. They make building much easier.
Watch our How to Use a Kreg Jig Video HERE!
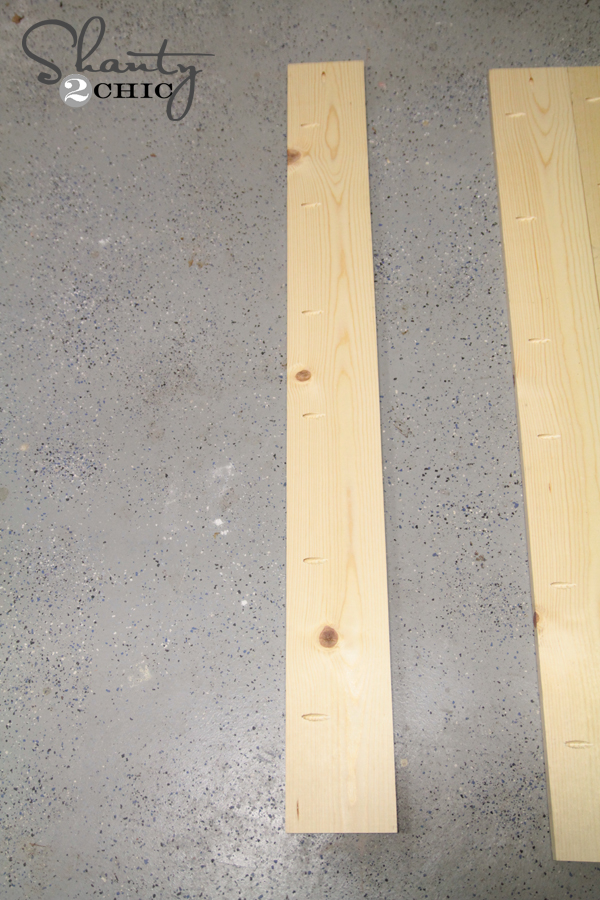
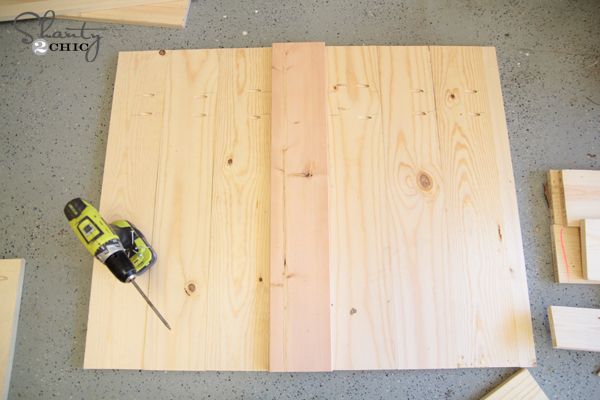
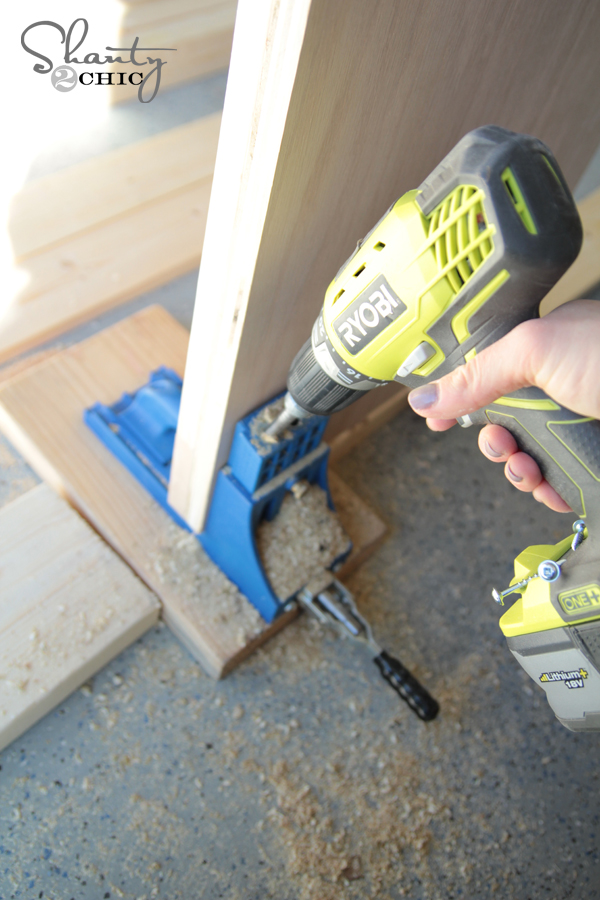
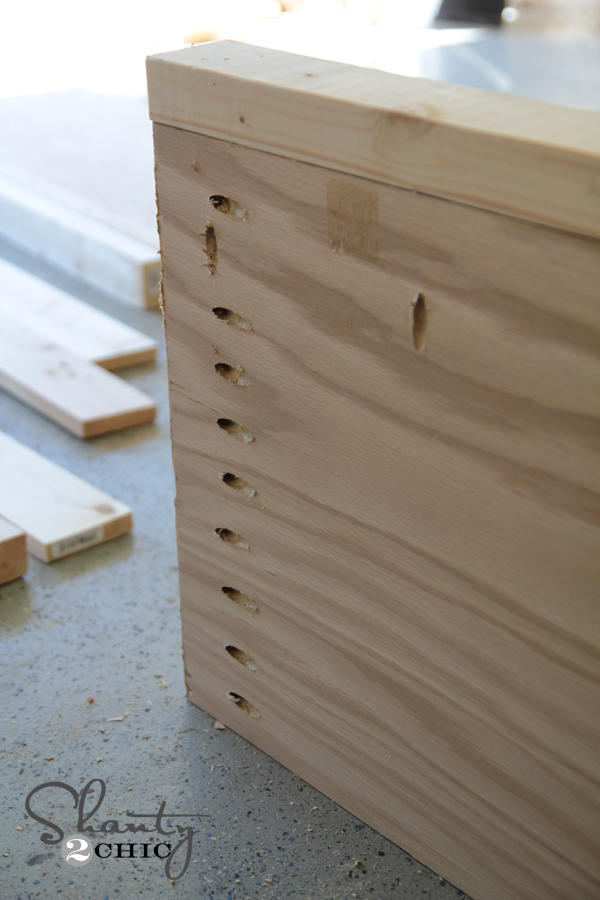
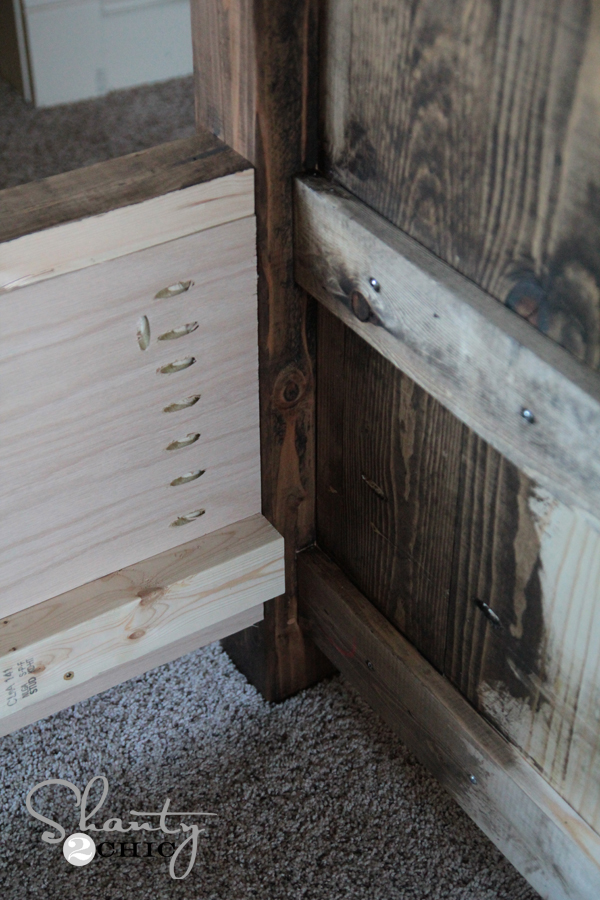
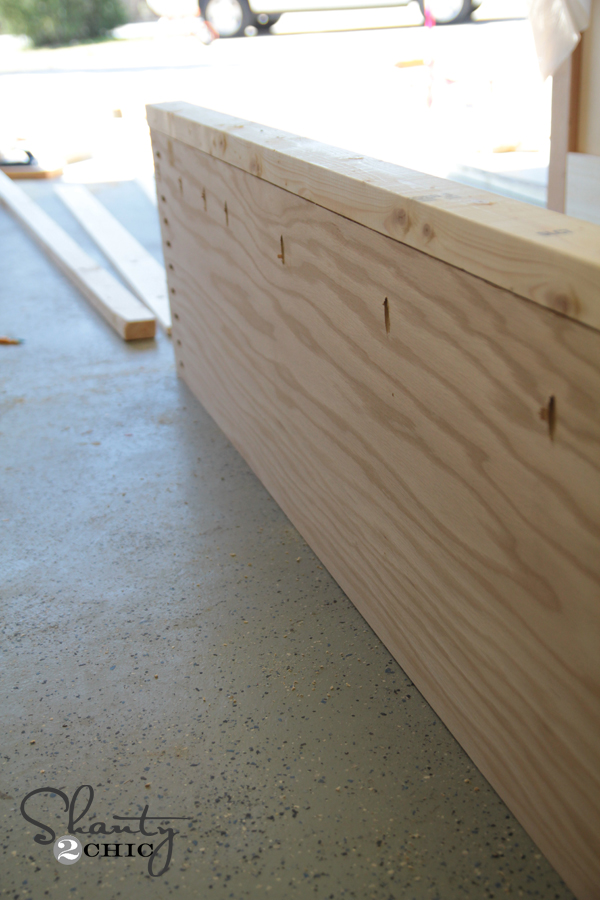
Let me explain how I did the pocket holes on the headboard. This uses 1×6 and 2×6. I didn’t do pocket holes in any of the 2×6. I did most of the planks with 3/4″ pocket holes down one side like this…
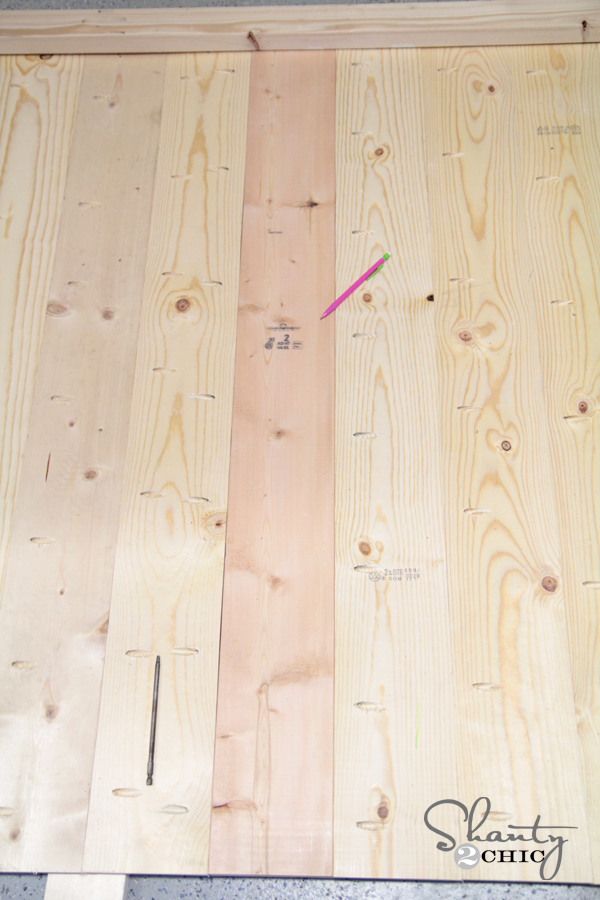
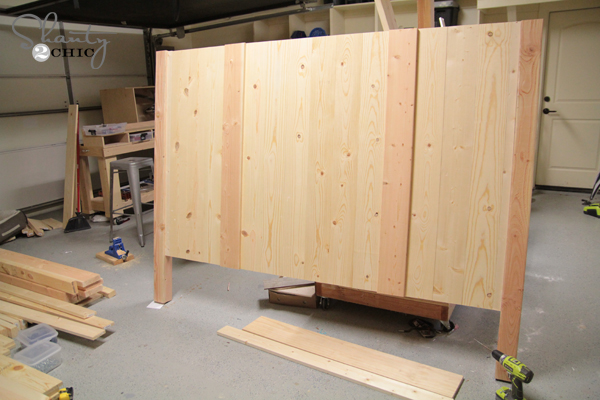
When I lined all of my boards up, you can see that on the boards sitting next to the 2×6 boards, I did pocket holes down both sides. This allowed me to attach into the 2×6 as well as the next plank.
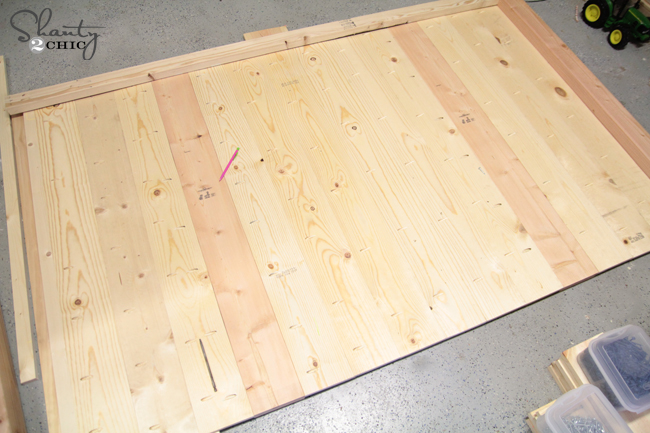
Here it all is laid out and you can see where all of the pocket holes were positioned…
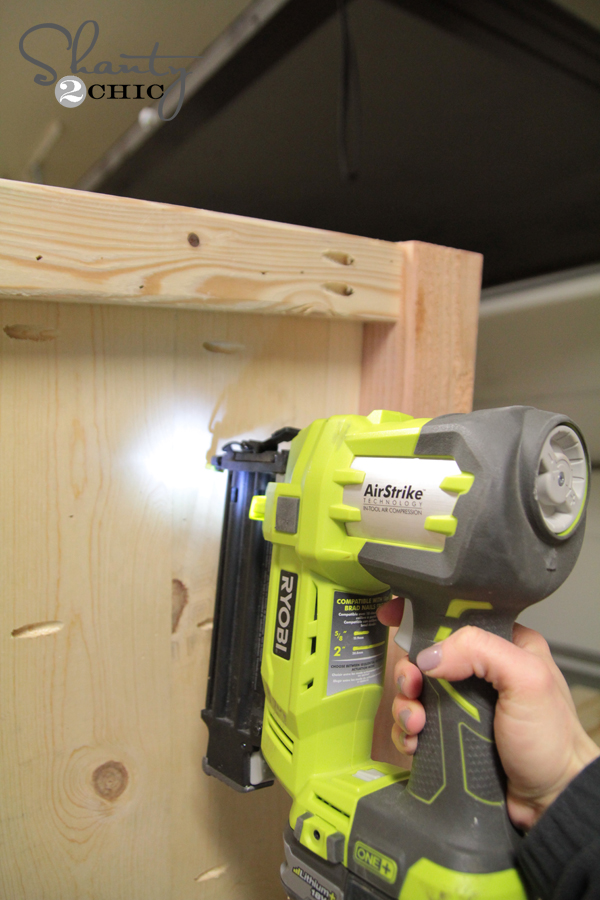
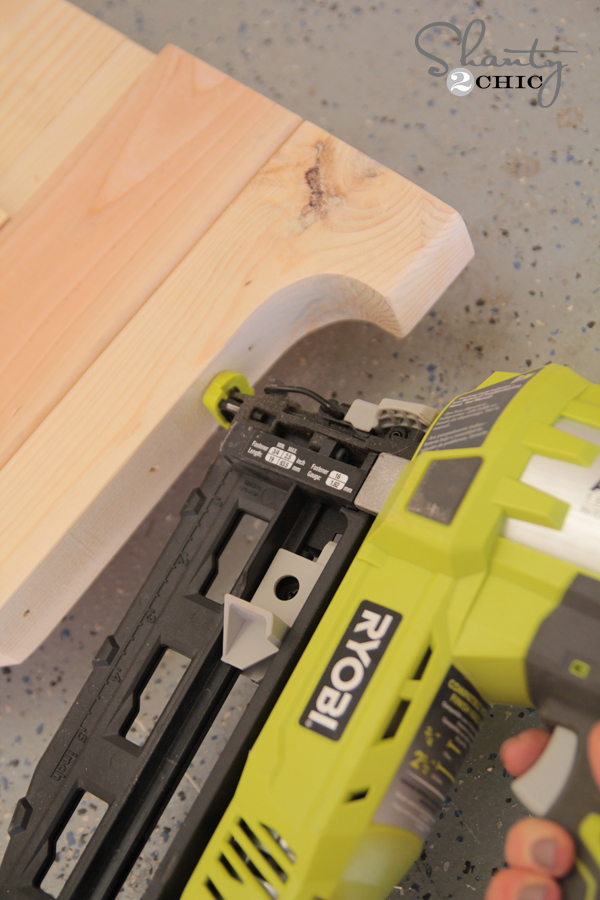
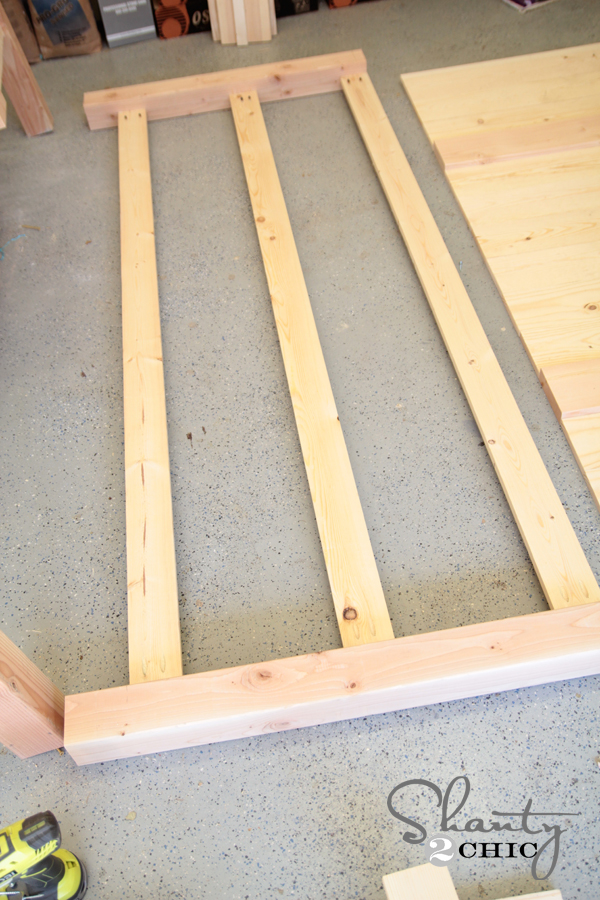
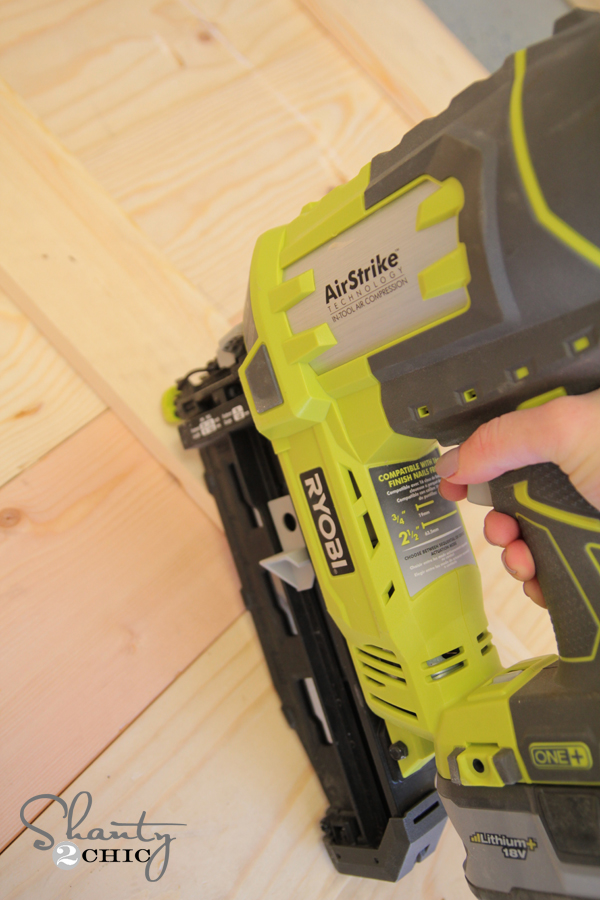
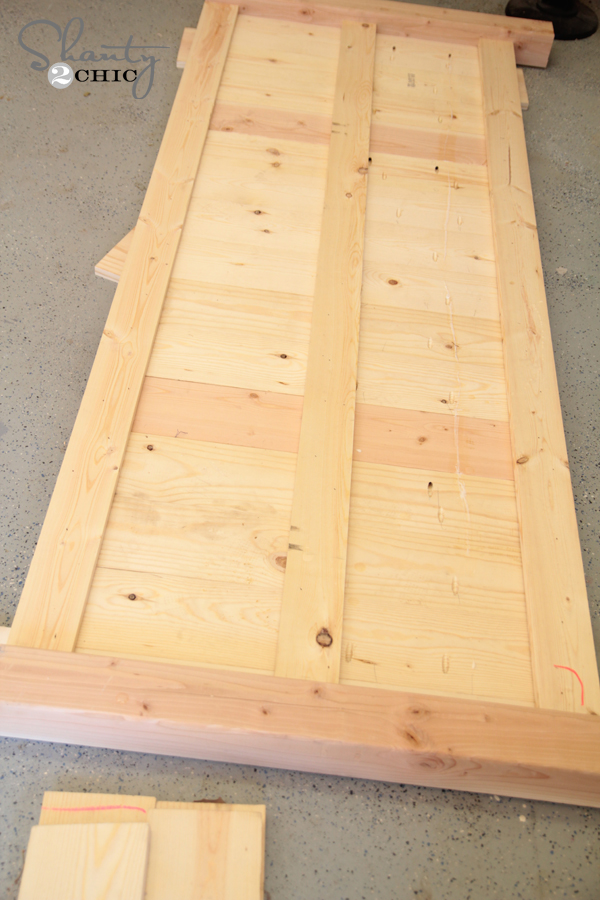
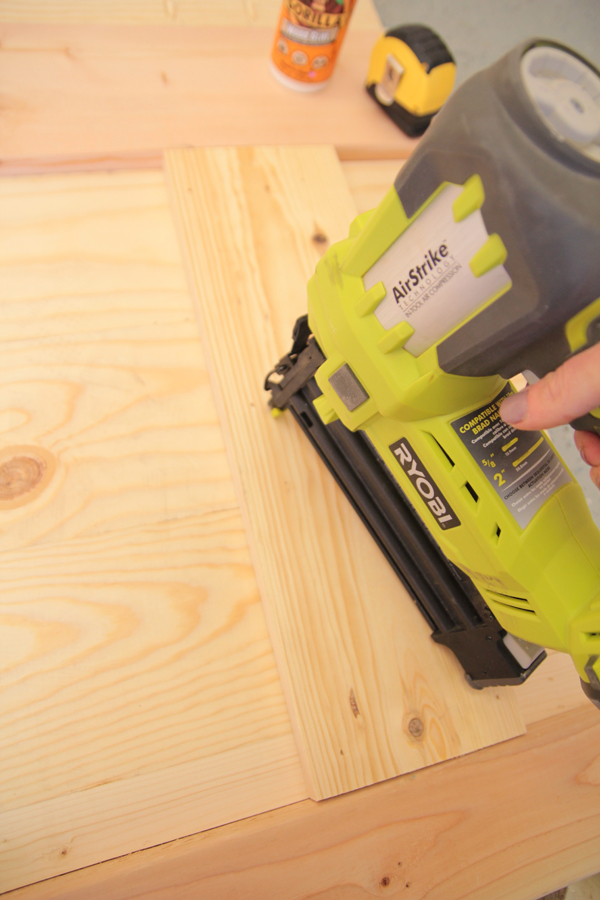
Once I had that finished I took the measurement to build the frame that sits behind it. For this I used 2×3 boards and made 1.5″ pocket holes on each end. I used 2.5″ pocket hole screws to attach them to the 4×4 posts. You want the face of the support to sit 1.5″ from the front of the posts. This will allow it to all line up correctly. Once the frame was made, I laid it on the back side of the planks. I used wood glue and 1.25″ finish nails with my Ryobi 16G finish nailer to attach through the frame and into the planks.
Here is the front of it…
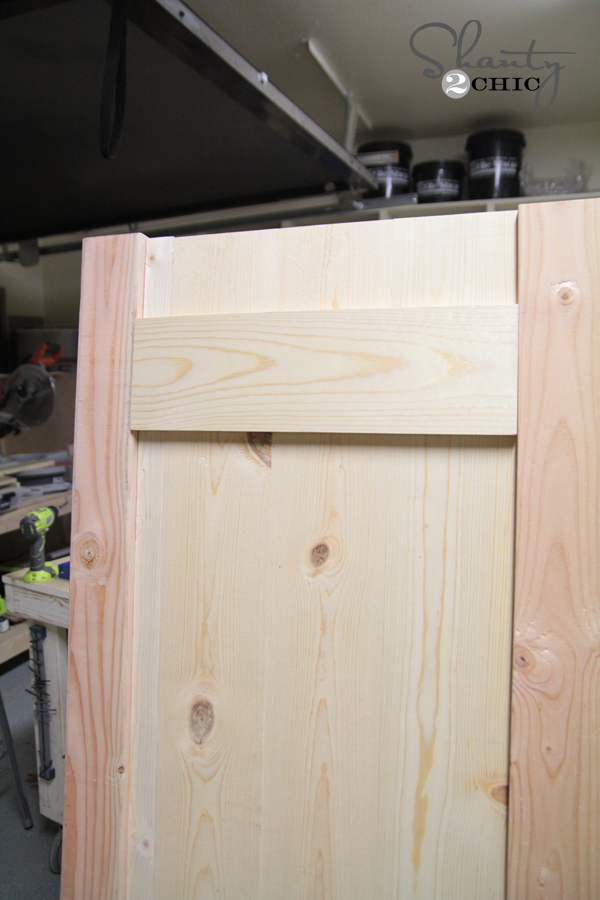
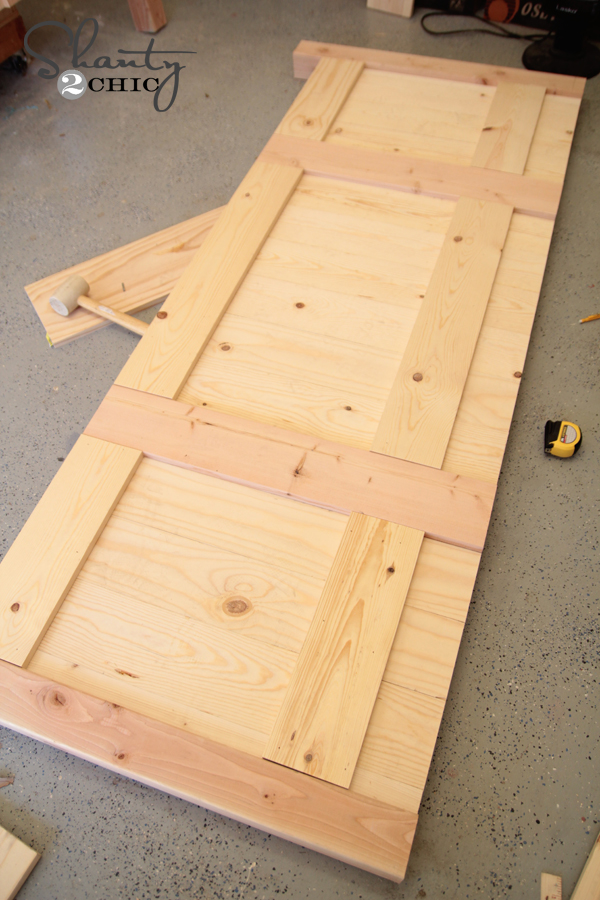
Next, you will add trim pieces. These are simple cuts. I measured the space exactly on each one rather than going from the plan. I used wood glue and finish nails through these pieces and into the front of the headboard.
First two lines of planks glued and nailed…
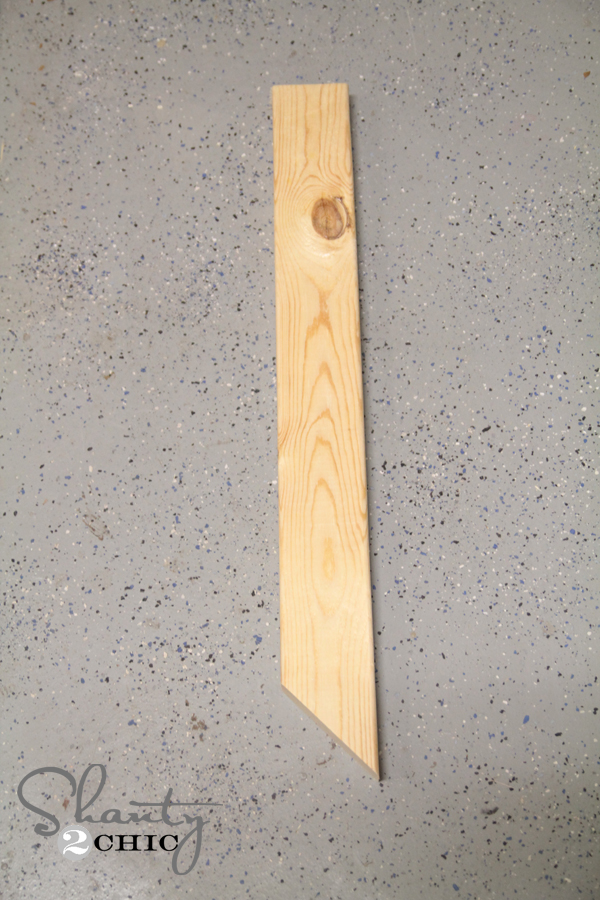
Now for the decorative side pieces. These were simple to make with my jig saw. I started by making just the miter cut on the 2×4 using my miter saw.
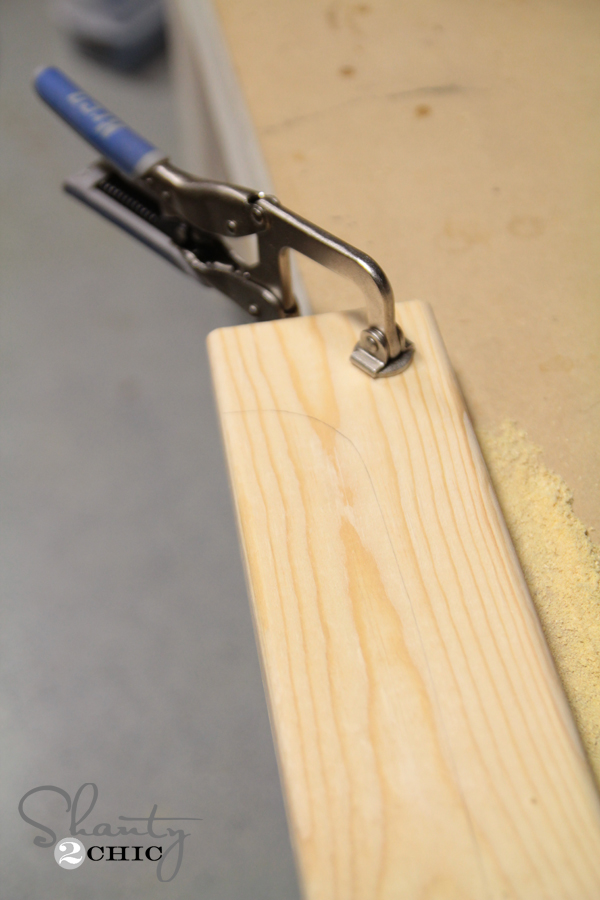
I clamped that piece to my workbench and drew out the design per the plan.
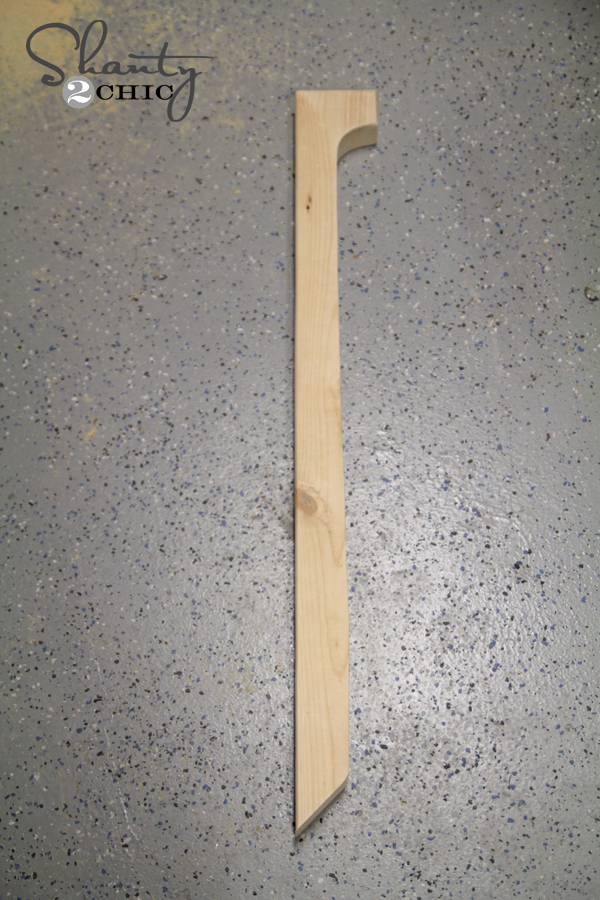
Then, I just used my Ryobi 18V jig saw to cut the design out slowly.
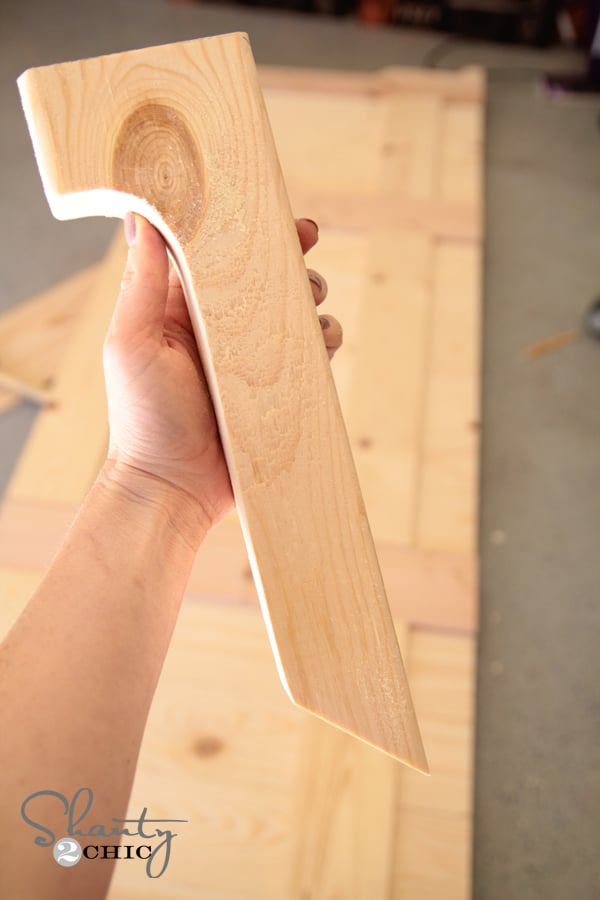
Here it is…
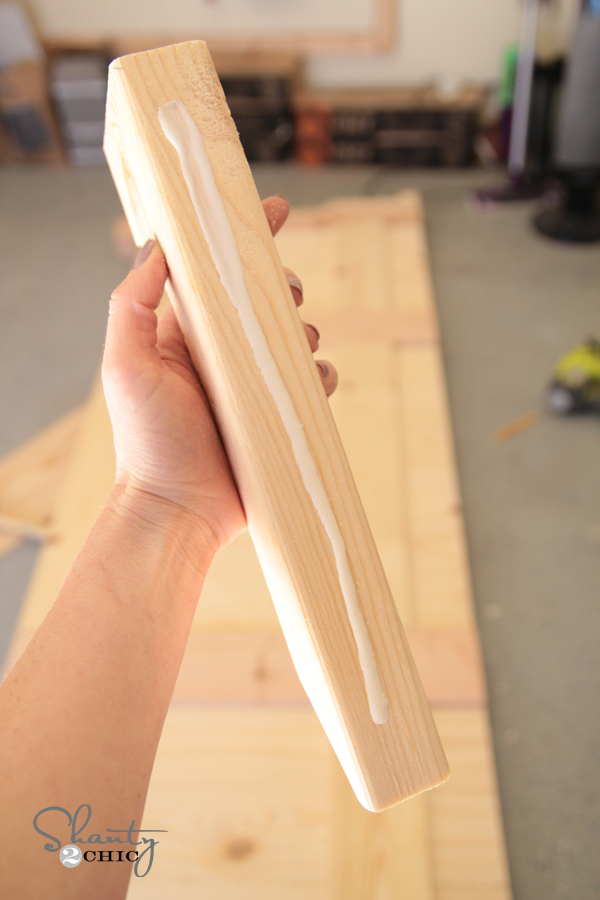
Add some glue to the end that will attach to the bed…
And I secured it using my finish nailer with 2″ nails.
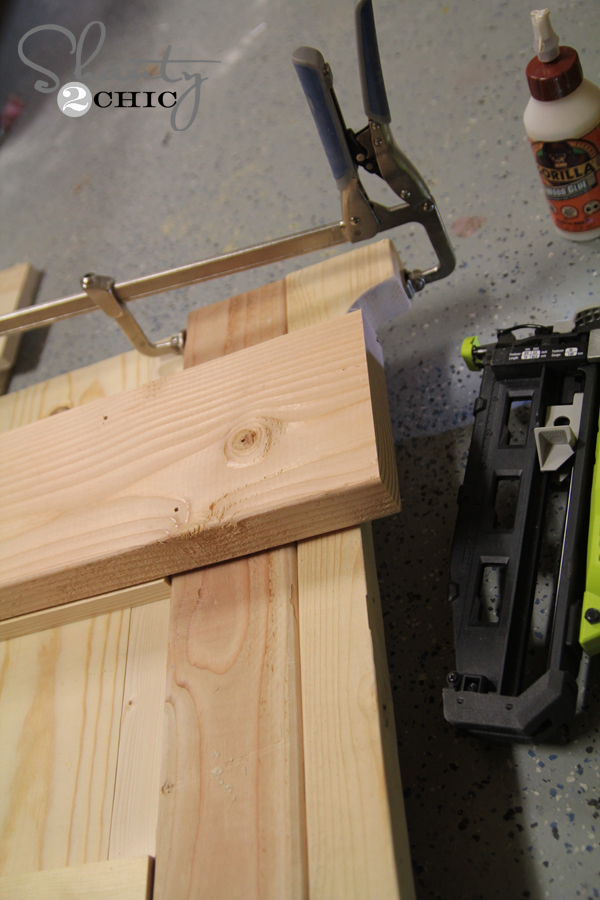
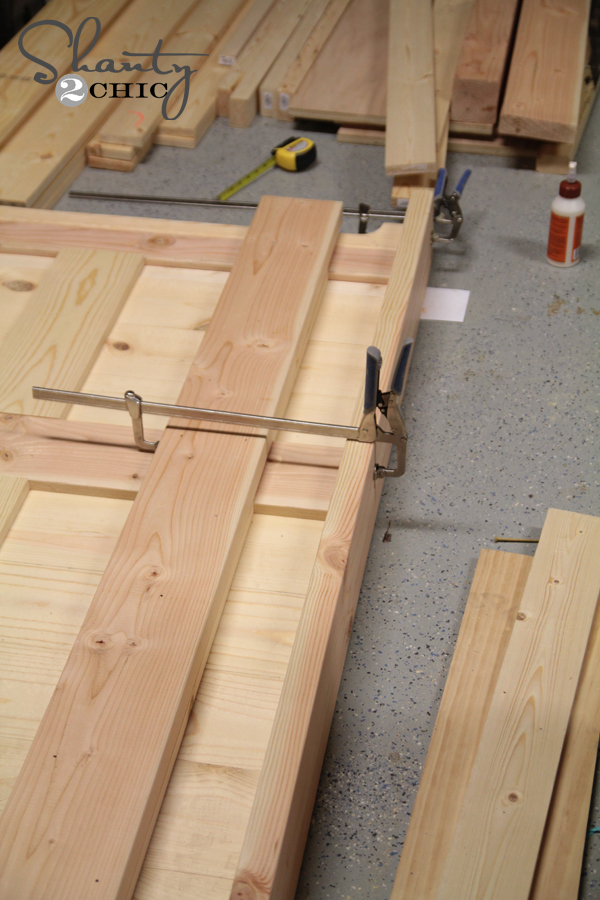
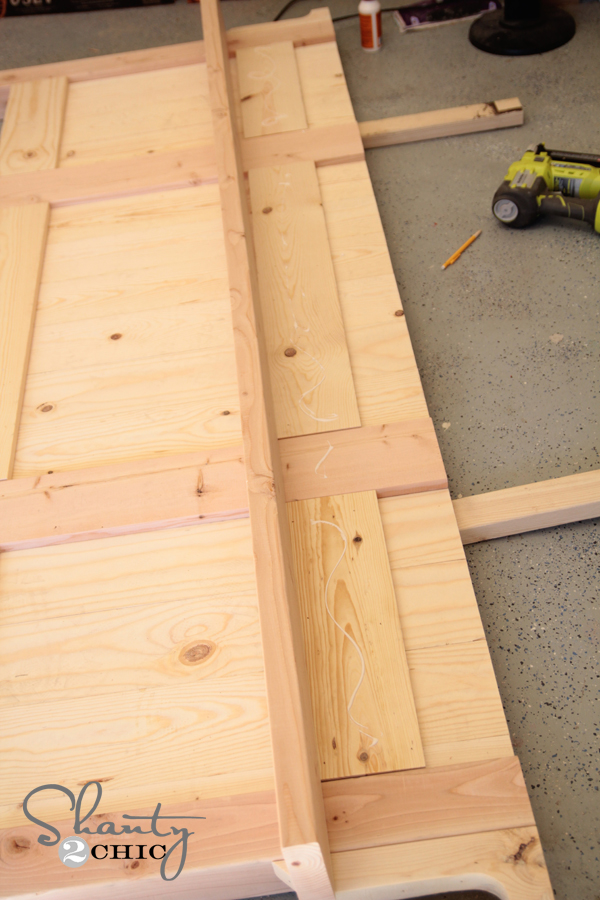
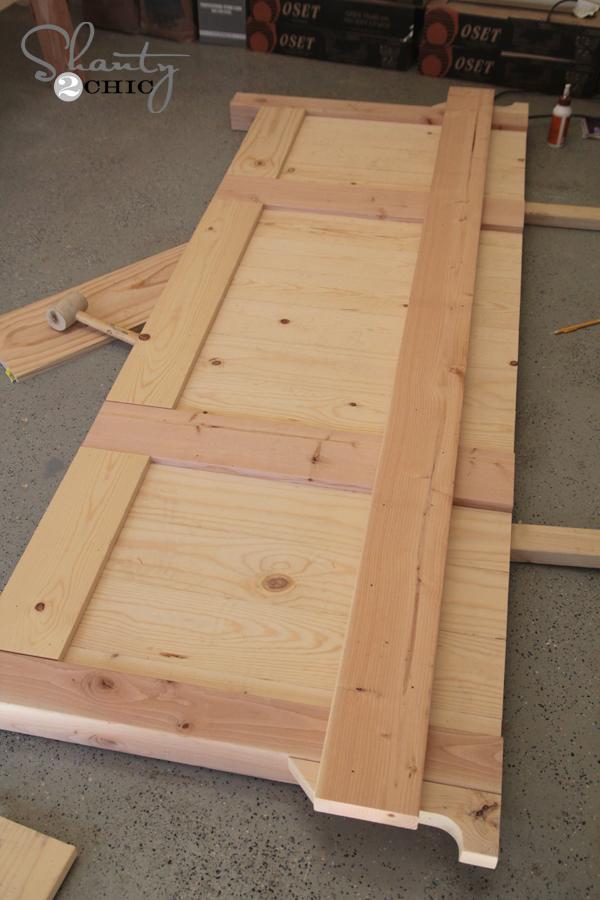
Next, you will add the 2×6 boards. These are heavy. I used a good amount of wood glue and 2″ finish nails to attach it in place. I also ran a few wood screws through the back of the headboard after that and into the 2×6 just to be extra safe.
I also added the top board at this point. After glueing and nailing it with 2″ nails, I did add some wood screws through the top and into the headboard just to be extra safe.
See my new Kreg clamps?? I love them. I have 4 and I want 36 π They are like having an extra set of hands around and they are so simple to use.
Headboard finished. Moving onto footboard.
This is basically the exact same build as the headboard with different measurements. I did do everything the same though. Here are some photos to show you…
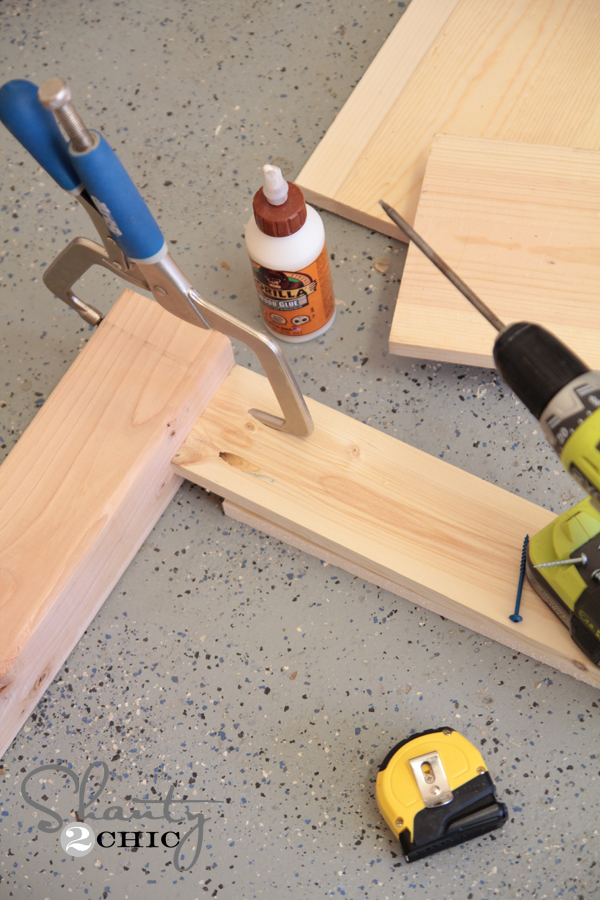
I did use 1×4 for the supports on the footboard since it wasn’t as large as the headboard. I used my right angle clamp to hold it all in place while I attached using 2.5″ pocket hole screws into the leg.
Here is the frame ready for the planks…
I used wood glue and nails through the back of the supports and into the planks.
Added my trim pieces to the front…
Then my decorative side pieces…
Now the 2×6 runners…
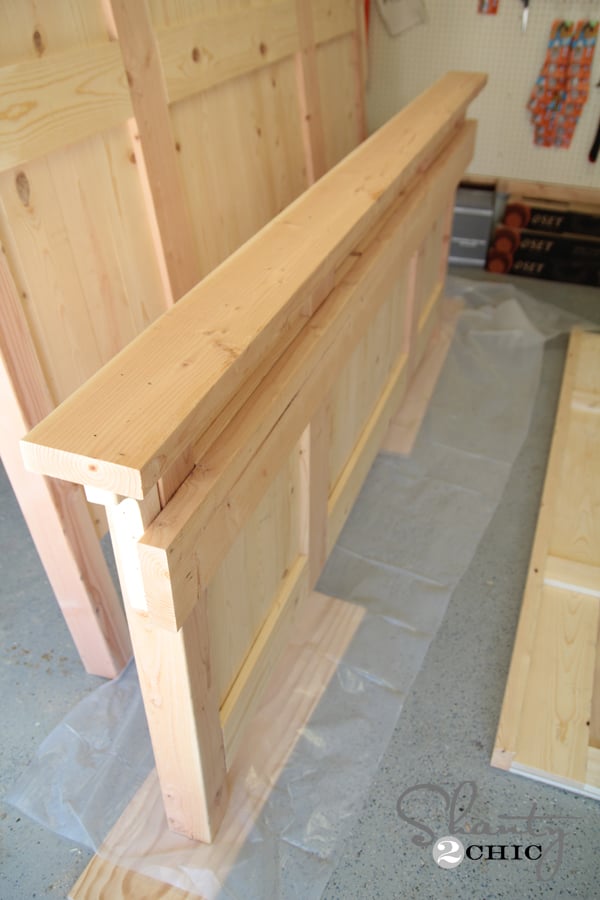
I put the top 2×6 on last before moving to the bed’s side rails.
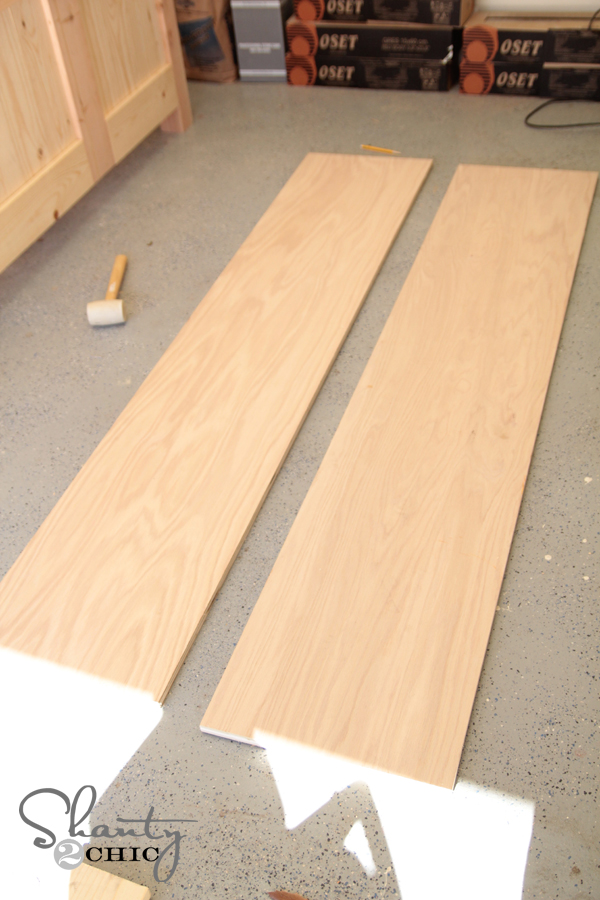
I used PureBond Plywood for the base of the side rails. I had the guys at Home Depot rip mine to size so I could get it home easy. I used Birch. You will start with two pieces that look like this…
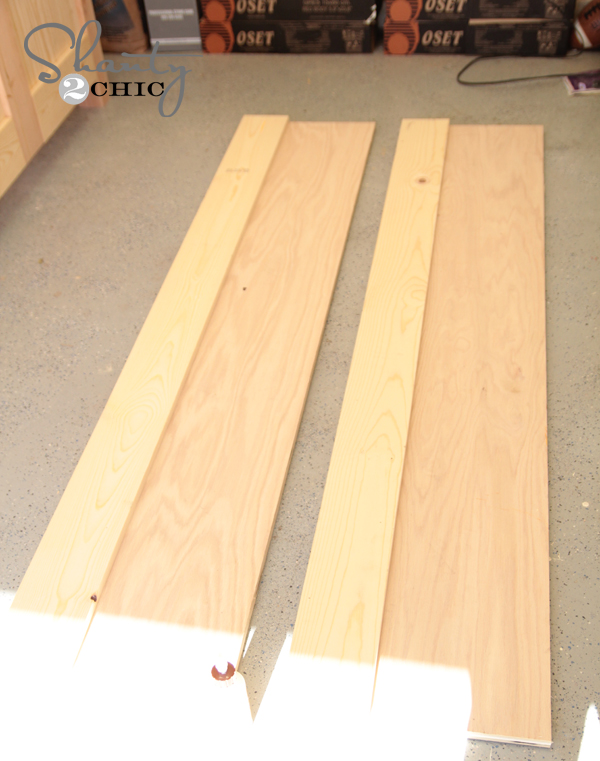
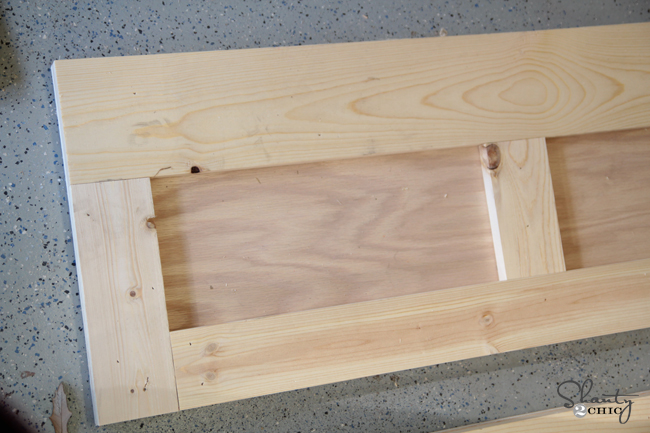
Next, I used wood glue and 1.25″ finish nails to trim these out starting with the top board.
Next, I added the smaller boards.
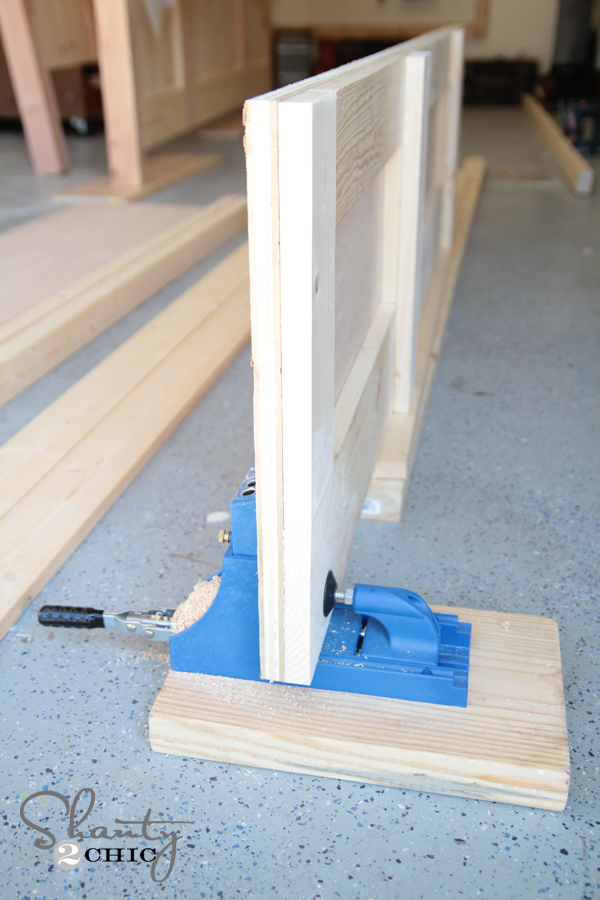
Once I had this trimmed out I used my Kreg Jig to make 1.5″ pocket holes on each end and running down the top of each side rail. I used my K3 mounted to a board to make my pocket holes.
The ends of each side rail should look like this…
I used 2.5″ pocket hole screws to attach the top 2×3 and the side rails.
And here she is ready for stain! I stained everything before getting it inside.
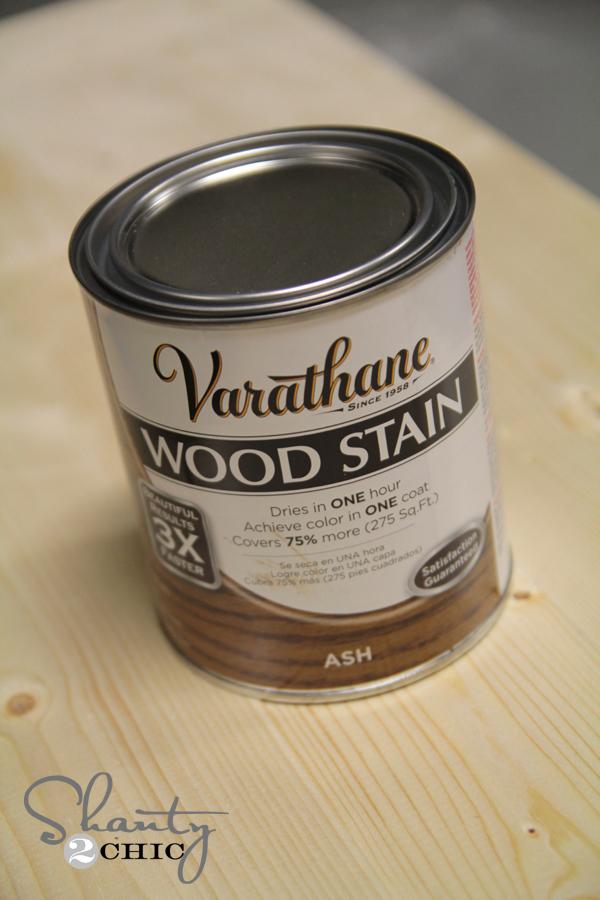
I used a new fav stain color on my bed. It’s called Ash by Varathane and you can find it at Home Depot. It’s not a very dark brown, but where the grain catches the stain it really goes a black tone which I love.
Now putting it together… This was something I did enlist lots of help on. My hubby and his friend moved the headboard in first. Then I cut a few 4×4 scraps to help hold the rails in place while I used 2.5″ pocket hole screws through the pocket holes on the rails and into the legs.
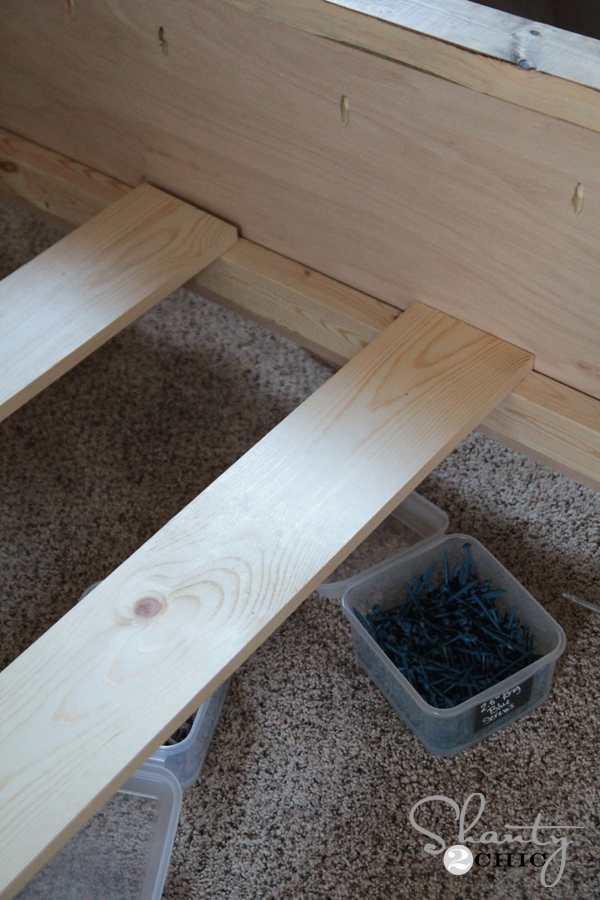
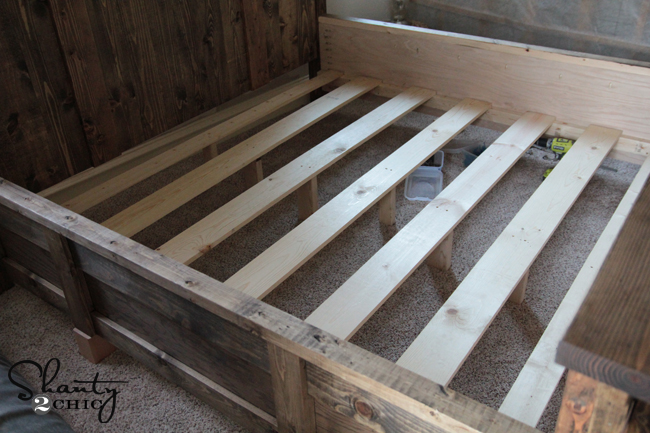
After that I did the same to the footboard. Finally, I cut all of the planks to run under the mattress. These all use a block under them to support the weight of the mattress. I nailed them in place with 2″ finish nails into the runners on the sides.
That’s it! Told you it would take forever π
But… I LOVE IT. I will say… This is not a super advanced build by any means. All of the cuts are straight and many are the same. I would say it is very labor intensive. I was sore for two days after building it… Which really is more a testament to my physical health, but we’ll blame the bed. π
I hope you LOVE it as much as I do!
You can download and print the FREE plans by clicking HERE
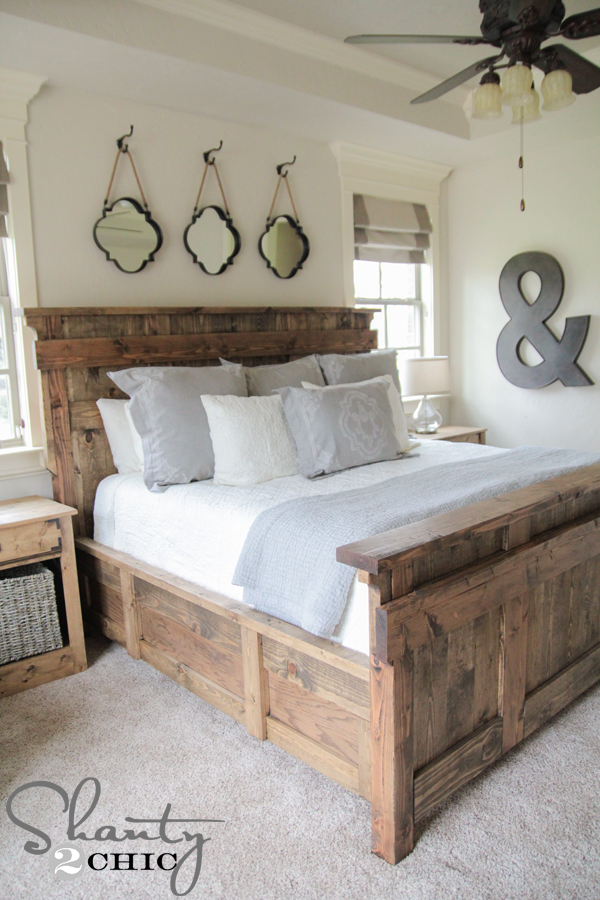
The bedding was a Valentine’s gift from my hubby. It’s all from Restoration Hardware.
The large metal ampersand magnet board can be found HERE!
The color on the walls is Valspar Homestead Resort Parlor Taupe.
The mirrors are from Hobby Lobby as well as the hooks I used to hang them. Wayfair carries one that is very similar and super cute HERE!
The nightstands are a little sneak peek for next week or so… One isn’t totally finished but you guys will love them!
I showed my husband this site and asked if he would build me this bed. He built ours out of rough cedar. We went out and bought a very nice king size mattress, box spring and a 6β mattress topper to go with. Weβve been sleeping in it for the last 3 years. I love climbing into our big bed. Thank you for sharing the plans,
I just finished this. I made it 6″ narrower for our King bed – still plenty of room to tuck in the comforter and things. I also shortened the footboard panels so they are 6″ off the floor to allow the robot sweeper to run under. Also, instead of 1x slats to hold bed and supports in middle, I routed som dados in the 1×2’s on side of rails and then used upright 2×4’s to go from one side to other. This leaves the underneath side completely open. We love it.
Also one more thing, I ordered some bed brackets from Amazon that I screwed onto the rails / headboard / footboard so I don’t need any pocketholes at all. This allows me to take it apart quickly if I ever need to.
My husband and I made this bed. Well, not exactly. The plans are not completely detailed and we had to make a few alterations, like we turned the little wing-side pieces forward instead of sideways to reduce the overall width to fit in our between-windows space. This also required narrowing the headboard and footboard, but lucky for me he’s an engineer and also knows his way around the woodshop. He’s also really cute π Even with the 6″ narrowing it fits a king mattress with enough room to fit the bedclothes into the box base. And the BED? It’s a BEAST. We’re going to have to die in it because it’s so effing heavy (even carrying the parts up from the basement I almost got a hernia) there is no way it’s ever going anywhere. But with that comes stability. He tosses around and wakes up before I do and that used to piss me off. This rock doesn’t move at all. Also, learning to drill pocket holes was very fun π I wish I could post a picture here because it’s really gorgeous!
I wanted to add that we lengthened the legs by 6′ because I wanted to have room for storage underneath. Right now it’s just ugly wheelie carts but I have plans to add a tailored (not frilly, I’m not a frilly kind of woman) skirt to the bottom edge to hide the carts. The bed is tall, but so are the adorable and capable husband and me.
I meant 6 INCHES not 6 foot lol. That WOULD be a tall bed!
I too want to build a modified version with hollow posts and hinges to allow for slide outs and hidden compartments. Extend the length and width of the headboard for slides and add drawers to the bottom area. Great job on this.
What size brad nails do you use?
What did you use for the planks to support mattress?
Can you give me the measurements for a queen size bed and a full size bed like this. I really want to build those two sizes for my family. If you could please do that for me. Thanks in advance!! By the way I love yβall video and yβall do an awesome job.
Just want to clarify that the bed slats are in fact 82 inches long.
Finished building the headboard, footboard and side rails just wanted to be sure about the slats before I started assembling everything. Thanks so much, love the bed so far
Could I please get the measurements for the side rails I am having trouble with that step only I am not sure what size to cut the plywood at.
Brilliant work!!
In a word.
I was wondering how you managed all these together.
And, would love to see a Throne for the King, btw. π
What would it be if the whole bed is colored dark – chocolate or complete black?
Pretty convincing as retro, right?
I made the bed and it is wonderful I wish their was a way to post a picture
This to me is the best looking king bed Iβve found online. Just finished building it n we love it! Wish I could post a pic of it. It came out so great! Thank yβall for the free plans!
Where did you get your bedding? I love it!
Hi I would like to know how high to you natal the interior support beam That hold the palette in place.
First time trying to build home furniture turned out great. I added 4 drawers , dog sleep area under foot of bed, night stands attached to each side, and head and foot of bed raise.
1 1/4′ screws for the 1x boards and 2 1/2′ screws for the 2x’s. the plans only say 1 1/4″ screws, so I am guessing it was just an oversight
i would like to have the rustic queen bed plans. but in king size…..if possible….thankyou
How could this be made for a queen size bed?
Good Evening;
I want to make this for a California King. Is there a breakdown of the change in dimensions for that? I have no issues going into the plans to figure it out, but thought I would ask the experts (or anyone following) first.
This one looks challenging, but I have really been impressed with everything I have made from you guys so far.
Thank you so much for all of your plans.
How big in the bed frame?
Hi! This is everything I have been looking for !!! I was just wondering what approximately did the materials cost? Trying to budget to build our own for our master!
Thanks!
Zoey
Thank you so much for the plans! We made a double queen size bed and itβs massive and beautiful! We actually went with the cheap wood so it ended up costing us about $250. Itβs solid as a mofo though. Thank you so much! I have pics but donβt know how to post them!
So, the width across the siderails is 82″ – as per the 82″ slats that are used. King size mattresses are 76″ wide. What is the extra 6″ for?
I know this post is from like 3 years ago, but I’m really wanting to build this as a surprise for my wife. However, we have a Queen Mattress. The only thing I can’t figure out is what size to cut the 2X3s. I would be able to figure out the rest; I know Queen is 60″, so would I cut to that size, or would it be 62″ to allow for the rails?
I built this bed per the plan and turned out great – went together as it should. When we ordered our king mattress (not looking at size) it showed up and is 76×80β which seems to be standard size. However, this left about 6β gap between mattress and side rails. I went back and double checked the plans – slats are 82β. Ended up turning the mattress to make work – did I miss something tho?
I’m in the same boat as you. I have 6 inches leftover on the side. I’m going to build out the siderails with 2 stacked 2x3s and stain/poly them to match the rest. It isn’t the best fix, but I didn’t like the look of the mattress turned the other way.
I wish my wife took a picture of my face when we dropped the mattress in place and I realized that the bed is 6″ too wide. I nearly had a conniption. I have a solution, but I’m very curious if I missed something and that extra 6″ width is simply part of the design.
They did that so you would have 3 inches on each side to tuck in your comforter….
I built this bed per the plan and turned out great – went together as it should. When we ordered our king mattress (not looking at size) it showed up and is 76×80β which seems to be standard size. However, this left about 6β gal between mattress and side rails. I went back and double checked the plans – slats are 82β. Ended up turned mattress to make work – did I miss something tho?
Did you use 2 1/2 inch pocket hole screws throughout the entire build? The plans say to use 1 1/4 inch screws.
Is there a way to make an additional plan for a second design, the base with storage? Make 2 or 3 drawers on each side instead of just being purely for looks?
I’m a little behind on this bandwagon but I have been wanting to build this frame for quite some time. I think I finally have my hubby on board. Only question I have that I haven’t seen on here for this plan is, can we add storage drawers to it? If so, do you have another plan we can kind of run off of but keep this look (or any other advice)? PS- You ladies are the inspiration behind my desire to learn to be more independent with my projects! Love what you do! Thank you!!!
What was the total cost of just the wood
I sourced my wood from a local lumber company and Lowes. Total lumber was around $400. I made a few minor modifications to bring the price down.about $60-$100. Nothing visible.
We are in the midst of building this bed which i absolutely LOVE!! I went to buy the stain and they don’t sell Ash. What would you recommend to be close to it? I bought two different stains and one is too black and one is too “traditional” brown. Any advice on what would be close to the ash colored stain that you used?
Hi! π What is the depth of the inside of the bed? I would like to add a boxspring but I’m unsure of the size I should buy.
How easy would it be to add drawers underneath?
I want to get rid of my dresser.
Did anyone ever get the instructions for the Queen size bed?
My wife fell in love with this design and wanted me to make this for her. The plans were easy to follow and the best part is she loves it!! Thanks so much!! The kentwiod nights stands are the next project!!!
IMG_0774.HEIC
IMG_0775.HEIC
Iβm wanting to build this bed for my brother and his wife is there a parts list or a shopping list of the material needed?
I am absolutely in love with this bed! Thank you for sharing. Husband just finished 2 weeks ago. Little on the pricey side how we did it but it was well worth it!
Did you rip the edges off all the boards? If so how much do u take off? Going to be making it soon and don’t want to mess up!! Thanks:)
Looks great, thanks for sharing.
One question: Going through the cut list and I only see (6) 1X6X18 boards for the headboard and footboard. Looking at the drawings, I count 8 boards required, 4 for the headboard and 4 for the footboard. Am I missing something?
I prepping to build this frame. This may be a silly question but aree all king sized beds the same size? Just want to make sure i can build without altering and my king fits. What are inside dimensions? Thanks!
What are the measurements for a California king
I made this as a Queen size frame and we love it! We used the measurements for store bought queen size headboards as our guide. Then we just changed the number of 1×6 boards on the headboard and footboard. We also simplified things by using 1×10 boards on the sides. It still looks great and cut down a lot of time. I don’t see how to post a picture or I would. Couldn’t find the “ash” stain, so I thinned ebony stain and it came out looking very similar to this picture. It’s a gorgeous bed and it only took 2 weekends to build!
I would love to see this plan but with drawers on the side.
I’m getting ready to start my bed now and was wondering if you have plans for a nightstand to match?.. thanks
I recently finished this bed as well for a lady who happen to visit my wifeβs FB page and said she saw it on your site. Small world! I love this page and have done a couple projects from you ladies. Yβall are awesome. Bed was heavy as h***!!! But weβll worth it.
I love this bed! I need some help with the color. I bought the stain pictured but when I test it out on my wood it comes out really dark and thick. Did you do anything to alter the color at all?
IMG_0217.JPG
The stain almost looks black. I’m trying to figure out if I’m missing something?
Thanks!
Did you use any polyurethane for a top coat? Or just the stain itself?
Prepping to build this. Was this just Doug fir from HD or Loweβs? And has anyone attempted attaching the bed sides with hardware vs pocket holes? Was thinking mortise/non mortise. Donβt want to brake the bed getting crazy if you know what I mean. ??ββοΈ
We used hardware so that the bed can be taken apart easily when we move. We used the kind with the hooks. It is SOLID.
Just wondering if you need a box spring for the build or a mattress only? It’s all stained a ready to be put together : ) We decided to purchase all new mattress and bedding for it though, so just want to be sure!
Thx!
Dani
I showed this to my Sweetie and she loved it. Will build it in a few months, but some questions:
The space between our windows is roughly size of a queen. Iβll be building a king bet. Wondering if it would make sense to extend headboard on either side at window height or just build a βqueen size headband and have bed stick out on either side (which doesnβt sound very attractiveβ.
Ok I am sorry, Iβve read all the comments, and Iβm still al little stumped, ok a Queen size mattress 60 inches wide by approximately 80 inches long. In the comments it was saying to subtract between 16-18 inches from the with. So how many slats would I remove to archive this? And which ones do I can still keep the look of this bed? Iβve looked all over for the plans for a Queen and this is all I can find, comments. Thank you in advance.
Just completed my own diy version of this bed. I love it! I used bed rail bolts and nuts to attach the side rails for easy break down and rebuild instead of all the pocket hole screws. Here is my finished project. Thanks for the awesome plans!
Do you guys think this could be make out of palette wood? Or would it not hold the weight..?
Hi, i’d love to make this bed in a full size….is there a plan for that somewhere?
thanks
How much would you charge to make a king size frame?
Can someone tell me what to do to make these plans into a queen bed? I bought all of the material according to the plan, but need to know how to make it into a Queen size. Please help
The king size is a California King, not regular King. Had to make inserts to tighten it up on the box spring. Love the bed anyways.
I am confused. So if I follow the plans exactly it will be too big for my regular (not California) king bed?
We added width on the sides to allow the quilt/comforter to lay without tucking. This bed has been built so many times and it always looks awesome!
Just finished building this bed, but its wayyy to wide. Wish you guys would have included this note into the plans, I much rather would have had the comforter sit on the outside then tucked in. But other then that, its a great bed.
Can you use an 18G Brad nailer for this bed?
Where the plans call for a nailer, yes. I don’t suggest using the nailer instead of the pocket holes though. Hope this helps!
How high on the bed rails do you attach the slat rails?
That really depends on how high you want your mattress. Figure out that height. Subtract the thickness of your mattress and you have the height of the slats. Obviously it needs to fall within the range of the side rails.
Dosent mention where to install the slat rail on each side I see they’re is no pocket holes in the plywood cause of the rail but what are the measurements from the bottom of the plywood ?
I’m about to take on this project and I’m wondering if after building this, anyone felt the headboard is too high. If looks fine in all the photos but when I put the tape measure at 66″ against the wall it seems extremely high compared to our present bed.
So my mattress is a standard King that is 80 inches long. I see the bed rails are only 79 inches long, do i need to modify any cuts or will my mattress still fit? I dont want it to be super tight so i can’t tuck my sheets and comforter in at the foot of the bed.
I love this design! do you have a plan for a Cal-King 72″x84″
The plan is larger than that so it might actually fit your Cali king. I am about to start building it and noticed that it’s way to big for a standard king. Glad I’m reading the comments now.
Looks great. But why so many Kregs? Wouldn’t it be cheaper and stronger to use mortise and tenon jointery?
How much does this weigh?
I saw comments on the width being incorrect at 95 1/2″ instead of 92 1/2″ to fit a standard king mattress. Were the plans corrected, or do we still need to take 3″ off of all of the horizontal measurements for the bed to fit a standard king? Thanks
Did you ever figure this out GH?
I am trying to figure it out now and I feel your frustration in no response lol!
Took a stab at the King. Couldn’t find the right stain so I went with a mid tone with a black wax and lacquer finish. Pretty happy with the result.
I saw comments on the width being incorrect at 95 1/2″ instead of 92 1/2″ to fit a standard king mattress. Were the plans corrected, or do we still need to take 3″ off of all of the horizontal measurements for the bed to fit a standard king?
I love this bed and am thinking about making it, but we will be buying a new house soon and it needs to be movable. Any suggestions on how I can alter the plans to make the bed a little easier to disassemble as well as make it for a queen?
Thanks for the plans, I love my new bed!
Hi! When you did this build did you put a clear coat on it? If so, what brand?
This is amazing work. I wish I could make this bed. It seems hard and I don’t even know where to start with the tools. Do you have to be a carpenter to make this bed.
Love the bed, but what is the paint color in your room?
Just finished up mine. Made some big modifications, but kept the inspiration. Queen Sized
What adjustment(s) did you make to complete the queen?
Hi Rajah, I did a lot of eye balling it and making adjustments on the fly. Basically, I took about 13 inches off the height of the headboard and 7 inches off the height of the foot board and just made the width smaller. I also made the side runners smaller – only 13inches wide
Sounds good. Great job with it!
Thank you for the plans. Making my wifes dreams come true!
My bed
I love the color that you used for your stain… can you tell me the brand / color?
I just finished my version of this. I added two drawers on each side and made it a platform bed since we don’t have a box spring. One thing is the slats are cut at 82″ in the plan but a king size mattress is only 76″ wide so keep that in mind. I would take out the two small 1×2’s on either side of the paneling of the head and foot board to make up for this difference. But I’ll have to figure out how to make up for the gap some other way… I’d post my sketchup file for my Captain’s bed conversion but I don’t know the best place to host it if anyone would be interested. I don’t know if it’s letting me add a photo either.
Do you have build plans for adding in the drawers and making it a platform bed? That’s exactly what I want to do!
Hopefully this works? If this isn’t a good hosting site for files, let me know a better one.
http://s000.tinyupload.com/?file_id=63070491216191099017
Hopefully this works. Let me know if it doesn’t. And in my plans I used 3/8″ ply for the cubbies to save money but this isn’t a good idea and makes things more difficult. I would use 3/4″ ply instead.
http://s000.tinyupload.com/?file_id=24722367579993279656
how did you overcome the gaps? i just completed my headboard and trying to troubleshoot the rest
Has anyone built this bed and NOT used a box spring? Did you raise the supports on the frame to give it the same look?
I built a more farmhouse style of this bed, but put drawers under and did not need a box spring.
You could easily run a 2×4 the length of the sides and run more slats across the bed to hold up just a matress.
Thanks Nick! That is exactly what I was trying to ask!
So is this plan designed for use with a box spring?
Yes it is. But you can adjust the slats as Nick mentioned above if you want to forgo the box spring.
HELP PLEASE! My husband and I are in the process of making this bed right now and are completely stuck. All the pieces are cut and pocket holes drilled. The problem is when I went to screw the pieces together for the headboard slats, the screw is going through the wood to the front! We are using 1.25″ screws and they are still going through. How do we prevent this from happening?
are you setting the kreg jig for 1″ or 3/4″ material? When doing thin material I also do tests and adjust the jig accordingly
Hi Kim, what Nick said, make sure you’re jig is set appropriately. You also need to make sure that the drill stop is set appropriately or your holes will bore too deep.
Hello. Could you comment on the fact that some others here have pointed out that the dimensions of your plan are too wide for a king mattress? It looks like from your photos that you really did use the plan and your king mattress fit?? By my calculations, the width based on your plans is about 81 inches wide. A standard king is 76. How did yo get your mattress to fit on the bed f yo used this plan? Also, I did not read other posters comments until I had assembled the headboard so I’m looking for a way to either dismantle and subtract boards or leave it as is and make the King mattress fit. Any suggestions would be greatly welcomed. Thank you.
Just finished a queen size version of this bed in a gray stain! We are absolutely in love!
How did you adjust the plan to make a queen?
Can you tell me what grey stain you used? Did you clear coat it with anything after?
If you want to it yourself just look for woodprix website. There is all you need to make it π
I love this bed and really plan on making it. The only question that I have (and it may be silly) but how does it come apart if you ever move? Without cams or other fasteners of the like it seems like you wouldn’t be able to. thank you and great job!
OH I AM OBSESSED. I. NEED. THIS. BED. I have a California King…Will the pattern easily translate to this size?
Did you use knotty pine or clear pine?
Looks like you used pocket holes and wood screws to attach the side rails to the head/foot boards. It would seem that this would make it very hard to break the bed down for future moves. Have you ever seen any hardware that would attach to each side and then hook together?
I finished mine today and love it! Based on some other comments I cut the width down by 3 inches and it’s perfect! All you need to do is not use the 1×2 on each side and cut down the length of all the horizontal boards on the headboard and footboard.
Cant wait to start this. I am a beginner, but after looking at these plans, I don’t see why I couldn’t complete this! Thanks for putting such details plans. I will upload my picture upon completion.
I’m late to the game here, but I’m looking for these exact roman shades. Could you tell me where you got them?
LOVE THIS BED…would look perfect in our future mtn home. We have an extended queen Sleep # bed. Does anyone know how to adjust the measurements for that? I’d love to see if my nephew would make this for me.
Just wanted to point out that the measurement for the width of the bed is wrong it says 95 1/2′ yet the dimensions for board cuts states the top rails at 92 1/2″, I noticed a few people comment their confusion on the matter.Love the design, I’ll be building a queen size version for my sister and her husband
The link to the pdf plans fails to download. Anyone else having an issue?
Did anyone get an answer to the size question? We have a king size bed but some comments indicated that this plan seems to make a bed frame that is too large for a standard size king bed. I would really like to make this frame for our room but I would like some direction on how to edit the plans if it’s going to be too big…
Will the Cal King Mattress fit in this plan??
I have emailed shanty 2 chic 3 times and never got a response from them on the plans for a queen bed. So I’ll try posting here do you guys have plans for a queen
Still have never heard from them
Most queen beds are 16-18 inches narrower than a king. Just subtract that from all the boards that go the width of the bed.
Hi there! My grandfather has been making furniture for years, and I printed off the PDF plans so that he could make this bed for me! It turned out gorgeous, but exactly following the plans the frame is far too wide for our standard king mattress π Did I miss an update on it somewhere?
I am glad you posted this. I am about to start my project tomorrow and measured my king size bed at 76 inches. That would leave 6 inches of space on each side of the mattress for this frame! Looks like I can return a few boards to home depot.
is there an actual cut list or materials list for this build? It would be nice to know what i am gonna need up front π
There is a diagram with each board and where to cut them.
I’m an idiot. I didnt realize that was a link lol thanks π
No worries! π
No worries! π
Did anyone ever attempt a queen sized version? I am assuming you could just subtract 16″ from the width? If anyone has tried this can you please let us know.. a pic would be fantastic too.
What color stain did you use on this bed and how many coats did you use? We bought the color ash stain, different brand thought but it doesn’t look as pretty as your bed.
Is there any way to convert the plans to a queen size?
This is beautiful!
I Just wanted to say one thing about the 4×4 posts though: you absolutely CAN cut them with a 10inch compound miter saw! I do it all the time!
Thank you for all your wonderful building plans! Y’all are such an inspiration and I love this bed!
Thanks Ashley! Some 10β saw can accommodate, but mine couldnβt at allβ¦ Just depends on the brand and model π
I am OBSESSED with this frame, but I have a Cal King size bed. Any tips on how to find new dimensions?
Did you use polyurethane after staining?
Most of the time they don’t use polyurethane on indoor projects. They talk about it in one of their other articles. It isn’t necessary, unless you are concerned about water damage or just like the finished feel of it.
If you don’t mind me asking, where did you snag your bedding? I’m looking for something simple pretty like that.
Hello,
Do you have measurements for a queen size? Also, what about drawers for the sides… would be a great idea! π
Did you use a clear sealer over the stain or not? Thanks
what paint colors did you use in the room?
Nice job ladies! Made one for my wife over the last week. One suggestion though is thbe dimensions. If you build to plan then the frame comes out to wide for a standard king mattress. If you remove the 1×2 slats on foot board and head board then you have the right dimensions. Virtually all king mattresses are 75in wide and 80in long. For now we have to have our mattress rotated until I can dismantle and unscrew and remove those slats… Good thing I did not glue those.
tada – wife liked the mirrors so much she got those too π
Nice! So this picture is after you fixed it?
No – still living with the king mattress sideways – really does not make it a big deal – the thing is so heavy would be a day exercise to take apart and remove the 1×2 slats on each side and then trim down the long boards… If I do another one will just be more aware of what the end dimensions should be.
I should’ve look at this before building. You are absolutely right!! Siderails are 79″ but the length of a king matress is 80″. Width of frame is 84″ but width on a king matress is only 76″. So since I’ve built the entire thing and am prepping to sand and stain… I guess I have no other choice but to rotate the matress. A bit disappointing since this thing has taken every evening and weekend for the last two weeks to build… π
The length of the side rails are 79″ but there is additional room for the length of the mattress given the onset of the supports on the footboard. There is extra width on the sides of the bed to drop the comforter inside rather than tucking it. This was done intentionally. I have answered this in a few comments. My mattress is a standard king and it fits great:)
*inset
Hi, thank you for your reply. So sorry, I looked but didn’t see any confirmation from y’all on the dimensions being intentional. Also, I emailed so please disregard that π
I appreciate you responding that this is intentional. I have been slaving by myself building this bed, all 135 lbs of me, so this makes me feel so much better!! I’m super excited to stain it!!!
Thank you again.
I love the bed but I want those mirrors! Do you remember where you bought them?????
Oh wow, what color stain did you use here? I love the gorgeous cherry color!!!!
Love this bed, amazing. Is there any way you will be making a dresser to match? I am looking for a master bedroom dresser to make with good instructions and that matches a DIY headboard.
Where is the ceiling fan from?
How well does this hold up if you need to dismantle and move? Can you reuse the same pocket holes without compromising the wood?
The plans for this is super confusing. The things that are labeled 1x2x8β is actually supposed to be 1×1.5. In a hardware store, things like 2×6 is actually 1.5×5.5 so that is obvious and doesnt need to be cut down to 5.5 in order to fit the 80β length for the headboard. But you cant usually buy a 1×2 so you make it. We made it into an actual 1×2, turns out it made the headboard 1β too long because the instructions are unclear. I think you guys need to go back and edit some things and make it to be the actual exact measurement. Also possibly labeling A-Z pieces because some of the colors are off as well….just the overall instruction is very unclear and for beginners would lead them in the wrong direction…thankfully we were able to figure this out but not until after we put together the headboard to find out it doesnt fit into the frame. Also pocket holes are misleading. We used two different pocket hole drill bits (older version vs new version) and they were different lengths so telling us which size to use ends up messing it up a lot because your pocket hole could be different than ours. Good start to do this but a lot of confusion.
For those who are moving or need easy transport β> we decided to use hinges instead of screwing it together so it comes apart in 4 pieces and the middle we are making a ledge to rest the boards on and use nylon rope across them so they can be easily packed up so nothing is screwed down. This is how a lot of big manufacturers make their beds so its easy to put together
Do you have pictures of how you did the hinges and rope part
Think you’re the only one confused…. 1×2 is how a hardware store labels the product! It’s the same as a 2×4, 2×6 or any others!
Can I simply subtract 16 inches from all width measurements to make this work for a queen size bed? I just want to make sure there are no other issues that I am missing.
matt, did you make the queen version? I really want to make this for my wife. Thanks!
Do you have any plans available for dresser and nightstands to go with this
Hi Matt. Did you ever make the Queen size bed?
I’m in the end stages of making a queen version of this. The instructions show the boards laid out for the headboard and footboard as: a 1×2, (3) 1×6, a 2×6, (6) 1×6, a 2×6, (3) 1×6, a 1×2
I just eliminated 1 1×6 from each section, making my layout as: a 1×2, (2) 1×6, a 2×6, (5) 1×6, a 2×6, (2) 1×6, a 1×2.
I cut my side rails last night, propped them up in place and everything seems to fall into placeπ I’m so excited about making this bed.
How heavy is this bed? Can it fit through a regular door frame? My big hesitation with trying to duplicate this is the fact that we will have to move in a few years…
I love the stain. I have tempurpedic ADJUSTABLE BED. (Also a California king) so it’s very difficult to find a product. Am I able to make this as just a headboard or use measurements and not have the wooden slats? Our bed needs to sit in the frame from tempurpedic and the wooden would just be kinda built around it. Thanks!
My husband is just finishing up this bed!! I’m worried about stain transferring onto bedding…did you use polyurethane?
you absolutely need to put a sealer on top of the stain. I used poly.
Did the stain transfer to bedding? And did you love the bed?
do you have a queen size bed plans & a dresser?
Beautiful work! I’m planning on building an entire set in this style. Any chance you will be building a dresser?
I’m also interested in a queen size plan for this!!!!!!!!
Me too! Have they posted one?
Me too…I plan to build this.
WOW!!! Amazing. Me and my husband will be building this soon for our room. Great Job!!!
Yeah!! Thanks Mary! Can’t wait to see yours π
Is this for a regular king size mattress and can it be done as a platform bed?
How high on the bed rails do you attach the slat rails?
Love the bed! I have been thinking of building is a new bed for our room but I am struggling roth not having matching dressers. What do you do as far as dressers and other furniture in the room. Try to match it? Go country white? Any suggestions? Thanks!!
That’s a great question Erica… I don’t have a dresser in my room but I know what you mean. Painting is a great option and fun way to split it up if you are unable to match the finish. Another option would be to paint the dresser and add a stained plank top to match the finish on the bed… Just some ideas!
Hi there! What did you use to apply the stain/finish?
I so want to build this! I was going to buy a king bed, but this is better ! I just got done building a castle bed for my daughters , so I know I can do this. I can’t wait for the nightstand ones!
Awesome Kay! Yes you can totally handle this! Sharing the tables soon! π
Beautiful bed!!! I sent my friend the link for her husband to check it out. I just have a quick question. Where did you get the mirrors above your bed?? Thank you!
Just saw they are from Hobby Lobby! Oops.
Glad you found it π
Thank you so much for sharing your plans on this bed and all the other great items you have built. I bet its an awesome feeling to stand back and say WOW! I built that with my own hands. Thank you Jesus for giving me insight and the ability to use my hands to built and create. Keep up the great work.
You got it Mary! We are so thankful for this blessing that God has given us and even more grateful for the opportunities He has given us to share it all with you guys. Thank you so much for your encouraging words this morning. They mean so much!
Is there anyway you can create a queen size plan for this bed I love it π
Me too. Have they posted one?
I actually finally finished building the queen. I found that if you got rid of three 1×6 planks on the headboard and footboard it fits a queen mattress perfectly. I also didn’t use the 1×2’s either. I worked off this plan and Ana Whites farmhouse bed for measurements.
awesome thanks!
can you post a picture
I have one posted in the readers projects. It has the love canvas over the bed.
Great place to learn how to make it yourself much much cheaper. Just google for ‘woodprix’ website:)
just do it yourself , go to woodprix page and turn your idea to reality.
Do you have a box spring with this bed?
Yes… But you don’t have to!
This may be an incredibly stupid question but how would it be possible to do this with the box spring and still get the same look and height?
Hello, This bed is excellent. Thank you for posting the plans. My wife has given me my Honey-Do for the weekend. However on the plans, at the bottom of page 3, the 1x4x8’s do not have a length cut. Based on the scale of the other cuts it appears to be 79″ or 80″. Can you please clarify?
Thank you for catching that! 80″! I’ll get it fixed and send a pic when you get it finished!
Thank you so much for the prompt response! You are welcome. Glad I could help!
Got the new plan updated this morning if you want to download it now… Thanks again! π
Are the bedside tables a plan here in the website?
They will be! Next week or the one after π
Would you mind giving us a cost break down?
It was under $400 for the lumber… One the 1x boards I did use whitewood to keep the cost down. Hope this helps!
Materials only under $400 but you said very labor intensive so if you add your labor where does that put you is it right up there at the one you first looked at a cost of close to $4000 I know some people have the time on their hands to do as a hobby but to make this and sell it it is a little misleading because labor is not free. Very nice bed. And the cost of your tools has to be taken into consideration.
I built one similar with 6 drawers underneath in about 20 hours. This was the first one I ever made and woodworking is a new hobby for me. If I was making these on a regular basis I am sure I could cut that time down even more. If I sold mine for $1750 I would still be making decent money.
Hi! Could you advise on adding the drawers? I would love to do that.
how did you do your drawers?
I made my own variation of a bed that I Like to Make Stuff made in a YouTube video. I added a three foot deep drawer in between the two sides for shoes
I believe this article is titled DIY, not build and sell for a living.
Does anyone have a plan for the queen bed yet? I see someone says to take away 3 of the 1×6 boards, but what other pieces need adjusted because of this? The whole width adjusts, not just the back panels.
Yes please total for material and labor
WOW! You are right, it is simple. Looking at it you think it is harder. I cannot tell you how much I love this design. GREAT JOB!
Thank you Stephanie! Glad you see that… And thanks for your sweet words!