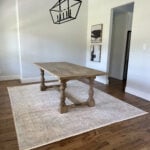
Learn how to build this dining table with free DIY woodworking plans by Shanty2chic!
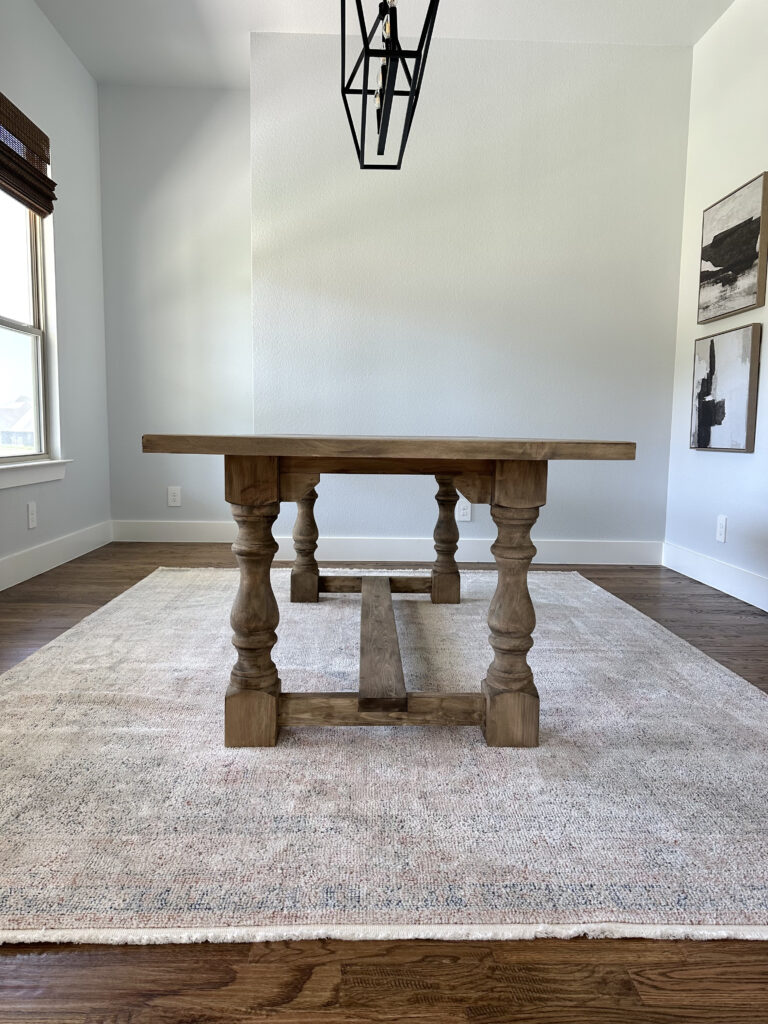
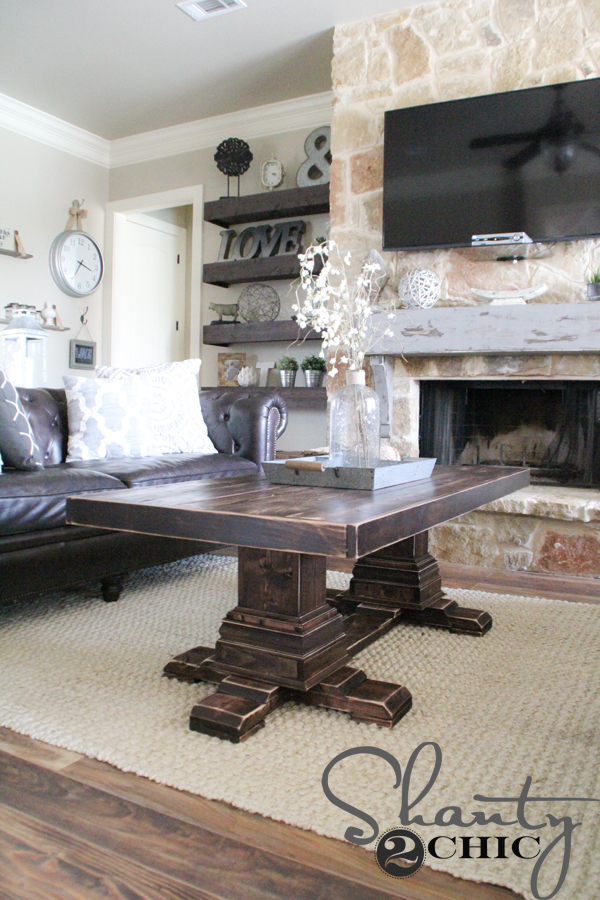
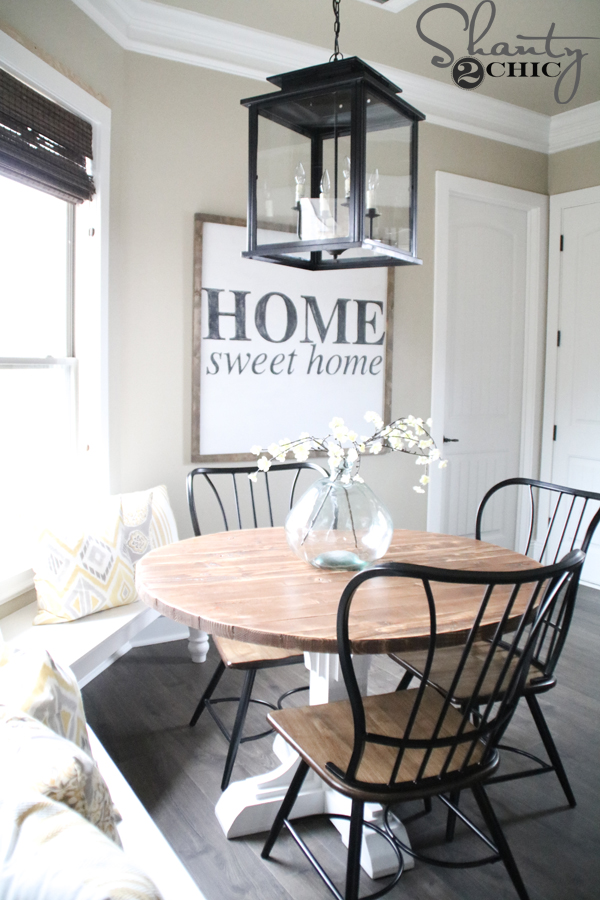
I moved into my new house in June and I’ve been on a mission to make it feel like a home. The first project to tackle was my dining room table. We don’t use our dining room very often but I love having a dining room with a beautiful wood table. It’s fun to decorate and it’s really the only spot in my home that doesn’t get messy. My inspiration for this table is from a picture of a vintage refectory table that I saw on Etsy. I love the massive, chunky legs and the antique detail of it, so I got to designing and created my own modern version for this DIY dining table.
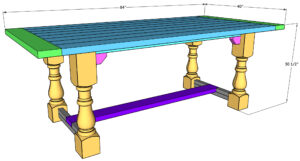
I was able to build it with only 11 2x6x8 construction lumber boards and 4 beautifully, chunky legs from Carolina Leg Company. These legs are 5″ thick, so pretty and very affordable! All together, I was able to build this table for under $250 total!
- You can find the Pine Monastery Dining Table Leg from Carolina Leg Compay here!
So, let’s get to building! Follow along below for the full tutorial!
Table of Contents
Dining Table Plans
Materials List:
Supplies:
- 11 – 2x6x8 Framing Lumber
- 4 – Pine Monastery Dining Legs
- 1 1/4″ Pocket Hole Screws
- 2 1/2″ Pocket Hole Screws
- 2 1/2″ Wood Screws
- Wood Glue
Tools:
Note: I ripped my 2x6x8 boards to 5″, this is not a necessary step but if you choose not to rip your boards, adjust the plans accordingly. I also ripped the more narrow widths boards from 2×6 to save on lumber cost.
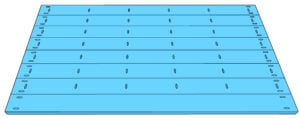
Building the Table Top
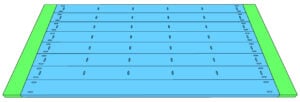
Step 1: Attaching the Planks
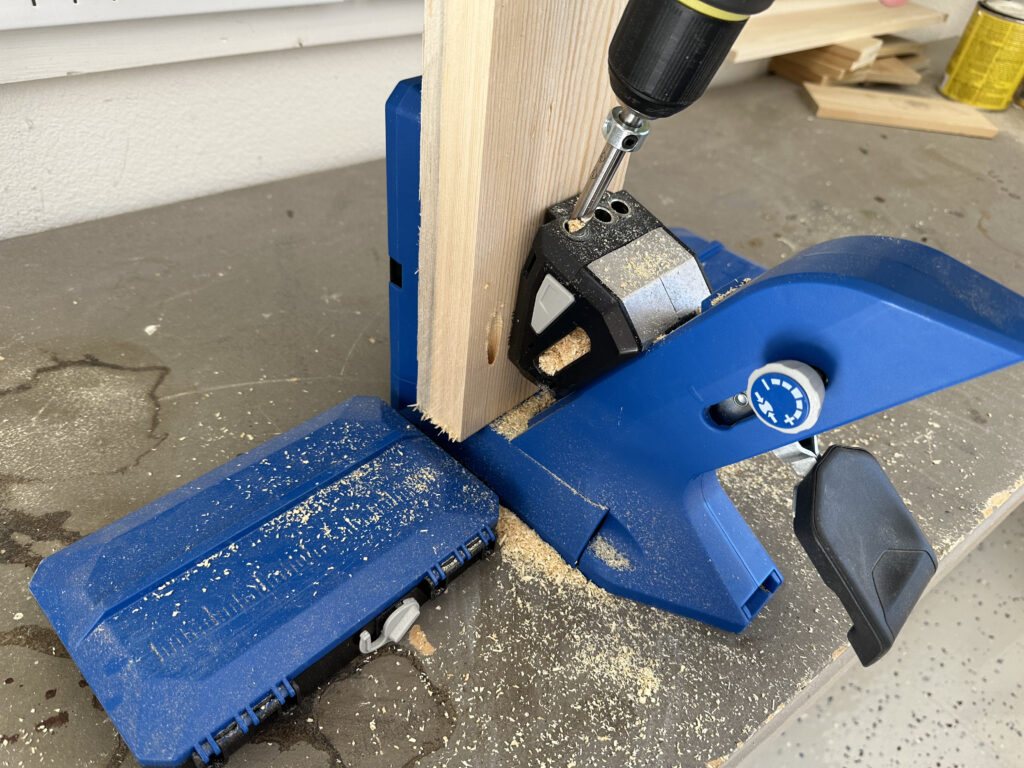
Cut the table top planks to size and drill 1 1/2″ pocket holes at both ends of each board and one edge of all, except one. I used our favorite Kreg Jig, the 720Pro.
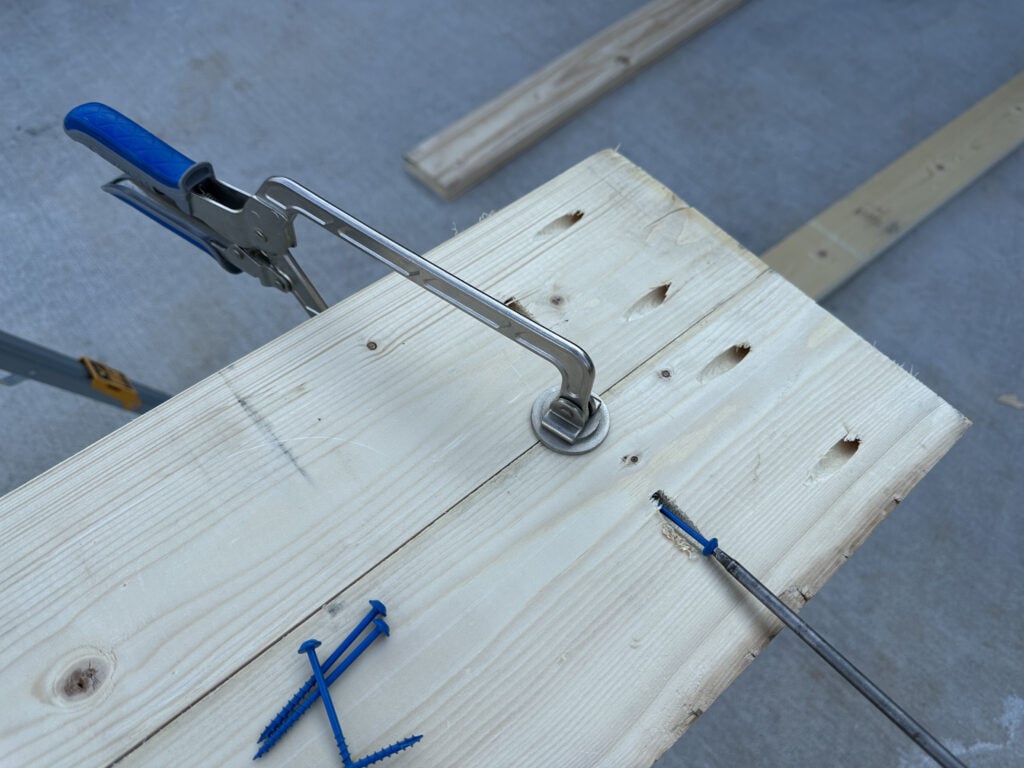
Attach them together with 2 1/2″ pocket hole screws and wood glue. We always get asked how we get our table top planks so smooth. We use the 6″ Kreg Face Clamps at each pocket hole joint.
Watch how we use the Kreg Face Clamp here!
Step 2: Breadboards
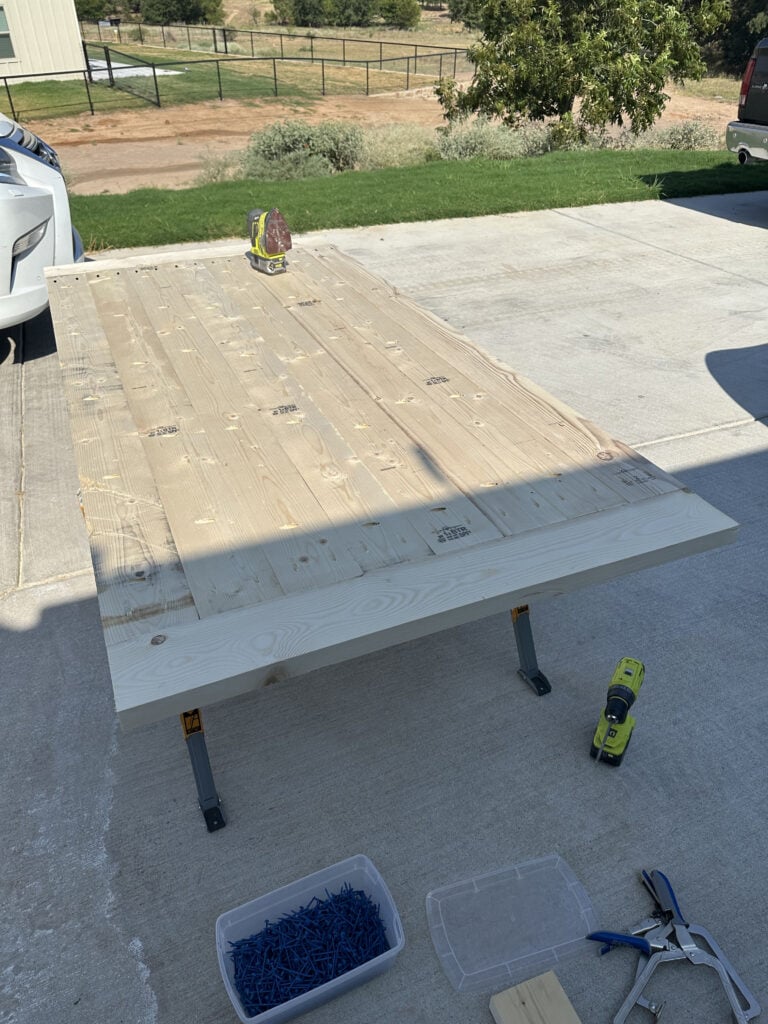
Measure and cut the breadboard pieces to size and attach them to the ends of the table top planks with 2 1/2″ pocket hole screws, through the pocket holes at the ends of the table top planks.
Assembling the Dining Table Base
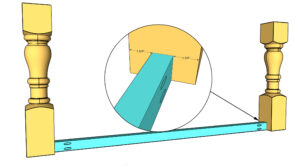
Step 3: Adding the Long Aprons
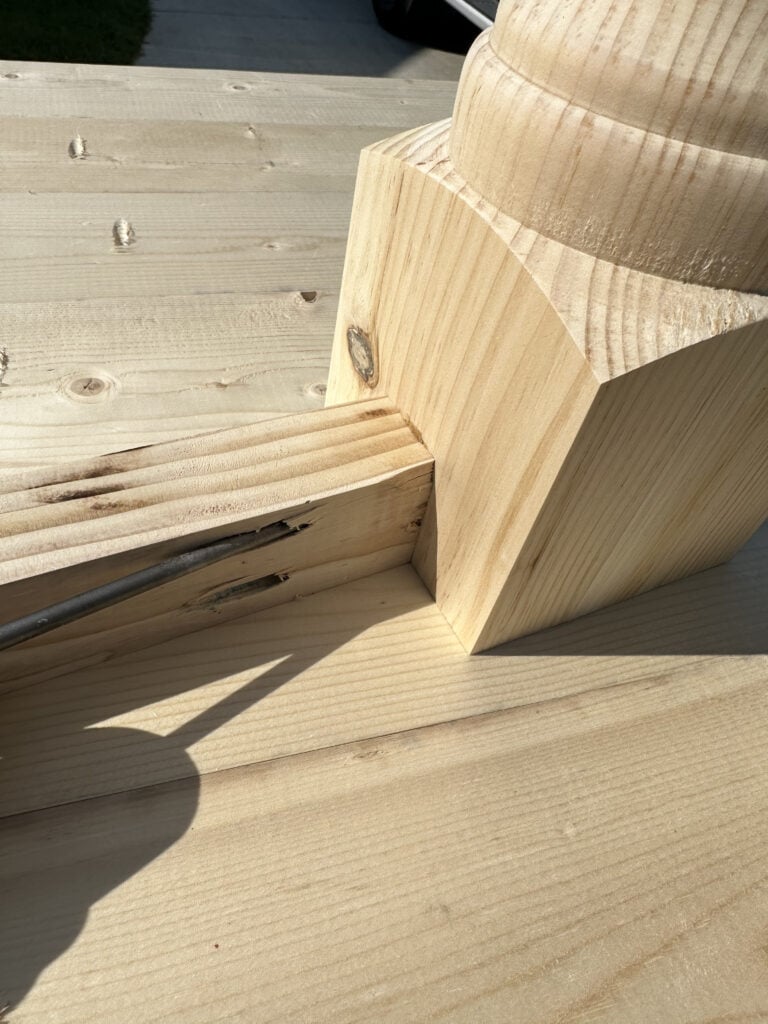
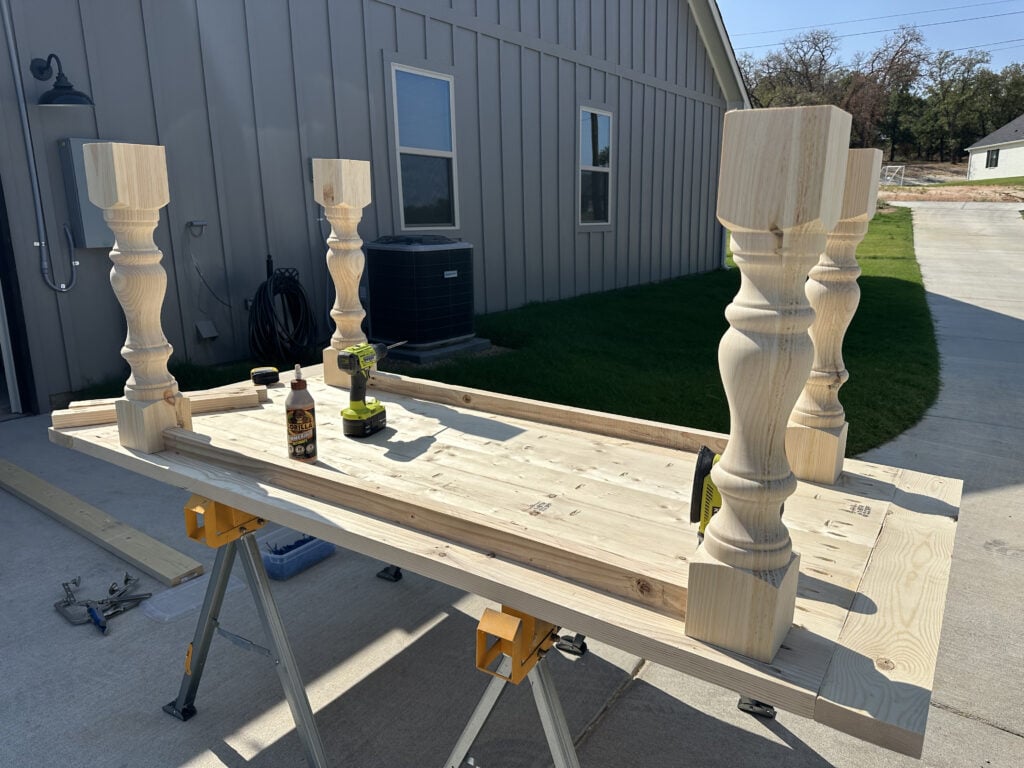
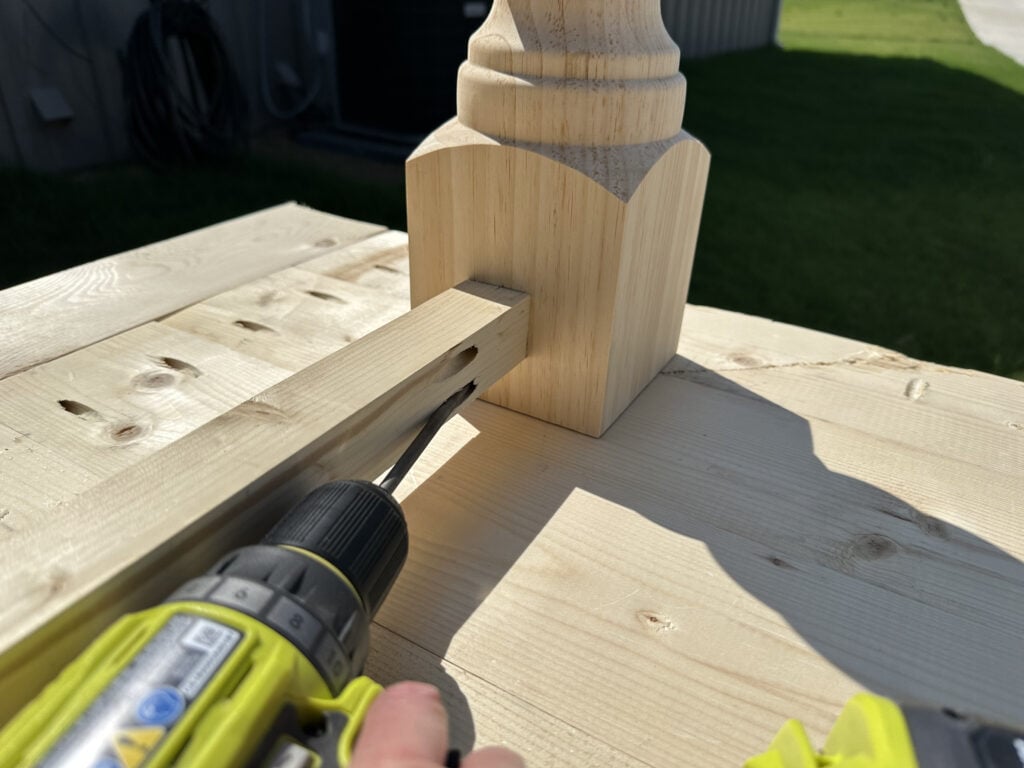
Cut the long apron pieces to size and drill 1 1/2″ pocket holes at both ends. Center the aprons on two legs and attach them to the legs with 2 1/2″ pocket hole screws and wood glue.
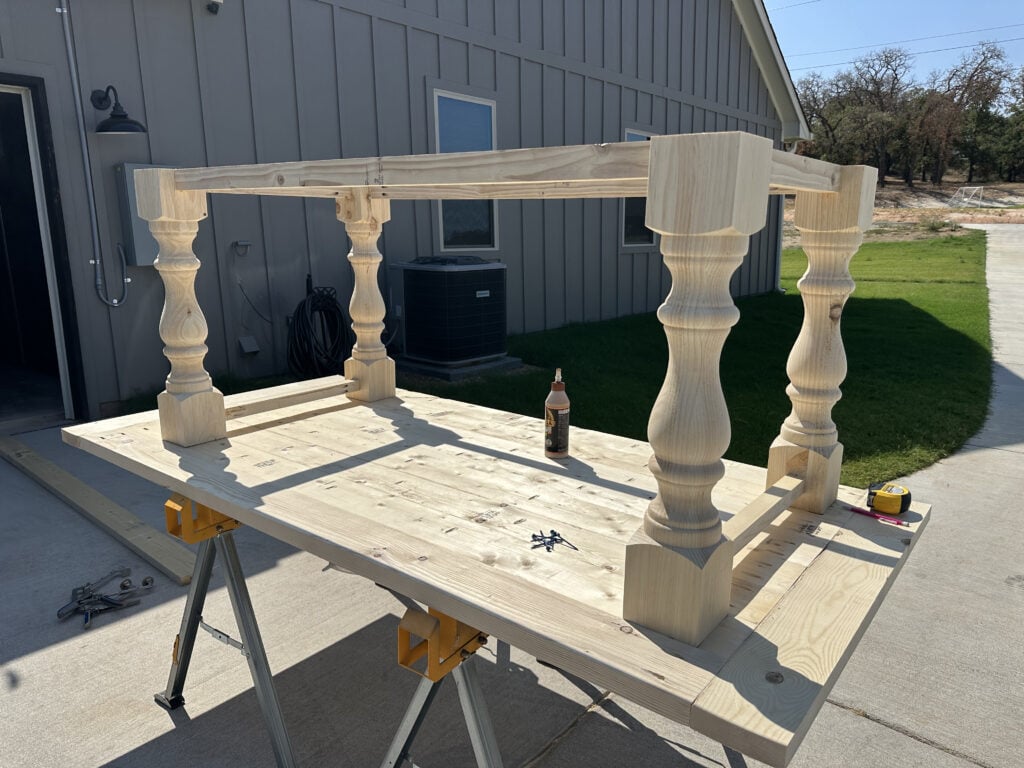
Build two leg assemblies.
This is how your table base should look at this point.
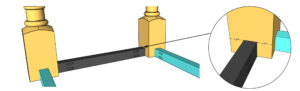
Step 4: Short Aprons
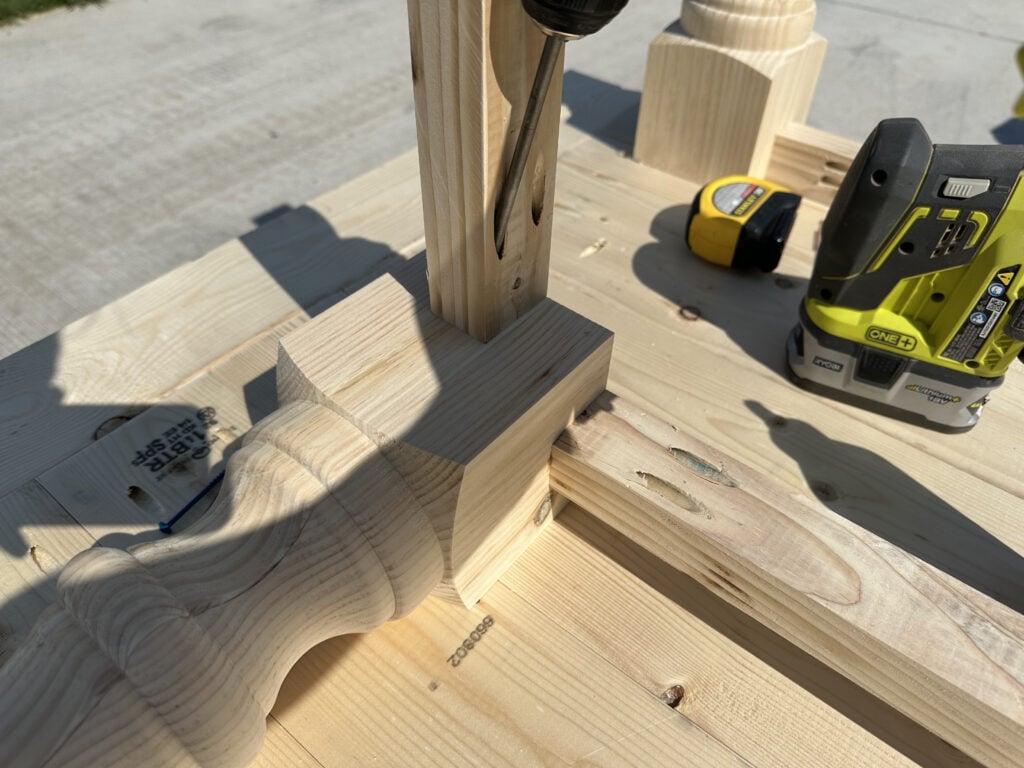
After cutting the short apron pieces to size, drill 1 1/2″ pocket holes at both ends. Center them on the leg assemblies and attach them to the legs with 2 1/2″ pocket hole screws and wood glue.
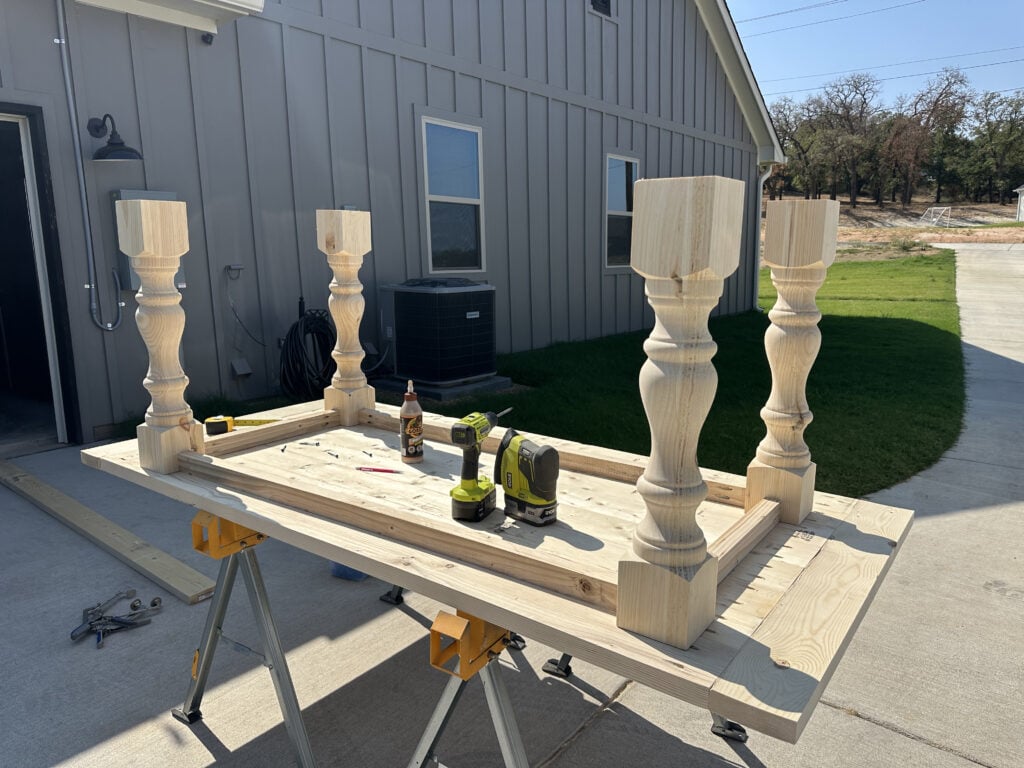
Here is a progress shot with all four aprons attached.
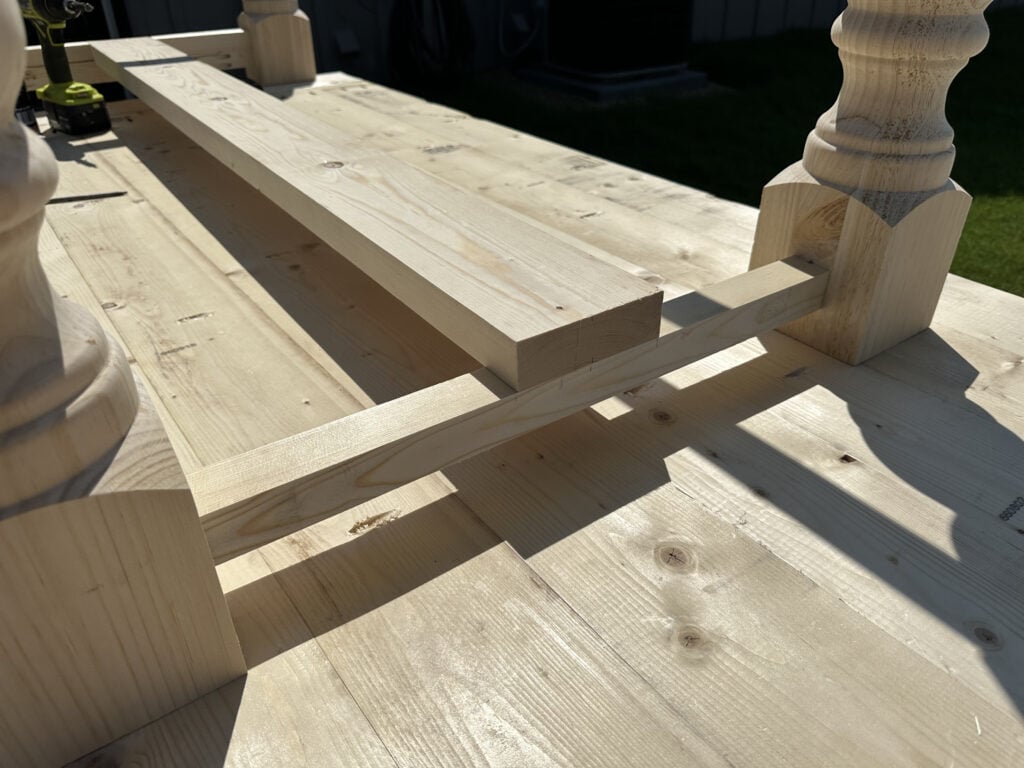
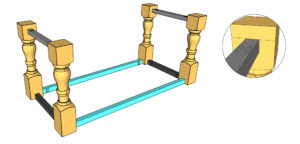
Step 5: Runner Support Pieces
First, cut the runner support pieces to size and drill 1 1/2″ pocket holes at both ends. Attach them to the bottom of the legs with 2 1/2″ pocket hole screws and wood glue. The pocket holes should face down, away from the table top. (Note: I attached mine to face inside but realized after attaching that facing down is best. I filled my pocket holes with wood filler).
Here she is will both runner supports attached.
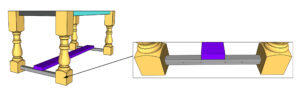
Step 6: Runner

Cut the runner to size and attach it to the center of the runner supports with 2 1/2″ wood screws and wood glue, from the bottom of the runner support, into the runner.
With the runner attached, it’s time for the trim!
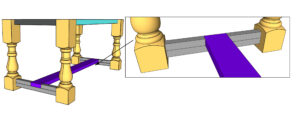
Step 7: Short Trim

Once the runner is in place, measure and cut the short trim pieces to size.
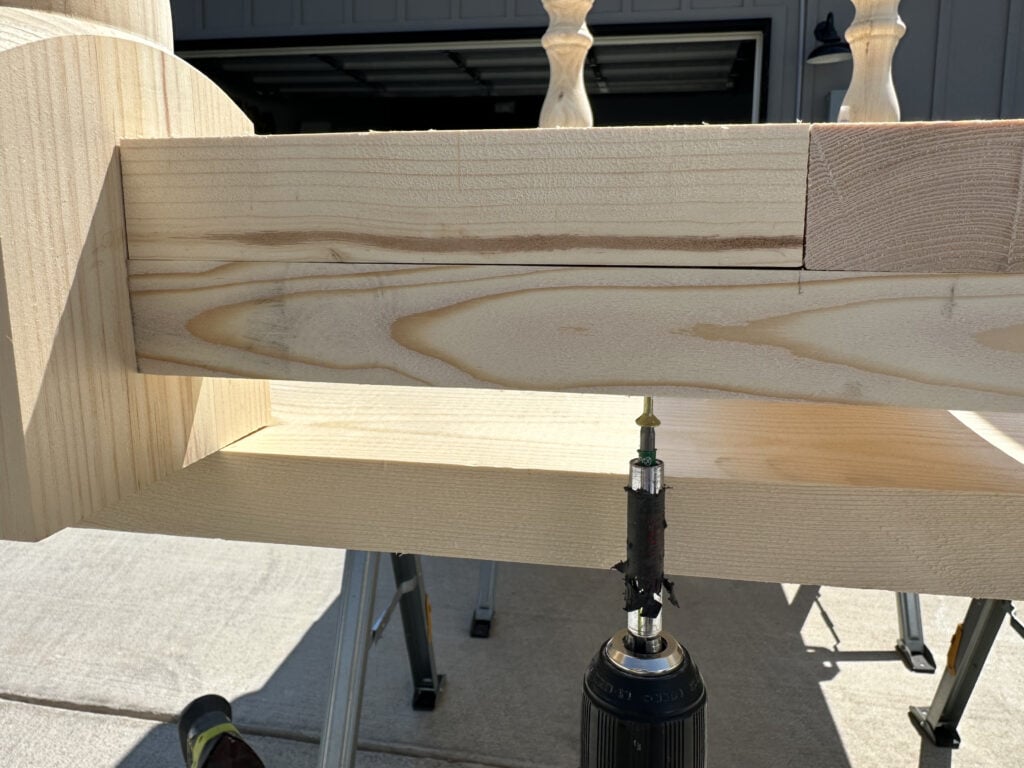
Attach them to the top of the runner support with 2 1/2″ wood screws, from the bottom of the runner support, into the short trim pieces.
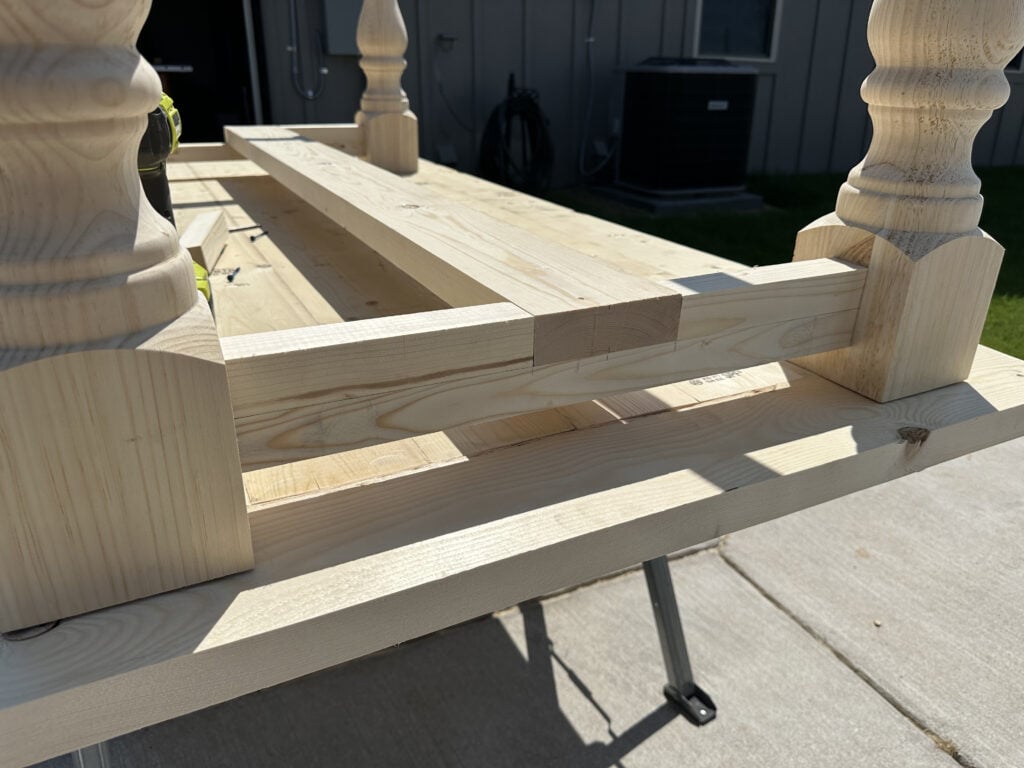
I love how the short trim pieces make the runner look like it goes through one main support piece.
Corner Pieces
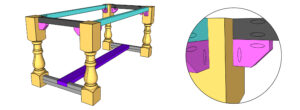
Step 8: Add the Corner Pieces
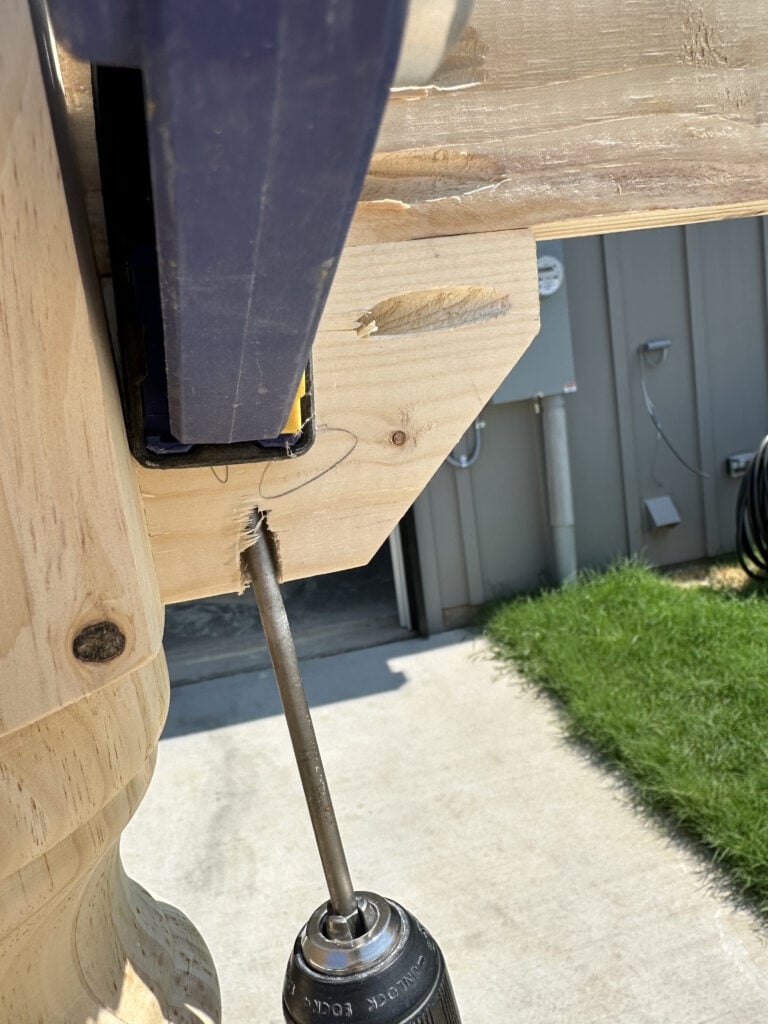
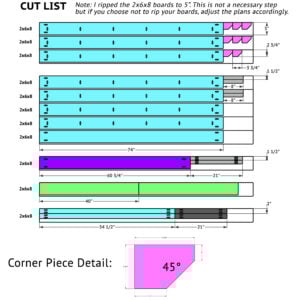
The corner pieces are not structural so you can make them any style, shape or design that you want. I chose a basic mitered corner style. First, cut each piece to size and drill one, 3/4″ pocket hole on the short side and one 1 1/2″ pocket hole on the long side – you can refer to the cut list for the detailed illustrations.
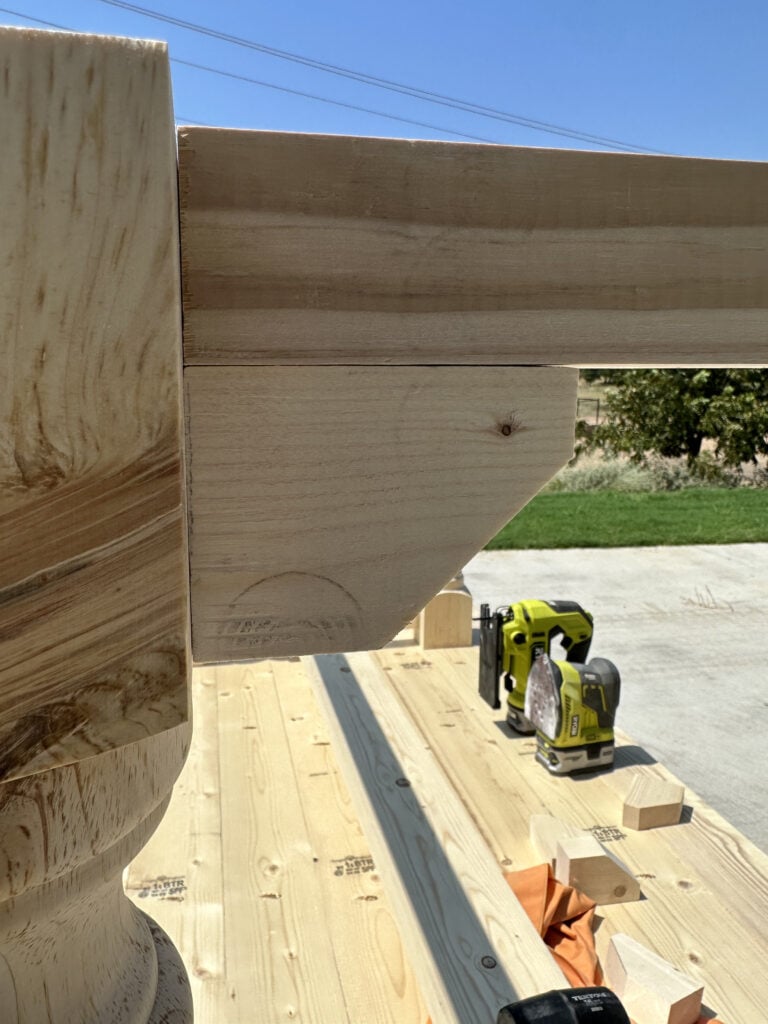
Attach a corner piece to each top corner of the dining table frame with pocket hole screws and wood glue.
Assembling the Dining Table
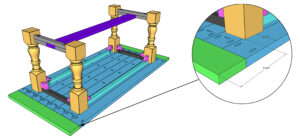
Step 9: Attaching the Table Top to the Base
Lay the table top upside down and center the base on top. Attach the base to the table top with 2 1/2″ wood screws, from the bottom of the apron pieces, into the table top planks. I like to do this step inside, after staining, once the table is in its spot. It makes it easier to get the table inside the house when it is in two pieces.
The Finish
Step 10: Sanding

Sand down the entire table down with an 80-grit sandpaper, followed by a 220-grit. Make sure to add wood filler to any exposed pocket holes.
Step 11: Stain
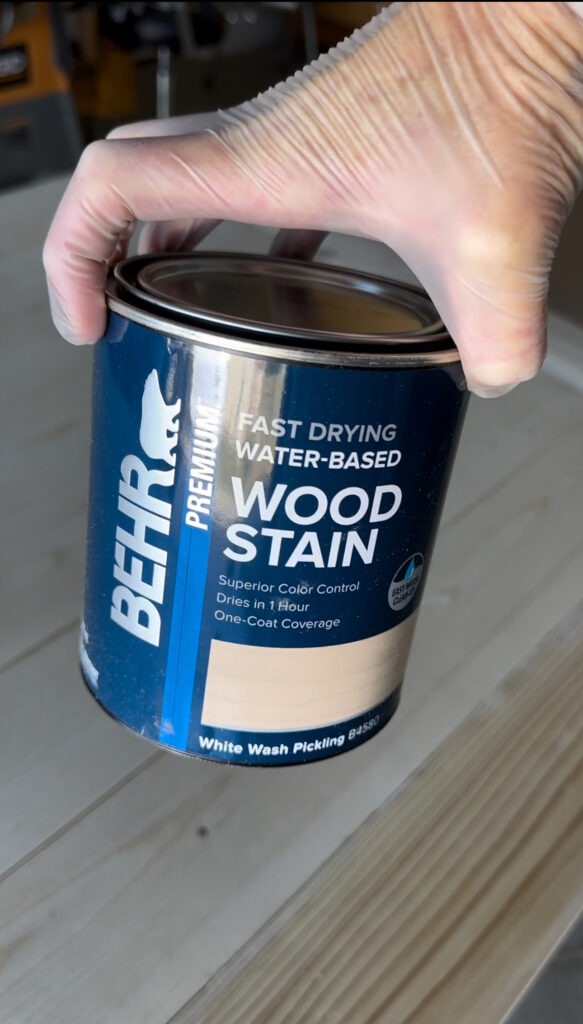
I tried a new staining method with this table and I love how it turned out. I started with one coat of BEHR White Wash Pickling stain all over the entire table.
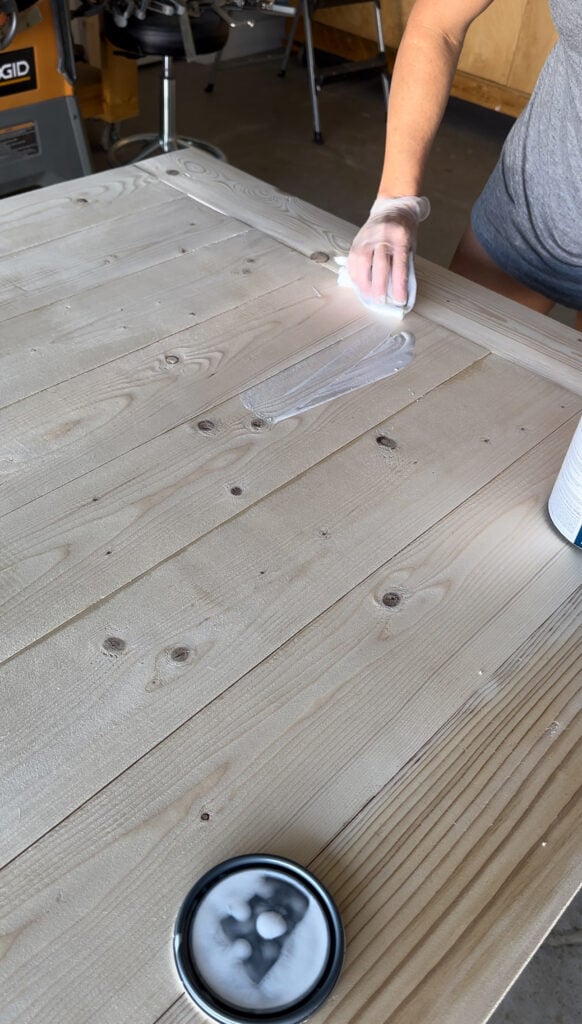
Wipe it on with a clean cloth, let it sit for about 5 minutes then wipe it again with a new clean cloth.
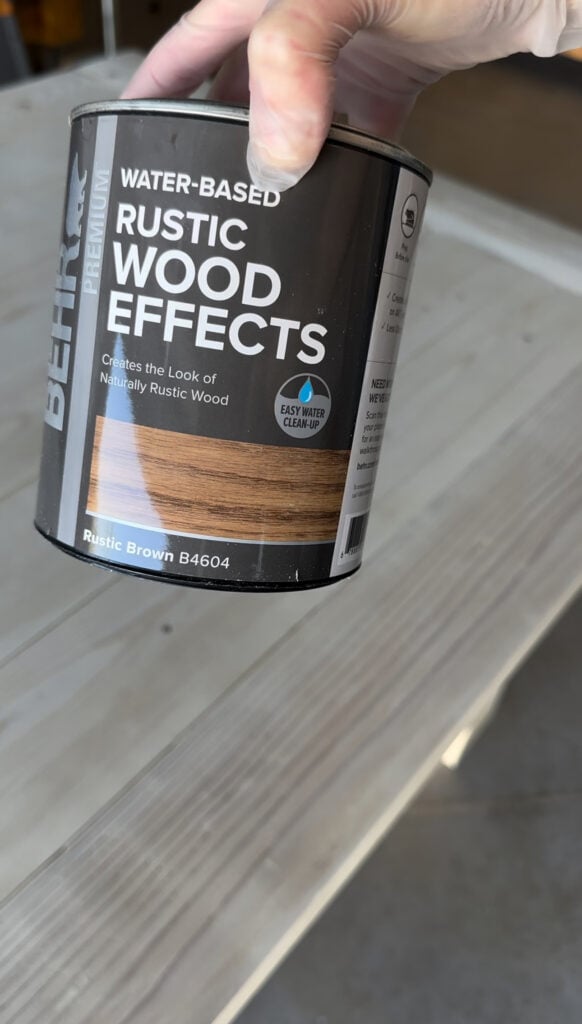
Once the table was dry, I used one coat of BEHR Rustic Wood Effects in the color Rustic Brown.
I wiped it directly over the pickling stain, let it sit for 5 minutes then wiped it away with a new clean cloth.
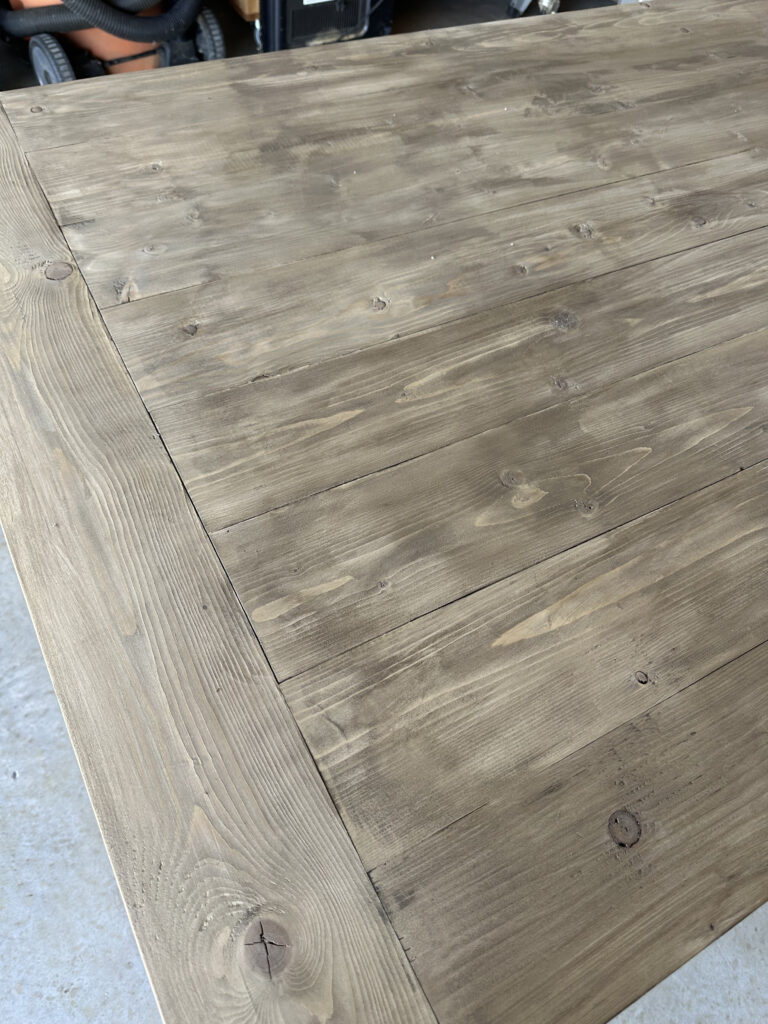
I love how the pickling stain gave the Rustic Brown a muted finish. It’s my new go-to for stain combos now and this BEHR line of stains is very high-quality, in my opinion!
You can watch me stain the entire table here!
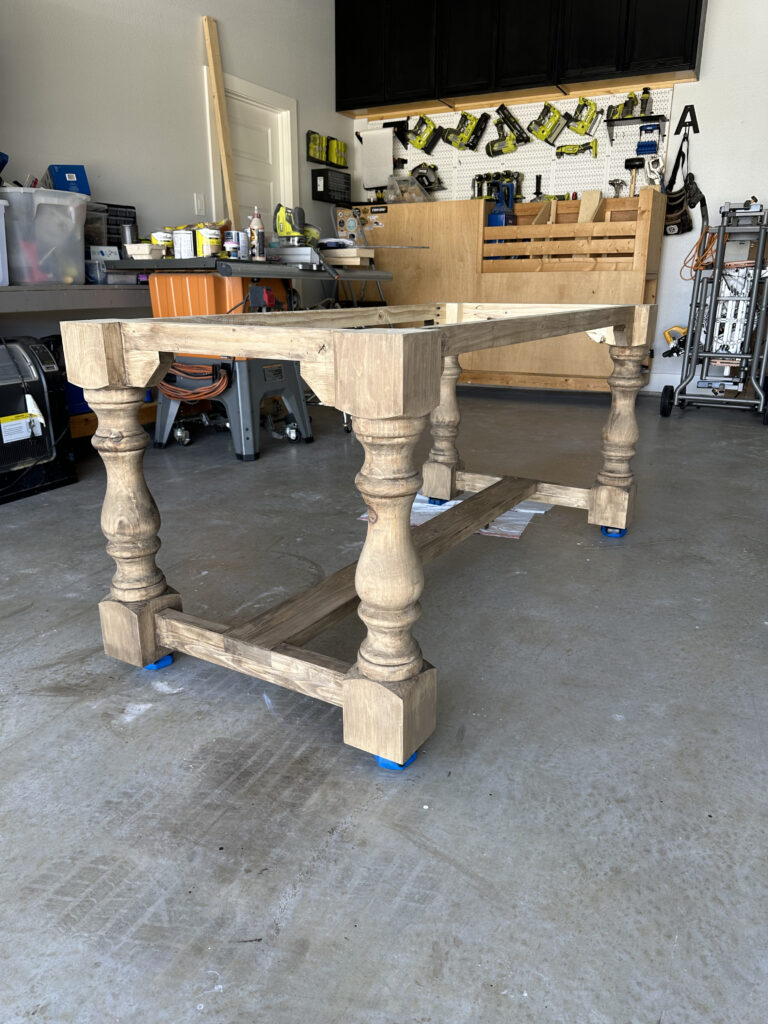
I used my Kreg Project Blocks to hold the table base and table top off of the ground while I stained them.
Step 12: Protective Finish
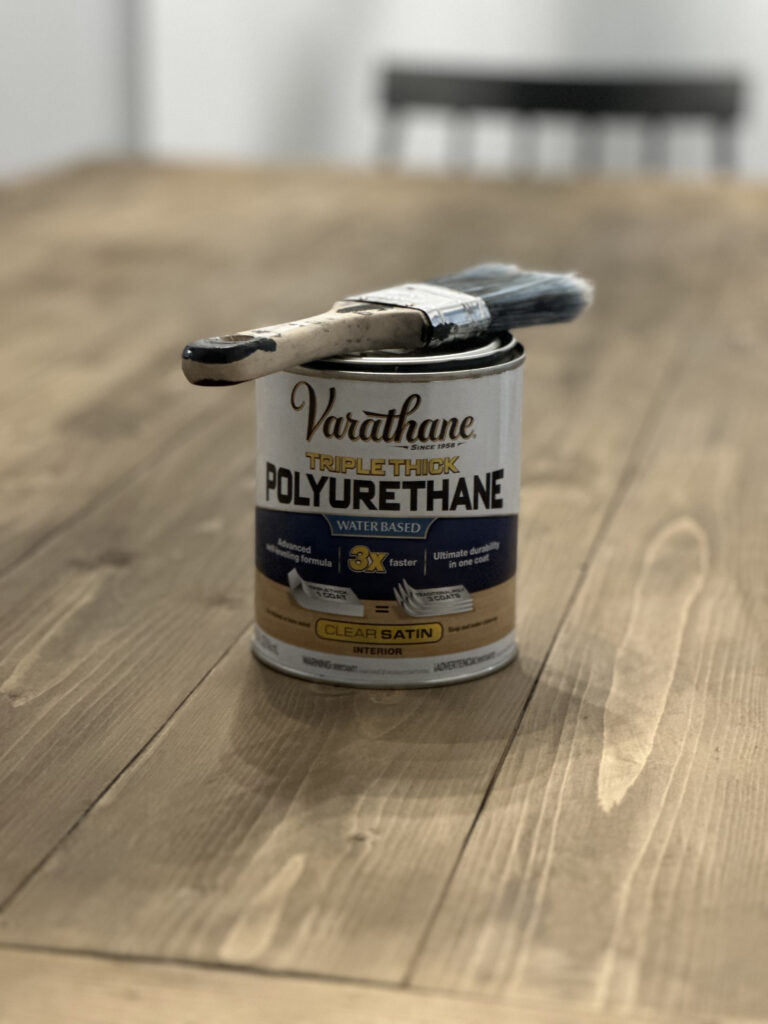
The final step was to add two coats of polyurethane to the table top. I used Varathane Triple Thick in a satin finish. Just paint it on with a bristle brush and let it dry.
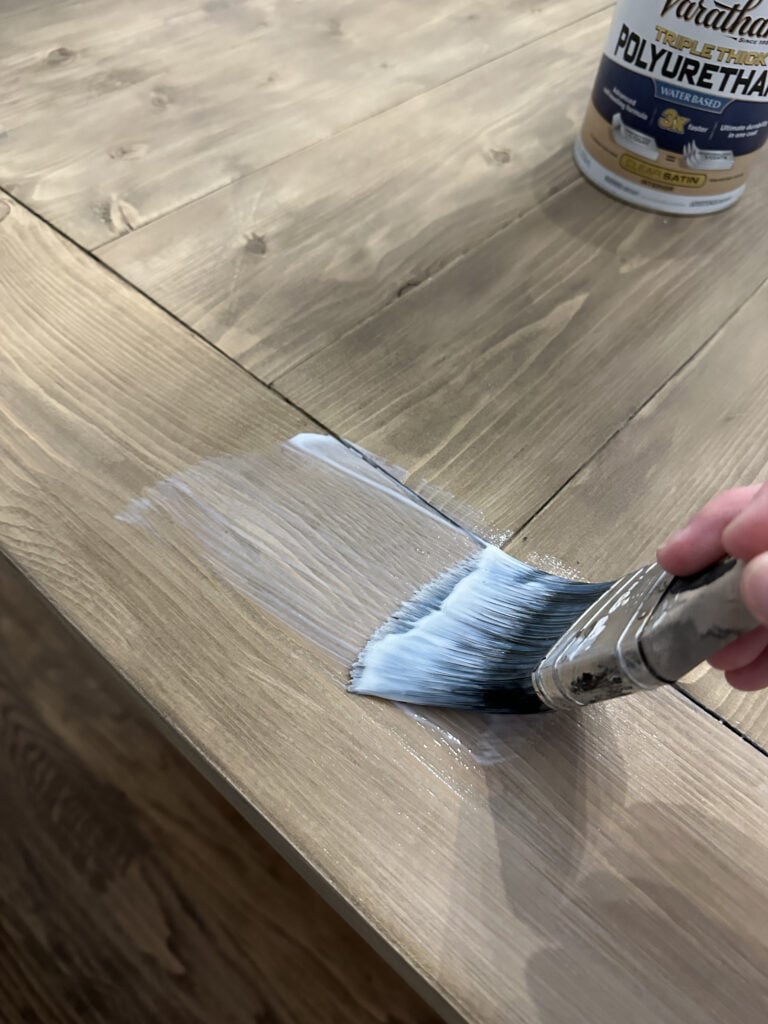
It will paint on white and dry clear. Let the first coat dry before adding another coat.

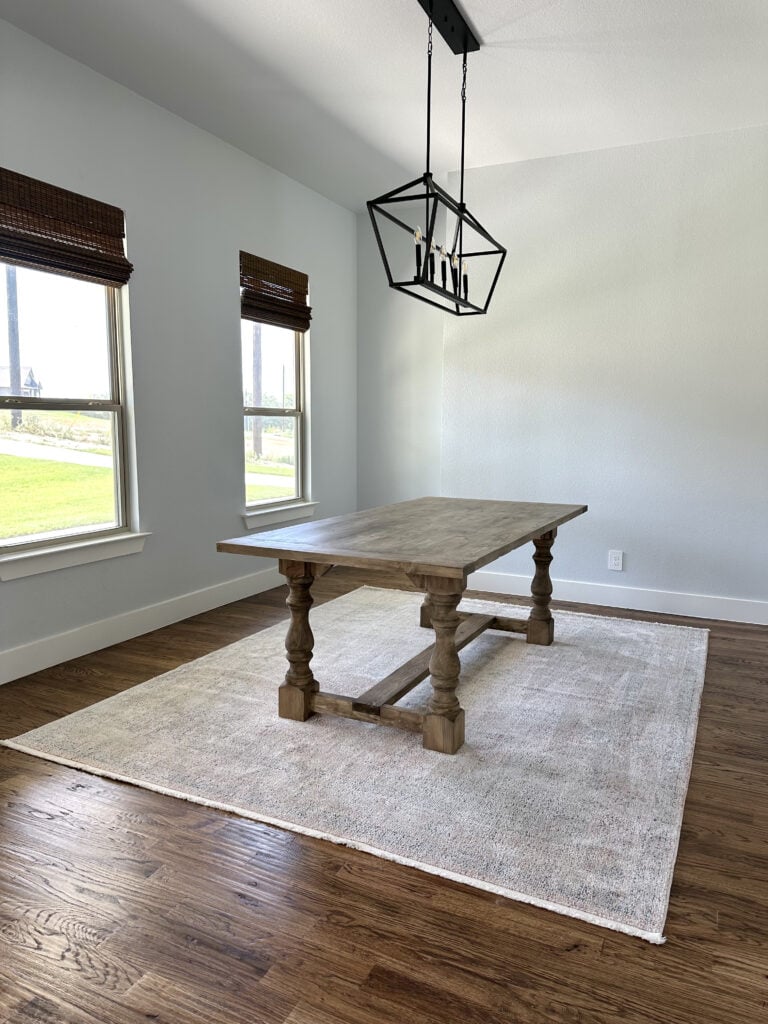
That was it! This may just be my favorite dining table out of all of my table builds! I love the vintage style, the massive legs and the new stain combination. Looks pretty Shanty to me!

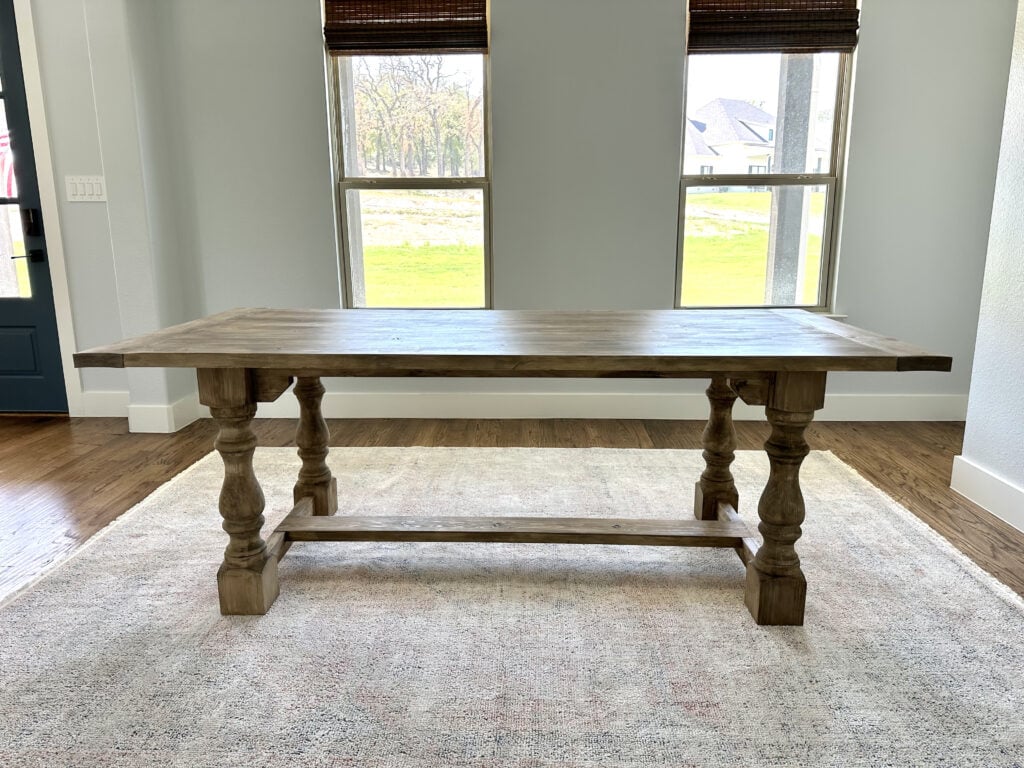

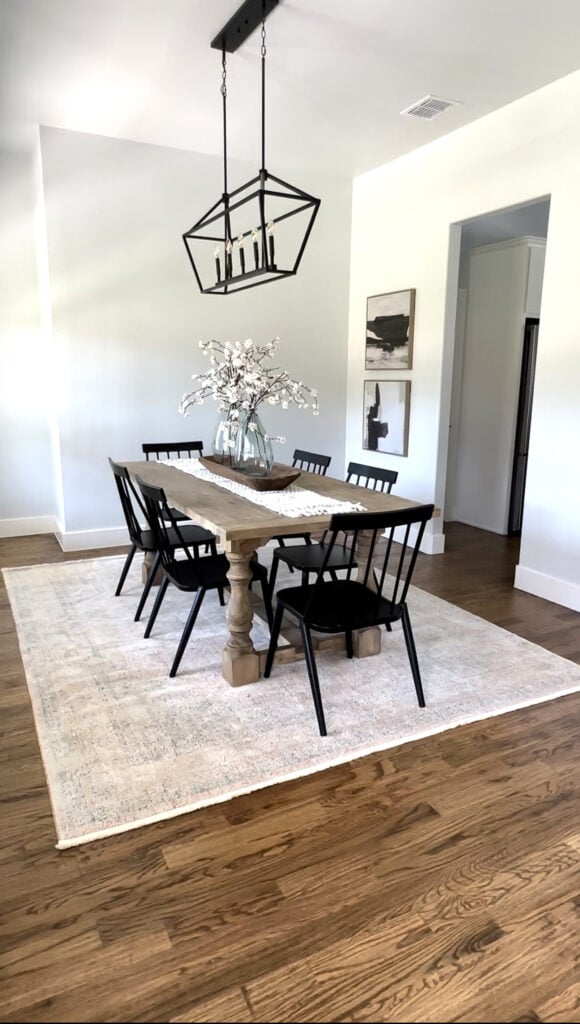
I decided to use my previous dining chairs, instead of building matching benches because I love them!
Make sure to share your builds with us on social media and use #shanty2chic so we can share them too!
Happy Building!
Check Our Top 20 Dining Table Plans!
DIY Dining Table Plans
How to Build a Dining Table: Free DIY Woodworking Plans
Tools
- Kreg Jig
- Miter Saw
- Drill
- Table Saw (optional)
- Sander
Supply List
- 11 2x6x8 Framing Lumber
- 4 Pine Monastery Dining Legs
- 1 1/4" Pocket Hole Screws
- 2 1/2" Pocket Hole Screws
- 2 1/2" Wood Screws
- Wood Glue
Instructions
Cut List
- Cut List

Building the Table Top
- Cut the table top planks to size and drill 1 1/2" pocket holes at both ends of each board and one edge of all, except one. Attach them together with 2 1/2" pocket hole screws and wood glue.

- Measure and cut the breadboard pieces to size and attach them to the ends of the table top planks with 2 1/2" pocket hole screws, through the pocket holes at the ends of the table top planks.

Assembling the Dining Table Base
- Cut the long apron pieces to size and drill 1 1/2" pocket holes at both ends. Center the aprons on two legs and attach them to the legs with 2 1/2" pocket hole screws and wood glue. Build two leg assemblies.

- After cutting the short apron pieces to size, drill 1 1/2" pocket holes at both ends. Center them on the leg assemblies and attach them to the legs with 2 1/2" pocket hole screws and wood glue.

- First, cut the runner support pieces to size and drill 1 1/2" pocket holes at both ends. Attach them to the bottom of the legs with 2 1/2" pocket hole screws and wood glue. The pocket holes should face down, away from the table top.

- Cut the runner to size and attach it to the center of the runner supports with 2 1/2" wood screws and wood glue, from the bottom of the runner support, into the runner.

- Once the runner is in place, measure and cut the short trim pieces to size. Attach them to the top of the runner support with 2 1/2" wood screws, from the bottom of the runner support, into the short trim pieces.

Corner Pieces
- The corner pieces are not structural so you can make them any style, shape or design that you want. I chose a basic mitered corner style. First, cut each piece to size and drill one, 3/4" pocket hole on the short side and one 1 1/2" pocket hole on the long side – you can refer to the cut list for the detailed illustrations. Attach a corner piece to each top corner of the dining table frame with pocket hole screws and wood glue.

Assembling the Dining Table
- Lay the table top upside down and center the base on top. Attach the base to the table top with 2 1/2" wood screws, from the bottom of the apron pieces, into the table top planks. I like to do this step inside, after staining, once the table is in its spot. It makes it easier to get the table inside the house when it is in two pieces.

The Finish
- Sand the table down, fill any exposed pocket holes with wood filler and add a finish! Make sure to share your builds with us on social media and use #shanty2chic so we can share them too!Happy Building!

Come see all of our DIY dining table plans! We have over 25 free tutorials for you to choose from!

Love this build! The chunky monastery legs are such a great choice. I just finished a similar farmhouse table using construction lumber and your tip about ripping the 2x6s to 5″ really does make a difference in the final look. One thing that saved me a ton on my build was planning out all my cuts beforehand — I used https://opticut.io to figure out the most efficient way to get everything from my 11 boards with the least waste. Ended up saving almost a full board. Thanks for sharing the free plans!
This dining table build is a great example of how solid woodworking and thoughtful proportions can create a centerpiece for any dining space. The clean design keeps it versatile for different interior styles, while the sturdy construction ensures it can handle everyday use. The detailed plans and step-by-step guidance make the project approachable for builders who want to create custom furniture.
From an interior industry perspective, dining tables like this highlight the importance of durable materials and craftsmanship in furniture design. Well-built wooden tables remain a key element in residential and hospitality interiors because they combine longevity with timeless appeal. We’ve also been exploring similar furniture material trends across the interior industry here: https://plywoodbazar.com/
What type of wood are you using in this design?
Thanks
It looks like pine.
Great job!
What adjustments would I need to make for this table to seat 10? And can it be an outdoor table?
I would extend it to 10’ long. You’ll add 2’ to the long planks and 2’ to the bottom runner and long aprons. If it’s outdoor, put a 1/4-1/2” gap between the planks and I would leave the breadboards off – so, 10ft on the long planks.