Happy Friday! I’m excited to share the easy DIY Picture Frame that is perfect for an easy project this weekend!
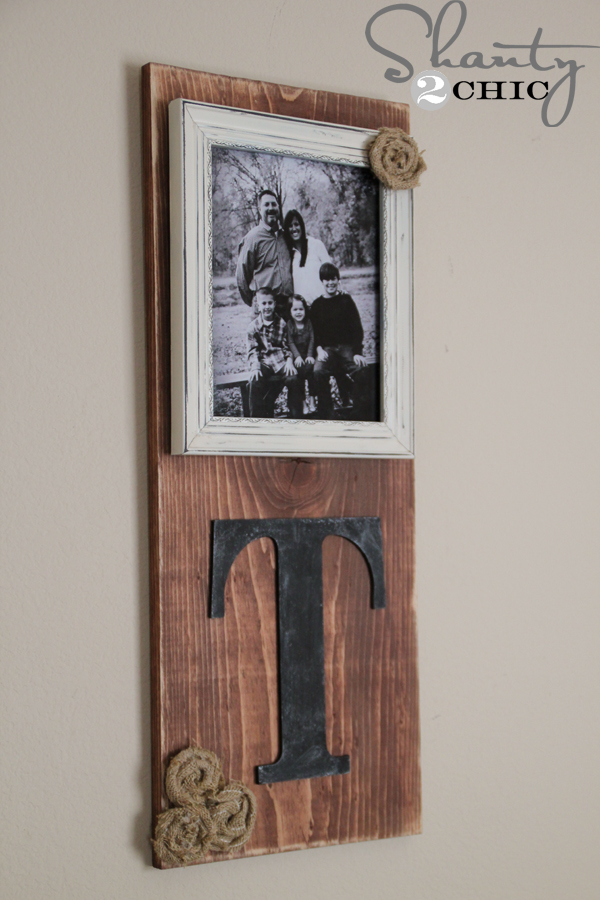 It’s not only super easy, I made it for under $10! Whoop!
Here’s how:
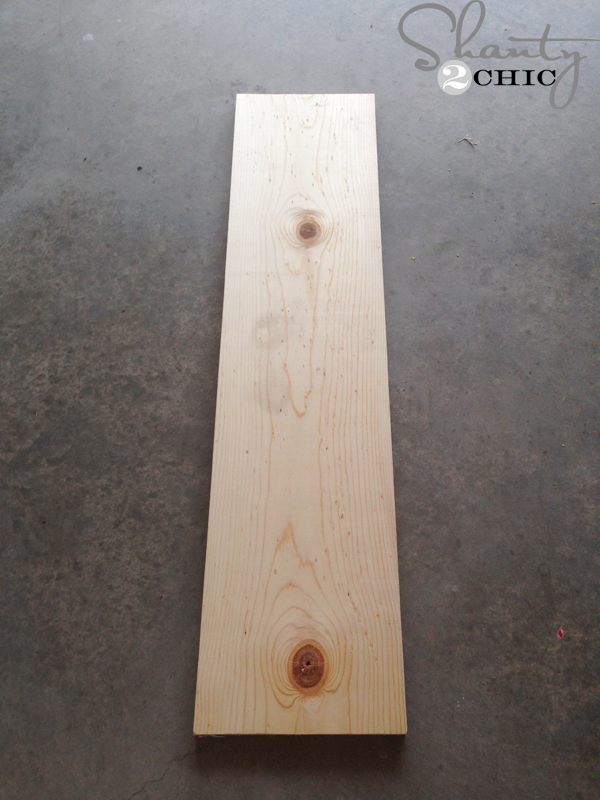 I purchased a 1×12 @ 4 ft. and cut it in half. You can make 2 of these frames with one board!
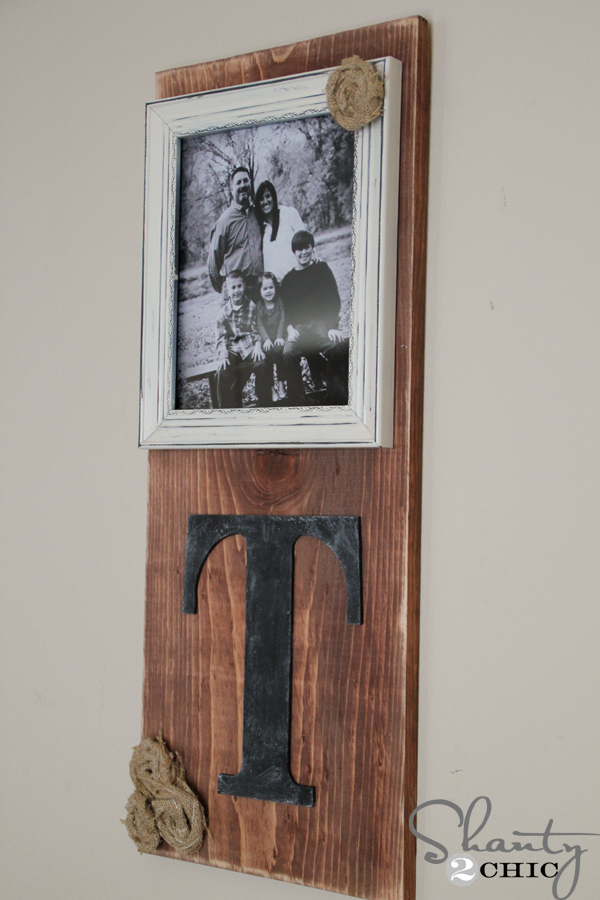
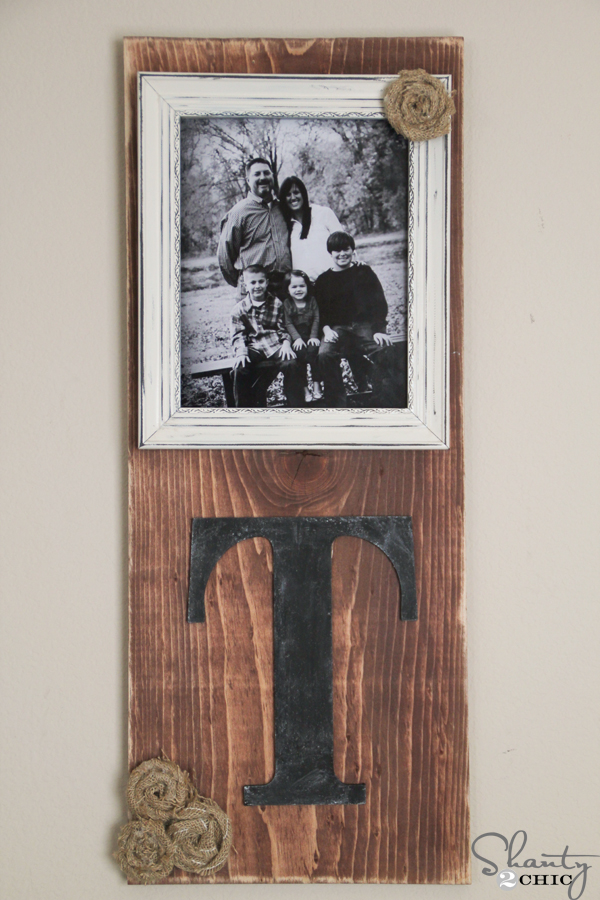
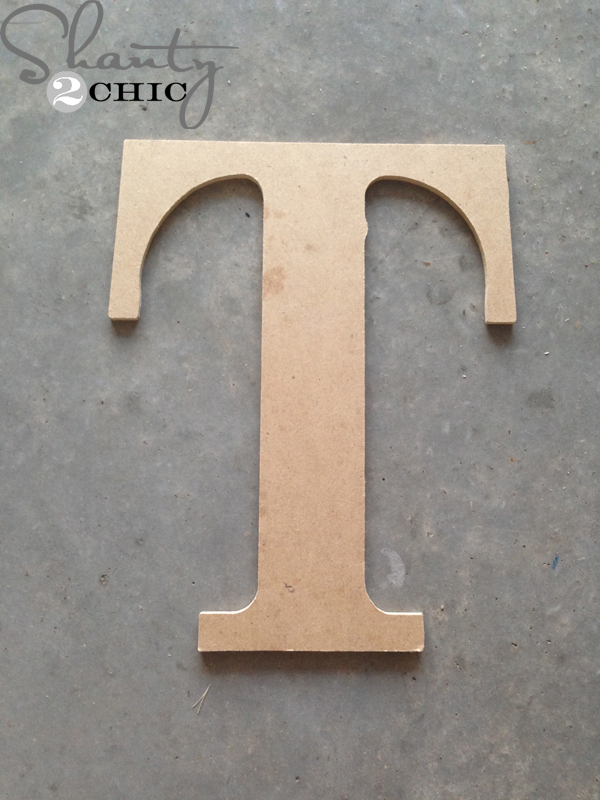 I bought an MDI letter from Hobby Lobby for about $1. (pick them up when they are one sale)! It’s the initial of our last name 🙂
 I wiped on one-coat of Light Walnut stain, with a foam brush. Then I let it sit for about 5 minutes and then wiped the stain with a clean cloth. Don’t wipe the stain away, just blend it.
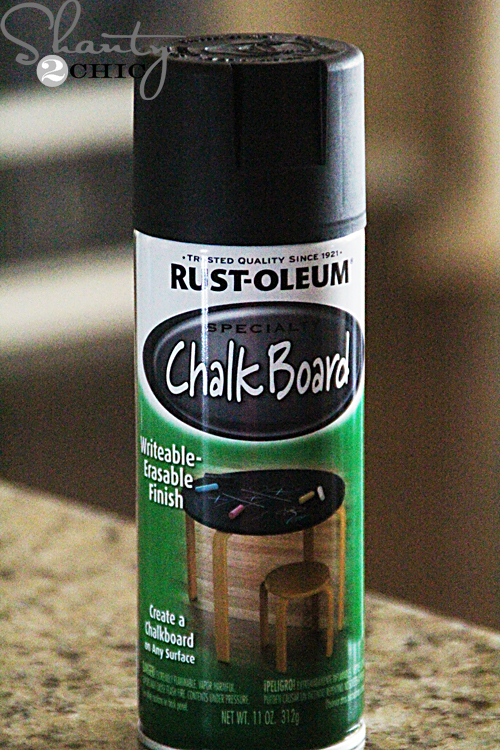 While the board was drying, I sprayed 2 coats of Chalkboard Spray Paint on the letter T.
 I love how the letters turned out on my Fall Chalkboard Sign, so I used the same technique. Just rub a piece of chalk all over the letter and wipe it off. It gives the letter a true chalkboard look.
 I picked up this 8×10 frame from Wal-Mart for $3! Score 🙂
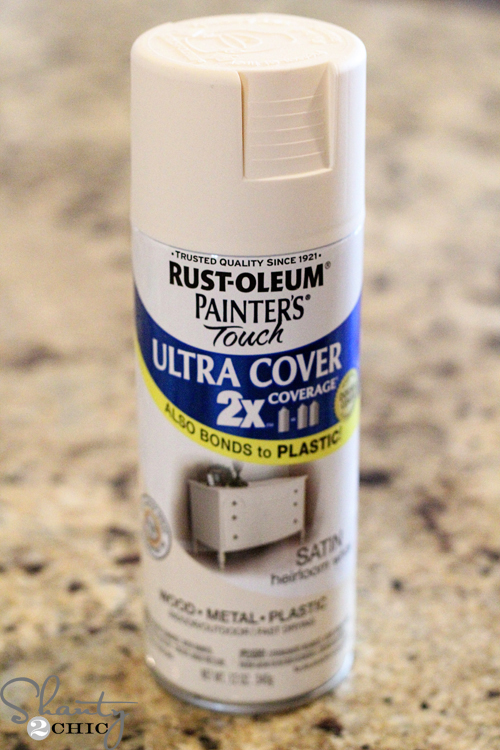 I sprayed about 2-coats of our favorite, Rust-Oleum Heirloom White on the frame
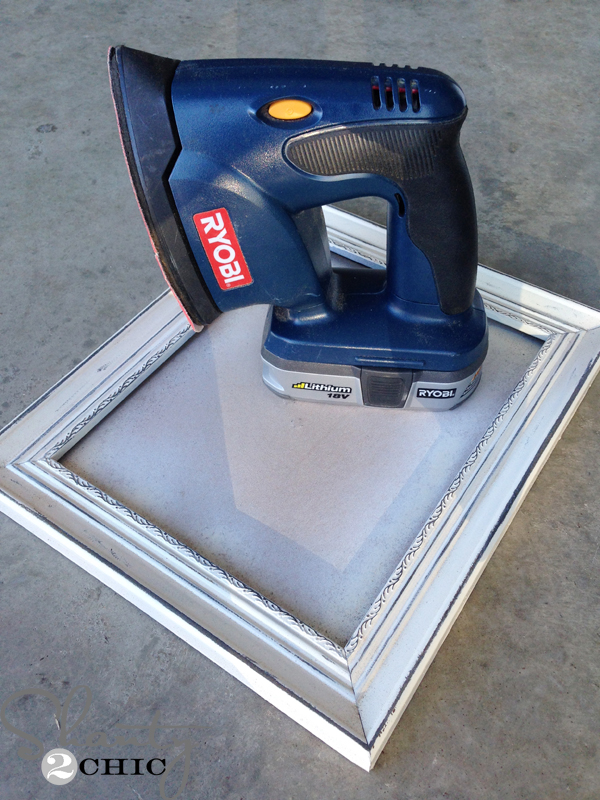 and distressed it with my Corner Cat Sander. Loved using this sander on the frame. The point on the end made it so easy to get in the corners of the frame.
 To hang the frame, I put a screw about 2 1/2″ from the top of the board (just eyeball it)
 Now, rip off the thing on the back of the frame that makes it stand. I just bent it backwards until the hinge popped off. Now you can just hang it on the screw.
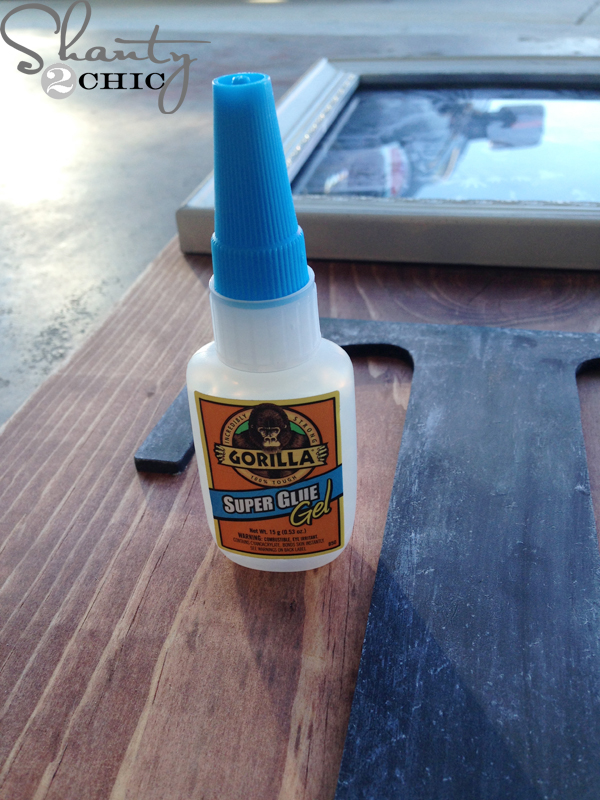 To attach the letter, I used Gorilla Glue Super Glue Gel. I just centered it on the bottom half of the board.
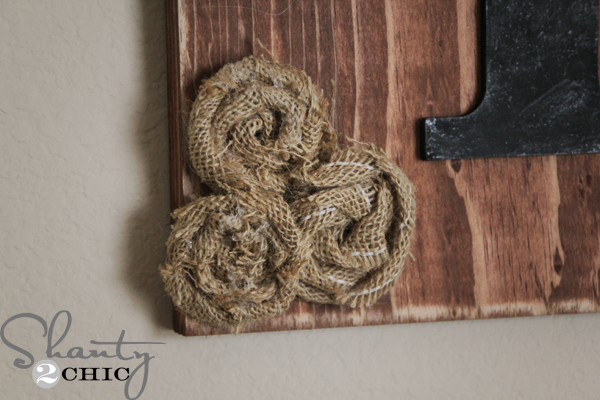 To finish her off, I added a few burlap, flat-rolled rosettes. Three on the bottom left corner and one at the top right corner of the frame. You can check out the tutorial for these cute rosettes HERE.
To hang, I just used a sawtooth hanger on the back of the board and an anchor in the wall.
 LOVE 🙂

I’m thinking Christmas gifts 🙂 You could also glue the frame down but I like to be able to swap the pictures out 🙂
I hope you love my cute, DIY Picture Frame 🙂
We always appreciate your shares and pins!
Thanks for stopping by!
~Ashley


How is the back done for allowing for hanging on wall?
thank you for the idea was beautiful!!!
?
?
✌?✌
?
??
?I built my own picture frame using the plans at www. WoodworkPlans.info – highly recommended you check those out too. They are detailed and super easy to read and understand unlike several others I found online. The amount of plans there is mind-boggling… there’s like 16,000 plans or something like that for tons of different projects. Definitely enough to keep me busy with projects for many more years to come haha
www. WoodworkPlans.info — check it out for much better picture frame plans.????????
Thanks for the great idea! Here is my version!
I absolutely love this! I know what my family will be getting for Christmas! Thank you for sharing!
This is gorgeous!!! Are you sure the measurements are correct? With only 2 ft in length for each one (you said you can make 2), I don’t see how the 8×10 frame and letter fit on there with room to spare?
I was wondering if the frame has to be made out of wood? The only thin one’s I could find at Dollar Tree or Walmart were not wood, they were plastic. Can’t wait to make this one…..Thank you!
the one I found was at Walmart, and she found it for $3 but mine was $4 ! It is plastic