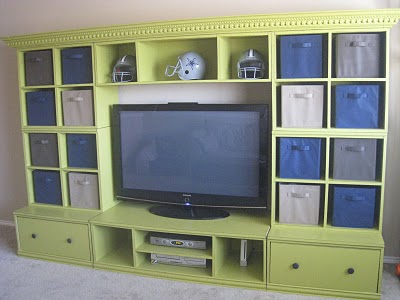
Well, it’s time for me to finally get around to decorating our game room and I am less than motivated by this color! In fact, the rule of thumb that you should never cut your hair when pregnant should also include…or pick out a paint color (at least in my case;) It screams 1st trimester nausea to me every time I look at it!
Fast forward two years later and I finally caved!!!
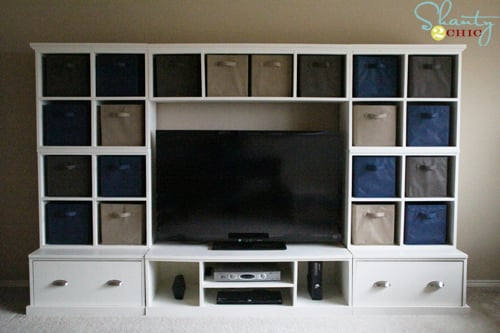
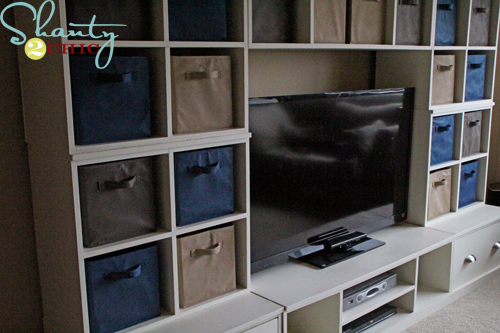
I am still so in love with this piece after two years and I love it even more with its modern look! I covered up the first trimester green with 2 fresh coats of Behr Cozy Cottage in satin! I also changed out the top and bottom trims for something a little more modern as well as the pulls!
Here’s what I did!
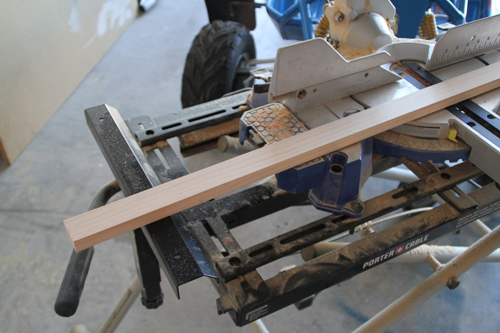
I purchased 1×2 and 1×3 select pine boards. 1×3’s for the bottom trim and 1×2’s for the top!
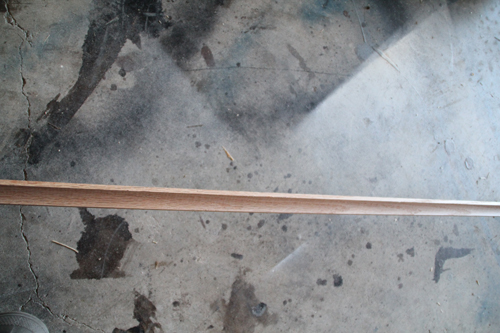
I also purchased sticks of cove molding to place underneath the 1×2’s.
I placed the 1×2’s flat side down on the very top of the unit and let them hang over the edge to be flush with the cove molding. I attached them with Liquid Nails and followed up with a few finishing nails.
I did have to miter the edges and it is NOT difficult! I used my compound miter saw and there are hard stops for 45 degree mitered angles. I just cut and caulked!
I also used Liquid Nails and finishing nails to attach the 1×3 boards for the base trim and I swapped the knobs for my favorite pulls that I purchase at Home Depot for about $5 each. They are a little pricey but oh so worth it!
I finally have the motivation I need to decorate our game room! This was the first building project I ever tackled and if I could do it with ZERO building experience…anyone can;)
If you missed the step-by-step tutorials I shared as I was building this unit you can follow the links below!!
Step 1Step 2Step 3Step 4Step 5Step 6Step 7Step 8
Thanks so much for stopping by;)
~Ashley
Become a VIP Insider
Stay up-to-date on all the new project, free plans and new products available for you!
????⭐?⭐⭐⭐
⭐?⭐?⭐?⭐?⭐?⭐?
I built my own using the plans at www. WoodworkPlans.info – highly recommended you check those out too. They are detailed and super easy to read and understand unlike several others I found online. The amount of plans there is mind-boggling… there’s like 16,000 plans or something like that for tons of different projects. Definitely enough to keep me busy with projects for many more years to come haha
⭐
Head on over to www. WoodworkPlans.info if you want to learn more – click the pink link above for some more plans! Best of luck on your building adventures!
⭐?⭐?⭐?⭐?⭐?⭐?⭐?⭐?
Ashley love the ‘makeover’. I feel your pain about repainting a piece, especially such a large one and oh that first trimester feeling/smell/sickness reminder will get you every time. PS – Cozy Cottage is my fave, so creamy but not yellow at all, only second to BM navajo white. Nice update for certain and now the queasiness is gone!
I love the new look! Great job. You always amaze me:) My hubby would die before letting me at his tools:) But since he usually very willingly works on whatever I want him to I think I’ll leave things the way they are! I’m very much impressed that you do all this though – you rock!!!!

 Well, it’s time for me to finally get around to decorating our game room and I am less than motivated by this color! In fact, the rule of thumb that you should never cut your hair when pregnant should also include…or pick out a paint color (at least in my case;) It screams 1st trimester nausea to me every time I look at it!
Fast forward two years later and I finally caved!!!
Well, it’s time for me to finally get around to decorating our game room and I am less than motivated by this color! In fact, the rule of thumb that you should never cut your hair when pregnant should also include…or pick out a paint color (at least in my case;) It screams 1st trimester nausea to me every time I look at it!
Fast forward two years later and I finally caved!!!
 I am still so in love with this piece after two years and I love it even more with its modern look! I covered up the first trimester green with 2 fresh coats of Behr Cozy Cottage in satin! I also changed out the top and bottom trims for something a little more modern as well as the pulls!
Here’s what I did!
I am still so in love with this piece after two years and I love it even more with its modern look! I covered up the first trimester green with 2 fresh coats of Behr Cozy Cottage in satin! I also changed out the top and bottom trims for something a little more modern as well as the pulls!
Here’s what I did!
 I also used Liquid Nails and finishing nails to attach the 1×3 boards for the base trim and I swapped the knobs for my favorite pulls that I purchase at Home Depot for about $5 each. They are a little pricey but oh so worth it!

 I am still so in love with this piece after two years and I love it even more with its modern look! I covered up the first trimester green with 2 fresh coats of Behr Cozy Cottage in satin! I also changed out the top and bottom trims for something a little more modern as well as the pulls!
Here’s what I did!
I am still so in love with this piece after two years and I love it even more with its modern look! I covered up the first trimester green with 2 fresh coats of Behr Cozy Cottage in satin! I also changed out the top and bottom trims for something a little more modern as well as the pulls!
Here’s what I did!
 I purchased 1×2 and 1×3 select pine boards. 1×3’s for the bottom trim and 1×2’s for the top!
 I also purchased sticks of cove molding to place underneath the 1×2’s.
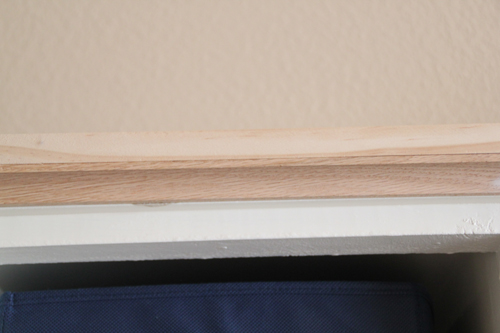 I placed the 1×2’s flat side down on the very top of the unit and let them hang over the edge to be flush with the cove molding. I attached them with Liquid Nails and followed up with a few finishing nails.
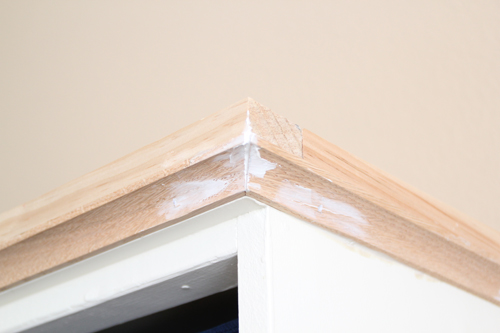 I did have to miter the edges and it is NOT difficult! I used my compound miter saw and there are hard stops for 45 degree mitered angles. I just cut and caulked!
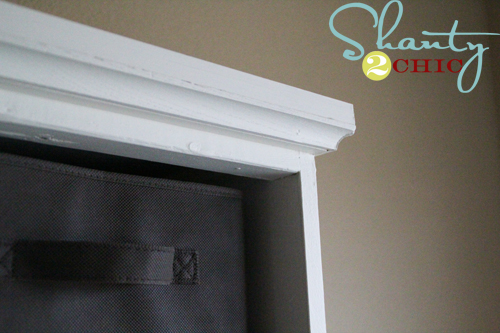
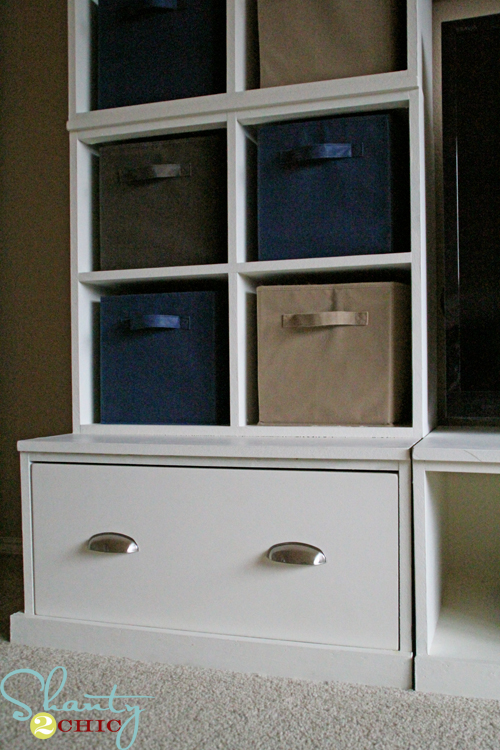 I also used Liquid Nails and finishing nails to attach the 1×3 boards for the base trim and I swapped the knobs for my favorite pulls that I purchase at Home Depot for about $5 each. They are a little pricey but oh so worth it!

????⭐?⭐⭐⭐
⭐?⭐?⭐?⭐?⭐?⭐?
I built my own using the plans at www. WoodworkPlans.info – highly recommended you check those out too. They are detailed and super easy to read and understand unlike several others I found online. The amount of plans there is mind-boggling… there’s like 16,000 plans or something like that for tons of different projects. Definitely enough to keep me busy with projects for many more years to come haha
⭐
Head on over to www. WoodworkPlans.info if you want to learn more – click the pink link above for some more plans! Best of luck on your building adventures!
⭐?⭐?⭐?⭐?⭐?⭐?⭐?⭐?
Looks Fantastic!
This looks fantastic!
Fabulous job!
I really like the bins.
(That’s about as far into this project as I can make it on my skill level…lol)
~ Dana
This looks amazing! Nice job! Go you!
Ashley love the ‘makeover’. I feel your pain about repainting a piece, especially such a large one and oh that first trimester feeling/smell/sickness reminder will get you every time. PS – Cozy Cottage is my fave, so creamy but not yellow at all, only second to BM navajo white. Nice update for certain and now the queasiness is gone!
I love the new look! Great job. You always amaze me:) My hubby would die before letting me at his tools:) But since he usually very willingly works on whatever I want him to I think I’ll leave things the way they are! I’m very much impressed that you do all this though – you rock!!!!