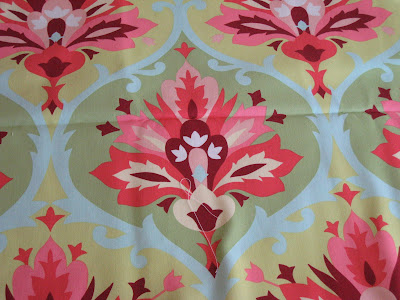
Hey Guys! I hope you all are having a great Spring Break! I showed you guys my fabric I had purchased for the girls’ new room last week. I had this plan for some fun headboards and after thinking it over way too much I decided to tweek my plan just a bit. First tweek… I changed my fabric. It is still the same amazing print from Amy Butler’s Love line but I went with a different color palette.
I wanted to create a headboard that used minimal space since I am combining two kiddos in one room. My original plan was to wrap plywood with the fabric and finish my edges with some fun picture molding. Just before leaving for Lowe’s I had a lightbulb moment… these usually come too late:). I remembered that I had two matching large frames that I could use instead. This saved me lots of time and even more money.
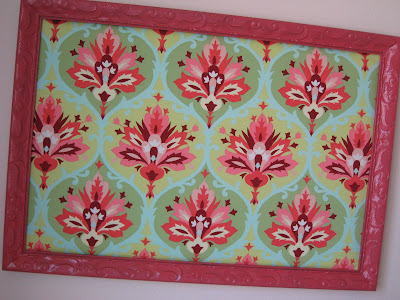
I started by spray painting both frames with a fun coral color I pulled out of my fabric.
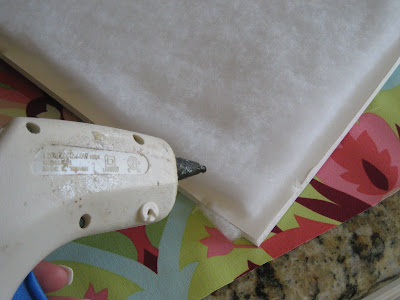
While that was drying I started working on the inside part. I purchased thick quilt batting at Hobby Lobby and cut a piece just a bit smaller than the cardboard I took out of the frame.
I used a hot glue gun to attach it to the cardboard. If your frame doesn’t come with cardboard you will want to cut a piece yourself or you can also use foamboard from a craft store.
I cut my fabric just larger than the cardboard and then ironed out all of the folds. Then, I placed it face down for the next step.
I laid my cardboard down on top of the fabric with the batting face down on the wrong side of the fabric. I then used my hot glue gun again to wrap the fabric and glue the edges to the back side of the cardboard. This is just like recovering a cushion… You want to make sure you pull tight.
My final step before hanging was to put it back in the frame. I placed it back in and pushed down the metal pieces to hold it in place.
I will show you this hanging on the wall but I can’t give you the full view until I get the bedding done. I am currently working on it and I LOVE it. The best part about these headboards is the cost. This is a very inexpensive yet chic way to create your own headboard in no time. I can’t wait to share the rest of this revamp! Hope you like it!
Thanks so much for stopping by and I can’t wait to share more of this fun revamp with you guys! Happy Wednesday!
~Whitney

Make sure you stop by Disc Hangers and check out their amazing products! You can see what Shanty2Chic did with them HERE!








I love this–I am just prepping a guest post on things to do with frames!
Very cute and very clever. Love the fabric too and the color you chose for the frame.
hugs
Sissie
These are just adorable. You are so lucky to have had that lightbulb moment before you bought your supplies! I'm loving that AB fabric. Job well done!
(http://welcometoheardmont.com)
What a CUTE idea! I love it.
wow i am extremely impressed…great job!
oooh, i love this. i've been thinking of doing a similar project, you made it look so great i think i'll give it a whirl!!
L-O-V-E!!!
Those are so so cute!!
The fabric is wonderful love that!!
Stop over and enter my giveaway if you get a chance
Wow! This is brilliant…and would solve me headboardless teen room problem.
Hmmmmmmm……
I just love the things I find here!
Lisa @ All That and a Box of Rocks
I totally LOVE this fabric! I used the same pattern for re-doing a chair! I posted it on my blog. =)
I love Amy Butler. Those headboards look great … I can't wait until the full reveal!
Great idea, so beautiful!
CUTE!!!!
WoW! So pretty! Love the bright colors you chose!
~Rebekah
That looks adorable! I can't wait to see the finished product.