DIY Bed Frame
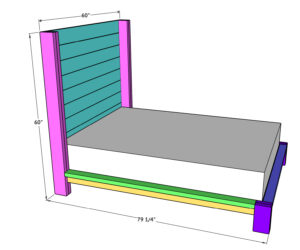
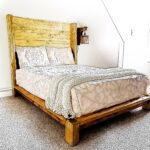
Learn how to build this full size DIY Bed Frame with just a few tools and free plans by Shanty2Chic! Click here to download the full set of printable plans, including a shop list, free!
Equipment
- Miter Saw
- Drill
- Kreg Jig
- Brad Nailer
- Sander
- Table Saw (optional)
Ingredients
- 4 2x6x8 Framing Lumber
- 9 2x4x8 Framing Lumber
- 9 1x6x8 Pine or Common Boards
- 11 1x4x8 Furring Strips
- 1 1/4" Pocket Hole Screws
- 2 1/2" Pocket Hole Screws
- 1 1/4" Wood Screws
- 2 1/2" Wood Screws
- 2" Brad Nails
- Wood Glue
Instructions
Cut List
- Cut List 1 (Note: I ripped the round edges off the 2x6 and 2x4 boards (noted on the cut list). This is not a necessary step but if you choose not to rip your boards, adjust the plans accordingly.
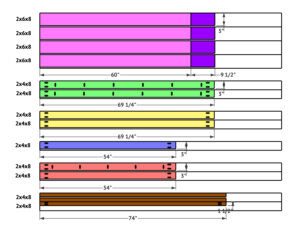
- Cut List 2
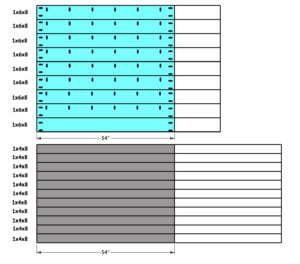
Building the Headboard
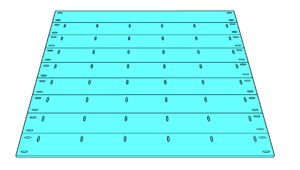
- Cut the planks to size and drill 3/4" pocket holes, according to the cut list. Attach the planks together with 1 1/4" pocket hole screws.
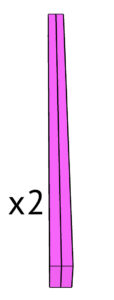
- Cut the leg pieces to size and stack 2 legs on each other. Attach them with wood glue and 2" brad nails. Build two leg assemblies.
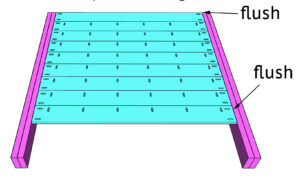
- Attach each leg assembly to the headboard planks with 1 1/4" pocket hole screws and wood glue. The back and top of the planks should be flush with the back and top of the legs.
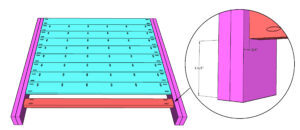
- Cut the headboard stretcher to size and drill 1 1/2" pocket holes at both ends. Attach it to the headboard legs with 2 1/2" pocket hole screws and wood glue.
Building the Bed Frame
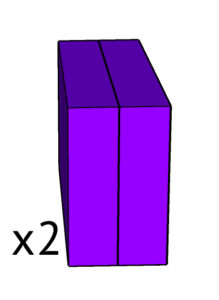
- Cut the foot pieces to size and stack 2 pieces together with 2" brad nails and wood glue. Build 2 foot assemblies.
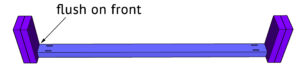
- Cut the footboard trim to size and drill 1 1/2" pocket holes at both ends. Attach it to the feet with 2 1/2" pocket hole screws and wood glue. The front and top of the trim should be flush with the front and top of the feet.
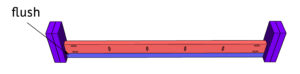
- Cut the footboard rail to size and drill 1 1/2" pocket holes along one edge and both ends. Attach it to the trim and feet with 2 1/2" pocket hole screws and wood glue. The back of the rail should be flush with the back of the trim.
- Cut the side trim pieces to size and drill 1 1/2" pocket holes at both ends. Attach the trim to the foot with 2 1/2" pocket hole screws and wood glue. Do this for both sides of the bed frame.
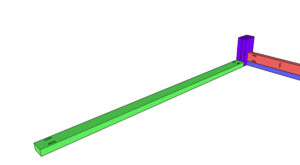
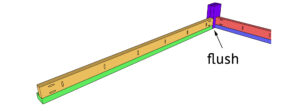
- Cut the side rails to size and drill 1 1/2" pocket hole screws along one edge and both ends. Attach the rails to the trim and feet with 2 1/2" pocket hole screws and wood glue. The back of the rail should be flush with the back of the trim and inside of the feet.
Assembling the Bed
- Attach the bed frame to the headboard with 2 1/2" pocket hole screws through the side rails and into the headboard legs. The inside of the rails and trim should flush with the inside of the headboard legs.
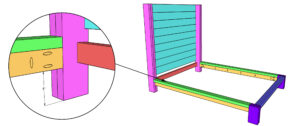
- Cut the cleats to size and drill 1 1/2" pocket holes at both ends of one of the cleats. Attach a cleat to each side rail with 2 1/2" wood screws. Center the final cleat up and attach it with 2 1/2" pocket hole screws.
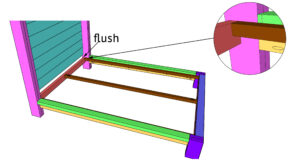
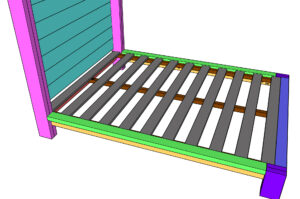
- Cut the slats to size and space them out evenly on the cleats. The top and bottom slats should be flush with the headboard and footboard rails. Attach them to the cleats with 1 1/4" wood screws.
The Finish
- Sand down the entire bed and add a finish!Make sure to share your builds with us on social media and use #shanty2chic so we can share them too!Happy Building!