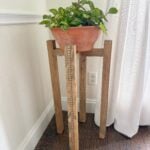
DIY Wooden Plant Stand
Learn how to build an easy DIY wooden plant stand using 2x4 pine boards. This beginner-friendly woodworking project features decorative beaded trim and free printable plans. Print the free plans HERE!
Ingredients
- 2 2x4 x 8' Pine Boards
- 2-1/2" Pocket Hole Screws
- Wood Glue
- Decorative Beaded Wood Trim
- 3/4" Pin Nails
- Stain Paint, or Sealer of Choice
Instructions
- Drill pocket holes in the 12" board with 2 pocket holes on each end.
- Drill 4 pocket holes in each 5-1/2" board, with 2 holes facing each direction. Be sure the holes do not overlap.
- Assemble the center support by attaching the two 5-1/2" pieces to the 12" piece using wood glue and 2-1/2" pocket hole screws.
- Mark the location of the support assembly on each leg. We positioned ours approximately 6" from the bottom of the legs.
- Attach the center support assembly to two legs using wood glue and pocket hole screws.
- Attach the remaining two legs to complete the stand, checking for square as you assemble.
- Cut decorative beaded trim to fit each leg. Apply wood glue to the back of the trim, center it on each leg, and secure it with 3/4" pin nails.
- Fill holes if desired and sand the entire project smooth.
- Apply stain, paint, or a protective finish and allow it to dry completely before adding your planter.
Notes
Decorative beaded trim is optional but adds a custom furniture-style detail.
Wipe away excess wood glue before staining for the best finish.