
Table of Contents
DIY Wooden Plant Stand Plans 🪴
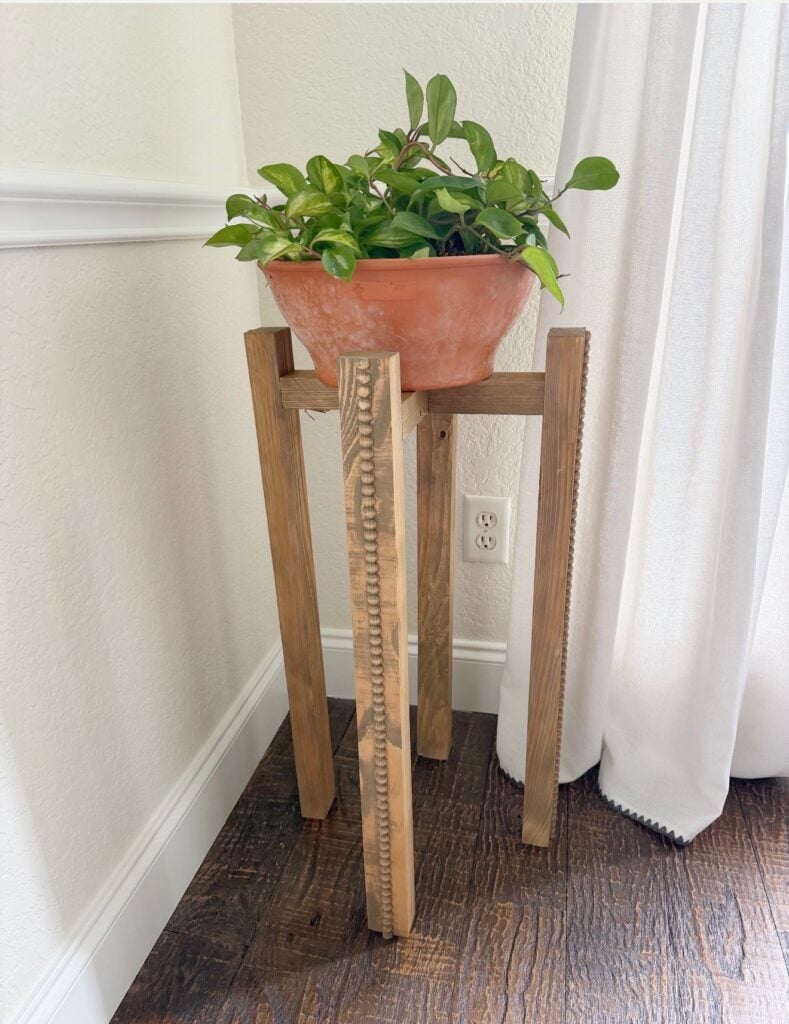
Looking for easy DIY plant stand plans? This DIY wooden plant stand is a beginner-friendly woodworking project that adds style and function to any space. Built from simple 2×4 pine boards, this wood plant stand is perfect for displaying houseplants indoors or creating a decorative feature on a porch or patio. With just a few tools and a handful of materials, you can build this DIY plant stand in an afternoon.
We shortened our version slightly from the original design and added decorative beaded trim to the legs for a custom furniture-inspired look. The result is a simple plant stand that looks much more expensive than it is! 😊
Tools
Supplies
- (2) 2×4 x 8′ Pine Boards – ripped to 2.5″ each
- 2-1/2″ Pocket Hole Screws
- Wood Glue
- Decorative Beaded Wood Trim
- 3/4″ Pin Nails
- Stain, Paint, or Sealer of Choice
Cut List
2×4 Pine Boards
- 4 @ 28″
- 2 @ 5-1/2″
- 1 @ 12″
How to Build a DIY Plant Stand
Step 1: Make the Cuts ✂️
Cut all of your boards according to the cut list above. Once everything is cut, lightly sand any rough edges and remove any splinters.
Step 2: Drill the Pocket Holes 🔨
Using a Kreg Jig set for 1-1/2″ material, drill pocket holes in the following pieces:
12″ Piece
- 2 pocket holes on each end
5-1/2″ Pieces
- 4 pocket holes per piece
- Drill 2 holes facing one direction and 2 holes facing the opposite direction
- Be sure the holes do not overlap
These pocket holes will allow the support pieces to attach cleanly to both the center support and the legs.
Why We Love the Kreg Jig 720PRO 💙
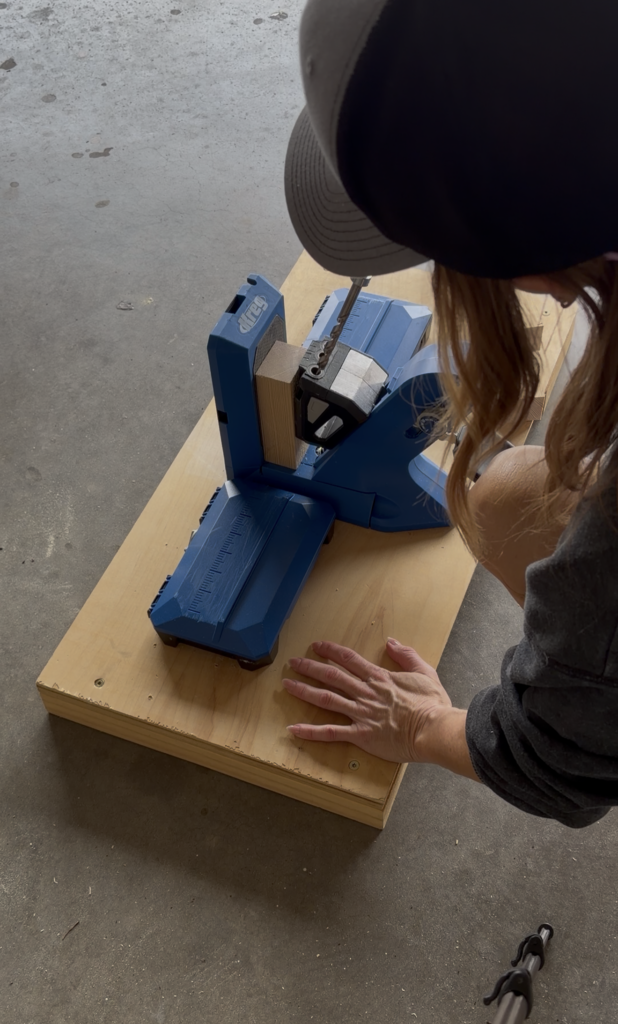
We used our Kreg Jig 720PRO to build this DIY plant stand, and honestly, it’s one of those tools we reach for on almost every project.
If you’ve followed us for any amount of time, you know we’re huge fans of pocket hole joinery because it’s fast, strong, and beginner-friendly. The 720PRO makes the process even easier with features that save time and make building more enjoyable.
A few of our favorite things about the Kreg Jig 720PRO:
✔️ One-motion clamping makes it quick to secure boards without constantly adjusting settings.
✔️ Built-in storage wings help support longer boards and keep everything steady while drilling.
✔️ Easy material thickness adjustments mean less time fiddling with settings and more time building.
✔️ Durable, strong joints that are perfect for furniture builds, home decor projects, and outdoor projects like this plant stand.
✔️ Great for beginners because it takes a lot of the guesswork out of creating strong woodworking joints.
We’ve built everything from furniture to outdoor projects with our Kreg Jig, and it’s easily one of the most-used tools in our workshop. If you’re just getting started with woodworking or looking to upgrade your pocket hole jig, this is one we definitely recommend.
👉 Shop the Kreg Jig 720PRO here
Step 3: Assemble the Center Support
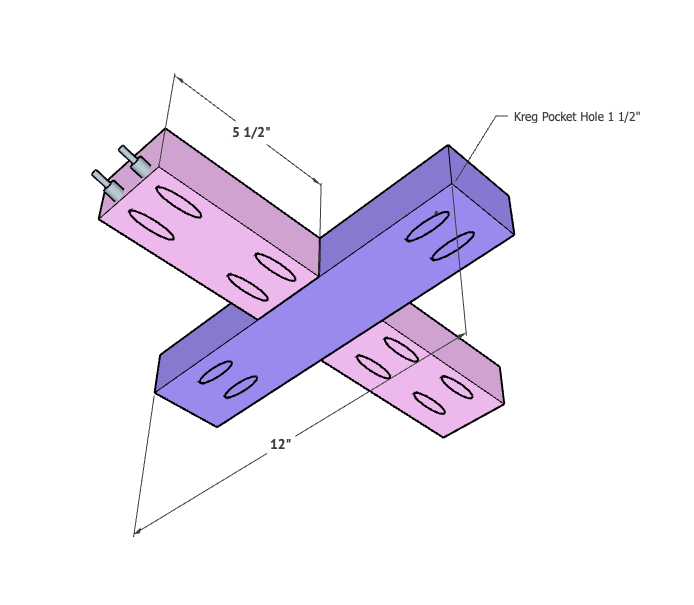
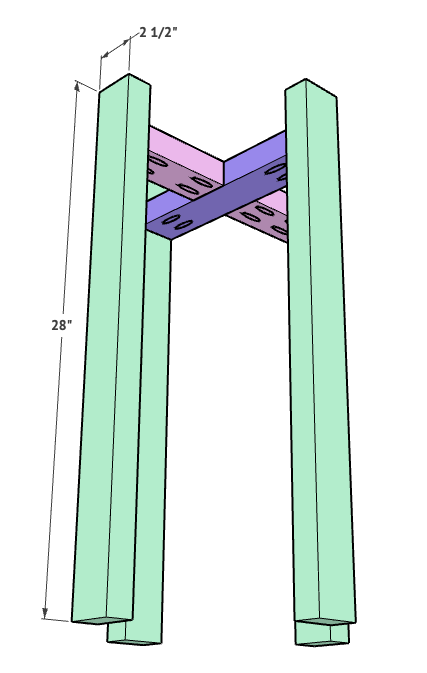
Attach the two 5-1/2″ pieces to the 12″ center piece to create the center support assembly.
Secure the joints with wood glue and 2-1/2″ pocket hole screws.
At this point, your assembly should resemble an “X” attached to the center support.
Step 4: Mark the Leg Placement 📏
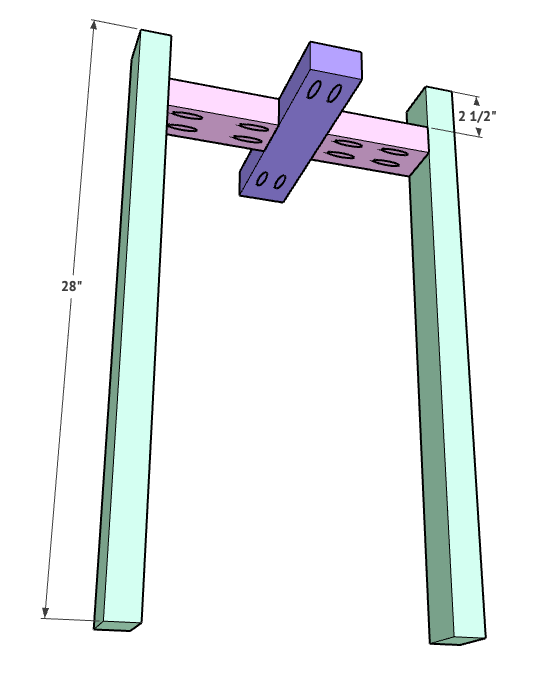
Lay out the four 28″ leg pieces and determine where you would like the planter to sit.
We positioned ours approximately 2.5″ from the top of the legs, but this can be adjusted depending on the size of your planter.
Mark the location on all four legs before attaching the support assembly.
Step 5: Attach the Legs
Using wood glue and 2-1/2″ pocket hole screws, attach the center support assembly to two of the legs.
Once one side is assembled, attach the remaining two legs to complete the stand.
Check for square as you assemble to ensure everything stays aligned.
Step 6: Add Decorative Beaded Trim ✨
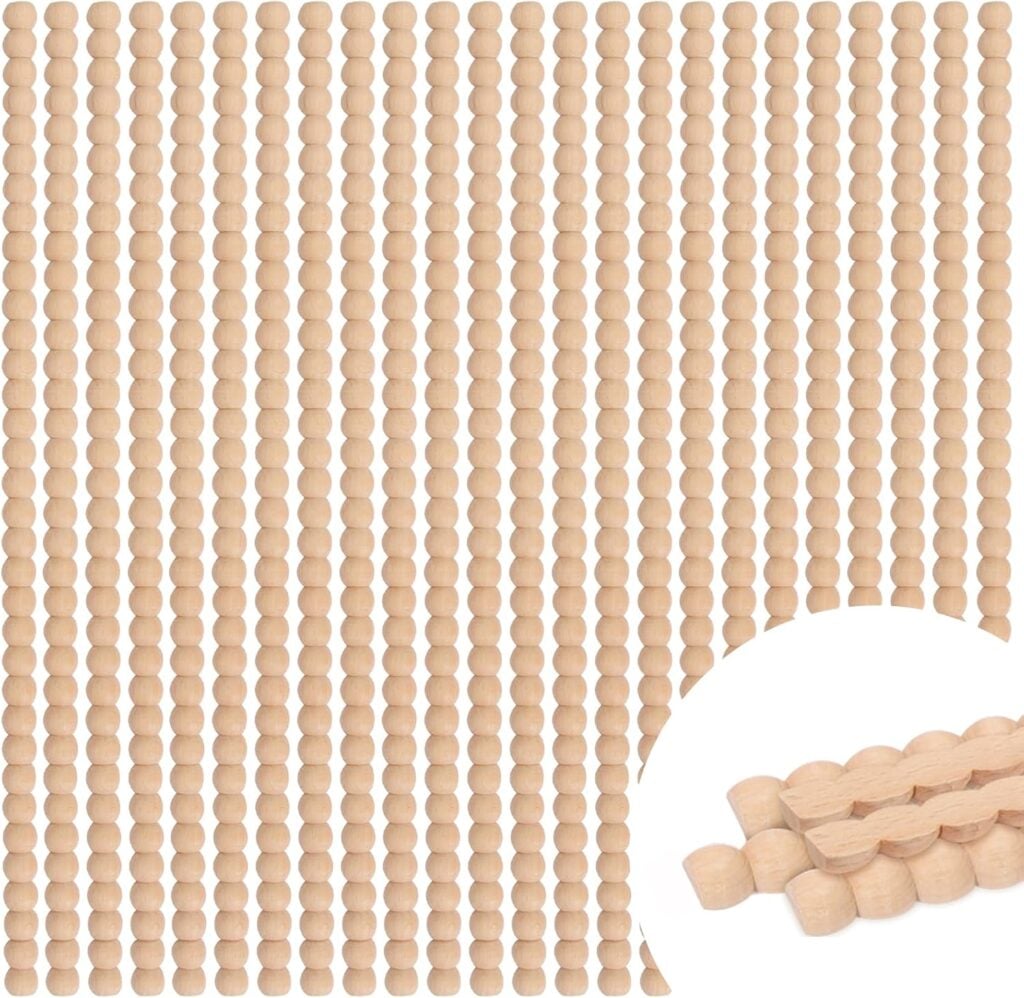
To give the plant stand a more custom, furniture-style look, we added decorative beaded wood trim down the center of each leg.
Cut the trim to fit the length of the legs and apply a thin bead of wood glue to the back. Center the trim on each leg and secure it with 3/4″ pin nails using a pin nailer.
This simple detail adds a ton of character and takes the finished look to the next level.
Pro Tip: Wipe away any excess wood glue before it dries to ensure your stain absorbs evenly.
Step 7: Finish the Plant Stand 🎨
Fill any visible holes if desired and give the entire stand a final sanding.
Apply your favorite stain, paint, or protective topcoat and allow it to dry completely before adding your planter.
Finished DIY Plant Stand 🪴
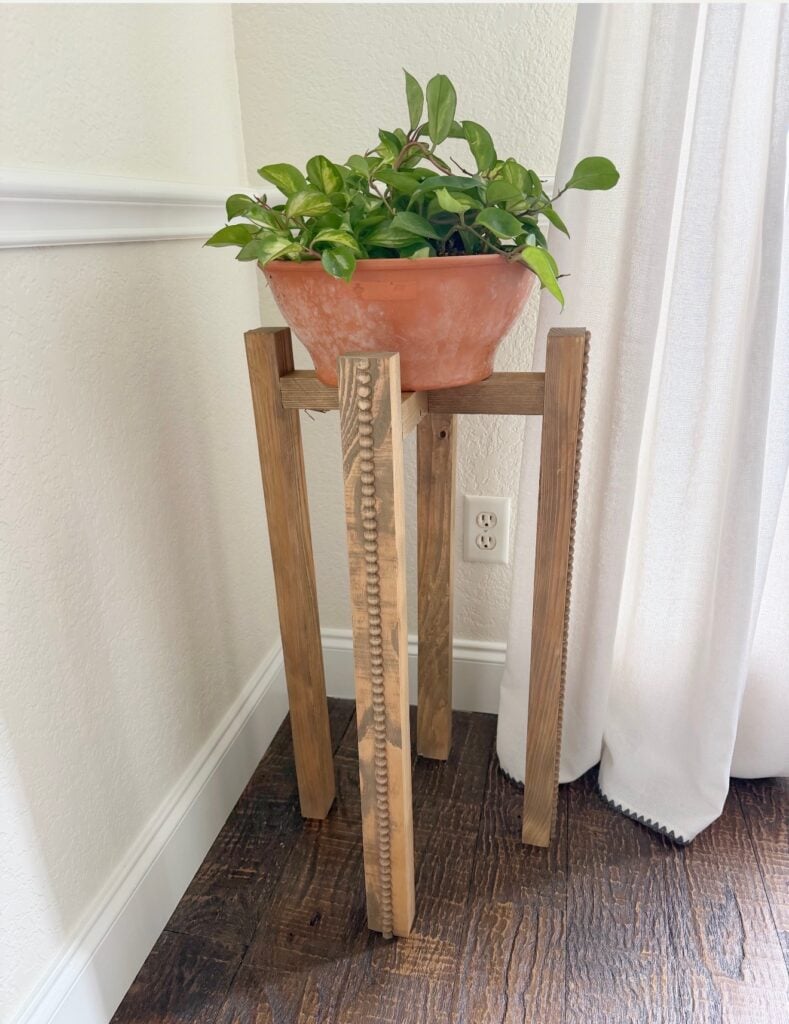
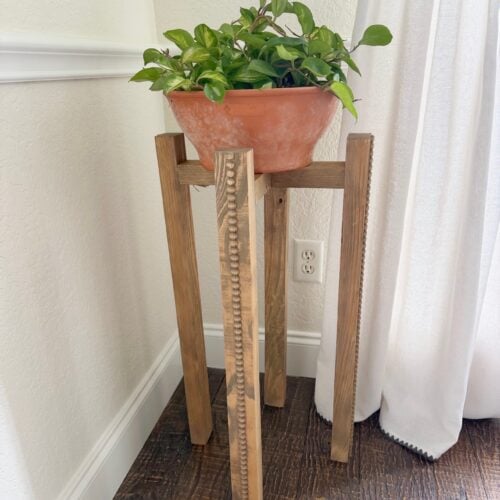
That’s it! This beginner-friendly woodworking project can be built in just a few hours and is an inexpensive way to add height and style to your favorite plants.
Whether you use it indoors or outdoors, this DIY wooden plant stand is a simple project with a big impact.
DIY Wooden Plant Stand
Supplies
- 2 2×4 x 8' Pine Boards
- 2-1/2" Pocket Hole Screws
- Wood Glue
- Decorative Beaded Wood Trim
- 3/4" Pin Nails
- Stain Paint, or Sealer of Choice
Instructions
- Drill pocket holes in the 12″ board with 2 pocket holes on each end.
- Drill 4 pocket holes in each 5-1/2″ board, with 2 holes facing each direction. Be sure the holes do not overlap.
- Assemble the center support by attaching the two 5-1/2″ pieces to the 12″ piece using wood glue and 2-1/2″ pocket hole screws.
- Mark the location of the support assembly on each leg. We positioned ours approximately 6″ from the bottom of the legs.
- Attach the center support assembly to two legs using wood glue and pocket hole screws.
- Attach the remaining two legs to complete the stand, checking for square as you assemble.
- Cut decorative beaded trim to fit each leg. Apply wood glue to the back of the trim, center it on each leg, and secure it with 3/4″ pin nails.
- Fill holes if desired and sand the entire project smooth.
- Apply stain, paint, or a protective finish and allow it to dry completely before adding your planter.
Notes
DIY Plant Stand FAQs
What type of wood should I use for a DIY plant stand?
We built ours using 2×4 pine boards because they are affordable, easy to work with, and readily available at most home improvement stores.
Can this DIY plant stand be used outdoors?
Yes! If you plan to use your plant stand outdoors, we recommend applying an exterior-grade stain, paint, or sealer to protect it from the elements.
What size planter fits this plant stand?
This DIY plant stand was designed around the planter shown in our photos, but the dimensions can easily be adjusted to fit larger or smaller planters.
Is this a beginner woodworking project?
Absolutely! This DIY wooden plant stand uses simple cuts, pocket hole joinery, and basic tools, making it a great project for beginners.

This is a fantastic DIY project that is both simple and elegant. The plant stand has a clean, modern design that can enhance any indoor or outdoor space, and the step-by-step instructions make it easy for DIY enthusiasts of all skill levels to follow.
Projects like this show how creativity and quality materials can come together to create beautiful, functional home décor. For anyone looking to source plywood, boards, laminates, and other woodworking materials for similar DIY projects, **https://www.plywoodbazar.com** is a valuable resource to explore.
Thank you for sharing such a well-crafted and inspiring tutorial. It’s a wonderful project for anyone who enjoys woodworking and home improvement.
This is a fantastic DIY project that proves elegant home décor doesn’t have to be complicated. The instructions are clear, and the finished plant stand is both functional and stylish, making it a great addition to any living space. It’s an ideal project for anyone looking to enhance their home with handcrafted furniture.
Choosing quality wood and the right materials is key to achieving a sturdy and long-lasting finish. For DIY enthusiasts and woodworking professionals looking to explore a wide range of plywood, boards, laminates, and other interior materials, **https://www.plywoodbazar.com** is a valuable resource before starting any new project.
Thank you for sharing such a creative and easy-to-follow tutorial. It’s sure to inspire many people to take on their next DIY woodworking project.
This is a wonderful DIY project that perfectly combines simplicity with style. The instructions are easy to follow, and the finished plant stand adds a beautiful touch to any indoor or outdoor space. It’s great to see a project that is both beginner-friendly and visually appealing.
DIY creations like this also emphasize the importance of selecting quality wood and the right materials to ensure durability and a professional finish. For those looking to explore a wide range of plywood, boards, laminates, and other interior materials, https://www.plywoodbazar.com is a useful resource to consider before starting their next woodworking project.
Thank you for sharing this creative and inspiring DIY tutorial—it’s a great idea for anyone looking to enhance their home with handmade furniture.
This is a very clean and stylish DIY project. The plant stand design does a great job of elevating greenery while adding a modern decorative touch to the space. I like how the structure keeps the focus on the plant while still feeling sturdy and well-crafted. It’s always inspiring to see décor and furniture ideas alongside broader interior and material trends here: [https://plywoodbazar.com/](https://plywoodbazar.com/) A simple yet impactful DIY build.