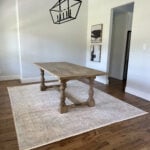
How to Build a Dining Table: Free DIY Woodworking Plans
Learn how to build this dining table with free DIY woodworking plans by Shanty2chic! Click here for the full set of printable plans, including a supply list!
Equipment
- Kreg Jig
- Miter Saw
- Drill
- Table Saw (optional)
- Sander
Ingredients
- 11 2x6x8 Framing Lumber
- 4 Pine Monastery Dining Legs
- 1 1/4" Pocket Hole Screws
- 2 1/2" Pocket Hole Screws
- 2 1/2" Wood Screws
- Wood Glue
Instructions
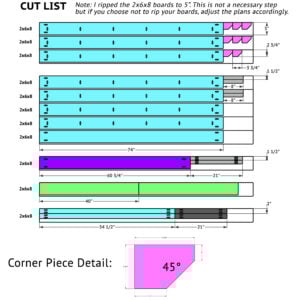
Cut List
- Cut List
Building the Table Top
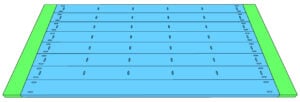
- Cut the table top planks to size and drill 1 1/2" pocket holes at both ends of each board and one edge of all, except one. Attach them together with 2 1/2" pocket hole screws and wood glue.
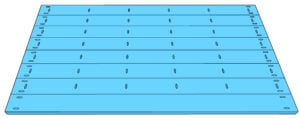
- Measure and cut the breadboard pieces to size and attach them to the ends of the table top planks with 2 1/2" pocket hole screws, through the pocket holes at the ends of the table top planks.
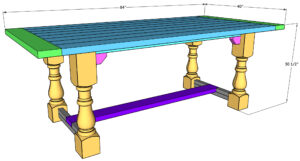
Assembling the Dining Table Base
- Cut the long apron pieces to size and drill 1 1/2" pocket holes at both ends. Center the aprons on two legs and attach them to the legs with 2 1/2" pocket hole screws and wood glue. Build two leg assemblies.
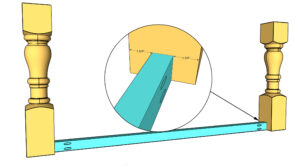
- After cutting the short apron pieces to size, drill 1 1/2" pocket holes at both ends. Center them on the leg assemblies and attach them to the legs with 2 1/2" pocket hole screws and wood glue.
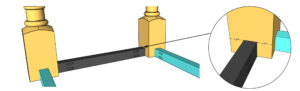
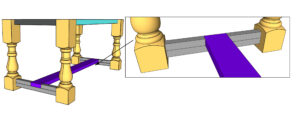
- First, cut the runner support pieces to size and drill 1 1/2" pocket holes at both ends. Attach them to the bottom of the legs with 2 1/2" pocket hole screws and wood glue. The pocket holes should face down, away from the table top.
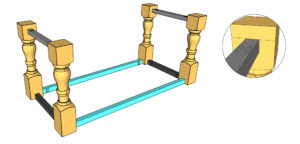
- Cut the runner to size and attach it to the center of the runner supports with 2 1/2" wood screws and wood glue, from the bottom of the runner support, into the runner.
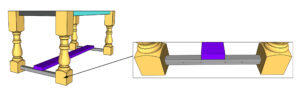
- Once the runner is in place, measure and cut the short trim pieces to size. Attach them to the top of the runner support with 2 1/2" wood screws, from the bottom of the runner support, into the short trim pieces.
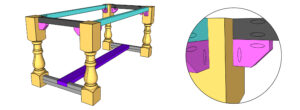
Corner Pieces
- The corner pieces are not structural so you can make them any style, shape or design that you want. I chose a basic mitered corner style. First, cut each piece to size and drill one, 3/4" pocket hole on the short side and one 1 1/2" pocket hole on the long side - you can refer to the cut list for the detailed illustrations. Attach a corner piece to each top corner of the dining table frame with pocket hole screws and wood glue.
Assembling the Dining Table
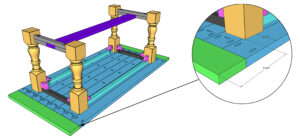
- Lay the table top upside down and center the base on top. Attach the base to the table top with 2 1/2" wood screws, from the bottom of the apron pieces, into the table top planks. I like to do this step inside, after staining, once the table is in its spot. It makes it easier to get the table inside the house when it is in two pieces.
The Finish
- Sand the table down, fill any exposed pocket holes with wood filler and add a finish! Make sure to share your builds with us on social media and use #shanty2chic so we can share them too!Happy Building!