Hey guys! So happy you found us! To keep up with all of our DIY projects, be sure to FOLLOW us on Instagram and Pinterest!
It’s our first official day of summer vacation and I am so EXCITED! I’ve mentioned, many times before, how much I love entertaining in the summer! Cook-outs, swimming, eating, time with friends and family – HEAVEN! I’ve always wanted a wooden ice cooler for our patio and decided last week that I could totally build one!
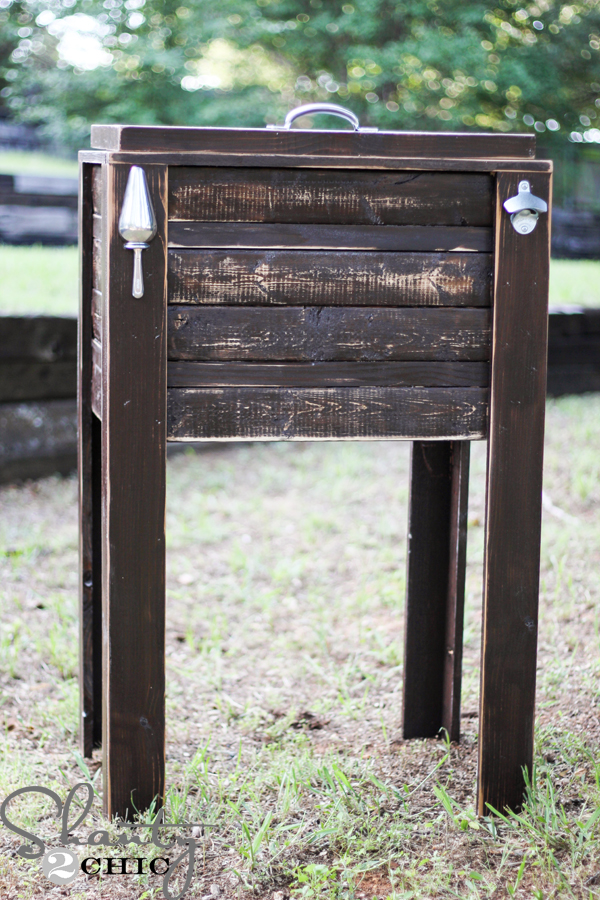
 Here she is, my Country Cooler! I’m so excited about this, not only because I have been wanting one but, I designed and built it myself! It’s my first attempt at a piece this big and I’m happy to say that it is such a beginner project and only cost me about $50! I will share a detailed tutorial with you here, and we now have FREE printable plans for this cooler! Click HERE, or the button below to save or print the plans!

Shopping List:
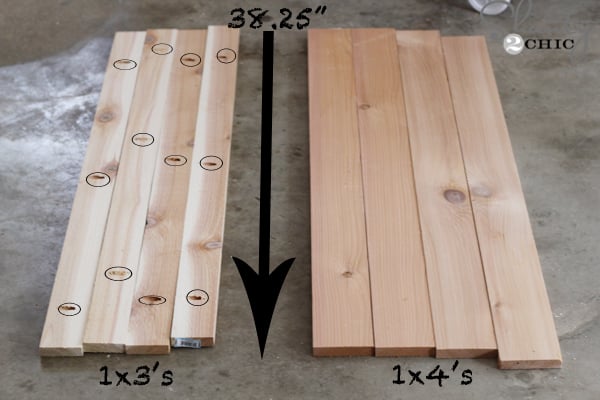
6 – 1×4 boards @8ft.
5 – 1×2 boards @8ft.
3 – 1×3 boards @8ft.
1 – 2×3 board @4ft. (try to find a scrap or buy an 8ft. board)
1 set of 2 1/2″ Zinc narrow hinges
1 – Rubber stopper with chain
1 – 6 1/2″ Zinc utility pull
silicone sealant
1 – sink flange
1 – 1/2″ U Bolt
1 – Ice scoop
1 – Zinc bottle opener
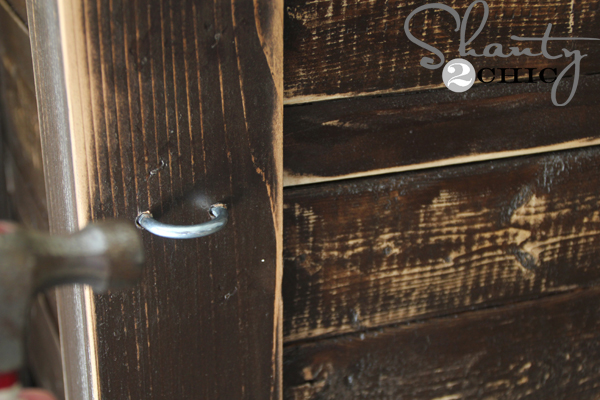
3 – Hooks
*I used cedar boards for everything except the 1×4’s on the main cooler surround. I had scrap 1×4 furring strips so I used those. However, if I didn’t have the scraps, I would have made the entire piece with cedar. It’s just gorgeous and great for outside!*
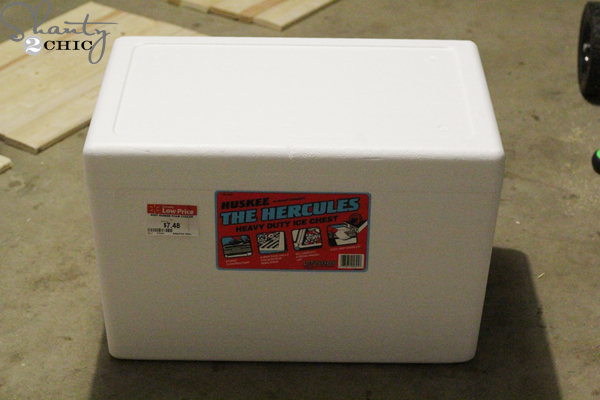 I found this great styrofoam cooler at Wal-Mart. I ordered it site-to-store, and it was ready for pick-up in about 4 hours!
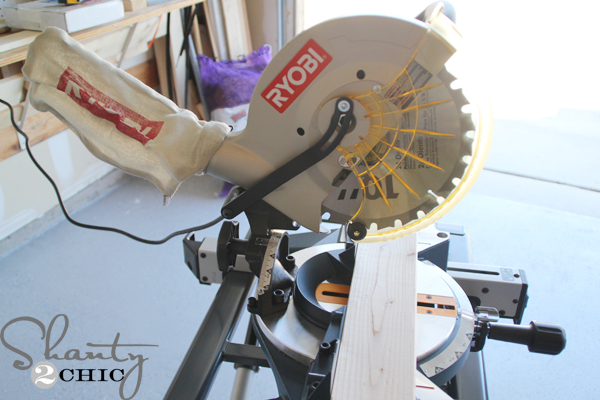 I used my miter saw to make the cuts. But, if you aren’t ready to purchase one, you can use the handsaw below for this project!
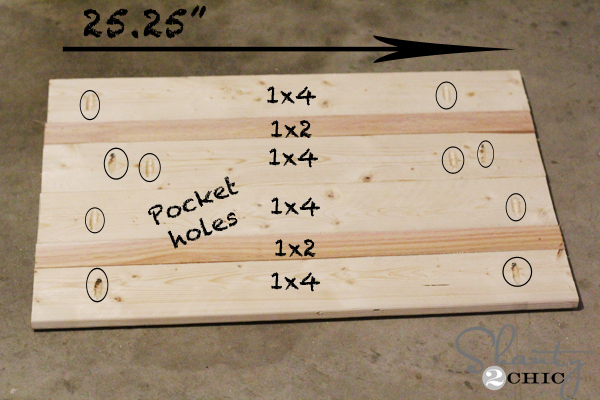
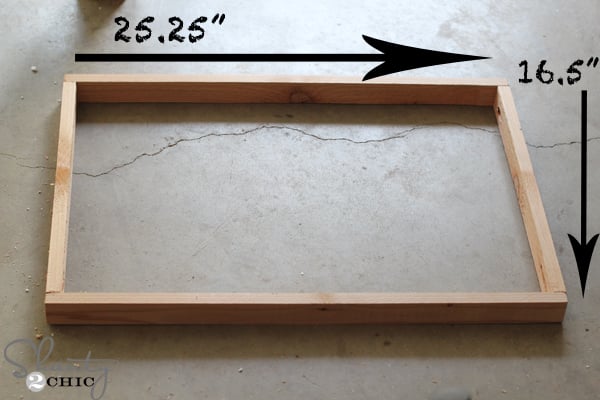
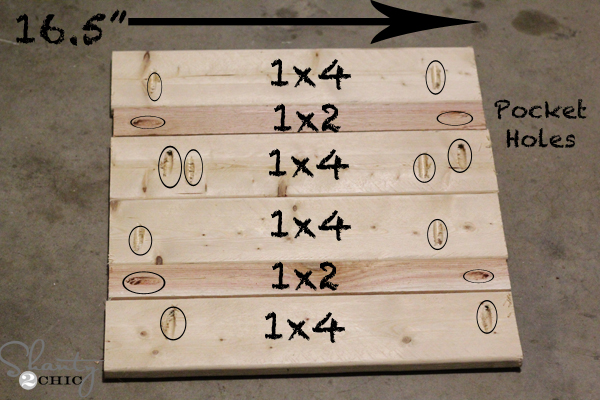 Start by building the surround for the cooler. I am going to share the measurements that I used for mine but, keep in mind that you need to measure and cut as you go. Board sizes vary and climates can affect the boards as well.
8 – 1×4 @25 1/4″
4 – 1×4 @16 1/2″
8 – 1×2 @25 1/4″
4 – 1×2 @16 1/2″

I attached the boards together using my Kreg Jig pocket holes! Above, I circled all of the places that I drilled the pocket holes and notice that I drilled pocket holes into the 1×4’s only so some 1×4’s have pocket holes going towards both ends to attach to the 1×2’s.
 Here is the surround, assembled with Kreg Jig pocket holes and Gorilla Glue wood glue!
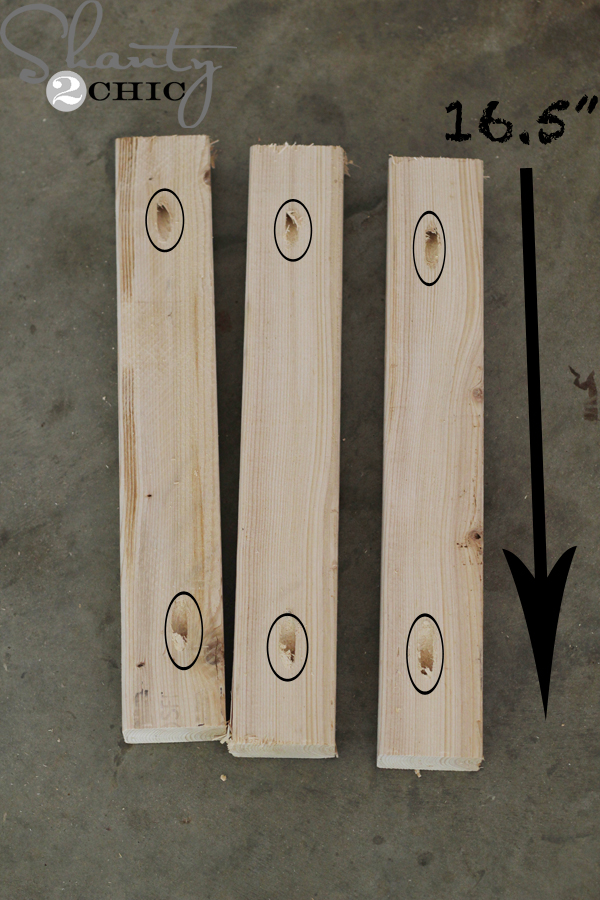
 Now for the legs! I also circled where I drilled pocket holes into the 1×3’s.
Measurements:
4 – 1×3 @38 1/4″
4 – 1×4 @ 38 1/4″
 Attach them with pocket hole screws and a line of wood glue!
Next, I just nailed them to the surround with my new Brad Nailer!

 I put a few nails on the outside and a lot on the inside. I also used lots of wood glue 🙂
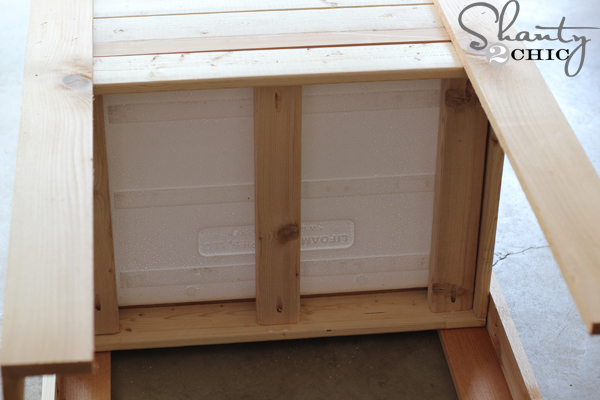
 Now, just drop the cooler inside the surround. it should be a snug fit! If not, it’s not a big deal, we are going to brace the bottom!
The top should be flush with the top of the surround
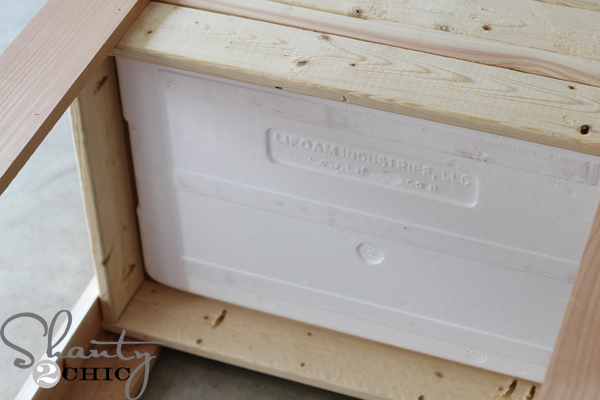 and you will have a little space below.
 This is where the 2×3 comes in. Cut 3 – 2×3 @16 1/2″ and drill pocket holes into both ends of each board.
 Just attach with pocket hole screws and wood glue!
 Now to make her pretty! Use 1×2 boards to trim the top, making the edges flush with the surround. You will have an over-hang between the legs. Measure for these cuts to get them exact and attach them with brad nails and wood glue!
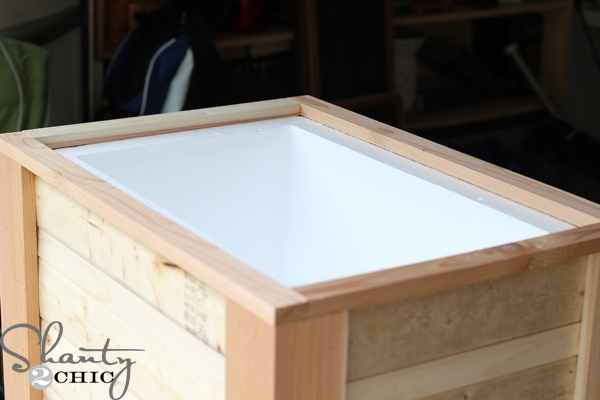
Now for the top!
 Use 1×2 for the trim on the lid and drill pocket holes into the ends of the 16 1/4″ boards. Attach with pocket hole screws and wood glue.
Measurements:
2 – 1×2 @25 1/4″
2 – 1×2 @16 1/2″
I attached the boards, for the top, with pocket hole screws. I circled where the pocket holes should be.
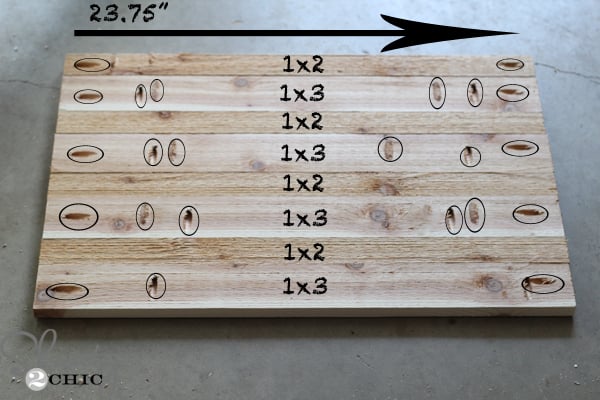
4 – 1×3 @23 3/4″
4 – 1×2 @23 3/4″
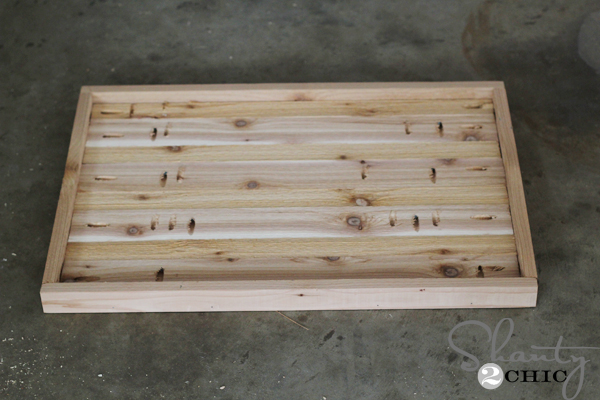 Now, just attach the trim to the top with pocket hole screws and wood glue. The top of the boards should be flush with the trim.
We need a drain still!
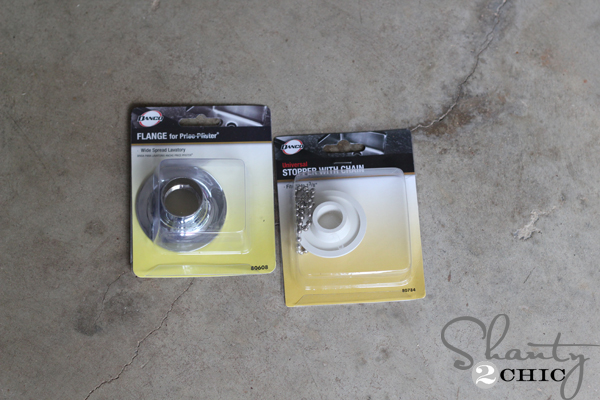 I had the idea to use a sink drain kind of contraption and this was SOOOO easy! I purchased a cheap sink flange and rubber stopper with a chain.
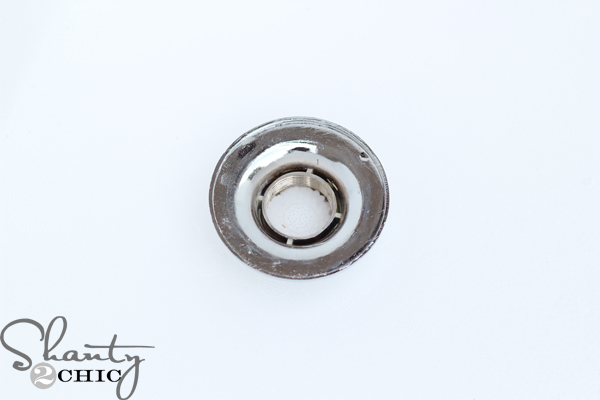 Just twist the flange into the spot where you want the drain (make sure the 2×3’s on the bottom are out of the way). Twisting it will cut through the styrofoam.
 I had to follow up with my knife a bit but this technique made it easy to get the exact size hole that I needed for the flange!
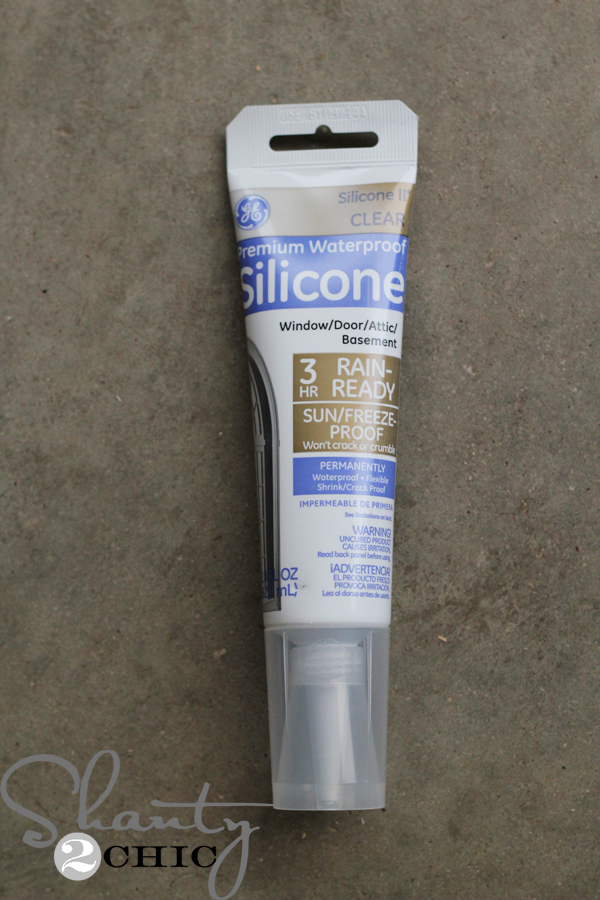
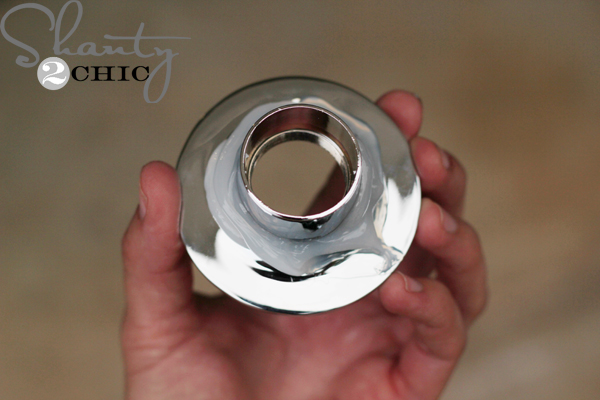 Next, I “gooped” silicone sealant around the flange and dropped it back inside the hole. Push it in snug and wipe the sealant that seeps out with a wet paper towel.
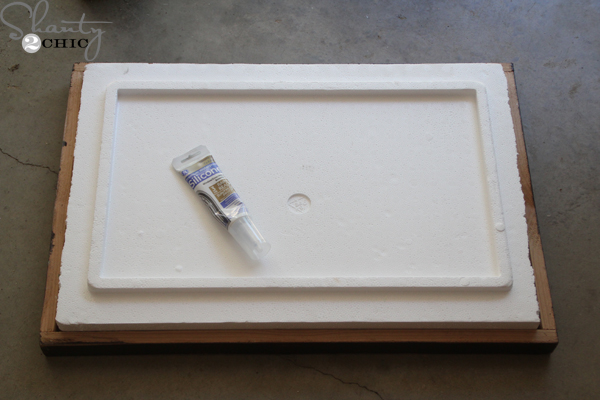 To attach the top of the cooler to the wooden lid, just use a generous amount of silicone sealant to the top of the styrofoam lid and press it into the wooden lid.
Now for the finish!
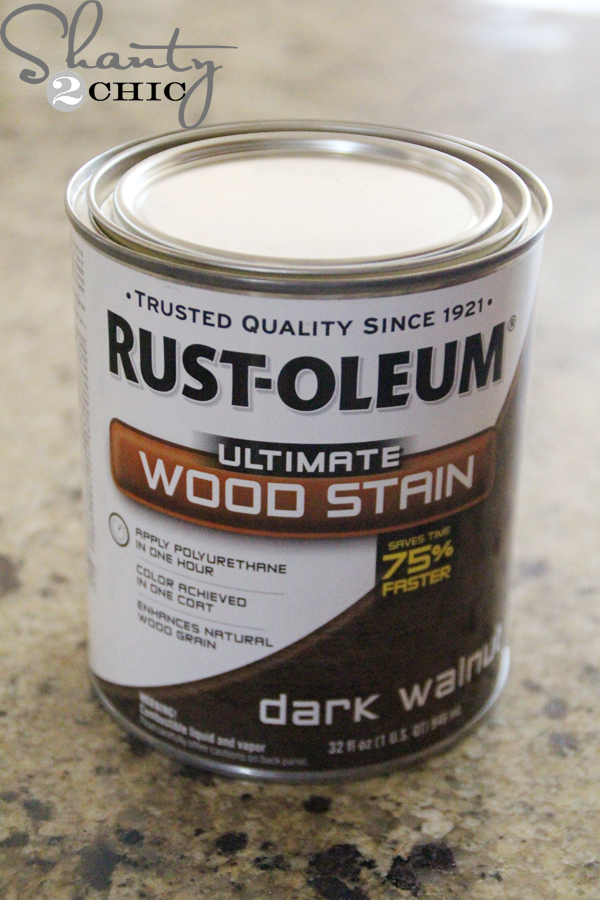 I brushed on 1 coat of Rust-Oleum Dark Walnut stain
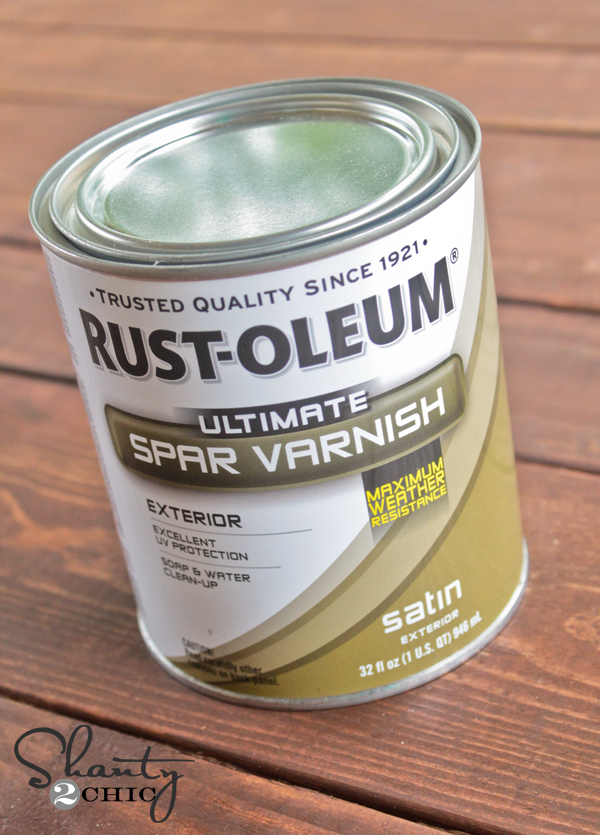 and followed up with 3 coats of Rust-Oleum Spar Varnish in satin! This is a great finish to protect outdoor pieces! Make sure to give the suggested drying time between coats!
 To get the distressed edges on the finish, I just used my Corner Cat! It’s super easy to use and it’s light-weight! I just ran over all of the corners and edges with it.
I got to excited to get this together and didn’t take a picture of the hinges. They are super easy to install though! I just two at the back of the lid.
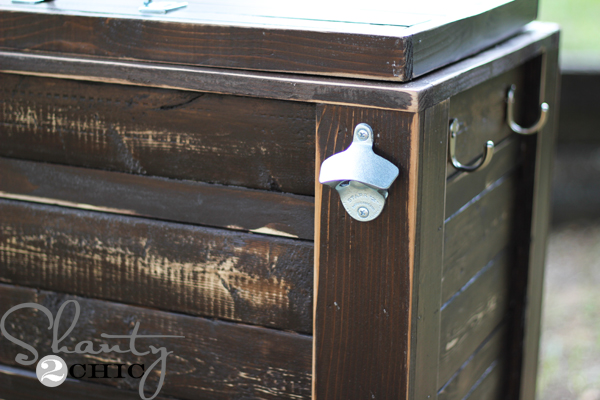
Do you love that zinc bottle opener? I purchased it from Amazon!. You can click the widget below to purchase your own!
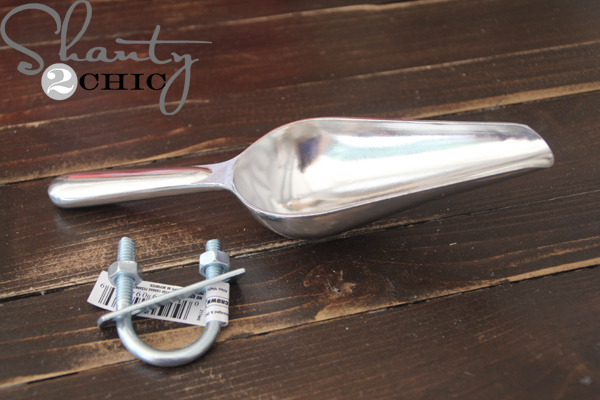 I found this great ice scoop on Amazon, as well, and found a U bolt to attach it with! You can click the widget below to purchase this same ice scoop!
 I just predrilled (using a drill bit that was the same thickness as the bolt) and hammered it into the holes 😉 If it isn’t a snug fit, I would use Gorilla Super Glue Gel to secure it.
I attached my hooks and handle and in the ice and drinks went 😉 It’s time to party!!!
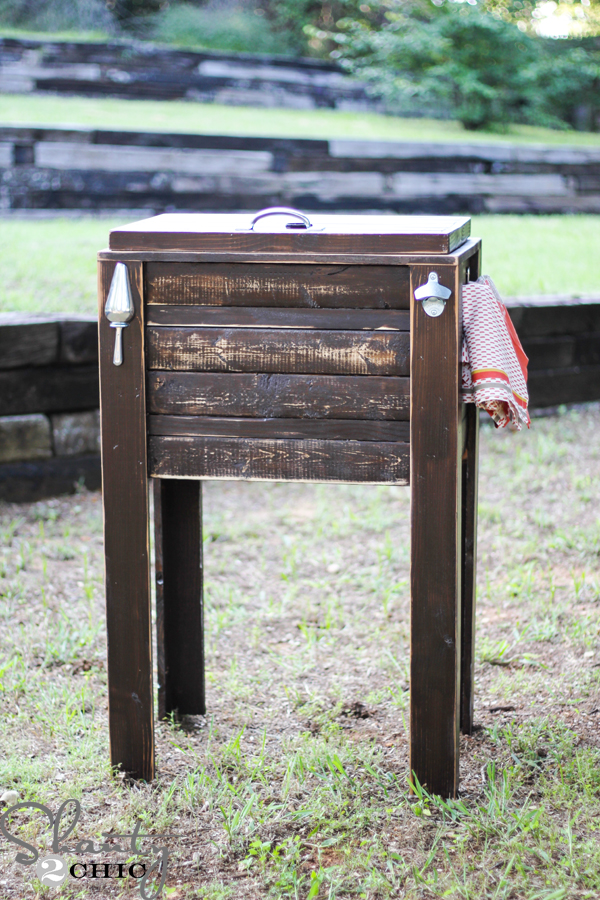

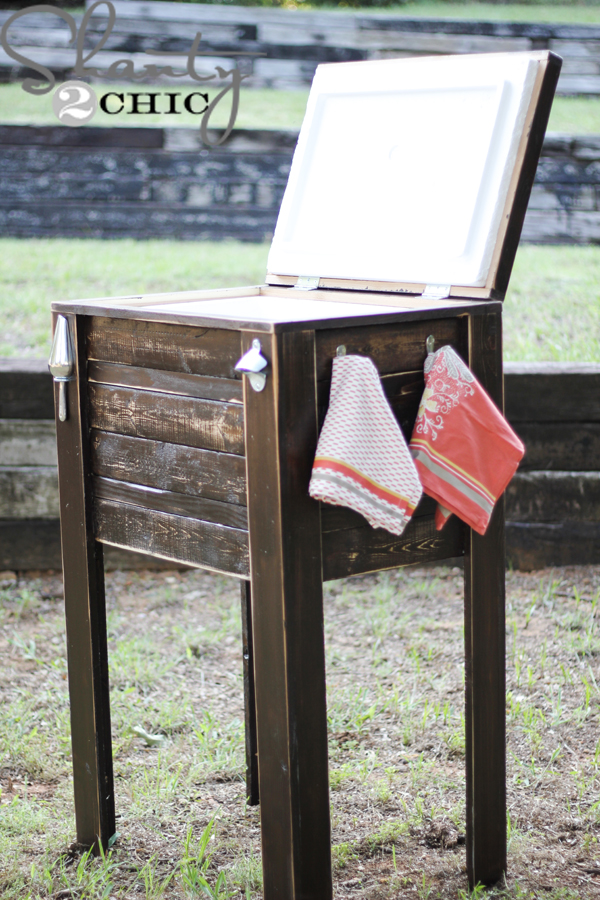
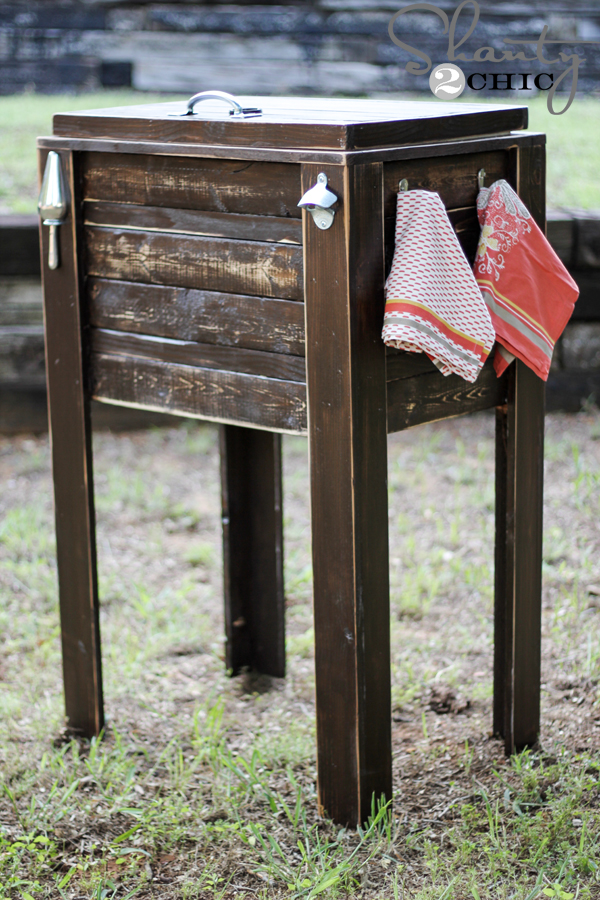
I’m just in love with this cutie! We have already been enjoying it this weekend! I designed this cooler so that the styrofoam cooler can be replaced as needed. It just slides in and out. The lid can be pulled off as well! And, FYI, the cute kitchen towels are Threshold brand from Target 😉
If you love my Country Cooler, I would LOVE your pins;)
Remember, you can download and/or print our FREE plans for this cooler by clicking HERE!!
Thanks so much for stopping by and Happy Summer!
~Ashley


How would you attach the lid of the cooler if you went with a non styrofoam cooler? I love this by the way!
Ginna, I made one of these last year on the fly and used a regular cooler. I attached the lid to the wood with a couple of small screws. Some lids are thinner so you may have to put an extra board or two across the inside of the wood top to allow the cooler to shut properly. I also used a piano hinge instead of regular hinges just because I like them better and it keeps them from getting slammed back when they open it. I framed mine in with 2×2’s so there was a good strong base and used 1×4’s on the bottom. I drilled a hole through the side and stuck a piece of pvc pipe in the drain and attached a brass spigot to the pvc to drain it because I figured I could attach a small hose to it in case it was somewhere I didn’t want to just let the water run free. I made a “ledge” in the front so you could actually sit a beverage while getting others. I made a shelf on the bottom so extra beverages or glasses, etc… could be sit and so I could install casters so I could move it easier. I have a bottle opener on it and I put two hooks, one on each side to hold small galvanized buckets. One for bottle caps under the opener and one for tabs because so many people save them. I’m attaching a pic or two to let you see the nearly finished project at that time so if you look at the one that is opened you can see the screws in the top corners but you could attach them anywhere as long as the screws don’t go through the top board. The only thing I do differently now is use my kreg jig, it makes them look so much nicer.
I did mine out of a regular cooler too, still don’t have it finished, but that looks awesome Nancy!!
I like the shelf lip around. Something to set a glass on if you’re going to fill it from something in the coller! So handy!
I am building this for a Father’s Day gift… I ended up short some of the 1×4 for the sides and had extra of the 1×2. … I figured out that I needed 4 more of the 1×4 for the sides.. 8 instead of 4. Maybe I read it wrong or something, too.. but I had extra 1×2 and was short 1×4. I am so excited to finish this!!!! I don’t have a Kreg Jig, so hopefully it will still turn out looking okay. Thank you SOOOOOO much for posting this and the directions! I am thinking these would make great Christmas gifts, too.
I finished it and my Dad loved it! Thank you, again!
I bought all the “ingredients” for a DIY Father’s Day present for my husband. Then one week later gave birth so we JUST started this project last night.
We’ve run into the same problem though. I think there was a typo or something with the first set of measurments. It says 4-1×4 at 16 1/2 and I think it should say 8.
Great job Ashley and your drain idea is ingenious. This would be a great addition to our patio. Thanks for the step-by-step tutorial.
Does the $50 include the cooler and how much did that run you? I want to put the materials together as a little DIY project kit for my husband for Father’s day. He’s wanted to make one forever but hasn’t had a good idea on how to go about insulating it. This is perfect. Did you get most of your materials at Home Depot and do you think I could find the bottle opener locally instead of online?
I have a feeling he will “Texas” it up with Lone Stars though instead of the scoop and hooks. 🙂
What kind/type of wood do you typically use for your projects? I’ve bought wood before at Home Depot and Lowe’s and it seems like there’s always a piece or two that’s slightly warped or bent. Yours always look perfectly straight! 🙂
Hey Katie! We get our boards there too. We usually use whitewood pine but sometimes we upgrade to premium pine, depending on the project. We just dig and we are very patient when we look for straight boards. Sometimes I will take them all out of their shelf until I get to the back. A lot of the boards at the front of the line have already been tossed many times by others. Hope this helps!!
I LOVE this!!! I am hoping I can convince my hubby to make one for us this summer!
Thank you Meredith! Good luck;) Hope he says yes!
Love this!
Thank you Sandi:)
Another great DIY to put on my list, I need one of these to add to my back deck for summer. I just finished some iPad holders using your tutorial for that and painted them up. I am going to post them on my blog this week, they were fun. I made them as gifts.
How fun!! Send us pics and thank you so much:)
I keep seeing pictures of these all over the internet and haven’t been able to find any plans/instructions! I can’t wait to build it this weekend! Thanks for sharing!!
Glad to help Nicole! I couldn’t find plans ether so I gave it a try and I’m so happy with it! Enjoy:)
Love this!!! I have just startdx “building: this spring and have already completed three of your projects! Adding this to my list! One thing I have found is the cost is always much higher than your cost. We live in a lower cost of living area, so I am surprised. I would LOVE a post on what your price for wood is. For example we pay 6.00 for a pine 1×4 at home depot. Is that a normal price? I am also looking forward to more videos. I received the mitre saw for mothers day! 🙂
Thank you Lindsay! We actually pay a little over $4 for our white wood pine boards! We rarely use the premium which is a little over $7!
Ashley another awesome build, love that it’s UP and OFF THE GROUND!!
Totally making this for a housewarming gift for a friend! Love it! (One for us too.)
Awesome Kim! Please send us pictures of them:)
It just doesn’t get better than that!
Great tutorial!! This would be perfect on any patio during the summer. I wonder if it would work well with a hard plastic cooler? Or would that be too heavy? Thanks for sharing 🙂
Thanks Elizabeth! It would totally work with a hard cooler. My hesitation with using one was that to get the kid to work properly it would have to be disassembled and it was more expensive by about $20. It would definitely work though 🙂
This is totally amazing. I love this idea. Great Tutorial. Be sure to link this up to my Inspire Me party this afternoon. This is totally inspiring. Hugs, Marty
Thank you Marty;)