Thanks so much for stopping by! If you don’t already, we would love to have you follow us on our Instagram and Pinterest accounts to keep up with all of our most recent projects and sneak peeks 🙂 Like of this new chalkboard sign!
Hey there! I’m so excited to share my first DIY fall decor project today! It’s been a little hard to get into the fall spirit this year with our near 100 degree temps but I finally got the itch!
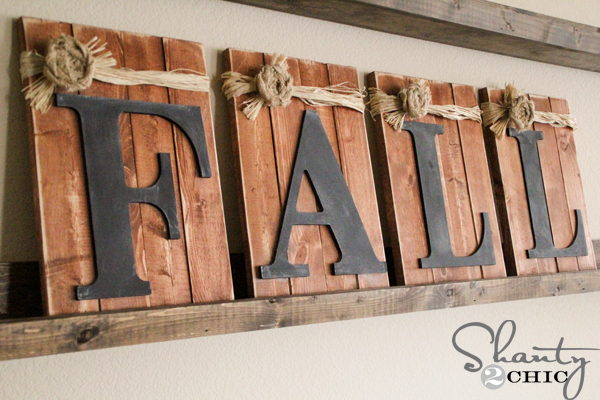 I came up with this cute little design made from 1×3’s and MDI letters! I spent under $15 for the entire project and it was super quick and easy 🙂 My kind of DIY!
Here’s how I made it!
 I purchased 2 – 1×3’s @ 10 ft. long (you can buy furring strips for this project to save money) and I cut 16 pieces at 14″. If you don’t have a saw you can purchase this hand saw and miter box below for this project. It’s a great saw for little projects like this 🙂
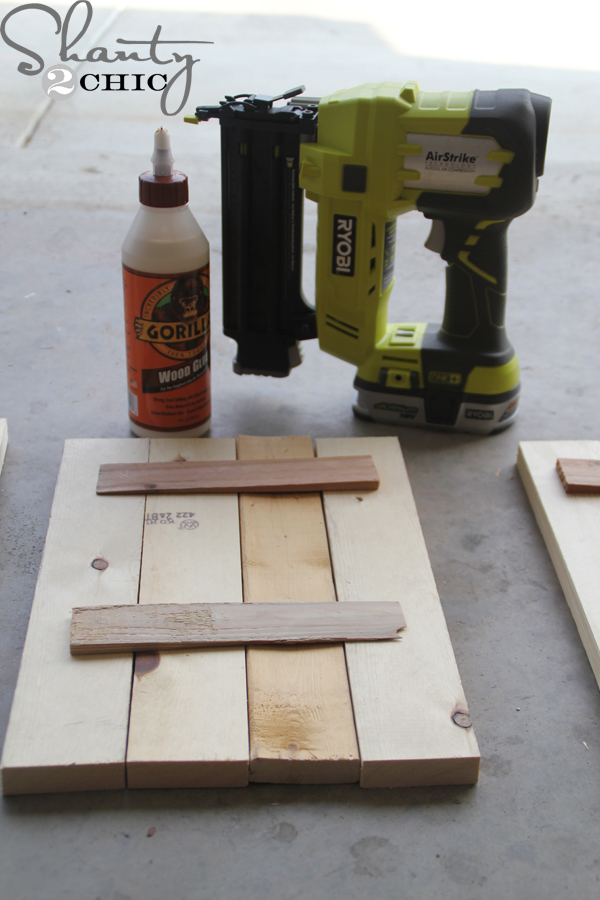 I used Gorilla Glue Wood Glue and my brad nailer with 5/8″ brad nails to attach shims to the back of 4 boards to form the pallets.
 If you don’t have a brad nailer, you can use a hammer, wood glue and 5/8″ finishing nails. I tried it on one pallet and it worked great, it just takes a little more time 🙂
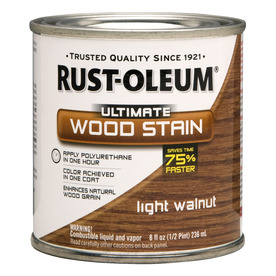 Next, I went with a lighter stain, than usual, to finish the pallets – Light Walnut! I LOVE it:) I also used it on my Pallet Wall Art and my DIY Dresser.
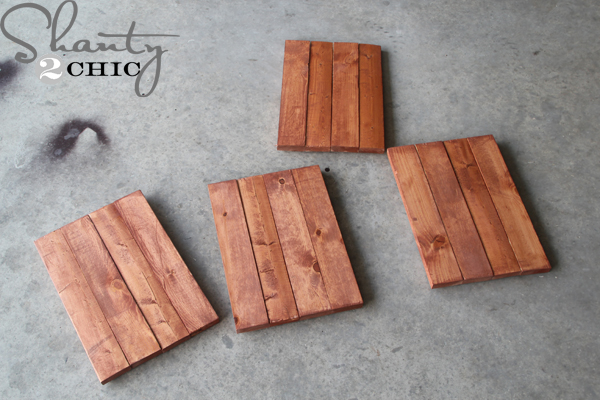 I just wiped one coat on with a foam brush, let it sit for 5 minutes and then wiped with a clean cloth. Don’t wipe the stain away, just make sure the stain is evenly spread over the boards.
While the stain dried, I got busy working on the letters!
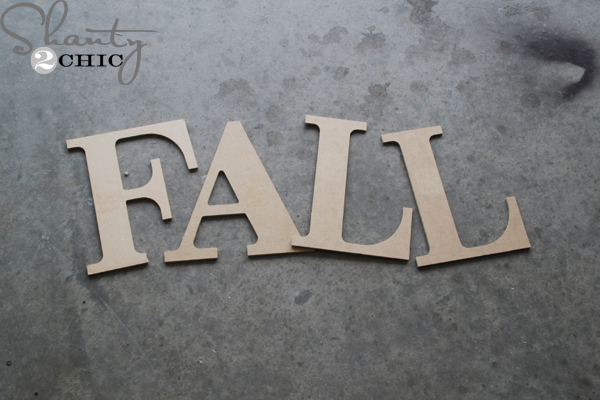 I purchased these 9″ MDI letters from Hobby Lobby. If you catch them on sale, they are about $1 each!
 I sprayed 2-coats of Chalkboard spray paint on each letter.
 Make sure to let the paint dry between coats 🙂
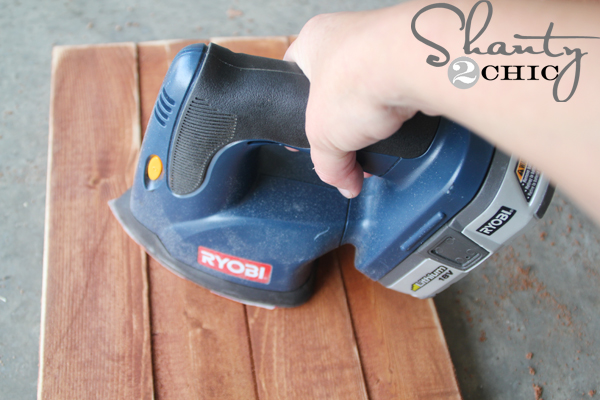 While I was waiting for the spray paint to dry, I used my Corner Cat to distress the pallets. I distressed all over, front, sides and edges.
Now for some cuteness 🙂
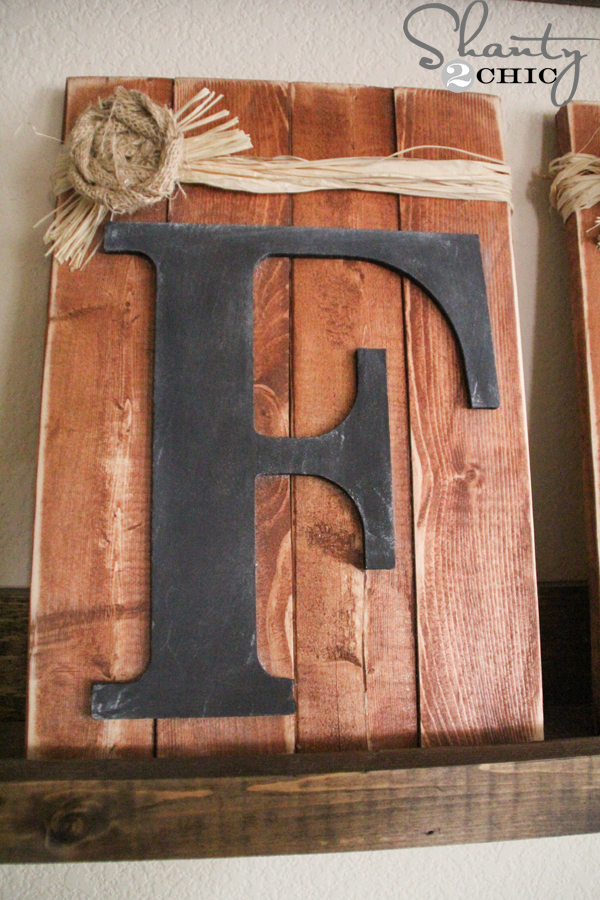
 I hot glued 1 letter on each pallet leaving about 1 inch between the bottom of each letter and the bottom of the pallet.
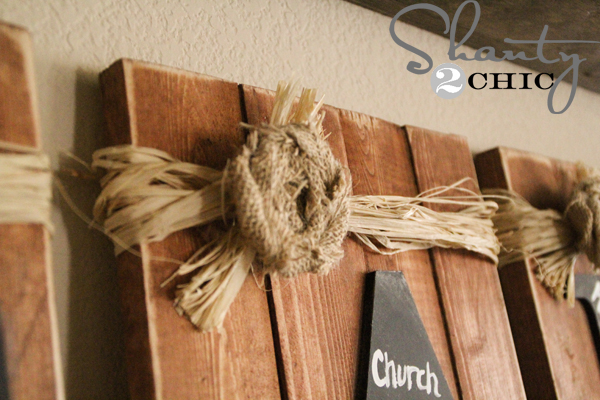
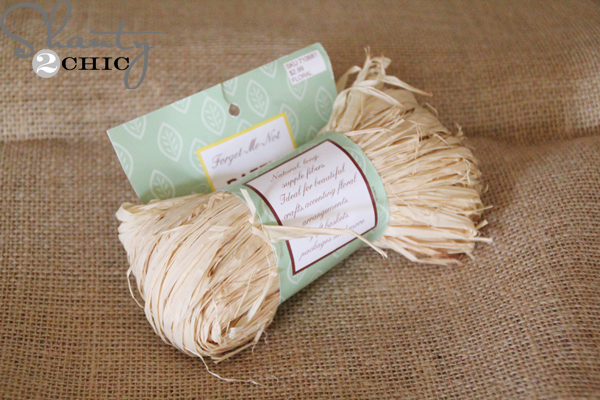 I also used scrap burlap (you can purchase it at Hobby Lobby or a local fabric store) and I purchased raffia at Hobby Lobby to finish these babies off!
 Then I grabbed a bunch of raffia strands, wrapped them around the top of each pallet and tied a knot between the first and second boards.
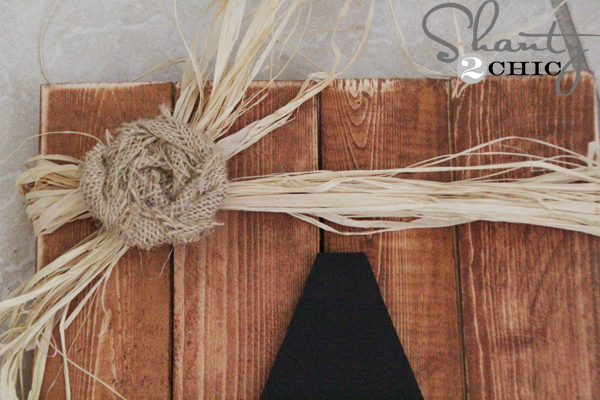 I then used hot glue to attach a burlap rosette on top of the knot and I snipped the extra raffia, with scissors, about an inch from the knot. You can click HERE for an easy tutorial to make these rosettes!
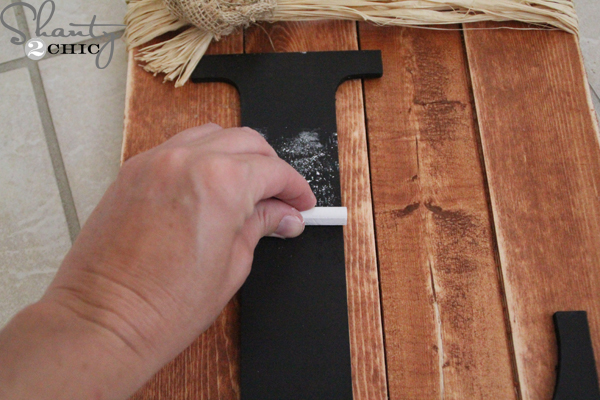 Now, to give the letters the true chalkboard look, I rubbed a piece of chalk all over the letters and wiped them down with a paper towel!
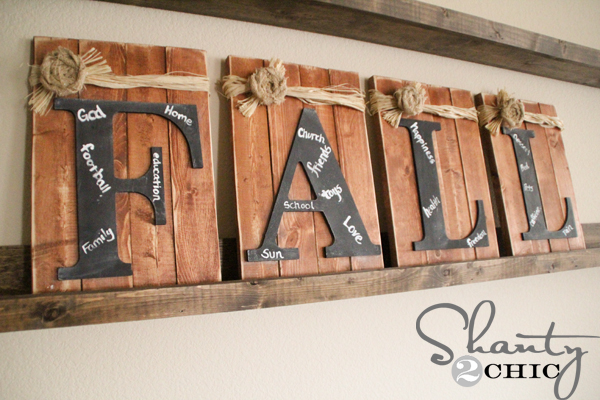
 Love it! I also thought it would be fun to have my family list things we are thankful for on each letter – so we did 🙂 How cool does this chalkboard sign look!
 I’m totally loving my first DIY fall decor of the season and I think it’s just what I need to shake the 100 degree temps and get into fall 🙂
I hope you love this chalkboard sign as much as I do! If you do, we would appreciate your shares and pins!
Happy Fall!
~Ashley

Can you use fine sandpaper to distress the wood if you don’t have the power tool your using,
Yes! You definitely can!
Exactly what I was looking for to use some reclaimed wood from my husband’s family’s 120 year old homestead. Great for upcoming Father’s Day. Awesome job!
Just finished my first attempt making this beautiful Fall sign. My only problem is getting the letters to stick to the wood with hot glue. Any tips?
I love your site and looking forward to tackling more projects.
I just put my own spin on your project and blogged about it so I came back to share. Thank you so much for the tutorial on the great wooden signs, I have so many ideas spinning in my head on what to do with them and I might just have one on every wall by the time I’m finished 🙂
http://robynbuildsanest.com/2014/09/fireplace-mantel-diy-rustic-fall-decor-15/
Love this ♥
I’ve never tried something like this but you have inspired me! Thanks for sharing your creativity 🙂
Did you also make this shelf the letters sit on?
I pinned your FALL wall decor project and it’s now been repinned 201 times. Hope it’s driving traffic to your very creative blog!
Super cute and very creative as always!! 😉
Absolutely LOVE these! I have got to try this so I can have some in my home too!! Love your Blog! ~C~
This is gorgeous!! I love the idea of writing things you’re thankful for on each letter!
This turned out really good, I like the idea of having the chalkboard on the letters so you can add your own messages. ~ Lisa
I love this! I am always looking for small projects to quench my diy bug in between my bigger builds, and I am so ready for fall. I feel like if I decorate it will come faster. 🙂 thanks for all your great plans.
Love this! Such a clever idea! Today finally feels like fall in Atlanta – I guess it’s time to bust out the fall decorations 😉
YA’LL ARE SOOO AWESOME!! I know what you mean about the weather being close to 100 degrees, i live in San Antonio, and believe me, it aint even CLOSE to fall here, yet!! keep’em comin’ girls!!
Thank you Naomi! Ugh, you probably have it worse! We would welcome high 80’s at this point 😉