I am so excited to share my latest project with you! This one couldn’t be more simple… and fun! Check out my DIY Plant Stand!

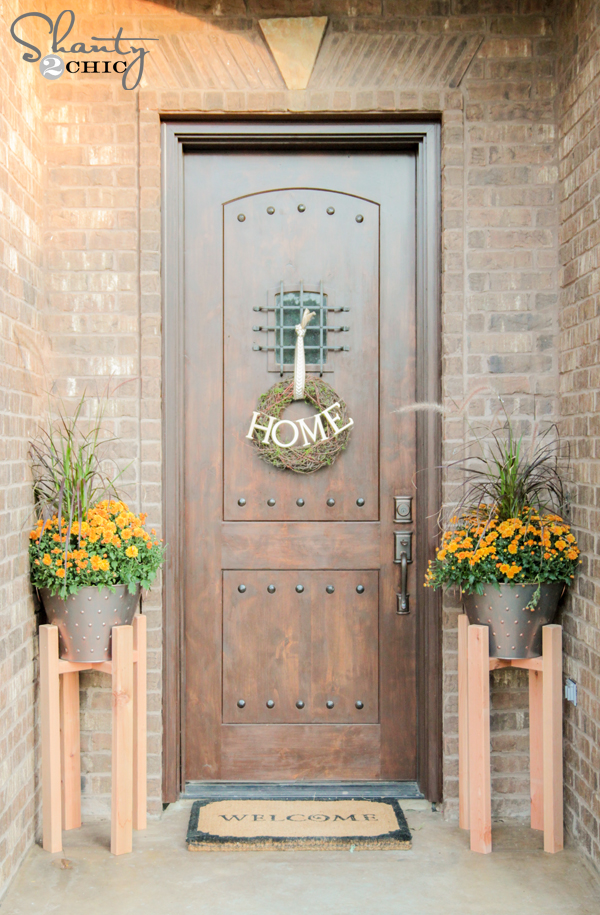
How cute are those??
You guys are going to love how simple these babies are… And cheap! The stands can be modified to any pot, and the cost of wood for one stand is under $10… Can I get a woohoo??
So… Let’s get started!
Supply List for 1 Plant Stand
Kreg Jig
2.5″ pocket hole screws
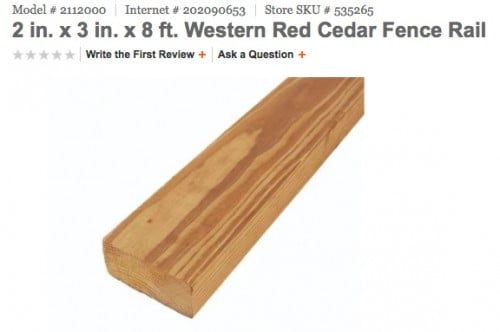
2 – 2 x 3 x 8 cedar posts (I used these from Home Depot)
Your first step will be to make your cuts. I used my Ridgid 12″ Miter Saw for this part, but you can also have the guys at Home Depot cut yours if you need them too. Another great saw would be the new 18V Ryobi Miter Saw! Have y’all seen this thing? It’s the perfect size for those of you without a large workspace, and it uses the same batteries as the Ryobi drill!

Cut List
4 cuts at 30″
2 cuts at 5.5″
1 cut at 12″

Once your cuts are made, you are ready to add the pocket holes! I used my Kreg Jig to make mine. For those of you that have no clue what a Kreg Jig is, you can check out our video HERE to help break it down. It’s a simple tool used to help you join your wood. You can see our very favorite model of the Kreg Jig HERE on Amazon!
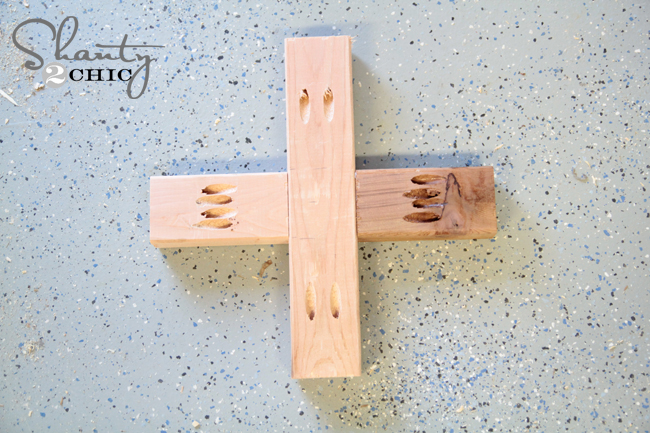
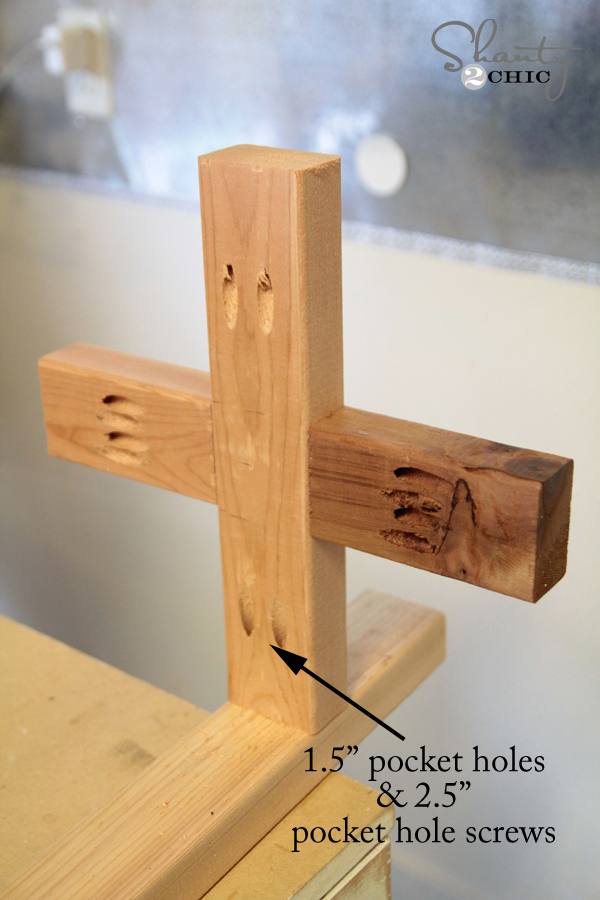
This is how I lined up my 2×3 in my Kreg Jig for these pocket holes. For this project, I made 1.5″ pocket holes and I will be attaching using 2.5″ pocket hole screws.
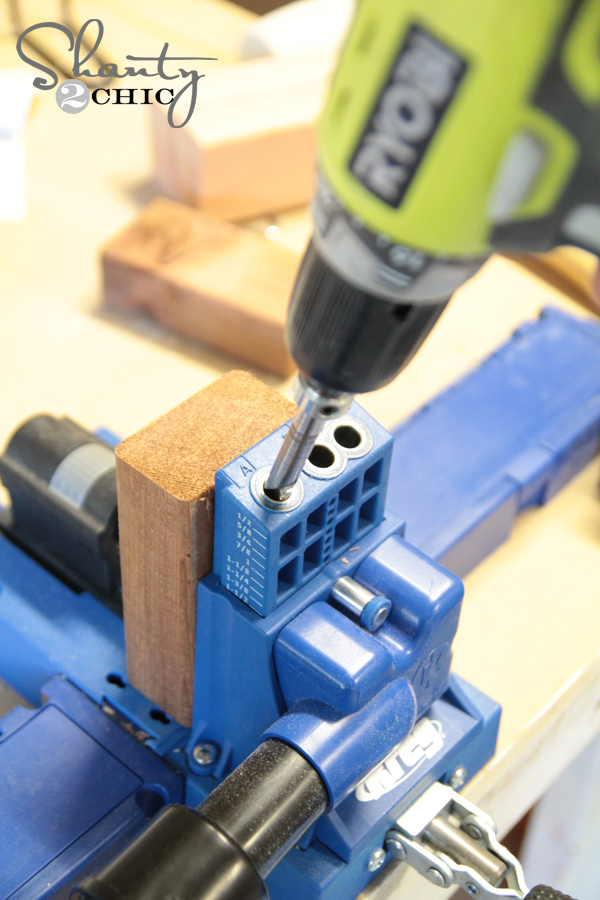
I used my Ryobi 18V drill to make all of my holes using the Kreg bit that comes with the Kreg Jig. You can see below where I put all of my pocket holes. The 12″ piece will have two on each end. The smaller 5.5″ pieces will have 4 on each piece. Two will face one direction, and two will face the other. Just make sure you don’t overlap them. They should fit side by side like mine do!
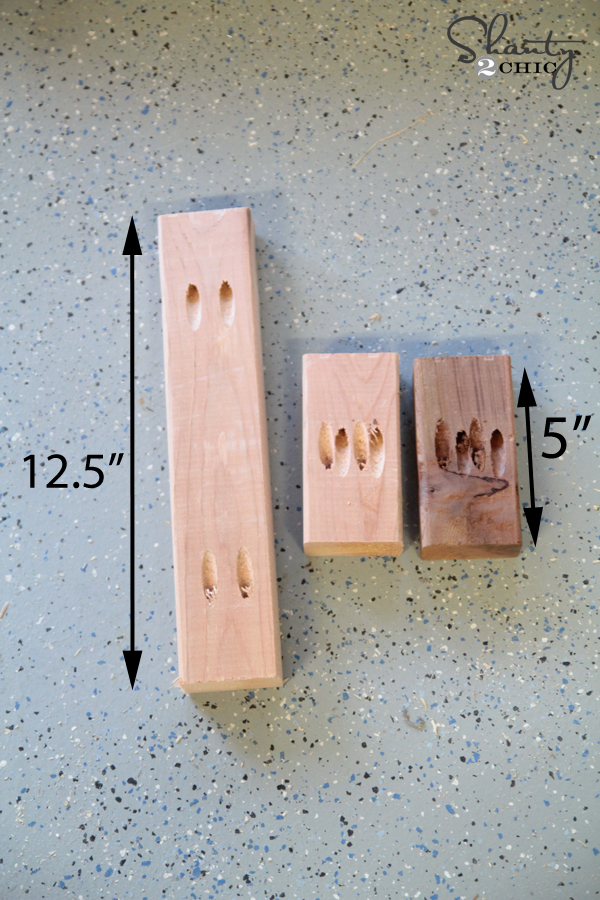
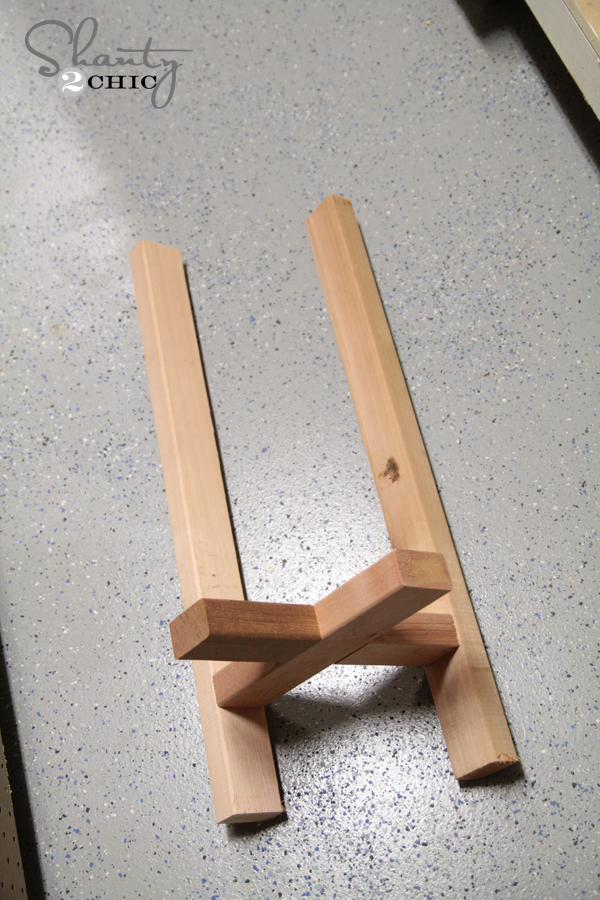
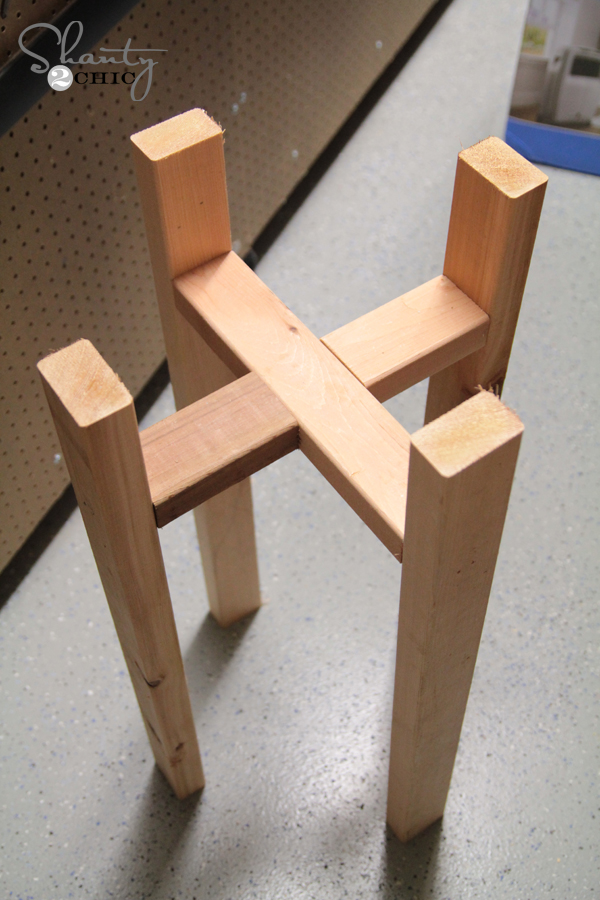
Now you are ready to attach. I made my X’s first using my smaller cuts. Each planter will have an X that looks like this. I just centered the 5.5″ pieces on the 12″ piece and attached them using 2.5″ pocket hole screws.
I then decided where I wanted my planters to stand and marked a line on each 30″ piece. I went with 6″ for mine. Yours will depend on the pots you use. I found my copper colored pots at Home Depot. I then attached each side making sure to line up my pieces on the lines so it would all be even. I also used some Gorilla Wood Glue at each joint.

That’s it! I told you it was simple!
My last step was dropping the pots inside and putting them on my porch! I decided to keep mine raw. I like the look of raw cedar… You can also stain or paint yours! Here’s a few more shots of mine!
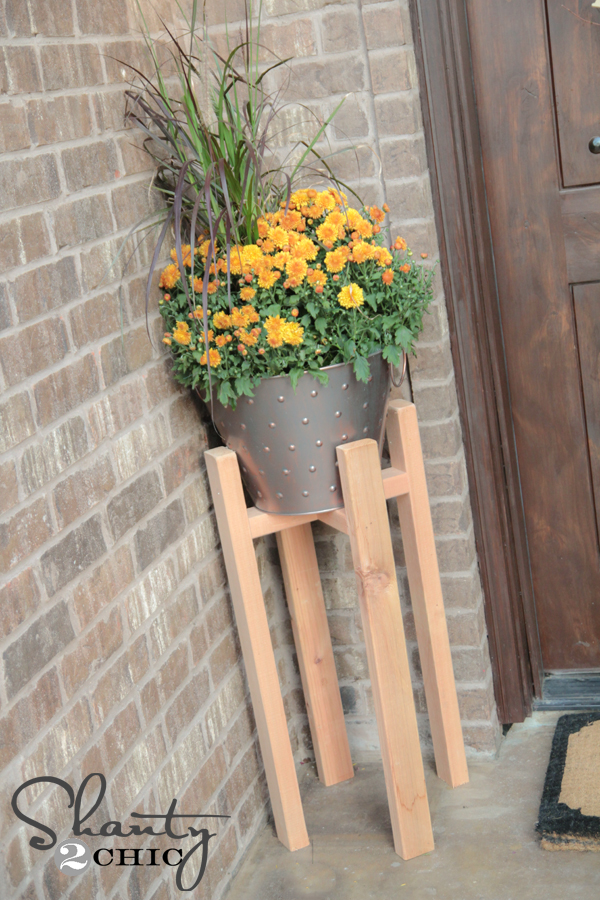
I filled mine with mums, hoping to channel some Fall weather here! Wish me luck on that ;-)!
Thanks so much for stopping by guys! I would LOVE for you to share and PIN these with all your peeps. Let me know if you have any questions at all!
~Whitney

I can view printables but can’t actually print them. What am I missing?
Pretty sure the 5.5″ piece needs to be 4.75″ at least it does if you want the cross piece to be 12×12. Mine is now rectangular based off original measurements.
5.5+5.5+2.5(actual width of 12″ piece) = 13.5
4.75″+4.75″+2.5″=12″
I am glad you said this because I was doing the math in my head and thinking, “No way those measurements are right. You are using a 2×3 board in the center, not a 1″ board.” lol Now I know I am not just terrible at math. I need to adjust my planter stand to fit my 15″ planter and now I feel more confident to do so.
I’m looking to build these for a 12″ pots, what is the size of pot you are using?
Is the cross piece 12 or 12.5inches?
Confused by the photo.
Approximately how much weight can this stand hold?
The drill bit that comes with the Kreg jig R3 is too long I can’t get enough clearance for the drill to finish screwing everything together. Any tips?
Try using the no. 2 square bit with the 3″ extension
We found the same thing when we built it.We ended up using the long bit that came with the Kreg and a 1/4″ socket and ratchet to get the last 2 screws all the way in
Where did you get the metal buckets?
Hello, what is the diameter of your pots? That will help me understand how to make other sizes. Thanks!
Hello, I am a total novice when it comes to wood working but I tried building the plant stand and had a hard time screwing the last leg on. The space to fit the Kreg square bit with drill was limited and I couldn’t get the right angle. Is there a tip that you can share with me? Thanks! Lorenza
Can you tell us when you did the update to your front door and how? It looks similar to the orignal front door you had but with more rustic hardware. Did you do this yourself or get a new door…or am I just completely blind! LOL
I love so many of your projects. Thanks for sharing with all of us. I noticed in you projects you use the Kreg Jig. Such a neat looking tool I’ve been tempted to run out and grab on but the $$-$$$ signs hold me back. Do these make for a stronger joint or are they just to hide the screw heads? Look out Home Depot or Lowe’s, I may be out to get one yet! 🙂
Soooo worth it! I use mine for almost every wood project I make. They have different models, mine is one of the cheapest.
Now this is simple! I think most all of us can pull this one off. I like the elevation for the plants. You could make a shorter one if you were doing planters on just one side to give a nice look for both plants to be seen.
Super cute! Love that you kept them raw.
Such a terrific idea!! Can’t wait for my hubby to get started on one or two or three ….. 🙂
Thanks for sharing your how-to.
Perfect, I love them. What a great idea.