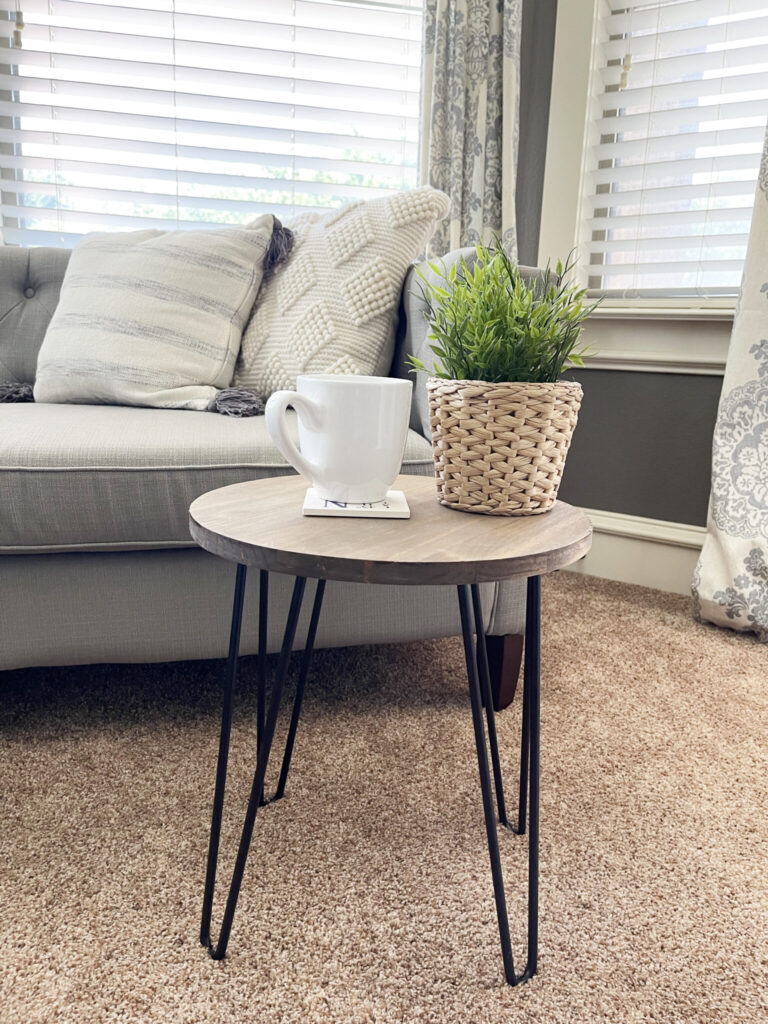
Learn how to build an End Table with just a few tools, free plans and a step-by-step tutorial by Shanty2Chic!
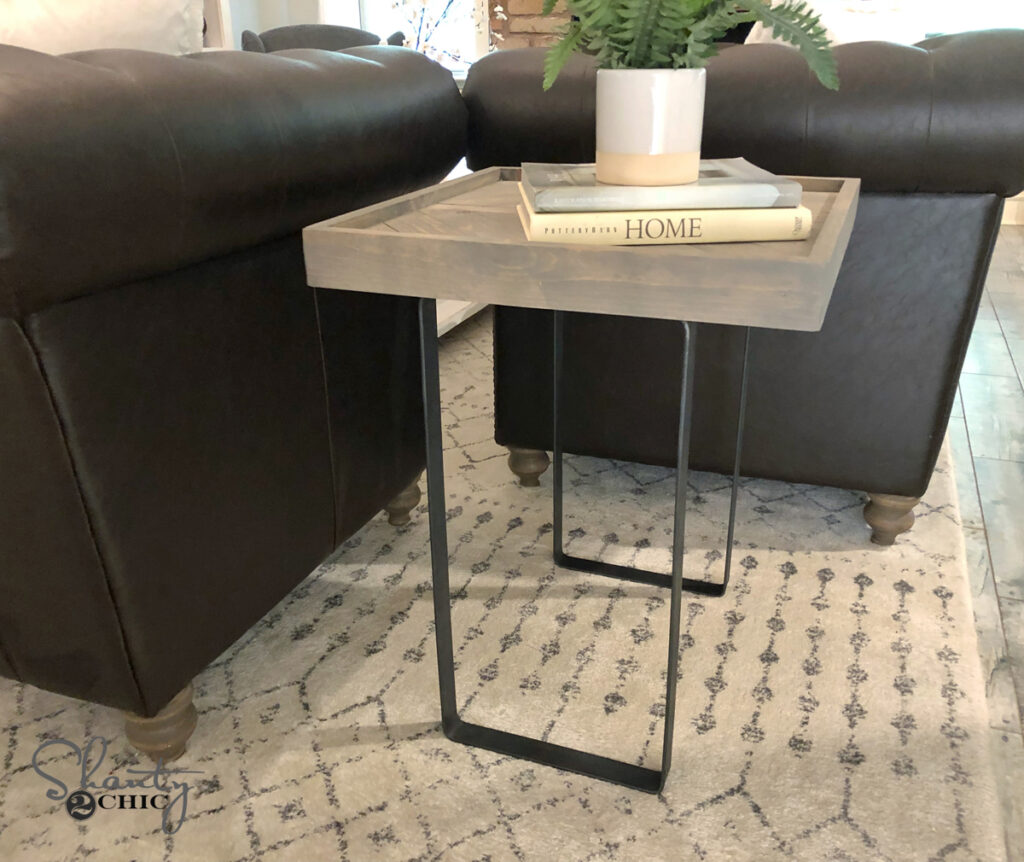
We build a lot of coffee tables but we rarely design and build a set of end tables to match! I’m so excited for this project today because it is just that! I loved the last DIY Parquet Coffee Table that I built, however, I did NOT love the way it looked in my living room. Did it look horrible? No, but I felt like it clashed with my stone fireplace and I could live with it. Luckily, being a carpenter, I was a little giddy to design and build a new one that would fit the space better. My friend loved the coffee table and had the perfect spot for it in her home so it worked great! She loved it so much, in fact, that she asked me to build her a set of matching end tables!
This is such an easy DIY project and you just need a few tools to build it! This set of plans is for one end table project so make sure to double it if you want to build two. So, let’s build it!
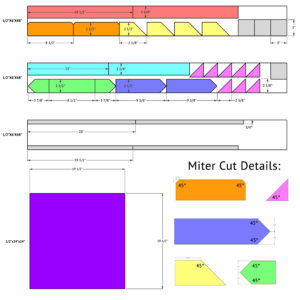
Jump to The Free Printable PlansNote: This parquet design requires measuring and fitting the pieces to fit your table top. The cut list diagrams are a guide but everyone will have different measurements on the individual pieces. Make sure to measure your own design and cut the pieces to fit, as you go.
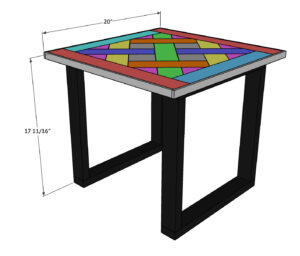
DIY Side Table
Table of Contents
Tools:
- Drill
- Miter Saw (or Circular Saw)
- Pin Nailer (or Brad Nailer)
- Table Saw (optional)
Supplies:
- 3 – 1/2″x6″x48″ Barn Wood Planks (you can use 1×6 pine boards but adjust the width of the trim pieces)
- 1 – 1/2″x24″x24″ Hardwood Plywood
- 2 – Metal Legs
- 1″ Pin Nails (or Brad Nails)
- Wood Glue
Building the Tabletop Frame
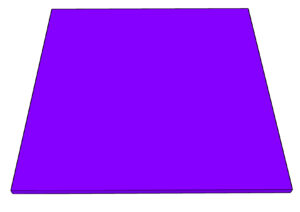
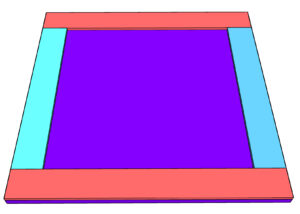
Step 1: Cut the Plywood to Size
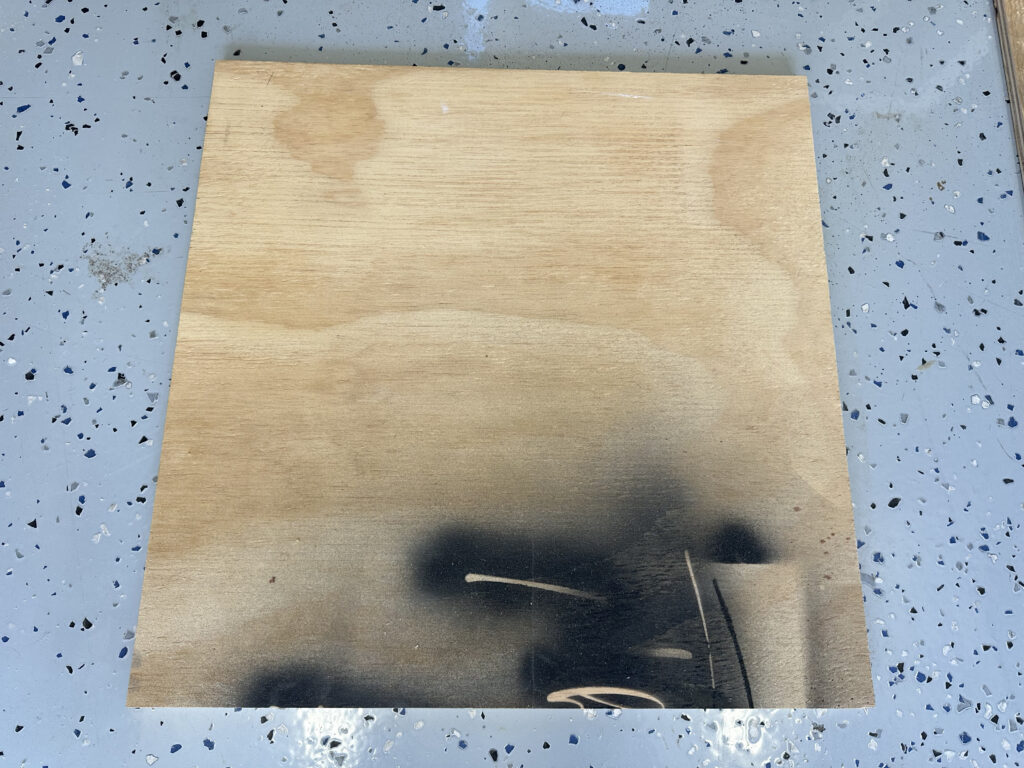
To begin, I cut my 1/2″ plywood to size. I had a scrap sheet that I was able to use. The spray paint won’t matter because it will all be covered up!
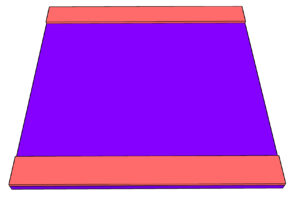
Step 2: Attaching the Long Frame Boards
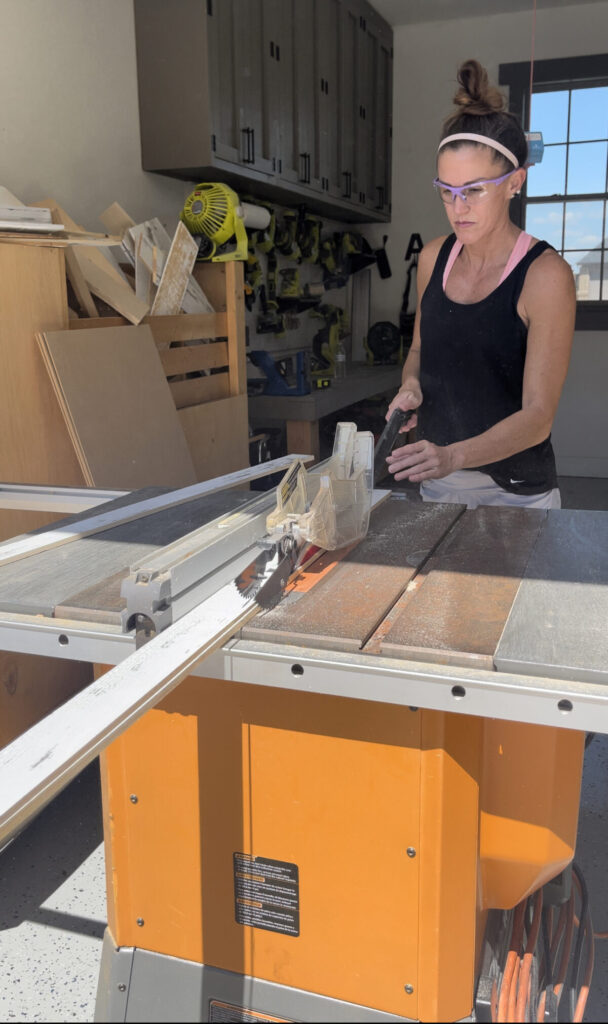
I ripped my barn wood pieces according to the cut list! There are several different width of boards to get this parquet design.
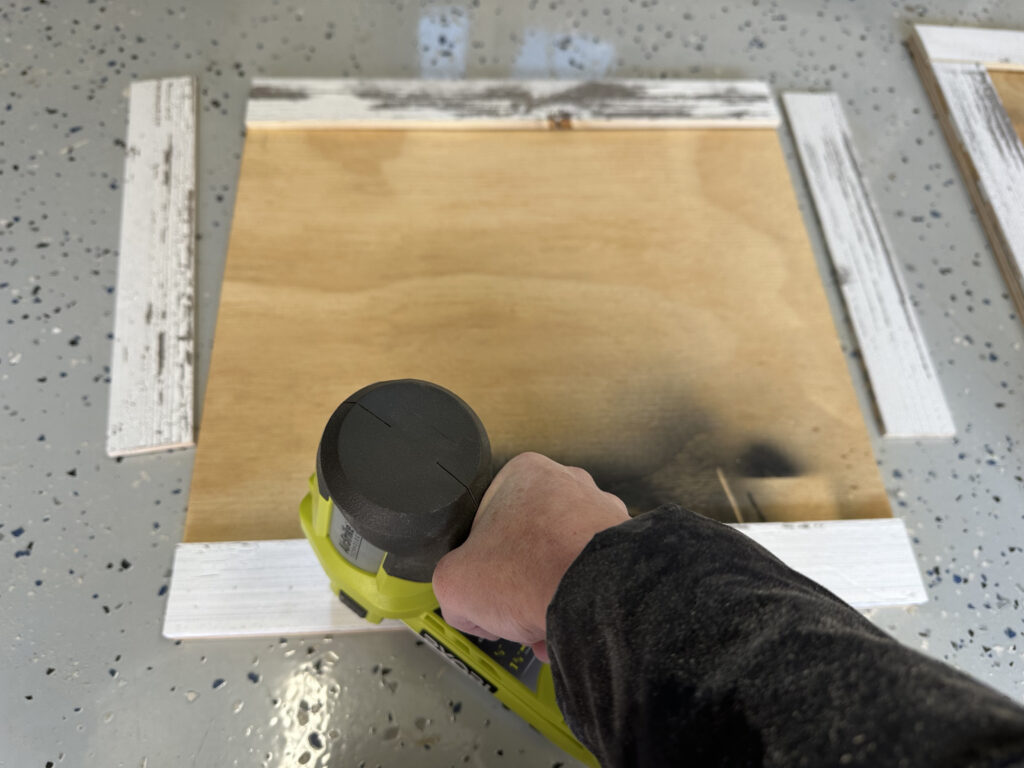
My first step in the design part was to form the frame for the parquet. I cut the long frame boards first and attached them with 1″ pin nails and wood glue.
Step 3: Attaching the Short Frame Pieces
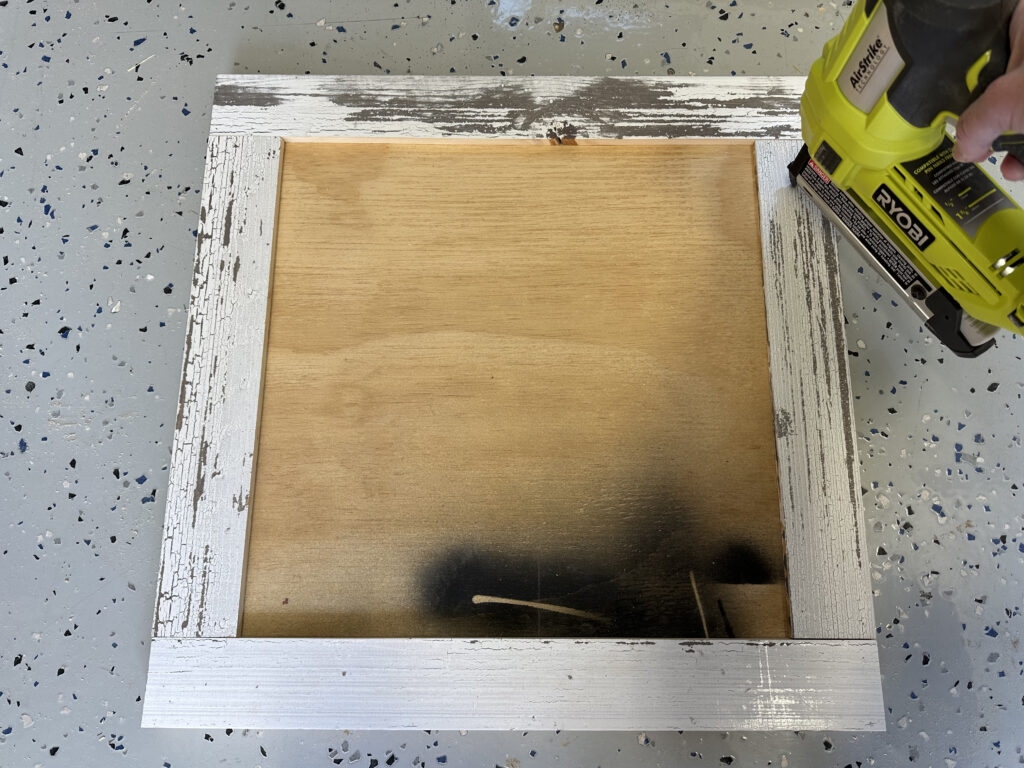
To finish the top frame, I used my tape measure to measure and cut the short frame pieces to size and attached them to the plywood with 1″ pin nails and wood glue.
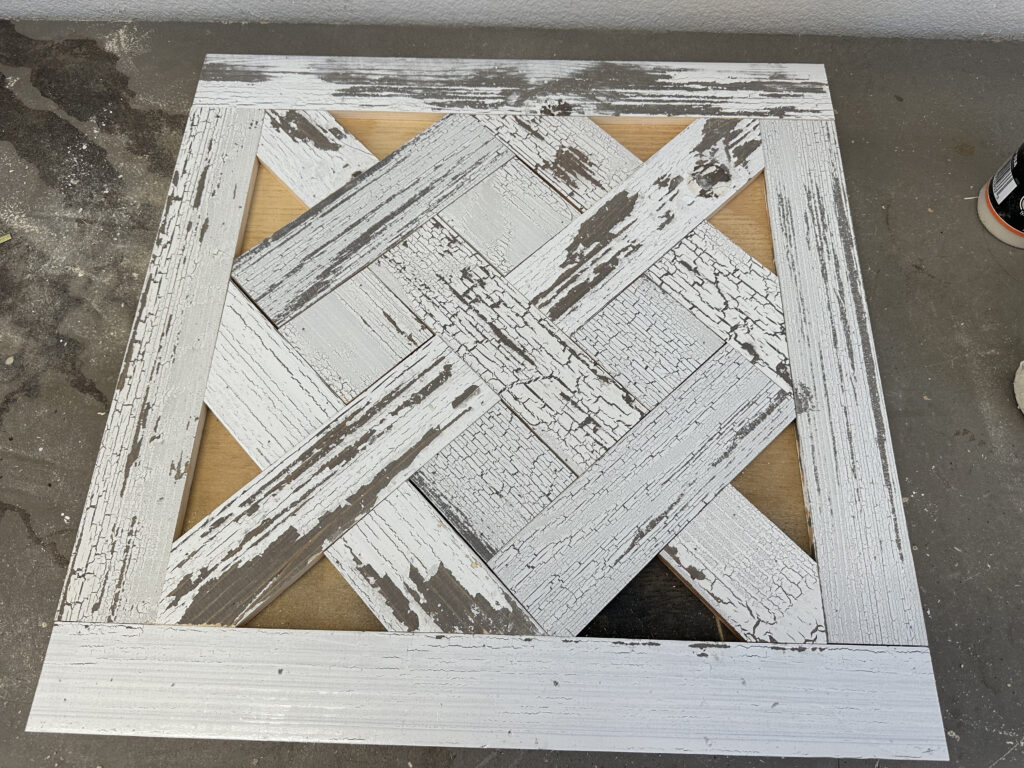
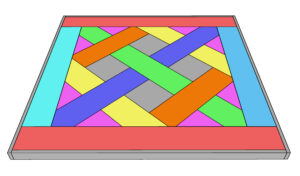
Creating the Parquet Design
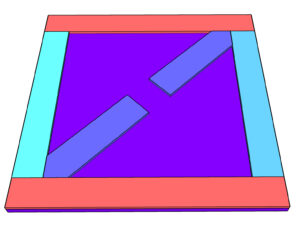
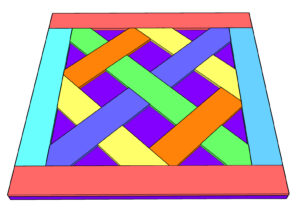
Step 4: Attach the First Corner Pieces
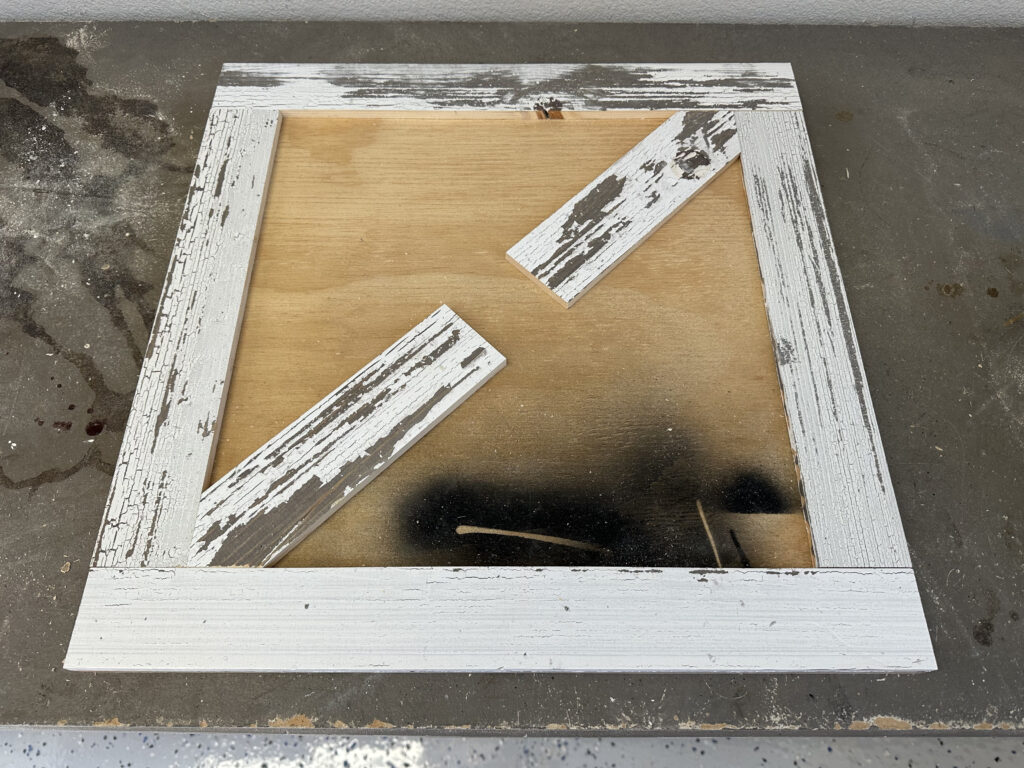
Measure and cut the first, corner pieces to size and attach them the same way. It helps to get the corner cut first and then adjust the length on the straight end.
Step 5: Attach the Second Corner Pieces
Once the first corner was attached, I measured and cut for the second corner pieces and middle cross piece. Attach with wood glue and nails.
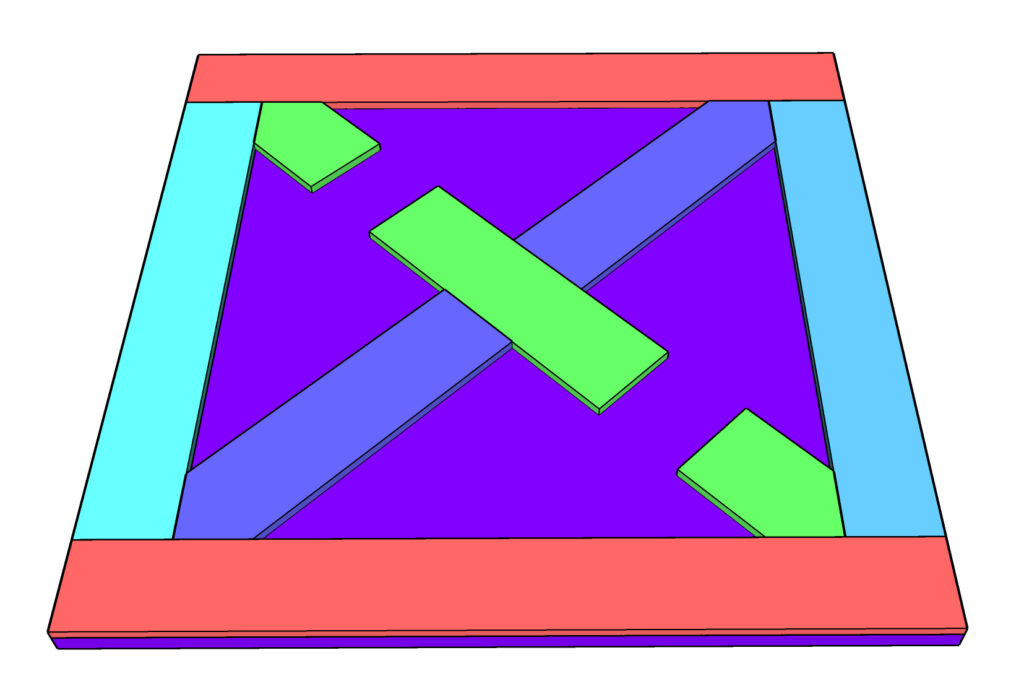
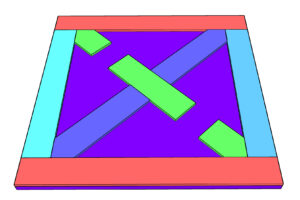
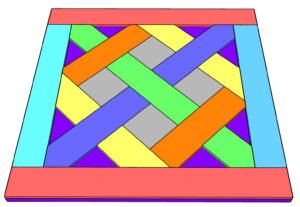
Step 6: Attaching the Split Inside Box Pieces
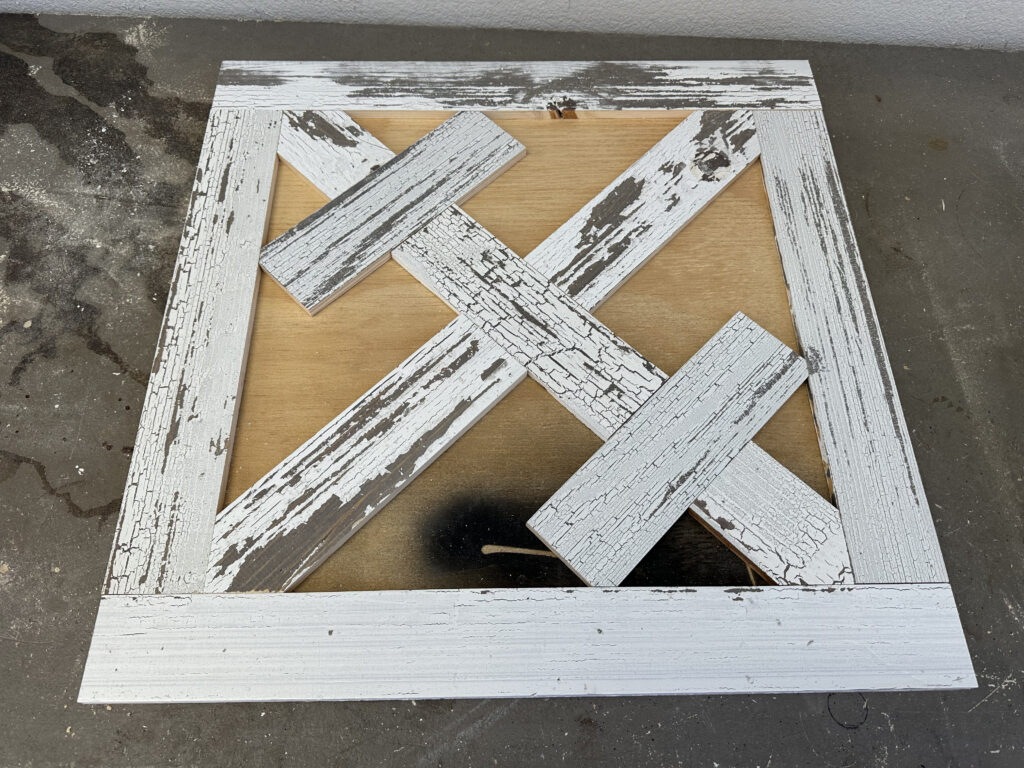
With the corner pieces done, I moved on to the yellow boards. The easiest way to get this fit is to cut one end of the piece at a 45° angle. Then mark for your straight cut. Attach the yellow boards the same way as the previous boards.
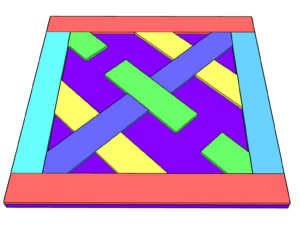
Step 7: Attach the Long Inside Box Pieces
To get the right fit for the orange pieces, measure the length the boards need to be, and make the cut. Then, take off the 45° notches from the corners and attach them with nails and wood glue.
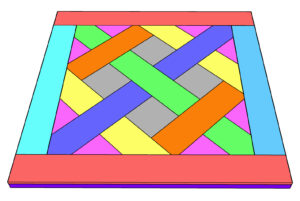
Step 8: Adding the Square Pieces
Measure and cut the square pieces to size. Follow up with pin nails and wood glue.
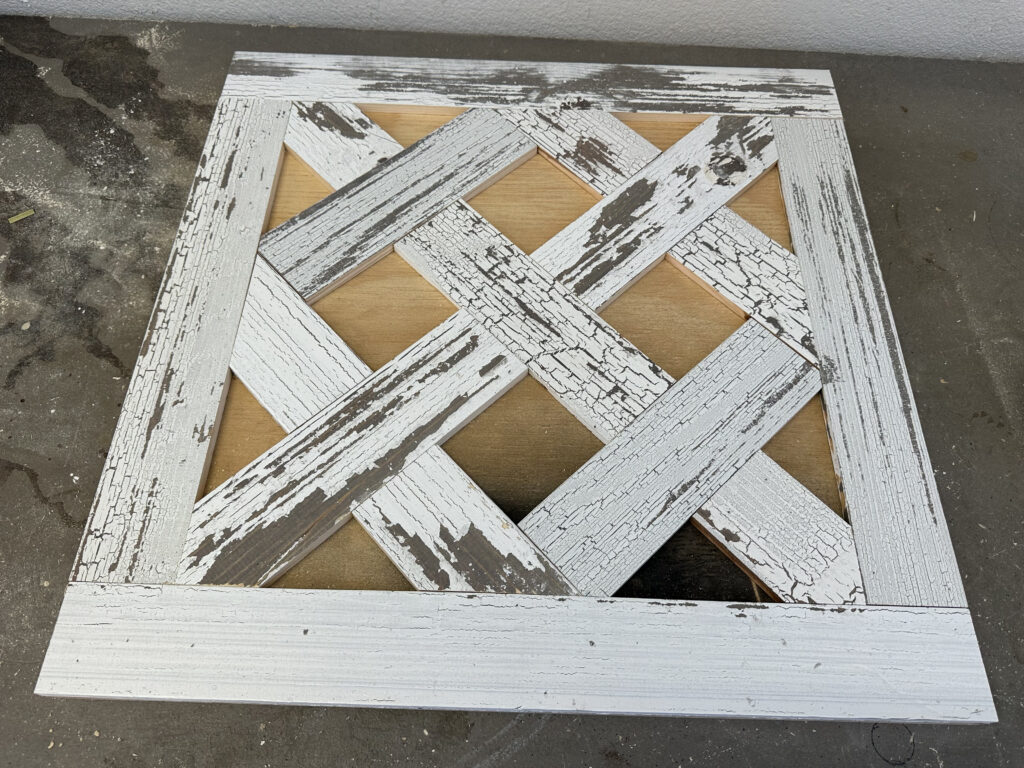
Step 9: Triangle Pieces
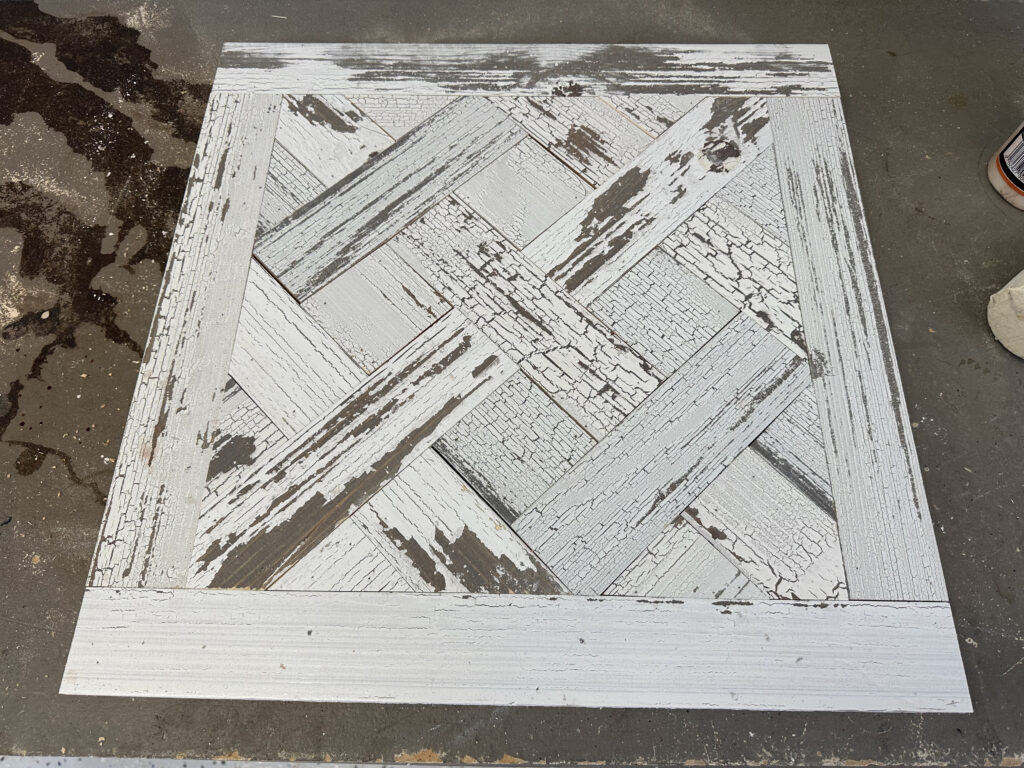
The triangle pieces can be a little tricky because they may not all be the same size. That being said, measure and cut for each individual piece. Tip: I found it helpful to cut one and see how many spots it also fit inside. Then I would replicate that same cut. Use wood glue and pin nails to secure!
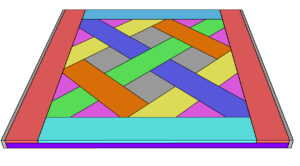
Trimming the Sides of the Table
Step 10: Short Trim Boards
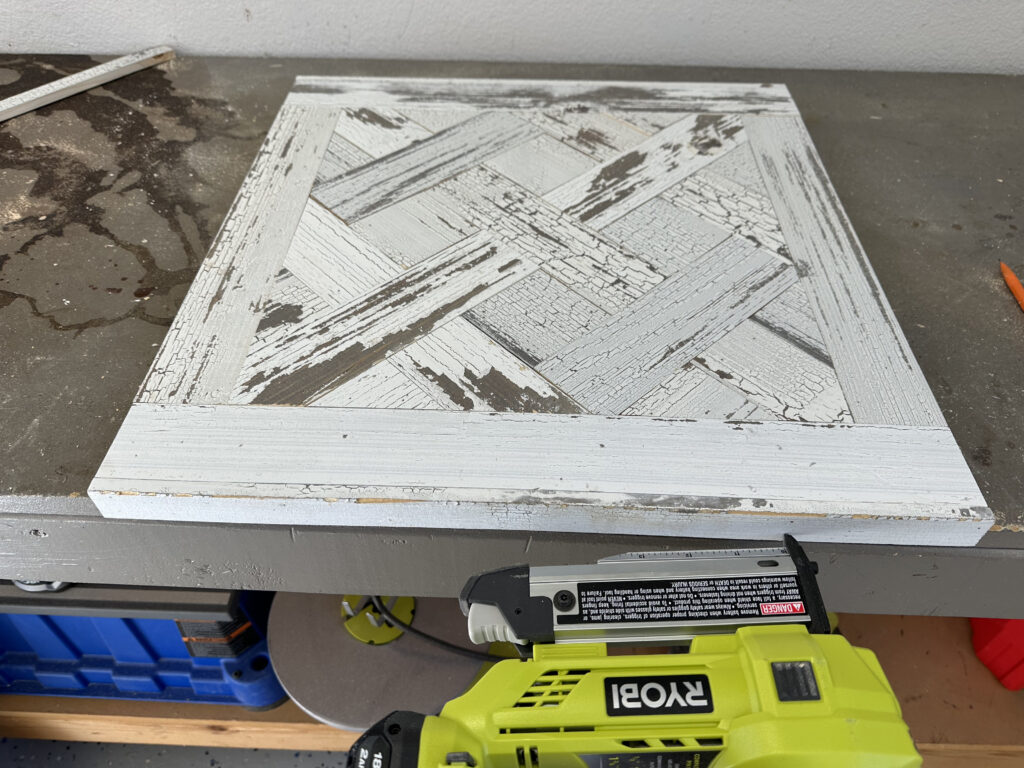
Measure and cut for the first trim pieces and attach them to one side of the table top with 1″ pin nails and wood glue. The top of the trim should be flush with the top of the table top.
Step 11: Long Trim Boards
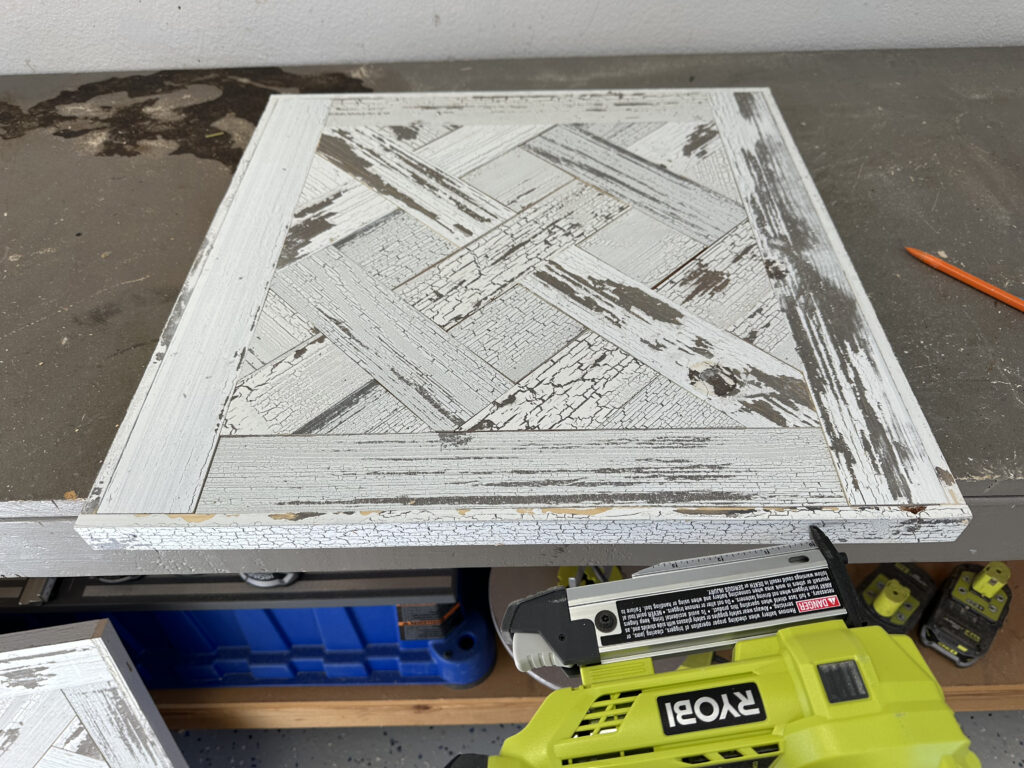
Cut the short trim pieces to size and attach them to the short sides of the table top with 1″ pin nails and wood glue.
End Table Base
Step 12: Add the Metal Leg Base
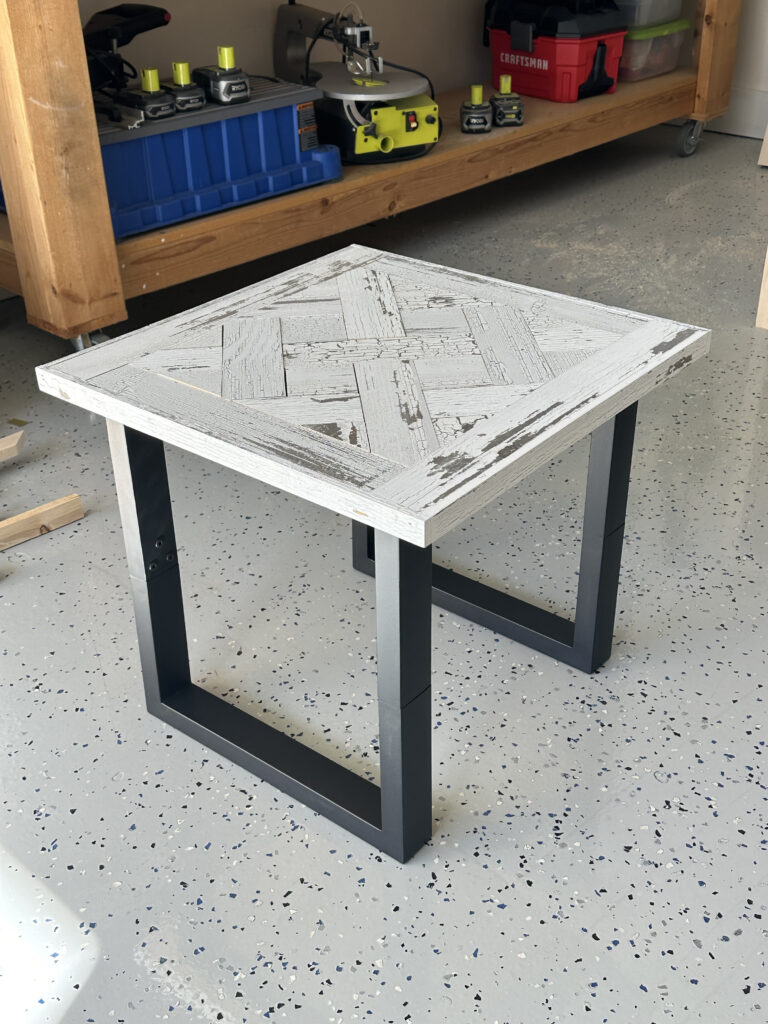
Flip the table upside down, center the legs on the back panel and attach the metal legs to the bottom of the table top. It helps to mark where both end of the legs are, with a pencil on the plywood. Note: I used 2 1/2 wood screws, through the pre-drilled screw pockets in the base, instead of the fasteners included because they were too long.
The Finish
If you used barn wood, you’re all done! You may have some exposed nail holes which you can fill with wood putty followed by a flat white paint to cover it up.
If you used another unfinished lumber material, sand the top down with a course grit sandpaper followed by a smoother grit, fill your nails holes and add a finish! I highly recommend staining with this parquet design so that wood grain pops and highlights the parquet design.
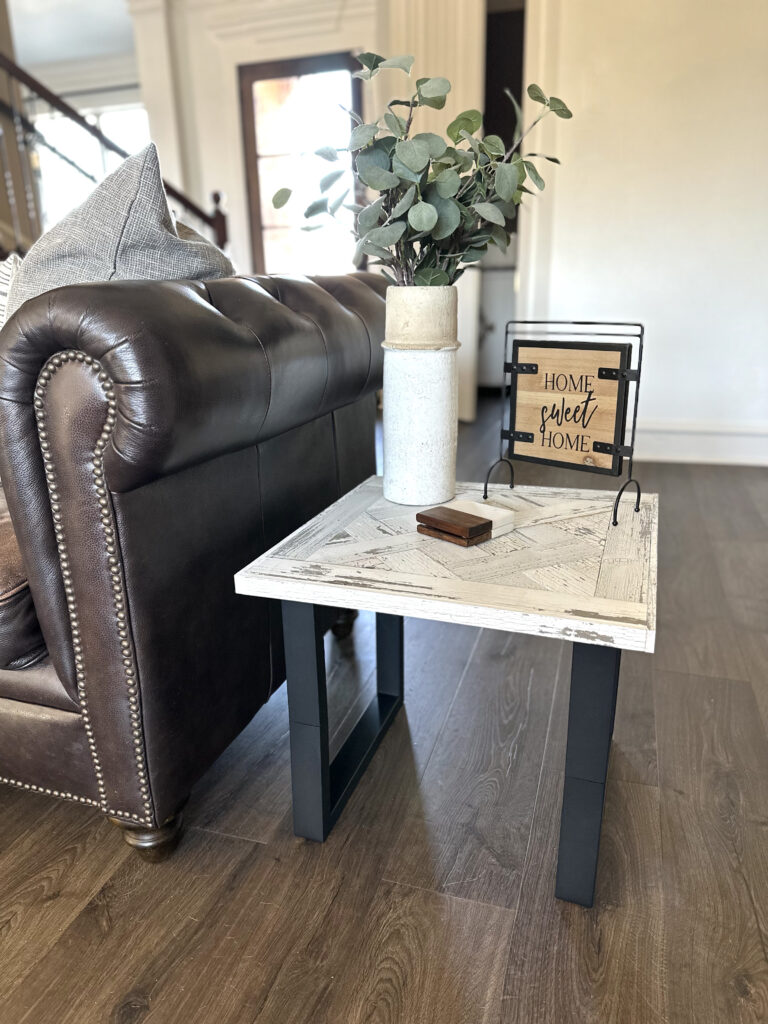
I love this little piece of furniture so much and I know my friend will love it even more! I’m thinking I may need to design and build myself my own end table.
Make sure to share your builds with us on social media and use #shanty2chic so we can share them too!
Happy Building!
Check out some of our other DIY End Table Plans!
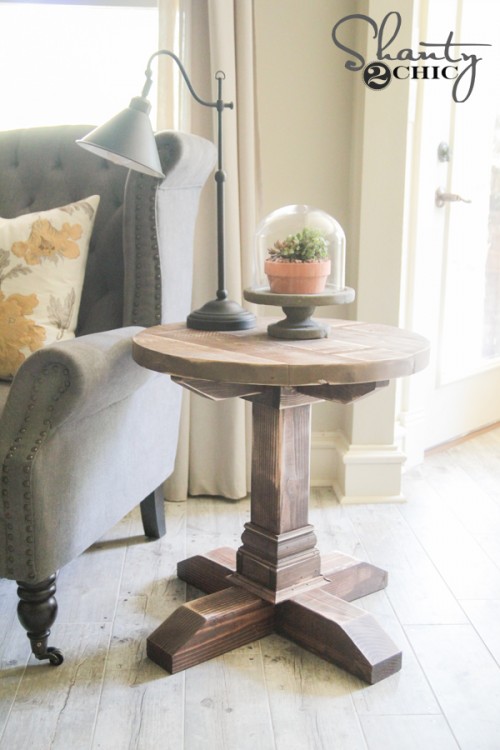

How to Build an End Table
Tools
- Miter Saw
- Drill
- Pin Nailer (or Brad Nailer)
- Table Saw (optional)
Supply List
- 3 1/2×6"x48" Barnwood Planks – Link in Post on our Site
- 1 1/2"x24x24" Hardwood Plywood
- 2 Table Legs
- 1" Pin Nails (or Brad Nails)
- Wood Glue
Instructions
Cut List
- Cut List

Building the Table Top Frame
- Cut the plywood to size.

- Cut the long frame pieces to size and attach them with 1" pin nails and wood glue.

Creating the Parquet Design
- Cut the short frame pieces to size and attach them to the plywood, as shown, with 1" pin nails and wood glue.

- Cut the first corner pieces to size and attach them with 1" pin nails and wood glue.

- Cut the second corner pieces and middle cross piece to size and attach them with 1" pin nails and wood glue.

- Cut the yellow pieces to size and attach them with 1" pin nails and wood glue.

- Cut the orange pieces to size and attach them with 1" pin nails and wood glue.

- Cut the square pieces to size and attach them with 1" pin nails and wood glue.
- Cut the triangle pieces to size and attach them with 1" pin nails and wood glue.

- Measure and cut for the first trim pieces and attach them to one side of the table top with 1" pin nails and wood glue. The top of the trim should be flush with the top of the table top.

- Cut the short trim pieces to size and attach them to the short sides of the table top with 1" pin nails and wood glue.

Attaching the Legs
- Flip the table top over, center the legs on the bottom of the plywood and attach the metal legs to the bottom of the table top.


The Finish!
- If you used barn wood, you're all done! If not, add a finish! Make sure to share your builds with us on social media and use #shanty2chic so we can share them too!Happy Building!


This end table plan is very beginner-friendly while still focusing on solid construction principles. Projects like this really show how important accurate cuts and proper material selection are for achieving a clean and durable finish. Using well-engineered boards like quality plywood can help maintain structural stability and consistency over time. We’ve come across useful material insights on platforms like https://plywoodbazar.com/
for similar furniture and interior applications. Very clear and practical guide!
I like the level of detail that you provided and actually showed the process along with the design plans. So much better than the average guide to building things.
It looks so nice! Thanks for inspiration and ideas
This is an amazing and informative article that covers so much ground.