Build this simple DIY Industrial Farmhouse Table with only framing materials and five tools! How-to video and free plans by Shanty2Chic.
We built this DIY Industrial Farmhouse Table for our friend Rachel’s Shanty House Crash! Rachel asked us to crash her kitchen nook. She has three boys so we wanted to give her a table that was not only durable but chic and budget friendly.Just click the Play Button below to watch!
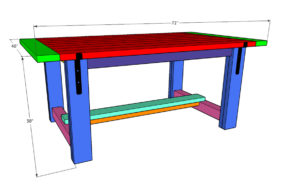
We put our brains together and designed this 6 foot industrial style, farmhouse table that we built with only framing $75 in framing lumber!
CLICK HERE TO JUMP TO THE FREE PRINTABLE PLANSFollow along with the how-to below!

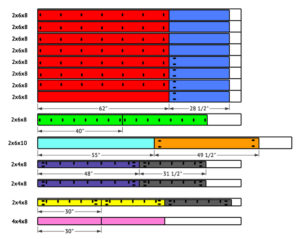
We started by ripping all of the 2×6 boards to 5″ and the 2×4’s to 3″. This is not a necessary step but it makes for nice straight edges and allows us to hide the seams on the chunky table legs that we built. The plans are based on ripping these boards so if you don’t rip them, make sure to adjust the measurements accordingly.
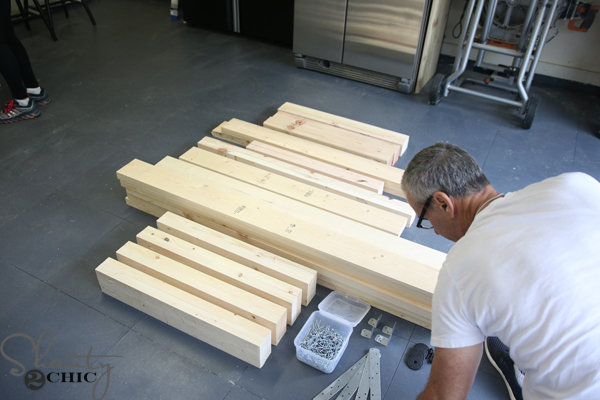
Next, we made all of our cuts for the table. Tip: for a precise breadboard cut, wait until the planks are attached and measure and cut to fit perfect. You can watch our How to use a Miter Saw video HERE!
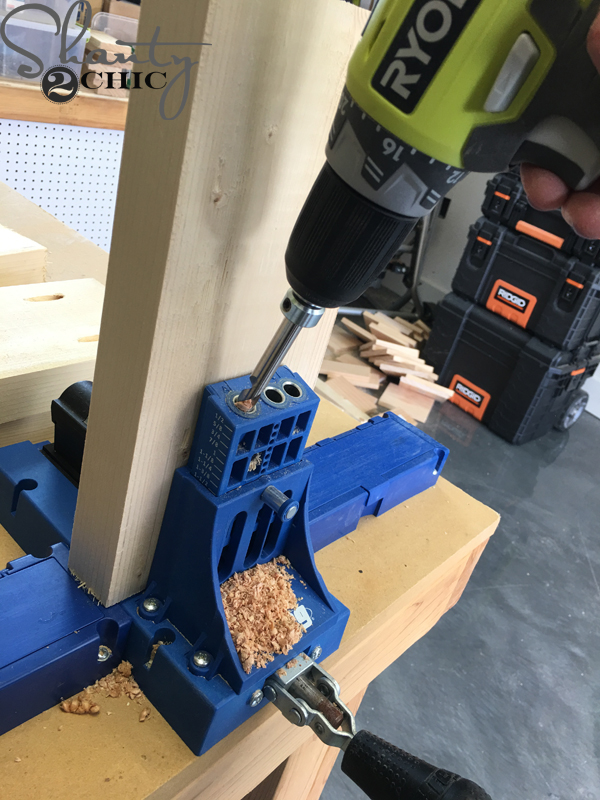
Once the cuts were made, we drilled all of the 1 1/2″ pocket holes with our Kreg Jig K5. Refer to the printable plans for pocket hole placement. You can find the Kreg Jig K5 HERE on Amazon. Watch our How to Use a Kreg Jig video HERE!
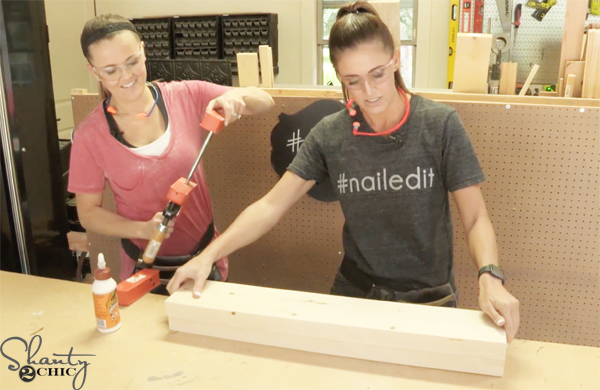
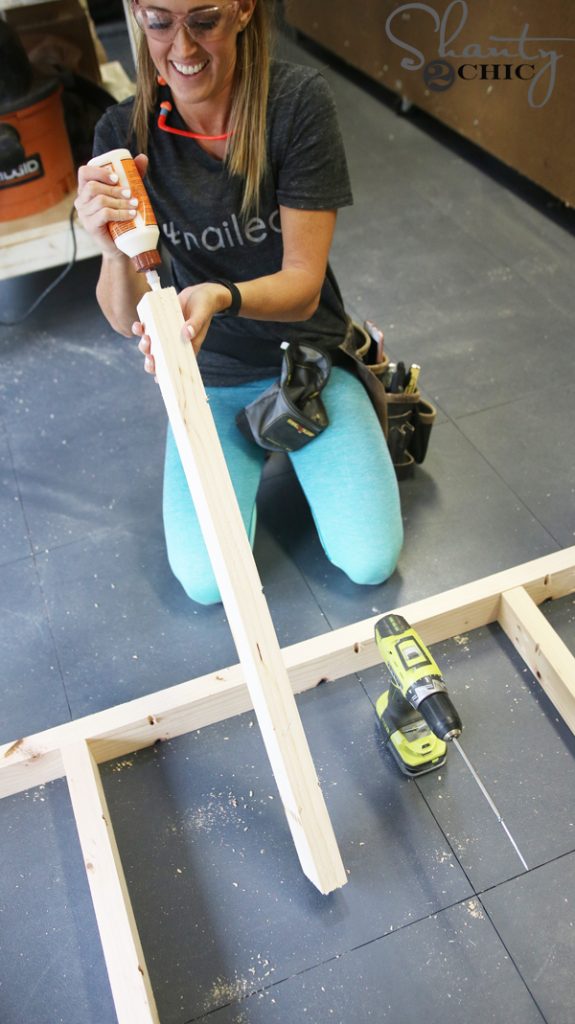
Time to laminate! We put glue on one 2×6 and layered another 2×6 on top of it.
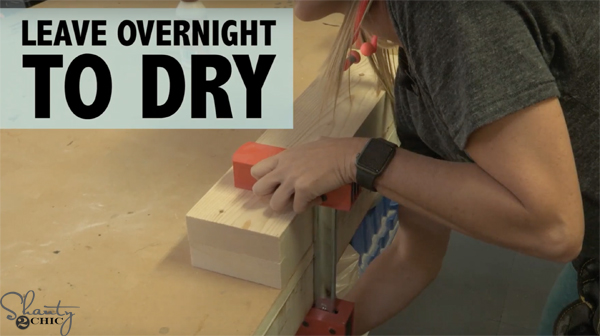
Then, we used clamps to hold the boards in place. Do this for all 4 legs and let the wood glue dry overnight.
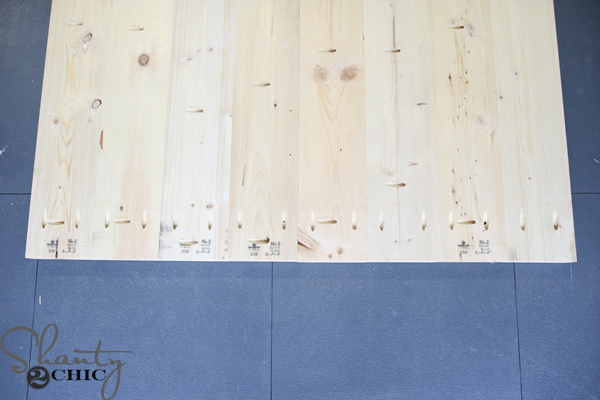
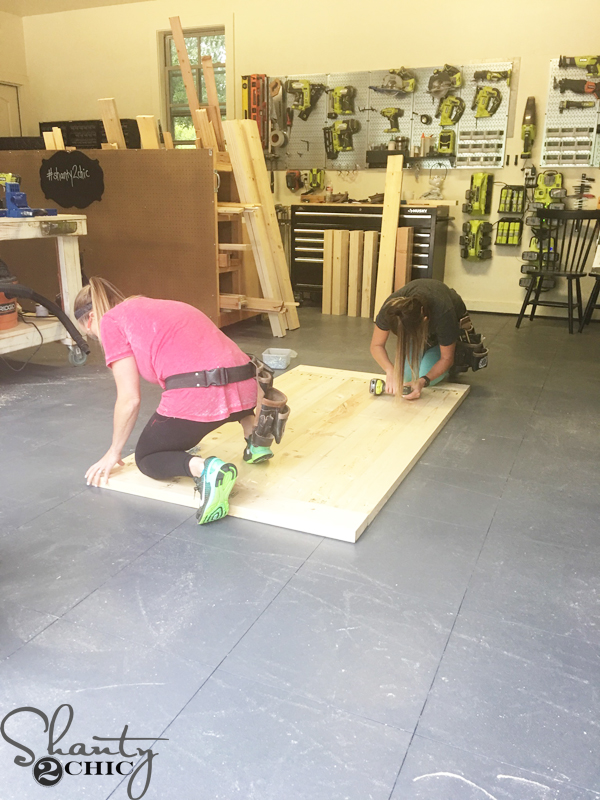
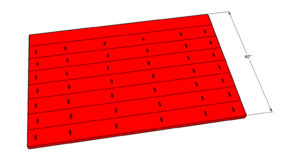
While the legs are drying, you can begin to build the planked top!
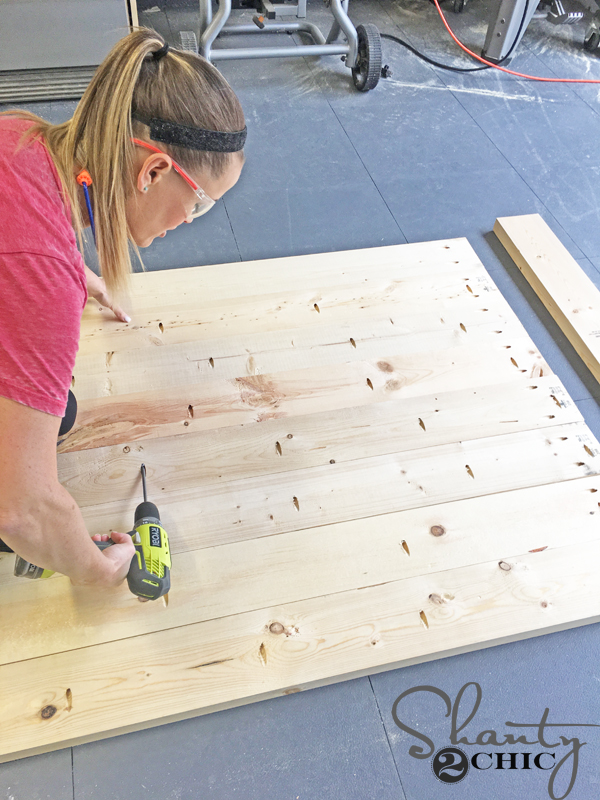
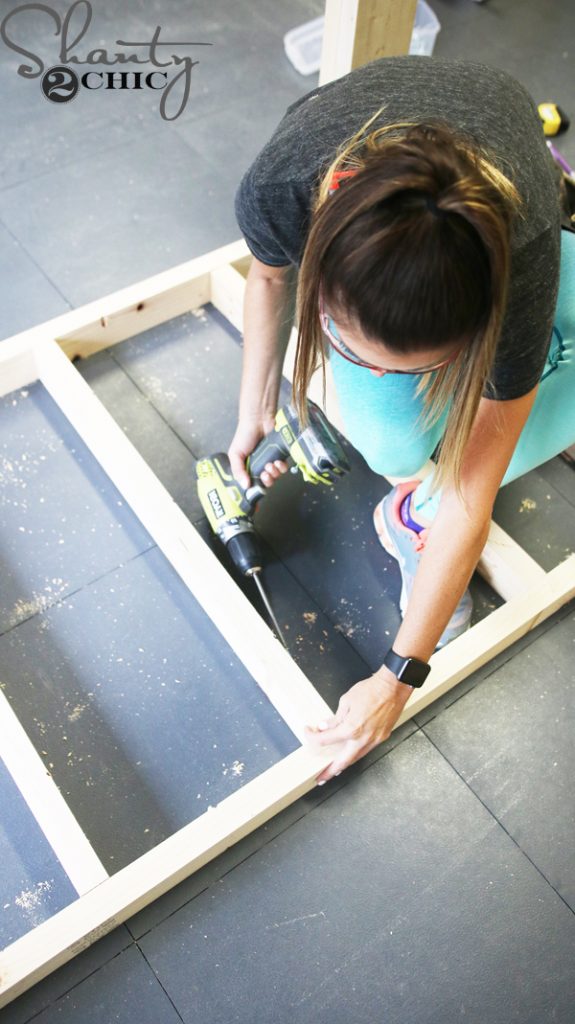
Attach all of the planks with 2 1/2″ pocket hole screws.
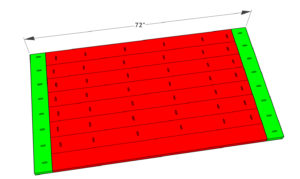
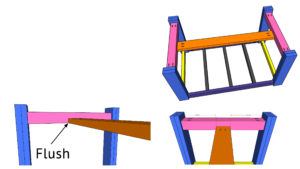
Then, measure and cut the breadboards to fit! Attach with 2 1/2″ pocket hole screws.
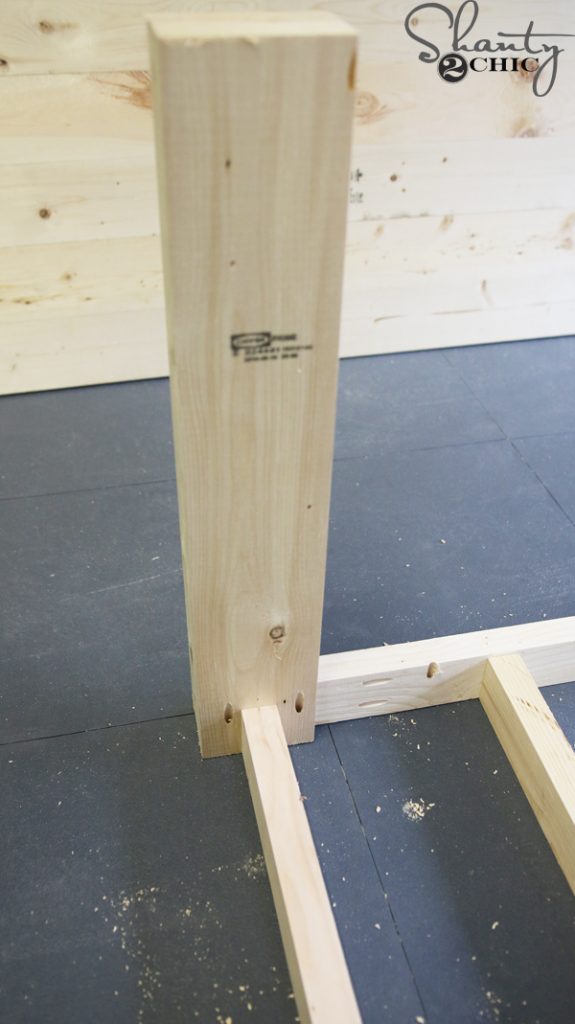
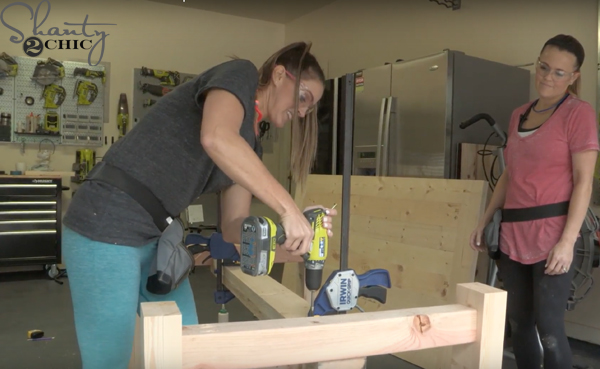
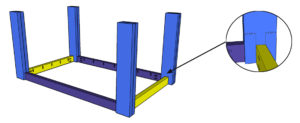
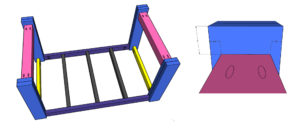
Once the legs are dry, you can build the table frame. First, attach the short and long aprons to the legs. The aprons will be flush with the top of the legs and centered on the face of the legs. Attach with wood glue and 2 1/2″ pocket hole screws.
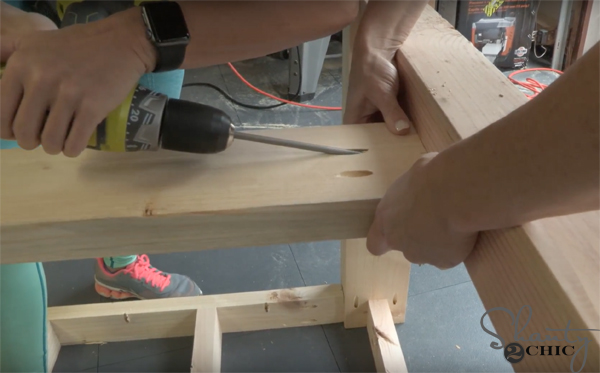
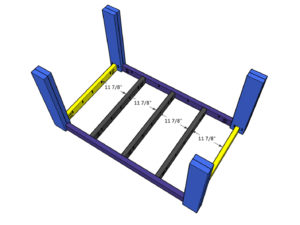
Now for the supports. Apply wood glue to each support
and attach them to the long aprons with 2 1/2″ pocket hole screws.
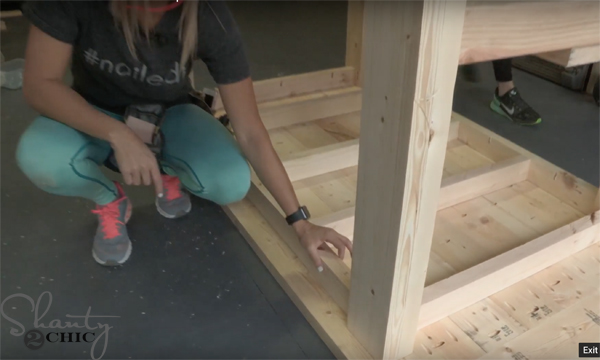
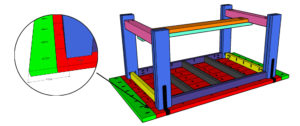
Once the supports are attached, you can attach the 4×4 leg runners. If you have a Kreg HD, then you can just drilled 3 1/2″ pocket holes into the 4×4’s. If not, you can just attach them with 3 1/2″ Spax screws from the front faces of the legs into the runners. You can hid the screw holes, with the hardware, at the end.
Now, attach the short runner, between the two leg runners. Use wood glue and 2 1/2″ pocket hole screws. The top of the runner should be flush with the top of the leg runners.
To attach the long runner, apply glue to the bottom of the long runner and clamp the long runner under the short runner. Attach with 2″ Spax screws from the bottom of the short runner into the long runner.
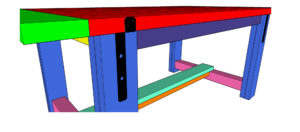
Next, put the table frame over the planked top and attach it to the top with 2 1/2″ pocket hole screws from the aprons and supports into the table top.
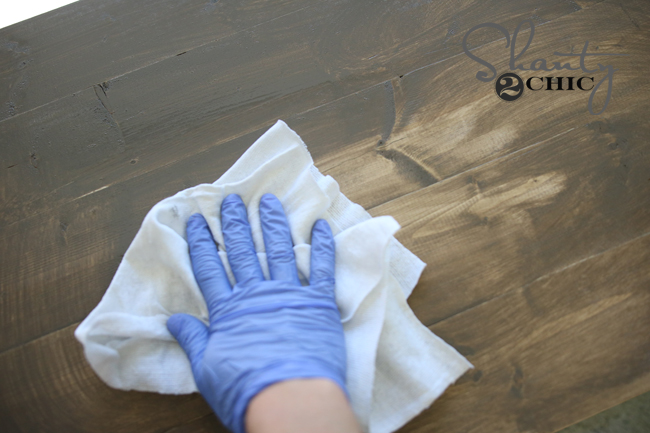
We chose Briarsmoke stain by Varathane to finish the table. Wipe on one coat with a clean cloth, wait about 5 minutes and then wipe away the excess stain with a new clean cloth.
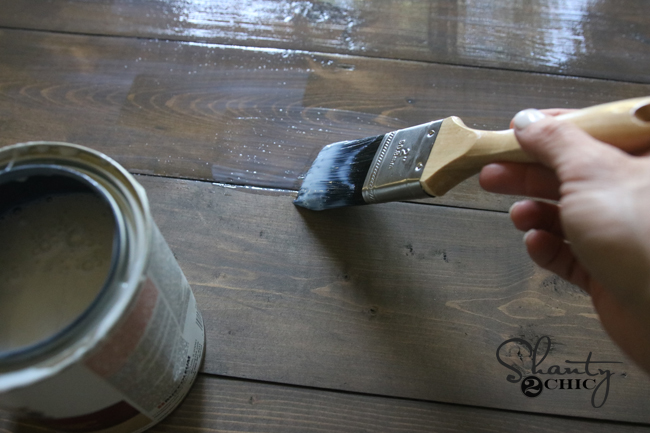
To protect the finish, we applied one coat of Varathane Triple Thick Poly in Matte finish. Just brush on with a bristle brush. It will look like glue before it dries 🙂
Now to make it pretty (and industrial)!
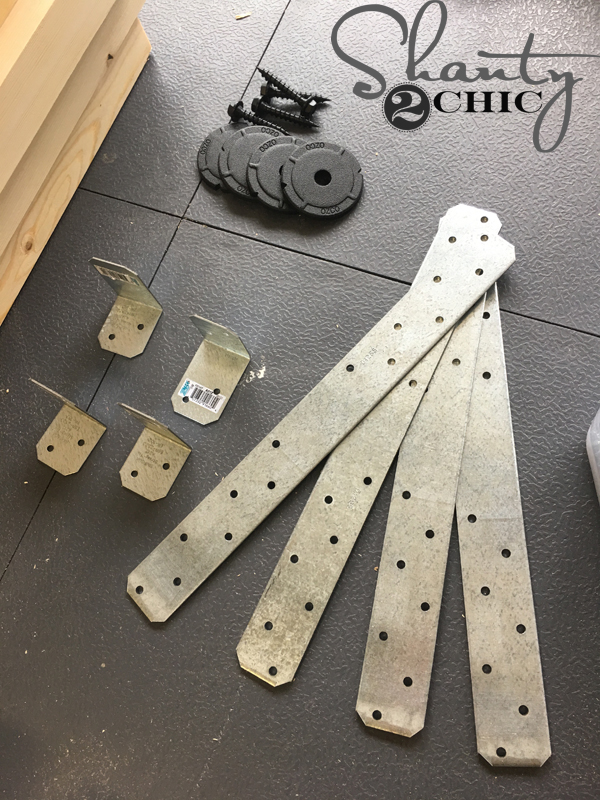
Here is the hardware we used! 4 Simpson Strong-tie angles, 4 Simpson Strong-tie straps, 4 Simpson Strong-tie Outdoor Accents Washers and 4 Simpson Strong-ties Outdoor Accents hex screws. We spray painted the silver pieces with a flat, black spray paint.
You can find the metal angle pieces HERE and the straight piece HERE on Amazon. The Outdoor Accents are Home Depot finds.
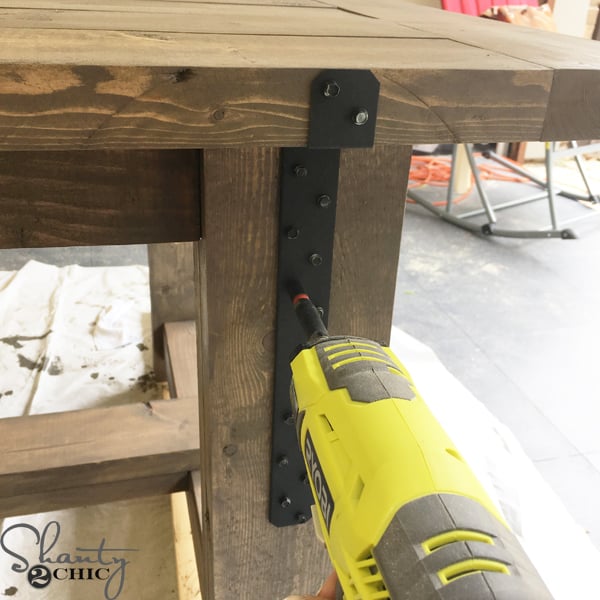
We attached the straps and angles to the table with small hex screws that we also painted black.
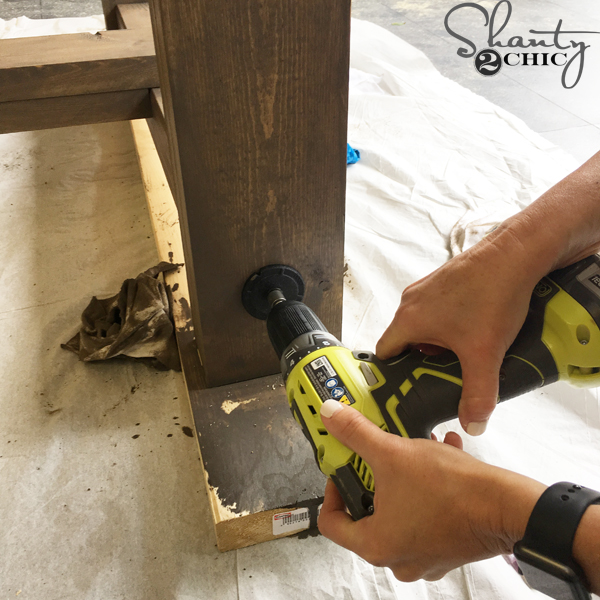
We used the washers and large hex screws on the legs, where the leg runners attached. This is where you can hide your screw holes if you didn’t use the HD Jig.
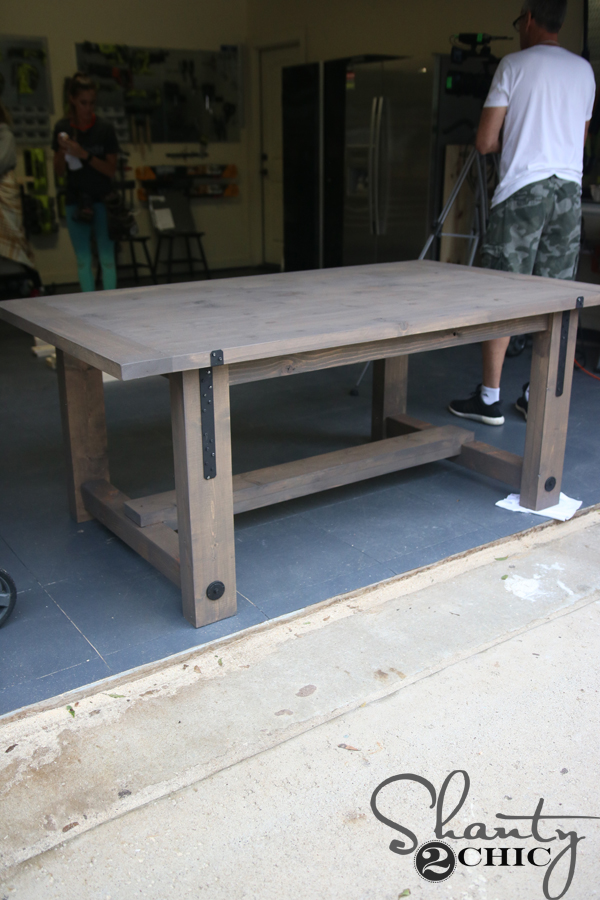
That was IT! How do you like it????
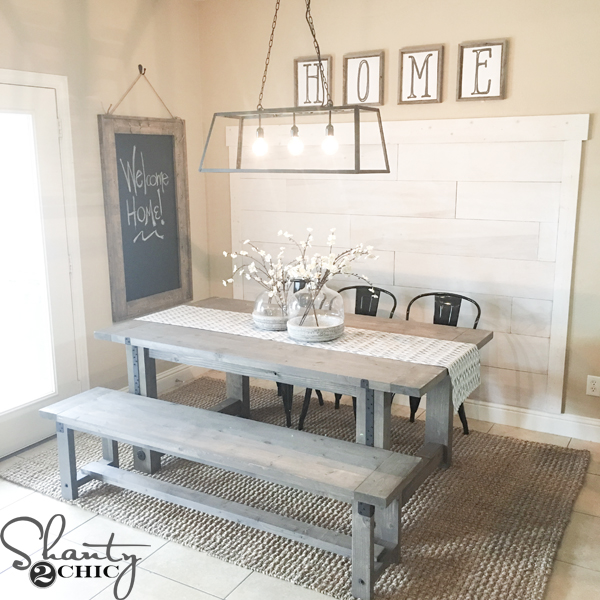
Rachel LOVED it and we do too 🙂 You can find out all the info for the rest of the pieces in her new kitchen nook below!
Planked Wall: How-to Video HERE!
Bench: HERE
Terrariums (on table): HERE
Stems: HERE
Table Runner: HERE
Chandelier: HERE
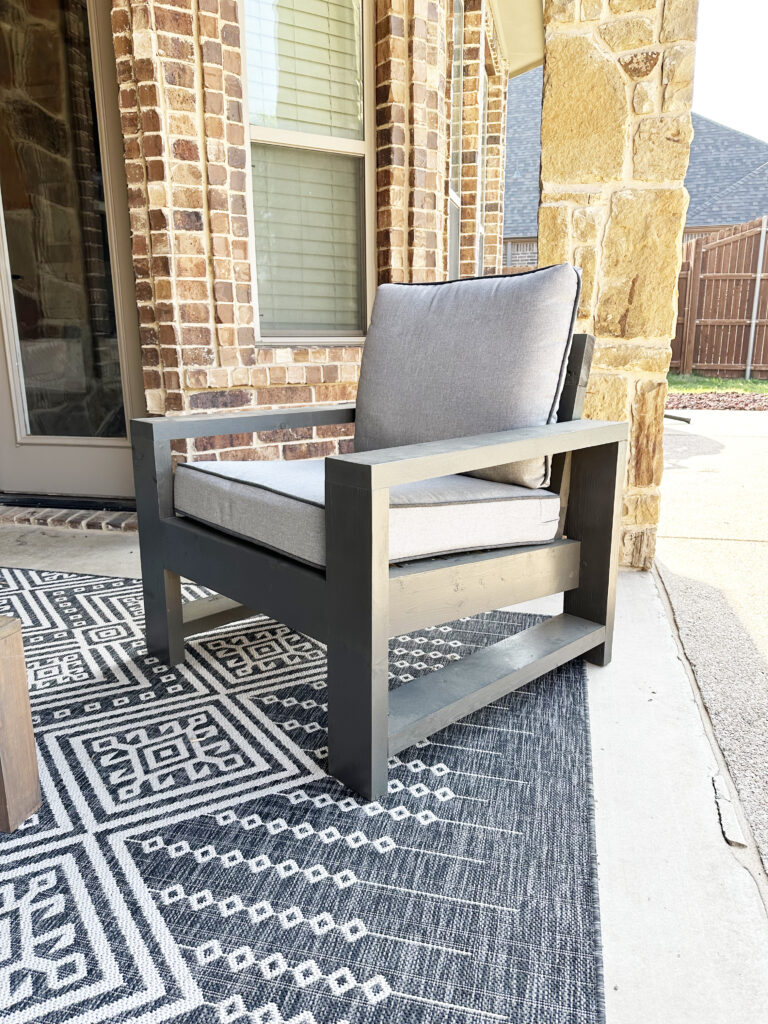
Chairs: HERE
Rug: HERE
Frames: Hobby Lobby
HOME Printable: HERE
Chalkboard: HERE

DIY Industrial Farmhouse Dining Table
Supply List
- 9 2x6x8 Pine or Framing Lumber
- 1 2x6x10 Pine or Framing Lumber
- 3 2x4x8 Pine or Framing Lumber
- 1 4x4x8 Pine or Framing Lumber
- 2 1/2″ Pocket Hole Screws
- Spax Screws
- Wood Glue
- Decorative Metal Pieces
Instructions
- Cut List

- Cut the boards for the planks. Then, drill 1 1/2″ pocket holes into 7 of the planks. Attach the planks with 2 1/2″ pocket hole screws.

- Now, measure and cut the breadboard pieces to fit. Drill 1 1/2″ pocket holes into the boards and attach them to the planks with 2 1/2″ pocket hole screws and wood glue.

- To create the legs, cut the boards to size, drill 1 1/2″ pocket holes in 4 of the pieces. Then, glue two pieces together (one with pocket holes and one without), clamp and let them sit for 24 hours.

- Cut the long apron pieces and drill 1 1/2″ pocket holes. Attach them to the legs with 2 1/2″ pocket hole screws and wood glue. The aprons will be centered on the legs where the pieces are joined together and flush with the top of the legs.

- Cut the short runners to size, drill 1 1/2″ pocket holes and attach them with 2 1/2″ pocket hole screws and wood glue. Center the short aprons on the wide side of the legs.

- Cut the support pieces to size and drill 1 1/2″ pocket holes into each board. Attach to the inside of the long aprons with 2 1/2″ pocket hole screws and wood glue.

- Now, cut the 4×4 pieces and run between the legs. You can use 3.5″ Spax screws to attach the runners from the outside of the legs or use a Kreg HD to drill 1 1/2″ pocket holes. Make sure to use wood glue and fill screw holes if not using the Kreg.

- Next, cut the short runner. Drill 1 1/2″ pocket holes in each end and attach with 2 1/2″ pocket hole screws and wood glue.

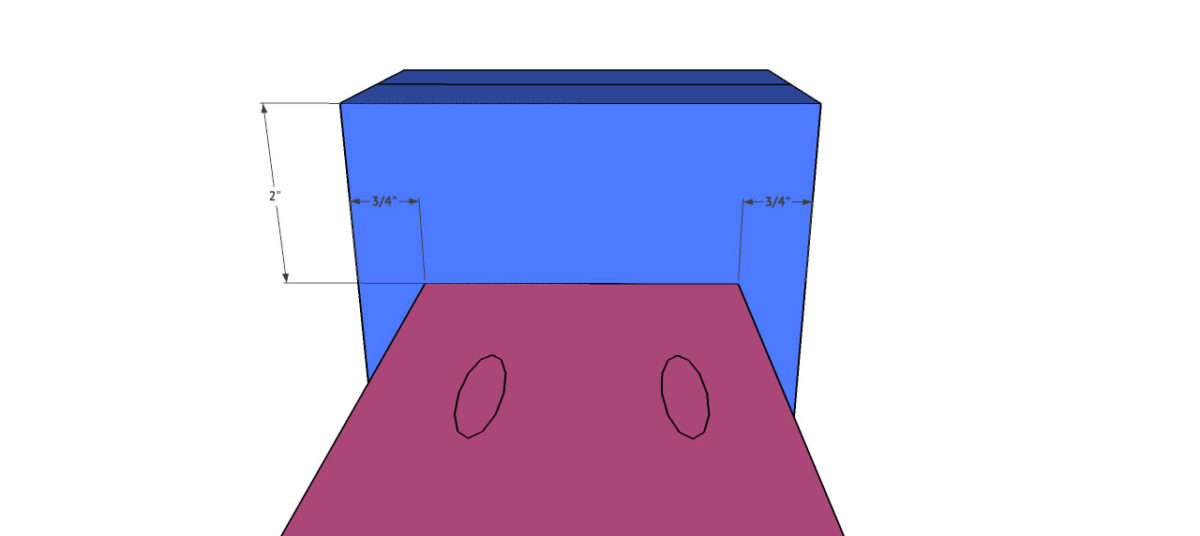
- Keep the base upside down and cut the long runner to size. Attach it underneath the short runner with wood glue and 2 1/2″ brad nails from the bottom of the short runner. This will hide the nail holes. The long runner should sit 3/4″ from the ned of the leg runners.

- Set the table base on top of the table top and attach it to the table top with 2 1/2″ pocket hole screws from the aprons and supports into the table top.

- Flip the table over and add decorative hardware We used framing brackets and spray painted them black.

- All finished! Now you can paint or stain it to get the look you want. Try adding different hardware to really make it your own. Be sure to share your builds with us on social media and use #shanty2chic so we can share them too! Happy Building!


Question…what would all the meausurements be if I wanted to make this 8ft, instead of a 6ft table. This will be my first build…so I’m new to all of this.
I was thinking the same thing. Did you get a response?
I built a table with a breadboard and it feels a little wobbly. Did you add an extra brace on yours or is it pretty stable.
Would this be easy enough to do a 4ft table instead of 6ft? Any drastic measurement changes?
I absolutely love this!!! Would this be easy to modify to pub height?
I love it! I’m just wondering how the table is going to respond to expansion and contraction across its width since the bread board piece is screwed to the boards.
This table will shatter the first winter due to poor construction. No table top should be pocket holed. The fake breadboard will fall off first.
I’ve been using pocket hole joinery for 20 years, so far so good bonehead…
Thomas I build a lot of tables and had one crack inside due to the pocket holes. Now I’ve been using figure 8’s to fasten the top to the base.
Could this comfortably seat 8? (3 on each side and 1 on each end)
I’m wondering if the 6ft would comfortably sit 8 as well.
Do I have to treat the wood prior to staining? In the past, I’ve have stained this type of wood before and it ended up looking splotchy. The wood absorbed the stain differently in different places…similar to how mildew looks. I am trying to prevent his from happening again. Thank you.
There are pre- conditioners for this type of wood to help the stain soak in evenly.
Ive been playing around with the stain, preconditioning, and whitewash. I think my favorite combination is a light whitewash and then stain with briarsmoke. Straight stain left lines of yellow from wood grain, so the light whitewash seem to even out the color a bit.
Is this like a brown/grey color or more brown? It looks way brown on the stain canister.
Brown gray. Pics of the table are accurate to what the stain looks like.
Thanks! Do you have direct links for the Home Depot finds as well in hardware – we can’t find those exact ones.
Hi! I am having trouble finding the plans for the benches.
Whoops! Never updated. Here it is! https://www.shanty-2-chic.com/2016/10/industrial-farmhouse-bench.html
Thank you! Can’t wait to see how this turns out!
Can you tell me when the bench plans will be posted?
They are already up with a video and plans:)
Thank you! I found them 🙂
This is a GORGEOUS table! I love your step by step details. And the total cost. It’s amazing how you can get a beautiful table if you make it yourself. I made a trestle table over five years ago and it’s still going strong, admired by all who see it. Thank you so much for sharing!
My favorite table so far. I was going to try to build a RH knockoff (Reclaimed wood & zinc strap dining table) but I like yours so much better!!!!! I see a new table in my future. LOVE! LOVE! LOVE! You ladies are the BOMB! Thanks for sharing this!
Oh dear – it’s beautiful!! What a joy it must’ve been to see what you did when she opened her eyes!! What a blessing!!!
I’ve been waiting all week for this video and the plans! I can’t wait to build it!
Is there a major difference between the framing lumber and dimensional or pressure treated lumber as far as aesthetics go?
You can expect that the grain of the framing lumber will be smoother for larger cuts compared to the pressure treated. Which becomes an issue for the rough texture and surface for staining. Another issue that comes with pressure treated lumber is the shrinkage amount per season if you plan to have it outside. You can adjust for this but you should expect changes with humidity.
I love it! My daughter wants a farmhouse table for Christmas, and she wants it to be sturdy. I think this one fits the bill! She’s got 3 littles, and this table looks like it can stand up to being stood on…lol! Great job, and thanks for sharing!!!