Learn how to build an Outdoor Chair with just 6 boards and just a few basic tools! Free plans and a how-to video by Shanty2Chic!

I will NEVER buy outdoor furniture again, am absolutely in love with my new outdoor patio set? I decided to give my outdoor space a glow up and that started with the furniture. To start, I built a DIY Outdoor Sofa, you can find the free plans for that here, and I loved it so much I designed a built a set of patio chairs to match! My new outdoor chairs are full of comfort, so strong and so beautiful! Would you believe I built them with 6 2x6x8 boards? That’s under $50 in lumber!
This is a very simple build that’s perfect for beginner woodworkers and we’ve got the how-to video for you as well! Just click the box below to watch us build it!
Super easy right?
Now, let’s get to building!
Table of Contents
DIY Outdoor Chair Plans
Make sure to download the free printable plans, below.
Click Here to Jump to the Free PlansHow to Build a DIY Patio Chair – How to Video
Click the box below to watch us build it!
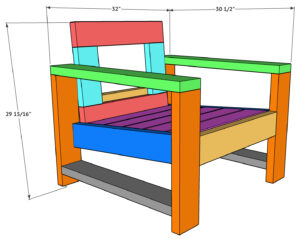
DIY Outdoor Patio Chair
Note: This set of plans is for one chair.
Tools:
Supplies:
- 6 – 2x6x8
- 2 1/2″ Pocket Hole Screws
- 2 1/2″ Wood Screws (deck screws will work too)
- Wood Glue
What Type of Wood is Best to Use for Outdoor Furniture?
Cedar boards are a great choice for outdoor furniture but they are very expensive compared to pine. We prefer to save money and build our outdoor pieces with pine. This type of wood works great as long as you use an outdoor wood stain or finish to protect it!
Why Do You Rip Your Boards?
We like to rip the round edges off of the framing boards that we build with. It gives the wood a clean, straight edge and it doesn’t look like we built it with framing lumber. Ripping your boards is not a necessary step for this build but if you do not rip your boards, make sure to adjust the plans accordingly. You can watch our “How We Rip Our Boards” video here!
Building the Arms of the DIY Patio Chairs
Step 1: Building the Frame
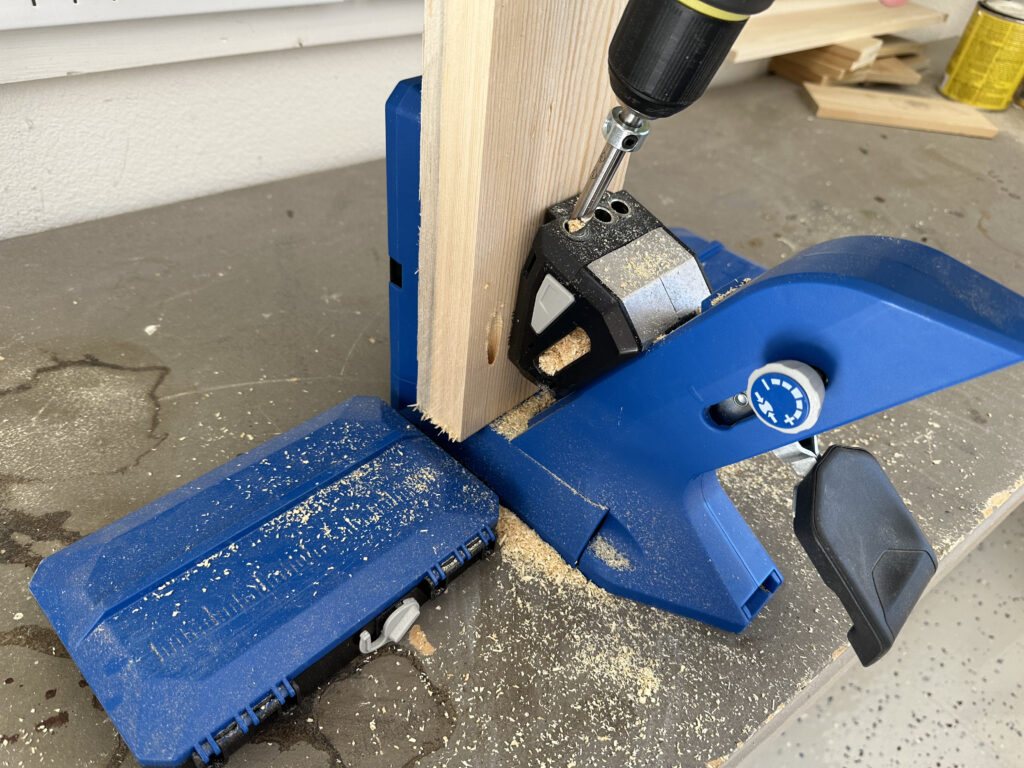
First, I cut the legs and arms to size. Then, I used my Kreg Jig to drill 1 1/2″ pocket holes at one end of each of the leg pieces.
You can find our favorite Kreg Jig Model here.

Then, attached them to the arms with 2 1/2″ pocket hole screws and wood glue.

Build two arm assemblies.
Step 2: Adding the Side Seat Supports

Once the arm frames were assembled, I cut the side supports to size, drilled 1 1/2″ pocket holes at both ends and attached it between the legs with 2 1/2″ pocket hole screws and wood glue.
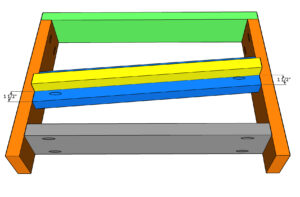
Step 3: Bottom Runner

Now for the bottom runner. Cut the boards to size and drill 1 1/2″ pocket holes at both ends. Attach them at the bottom of each side with 2 1/2″ pocket hole screws and wood glue.
Step 4: Attaching the Cleats

Measure and cut the cleats to size and attach them to the side, slat support with 2 1/2″ wood screws and wood glue.
Step 5: Back Stretcher

Let’s get these armrests attached to form the frame of the chair! Once the back stretcher is cut to size, drill 1 1/2″ pocket holes at both ends. Attach it to the inside of both arm assemblies with 2 1/2″ pocket hole screws and wood glue.
Step 6: Attaching the Front Stretcher

Moving to the front of the chair, cut the stretcher to size and drill 1 1/2″ pocket holes at both ends. Attach it to the inside of the arm frames with 2 1/2″ pocket hole screws and wood glue.
Building the Back Assembly
Step 7: How to Build the Back Rest

With the chair frame now assembled, we can move to building the back rest. Cut the back slats for the back assembly to size. Drill 1 1/2″ pocket holes in the short boards and attach them to the long boards with 2 1/2″ pocket hole screws and wood glue.
Step 8: How to Attach the Back Rest to the Chair

To attach the back rest, I rested the back assembly on the cleats, flush with the 5° angle of the cleats. Drive 2 1/2″ wood screws, from the bottom of the cleats, into the back. Then, drive 2 1/2″ wood screws from the back of the back stretcher, into the back to secure.
Seat Slats for the Outdoor Chair
Step 9: Attach the Seat Slats
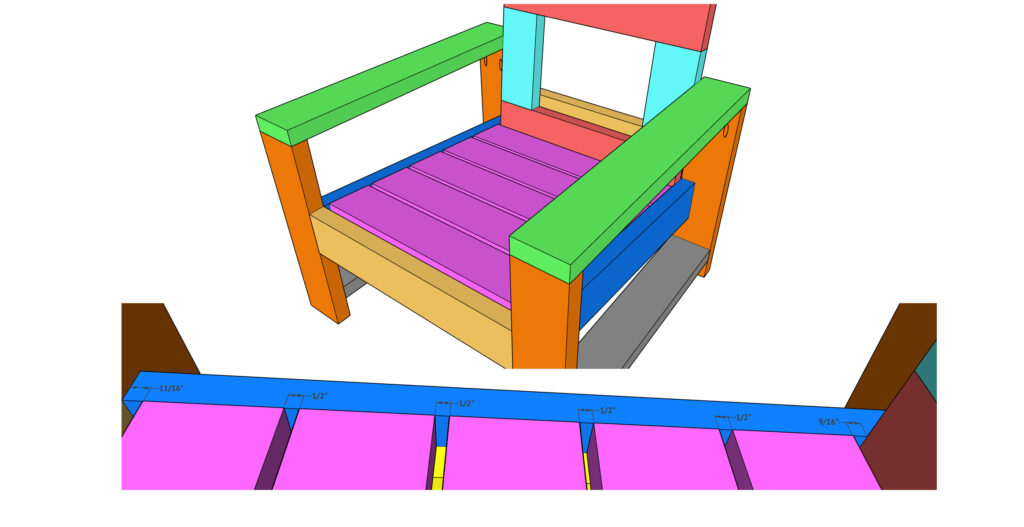
The seat frame is now complete so, let’s move to the seat slats! Start by cutting the seat slats to size, place them on top of the cleats, according to the spacing in the plans, and attach them to the cleats with 2 1/2″ wood screws and wood glue.

We used our Kreg Quick Flip to drill the pilot holes for the slats.
You can find the Quick Flip here!

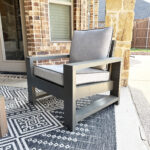
Cushions fit GREAT! Here it is ready for a finish!
I designed the chairs to fit this set of cushions! This is a standard size so, you should be able to find plenty of seat cushion options!
You can find the cushions that I bought here.
The Finish
Step 10: How to Hide Screw Holes
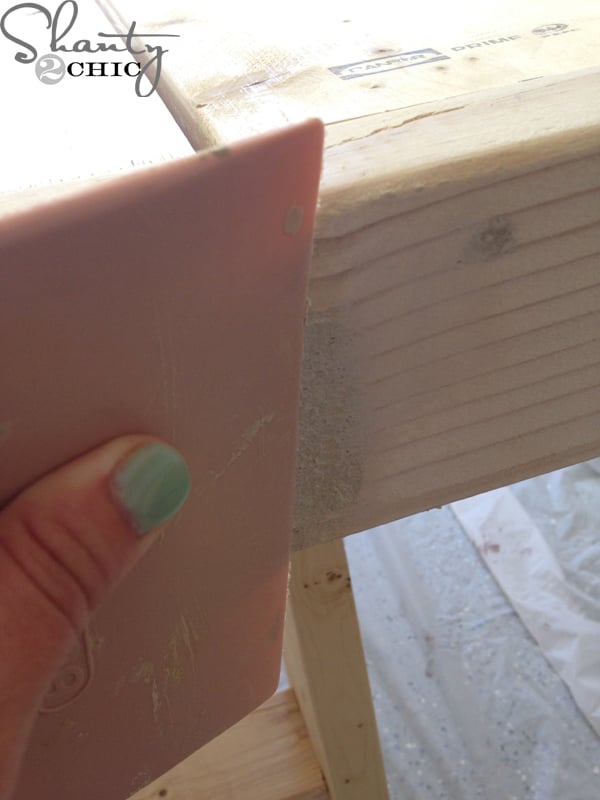
I used an outdoor wood filler to fill all of the exposed screw holes. A putty knife is a great tool to have in your shop for jobs like this.
Step 11: Sanding

After the wood filler dried, I sanded the entire chair down with 120-grit sandpaper and then smoothed it out with 220-grit.
I like to use my corner cat sander but you can use an orbital sander or even sandpaper and elbow grease.
Step 12: Add a Finish

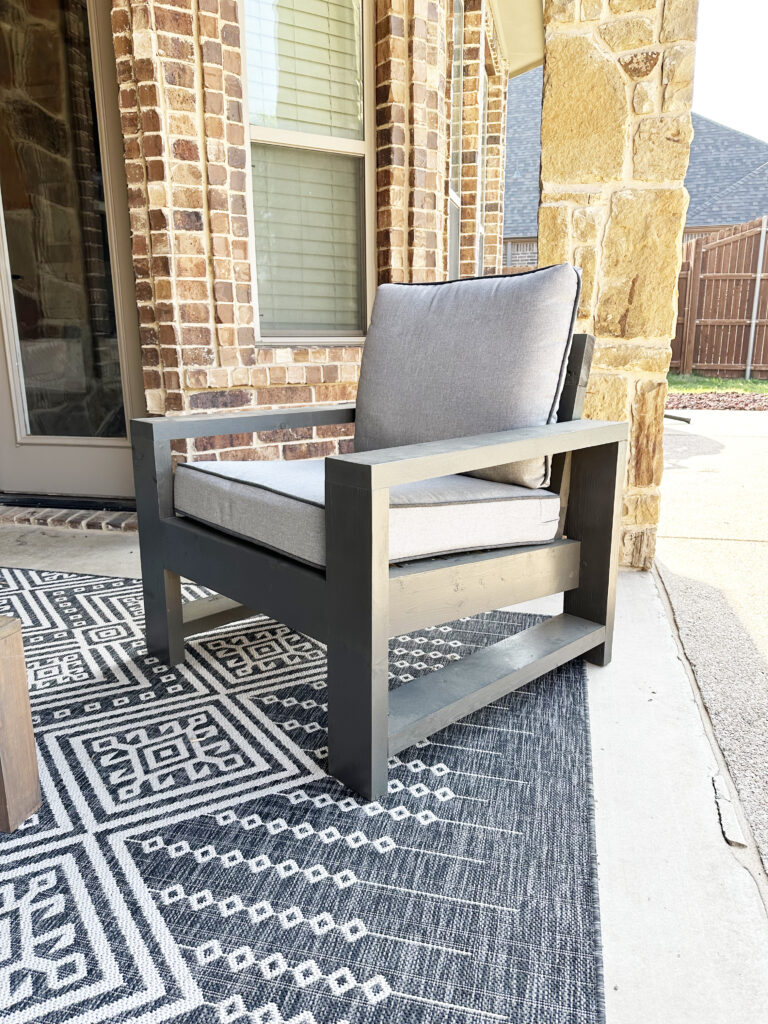
For the finish, I decided to use our favorite door and trim paint, which is now an indoor/outdoor paint to finish the chairs. The color is tinted to Urbane Bronze and I LOVE IT, so much that I decided to cover the stain on the Outdoor Couch with it!

I am so in love with my new modern outdoor chairs! I was able to build the entire patio set, an Outdoor Sofa and the Outdoor Patio Chairs for about $175 in lumber leaving me budget to splurge on amazing outdoor cushions!


Thanks so much for stopping by! Happy Building!
Other Outdoor Plans


DIY Outdoor Chair
Tools
- Miter Saw
- Kreg Jig
- Drill
- Table Saw (optional)
Supply List
- 6 2x6x8 Framing Boards
- 2 1/2" Pocket Hole Screws
- 2 1/2" Outdoor Wood Screws
- Wood Glue
Instructions
Cut List
- Cut List 1


Building the Arm Assemblies
- Cut the legs and arms to size, drill 1 1/2" pocket holes at one end of each of the leg pieces and attach them to the arms with 2 1/2" pocket hole screws and wood glue. Build 2 arm assemblies.

- Cut the side runners to size, drill 1 1/2" pocket holes at both ends and attach them in between the legs with 2 1/2" pocket hole screws and wood glue.

- Cut the bottom runners to size and drill 1 1/2" pocket holes at both ends. Attach them at the bottom of each side with 2 1/2" pocket hole screws and wood glue.

- Cut the cleats to size and attach them to the side, slat support with 2 1/2" pocket hole screws and wood glue.

- Cut the back runner to size and drill 1 1/2" pocket holes at both ends. Attach it to the inside of the arm assemblies with 2 1/2" pocket hole screws and wood glue.

- Cut the front runner to size and drill 1 1/2" pocket holes at both ends. Attach it to the inside of the arm assemblies with 2 1/2" pocket hole screws and wood glue.


Building the Back Assembly
- Cut the back pieces to size and drill 1 1/2" pocket hole screws at both ends of the shorter boards. Attach the short boards to the long boards with 2 1/2" pocket hole screws and wood glue.

- To attach the back, rest it on the cleats, flush with the 5° angle of the cleats. Drive 2 1/2" screws from the bottom of the cleats into the back. Then, drive 2 1/2" screws from the back of the back runner into the back to secure.


Attaching the Seat Slats
- Cut the seat slats to size, place them on top of the arm assembly cleats, according to the spacing in the image. Attach them to the cleats with 2 1/2" wood screws and wood glue.


The Finish
- Fill in your expose screws holes, sand down the entire piece, give it a finish and follow up with an outdoor protectant. Make sure to share your builds with us on social media and use #shanty2chic so we can share them too!Happy Building!


What are the dimensions of the cushions?
What is 2x6x8?? I am from middle Europe and it is not really clear for me
Dimensional lumber in the US. It’s technically a 1.5” thick x 5.5” wide x 8’ long framing stud. Hope this helps!
Great Plans- I am about to start building. After reviewing I noticed the cut list only had one 23″ piece for the back support ..shouldn’t it be 2? Also the 5-degree angle supports – one shows 27 5/8″ and the other 28″? Mine will be slightly different as I ripped my boards to 5″ and ran them thru a planner so everything will be slightly adjusted. But for those who are using scrap, they need to be sure they have the extra 23″ piece! Thanks! Your friendly Colleyville, Neighbor.
hiHello, I am Iranian and I am very happy to meet you on YouTube. Unfortunately, YouTube is a filter in Iran and we can hardly use it, but I still follow you. Good luck.
How can I print these plans?
Click the link at the top of the plans at the bottom of the post 🙂
Where is that outdoor rug you have with it from? Thanks!
I want to build this outdoor furniture!! I want to buy my cushions before getting started! Which cushions did you use?