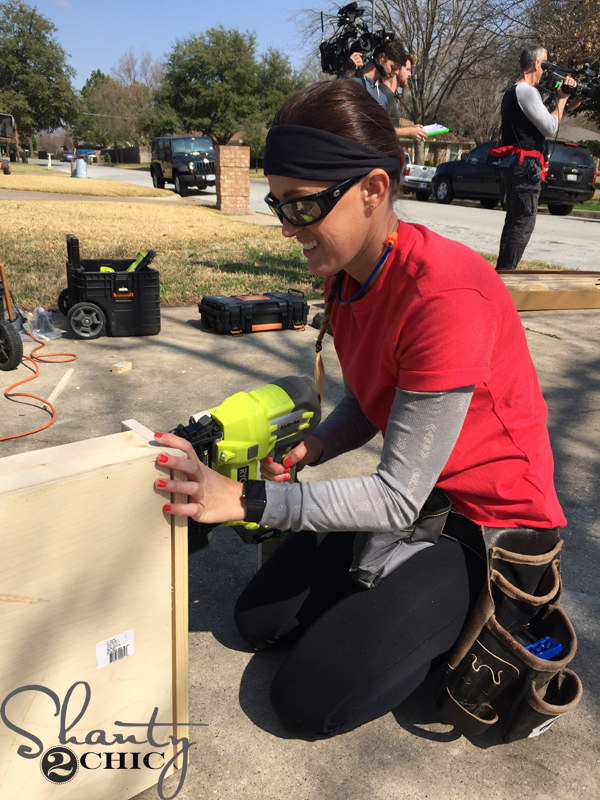
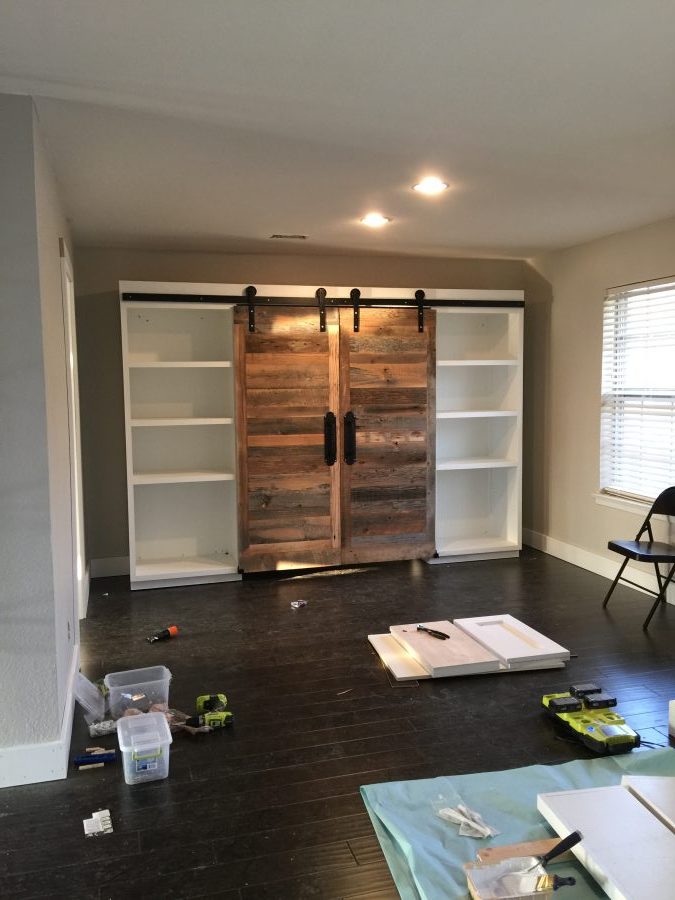
We are so excited to finally share this massive build with y’all! In this renovation, we were challenged with giving the homeowners an office area in this dining room/entry way space. With the space open to the entryway, we had to get creative, which lead to us designing and building this DIY Hidden Study with Sliding Barn Doors! Here’s a peek at the before space.
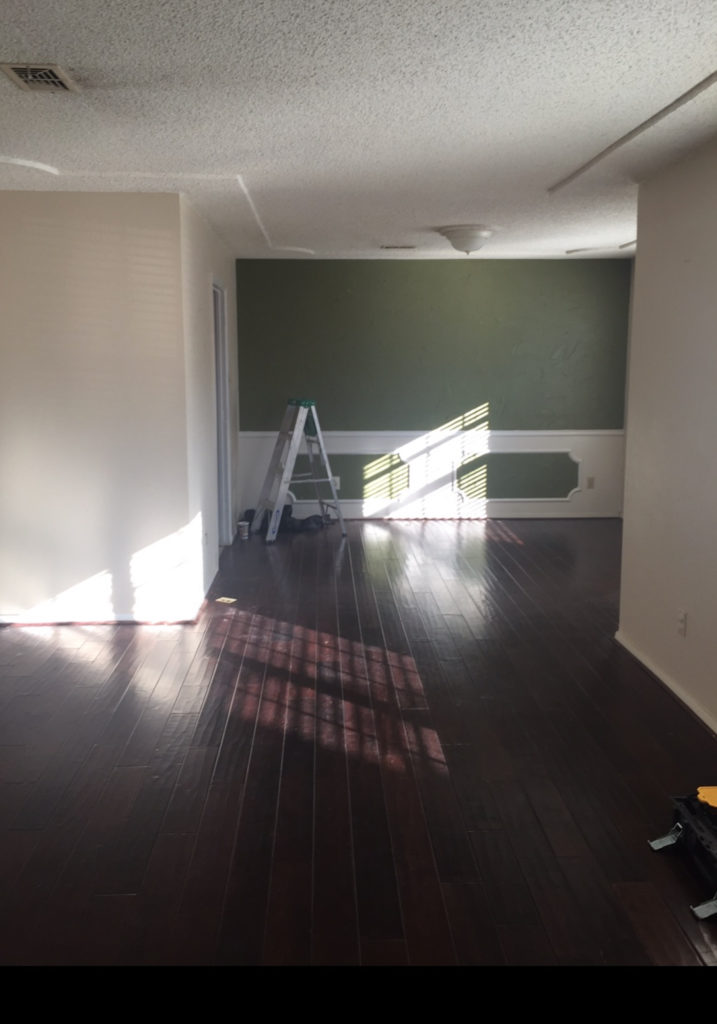
This is a shot from the entryway. When you walk into the front door of the home, this is what you see to the right.
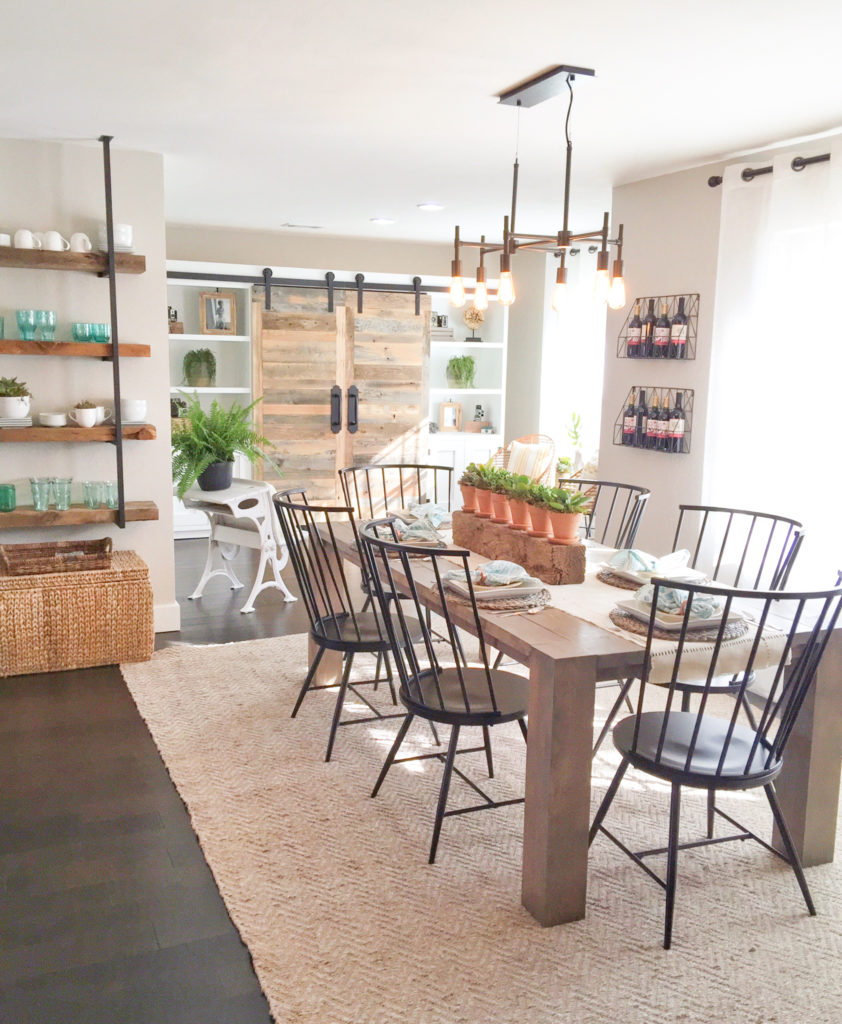
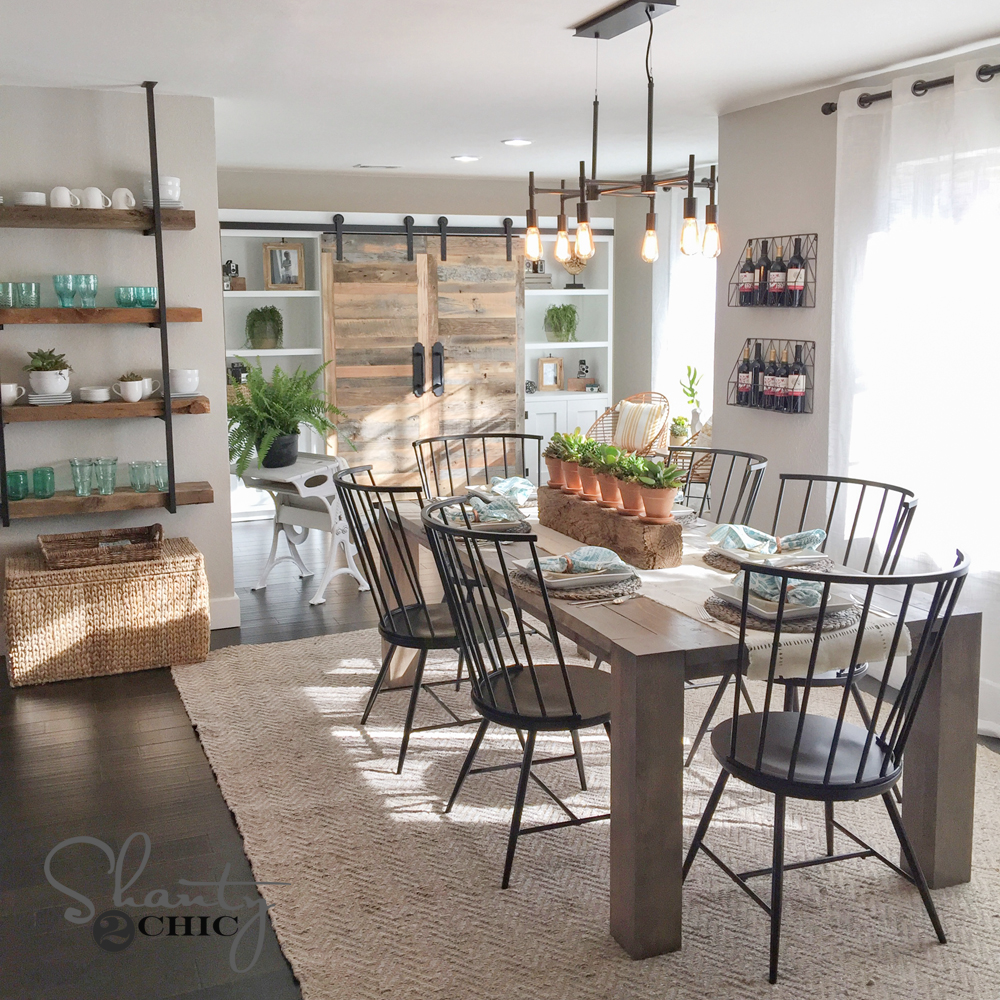
Here is a view from the same spot, after the renovation. We love that there is a hidden desk behind those beautiful barn doors. It gives the perfect backdrop for the newly renovated dining room!
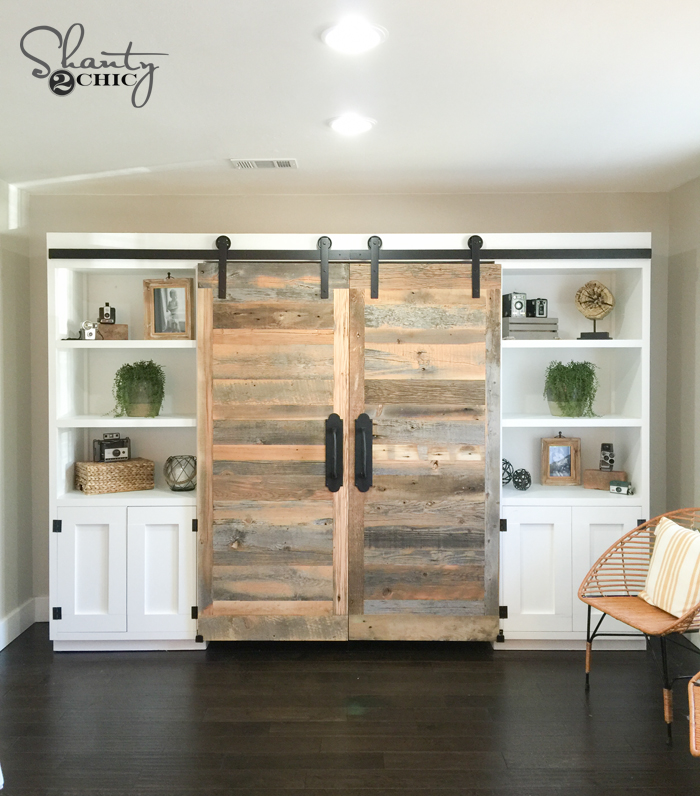
This is one of our very favorite pieces that we have built together. It’s a 4-part unit. We each built one of the towers, and then came together to get it all attached and add the doors.
Isn’t it beautiful?! We love everything about it. This is a 3 plan post… yes. 3. Lots of words and pics 🙂
Here are links to all 3…
Free Plans for the Desk and Top Brace
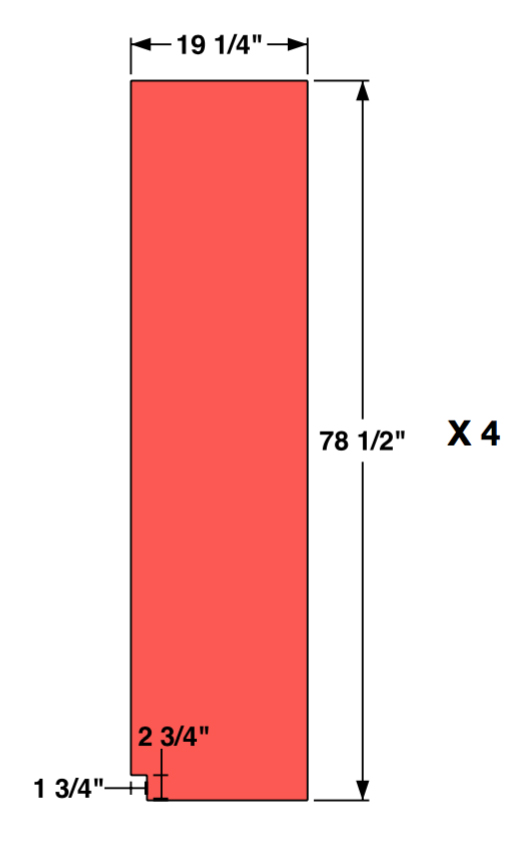
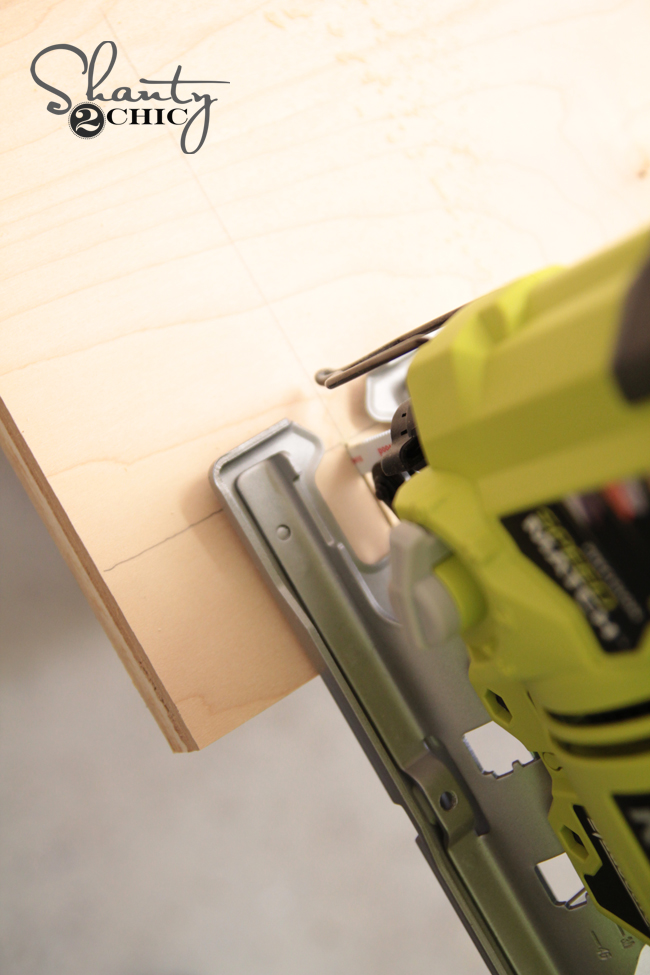
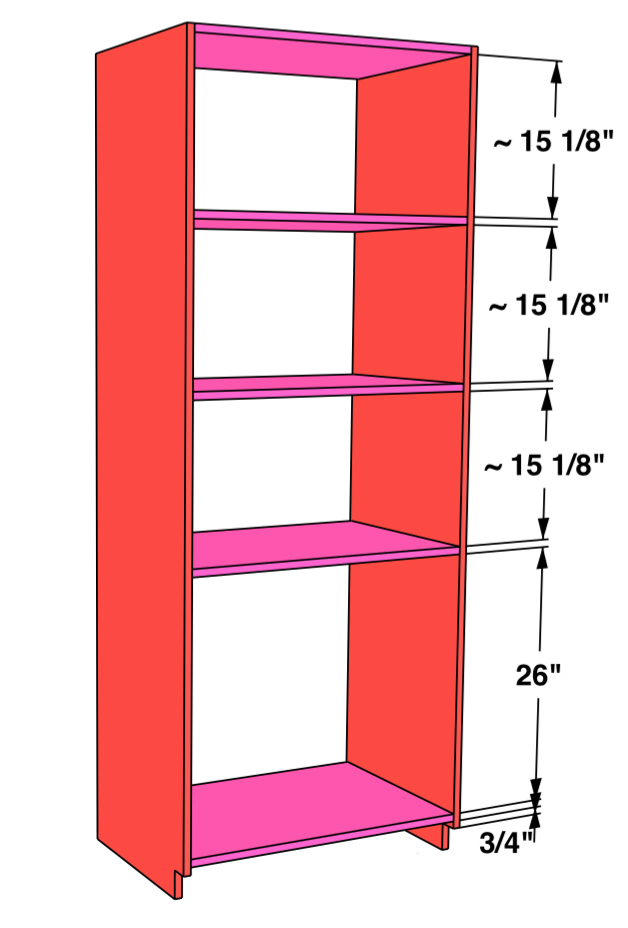
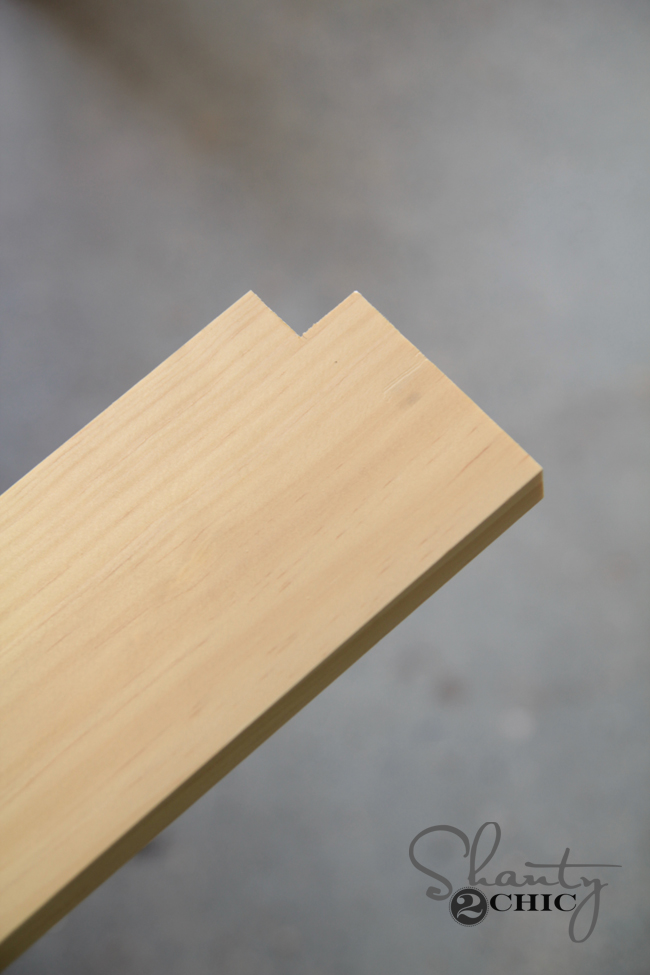
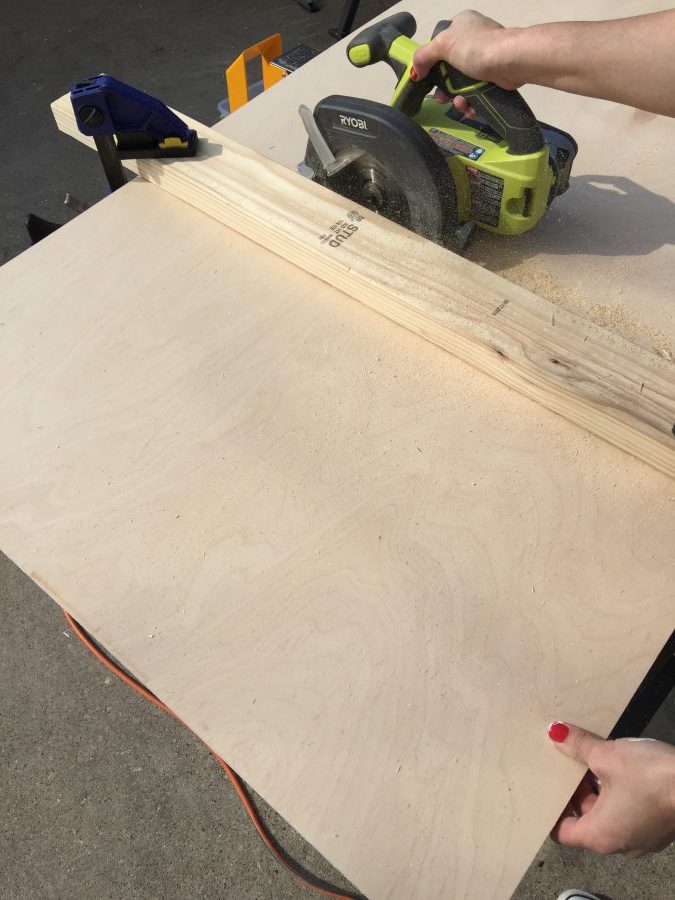
These towers use hardwood plywood for most of the construction. We used PureBond Plywood in Birch from Home Depot for ours. Your first step is cutting the sides including a small notch at the bottom. Here is a shot of the measurements.
We ripped the pieces first using our table saws, and then used our jig saws to cut the small cutouts at the bottoms.
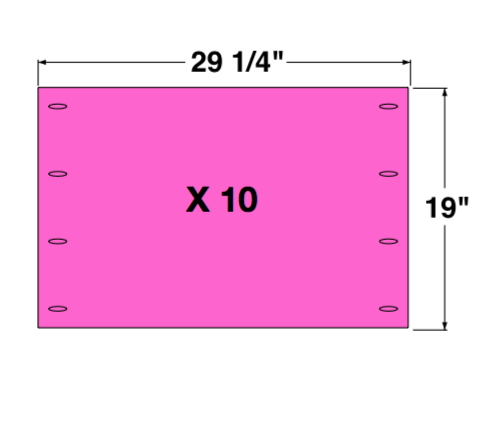
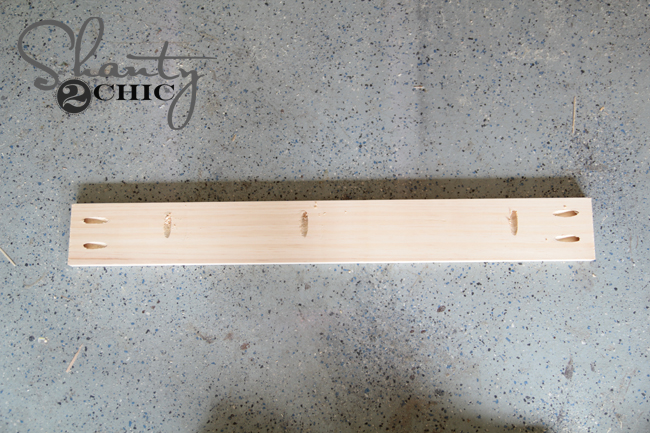
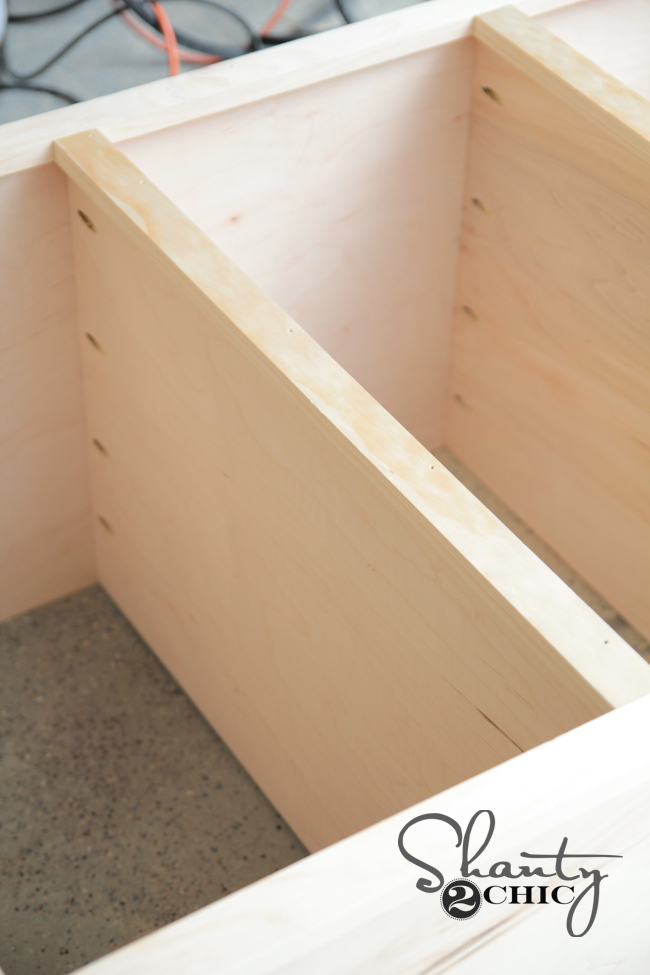
Next, we cut the 5 shelf pieces for each tower. So, you will have 10 of each of these.
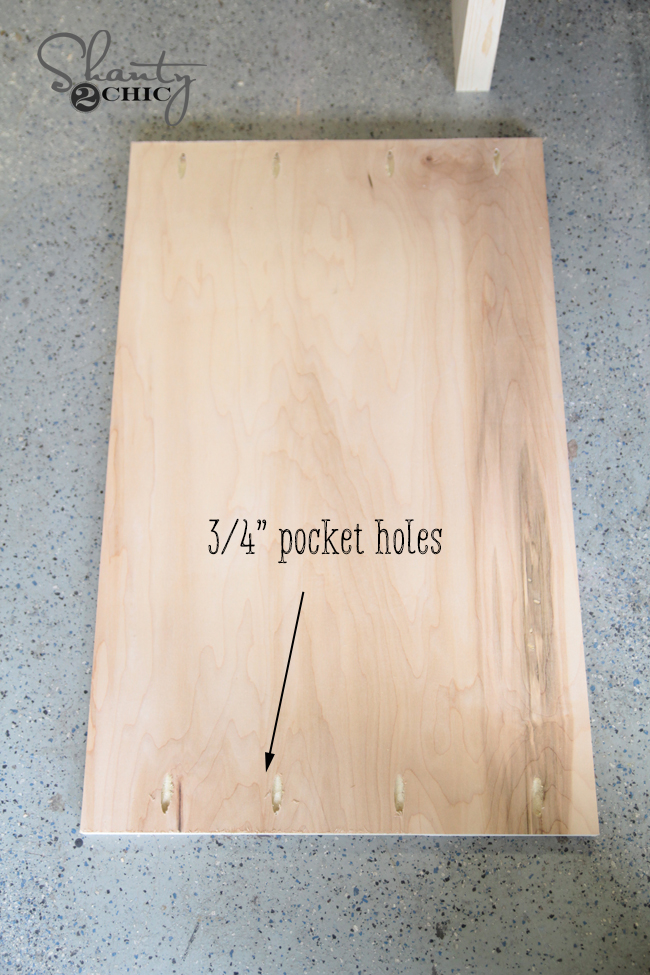
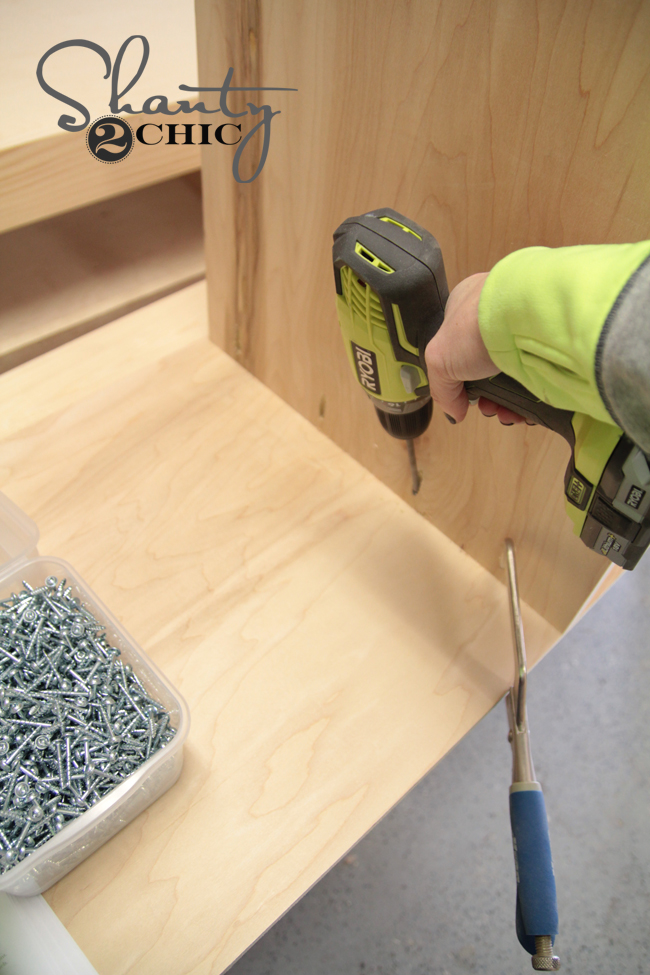
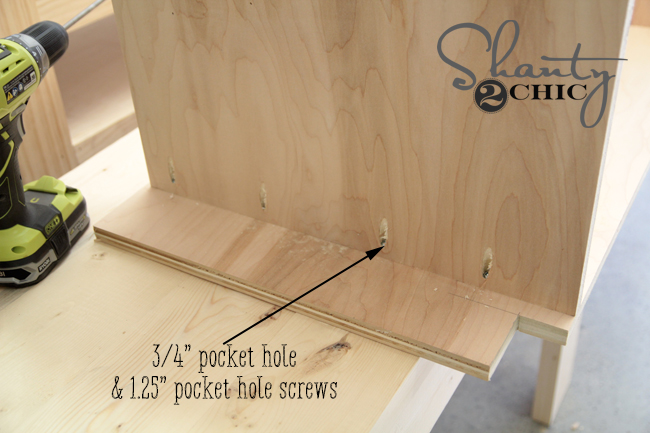
We added the 3/4″ pocket holes using our K5 Kreg Jig. You can see in the pictures where you should place your pocket holes.
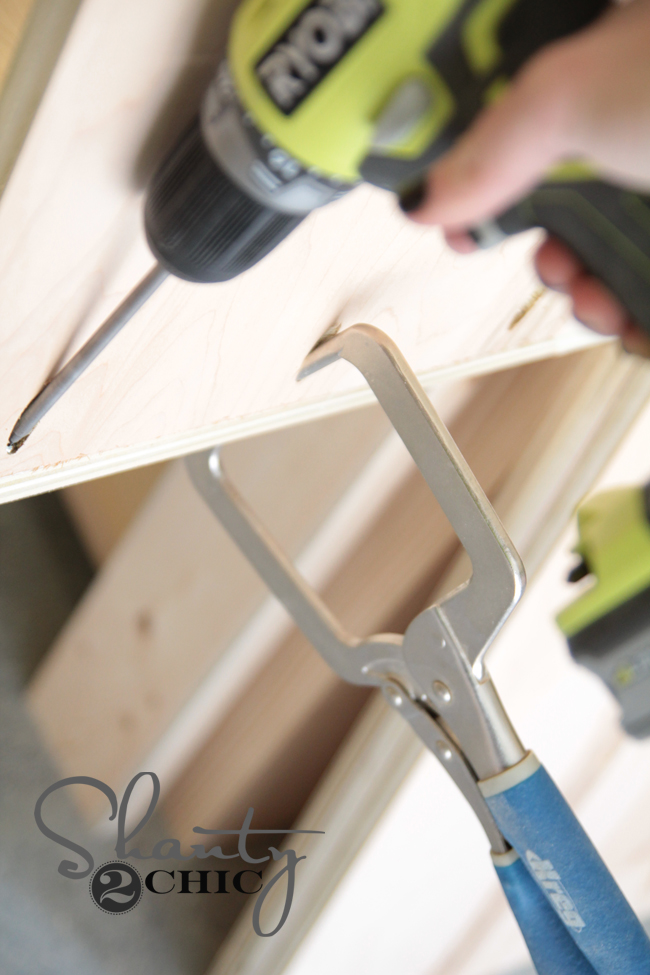
To attach the shelves to the sides, we ran a line of wood glue down the side where the shelves would line up. We then attached them using 1.25″ pocket hole screws. We used our Kreg right angle clamp to help hold the shelves in space. These things are SO handy… It’s like having a third hand there helping you!

We attached the remaining shelves the same way.
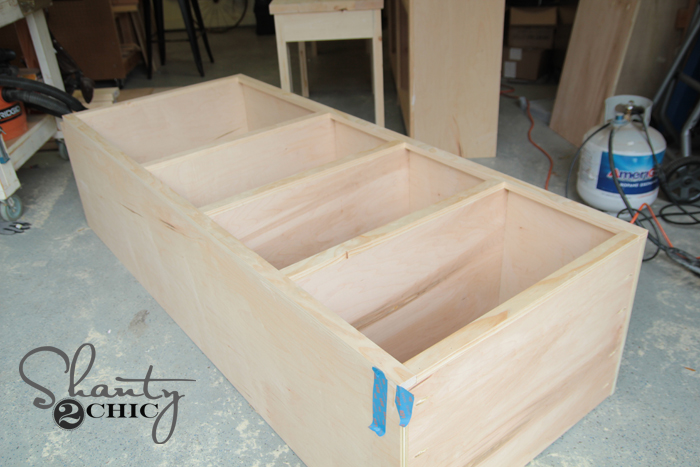
You can see below your spacing of the shelves…
Here is a shot of the bottom shelf attached to the side.
The top will look like this…
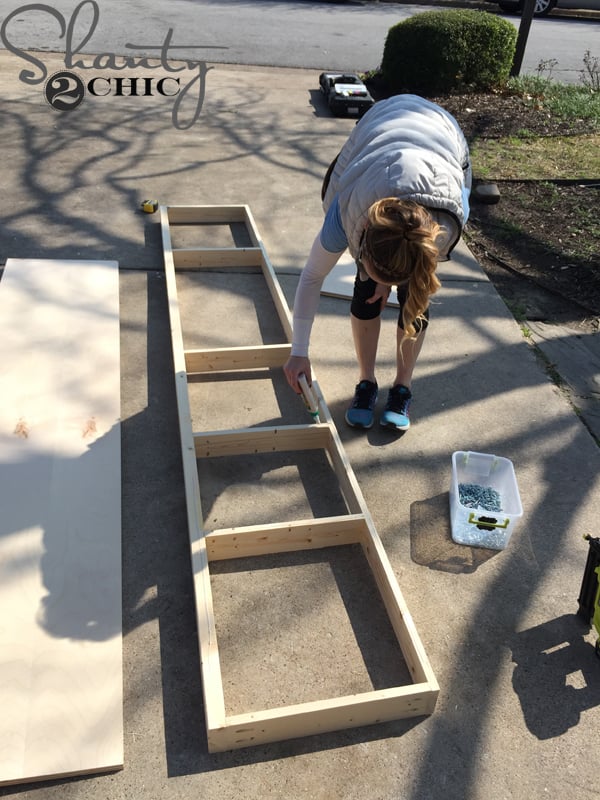
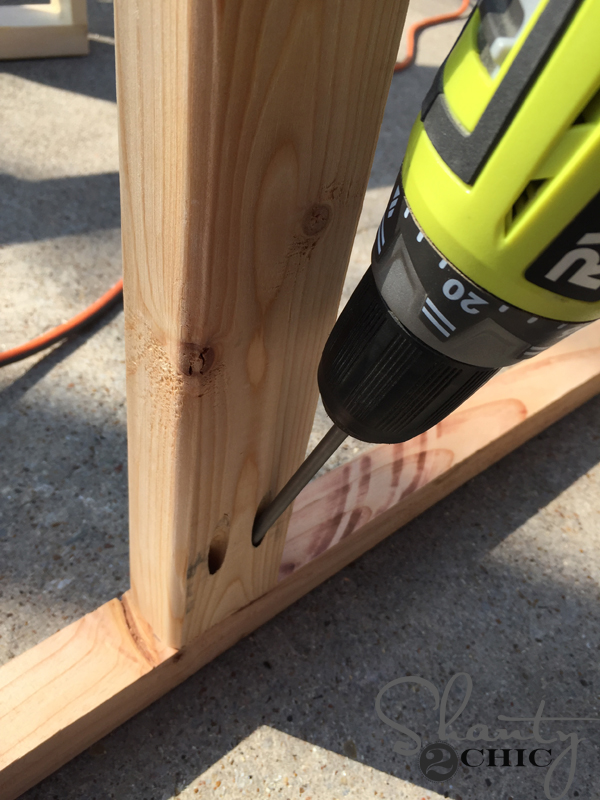
Now, we added the bottom support boards. These are cut from 1×4 pine boards and we added pocket holes to each board.
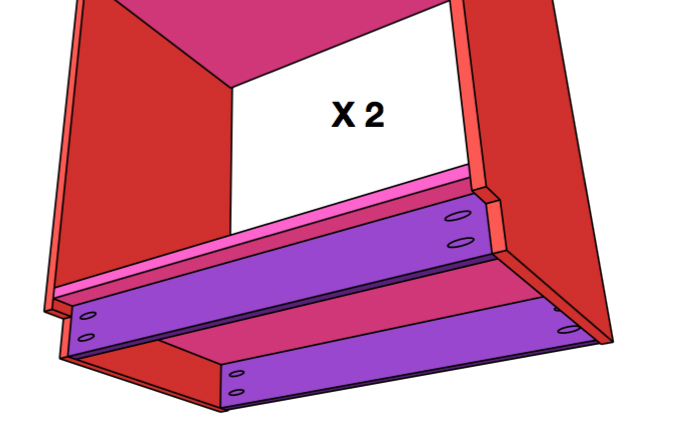
We attached these to the bases using wood glue and 1.25″ pocket hole screws.
Next, we cut the trim board to cover the support boards. We cut the notches on these using our jig saw as well.
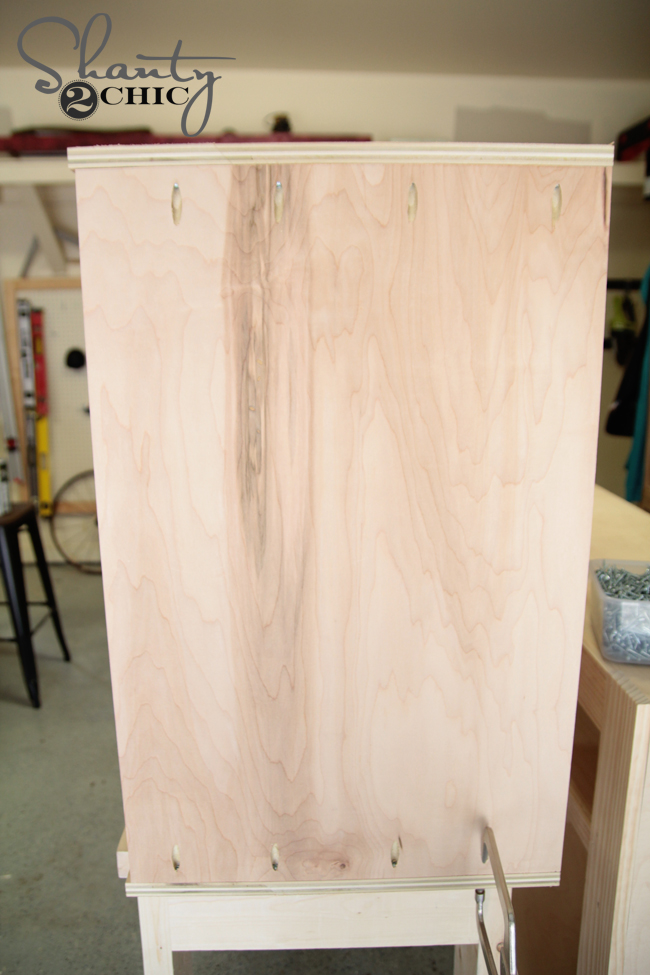
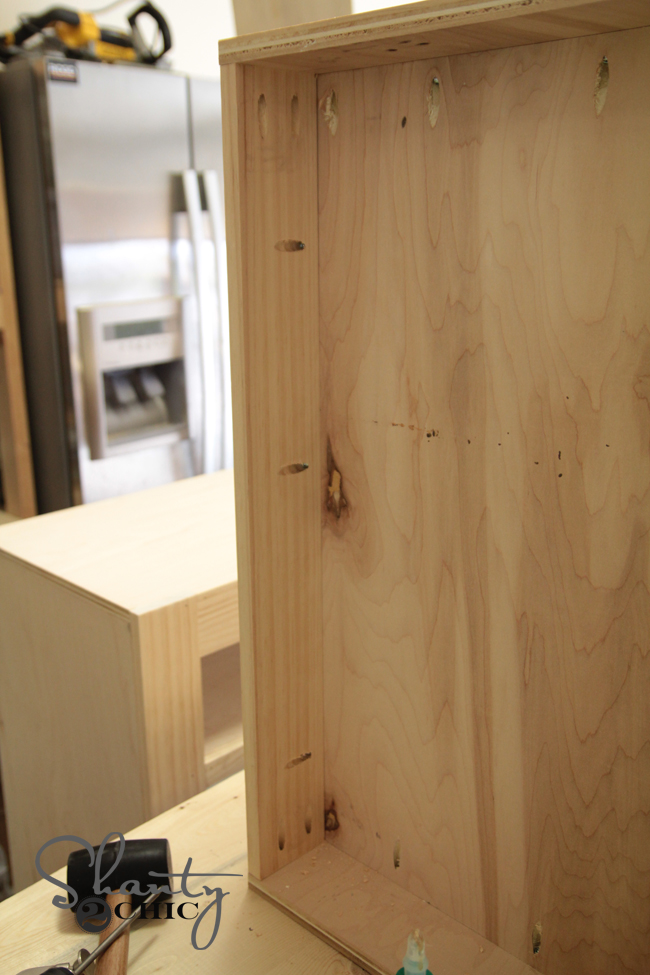
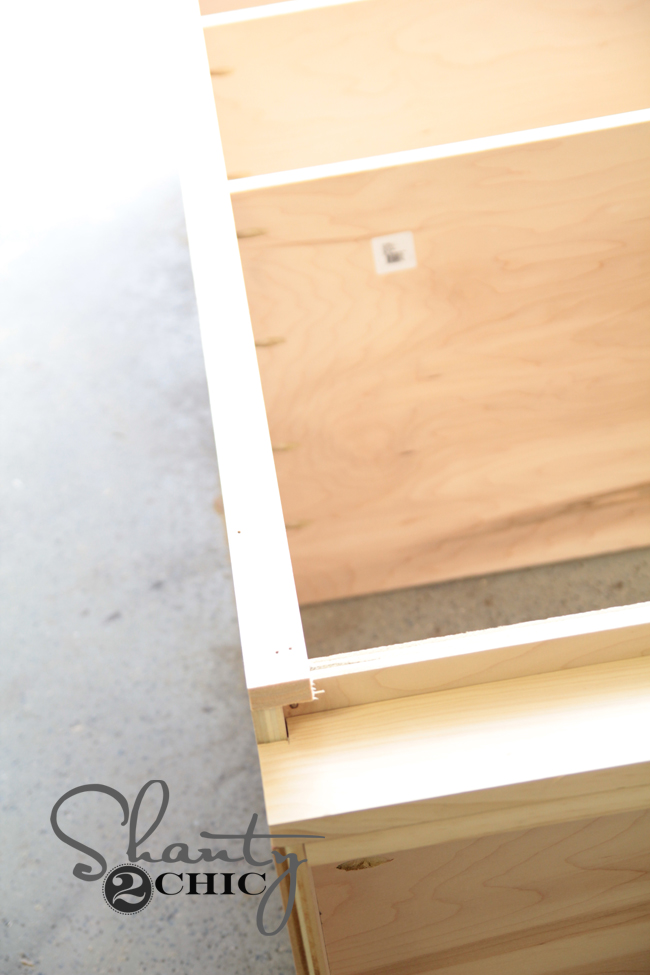
At this point, we used our Kreg Shelf Pin Jig to create shelf pin holes inside the cabinets for optional shelving. This just gives you the option of moving your shelves around, and it’s super easy to use!

And now for the other trim pieces!
You can see here how each one will be placed. We started with the long side pieces. These are cut from 1×2 pine boards and attached using wood glue and 1.25″ finish nails.
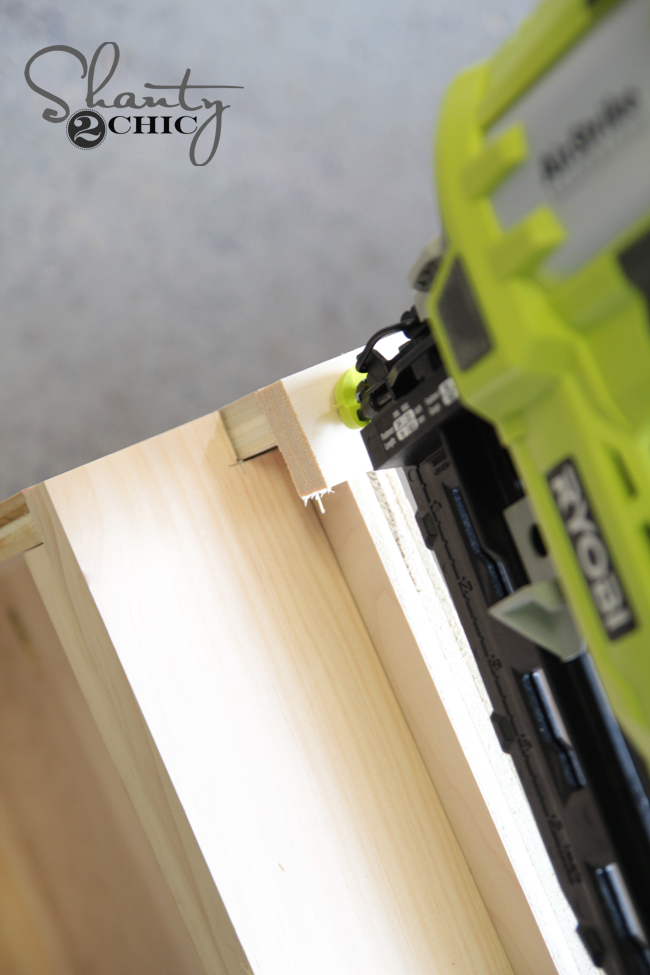
After that, we added the small pieces of 1×2 trim that ran from side to side. These are attached the same way.
We attached the other 1×2 pieces on the inside and back of the cabinet. These are also glued and nailed and will help hold the back of the cabinet in place.

Here she is ready for doors!
We built the door frames first. You create these by attaching the joints with 1.25″ pocket hole screws through the 3/4″ pocket holes.

We added a bunch of wood glue to the back of these…
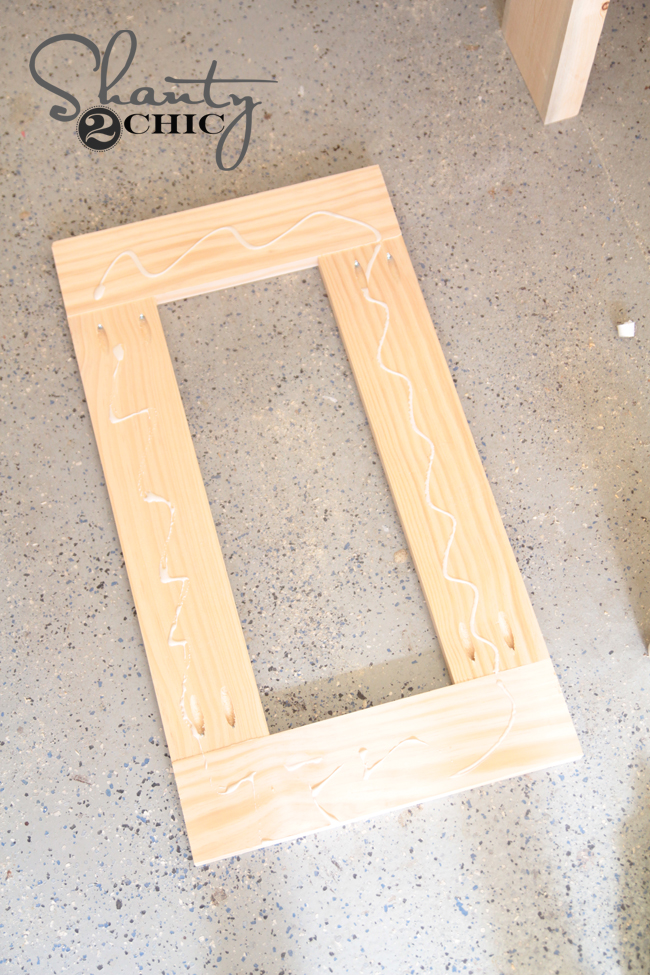
And attached the inside panel with 5/8″ staples.

This is the hardware we used for the doors…

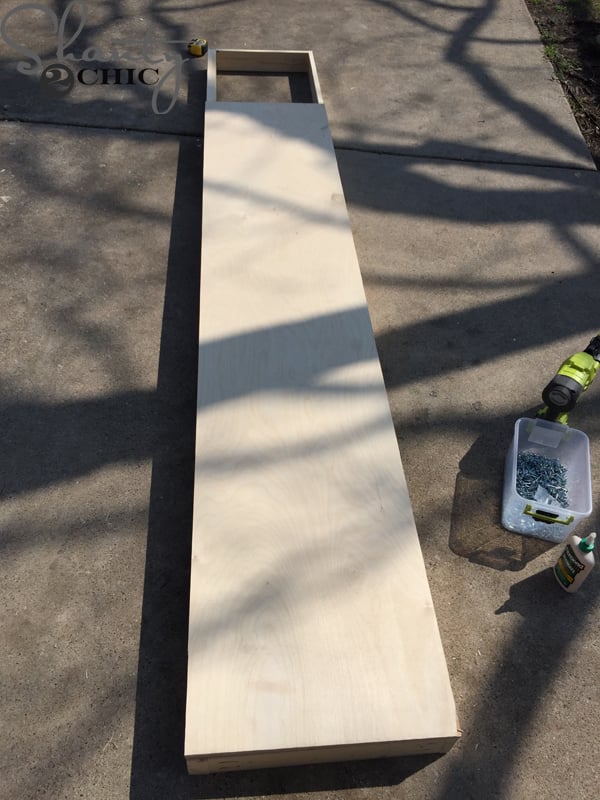
We added the 1/4″ plywood to the back of the towers using staples as well. We moved the towers into the house and started working on the bridge that runs between the two towers.
This will be what holds the barn door hardware in place.
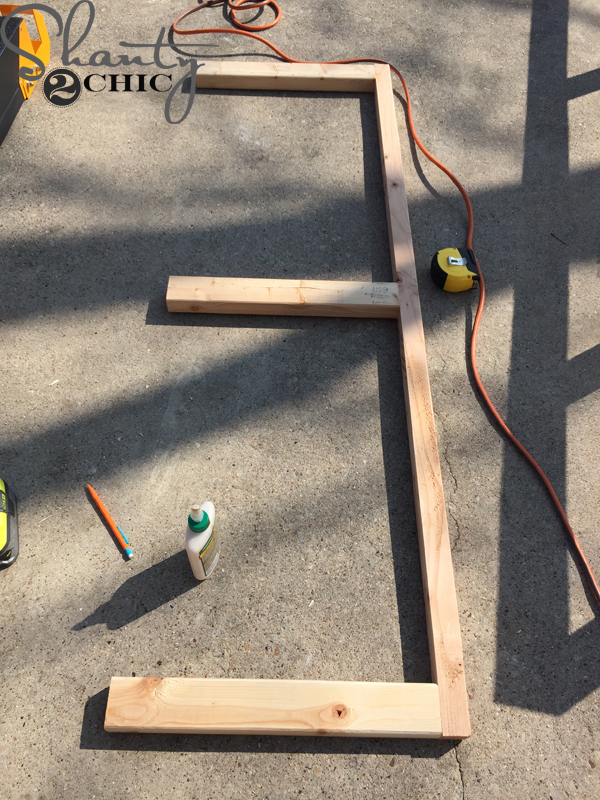
We also built the hidden desk that runs between both towers. This is built using 1.5″ pocket holes and 2.5″ pocket hole screws.
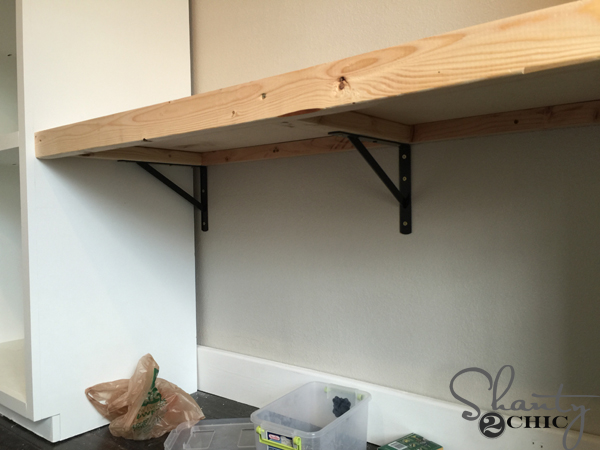
We attached this to the towers and also used metal brackets from Home Depot to support the weight.
We painted the desk to match the towers before starting on the doors.

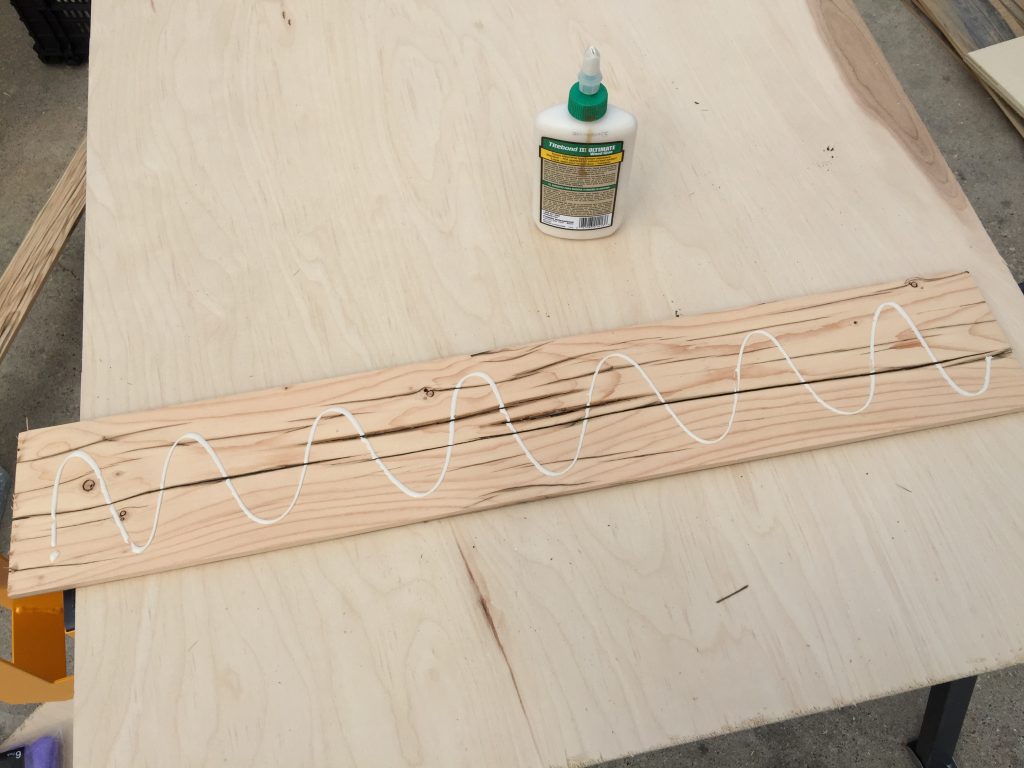
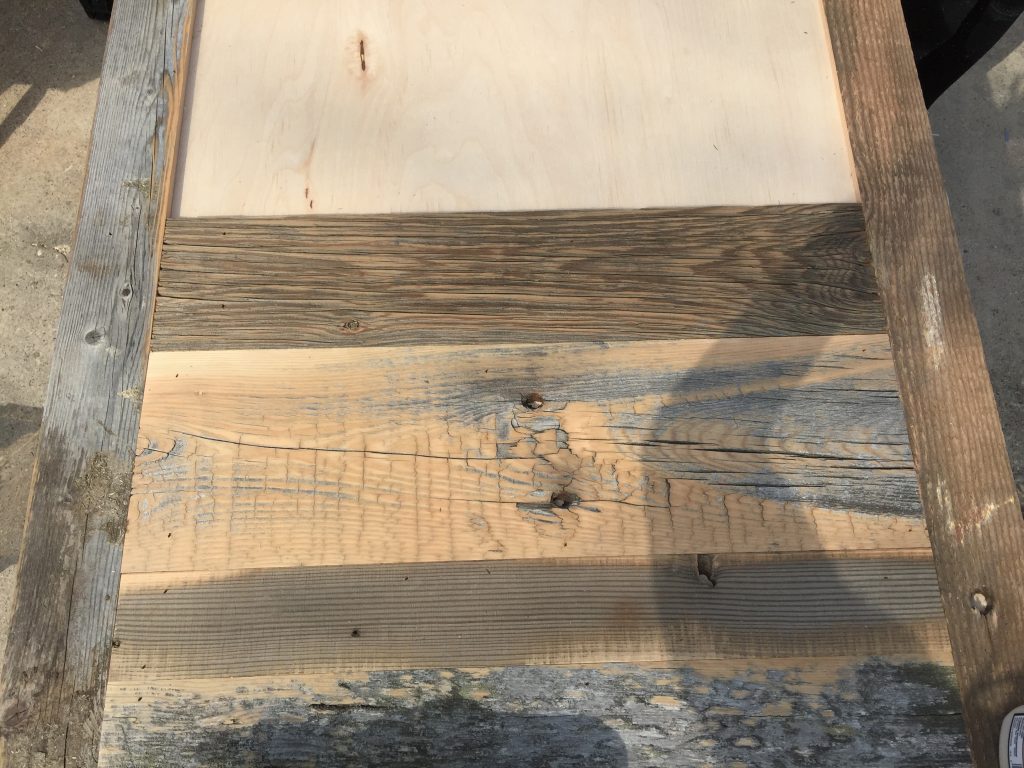
We teamed up with one of our favorite companies for the doors on this baby.Reclaimed Designworks is a really cool company that supplies reclaimed wood. They also clean this wood and prep the back for application making it super user friendly and minus bugs which Ash and I appreciated 🙂 They also ship nationwide! You can find the product we used HERE. It’s called the Mixed Softwood Blend.
We started by building the frame for the door.
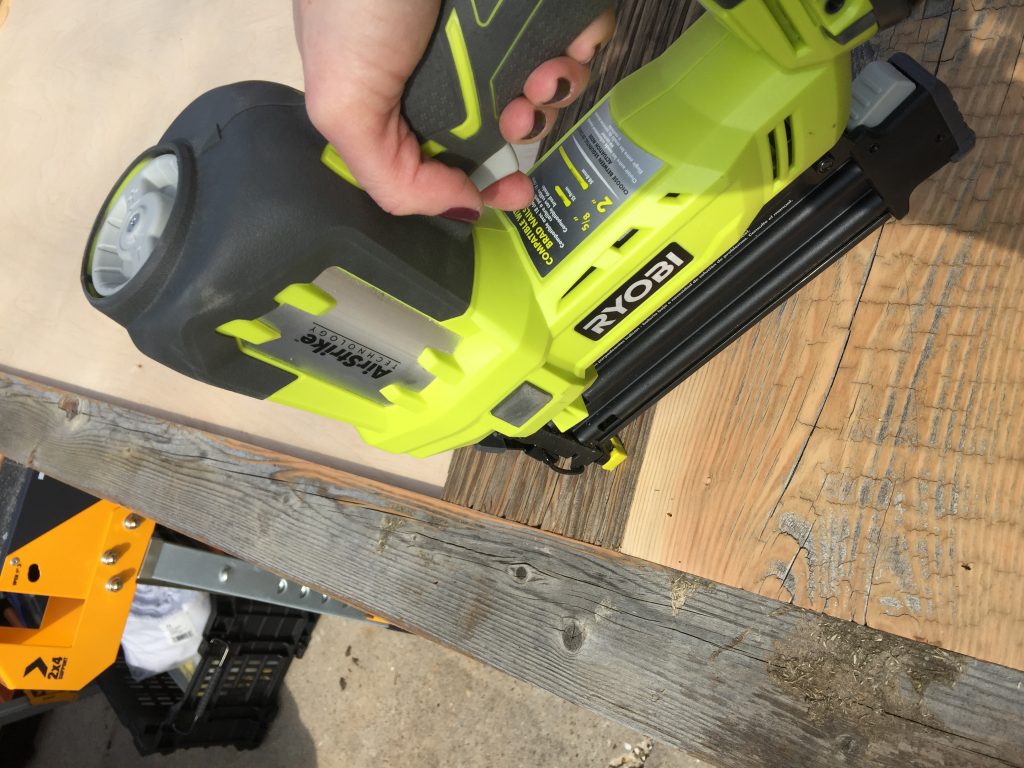
We added the outside reclaimed strips to the plywood first. Next, we measured and cut the planks for the doors. We attached these using wood glue and 5/8″ brad nails.
We attached the hardware that we got from our GREAT and crazy talented friend Tyler Wayne of Wayne Works. You can find his shop HERE!
We attached the hardware and hung the doors to make sure we had a good fit!
But, this was the best part….

Did you catch the share we did on Instagram over the weekend??
Here are a few more shots of her all finished up!


Wondering what your overall approximate cost was on this hidden barn down desk! Thanks!
Can you give me a ballpark estimate on what the wood supplies for this project costed you? It’s beautiful!
Is it possible for this to be made into a queen Murphy bed instead of a desk?
What are the complete dimensions of this project? And could we use premade cabinets for this? Please help I have been searching for like 8 months for a piece just like this and it doesn’t exsist!!
I wondered the same. If you click on the plans for the desk and top brace, it shows total dimensions of 120″ wide, 84″ high and 20″ deep.
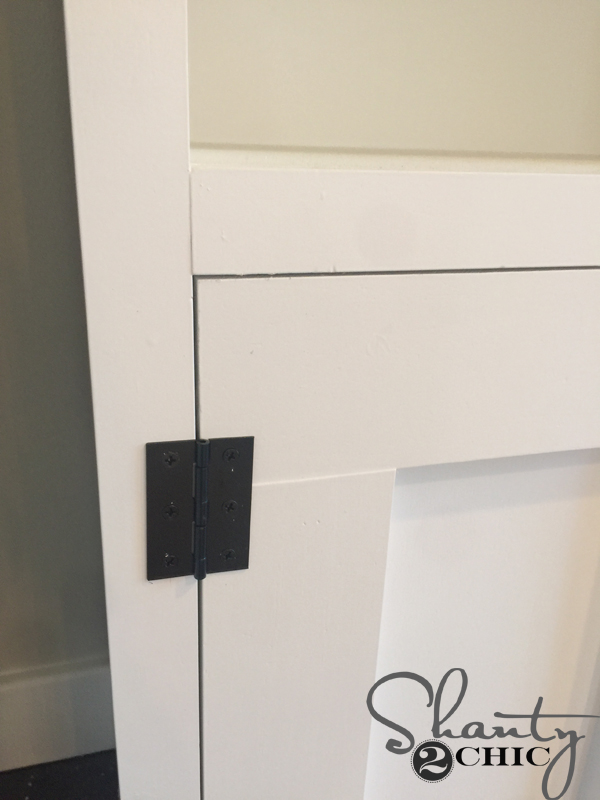
Could you please tell me what hinges those are? I’m just finishing the “towers” of this project and having a difficult time finding just the right hinges and I like the ones you used very much. Thanks
Could you tell me please! what software are you using to make those drawings on your site. I would like to know..
Thank you
I would love to use this for a Murphy bed. Can you help with the measurements please 🙂
What are the overall measurements of the piece?
please show us how you can make it into a queen size murphy bed ASAP thanks!
can you make this into a murphy bed????
Where can I find blue beetle wood?
Hello,
I love this piece! What type of paint did you use for the white? Did you brush or spray it on? Did you seal it with anything? thanks
Could this be made into a murphy bed instead of a desk, where when you slide the doors open the bed folds down??
Certainly one of my favorite builds you have done so far! Absolutely Gorgeous!!!
Could you use premade cabinets for this?