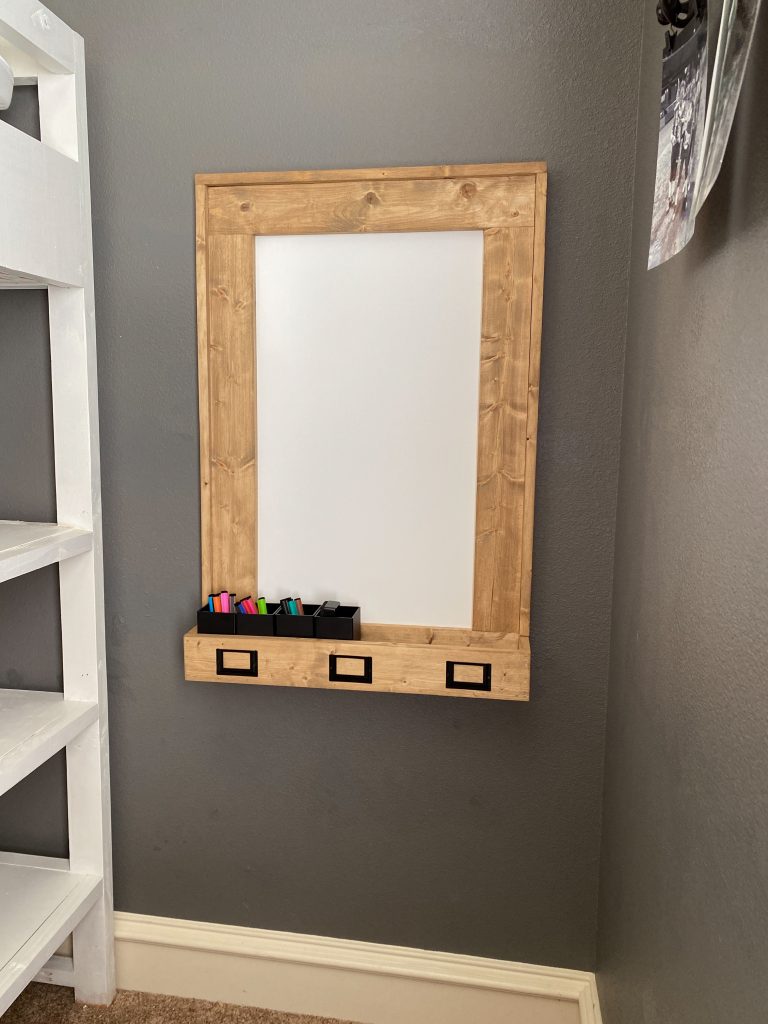
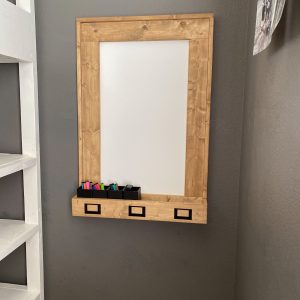
Learn how to build this simple, cute and functional DIY Dry Erase Board with free plans by Shanty2Chic!
Like many of you, we are in full blown remote learning mode around here! My daughter decided she wanted to turn her bedroom into a classroom/school room for remote learning and I am willing to do whatever it takes to get her excited for this new phase in our lives. I just built her a Loft Bed with a Desk underneath (plans for that to come soon) and she really wanted a dry erase board too! So, today I’m going to show you how I built this 3ft DIY Dry Erase Board for less than $40! We teamed up with Minwax for this project and LOVED how easy their Wood Finish stain was to use and the results are incredible!
So, let’s get building!
Click here to download the Free Printable PlansHow to Build a DIY Dry Erase Board
Tools
- Miter Saw
- Drill
- Kreg Jig
- Brad Nailer
- Sander
Supply List
- 2 1x4x8 Common Board
- 1 1x2x8 Common Board
- 1 24″ x 36″ Dry Erase Board – purchased at Lowe’s
- 1 1/4″ Pocket Hole Screws
- 5/8″ Brad Nails
- 1 1/4″ Brad Nails
- Wood Glue
- Minwax Wood Finish Penetrating Stain in Golden Oak
- Minwax Wood Finish Penetrating Stain in Classic Gray
- Minwax Polycrylic Protective Finish
- 3 Label Holders
- Pen Holders
Building the Frame
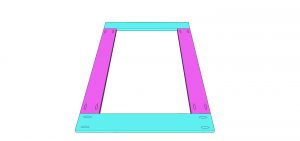
Step 1
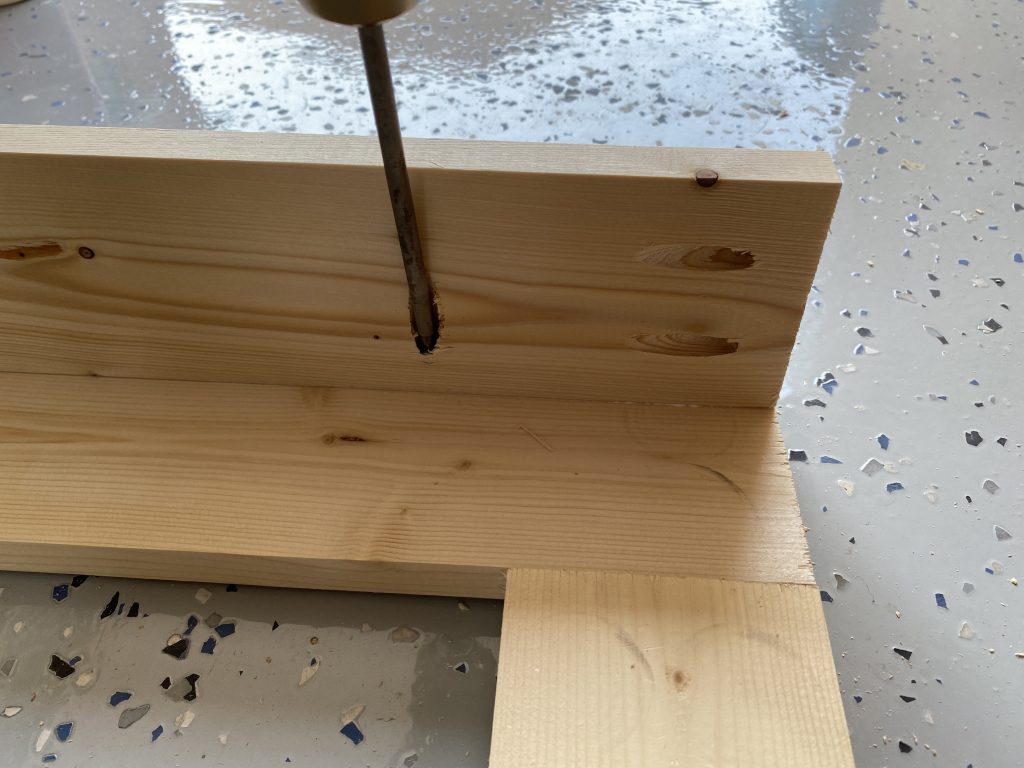
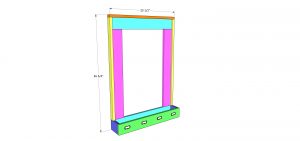
Cut the frame boards to size and use a Kreg Jig to drill 3/4″ pocket holes at both ends of the vertical boards and both ends of the bottom frame piece.
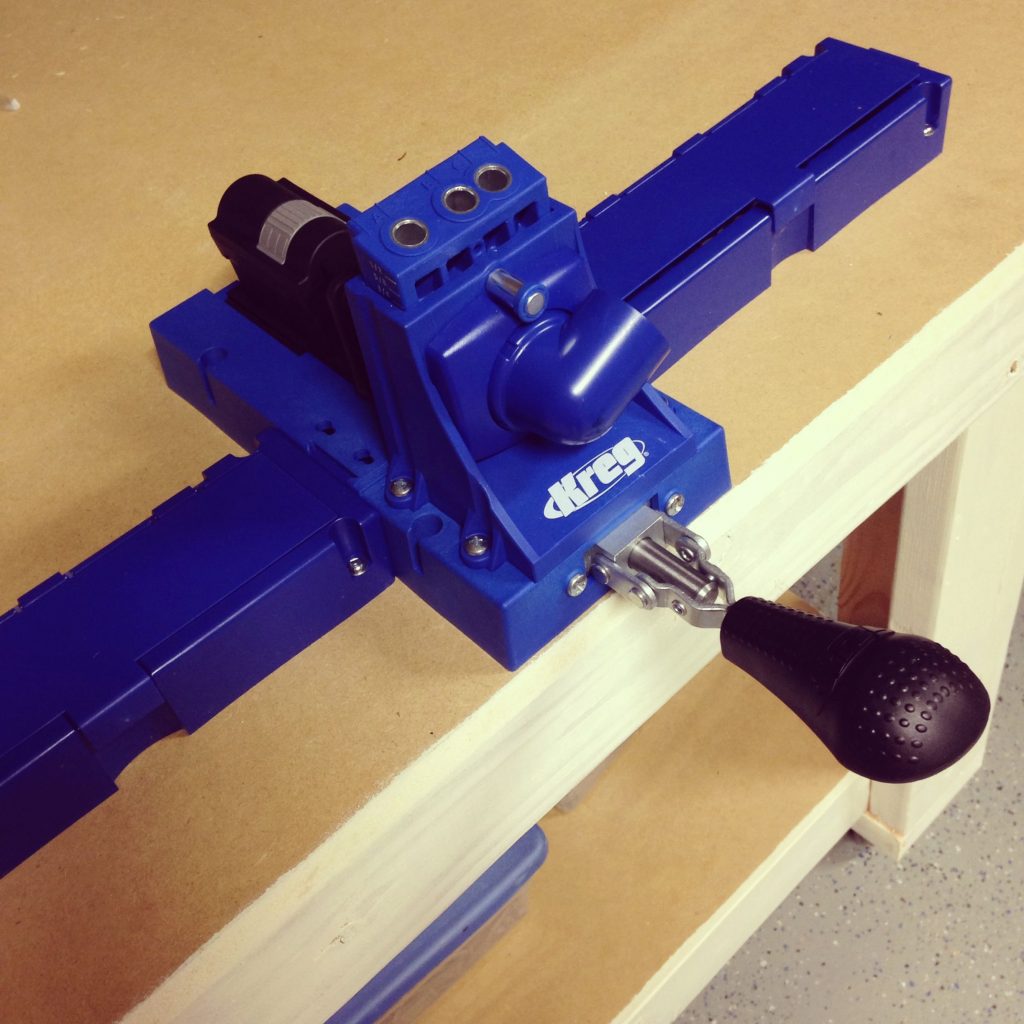
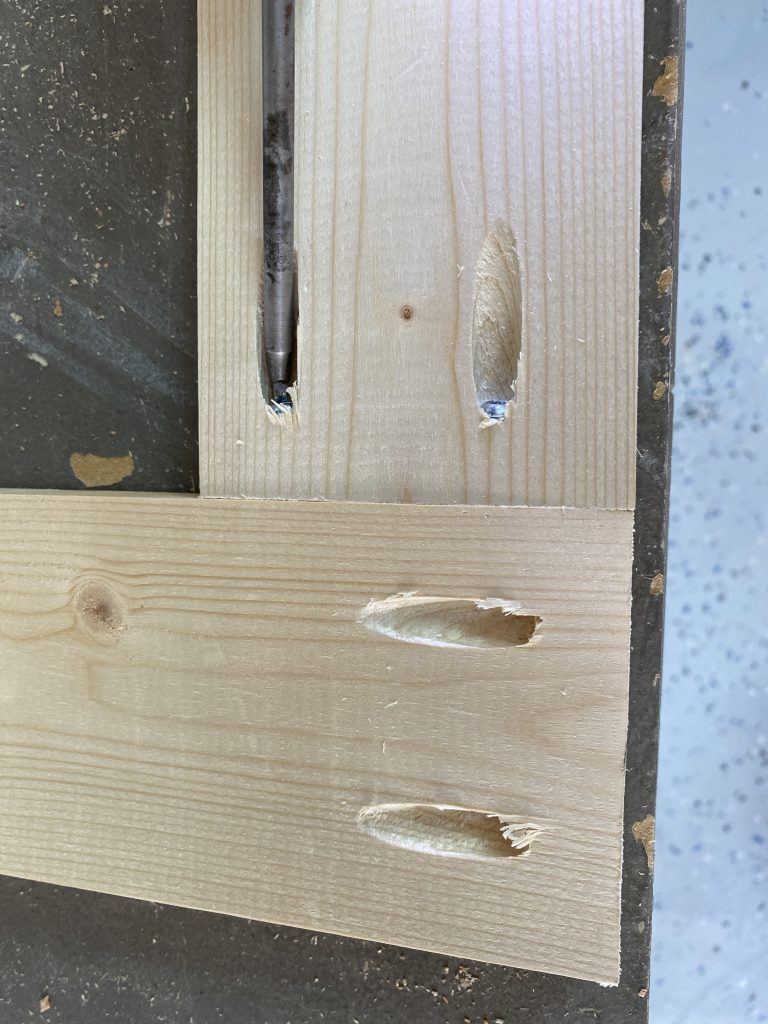
Attach them together with 1 1/4″ pocket hole screws and wood glue.
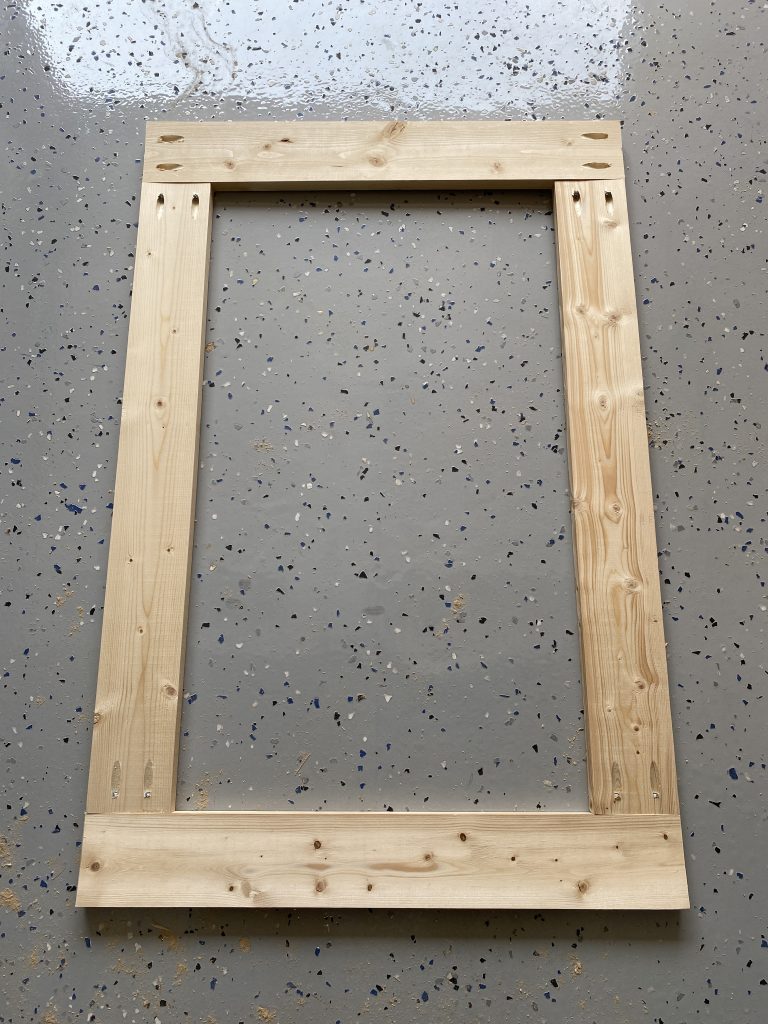
The frame should look like this now.
Building the Cup Holder
Step 1
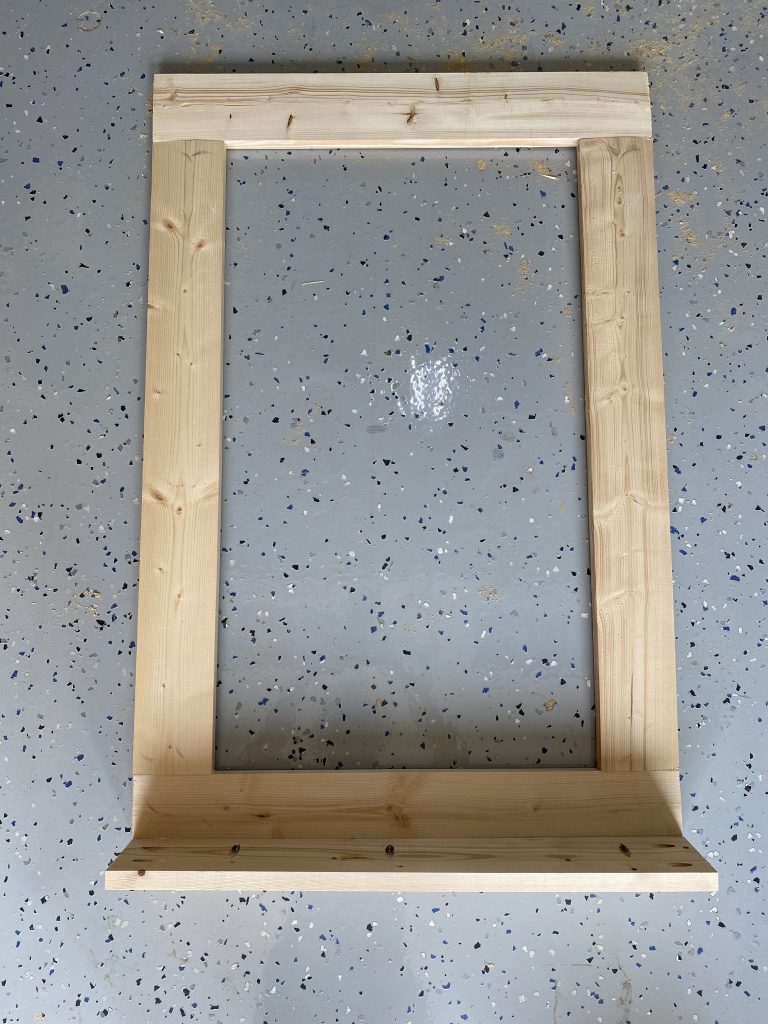
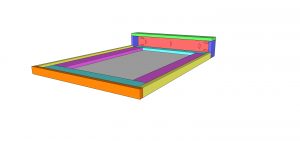
Cut the bottom cup holder board to size and drill 3/4″ pocket holes along one edge and both ends. Attach it to the bottom of the frame with 3/4″ pocket hole screws and wood glue.
The frame should look like this now.
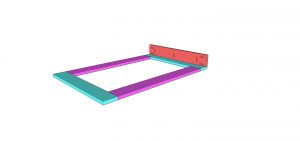
Step 2
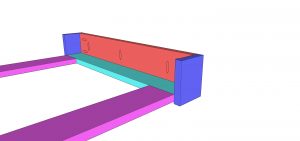
Cut the side cup holder pieces to size and attach them to the bottom of the frame and the bottom of the cup holder with 1 1/4″ pocket hole screws and wood glue. The backof the side pieces should be flush with the back of the dry erase board.
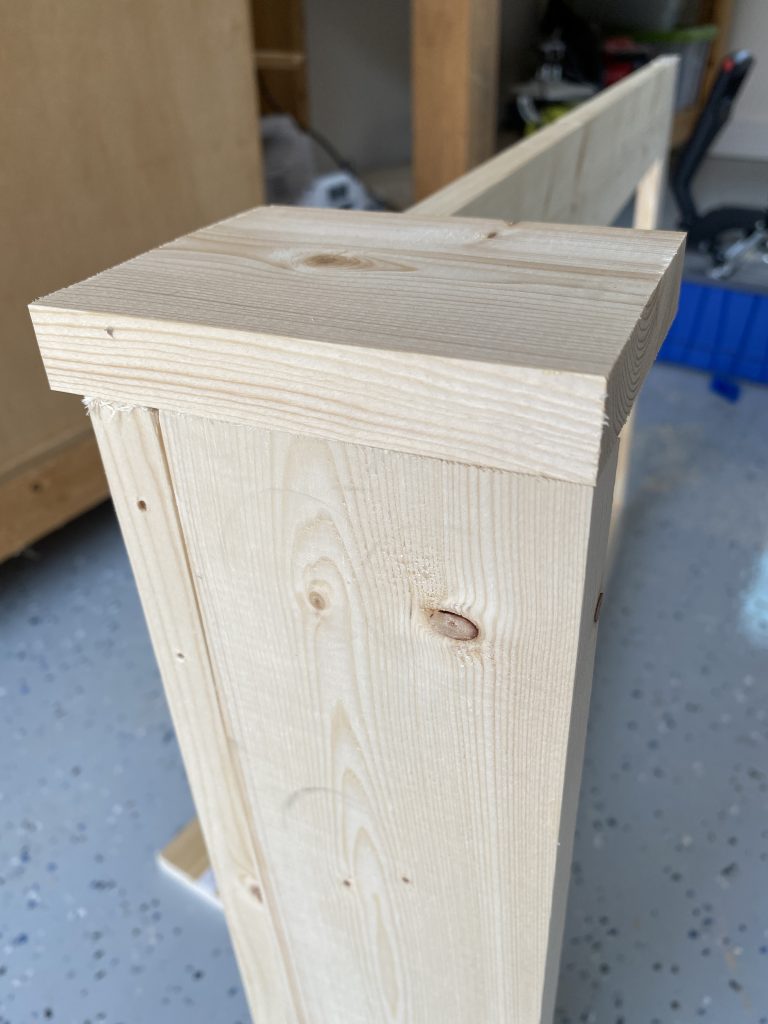
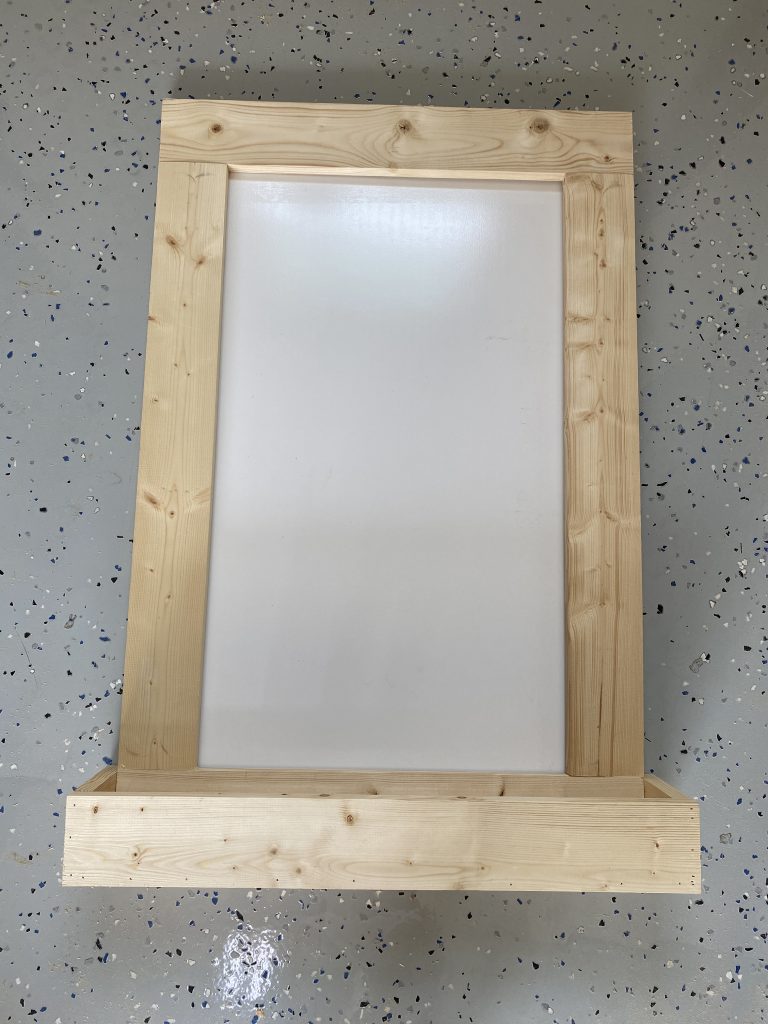
The frame should look like this now.
Step 3
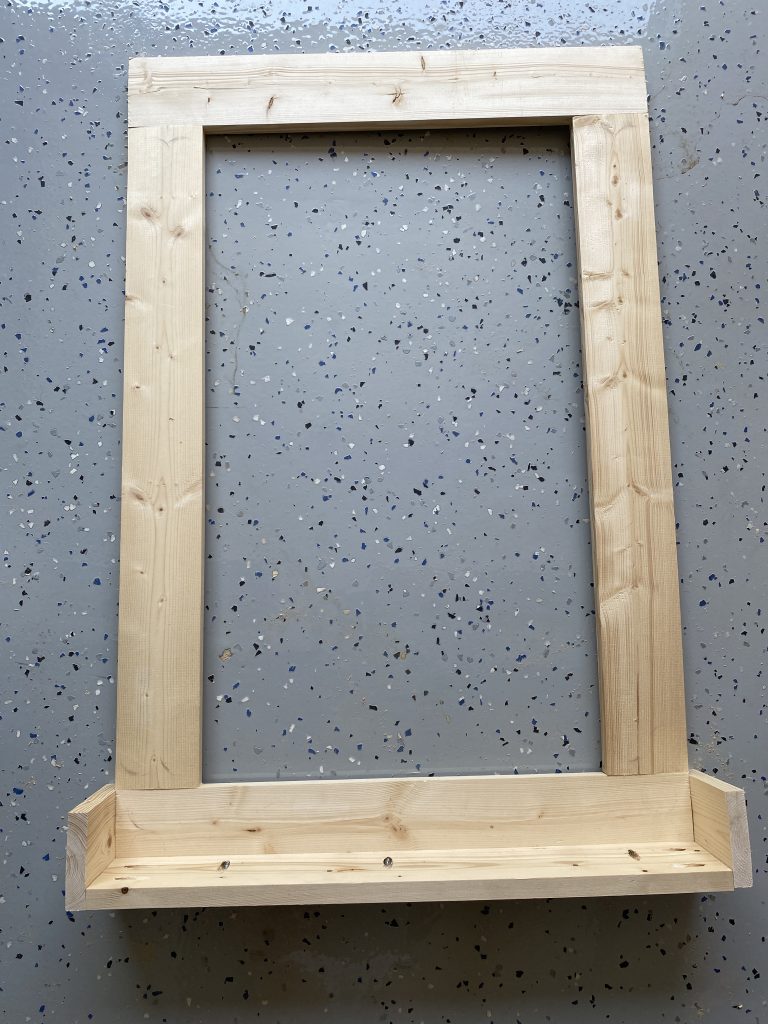
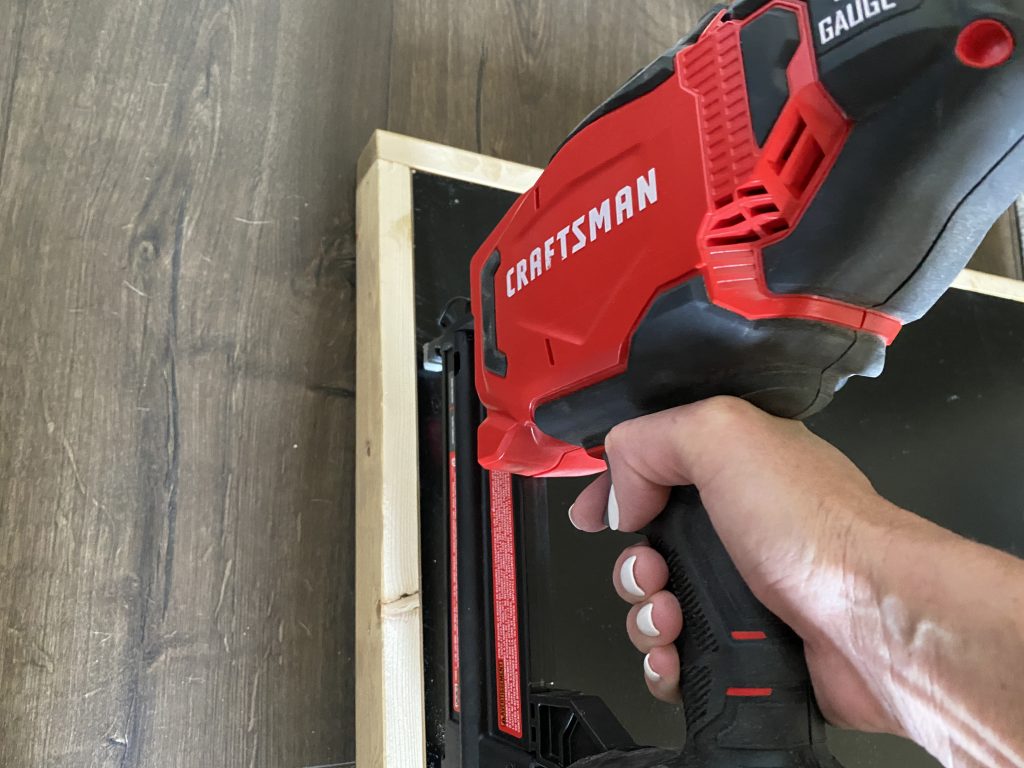
Cut the front cup holder piece to size and attach it to the side and bottom cup holder pieces with 1 1/4″ brad nails and wood glue.

Adding Trim
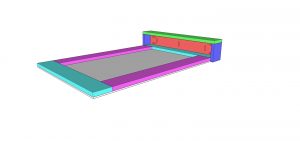
Step 1
Lay the frame over the dry erase board but don’t attach it yet.
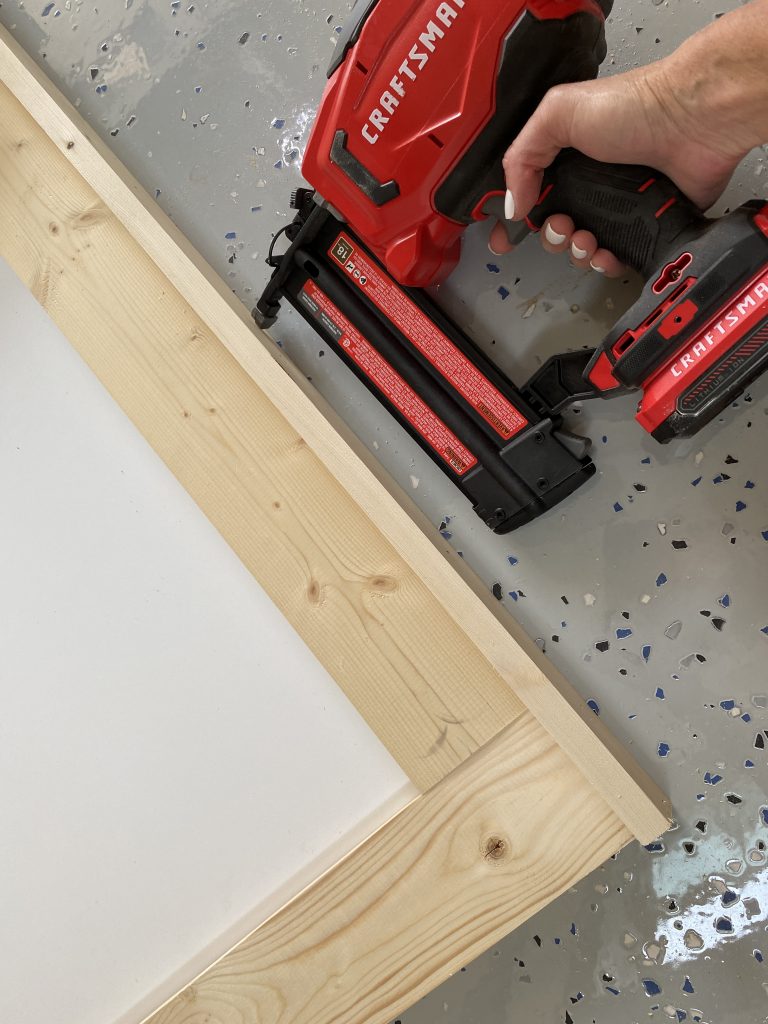
Step 2
Cut the side trim pieces to size and attach them to the side of the frame with 1 1/4″ brad nails and wood glue. The side trim pieces should be flush with the back of the dry erase board.
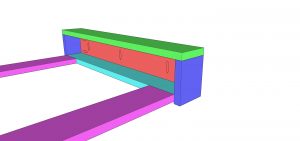
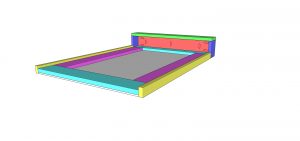
Step 3
Cut the top trim piece to size and attach it to the top of the frame with 1 1/4″ brad nails and wood glue.
The Finish
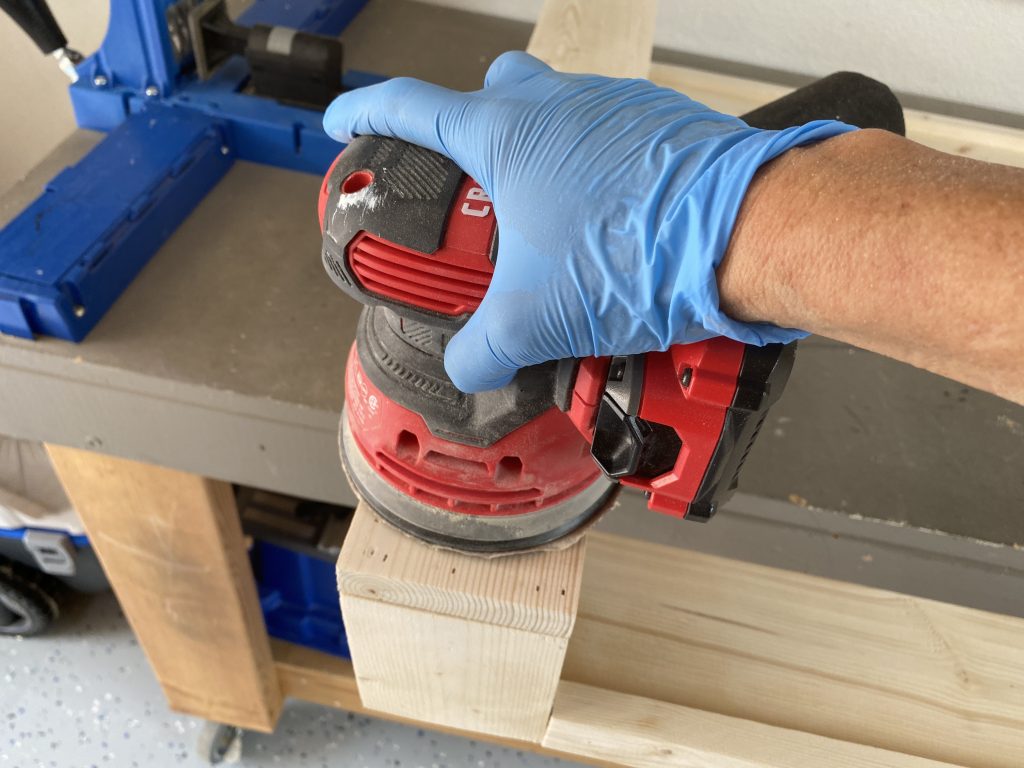
Step 1
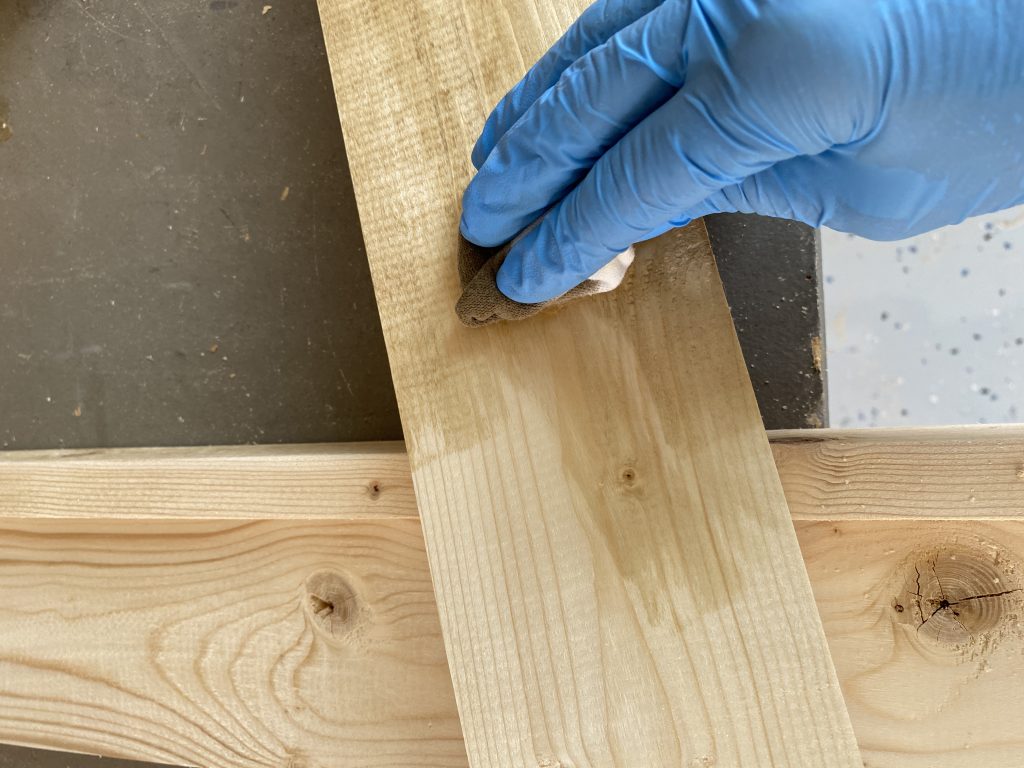
To prep for the finish, I sanded the entire piece. I started with an 80-grit, followed with a 120-grit and finally a 220-grit.
Step 2
I chose to stain my frame with Minwax Wood Finish! You can check out all of their amazing color choices HERE!
I mixed 2 parts Golden Oak and 1 part Classic Gray together in a bowl.

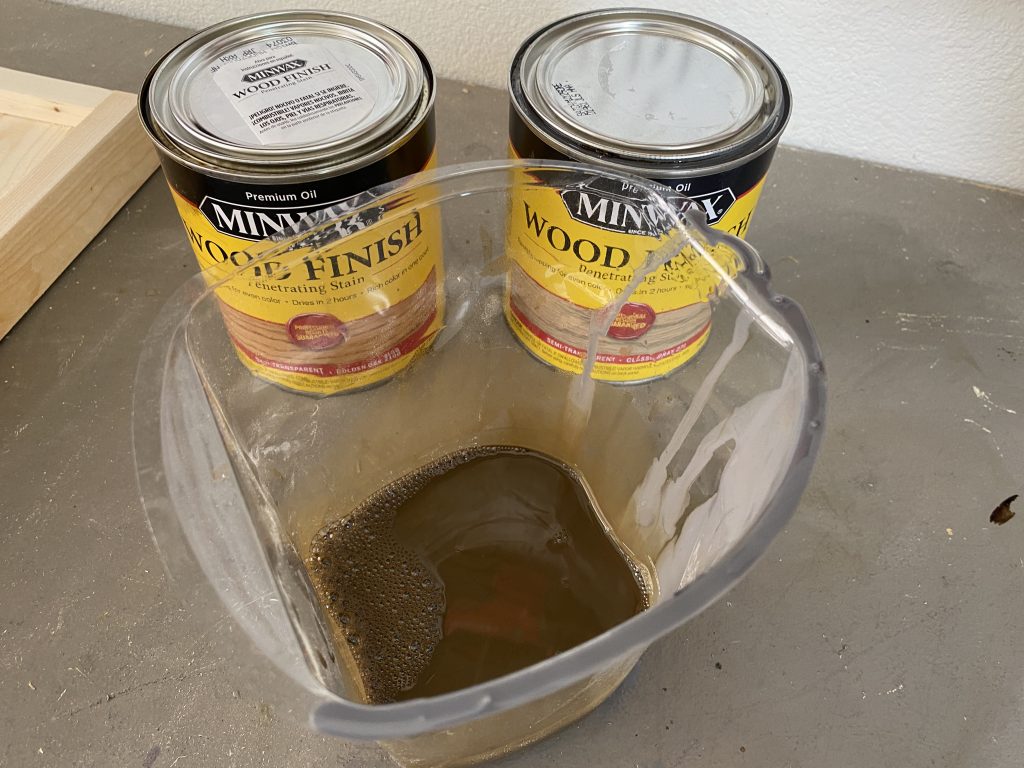
To test the color I used a scrap piece of the same pine boards that I built the frame with. I loved the color immediately so I got busy staining.
Once I began staining I noticed the new formula in the Minwax Wood Finish! The color goes on as easily and as rich as before but it’s a one-coat product now! My rich color was achieved in just one easy coat!
To apply the stain I just used a clean cloth and wiped it all over!
I LOVE that it dries in 2 hours! After I applied the stain I let the frame sit to dry while I cleaned up my shop!
Once the stain was dry (and my shop was clean) I applied one coat of Minwax Polycrylic Finish for added durability!
Then, it was time to attach the dry erase board! I attached the dry erase board to the back of the frame with 5/8″ brad nails!
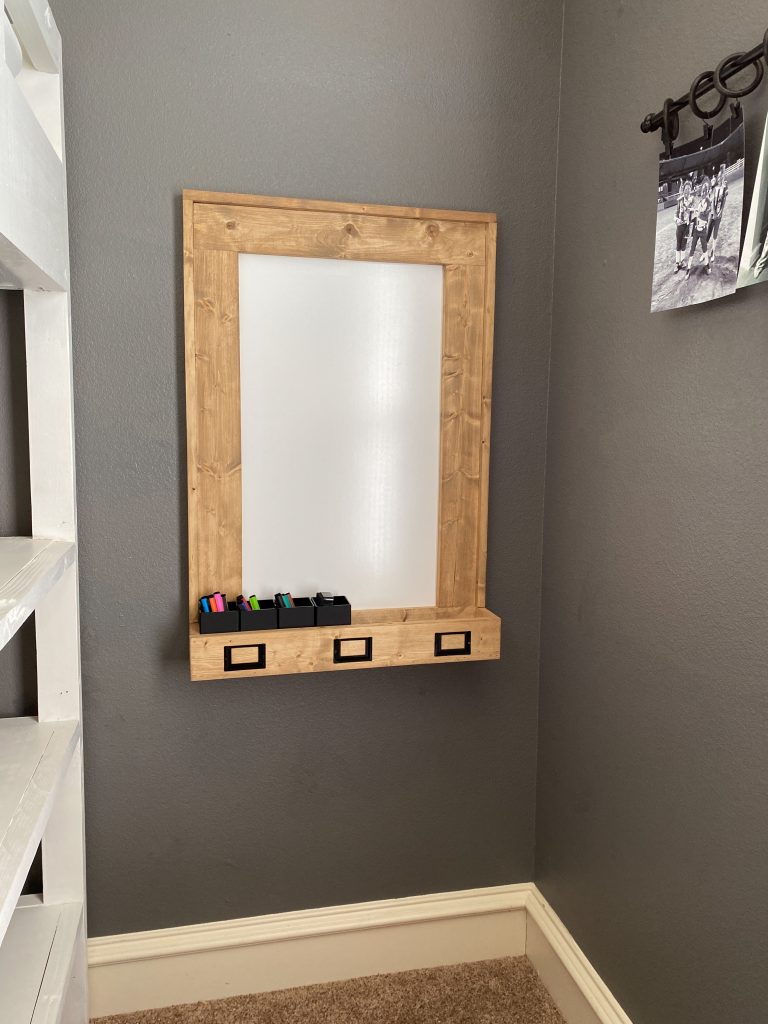
I hung it on the wall with anchors and screws and added cute label holders for decoration!
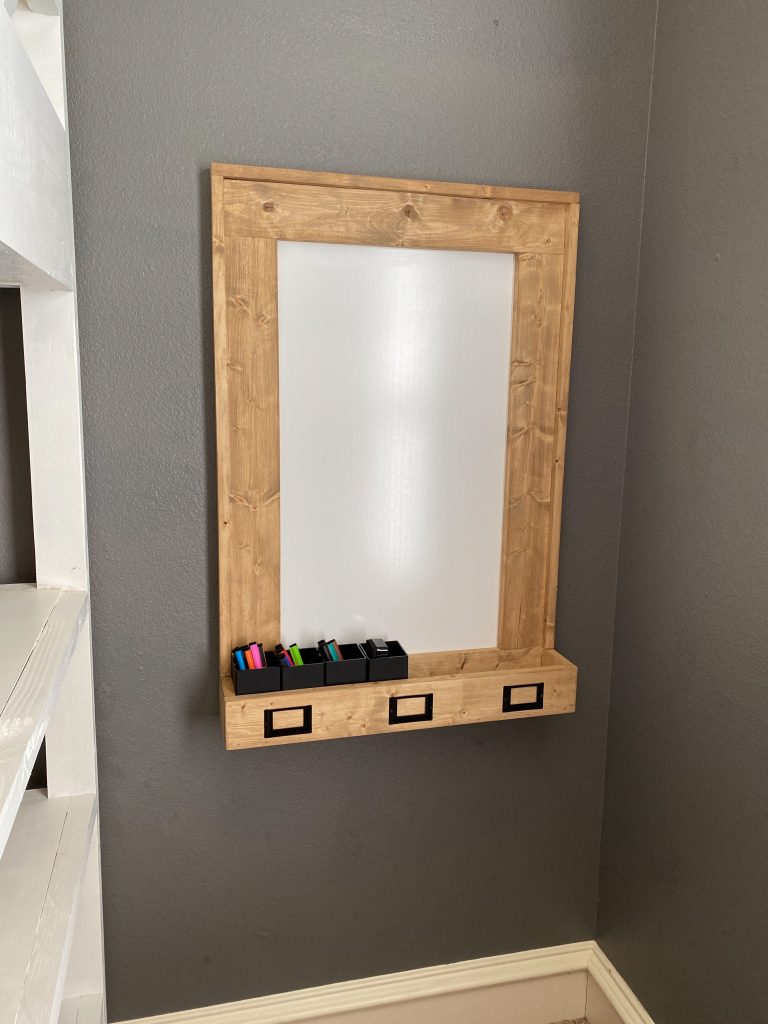
In just a few hours and under $40 my daughter has a cute DIY Dry Erase Board that has her a little excited about her new remote learning bedroom!

DIY Dry Erase Board
Tools
- Miter Saw
- Drill
- Kreg Jig
- Brad Nailer
- Sander
Supplies
- 2 1x4x8 Common Board
- 1 1x2x8 Common Board
- 1 24"x36" Dry Erase Board
- 4 Label Holders
- 1 1/4" Pocket Hole Screws
- 5/8" Brad Nails
- 1 1/4" Brad Nails
- Wood Glue
Instructions
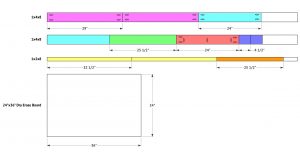
Cut List
- Cut List

Frame
- Cut the frame boards to size and drill 3/4" pocket holes at both ends of the vertical boards and both ends of the bottom frame piece. Attach them together with 1 1/4" pocket hole screws and wood glue.

Cup Holder
- Cut the bottom cup holder board to size and drill 3/4" pocket holes along one edge and both ends. Attach it to the bottom of the frame with 3/4" pocket hole screws and wood glue.
- Cut the side cup holder pieces to size and attach them to the bottom of the frame and the bottom of the cup holder with 1 1/4" pocket hole screws and wood glue. The backof the side pieces should be flush with the back of the dry erase board.
- Cut the front cup holder piece to size and attach it to the side and bottom cup holder pieces with 1 1/4" brad nails and wood glue.
Trim
- Lay the frame over the dry erae board but don't attach it yet.
- Cut the side trim pieces to size and attach them to the side of the frame with 1 1/4" brad nails and wood glue. The side trim pieces should be flush with the back of the dry erase board.
- Cut the top trim piece to size and attach it to the top of the frame with 1 1/4" brad nails and wood glue.
Finish
- Now, add a finish and attach the dry erase board with 5/8" brad nails from the back of the board and into the frame.Have fun with it and make it your own! I added cute label holders for decoration!Make sure to share your builds with us on social media and use #shanty2chic so we can share them too!Happy Building!


I came across your blog post just right now. I read it and saved it on my browser. Really, you have penned down fruitful content for an audience who love to read. Good luck for your next posts. Thank you for sharing.
I love this update! Can you add photos of how you attached it to the wall? Thanks!