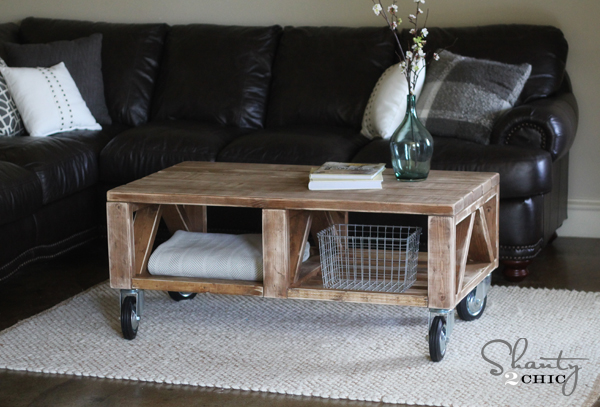
Hey friends! I am so excited to share my latest furniture build with you today! I teamed up with Ana White to design this new coffee table, and I LOVE the results!
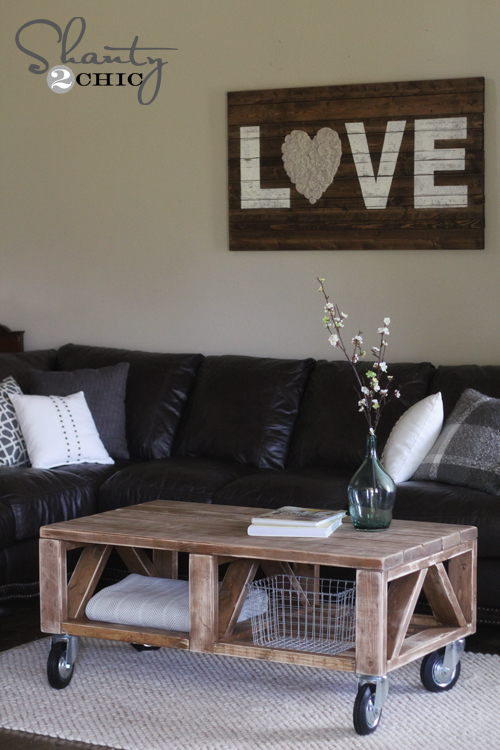
This is a super easy build and the cost of wood was under $50. That makes me like it even more! I will share some tips with you here, and you can check out the full set of plans at Ana White’s site!
To cut my pieces I used the newest member of my tool family…
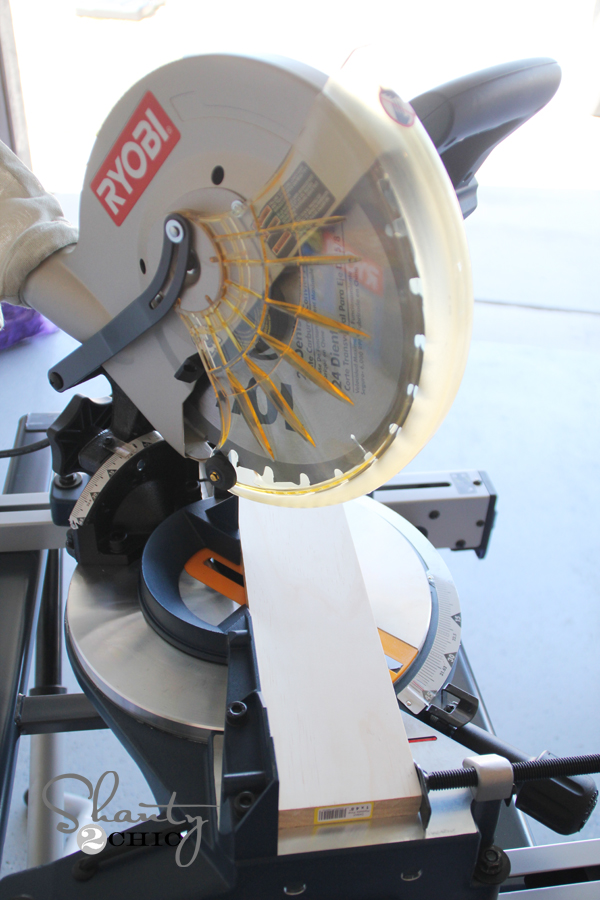
For those of you in the market to buy a new saw, this Ryobi 10″ Compound Miter Saw is a great place to start! It saves a TON of time on your cuts and it is also a great price!
I used one of my very favorite tools to get this baby easily put together.
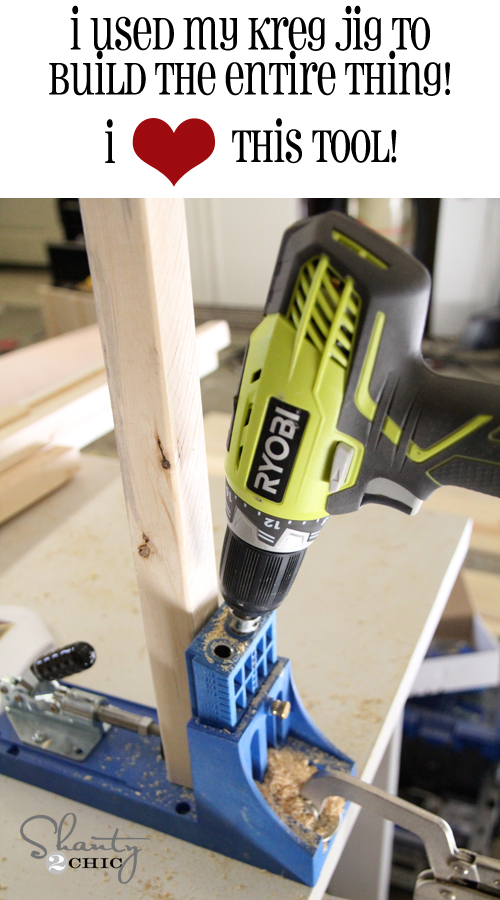
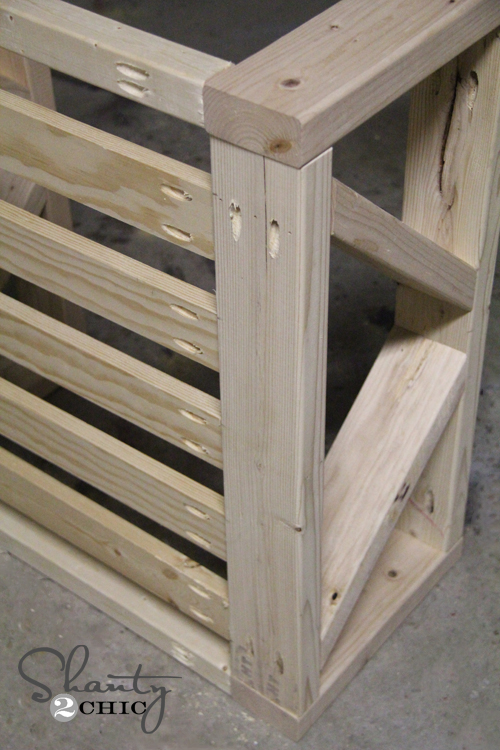
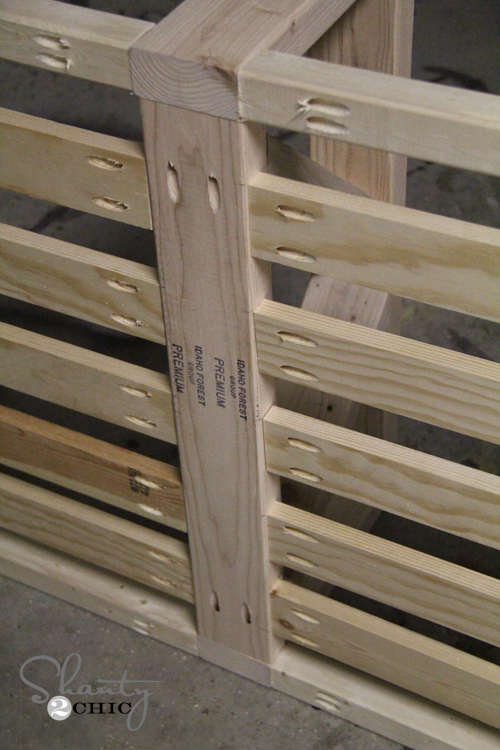
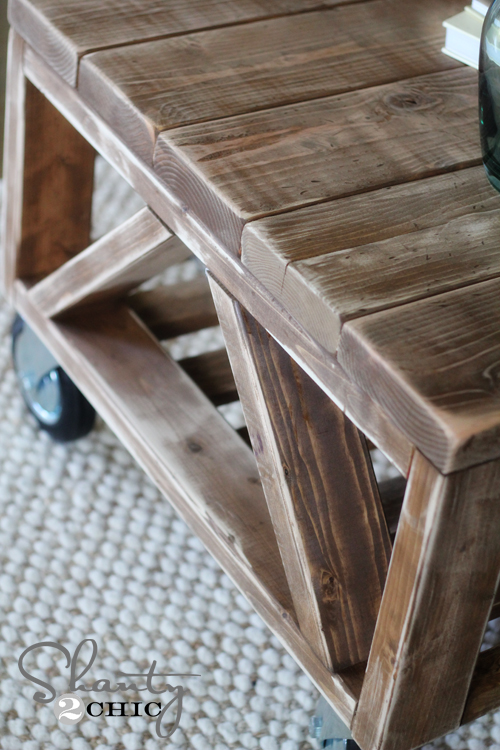
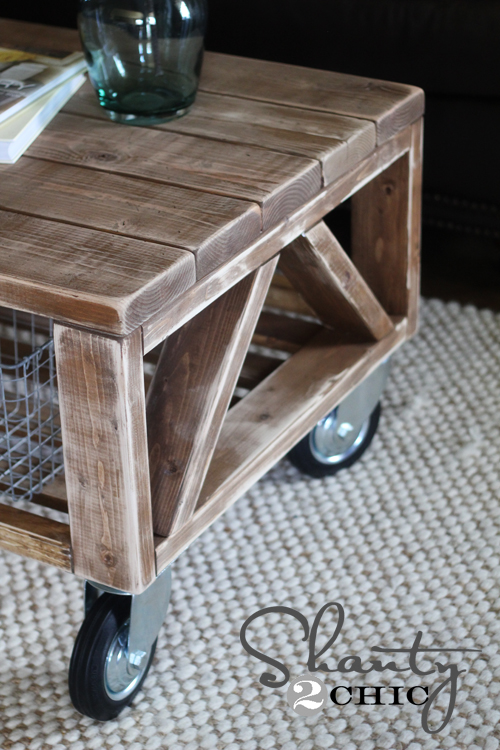
The Kreg Jig makes building so much easier! It also makes your projects more sturdy and professional. The first thing I did for this coffee table was make all of my pocket holes. Here is a shot of the bottom of the table. You can see where I put my pocket holes. For this part I used 1 1/2″ pocket holes.
For the 1×3 slats I used 3/4″ pocket holes. The Kreg Jig easily adjusts to the different size making this part super easy.
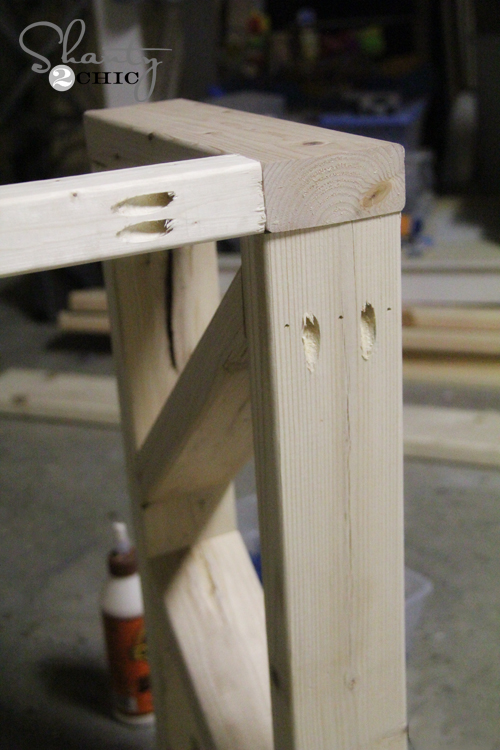
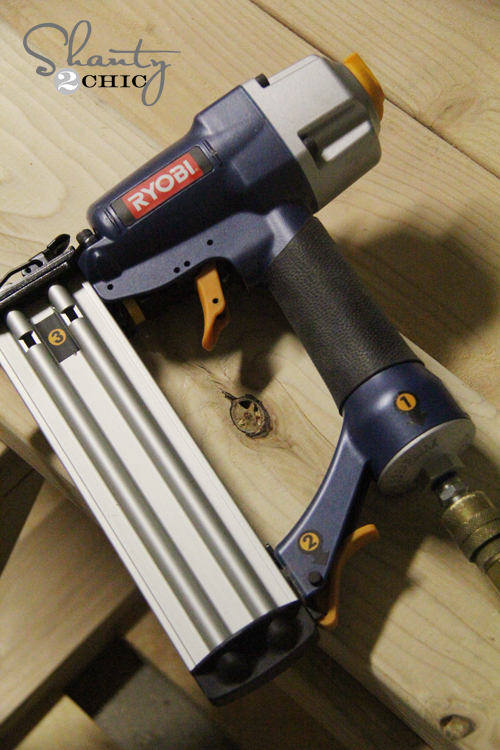
Then I used my Ryobi Brad Nailer to attach my top slats and for my angle pieces.
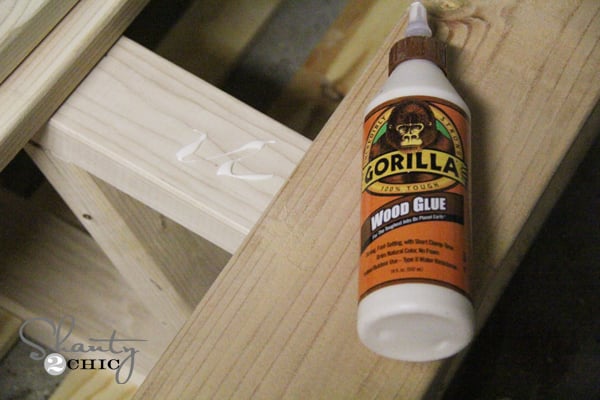
This part was so easy! Just use some Gorilla Wood Glue under each slat, and nail from the bottom side of the table.
My final step was finishing! I wanted to do something a bit different with this piece.
I started by staining the whole table with one of my favs…
Rust-Oleum Ultimate Wood Stain in Early American

After that dried I used one of my new VERY FAVORITE tools to sand the whole thing down! This little guys is just about the coolest thing since sliced bread…
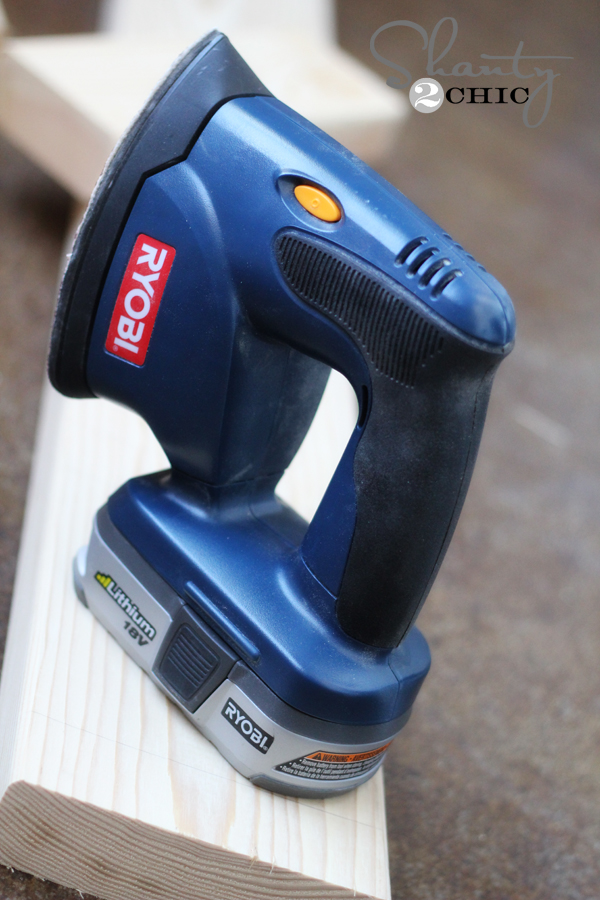
It’s Ryobi’s Corner Cat Finish Sander. We have so many people ask what tools we use for distressing and sanding our pieces. This tool is the best. It’s lightweight but so powerful, and the sanding papers are so easy to change out. And, it’s CHEAP!
I just used 120-grit paper and sanded the table until I liked the way it looked… Quick and SIMPLE!
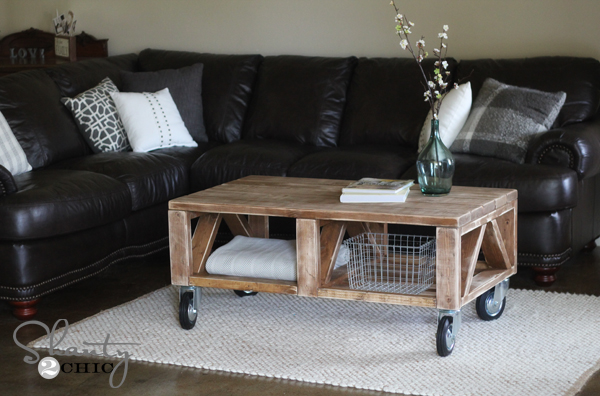
On Ana’s plans this coffee table has feet. I opted to make the table without feet, and add some wheels to it. That’s the great thing about DIY. You are the designer! With a few modifications, you can take any plan and put your own spin on it… No pun intended 😉
So… Here are a few more pics of it all finished up in my living room…

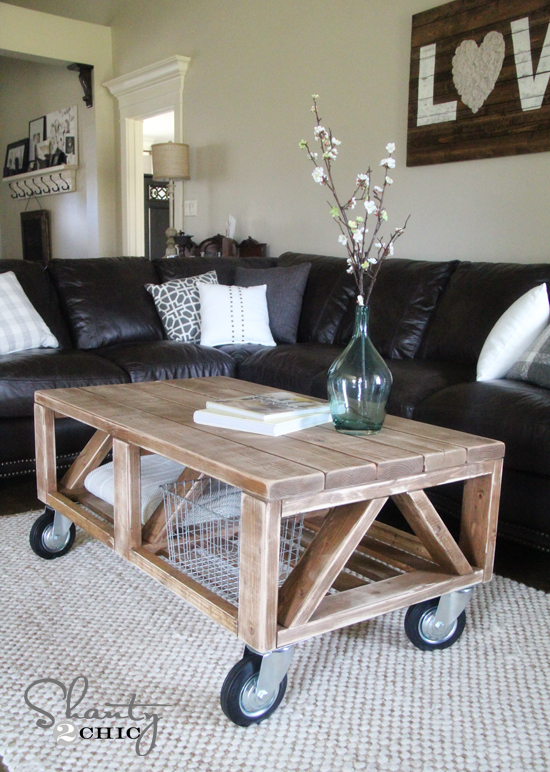

Hope you love it as much as I do! I would love for you to share this $50 table and pin it below! You guys are great!
Thank you so much for stopping by!
~Whitney


Hey! I see that rustoleum satin poly is water based… is the stain you used oil or water based?
and can you use an oil stain with water based poly? Thank you for your help!
Hi RJ! We do use the rustoleum poly and it is water based. No worries using it on an oil based stain. Hope this helps 🙂
What did you seal this with?
Rust-oleum Polyurethane in satin.
Thank you!! It looks lovely!
Have you worked with Minwax poly in satin?
If so how do they differ?
Thank you for helping!
We haven’t used their poly but have used their stains and much prefer the Rustoleum stain 🙂
what did you seal this with?
I love the LOVE sign above your couch as well. Was this a DIY as well that you would care to share instructions on? Or was this a purchase and from where? I love the table btw…I dream of finding someone to make this for me….
Just built this, and I’m having the hardest time attaching the casters. How did you do it???
Hi. Could you tell me how you attached the casters? Also, what size are they?
LOVE IT!!!! Thank you, thank you, thank you!!! Thanks to you girls and Ana White for making it easy!!!!
Im starting a new blog and I wanted to link you if that’s ok
So you stained first and then sanded? I don’t need to sand, stain and then sand again for your finish? Want to make sure! 🙂 Thanks
So this puppy is all built sitting in my garage waiting for a coat of stain tomorrow!! Once your done staining and sanding it up a bit do you use a wax sealant or poly coating to protect your pieces or just leave au natural?? Thanks!!
LOVE THIS!! Also LOVE your “LOVE” sign above the couch. Where did you find that or did you make it?
❤ I built my own coffee table using the plans at www. WoodworkPlans.info – highly recommended you check those out too. They are detailed and super easy to read and understand unlike several others I found online. The amount of plans there is mind-boggling… there’s like 16,000 plans or something like that for tons of different projects. Definitely enough to keep me busy with projects for many more years to come haha ❤❤❤
www. WoodworkPlans.info – check it out!
?? ☁
???
☁ ????
????
☁ ???
\|/
? ☁
☁ ☁
??????_????
Love the table! What size casters did you use?
I noticed the Idaho Forest stamp on your lumber. Are you from Idaho? I love this table. We my be building it in the near future!
They sell murphy
beds, closets, and complete home office furnitures directly to the publics.
Love it! Where did you find the wheels?
Northern Tool 🙂
Hello! FABULOUS table – might just be the best coffee table EVER! PLEASE provide “Northern Tool” phone number and address……… thanks a ton!