This step-by-step tutorial will show you how to build a simple DIY dining table. It’s a great beginner woodworking project!

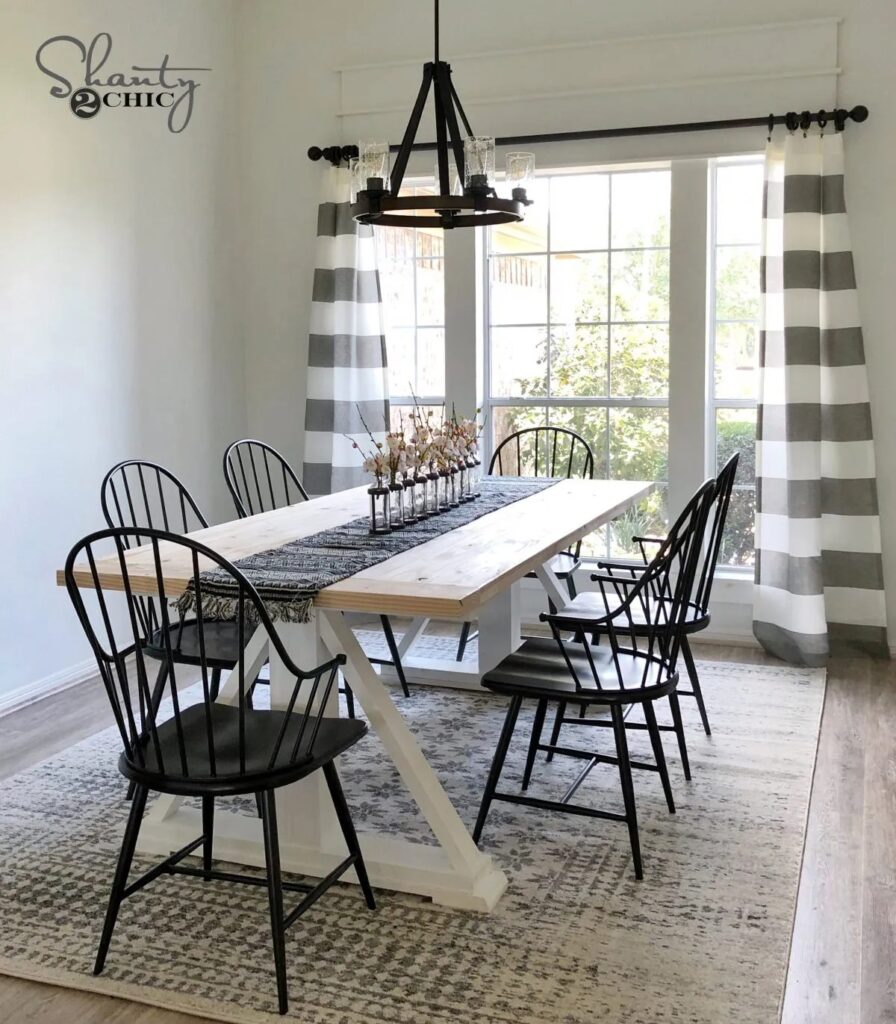
We are back with another episode of our most recent #shantyhousecrash! Leasha, our baby sister just upgraded to a new house and we couldn’t help but drive down to Houston to help her make it a home! No Shanty House Crash is complete without a DIY Dining Table, right?!
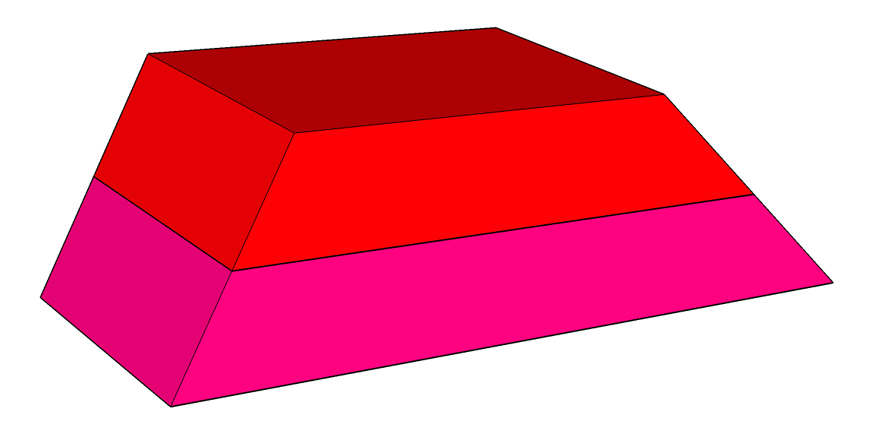
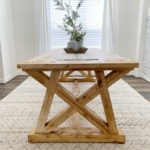
We love this wood dining table so much. I love the price, the color, the angles, the size…I could go on! The best part about this table is that it was built with only 21 2×6 boards, making the total cost in lumber $129! Grab a cup of coffee and come build this dining table with us. Just click the box below to watch the how-to video!
How fun was that!? Now, let’s get to the step-by-step instructions!
Click here to jump to the free dining table plan!Table of Contents
How to build a DIY Dining Room Table
Materials
Supply List
- 21 – 2x6x8 Pine or White Wood Boards (framing lumber)
- 2 1/2″ pocket hole screws
- 1 1/4″ brad nails
- 2 1/2″ finish nails
- 2 1/2″ wood screws
- 3″ wood screws
- 3 1/2″ wood screws
- wood glue
Tools
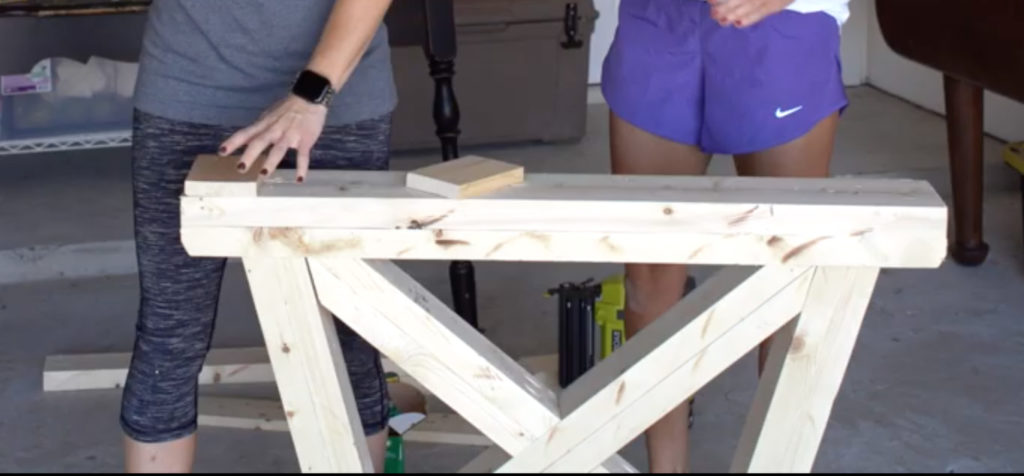
Building the Tabletop for the DIY Dining Table
Step 1: Pocket Holes
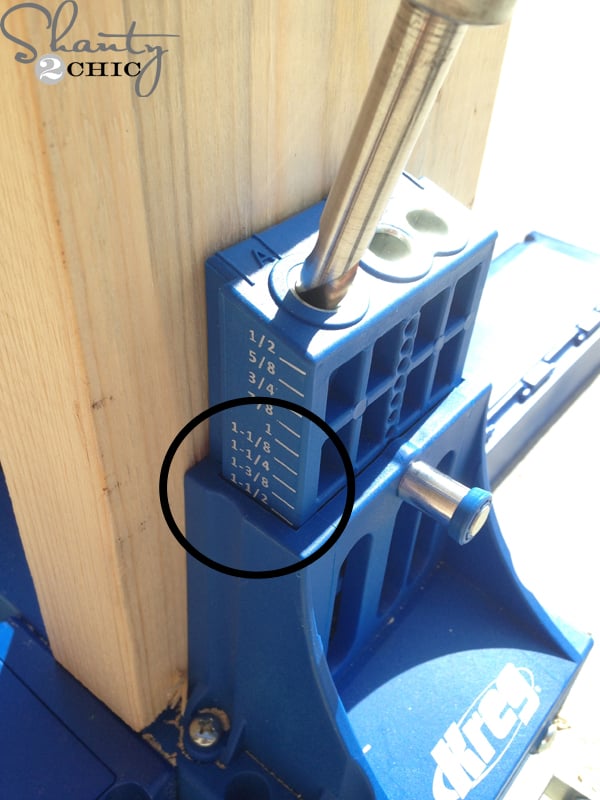
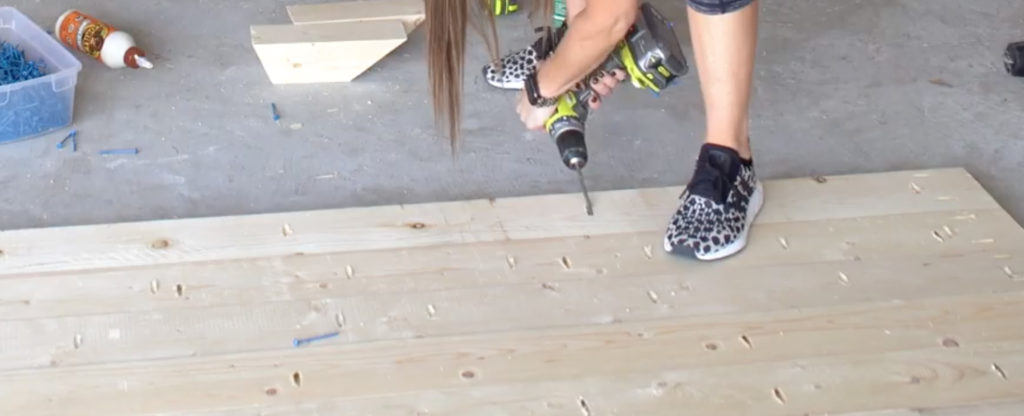
First, cut the planks to size and drill 1 1/2″ pocket holes, with a Kreg Jig, on one edge of 7 of the boards and both ends of all of the boards.
Step 2: Attaching the Planks
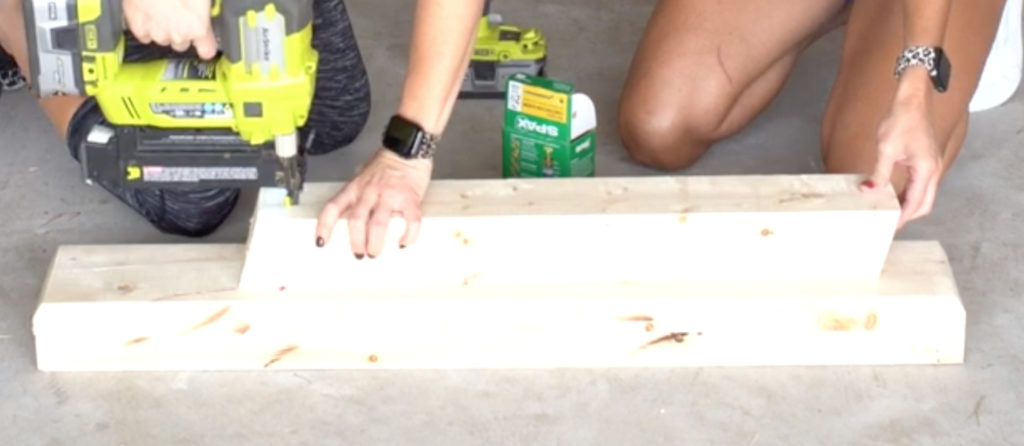
Afterwards, attach the planks together with 2 1/2″ pocket hole screws.
Step 3: Bread Boards

Next, measure and cut the breadboards to size. Attach them to the ends of the planked top with 2 1/2″ pocket hole screws and wood glue.
Dining Table Base
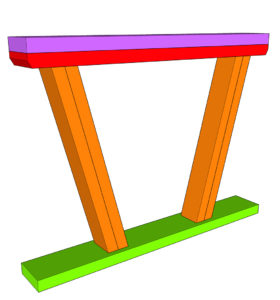
Step 4: Building the Dining Table Legs
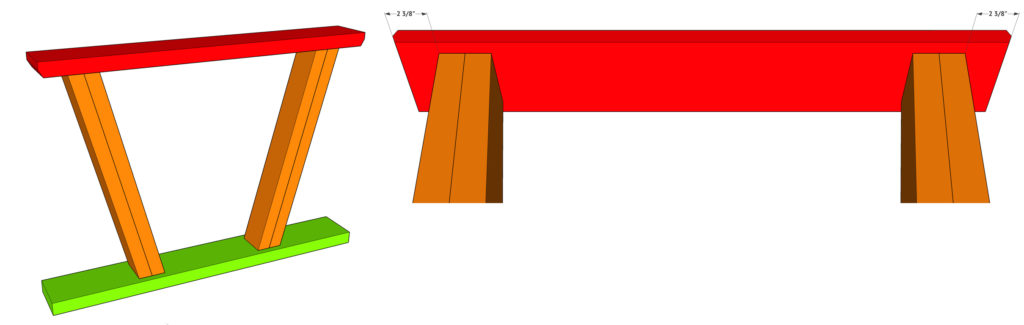
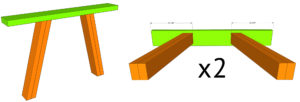
Once the table top is build, cut the leg pieces to size and attach them together with wood glue. Build 4 leg assemblies.
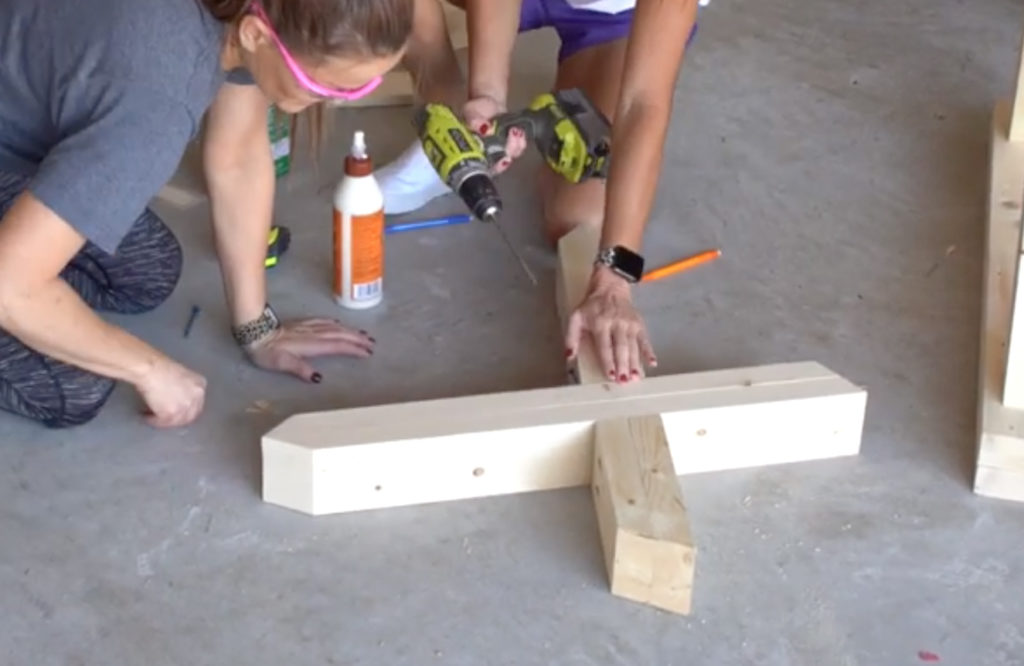
Step 5: Attaching the Leg to the Base

Now, cut the top base piece to size and attach the legs to the top base with 3″ wood screws from the top of the base and into each leg. Use wood glue. Build 2 bases.
Flip the base over and cut the first bottom base piece to size and attach it to the legs the same way.
After you add the first bottom piece, cut the second bottom base piece to size and attach it to the first bottom base piece with 2 1/2″ wood screws and wood glue.
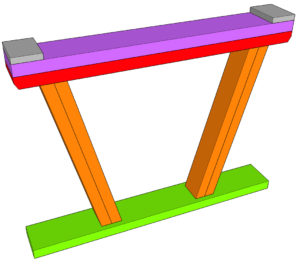
Step 6: Foot Pads
Now, cut the foot pad pieces to size and attach them to the bottom of the base with 1 1/4″ brad nails and wood glue.
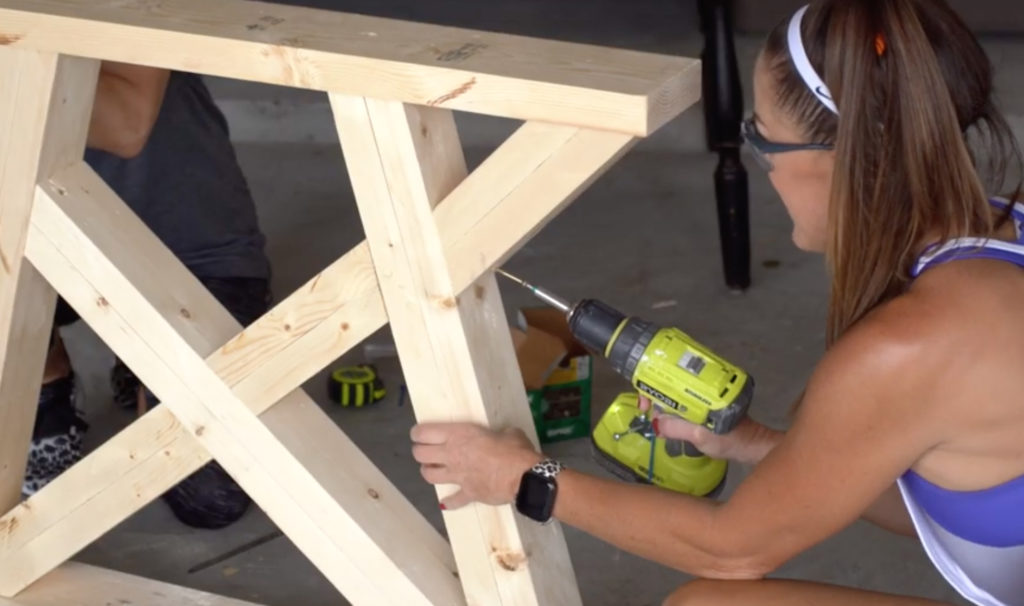
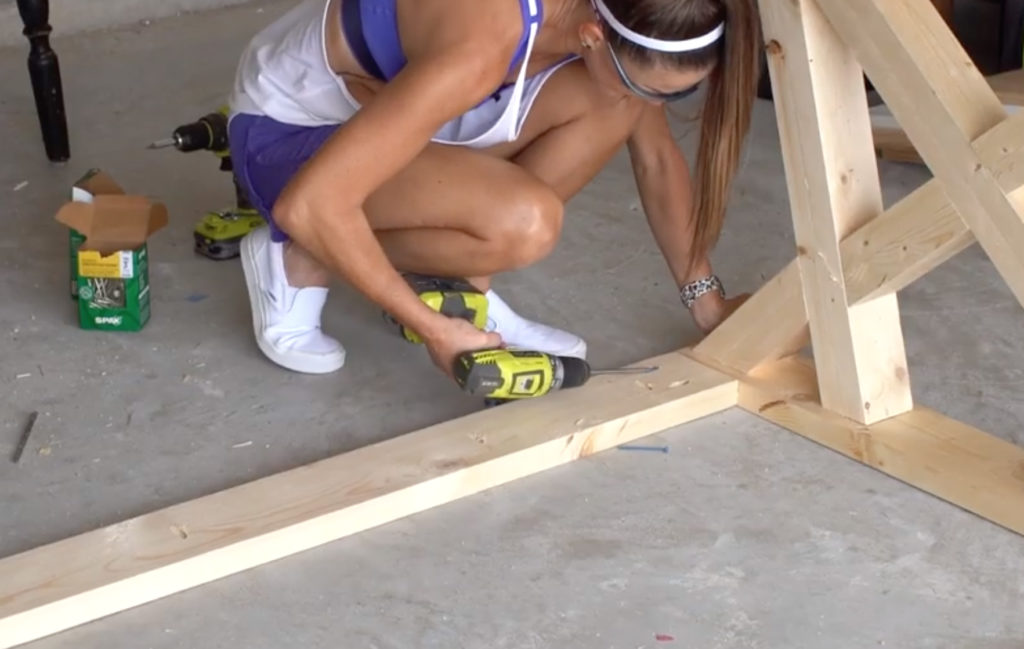
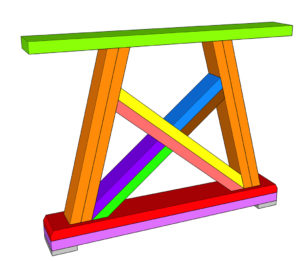
Step 7: Decorative Trim
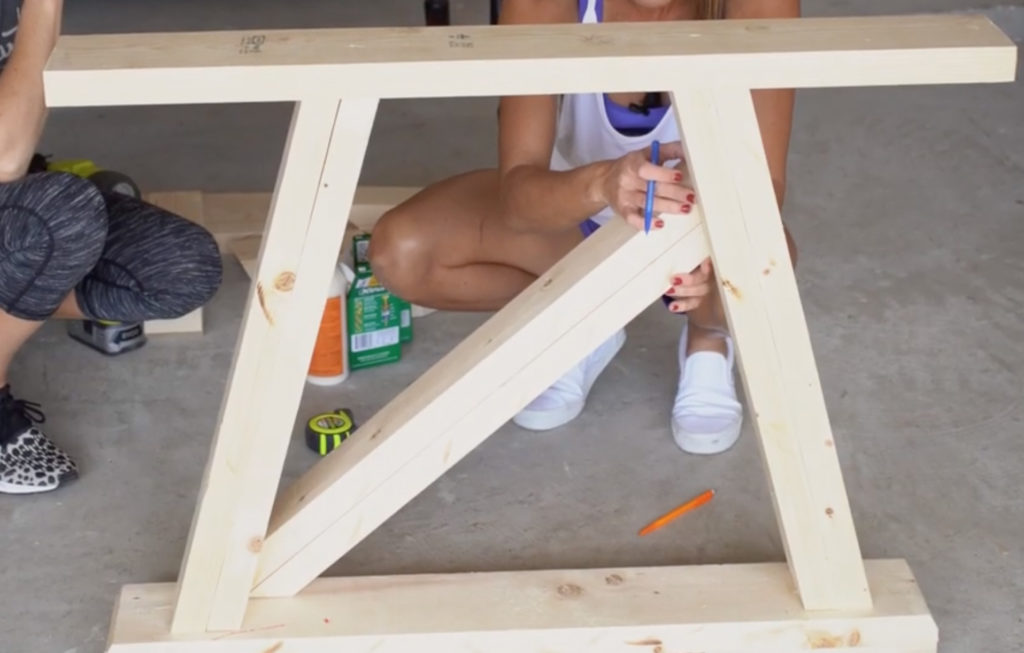
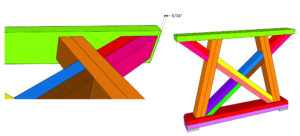
Now for the decorative pieces. Measure and cut the middle cross pieces to size, drill 1 1/2″ pocket holes, according to the cut list, and attach them with 2 1/2″ finish nails as shown below.
Note the location of the pocket holes. Build 2 of each. It is best to make the pieces a little long when you attach the two boards together. Then hold it up to the base and mark for the cut.
Attach the shorter cross pieces to the long cross piece with 2 1/2″ pocket hole screws and wood glue.
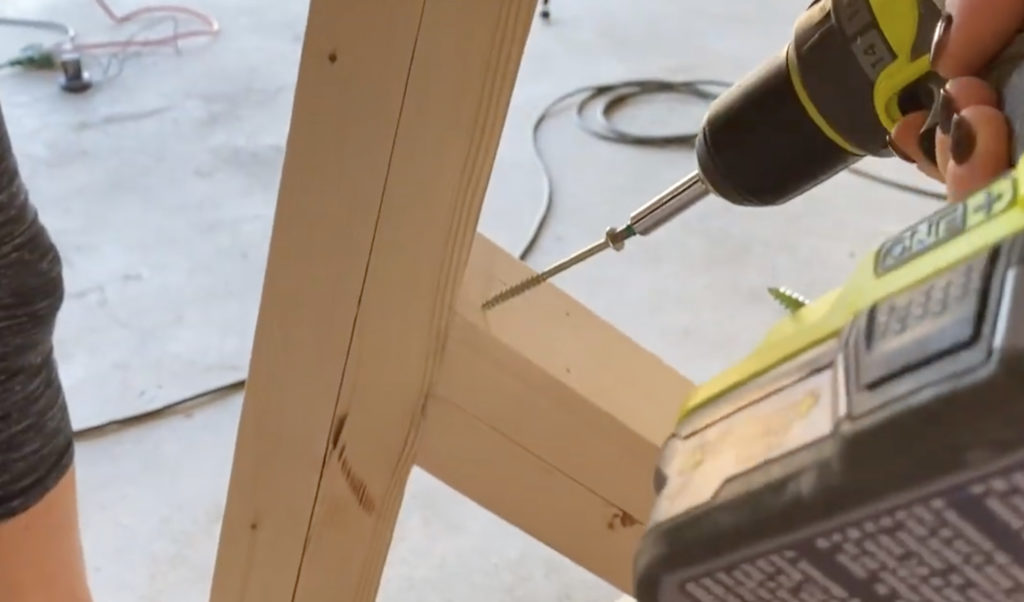
Slide the crossing between the 2 legs. Attach each corner to the legs with 2 1/2″ and 3 1/2″ wood screws and wood glue.
Cut the top corner pieces to size and attach them together with 2 1/2″ finish nails and wood glue. Build 4 corner assemblies.
Attach the corner pieces to the top corners of the bases with 2 1/2″ wood screws and wood glue into the legs and top of the base.
Assembling the Dining Table
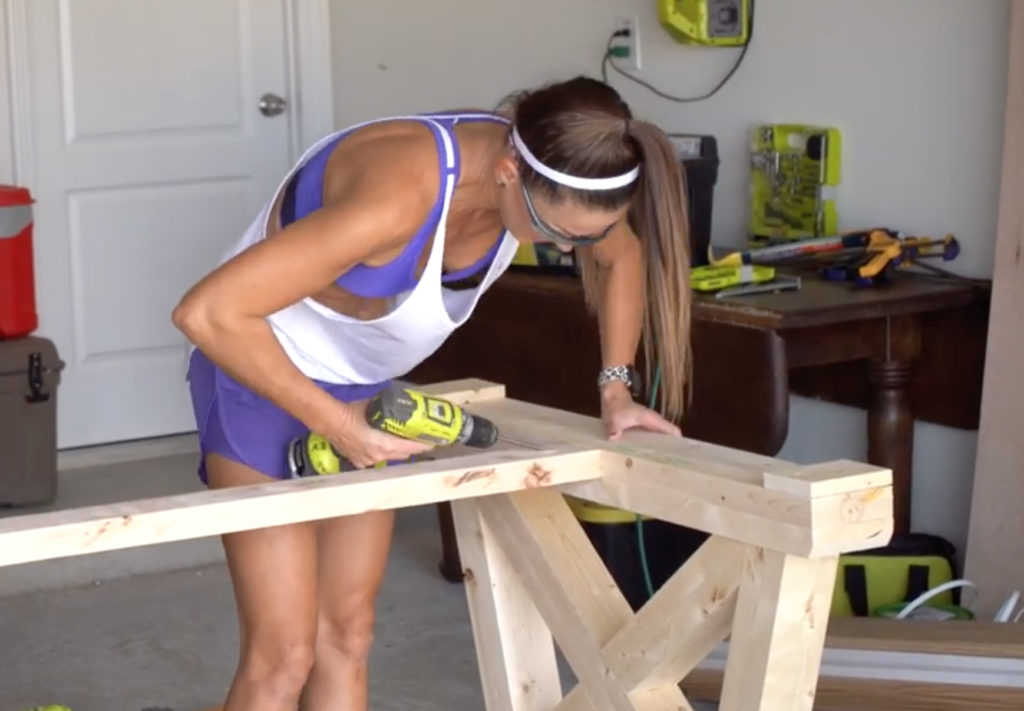
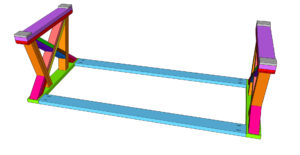
Step 8: Runners
Cut the runners to size and drill 1 1/2″ pocket holes at both ends. Attach the runners to the ends of the top of the bases with 2 1/2″ pocket hole screws and wood glue.
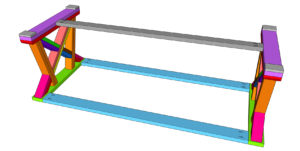
Step 9: Stretcher
Cut the bottom stretcher to size and drill 1 1/2″ pocket holes at both ends. Attach the runners to the ends of the top of the bases with 2 1/2″ pocket hole screws and wood glue.
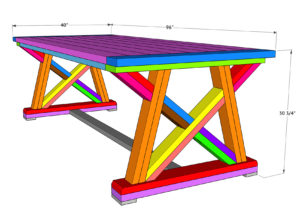
Step 10: Attaching the Table Top to the Base
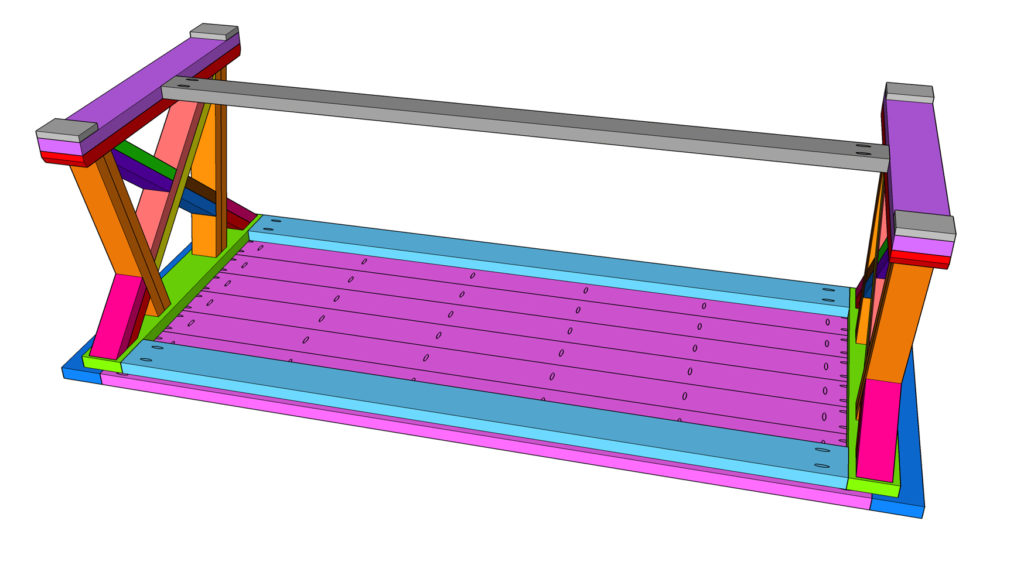
Put the table base on top of the table top and attach the base to the top with 2 1/2″ wood screws from the bottom of the runners and top base pieces and into the planks.
The Finish
That’s it! Now, just fill all of the screw and nail holes, sand it down with an 80-grit sand paper followed by a 120-grit and 180-grit. Finally, give it a finish. We chose to stain the entire table. Don’t forget the brush on thepolyurethane too!
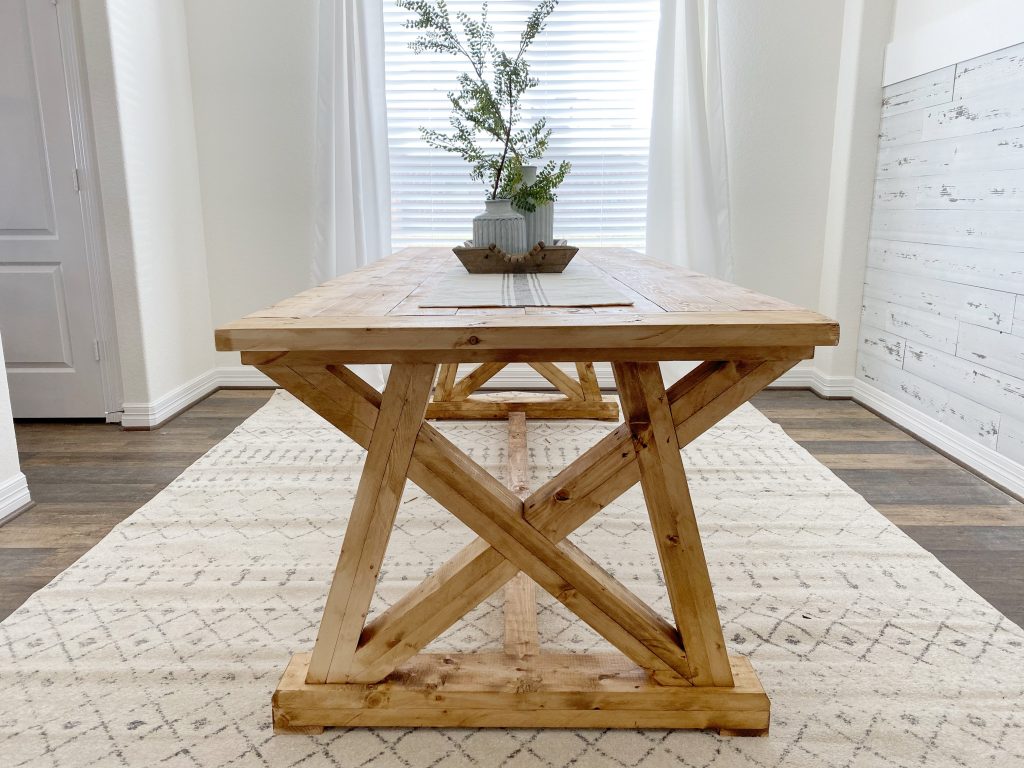
We are so thrilled with how our baby sisters DIY Farmhouse Table turned out. It’s the perfect color for her dining room, we love the angle design and she has room to fit her entire family around the table with room to spare! That’s a lot of bang for your buck!
Make sure to share your builds with us on social media and use #shanty2chic so we can share them too!
Happy Building!
Check Out Our Other Free Dining Table Plans

DIY Angle Base Dining Table
Supply List
- 21 2x6x8 Framing Lumber
- 2 1/2" Pocket Hole Screws
- 1 1/4" brad nails
- 2 1/2" Finish Nails
- 2 1/2" Wood Screws
- 3" Wood Screws
- 3 1/2" Wood Screws
- Wood Glue
Instructions
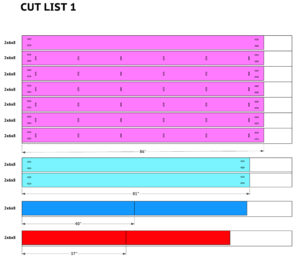
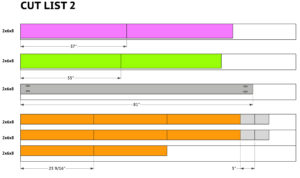
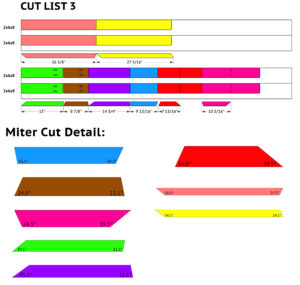
Cut List
- Cut List 1

- Cut List2

- Cut List 3

Part 1: Building the Top
- Cut the planks to size and drill 1 1/2" pocket holes on one edge of 7 of the boards and both ends of all of the boards. Attach the planks together with 2 1/2" pocket hole screws.

- Measure and cut the breadboards to size. Attach thm to the ends of the planks with 2 1/2" pocket hole screws and wood glue.


Part 2: Building the Legs
- Cut the leg pieces to size and attach them together with 2 1/2" finish nails and wood glue. Build 4 leg assemblies.

- Cut the top piece to size and attach the legs to the top base with 3" wood screws from the top of the top base and into each leg. Use wood glue. Build 2 bases.

- Flip the base over and cut the first bottom base piece to size and attach it to the legs the same way.

- Cut the second bottom base piece to size and attach it to the first bottom base piece with 2 1/2" wood screws and wood glue.

- Cut the foot pad pieces to size and attach them to the bottom of the base with 1 1/4" brad nails and wood glue.

- Cut the middle cross pieces to size, drill 1 1/2" pocket holes according to the cut list and attach them with 2 1/2" finish nails as shown below. Note the location of the pocket holes. Build 2 of each.

- Attach the 2 shorter cross pieces to the long cross piece with 2 1/2" pocket hole screws and wood glue. Build 2 of these.

- Slide the cross in between the 2 legs. Attach each corner to the legs with 2 1/2" and 3 1/2" wood screws and wood glue.

- Cut the top corner pieces to size and attach them together with 2 1/2" finish nails and wood glue. Build 4 corner assemblies.

- Attach the corner pieces to the top corners of the bases with 2 1/2" wood screws and wood glue into the legs and top of the base.


Part 3: Assembling the Table
- Cut the runners to size and drill 1 1/2" pocket holes at both ends. Attach the runners to the ends of the top of the bases with 2 1/2" pocket hole screws and wood glue.

- Cut the bottom runner to size and drill 1 1/2" pocket holes at both ends. Attach the runners to the ends of the top of the bases with 2 1/2" pocket hole screws and wood glue.
- Put the table base on top of the table top and attach the base to the top with 2 1/2" wood screws from the bottom of the runners and top base pieces and into the planks.

- That's it! Fill any exposed nail and screw holes, sand it down and add a finish! Make sure to share your builds with us on social media and use #shanty2chic so we can share them too!


We have a collection of over 25 DIY dining table plans that you can pick from, all including free tutorials!


You missed the angles for the orange pieces.
just checking to see if the plans have been updated. i don’t see ya’ll replying to any of the comments regarding this….
I would message them on FB or Instagram they are actually really good at replying there. I think comments on the blog they maybe don’t after a few months.
They have not and since this table build is getting older I doubt they do. Several commenters have said how they amended the project.
A whole page of instructions and not a single dimension or angle mentioned…
Look at the cut list. All lengths, dimensions, and angles are listed there.
However, the angles are off when you use the ones they put in the cut list. Look through the comments and follow other comments to adjust. That is what I did and I am just about finished.
Love the look of the table once I finished it. I’ll also tell you to totally throw out the plans as far as angles are concerned. My very first angles did not match up and I wasted a few boards learning that. I figured out that I had better success by cutting an angle that runs to the sides and not the corners of the bases. That meant cutting one angle as opposed to trying to learn how to cut the entire corner. Since this was not my first table or miter angle project, I was able to adapt and bring the look home. I would say that most people should not do this as their first woodworking project/dining table build.
Agreed, this project is not for someone starting their first build, but it does look great when you figure it out!
Have the plans been updated to the correct cuts, miter cuts and rips yet? I’ve been waiting a bit now. I’ve cut most of the lengths and just haven’t touched the miter cuts yet. Girlfriend is waiting on me to finish it. Also on the cut list can you please provide the width of the boards. There are no widths just lengths. Thanks.
Hey Sethdillard7…did you get updated plans to this project I have starting cutting and decided to read the reviews lastly and I’m stuck!!…
What stain did yall use in the original picture??