Happy Monday friends! Welcome to day 2 of our 12 Days of Christmas series. To keep up with all of our Christmas projects and posts, be sure to FOLLOW us on Instagram!

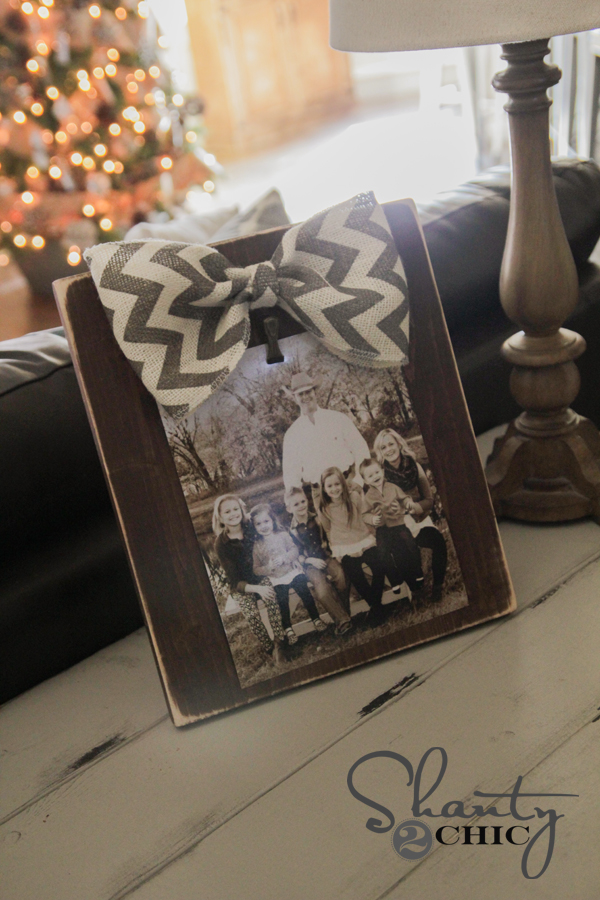
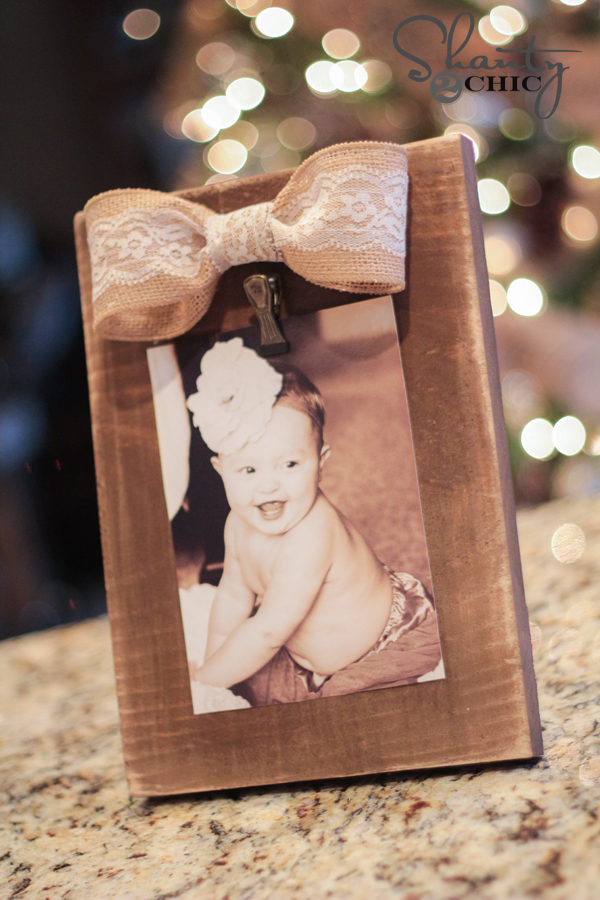
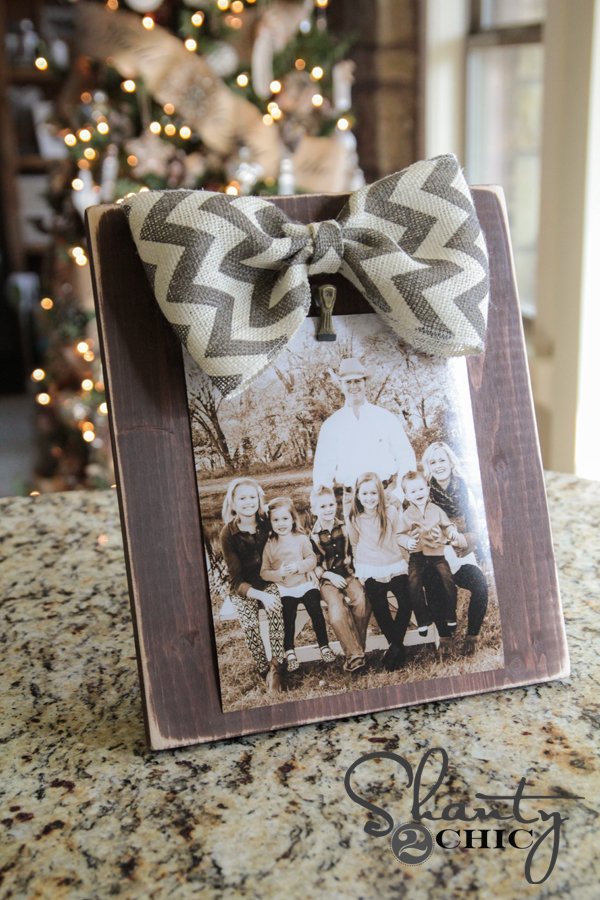
I am so giddy with how this latest project turned out. I LOVE gifting and receiving photos each year. My fam loves receiving them, and they really do make the best gifts! I always like to come up with a fun and cheap (of course 😉 ) way to display them, so I came up these cuties…
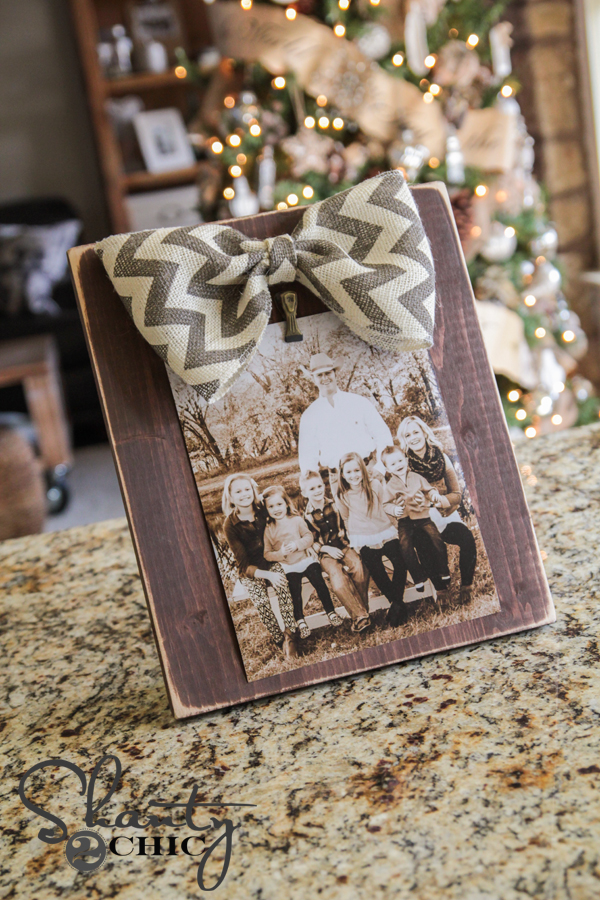


Aren’t they too cute??
My favorite part has to be the price! I made each of these frames for under $3 in supplies. CAN’T BEAT THAT!
This is a super simple project! Let’s get started! This supply list will make 6 frames. You can buy more or less wood depending on how much you need.
Supply List
1 – 1 x 12 x 4
1 – 1 x 3 x 6
Burlap Ribbon
Twine
Metal Clips
Gorilla Wood Glue
Gorilla Super Glue Gel
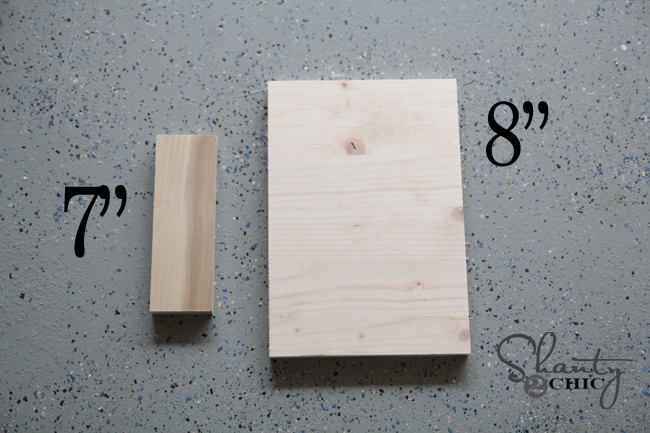
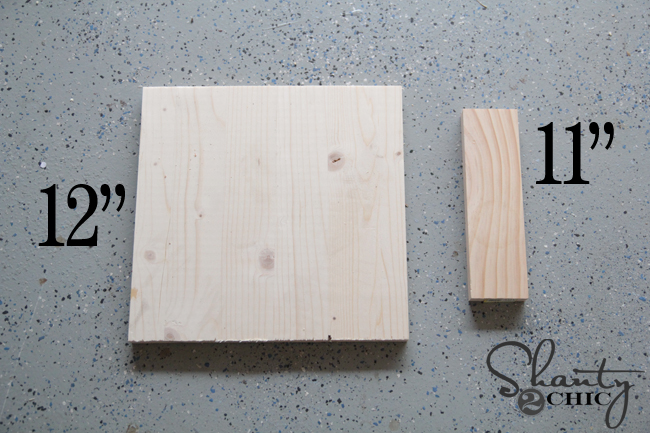
Start by cutting your frames!
If you are making the smaller frames that hold a 5×7 photo, you will cut your 1 x 12 at 8″ and your 1 x 3 at 7″.
If you are making the larger frames that hold an 8 x 10 photo, you will cut your 1 x 12 at 12″ and your 1 x 3 at 11″.
Time to attach them!
I decided to use my Kreg Jig to attach my pieces. You can totally use just glue and clamp, or you can also use wood glue and wood screws through your 1×3 piece. If you choose to use wood screws, you will need to use 2.5″ wood screws and make sure to pre-drill to keep your wood from splitting.
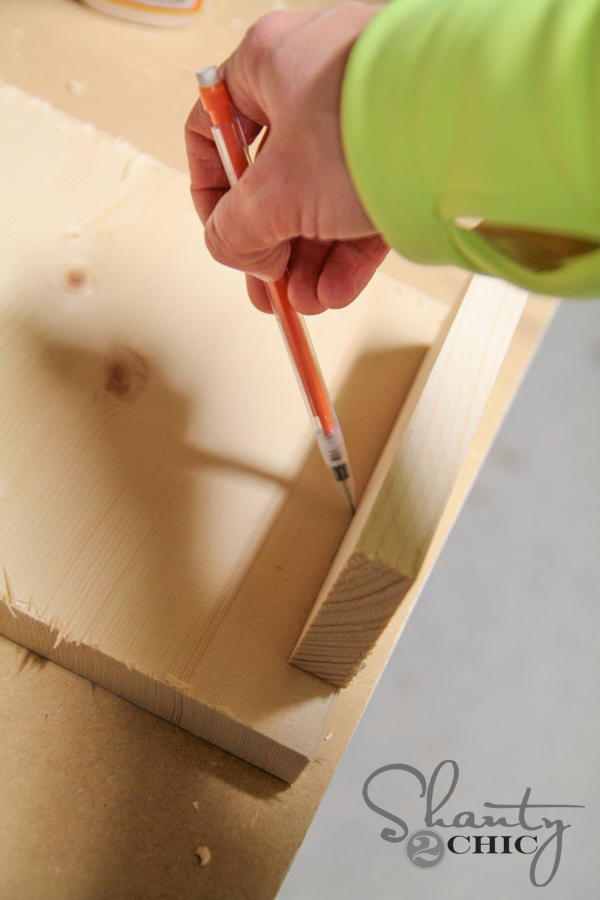
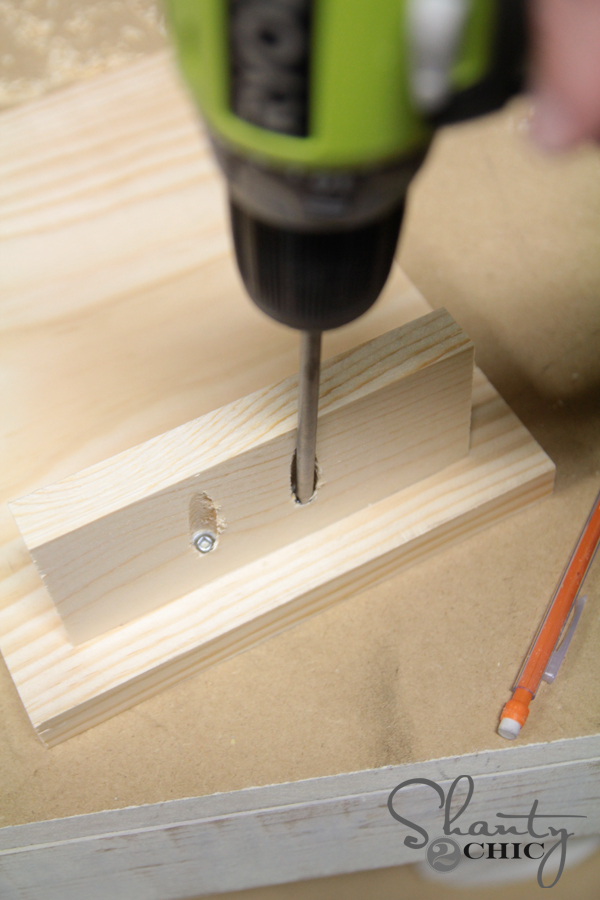
I would totally recommend the Kreg Jig though. This is a PERFECT starter project if yours is still sitting in the box. It makes building these a total breeze. I used 3/4″ pocket holes and 1 1/4″ pocket hole screws on this project. Start by making 2 pocket holes in your 1×3 piece like this…

I lined up the 1×3 piece at the base and drew a line to mark where I planned to attach it.
Next I used a line of wood glue and attached the back piece using my Ryobi drill and pocket hole screws. You can see where I lined up the 1×3 on the line I drew in my last step. If you decide to use wood screws on this part, just pre-drill through the back of the 1×3 on this part, and used wood screws through those holes and into the back of the 1 x 12 piece. But I promise… The Kreg Jig gets this part done much faster and easier! You will thank me!
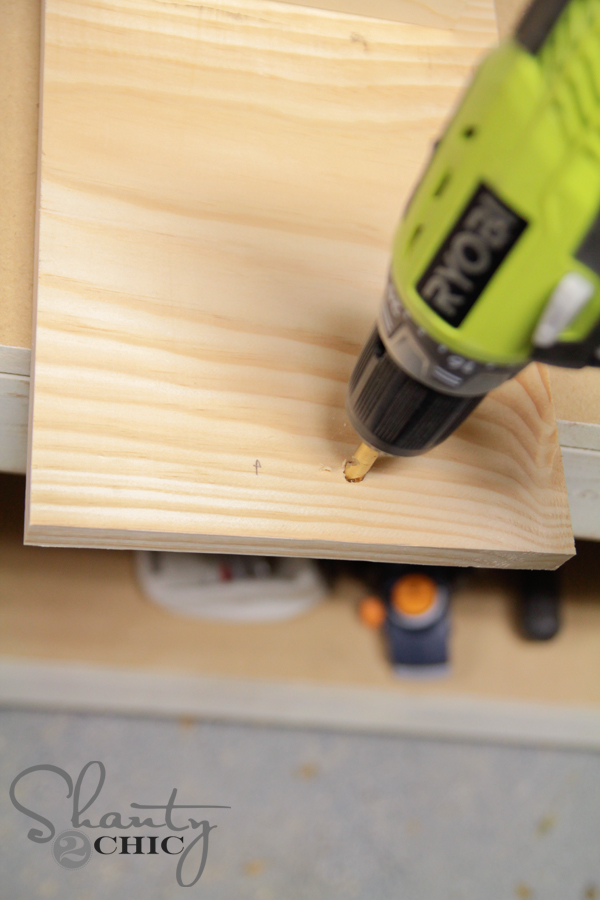
After attaching my back piece, I drilled two holes in the top of each frame. I made my holes about 1.5″ apart. No science here. Just eyeball it. The bow will cover up these holes, so no need for perfection on this part.
That’s it for the building part. Before making the bows, I stained and painted my frames. For my larger frame I used Rust-Oleum Wood Stain in Carrington. I love this color! So pretty and rich.

For the smaller frame I used Rust-Oleum Painter’s Touch spray paint in Canyon Black.
While those were drying, I started on my bows!
I like to call my bows ‘faux bows’! They are super easy to make. All you need is a hot glue gun.
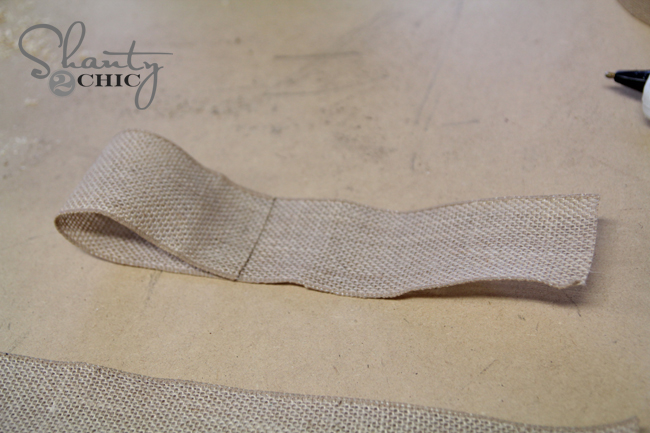
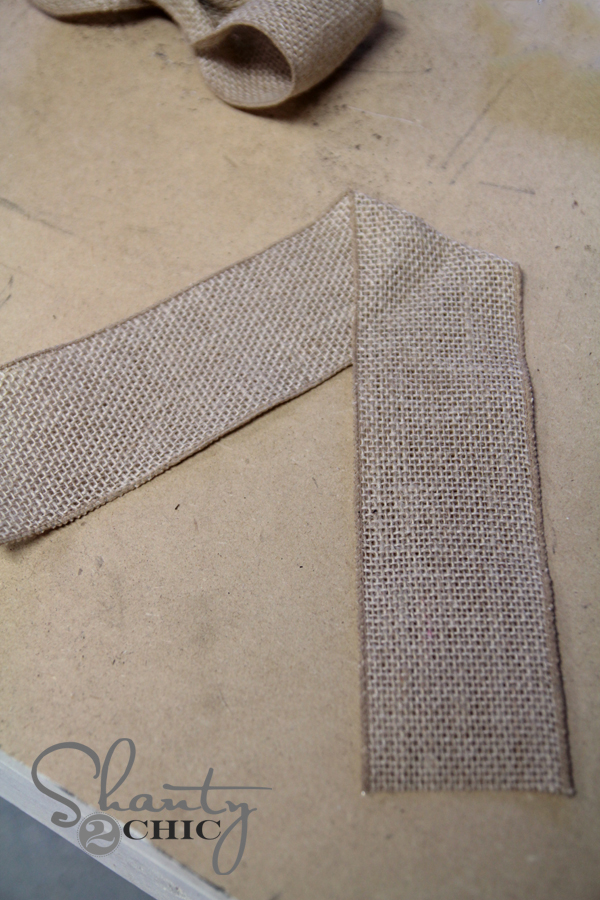
I will show you how I made the smaller bow here. Start by cutting two pieces of burlap ribbon. I found mine at Hobby Lobby. I like to use a wire edged ribbon because it helps keeps the bow’s pretty shape. I started by cutting 2 pieces each at 16″.

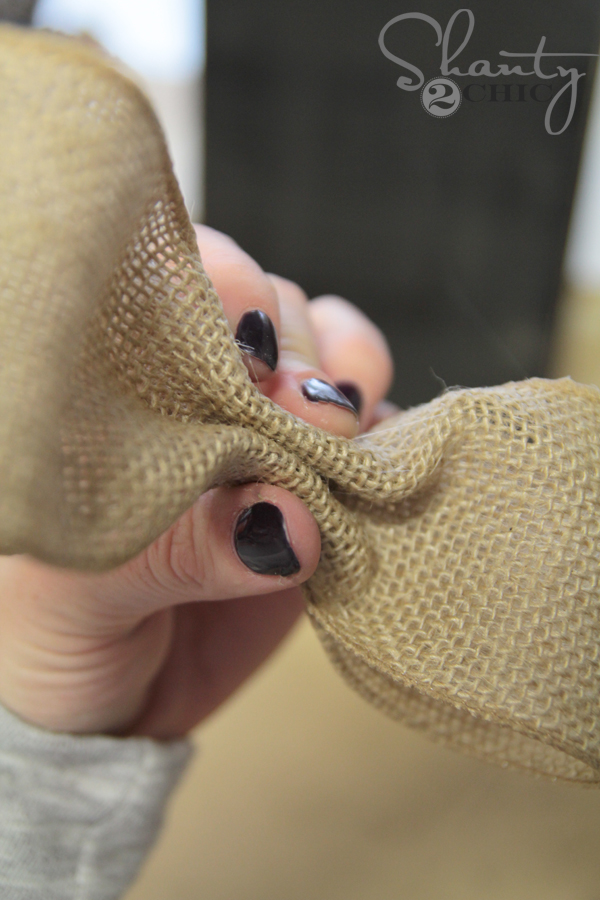
I folded one piece to the center just like this and used a few dabs of hot glue to hold it in place.
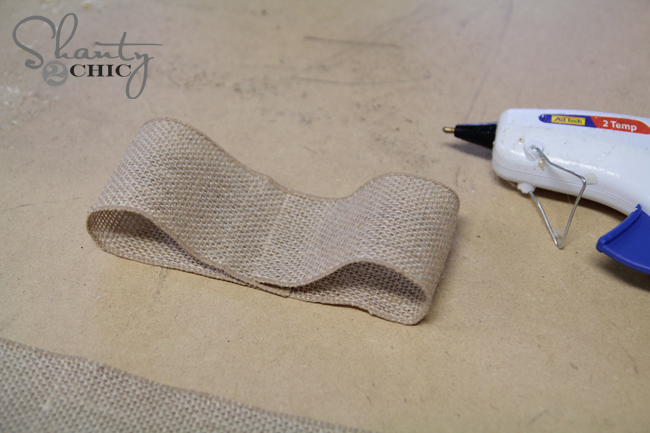
I pinched the center of this together and used a few drops of hot glue to hold it all in place. Be careful on this part! The glue gets hot and I have been known to fry a fingertip or 2.
Next, I folded the other piece like this and used a dab of glue to hold it in place.
Then, I glued the bow to the tails with a drop of hot glue.
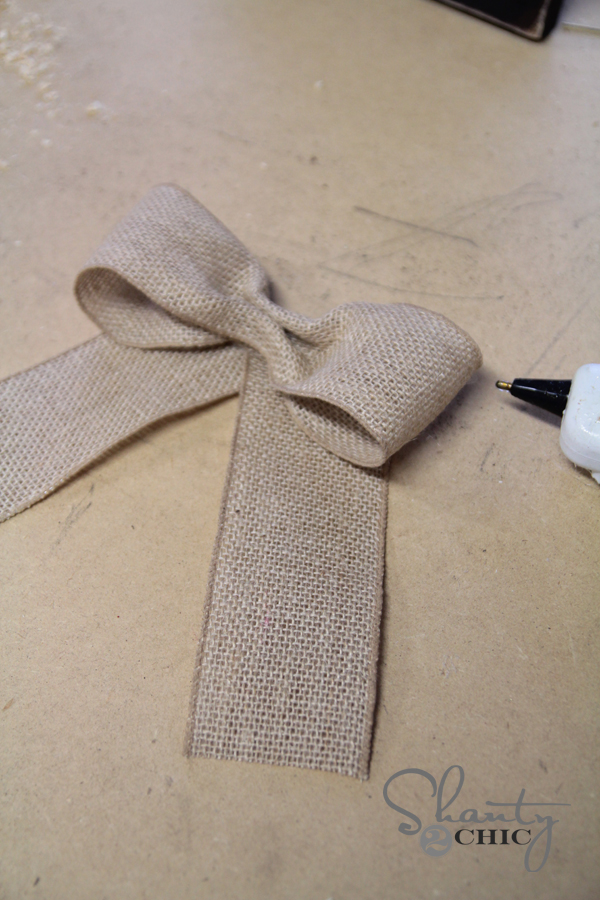
To make my center knot, I cut a small piece of ribbon and folded it two times. Next, I made a knot like this…
I glued the knot to the top of the bow…
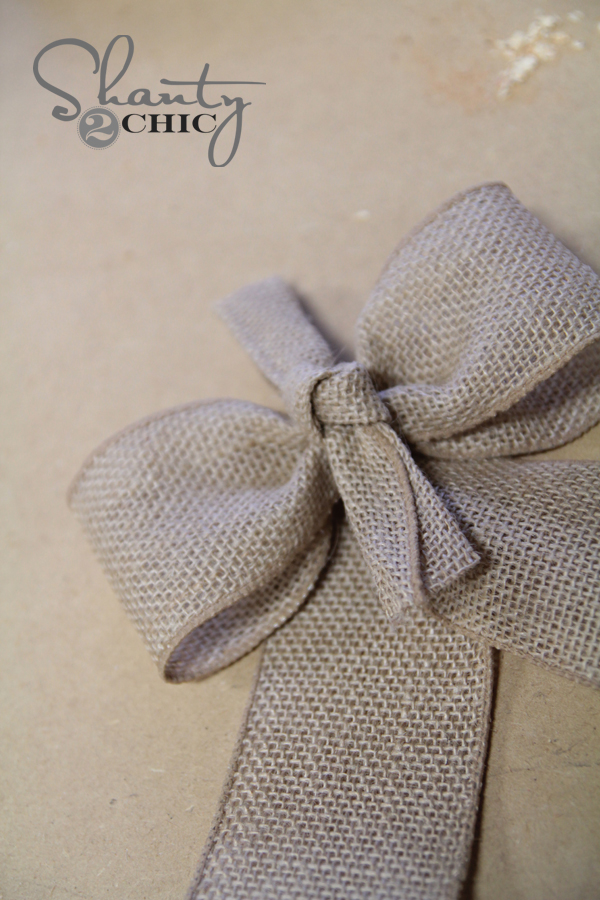
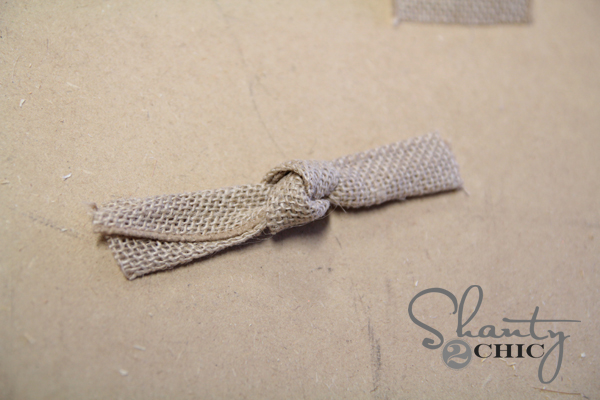
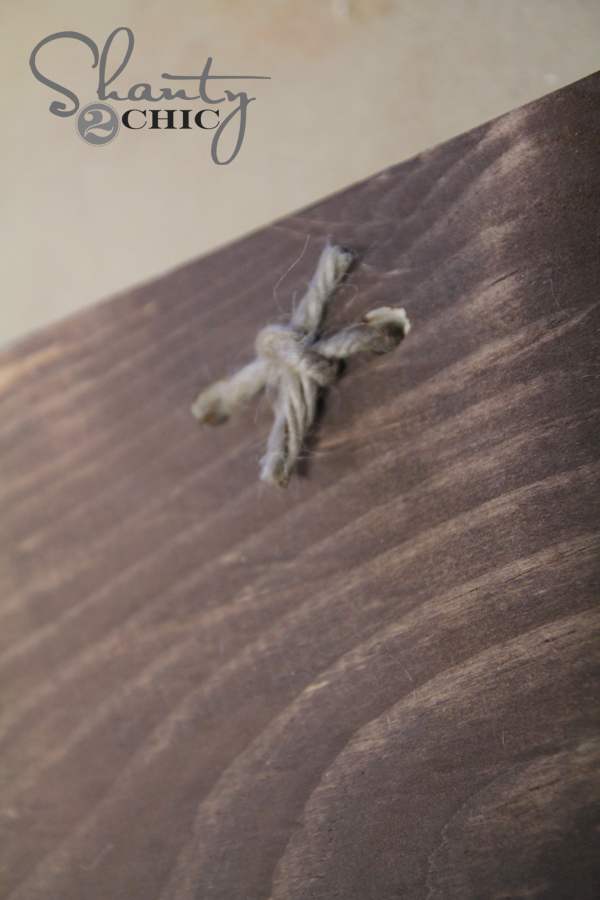
Now, I wrapped one end around to the back and glued it down. Cut the extra ribbon off here. I added a small piece of twine, and then attached the other end of the ribbon and glued it down as well.

Cut all the extras off and you are set!
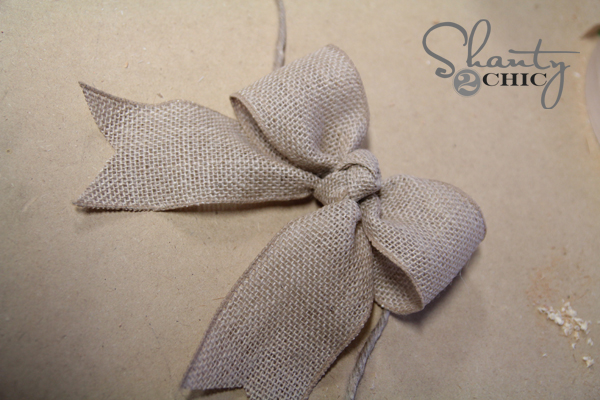
If you are making a big bow, just skip the tail piece all together.
![]()
Also, instead of making a knot for the center, I just folded it two times and wrapped it around the center of my bow. Easy peasy!
![]()
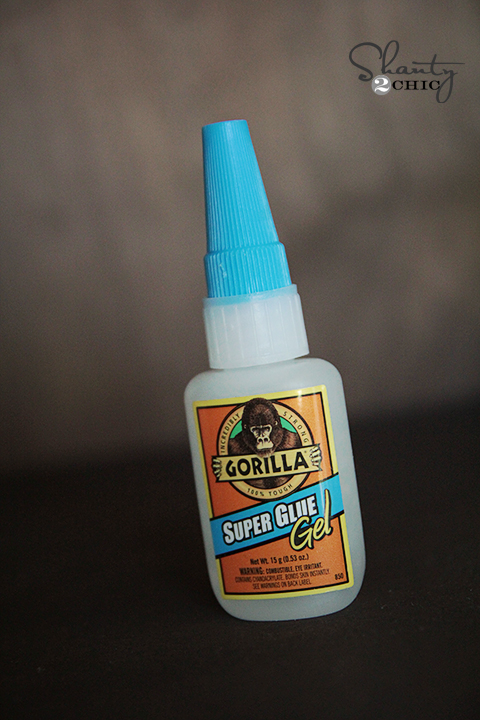
I found these super cute clips to hold my photos! You can also find them at Hobby Lobby. Really any metal clip will do, but these are extra fun! I used some Gorilla Glue Super Glue gel to hold the clip in place.
My final step was attaching it to my frame.
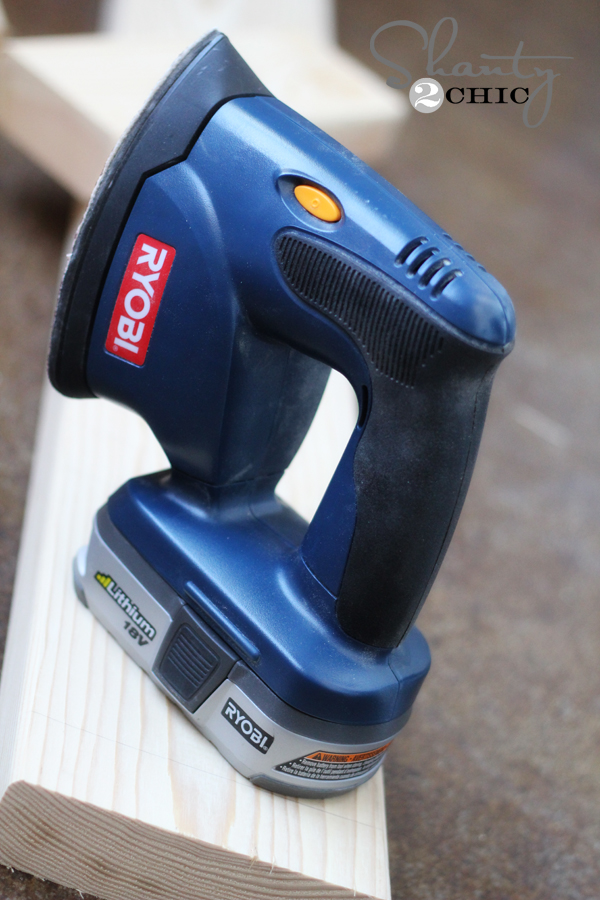
Before attaching my bow, I sanded the corners and edges of my frames down to give them a fun, distressed look. I used my Ryobi Corner Cat sander on this part. I use this bad boy on just about every project I do. LOVE it.
I ran the twine through the holes of my frame and tied a knot on the back. Done!
Here they are all finished up!

Thanks so much for stopping by guys! I hope you love them as much as I do! And did I mention… $3 a piece? Just checking. 😉
I would LOVE for you to share and PIN this with your peeps below!
And don’t forget to check out these great 12 Days of Christmas posts as well!


Here are a few projects that we have recently done to help you get your home holiday ready!

 Free Printable Merry Christmas Banner
Thanks so much for stopping by!!!
~Whitney


What type/kind of wood did you use?
where do you get your paint….Rust-Oleum wood stain in Carrington? I cant find it at my homedepot or lowes.
Hi! Do you sell these at all? I’d make them myself but I don’t have the machine.
Maybe I missed this…and I’m so embarrassed to ask…you are making the ones that fit a 5×7 the length of 8 inches, but what is the width? It looks like the bigger one for an 8×10 is a 12×12. Thank you!
Just made these as christmas gifts, they were awesome!! Used free chalkboard printouts found on pinterest! The project is a lot more time consuming than anticipated and costs way more up front but once all said and done turns out to being $3 after making about 12 if you don’t have the stuff lying around your house. Way worth it though!!! They can hold pictures, recipes, or cute sayings all year long!
Love this idea thank you!! I tweaked it by hot glueing the bow on and using the holes to string the metal clip. I liked the look so much I added two more holes underneath so instead of holding 1 vertical 5 x 7 photo, it holds 2 horizontal 4×6 photos! Giving these out for Christmas cant wait!
Thank you so much for your tutorials! I’ve done several of your projects & I’m thankful there are wonderful people like you willing to share your gift with others! I just made 6 of these in no time at all for my kids’ teacher gifts this year & love the way they turned out!
how wide is the burlap ribbon? 2 and a quarter inches or 4 inches?
I love these! However, can you please explain how you got the weathered-edge look as I do not see that in your directions?
She sanded them with her corner sander.
What was the size of the width of the ribbon you bought at Hobby Lobby?
How do you make your paint look distressed?
Looks so amazing. Will surely share this idea with our readers at http://www.paintboxsoho.com
My fam loves receiving them, and they really do make the best gifts!