
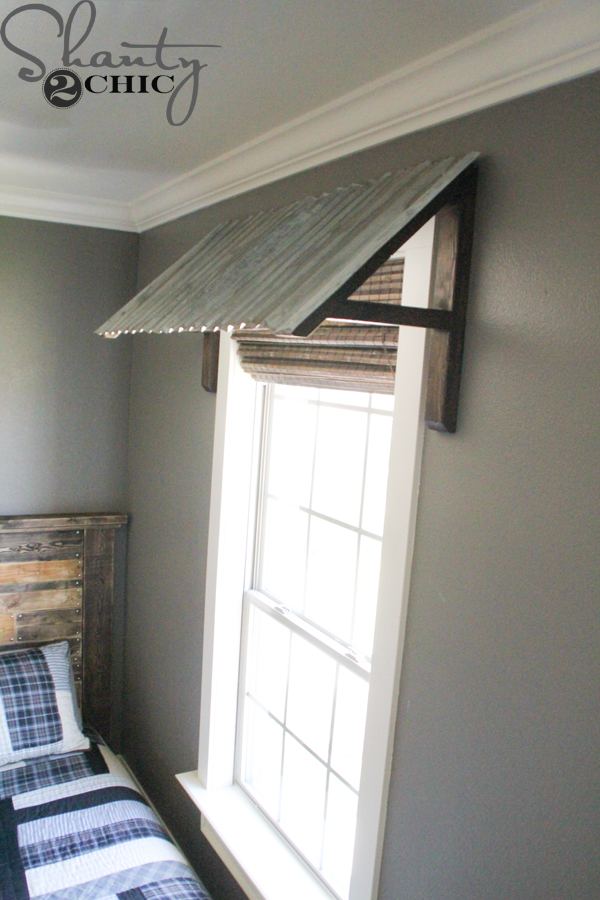
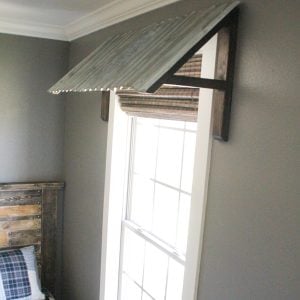
I wanted something different over the windows in my son’s room, and these DIY corrugated metal awnings ended up being exactly what the space needed. I built the wood frames from inexpensive 2×3 boards, covered them with corrugated metal, and spent about $10 per awning at the time.
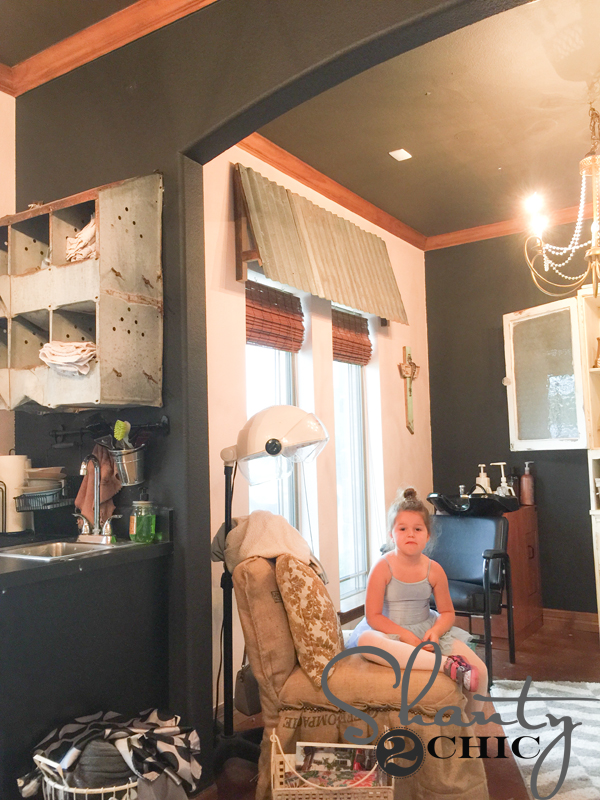
The idea actually came from my hairstylist’s salon. She had the cutest metal awnings made from scrap wood and metal, and as soon as I saw them, I knew I wanted to figure out a version for my son’s room. I snapped a picture, went home, and got busy designing!

Table of Contents
Why I Love These DIY Metal Awnings
These added so much character to his room without needing a traditional curtain or valance.
- The size can be adjusted to fit your own window.
- The basic frame is built with inexpensive 2×3 boards.
- One sheet of corrugated metal was enough for both of my awnings.
- The metal gives the room a fun industrial look.
- You can leave the metal new and shiny or choose a weathered finish made specifically for metal.
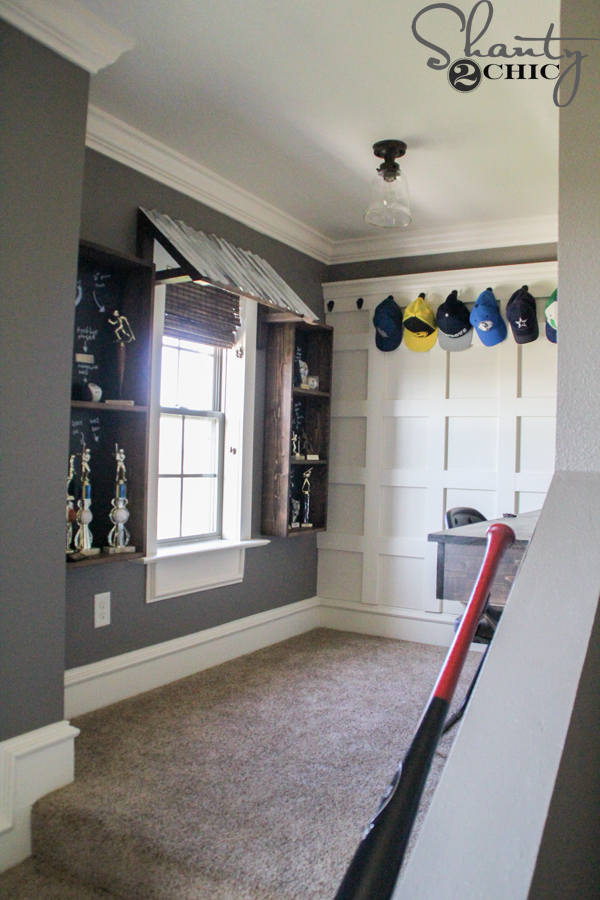
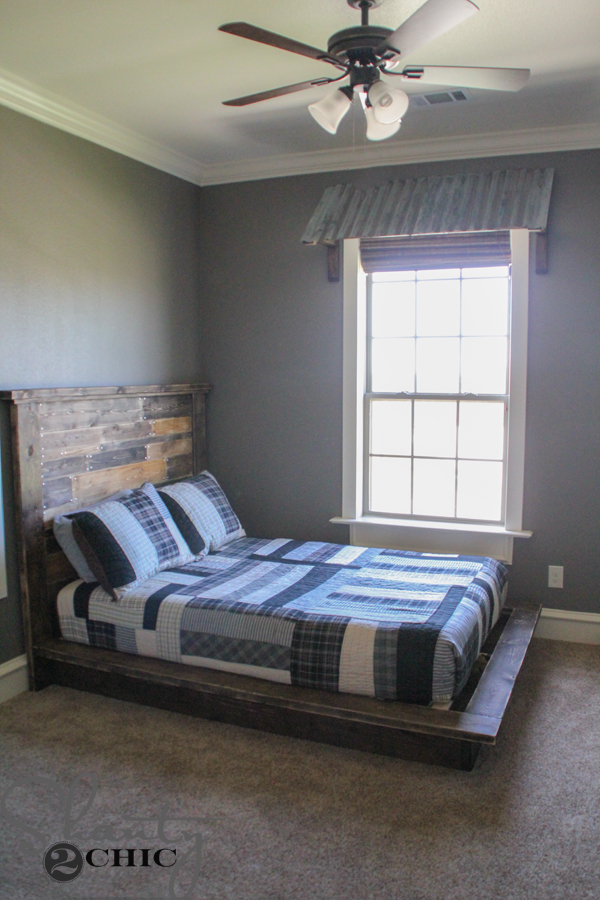
Everything else in this room was DIY too, so the awnings fit right in with his DIY planked headboard and DIY platform bed.
Key Supplies I Used
2×3 boards. These make up the entire wood frame. They give the awning enough substance without making it look too bulky over the window.
Corrugated metal roofing. I found mine at Home Depot for around $10 per sheet at the time, and one sheet made both awnings.
Pocket hole screws and wood glue. I used 1 1/2″ pocket holes with 2 1/2″ pocket hole screws to assemble several parts of the frame.
2″ wood screws. These attach the angled supports and cross braces. I used Spax screws because they didn’t require predrilling for this project.
Tin snips and gloves. Tin snips make cutting the corrugated metal pretty simple. The cut edges can be sharp, so gloves are important.
1″ multi-material construction screws. I used these to attach the metal to the wood frame.
How to Build a DIY Corrugated Metal Awning
I’ll walk you through the whole build below. The size of the main frame depends on your window, so measure yours before making the long cut.
Cut the Back and Side Pieces
I built the frame from 2×3 boards.
Start by cutting the long back piece that will eventually attach to the wall above the window. I made this board about 6″ wider than the window.
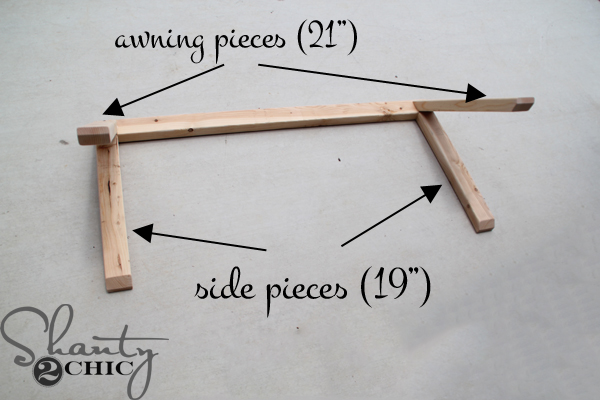
Cut two side pieces at 19″ long.
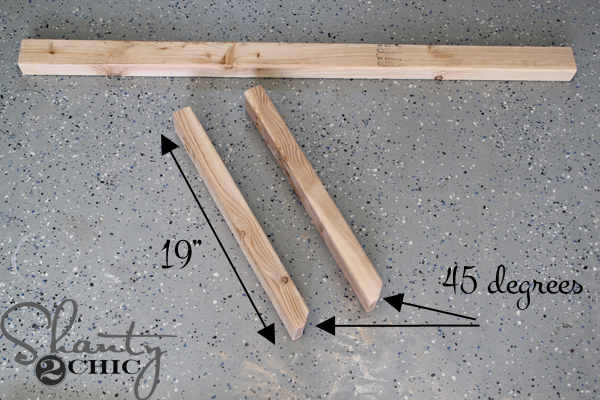
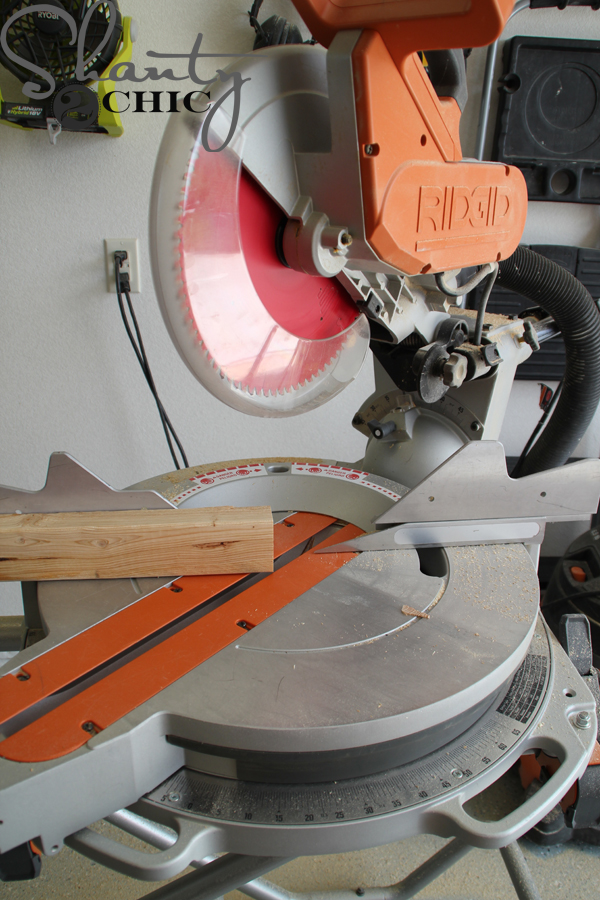
Make a 45° decorative cut on one end of each side piece. You are only cutting away half of the end rather than making the entire end a standard 45° miter.
I made these cuts with my miter saw. If you don’t have one, a hand saw and miter box can work for these cuts too.
Drill the Pocket Holes
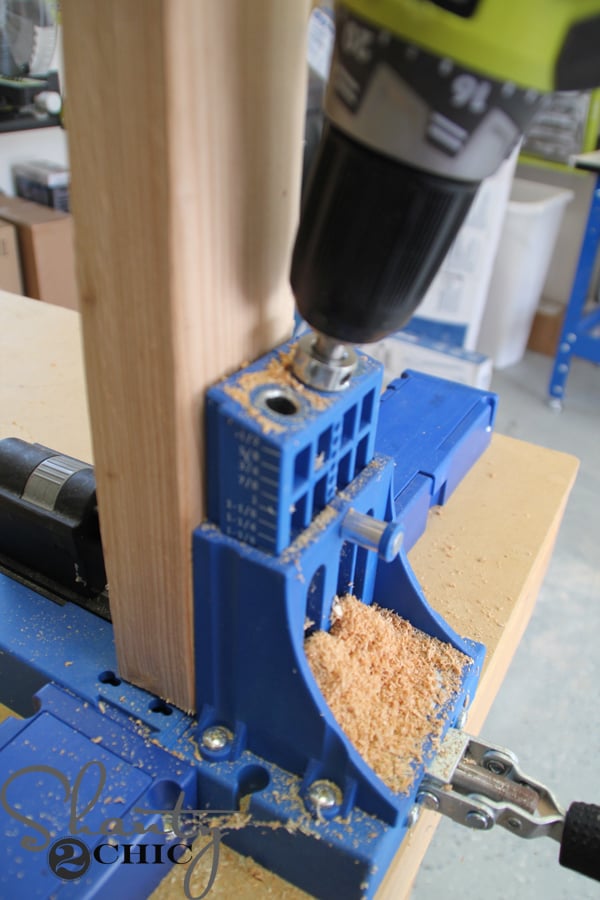
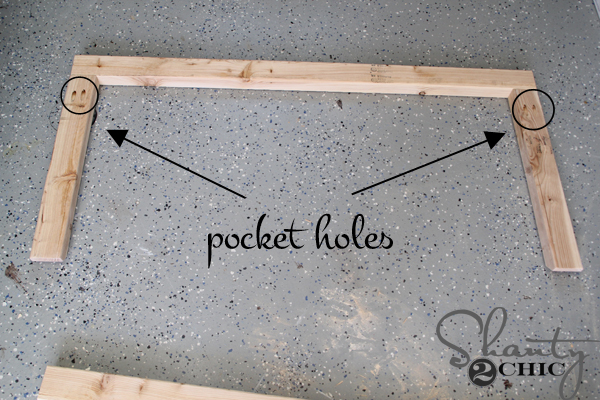
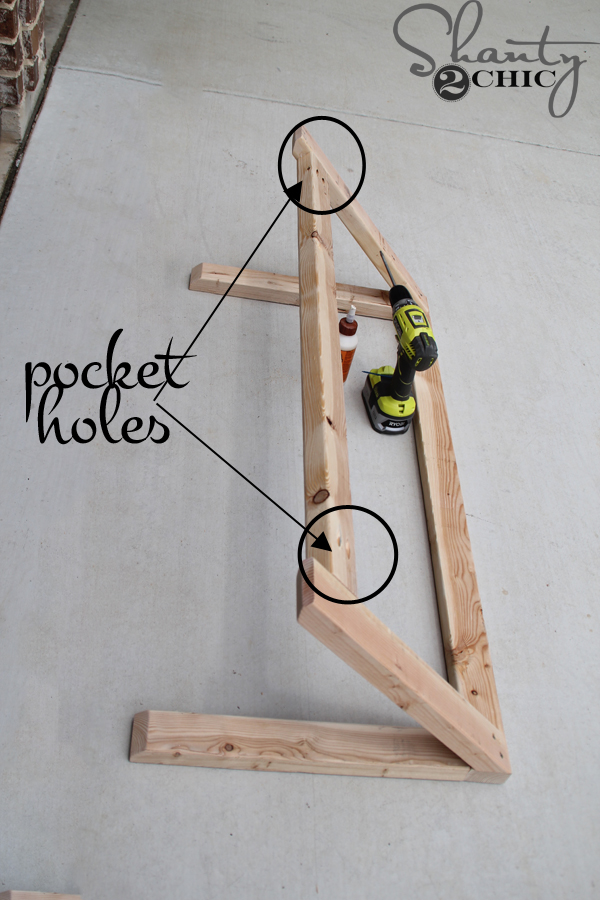
Drill 1 1/2″ pocket holes into the square end of each 19″ side piece.
These go on the end opposite the decorative angle.
Make sure the pocket holes are drilled on the face of the board where they will be hidden once the awning is assembled.
Attach the Side Pieces
Attach one side piece to each end of the long back board using wood glue and 2 1/2″ pocket hole screws.
This gives you the back and two sides of the awning frame.
Cut the Angled Awning Supports
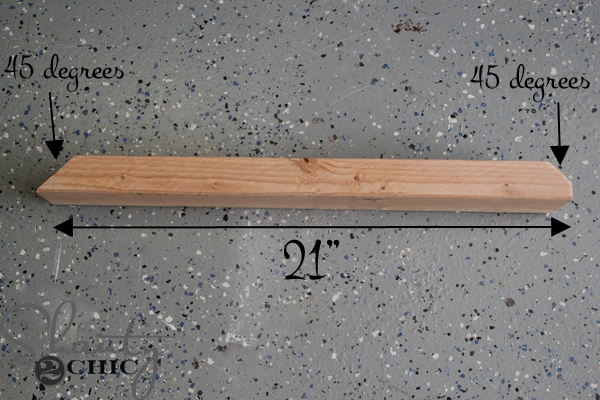
Next, cut two more 2×3 pieces at 21″ long point to long point.
These pieces have a 45° angle on one end and a 45° decorative cut on the other end.
Pay attention to the direction of the cuts here. They are not parallel.
These are the supports that extend out from the wall and create the slope for the corrugated metal.
Attach the Angled Supports
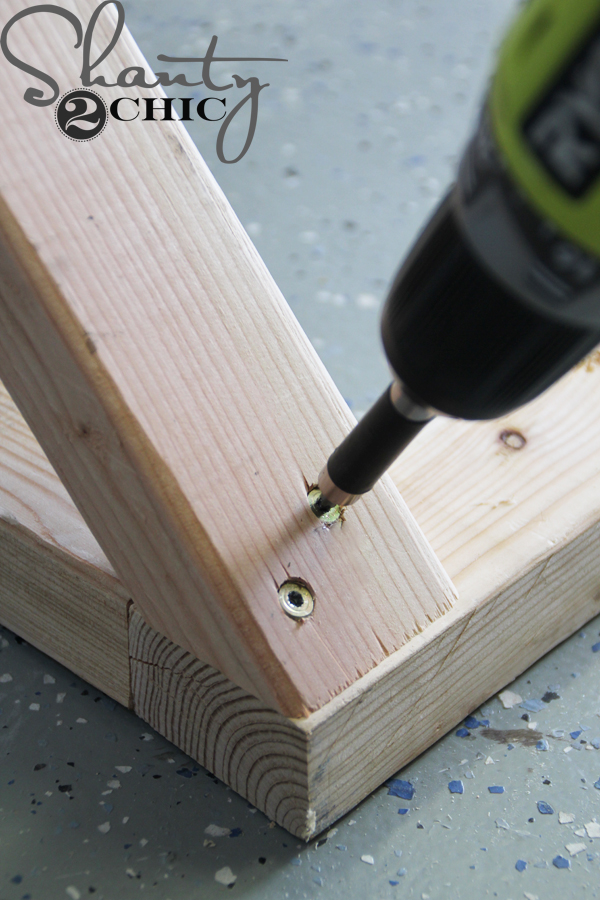
Attach the angled supports to the long top piece using wood glue and 2″ wood screws.
I used Spax screws here so I didn’t need to predrill.
At this point, you’ll start to see the basic awning shape coming together.
Add the Front Support
Measure the distance between the two front angled pieces before cutting this board. I like measuring this opening rather than relying on a predetermined measurement so I know the piece fits my actual frame.
Cut another 2×3 to fit.
Drill 1 1/2″ pocket holes into each end and attach it with wood glue and 2 1/2″ pocket hole screws.
Position this board about 2″ up from the front ends.
Keep the pocket holes facing upward. The corrugated metal will cover them once the awning is finished.
Add the Cross Braces
Cut two 2×3 pieces at 11″ long, with a 45° angle on one end.
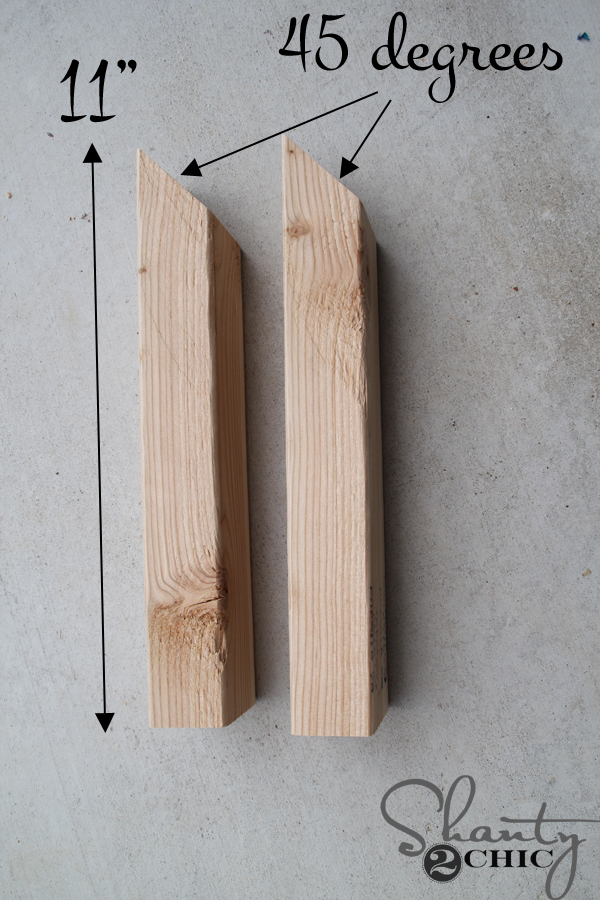
Attach one brace to each side of the frame using wood glue and 2″ wood screws.
I positioned mine 7″ up from the back of the 19″ side pieces.
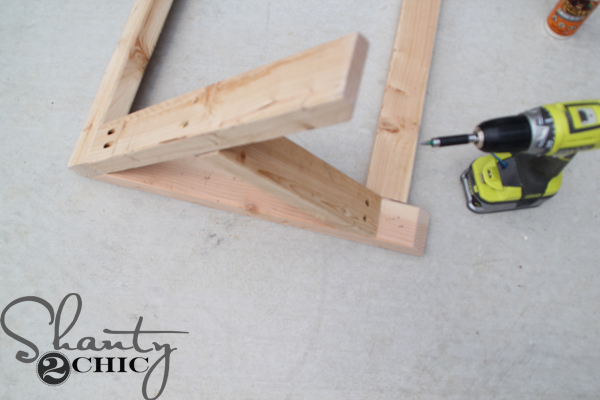
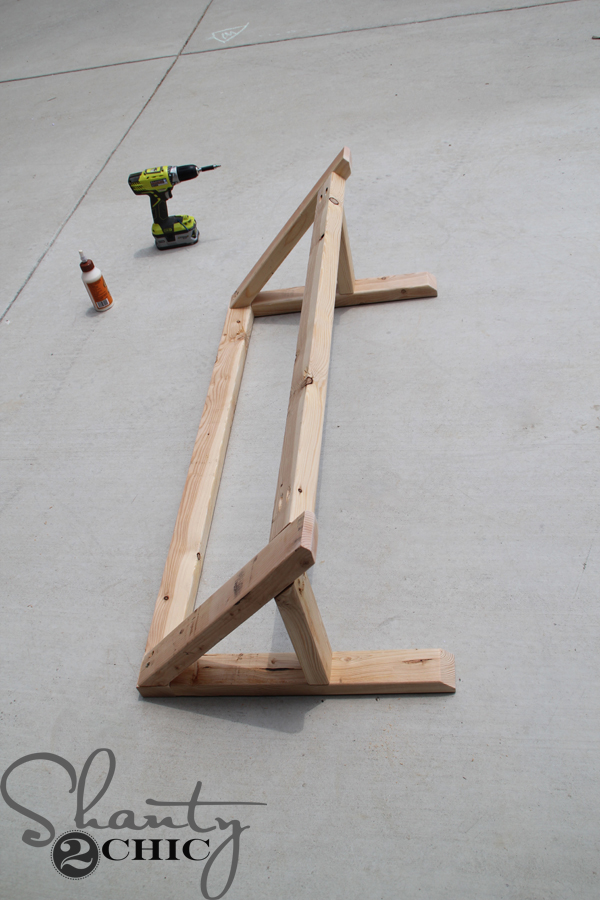
They should run level with the front support you installed in the previous step.
Now the wood frame is assembled and ready for the metal.
Cut the Corrugated Metal
I used a sheet of corrugated metal from Home Depot and was able to get both awnings out of one sheet.
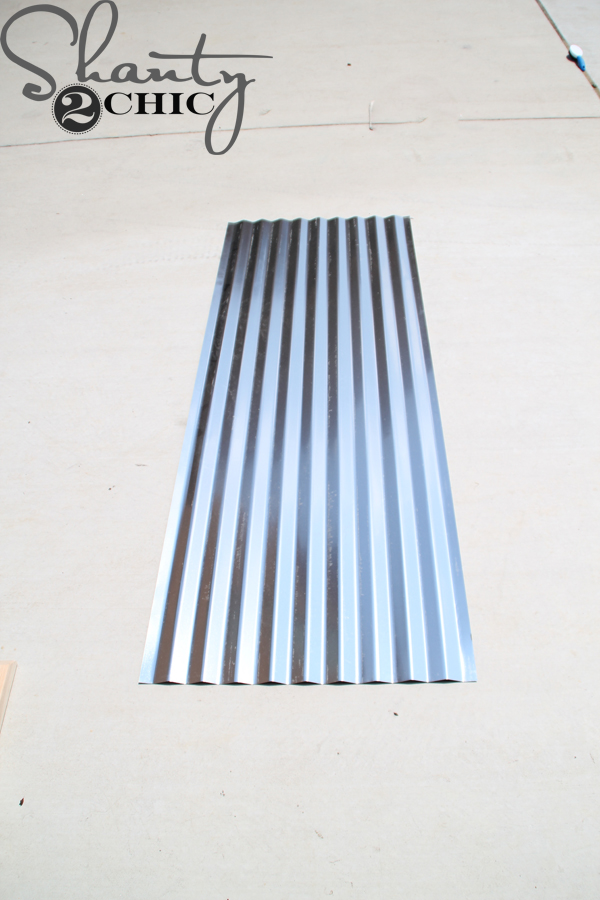
You only need a pair of tin snips to cut it, but definitely wear gloves because the metal edges can be sharp.
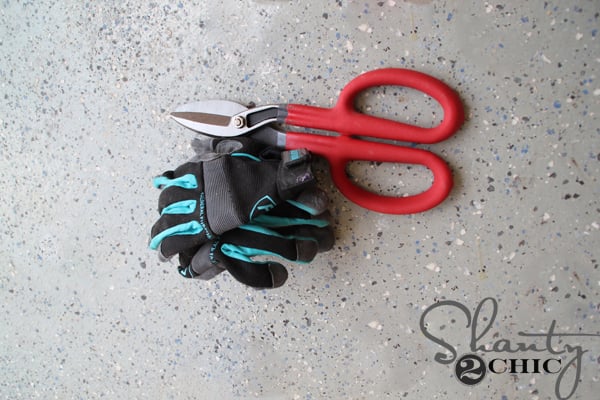
Mark your cut line first, then work slowly across the corrugations one section at a time.
I cut my metal 20″ wide.
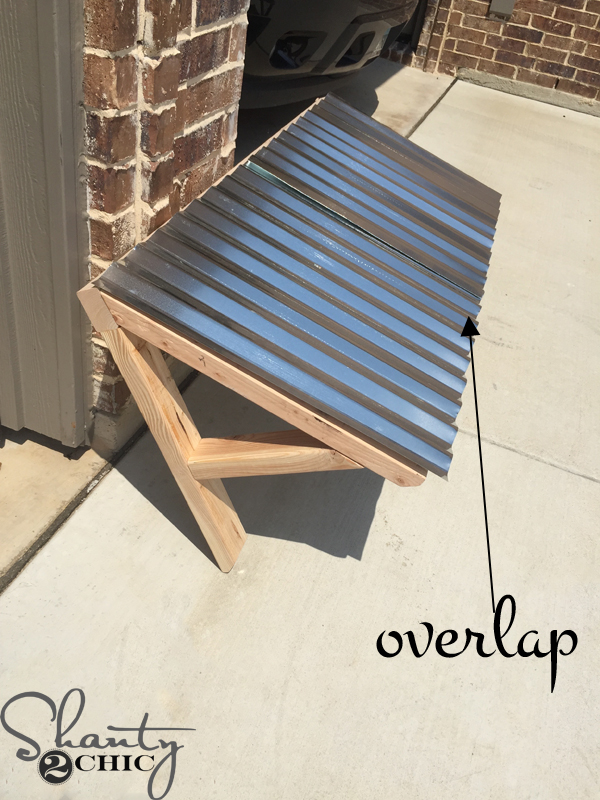
If your window is wider than your sheet of metal, that’s okay. You can overlap two pieces when attaching them to the frame.
Age the Corrugated Metal
The corrugated metal was really shiny when I bought it, but I wanted mine to look like it had been sitting out in the elements for years!
When I originally made these awnings, I researched ways to age metal and found a technique using acidic toilet bowl cleaner. I used Zep brand from Home Depot.
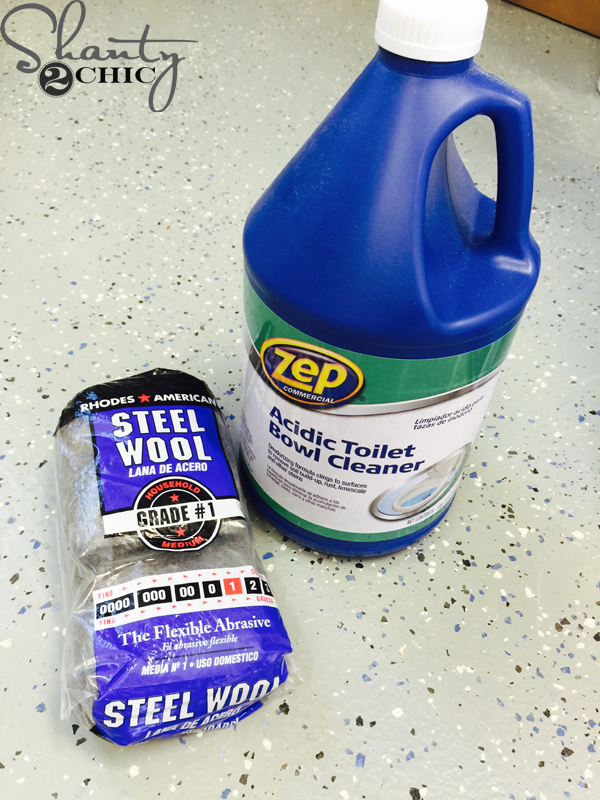
I started by sanding the metal with 80-grit sandpaper to rough up the shiny surface.
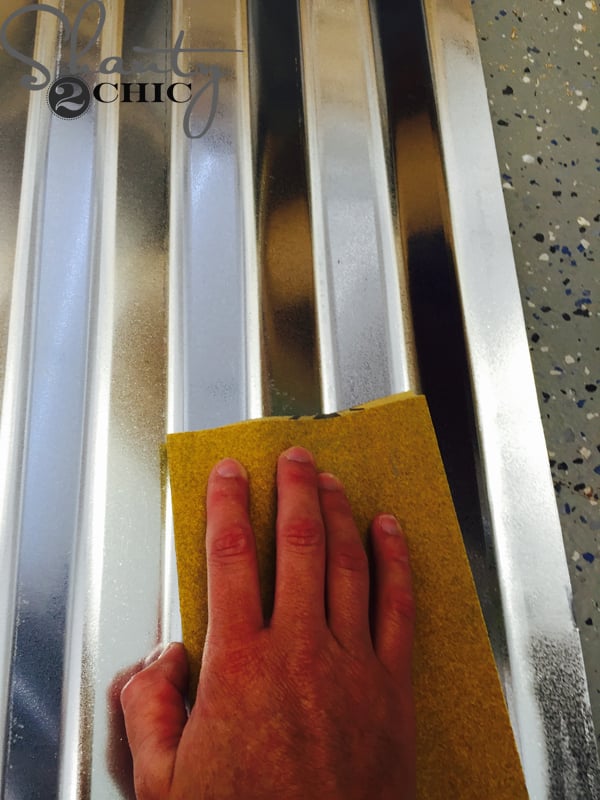
Then, pour the toilet bowl cleaner over the metal. Be generous with this part and make sure not to do this in the grass if you don’t want your grass to die 😉 Rub the cleaner all over the metal with steel wool and gloves! Gloves are a MUST!
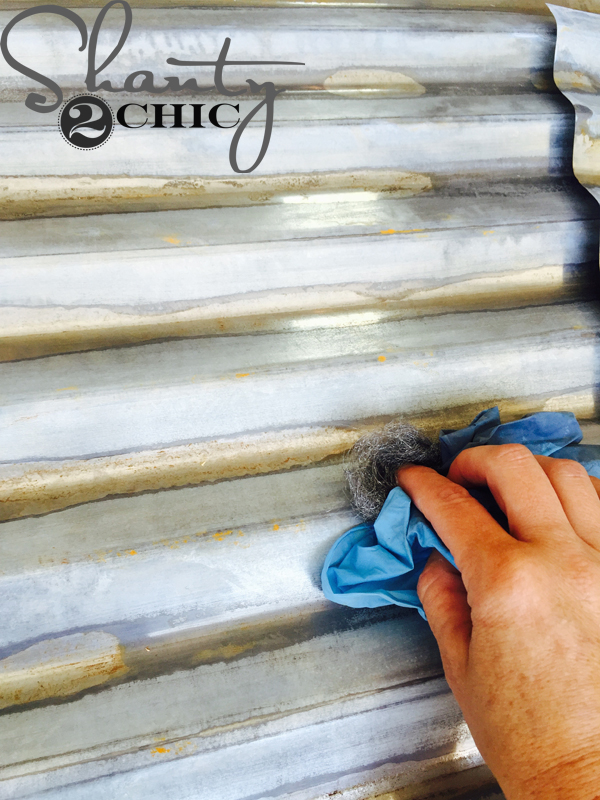
The result was exactly the rustic, aged look I wanted for my son’s room!
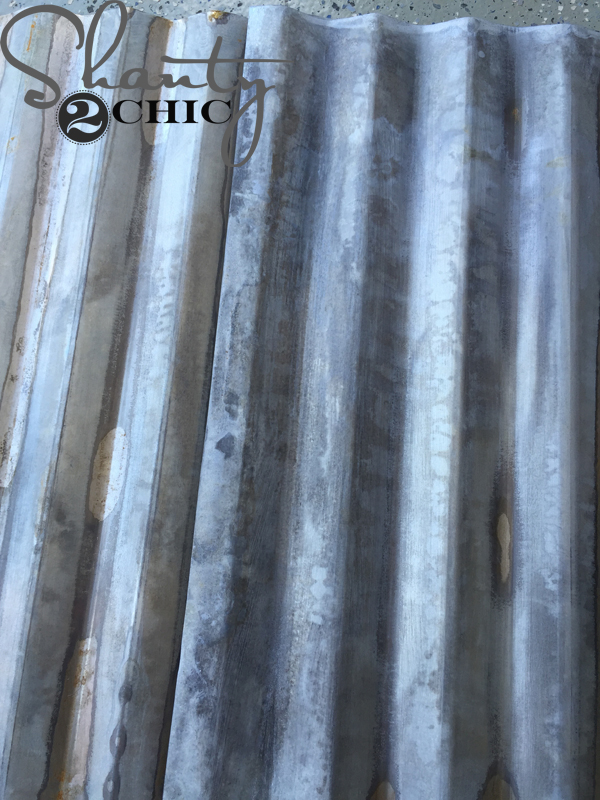
Important Safety Note About The Metal Finish
This is the method I used when I originally built these awnings, but acidic toilet bowl cleaners are not designed for treating galvanized metal. Some contain hydrochloric acid, which can cause serious skin and eye burns and react with the zinc coating, releasing flammable hydrogen gas.
Gloves, eye protection, and working outdoors do not eliminate these risks. I recommend using a metal-aging product specifically approved for your material and following its safety instructions instead. I’m keeping these original photos to show how I achieved the finish on my awnings.
Attach the Metal to the Frame
Once the metal is cut to fit and aged, place it over the wood frame.
I attached mine with 1″ multi-material construction screws.
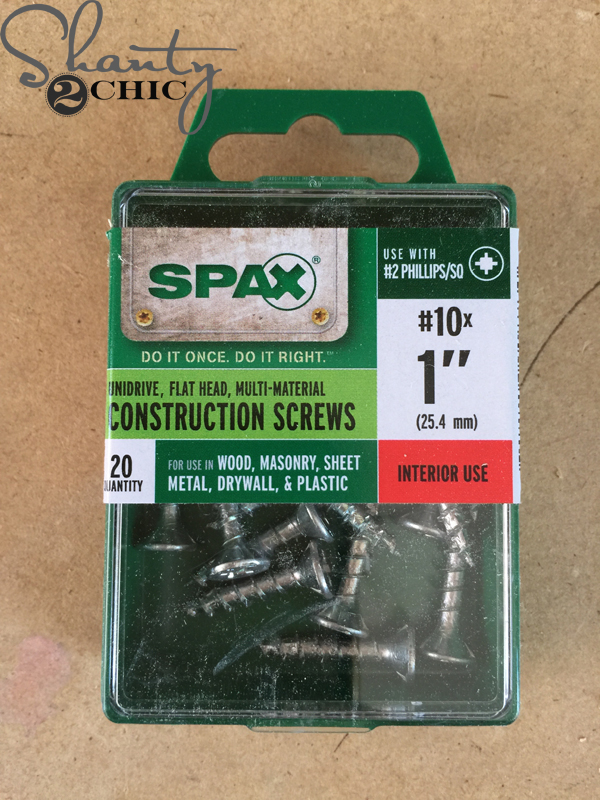
Start at the corners and drive the screws through the metal and into the wood frame.

Continue adding screws every few corrugations along the top, bottom, and sides.
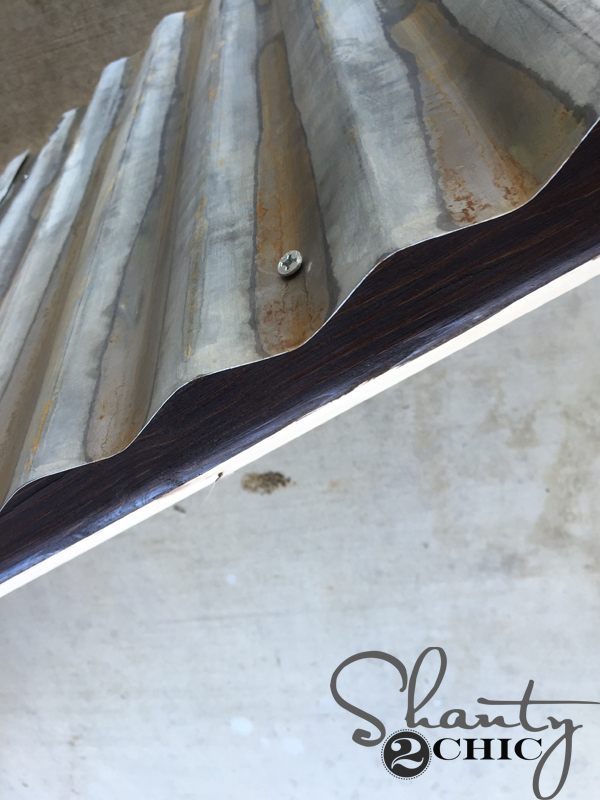
If you are overlapping two pieces of metal, add screws through the overlap as well so everything stays securely in place.
And that’s the awning built!
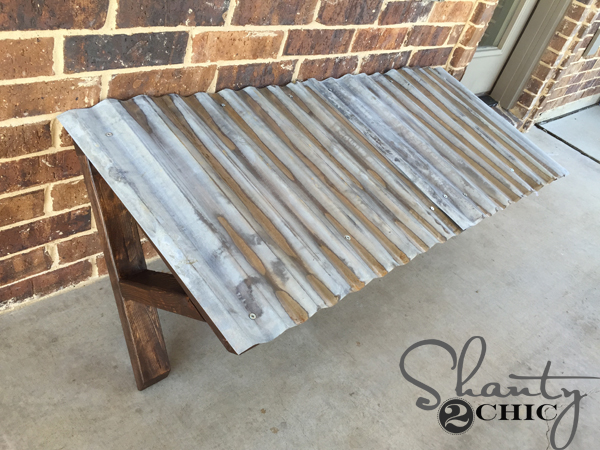
Installing the Awning Over the Window
I found it easier to temporarily remove the corrugated metal before installing the frame.
Technically, you could wait and add the metal after the wood frame is mounted, but lining everything up while working over your head can be frustrating. Attaching the metal first creates the screw holes, so it’s much easier to remove it, hang the frame, and put the metal right back in the same position.
The awning needs to be secured into framing, not just drywall.
There should typically be framing above and along the sides of the window, but verify the framing location in your own wall rather than assuming where the studs or header are located.
Secure the long back piece into structural framing with appropriate wood screws. If you’re also fastening through the side pieces, make sure those screws are going into framing as well.
Because wall construction can vary, use fasteners appropriate for your wall and installation.
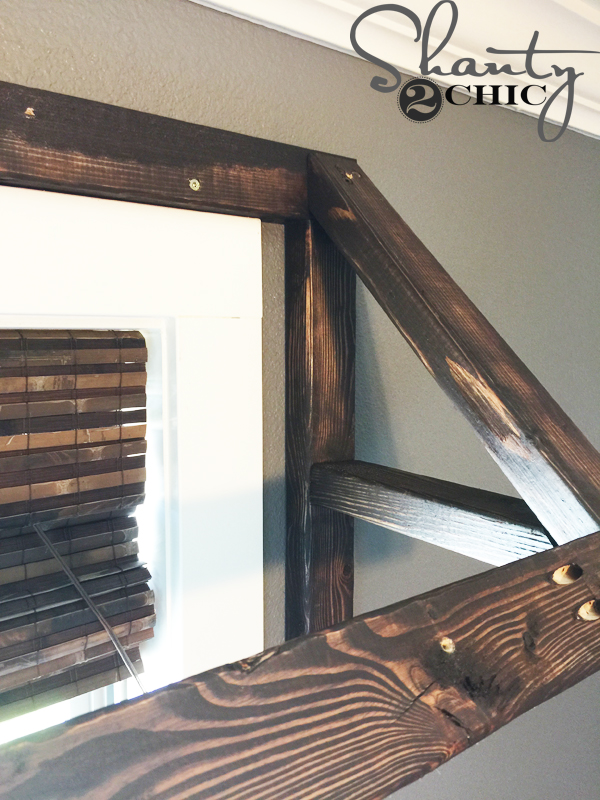
Once the wood frame is securely installed, reattach the corrugated metal using the holes you already made.
And that’s it!
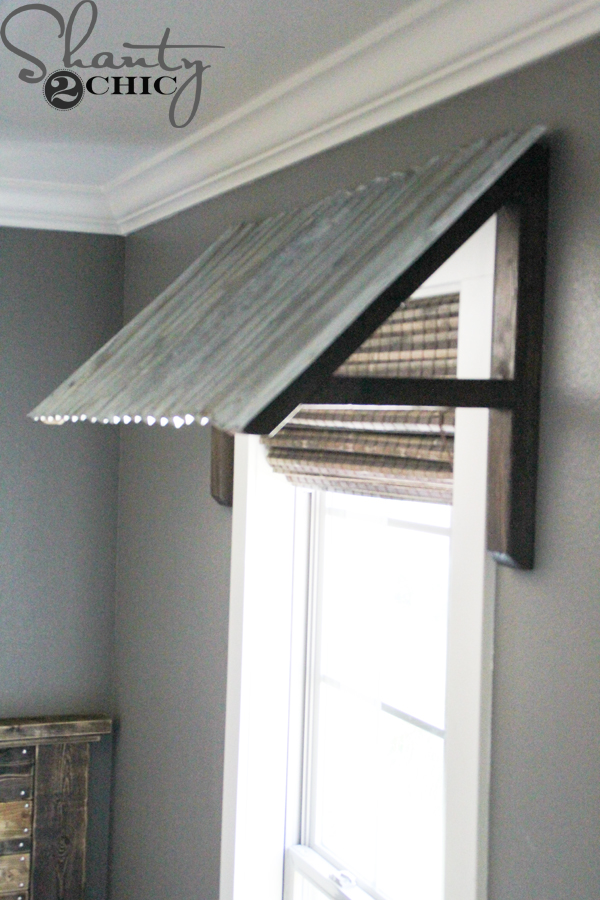
My son has two windows in his room and I LOVE the awnings over both of them! It’s such a great look for his little study area!

Expert Tips
A couple of details will make this project much easier.
- Measure your actual window first. The long back board should be about 6″ wider than the window, so this isn’t a project where every reader will use the same dimensions.
- Cut the front board to fit. Small differences during assembly can change that opening slightly.
- Watch the direction of your 45° cuts. The two cuts on the 21″ supports aren’t parallel.
- Wear gloves when handling the metal. Freshly cut corrugated metal edges can be extremely sharp.
- Mark your metal before removing it for installation. That makes it much easier to put it back exactly where it was.
Ways to Customize the Awning
You can change the look quite a bit without changing the basic construction.
Paint or stain the wood frame to match your room, leave the corrugated metal bright for a cleaner industrial look, or use a manufacturer-approved metal finish if you want something darker or more weathered.
You can also adjust the overall width to fit a different window. Just remember that changing the width means the long back board, front support, and metal will all need to change together.
Frequently Asked Questions
I made the long back board about 6″ wider than my window, which gives you roughly 3″ of overhang on each side if the awning is centered.
Yes. I used tin snips. Mark the cut first and work slowly across each corrugation.
I drilled 1 1/2″ pocket holes in the 2×3 boards and used 2 1/2″ pocket hole screws.
Absolutely. Aging the metal is completely optional.
I wouldn’t. This project sticks out from the wall and needs a secure attachment. Locate structural framing and use fasteners appropriate for your wall construction.
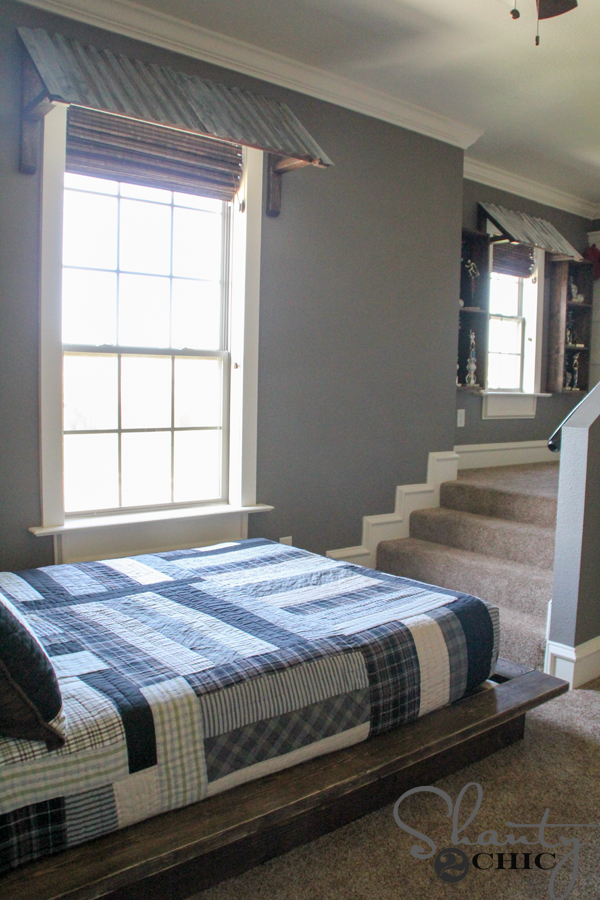
Now I’m tempted to put metal awning all over my house…. I’m sure that will pass but all to say – I am LOVING them!
More DIY Projects From This Room
My son ended up with such a fun room, and almost everything in it was something we built. Along with the planked headboard and platform bed, I also built a board and batten hat rack and these DIY trophy shelves.
The awnings ended up being one of my favorite details in the whole room. They gave those plain windows so much character, and I love that I was able to make them myself for very little money.
Happy Building!
If you build one, we’d love to see it! Tag @shanty2chic on Instagram and use #shanty2chic so we can check it out.
🛠️ Printable Tutorial
DIY Corrugated Metal Window Awning
Tools
- Miter saw or hand saw with miter box
- – Drill/driver
- Pocket-hole jig
- Measuring tape
- Pencil
- Tin snips
- 80-grit sandpaper (optional)
- Work gloves
- Safety glasses
Supplies
- 2 x3 lumber amount depends on window width
- Corrugated metal roofing sheet
- 2 1/2 ” pocket hole screws
- 2 ” wood screws
- 1 ” multi-material construction screws
- Wood glue
- Mounting screws suitable for wall framing
- Metal-compatible aging finish optional
Instructions
- Cut the Frame: Cut one 2×3 approximately 6″ wider than the window and two 19″ side pieces with decorative 45° cuts.
- Assemble the Sides: Drill 1 1/2″ pocket holes into the side pieces and attach them to the back board with wood glue and 2 1/2″ pocket hole screws.
- Add Angled Supports: Cut two 21″ supports with nonparallel 45° cuts. Attach with glue and 2″ wood screws.
- Install Front Support: Measure and cut a 2×3 to fit between the angled supports. Attach 2″ up with 2 1/2″ pocket hole screws and glue, pocket holes facing up.
- Add Cross Braces: Cut two 11″ braces with a 45° cut on one end. Attach them 7″ up from the back side pieces with glue and 2″ wood screws.
- Cut the Metal: Measure and cut the corrugated metal to fit using tin snips. The original project used a 20″ width.
- Finish the Metal (Optional): Leave the metal shiny or apply a finish approved for your specific metal, following the manufacturer’s instructions.
- Attach the Metal: Secure the metal with 1″ construction screws along the edges and at any overlaps.
- Install the Awning: Remove the metal, mount the wood frame securely into verified wall framing, and reattach the metal.
Notes
- Measure your window before cutting the frame. The long back board should extend approximately 3″ beyond each side.
- The 21″ angled supports have nonparallel 45° cuts.
- Wear gloves when cutting and handling corrugated metal.
- The original project used acidic toilet bowl cleaner to age galvanized metal. This can cause serious chemical burns and release flammable hydrogen gas. Use a metal-compatible finishing product instead.
- Designed for interior decorative use, not outdoor structural installation.