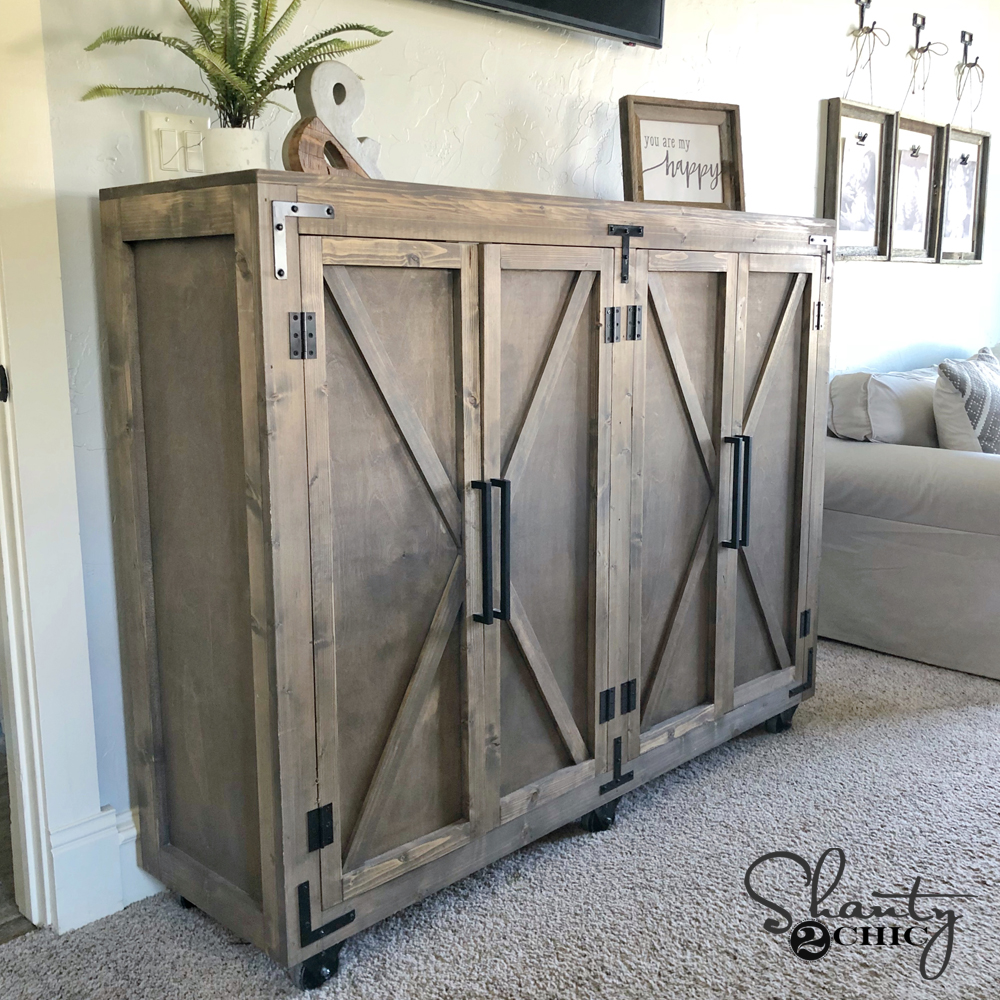
Hey friends! Today I’m sharing a DIY Farmhouse X Storage Cabinet I designed and built to go in my bedroom. I built this before my baby made his entrance into the world to house my printers and also some of his stuff I use that I don’t keep in his room. I designed it to be a bit on the taller side. My hubby insisted on hanging our TV higher than I wanted in our room, and I felt a taller piece helped balance the look of it on the wall… A girl can dream, right? 😉 Here is how it turned out!
DIY Farmhouse X Storage Cabinet – Free Plans
Before we get started, be sure to download and print the FREE PLANS by clicking HERE!
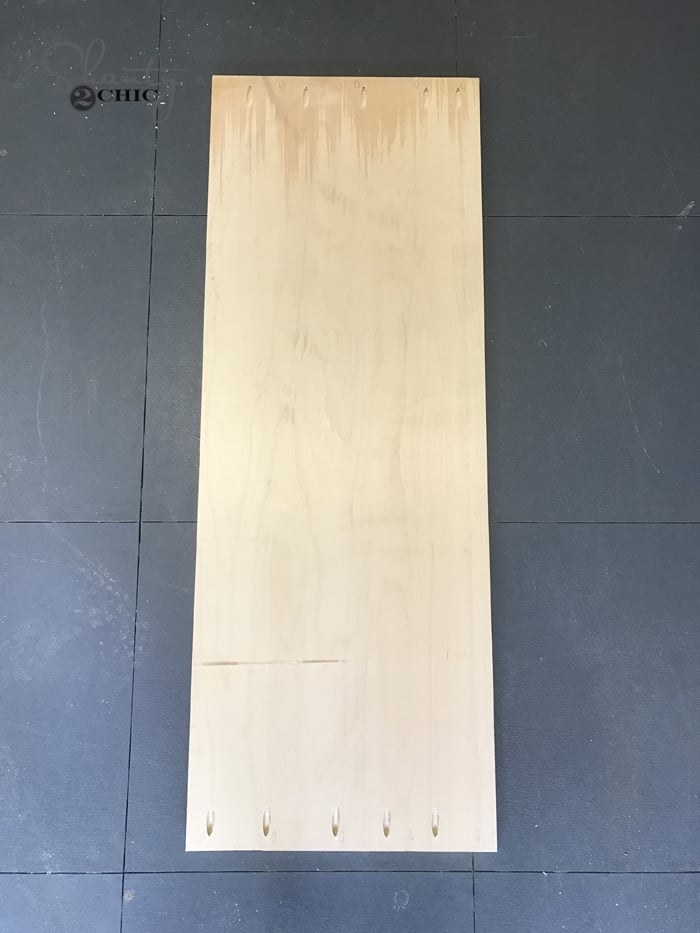
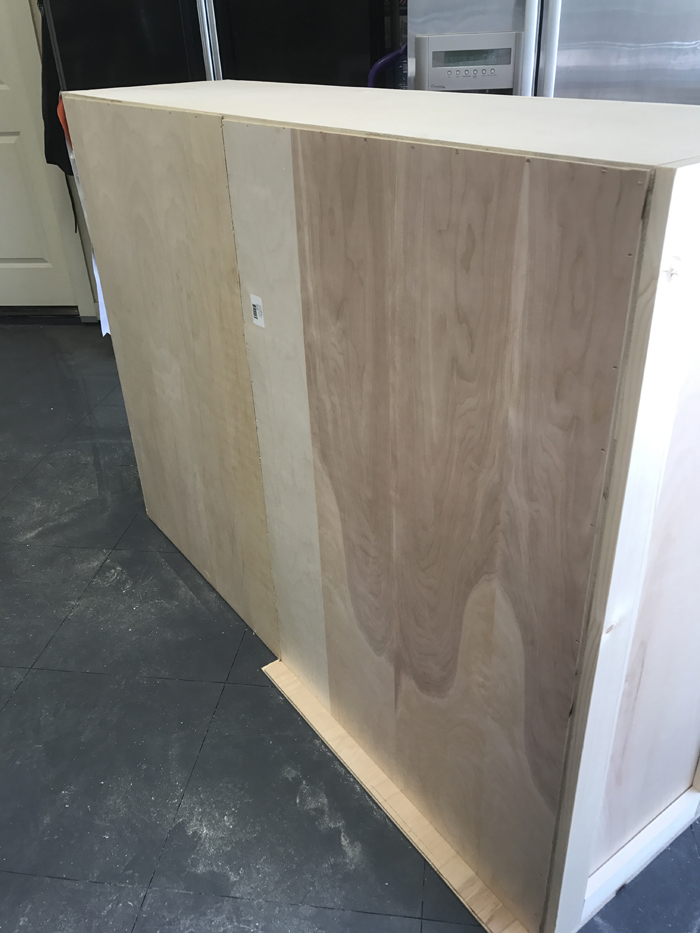
My first step was getting the hardwood plywood ripped at Home Depot. We always have them rip it into the longer boards, and we make the smaller cross cuts at home with the miter saw. I used PureBond Plywood for this project.
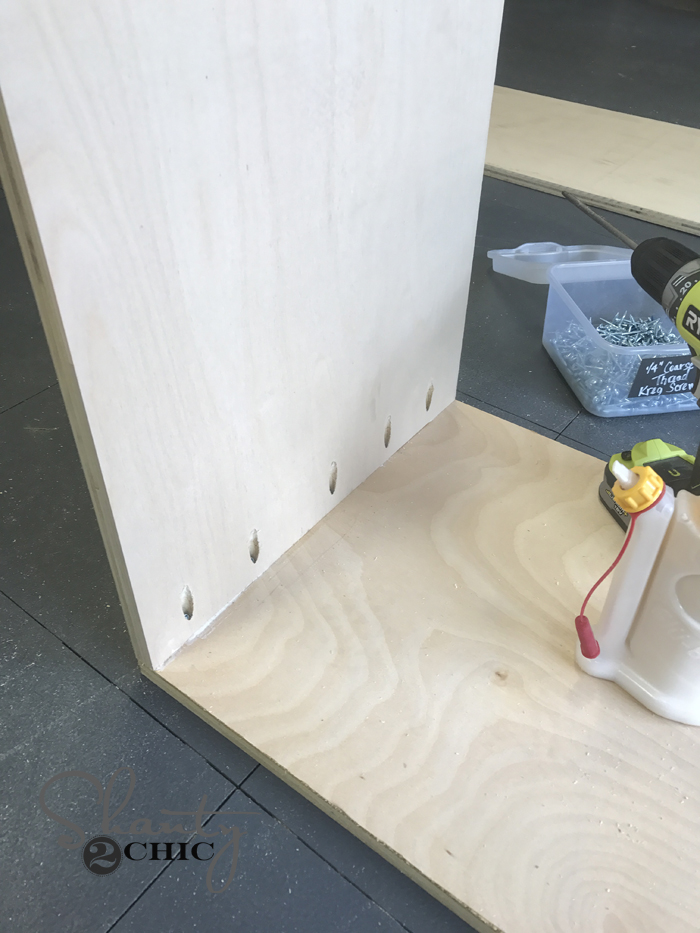
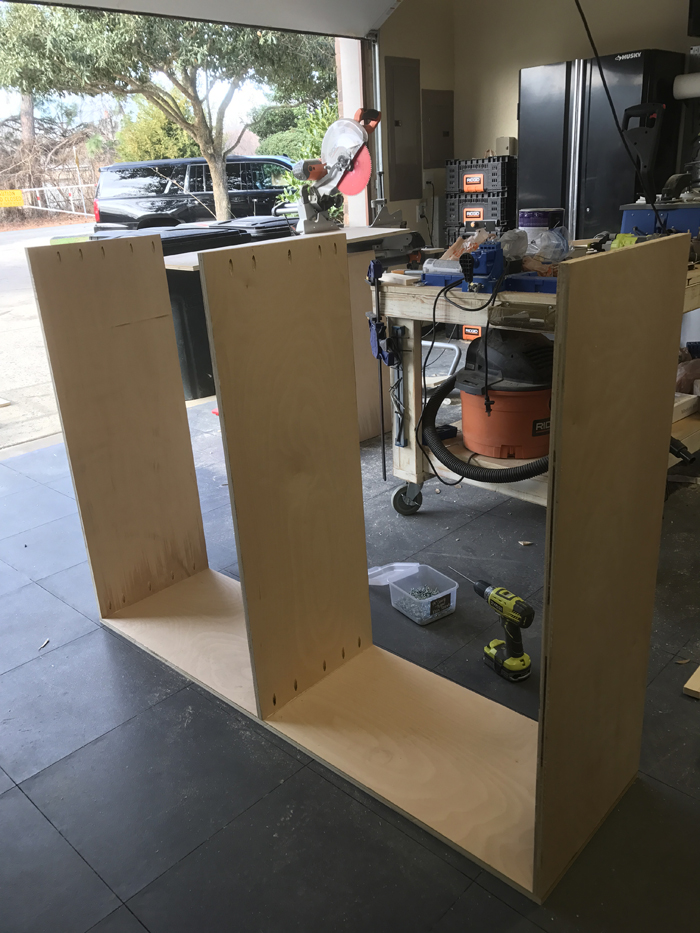
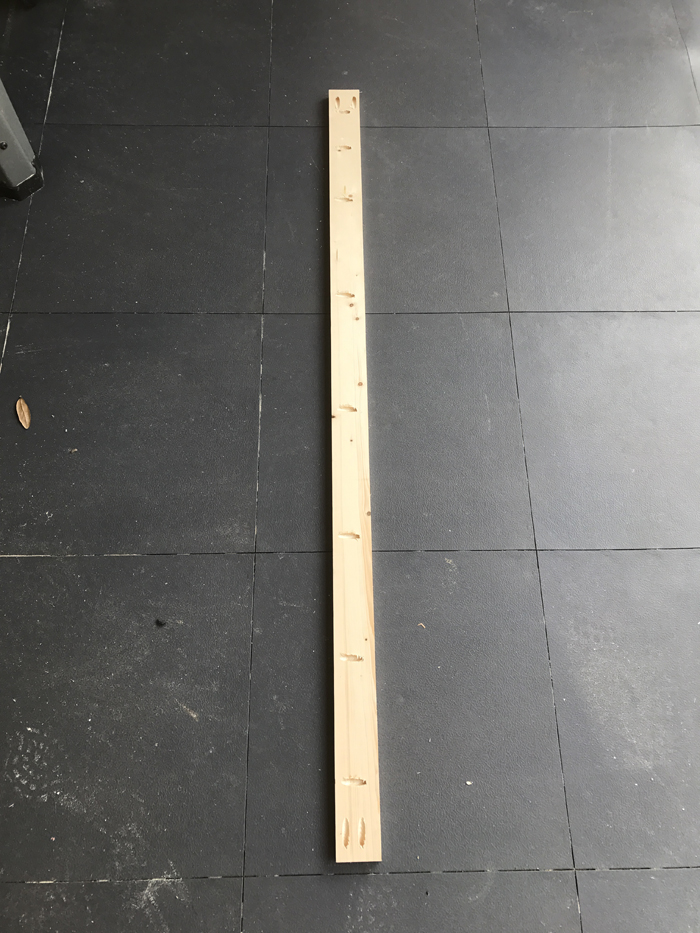
First, add 3/4” pocket holes to each end of all three vertical cabinet boards. Attach these boards to the base piece using 1.25” pocket hole screws and wood glue. Make sure the outside 2 boards are flush with the ends of the bottom board.
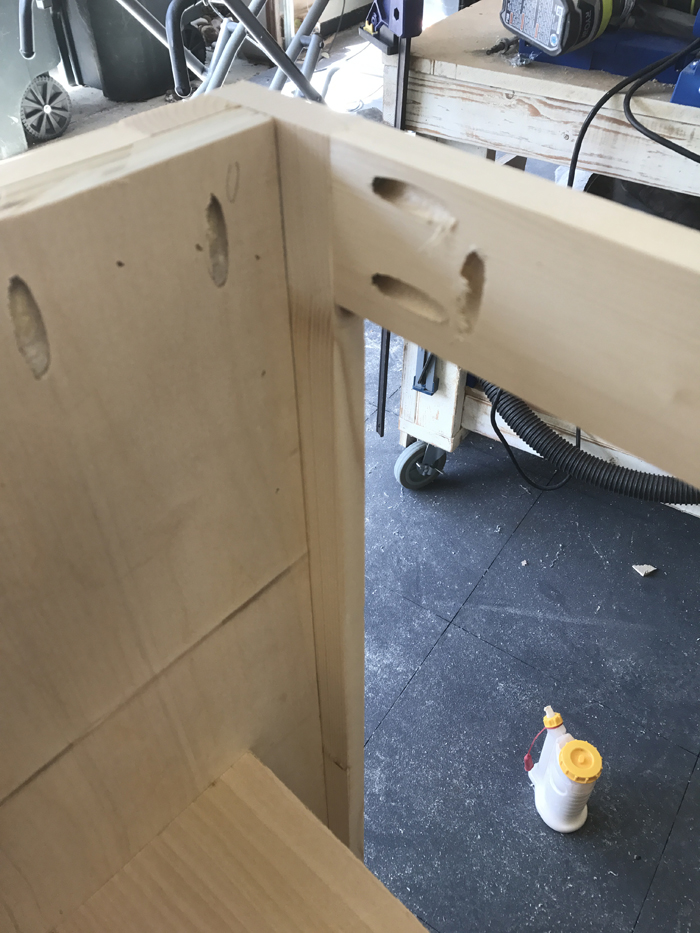
Next, attach the top project panel. Attach it with wood glue and 1.25” pocket hole screws through the ends of each vertical board and into the top. When I first built the cabinet, I waited until a later step to attach the top and had a difficult time getting to all of the pocket holes. I adjusted that step in the plans which is why some of the photos show no top attached.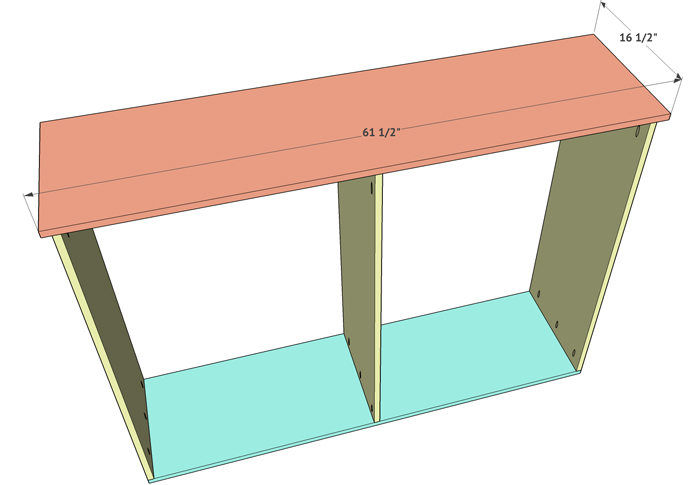
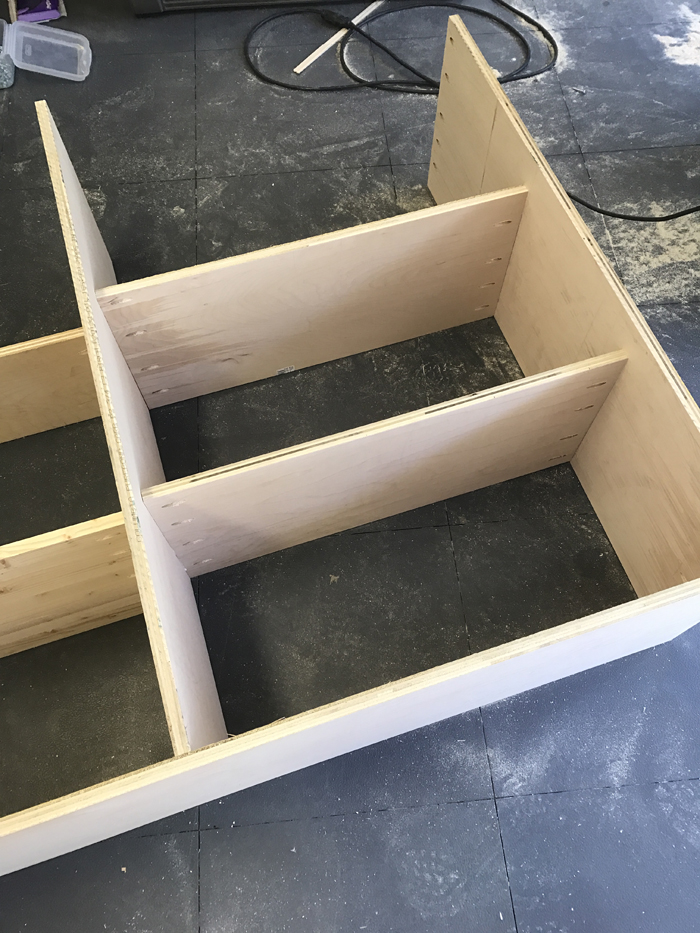
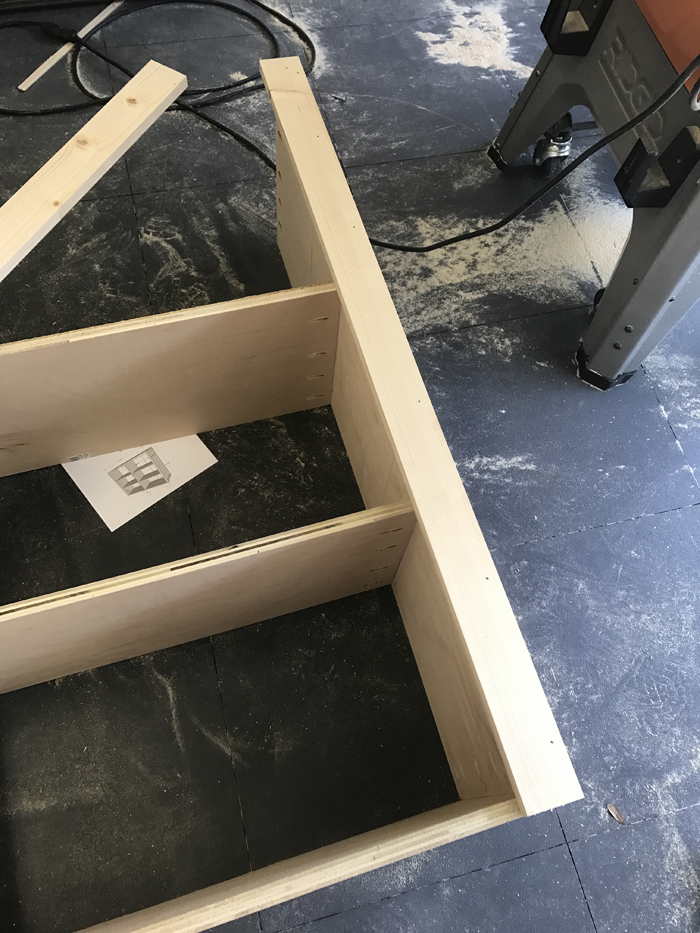
Now add the shelves. These will each have 3/4” pocket holes on each end of one side. Attach them to the vertical boards using 1.25” pocket hole screws and wood glue. You can place the shelves where they best fit your storage needs. You can also use the shelf pin jig to create shelf pin holes if you want to be able to move your shelf boards around.
Attach the side trim boards next. Use wood glue and 1.25” brad or finish nails to attach them in place. I chose to nail mine from the inside of the cabinet to hide my nail holes. That’s entirely optional. Attach the trim pieces on both sides of the cabinet.
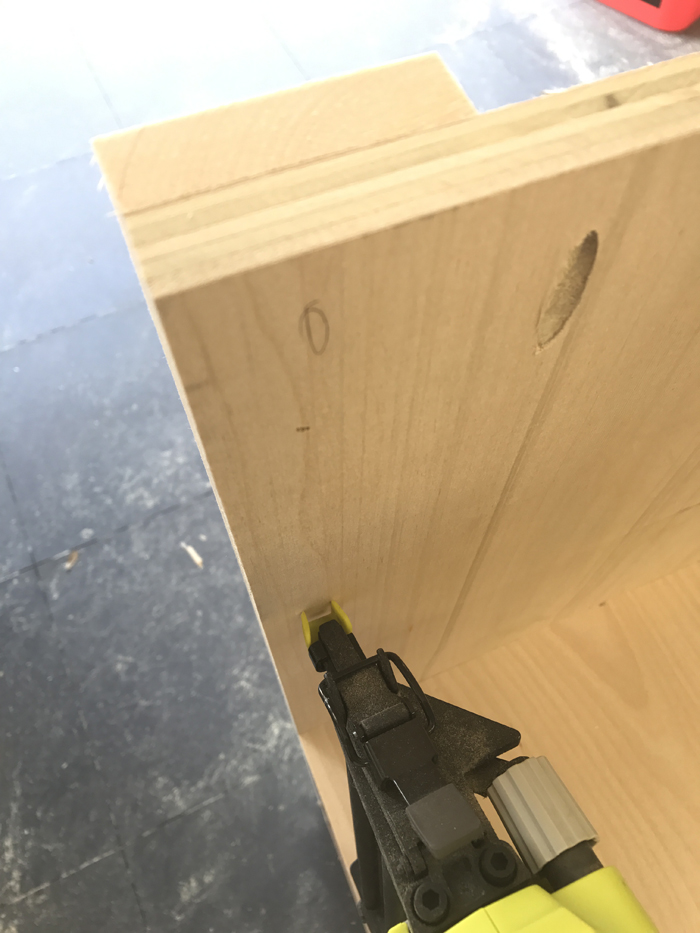
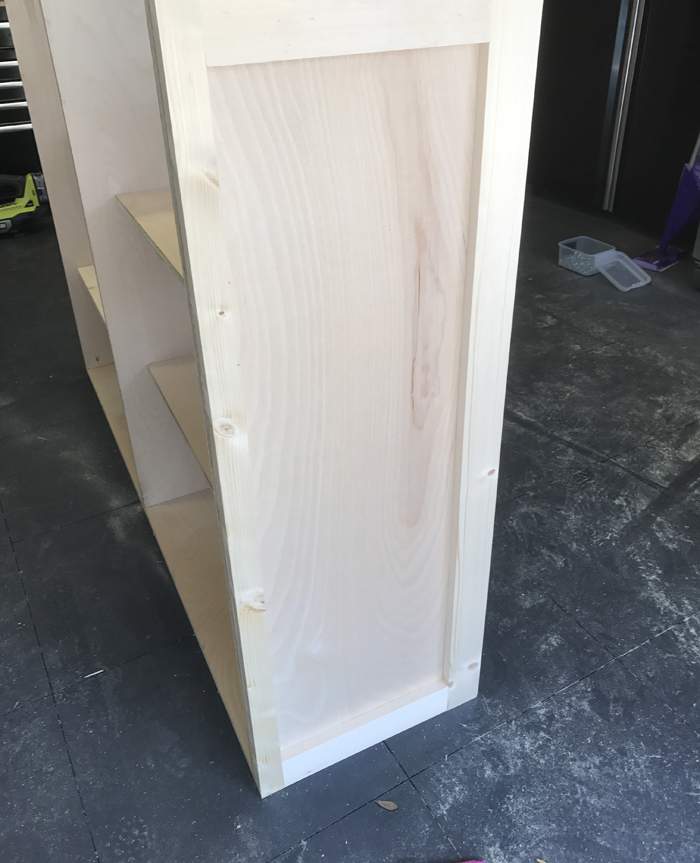
Attach the vertical front trim boards next. Line them up flush with the outside of the cabinet and attach them using wood glue and 1.25” brad or finish nails.
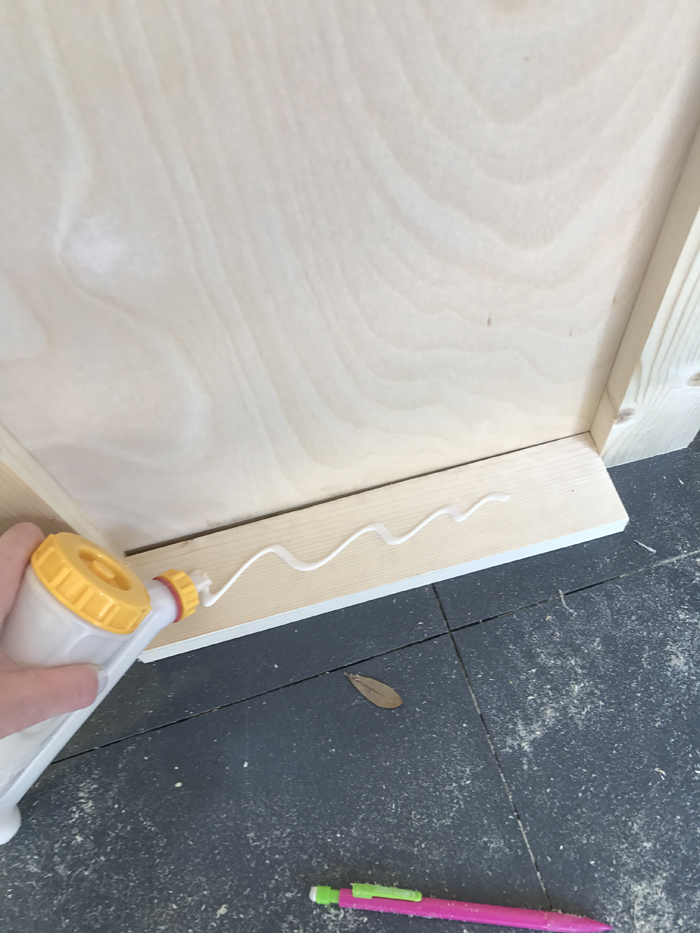
Now attach the horizontal trim boards Attach the bottom board with 1.25” brad nails into the base of the cabinet, and attach it to the vertical trim boards using 1.25” pocket hole screws. Don’t forget wood glue!
The top board will be attached to the top of the cabinet and to the vertical boards using wood glue and 1.25” pocket hole screws.
Glue and nail the middle divider board into place. Make sure you line this board up in the center of the cabinet.

Attach the back of the cabinet using 3/4” staples. You can also use brad nails on this part if you don’t have a stapler. I had Home Depot make the cut for the back to make it easier to get home.
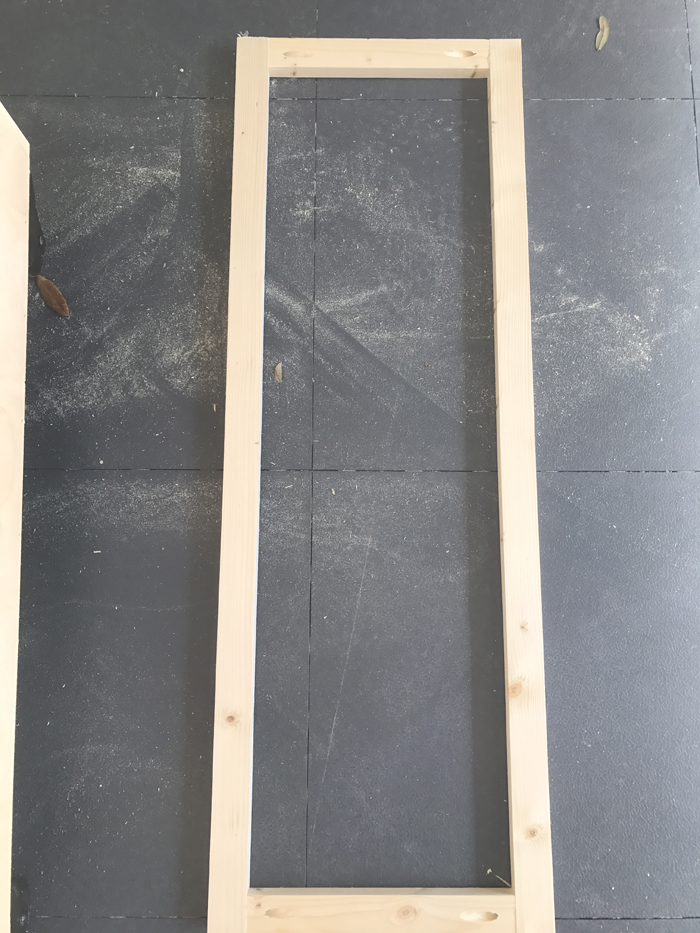
Build the door frames first by attaching the shorter boards to the longer boards with wood glue and 1.25” pocket hole screws. Then, attach the backs of the doors to the back of the frames using wood glue and 3/4” staples or brad nails. Attach the diagonal trim boards last. Cut these to size! The easiest way to get the best cut is to actually hold the board in place and mark where you need to make the cut.
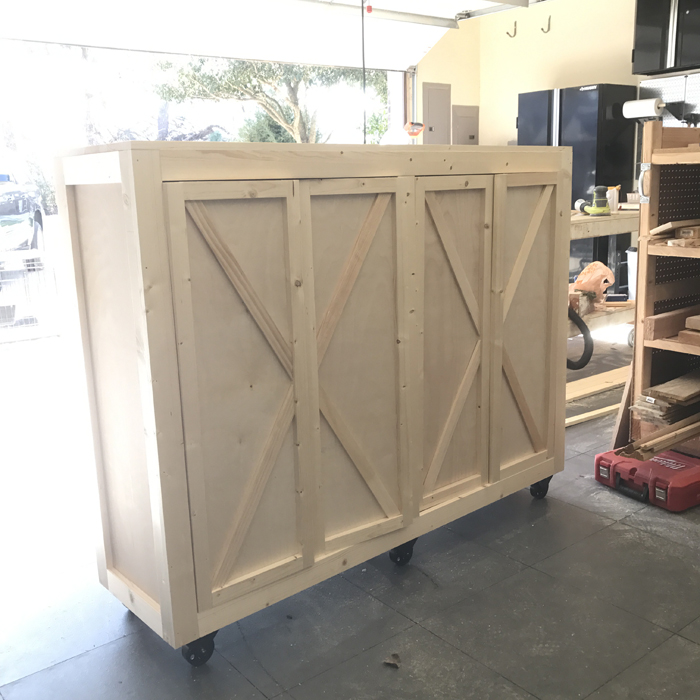
I made the plans for these with 1×2 boards, but I actually used 1/2” craft boards to make my diagonal trim pieces. I know some of you have a hard time finding those, so I did the plans this way. If you decide to use craft boards, just sub them for the 1×2 on the supply list.
DIY Farmhouse X Storage Cabinet – Hardware
Now for the fun stuff! Below are the links for the hardware I used!
Large Metal Cabinet Door Pulls – https://rstyle.me/n/cxshruxv6w
Metal Casters (I painted these with black spray paint) – https://rstyle.me/n/cxsht5xv6w
Black Spray Paint – https://rstyle.me/n/cxsjs3xv6w
Wood Stain Used – https://rstyle.me/n/cxsjtuxv6w
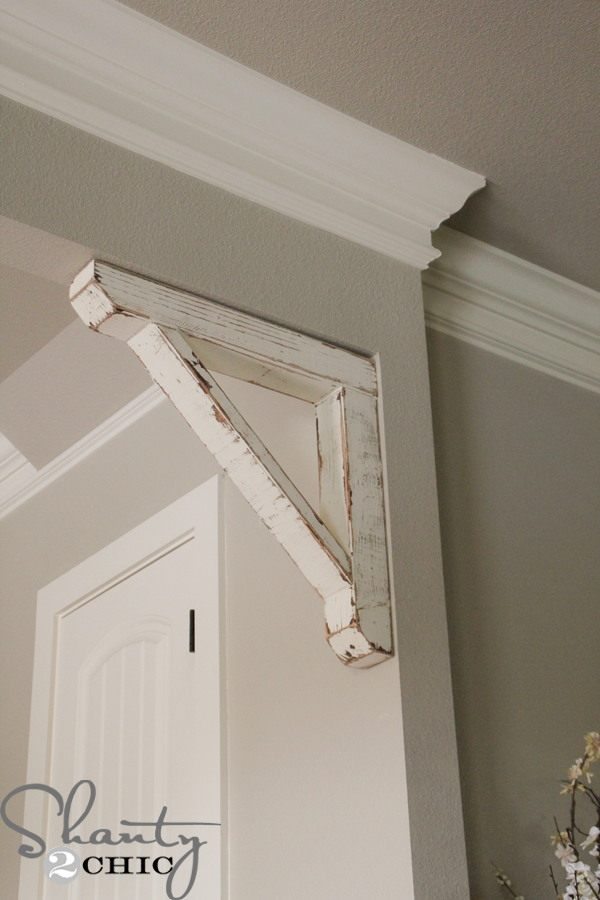
The metal corners were purchased at the hardware store. Both blue and orange have them and you can buy them in several sizes. These are the 4″ brackets and I spray painted them black like I did the casters.
DIY Farmhouse X Storage Cabinet – Here it is all finished up!


This is a very practical and stylish storage project. The farmhouse X detailing adds a strong visual element while the cabinet itself offers plenty of functional storage. I like how the design balances rustic character with everyday usability. It’s always inspiring to see storage furniture ideas alongside broader interior and material trends here: https://plywoodbazar.com/
A smart and well-crafted DIY build.
I actually am wanting to know how high the tv is mounted? And what size is your tv? Just trying to figure out the balance for our living room wall!
HI, I made this cabinet awesome with the plans thank you so much. Was wondering where you purchased the L and T brackets. Thank you
Love these, going to make a larger version for my garage, thanks for the inspiration and the plans!
The briarsmoke stain you used seems lighter than it does online in other people’s projects. Do you do something different that makes the stain lighter? Wipe it off quickly, sand afterwards? Etc?
Where do you find a 16 1/2 ” wide project panel? Orange doesn’t carry them. Blue only carries boards that are 16 ” wide. Either have to change the width on the entire project or buy 4 x 8 plywood, rip down to 16 1/2 ” and use edge banding.
Don’t know if you are still looking for an answer on this. Did you build it? What did you do about the top? I haven’t found project board yet? I’m considering using 3 1×6 boards.
What length pulls did you use?
Hey Girls did you stagger your pocket holes on your shelf boards? i use my domino machine to make shelf supports works pretty good too.
Is there anyway to change the shelves into drawers on this?
What type of wood stain or paint did you use?
They used Briarsmoke
You girls rock! Roughly how much did this cost to make? Thanks in advance!
Both blue and orange have them ? clever girl
Any ideas on building a roof on my deck