As a mom of 5 kiddos, there are a few things that I know. Ok, maybe just a couple. One of those is LAUNDRY. I know it, and I don’t love it. I always smile when I see those pins about missing laundry one day when the kids are grown. Nope. I won’t miss it. I will miss lots of things, but not laundry baby. So… for now, I try to find ways to dislike it a little bit less! 😉
That leads me to today’s project. This may be one of my very favorite builds yet! For years, I have placed a laundry basket in the hall upstairs for my kids to throw their dirty clothes into. I have stared at that thing for years thinking one day I would come up with a solution that fit our needs and my dislike of dirty piles of laundry.
Let’s build this DIY Laundry Sorter!
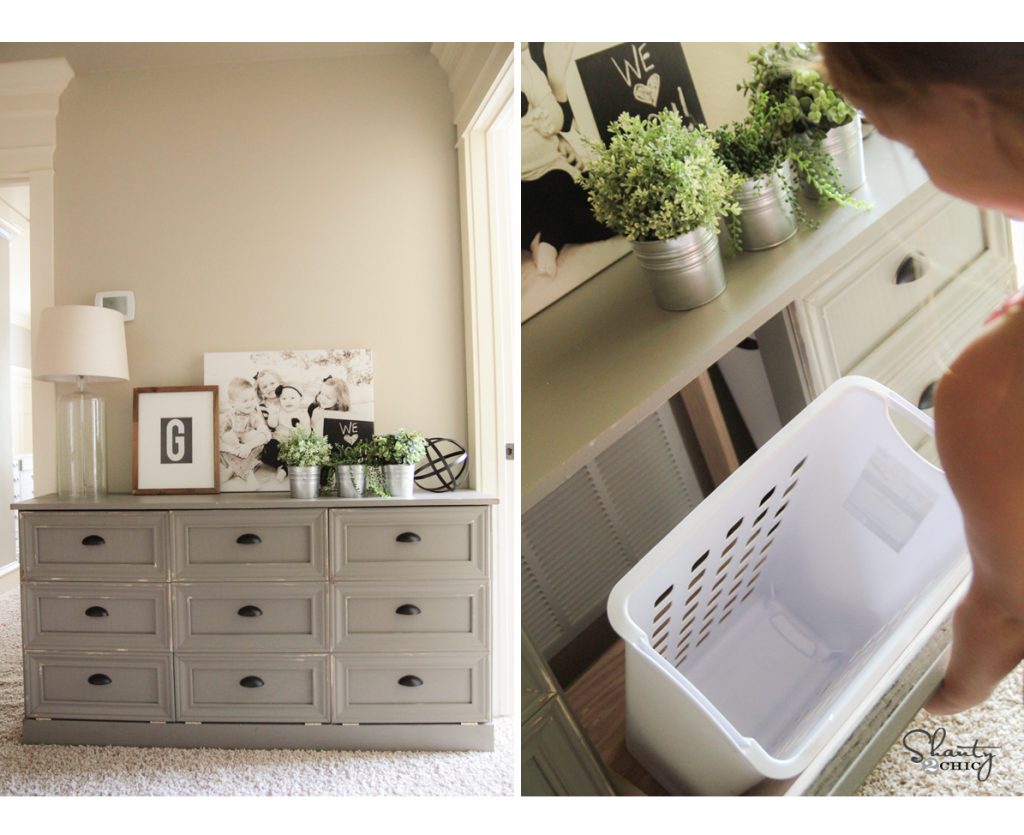
Now, before I do get questions… I do realize that it is long for this space, and does cut off that door opening into my son’s room a tiny bit. I thought about that while I was planning this dresser. I had the choice to go with two baskets, but I couldn’t pass up that third! So, I traded few inches of space for another basket. I found these baskets at Walmart for $7 a piece, or you can find them HERE on Amazon!
. You can also find them This dresser is designed around the size of this basket, but it may fit others as well.
I’ve added a link to the free plans at the bottom of this post! Now, lets build it!
DIY Laundry Basket Dresser Details
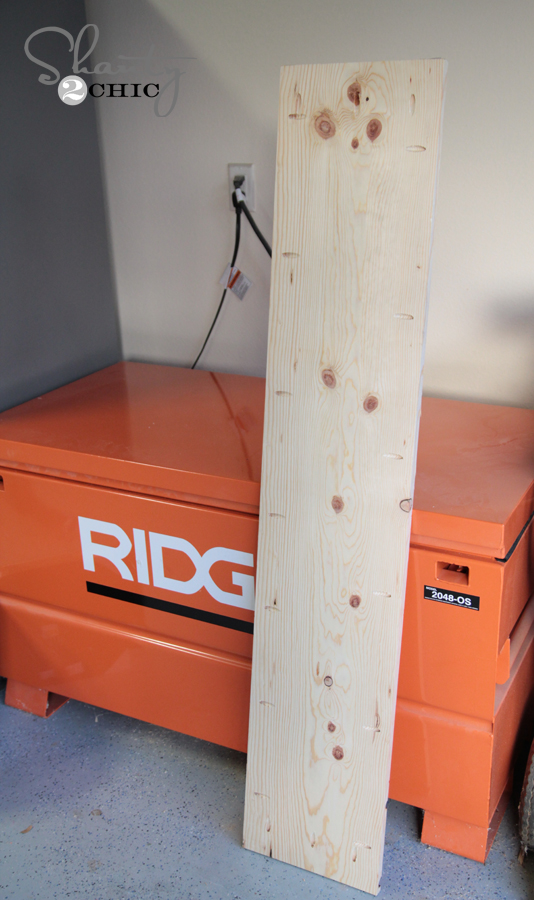
I started by creating the box of the dresser. This uses hardwood plywood, and I went with Purebond Plywood for this.

Many of you have heard us talk about Purebond. It really is an amazing product to work with when you build furniture. It’s greatest draw is that you get the look of an expensive hardwood for a fraction of the cost. Not only that, it’s also made in the USA with sustainable resources, and it’s formaldehyde-free making it safe to work with and breathe. Winner. You can find it at Home Depot.
I did have Home Depot rip down my plywood to make it easier to get home. Once I had it home, I made all other cuts on my Ridgid Miter Saw.

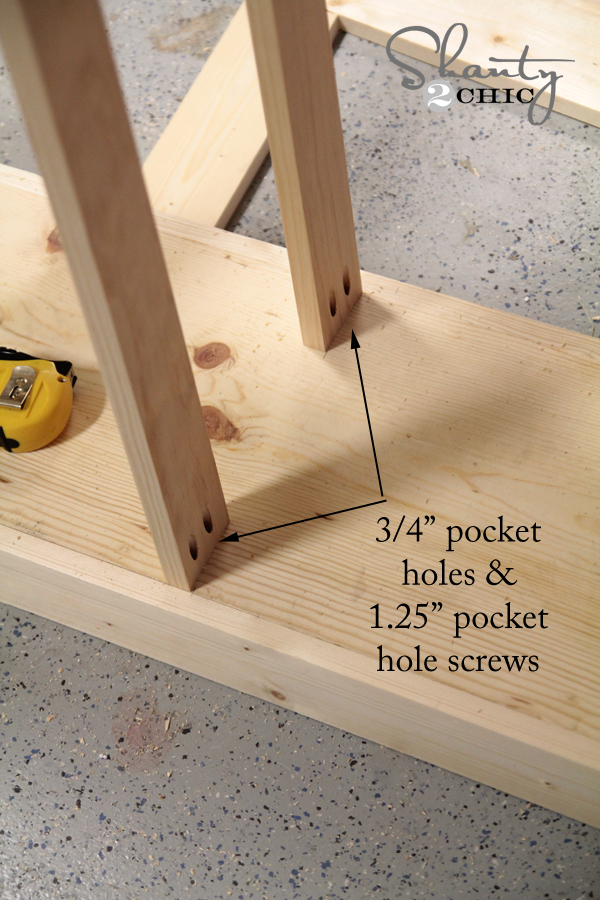
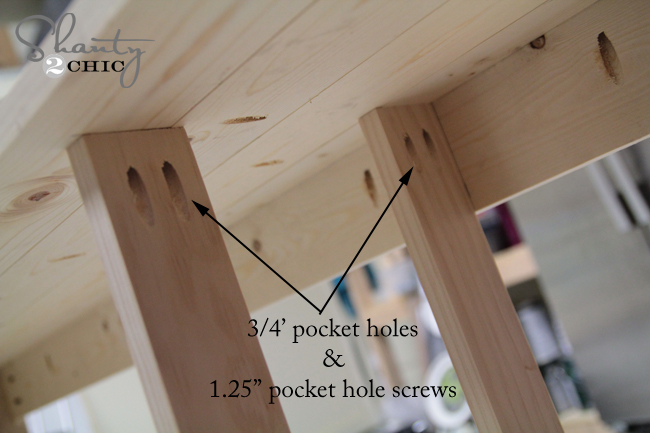
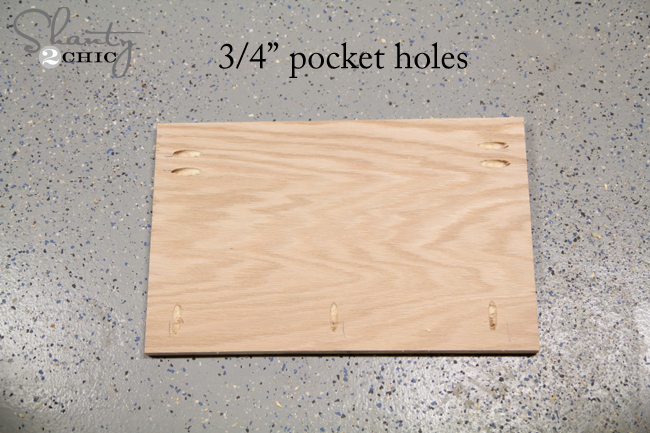
I used my Kreg Jig
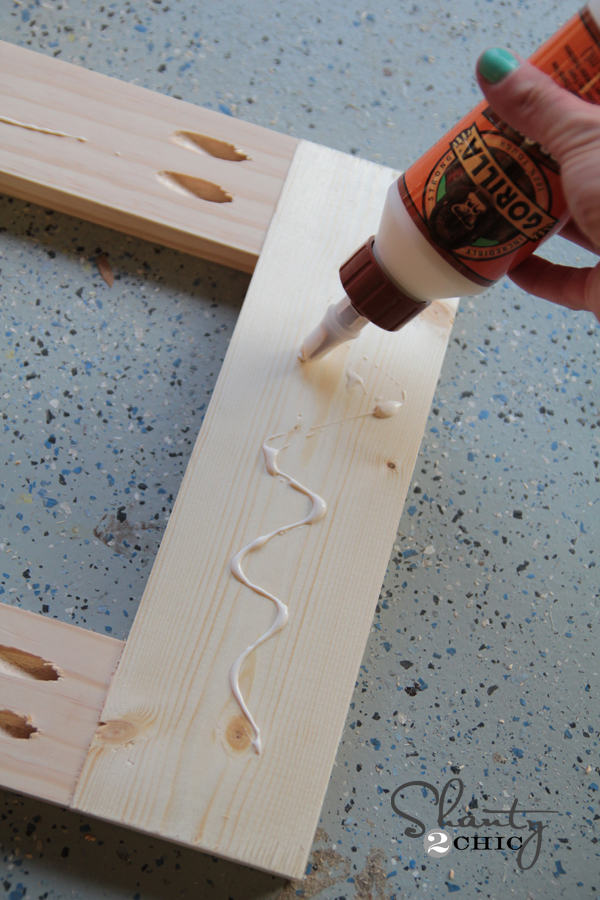
to make all of my pocket holes. You can see in the photos below where I placed all of them. I started by building the side frames. These are simple! I used 3/4″ pocket holes and 1.25″ pocket hole screws for this part. I also used a bit of Gorilla Wood glue on each joint before using my drill to attach them.

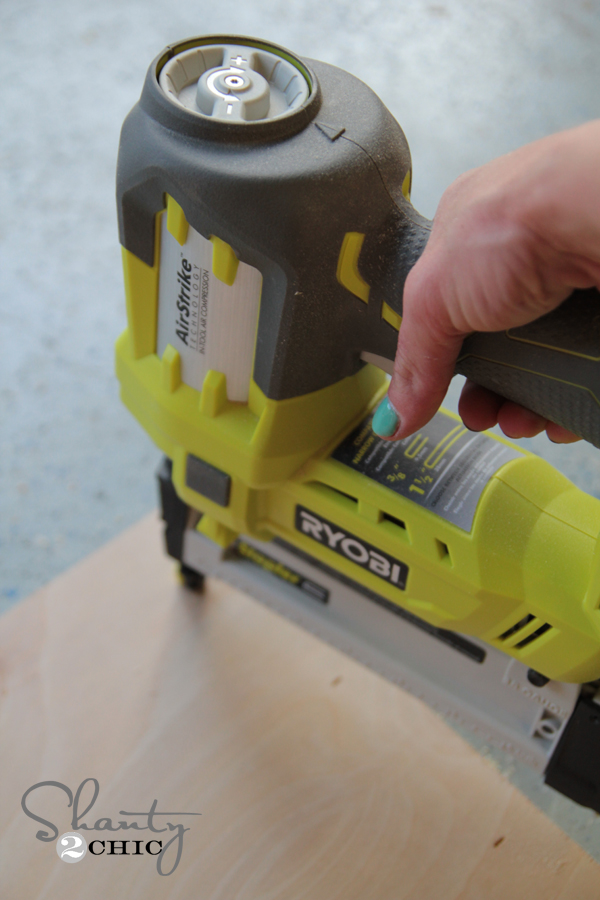
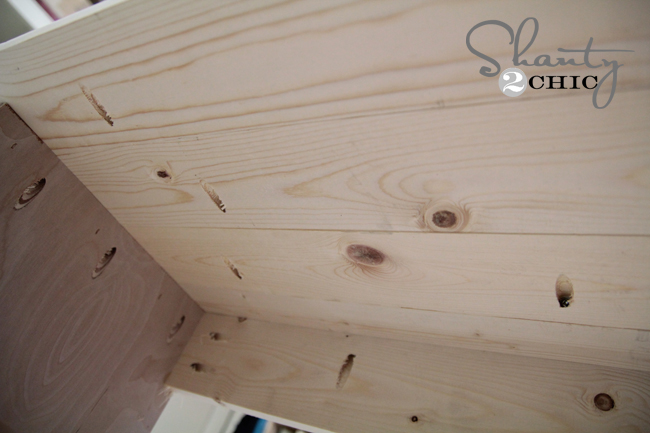
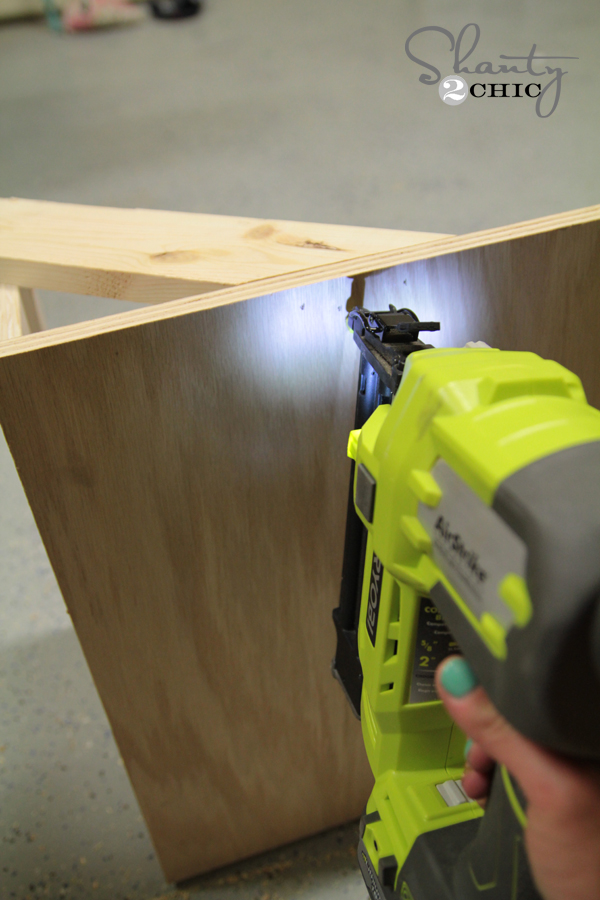
The back of the frame is also Purebond Plywood that is 1/4″ thick. When attaching thin material like this, it’s a good idea to use staples rather than brad nails. The nails tend to go right through that thin material, but the staples hold it in place perfect. I used my Ryobi Airstrike cordless stapler for this part. The best part? It uses the same 18v One+ battery that my drill and other tools use.
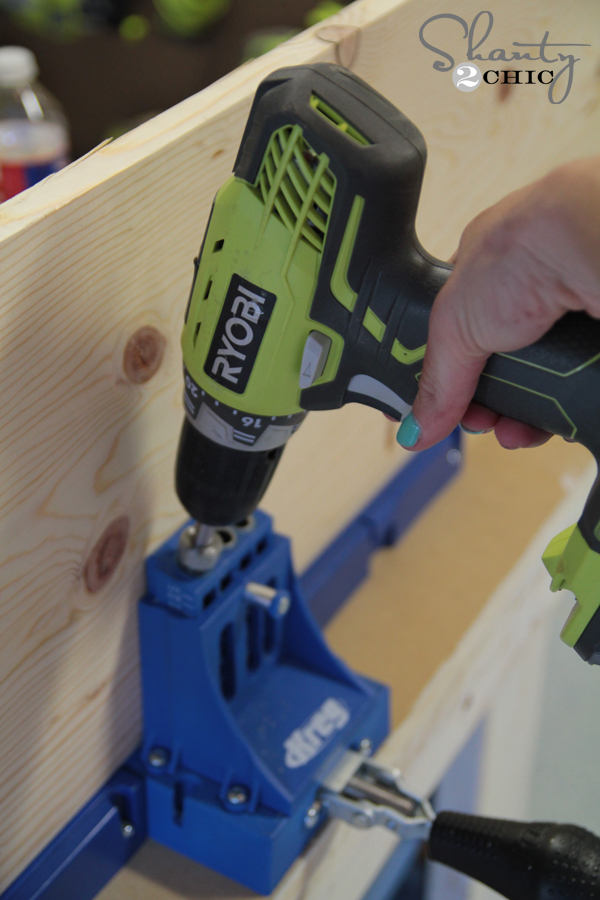
I drilled the pocket holes for the base next. You can see here how I placed the base into the Kreg Jig to make the holes on each long side. I am using the same size holes here.
This is what the base of the dresser looked like after my pocket holes were added.
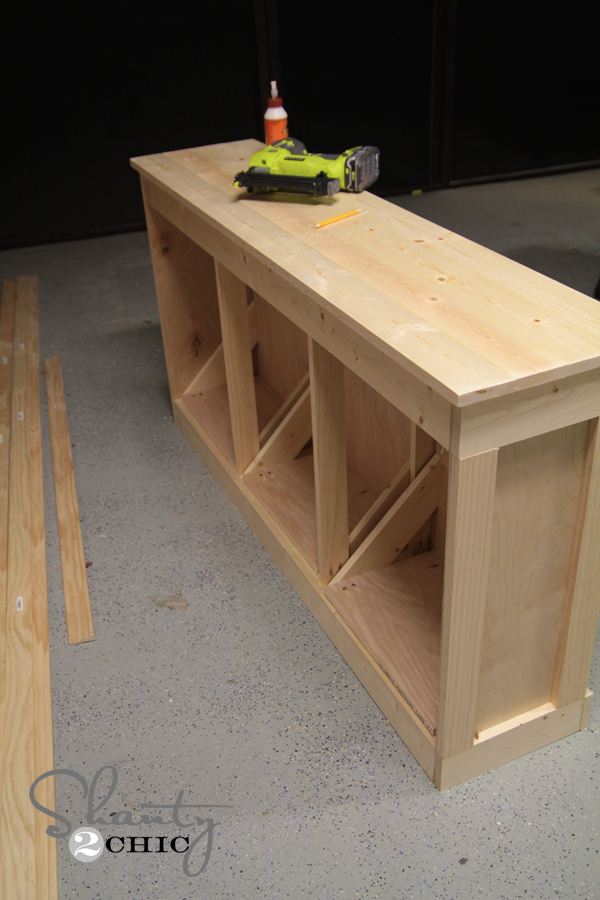
After planking the top, I attached the whole thing. You can see where all of the pocket holes line up and attach.
Once I was done with the box of the dresser, I moved on to the doors/drawers… I couldn’t decide what to call them 🙂
These are a very simple design of attaching two pieces of plywood together with pocket holes. Each base should look like this below…
Attach them to the door fronts using 1.25″ pocket hole screws.

To attach the side pieces, I nailed them in place first before attaching with the pocket hole screws. It made this part lots easier.
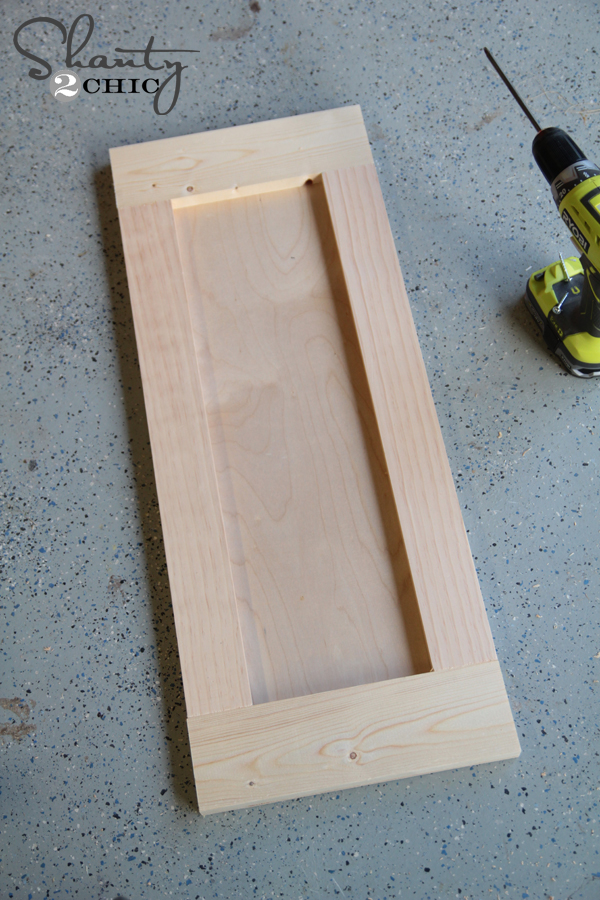
At this point, my dresser looked like this…

And the back looked like this.
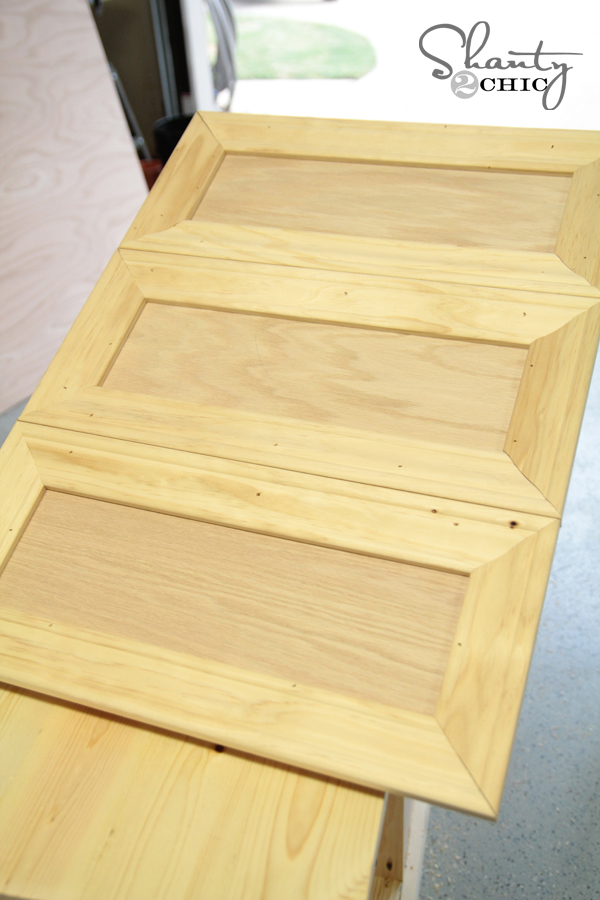
Now for trim! Now, this is where you get to be the artist. I wanted my dresser to look like individual drawers, so I made faux drawers from trim. It did cost more money, but I love the look of it. You can simply frame around each dresser door. That would be simple! When doing the trim, I started flush with the bottom of each door. All of my cuts are 45 degrees.

Next, I attached side pieces.
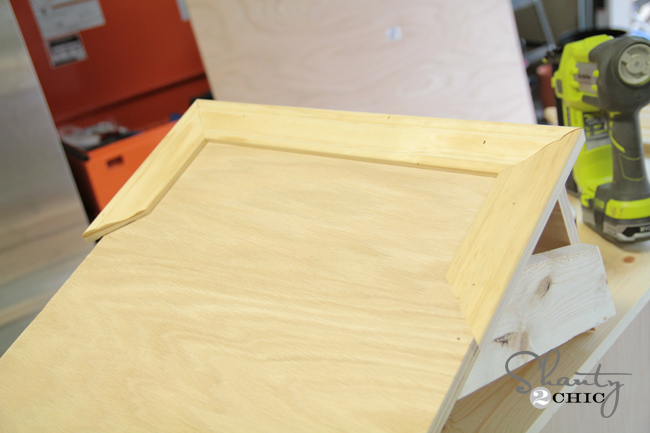
Then, I aligned the next ‘drawer’ up flush with the one I just did. Once finished, the trim should overhang the doors about 1/2″ on the sides and top of each door.
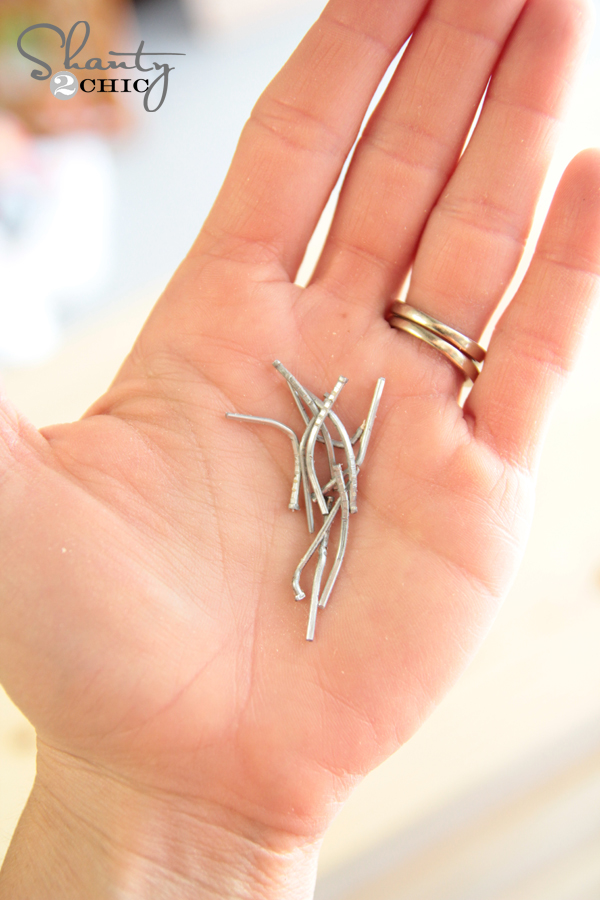
Now, on my second drawer I decided to speed through it. I forgot the old saying ‘measure twice, cut once’, and I ended up removing every piece of trim I added. There were choice words used on this part as well. 😉 Just be sure to measure each piece, or you will end of with a handful of nails like me!
After trimming each door, my dresser looked like this and was ready for a little paint.

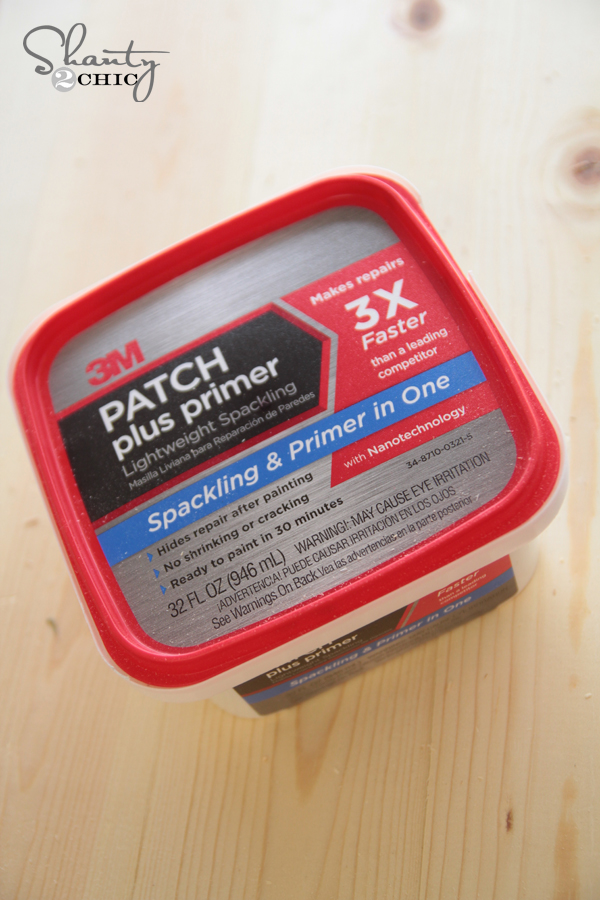
I filled all of my nail holes with this before painting. I also caulked some of my less than perfect seams… There may have been a few. 😉
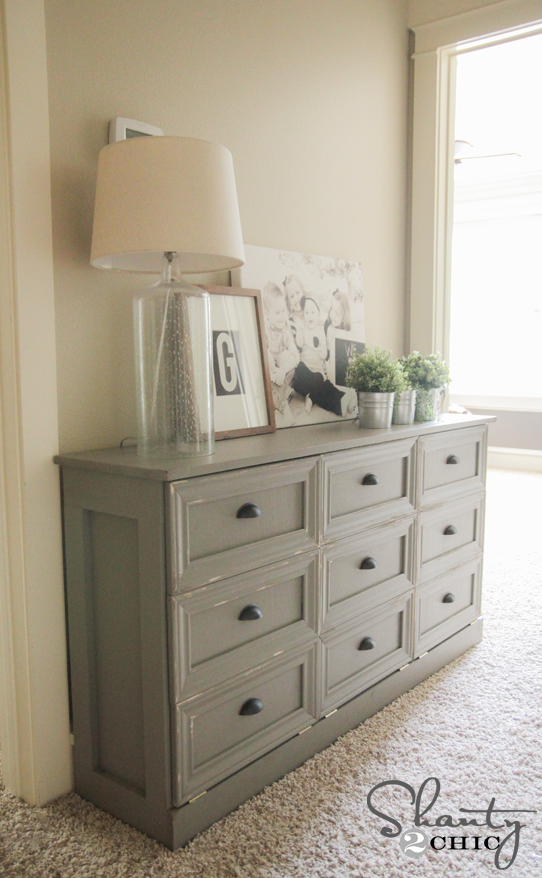
The color I used on this dresser is Sherwin-Williams Anonymous (SW-7046)

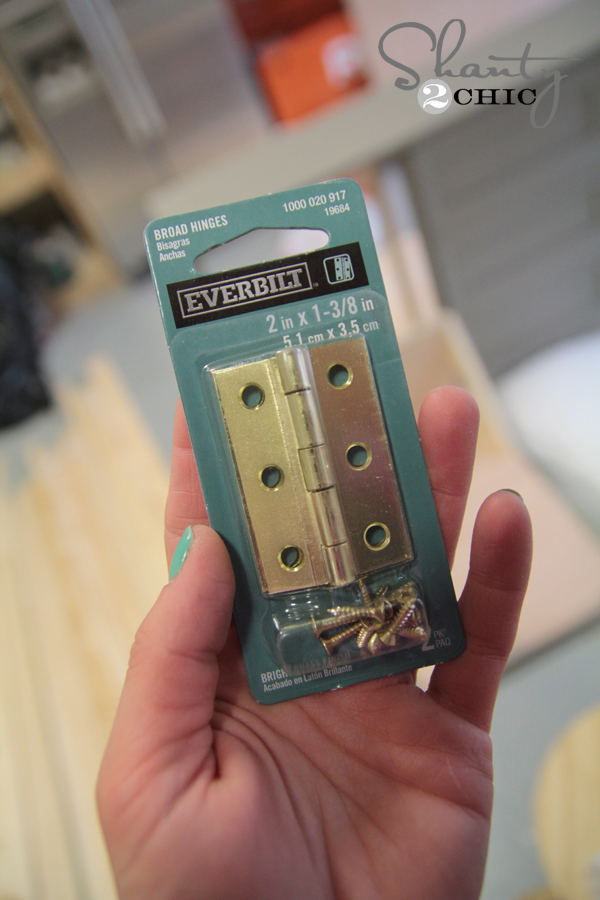
Once that dried, I used my Corner Cat sander to distress it a bit before adding my hinges. I used these hinges from the Home Depot.
It’s helpful to have a second pair of hands on this part to hold the doors… Just a heads up. I first attached each hinge to the box of the dresser. Please ignore my botched paint job. I only paint what eyes can see.
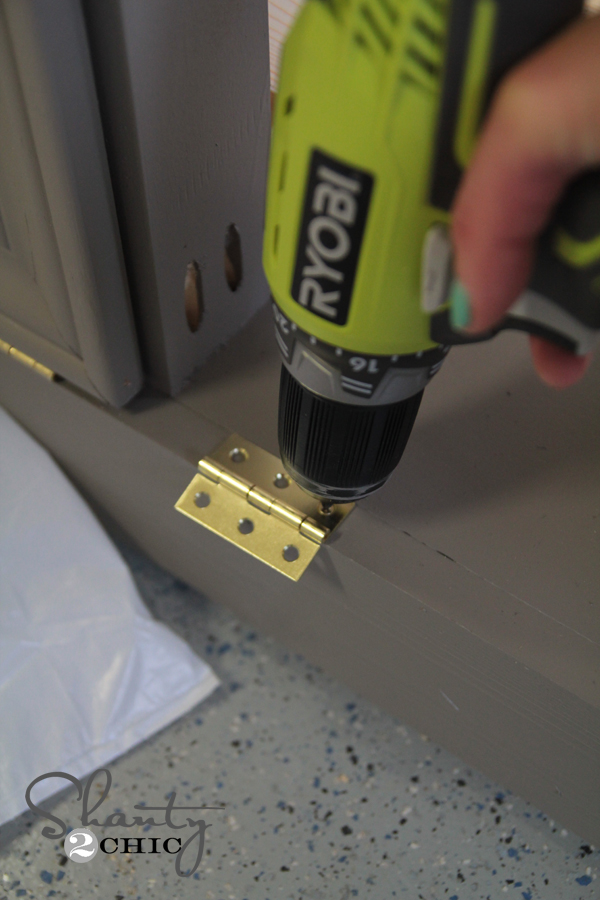
So, each opening had two hinges like this.

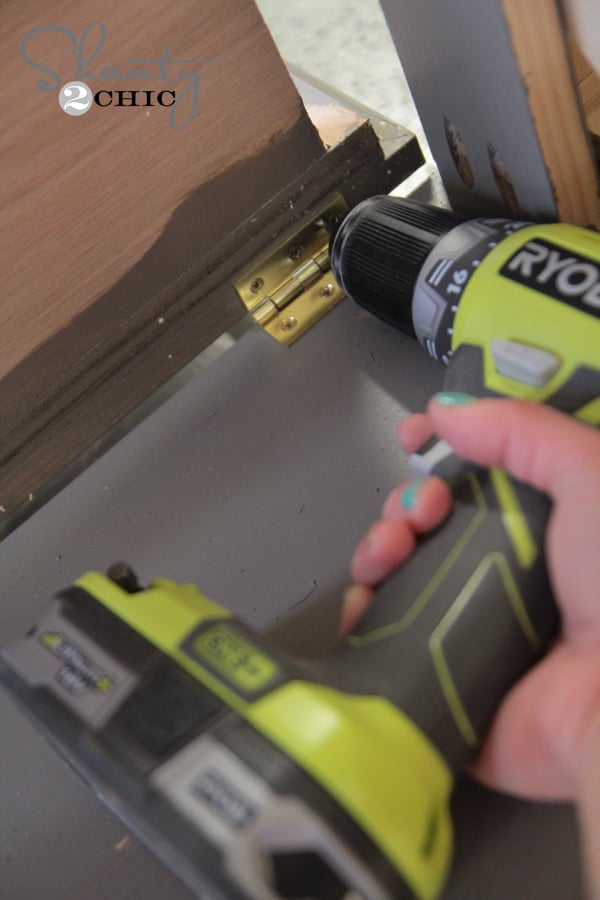
Now, fold the hinges together like this.

Set each door into place on top of the hinges. Now from the back of the dresser, open up each door and attach the base of the door to the hinge. There is probably an easier way to do this, but it totally worked for me.

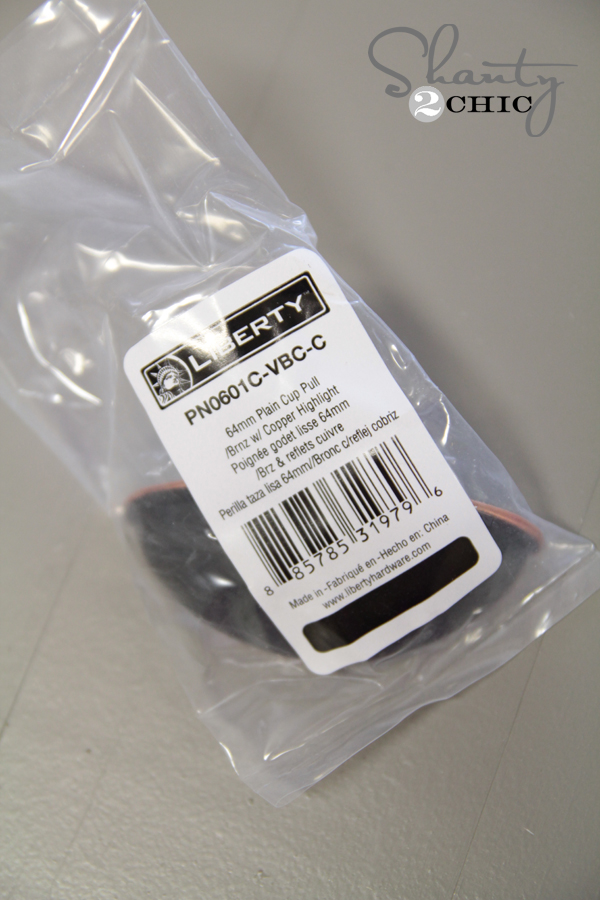
And for my very last step… hardware! I found these cute cup pulls at Home Depot. Again, buying 9 of them did drive the cost up, but you can stick with 3 and keep it lower. The doors will fold open to the floor, but you can add small stop chains if you want. That will keep it from opening all of the way. I am adding them to keep the littles from opening the doors and playing inside of this thing. 🙂
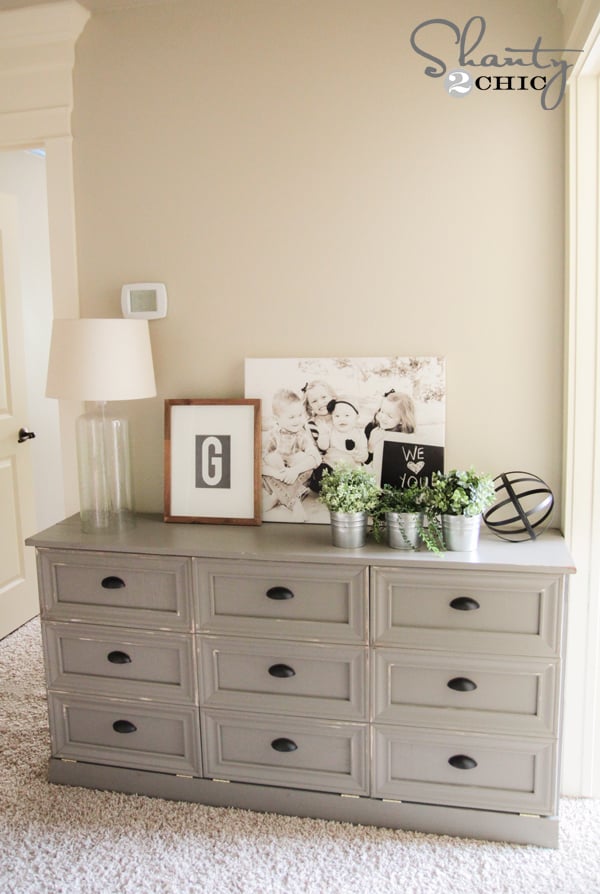
And here she is all finished up. Oh. I love it.
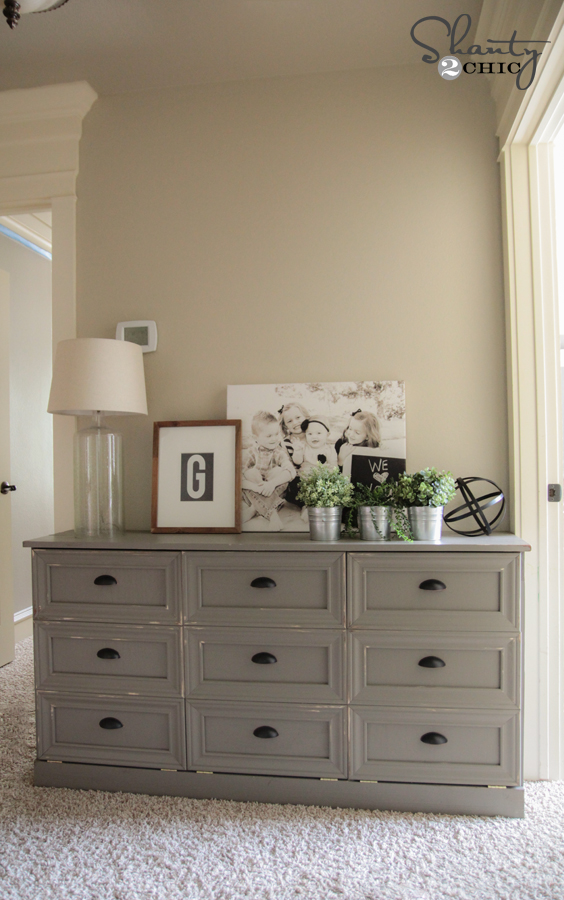
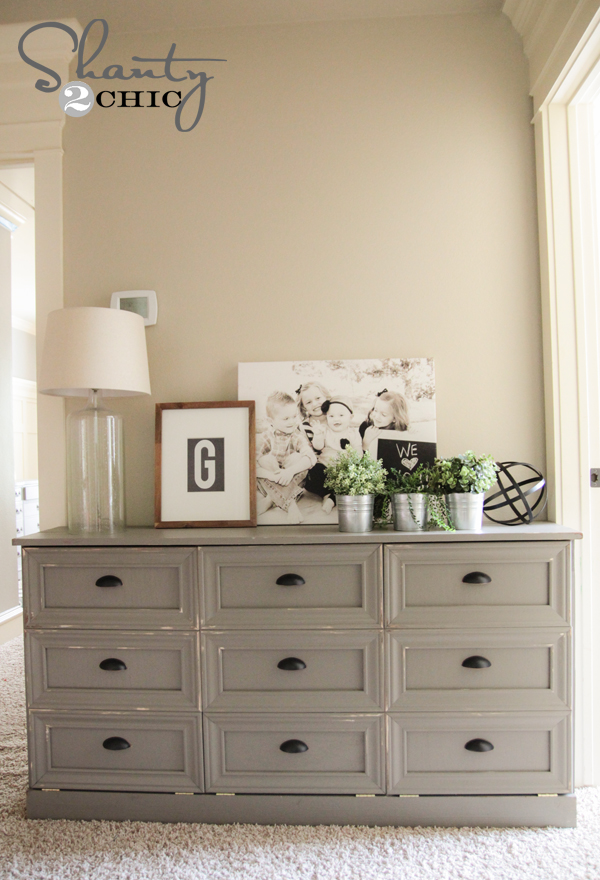

What do you think?? Would it make you love laundry any more than you do now??
Let’s talk cost. I did spend a bit more on this piece. It is large, and the hardware and trim I went with did drive up the cost of the project. I spent around $100 for the wood before my trim and pulls. My trim and hardware added another $100 to the cost, making the project around $200. You can easily simplify the trim and cut down on your pulls to stay under a smaller budget if you need to though! But really, I would have paid a lot more for it because I LOVE it! 😉
To download and print the free plans, CLICK HERE!
Thanks so much for stopping by! I would love for you to share and PIN this project with all of your friends!
Thanks so much guys!
Whitney


I love everything about the picture …. Project, decor, colors. However, I can not find any info on the wall color. Is it posted and I can not find it? I’m terrible in matching colors!! Thanks!
I wonder if I can save a lot of money if I redesign a old real wood dresser from goodwill
Love the idea, I have a odd question. I notice when your showing the basket the cabinet is in front of the intake wall vent where the filter goes for your ac, wont that burn your unit up since it cant get air ?
This is an amazing project. Functionality has never seem so easy. Thanks for sharing.
Genius! Dirty clothes hidden in plain sight! My laundry room is so small that I have to sort everyone’s clothes in the (highly visible) small hallway between my kitchen and powder room and pray that I can get it all done before someone stops by. Lol.
Love this piece. But I noticed in the picture of the first door pulled down, that it is covering your return vent for you ac unit. That’s not good to cover that, it will make your unit work harder and possibly burn a motor if it doesn’t get enough air in it. Just thought I’d tell you if you didn’t already know.
Beautiful project!! Like some of the others – would you please share your wall color. We are getting ready to repaint the interior of our home and I need a soft color like this. Thanks in advance.
Great plans, I want to build this with just one bin. Just a wish, though, I would like to see the parts labeled on the PDF plans, what each cutout piece is used for, like you see on most of Ana White’s plans.
What a great idea! I think I might just have to make one of these!
I’m totally in love with this idea and will be making one for my laundry room. Thanks for the great idea and free plans!
Would you please share your wall color also? I’m a dork and just spent 30 minutes searching your site and could not find it. :/
You guys inspire me to do stuff on my own without waiting on my sweet husband to help out. I’m sure he appreciates you even more than I do!
You are brilliant! I love this and every single thing you guys build. I am all about up cycling and kind of love redo-ing furniture. I have an old dresser I am going to look really hard at figuring out how I can convert it into something like this. This idea probably won’t become a reality for a really long time but if and when I do, I will be sure yo share. Love you guys so much!
This is clever behind belief. I’m going to try this for our garage. BTW, love you wall color. Care to share?
Could you use a piano hinge so the “drawers” lie flatter at the bottom?
I don’t have room for a 3-wide sorter like this. How easy would it be to make it just 2 sections?? What would be the measurements for that?
Oh my goodness. This is amazing!!! I love everything about it. Thanks for taking the time to document the process with pictures AND provide great plans. It’s so helpful!! I can’t wait to make this piece. You guys are my favorite blog ever!!!!