Hey guys! Hope you all had a great Christmas and are ready for the new year! One of my favorite gifts Ash and I got this year was a new printer. We actually bought them for each other as gifts 🙂 We influence each other like that fairly often… It’s a Canon SELPHY Photo Printer
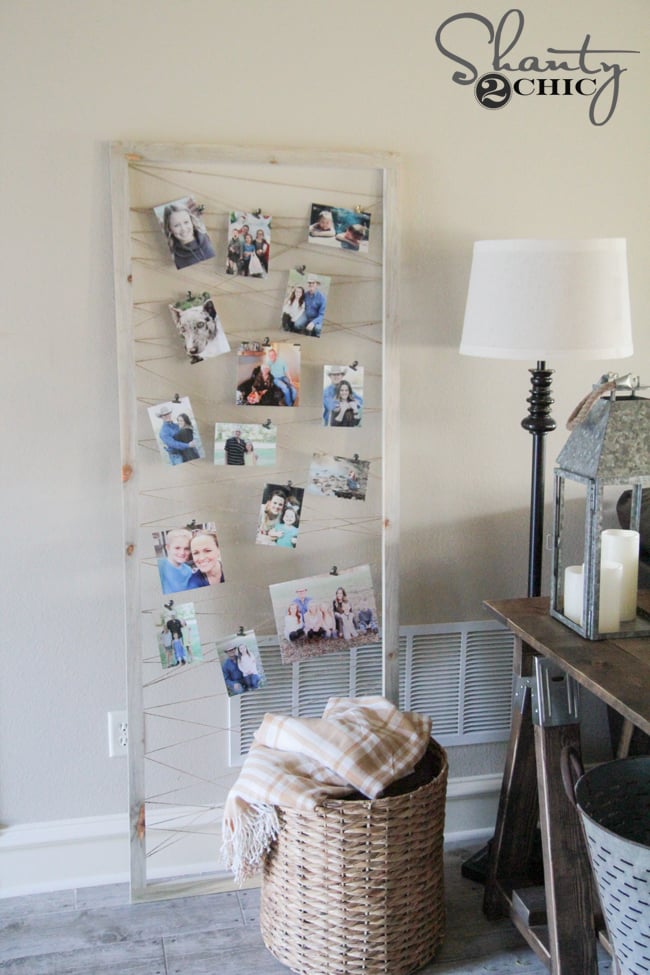
that does 4×6 prints wirelessly. It’s amazing. I am so bad about updating photos around the house of my kiddos and this totally solved my problem. I have been looking for a way to camouflage an air return we have in our living room without totally covering it. I used to have a blanket ladder in this spot, but I gave that to my little sis, soooooo… It was time for something new. This is what I came up with! Check out my new DIY Photo Display Frame!
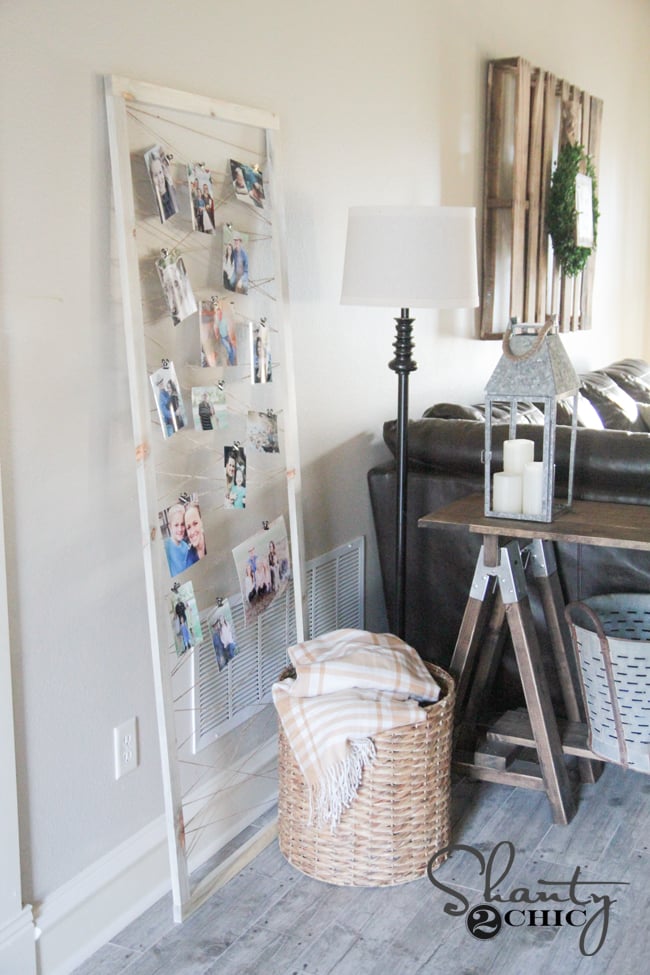
How cute is that? It’s so simple to change out pics, and I love the height it adds in this spot on the wall as well as being a great disguise for the darn return vent. The best part? It costs about $6 in material to build… Can I get a woohoo?
Here’s how I did it!
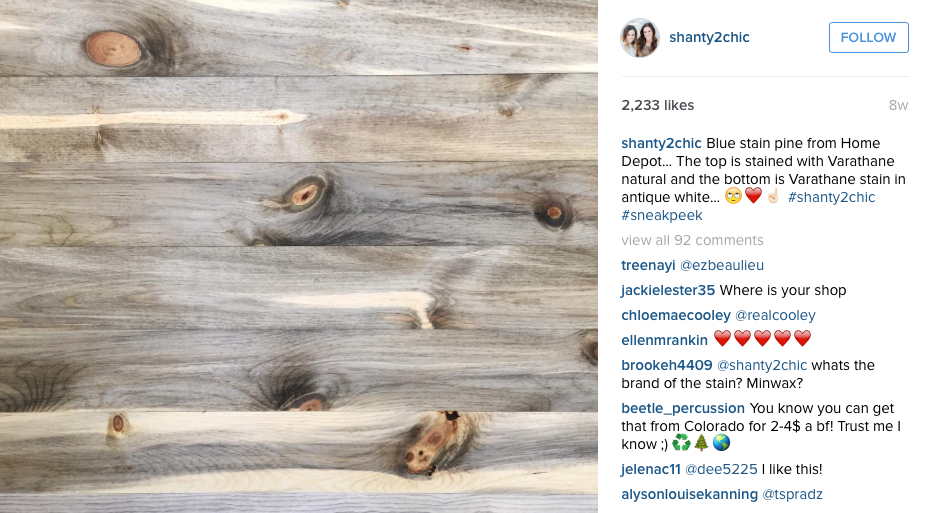
I chose to use a new fav material that we found at Home Depot. It’s call Blue Stain Pine. It is a tongue and groove paneling that is about 1×6 in size. Ash and I have been ripping it down into smaller dimensional boards to use in building projects. One board will easily rip into 2 1×2 boards which is what I did with mine. It’s amazing wood… It has a grey weathered appearance to it and it’s super straight. If you follow us on Instagram, here is a shot of it we shared stained in Varathane natural.
If you don’t have blue pine wood, just use 1×2 pine. Buy two 1x2x8 boards and you are set. You can skip straight to the pocket hole part. 🙂
I used my Ridgid table saw to rip mine down. I love this guy. He’s quickly becoming one of my fav tools in the shop.
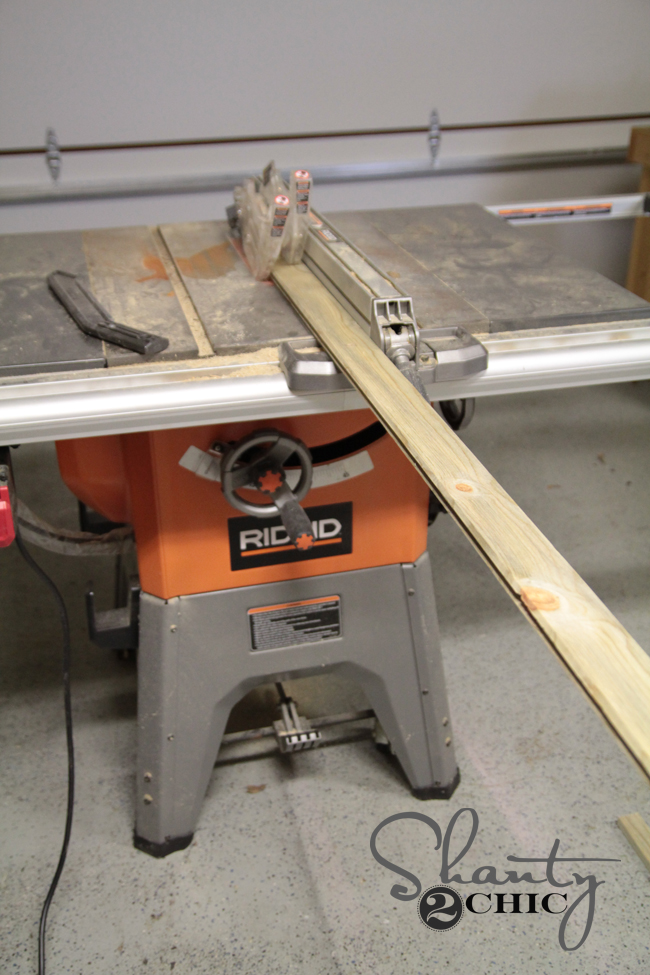
I set the fence on the saw to first cut off just the touch edge I don’t want. After I make that cut, I set the fence to cut the board to the width I need… In this case it was 1.5″ for a 1×2.
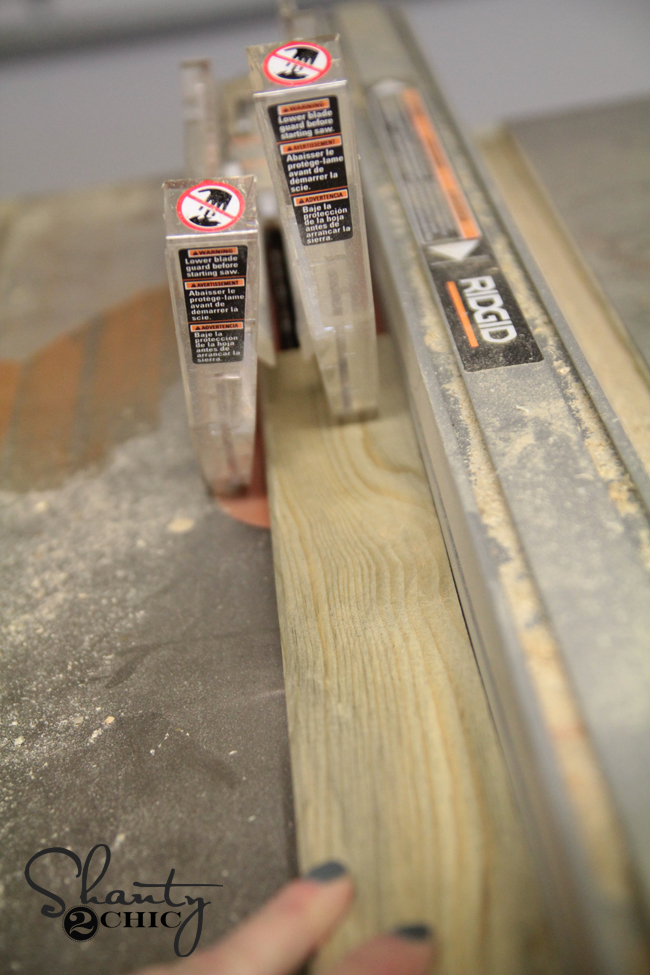
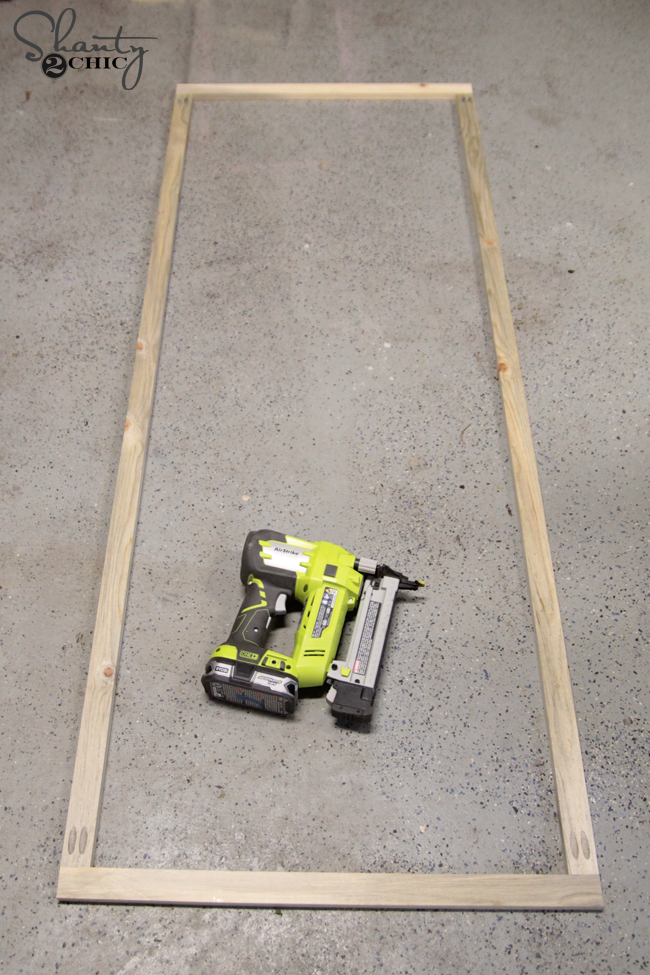
Once I ripped my board into two 1×2, I made the cuts for the frame.
I made two cuts on each board. One at 27″ and one at 68″. So, after cutting both boards, I had 4 total.
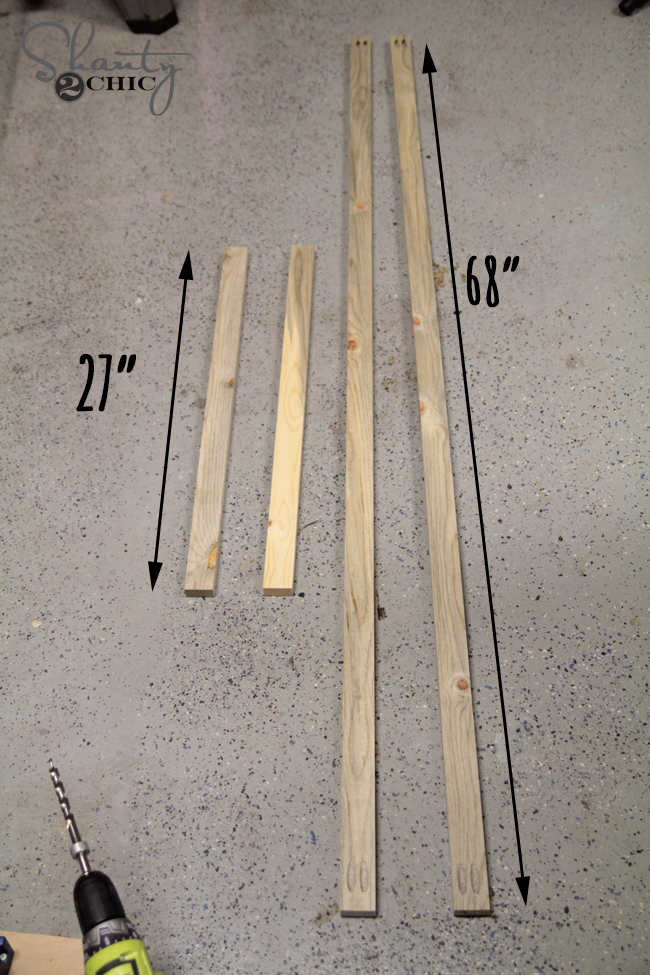
Make sure you make one long board and one short board from each 1×2 or you will need more wood.
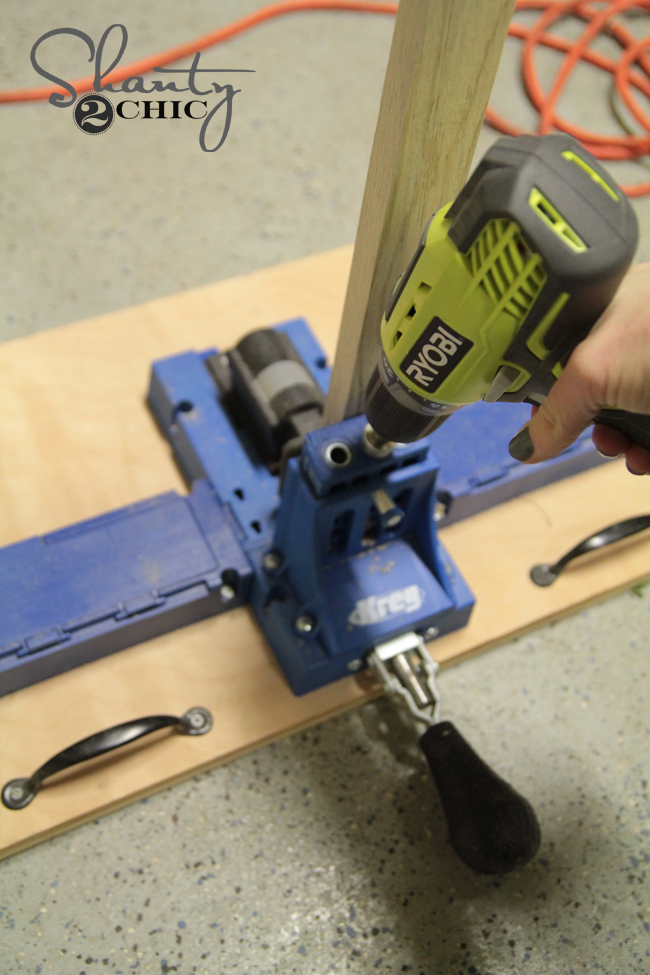
Next, I drilled my pocket holes on the boards. I made 3/4″ pocket holes on both ends of my 68″ boards. I have a K5 Kreg Jig![]()
that I have mounted to a scrap board that I pull out to use on the ground when working with longer boards like these.
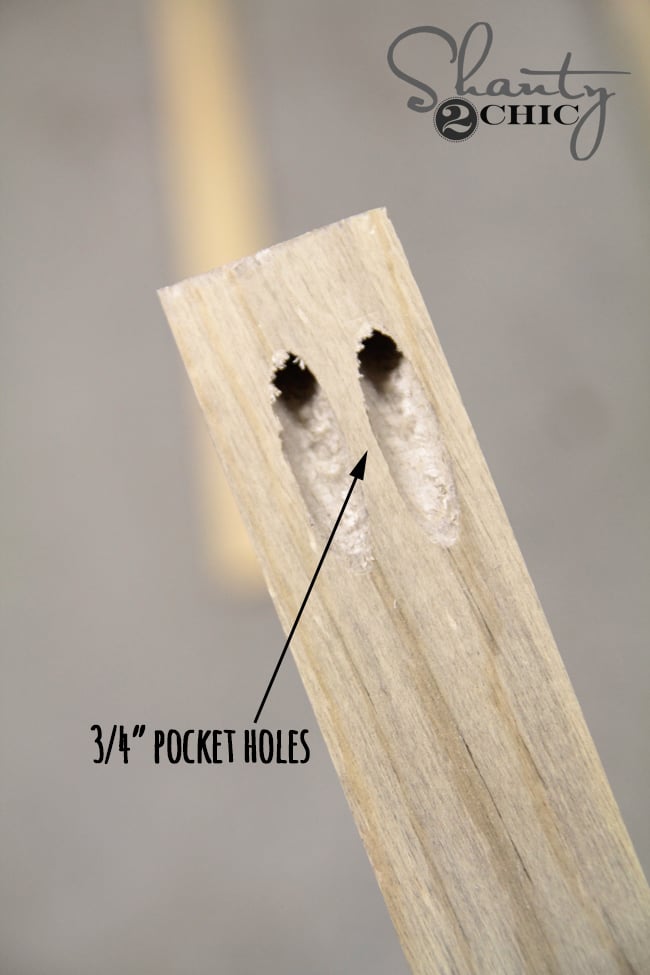
Each end of my 68″ boards looked like this…
Next, I attached my longer boards to my shorter boards to create the frame. I used 1.25″ pocket hole screws for this part.
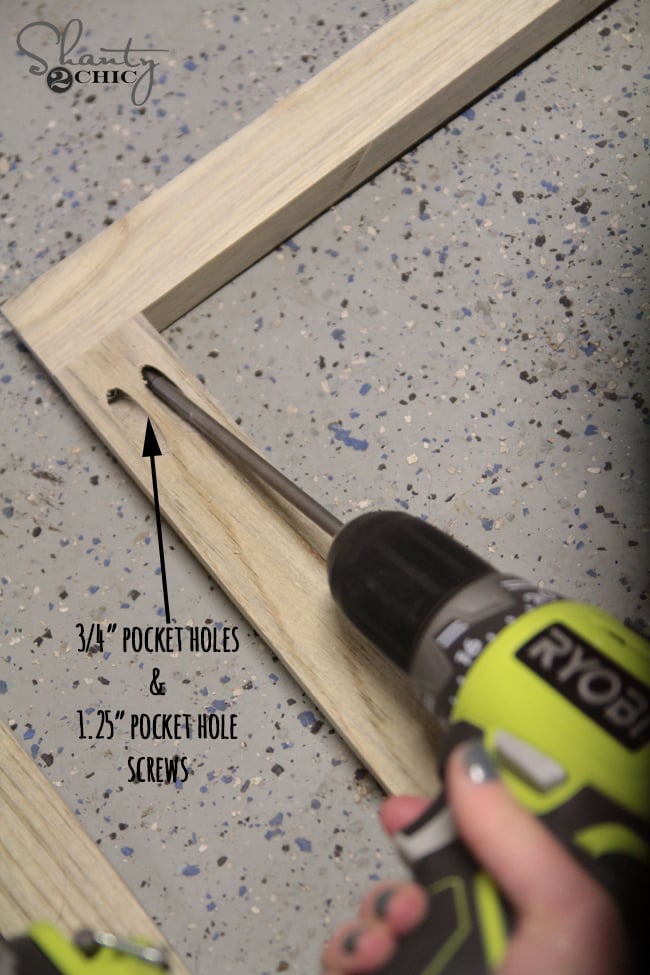
I attached all 4 pieces together, and I had a frame that looked like this…
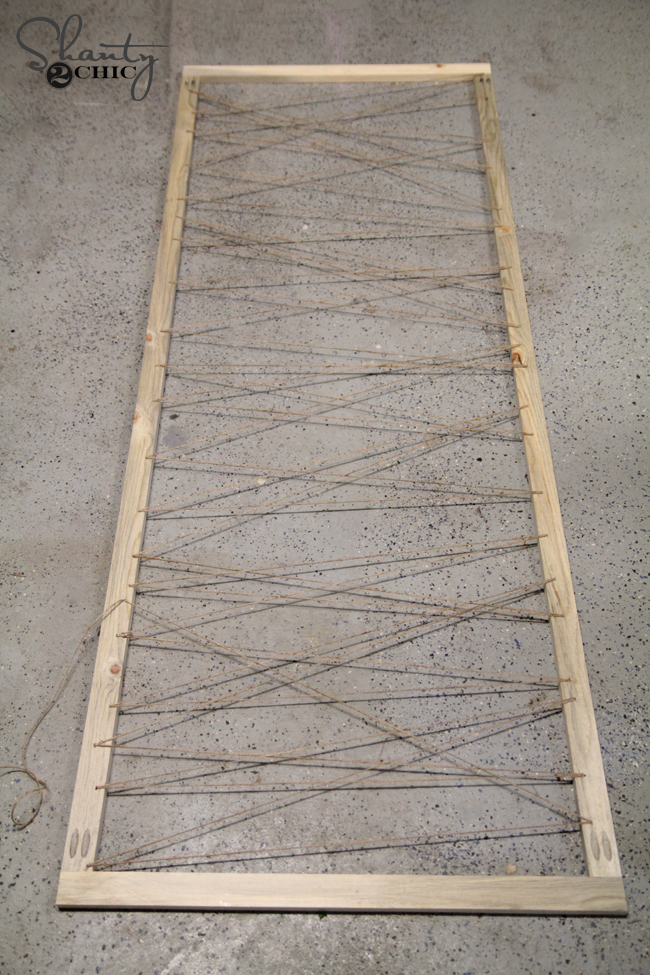
Now for the twine! I used a thin twine for this part. I usually purchase mine at Hobby Lobby. I tied a small knot at the beginning and used my Ryobi 18V stapler to attach the twine at the top corner of the back of the frame. Since the thickness of the frame is 3/4″ I used 5/8″ staples.
I went side to side (no rhyme or reason) I just eyeballed it as I went and held each side down with a staple.

When I made it all the way down the frame, it looked like this.
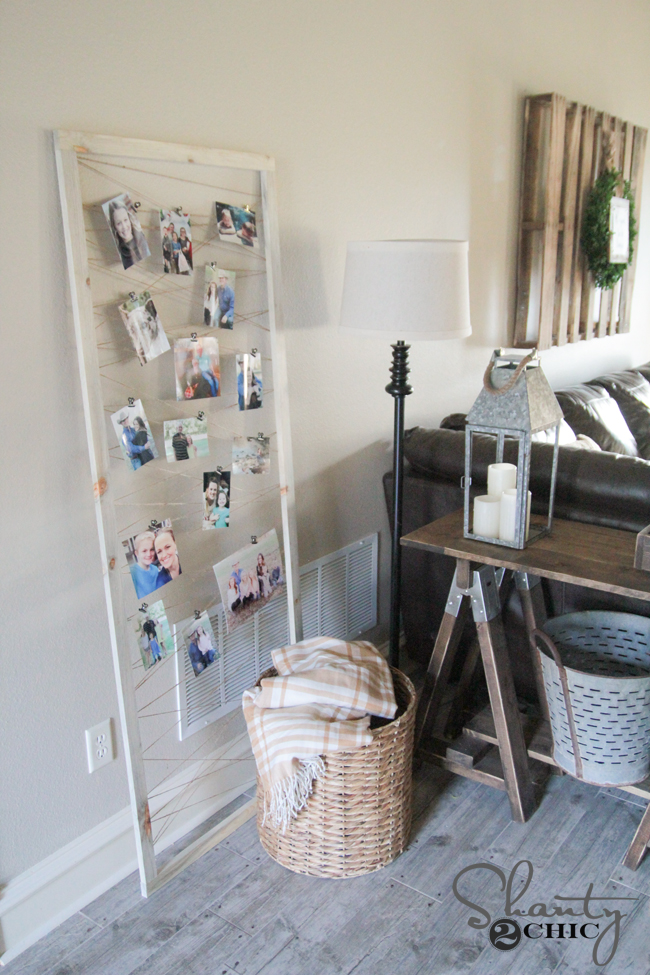
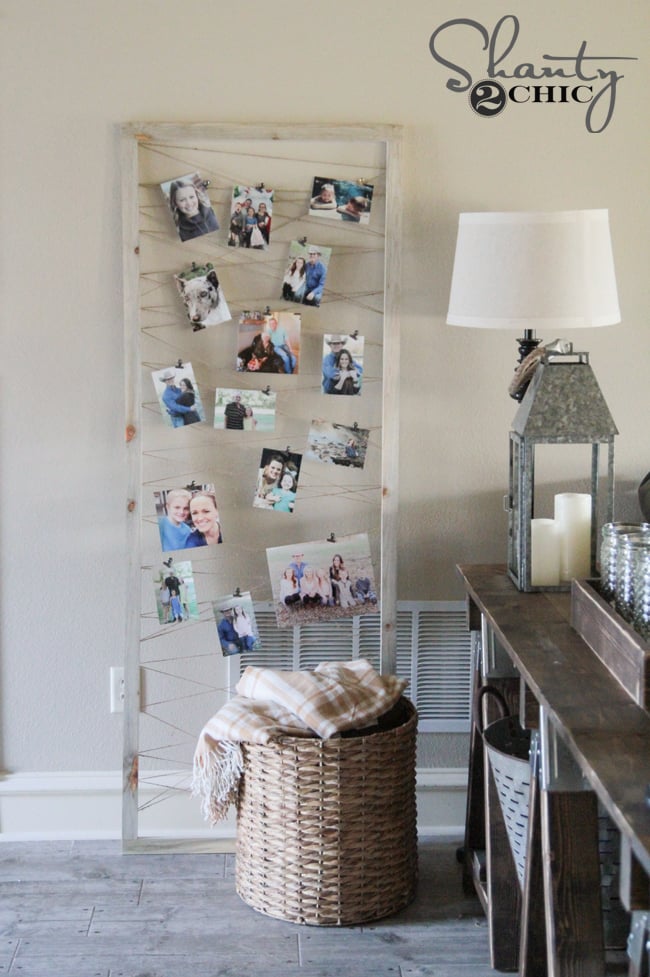
That’s it! So simple. So cheap. But, so cute! I used these little bulldog clips![]()
to hold my photos in place. Hobby Lobby sells gold ones that are super cute too. I didn’t add any stain or finish to this one because I like the look of this wood raw, but you can stain or paint yours to fit your style!
Here it is all set up and filled with pics of my crazies…
Thank you so much for stopping by guys! Let me know if you have any questions at all! Hope you all have a happy and safe new year!


I love this! Do you think it could be hung up? I have a bare small wall in my kitchen entry way I’m looking to fill
Thank you for sharing… I may add some fairy lights. I would also recommend mounting photos on cardstock to keep them from warping.
I thought so too. Had to ask. Completely moved to their own section out of paint dept. Strange. ????
Do you ladies know where Rustoleum and Varathane stains have gone? They seem to have been pulled from the shelves at Lowes and Home Depot.
Just moved in the store. at least mine has re arranged…. Bought some varathane today.
What section did you find them in? I walked the entire paint department. Even their websites shows them as not available in stores. Maybe it is just locally here in Austin.