Learn how to build this DIY Planter Box with just a few tools, free plans, a how-to video and a step-by-step tutorial by Shanty2Chic.

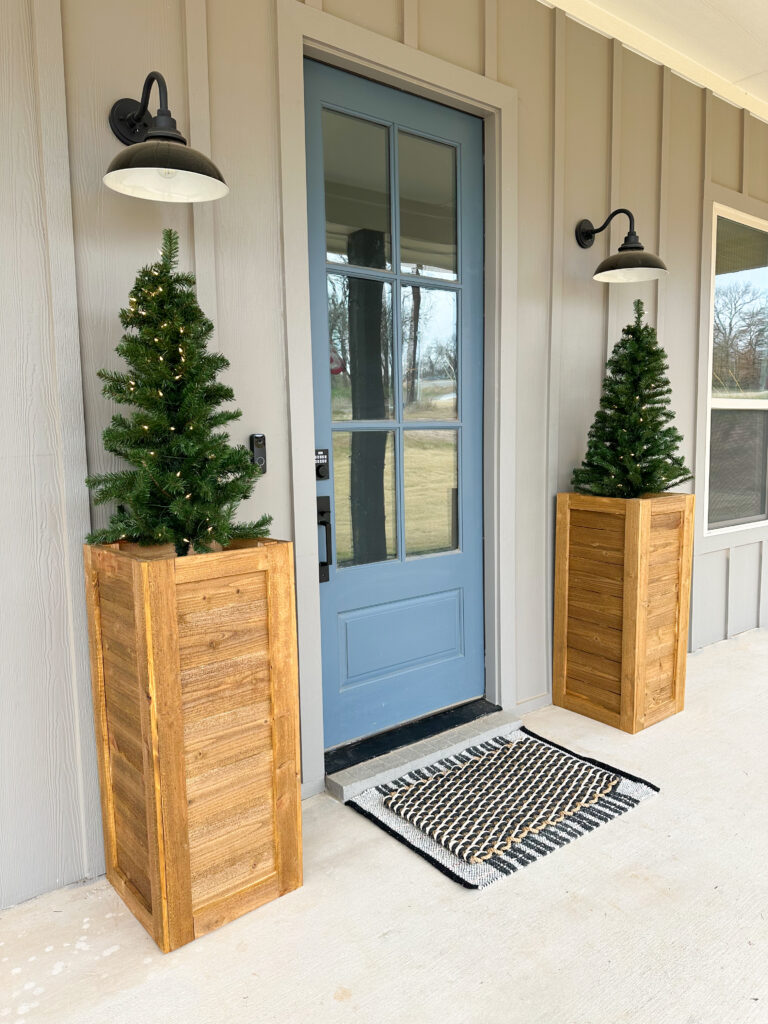
We have had some crazy weather in Texas over the last year and the multiple freezes have taken a toll on my flower beds. Most of my bushes died and I really needed to dig everything up and start fresh.
I have always wanted a couple of large cedar planters in my front flower beds and this was the perfect time to make that happen. So, I designed and built these Cedar Planter Boxes to add curb appeal, fill space and add dimension to my front flower beds. I really love how they completely changed the look of my home and they are super easy to build!
Just click the box below to watch Whitney and I build one!
As always, we have the free printable plans and the step-by-step instructions!
Click here to jump to the free DIY Planter Box PlansSo, let’s get to building a large but simple wooden planter box!
How to Build a Planter Box
Table of Contents
Tools:
Supplies:
- 9 1x6x8 Cedar Planks or Cedar Fence Pickets
- 2 1x4x8 Cedar Planks or Cedar Fence Pickets
- 6 2x4x8 Cedar
- 1 1/4″ Pocket Hole Screws
- 2 1/2″ Pocket Hole Screws
- 1 1/2″ Outdoor Wood Screws
- 1 1/4″ Brad Nails
- Wood Glue
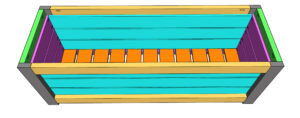
Building the Frame
Step 1:
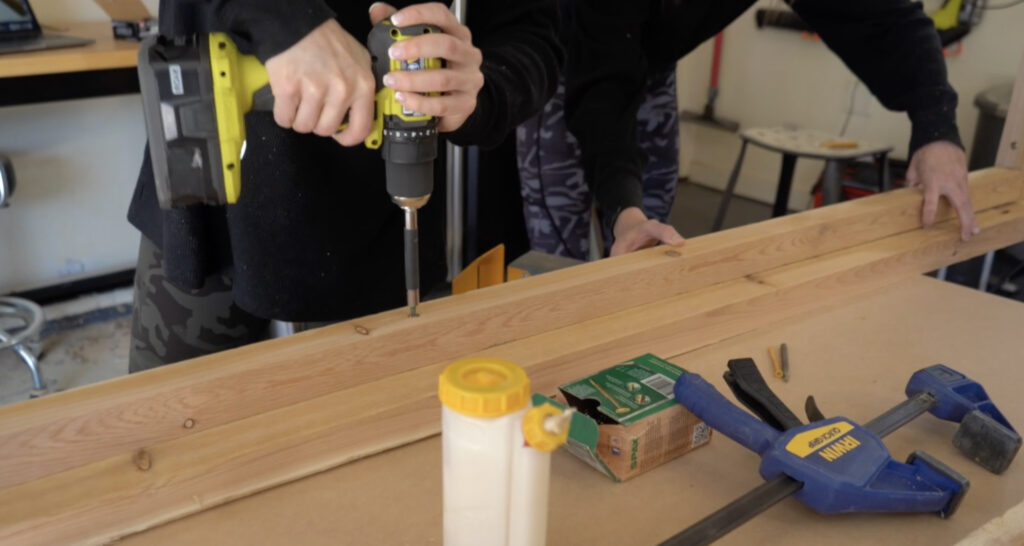
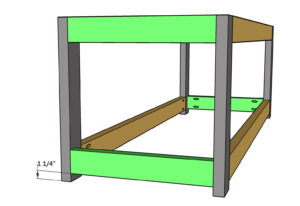
Cut the frame pieces to size. Drill 1 1/2″ pocket holes at both ends of each long, horizontal frame piece.
- You can find our favorite Kreg Jig model here
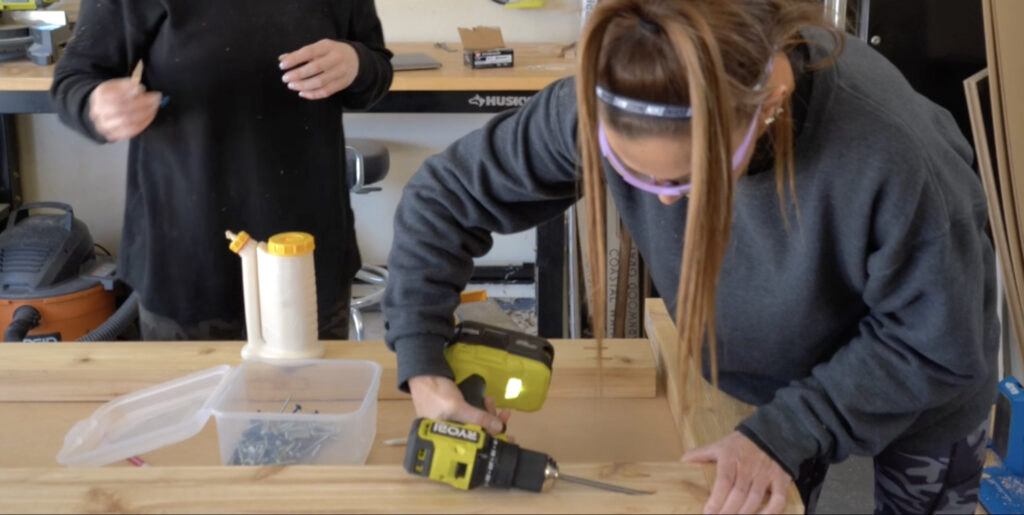
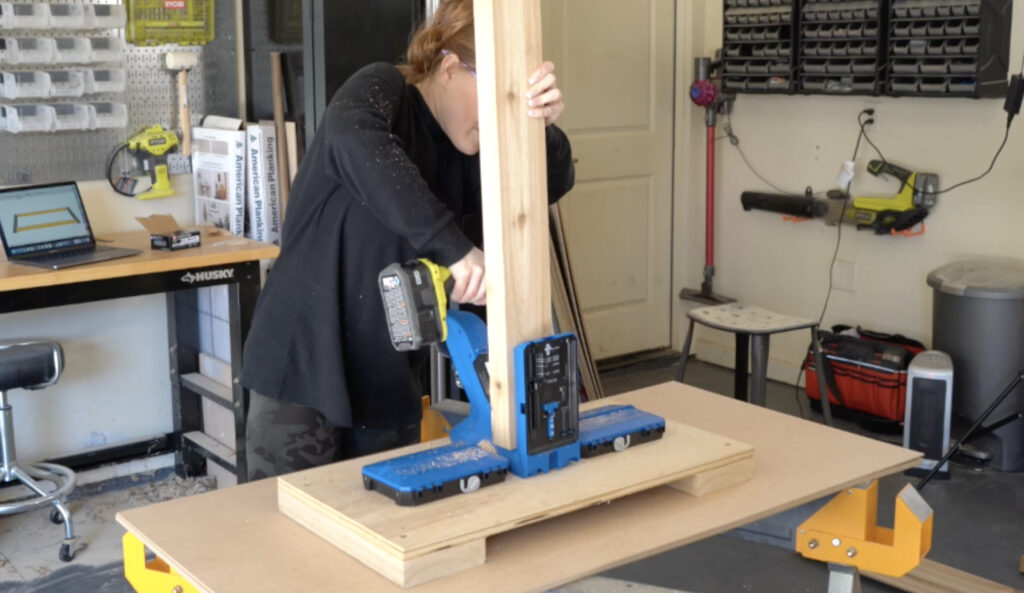
Attach them to two legs with 2 1/2″ pocket hole screws and wood glue. There should be a 1 1/4″ space at the bottom of the legs. Build two long frame assemblies.
Step 2:
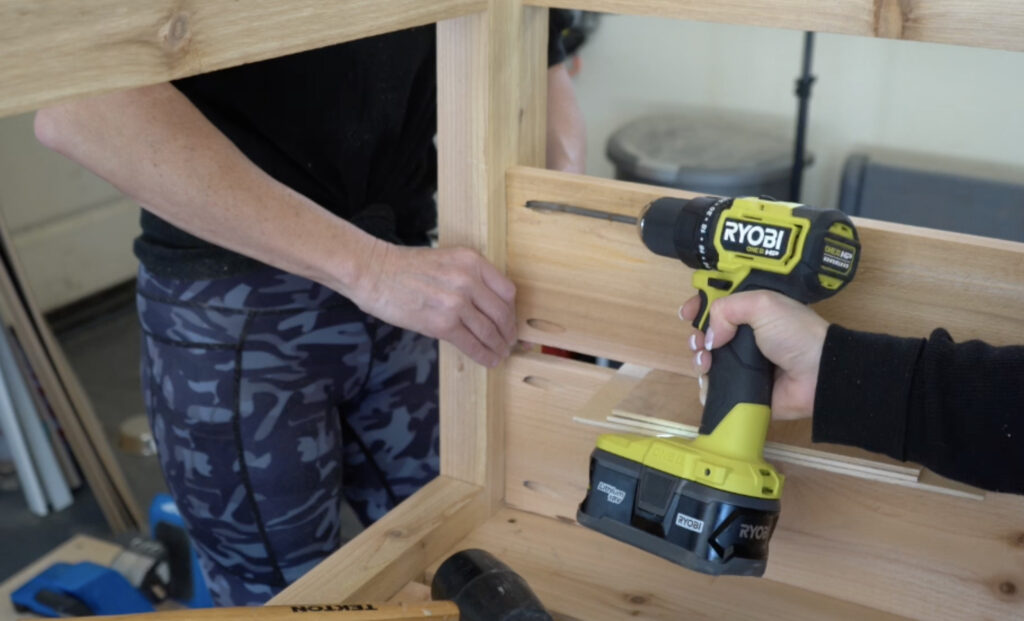
Cut the short frame pieces to size and drill 1 1 /2″ pocket holes at both ends of each piece. Attach them to the long frame assemblies with 2 1/2″ pocket hole screws and wood glue.
Step 3:
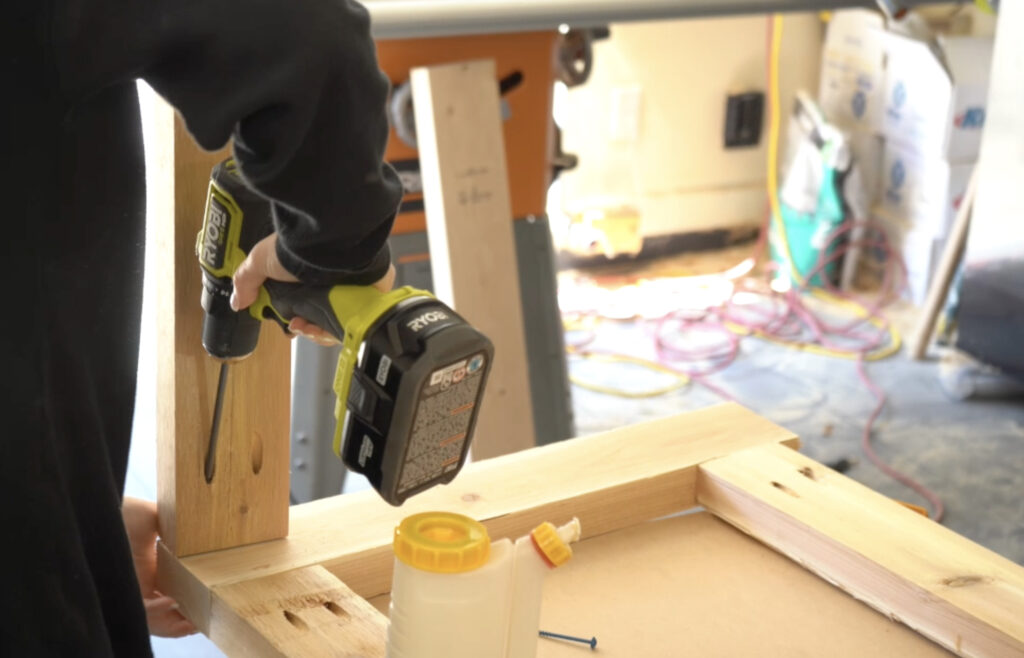
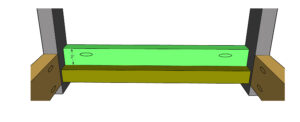
Cut the short cleats to size and attach them flush with the bottom of the short frame pieces with 2 1/2″ outdoor wood screws and wood glue. Note: If you don’t need a deep planter box you can attach the cleats higher. Check out the post on our site for more detailed instructions.
Step 4:
Cut the long cleats to size and attach them flush with the bottom of the long frame pieces with 2 1/2″ wood screws and wood glue.
Attaching the Slats
Step 1:
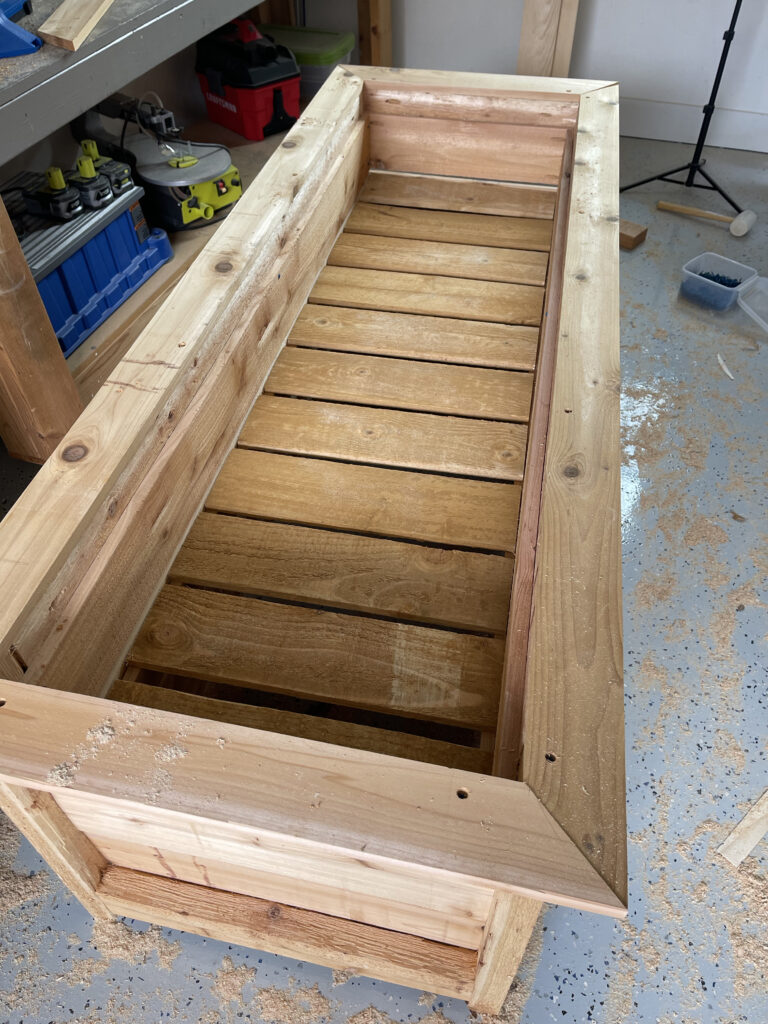
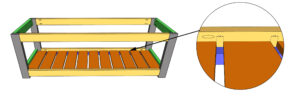
Cut the bottom slat pieces to size, spread them out evenly over the cleats and attach them to the cleats with 1 1/2″ outdoor wood screws and wood glue. The spacing of the slats will allow for proper drainage.
Step 2:
Cut the side slat pieces to size and drill 3/4″ pocket hole screws at both ends. Attach them to the inside of the legs with 1 1/4″ pocket screws and wood glue. We used scrap wood as a spacer for the 1/2″ space between the boards.
Step 3:
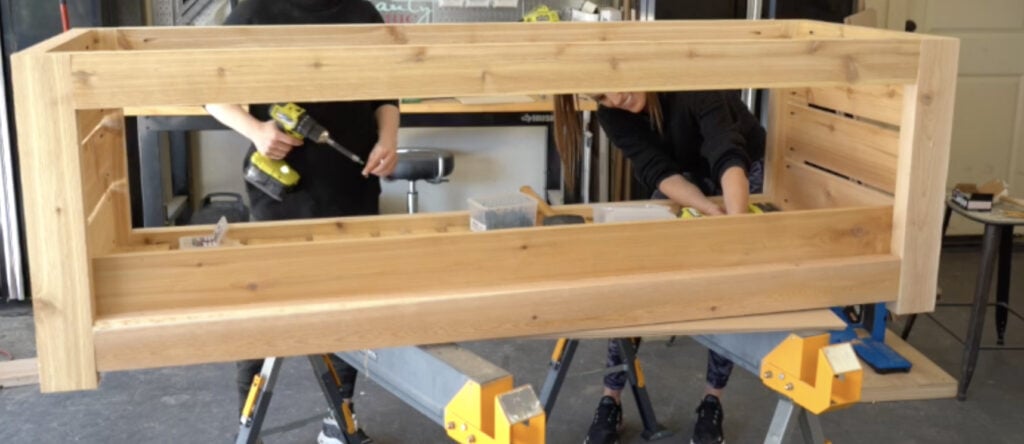
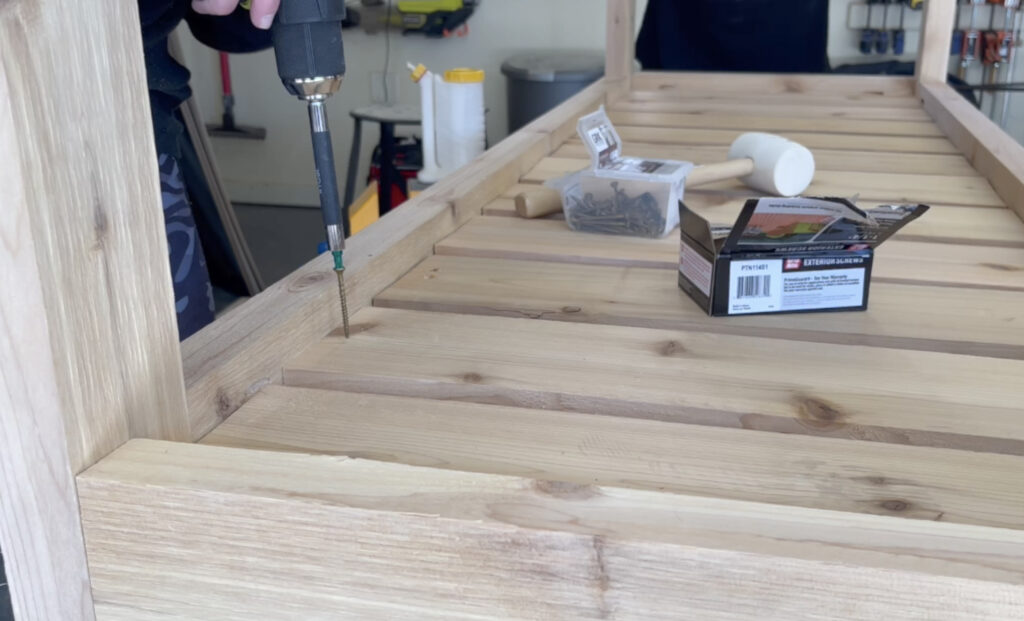
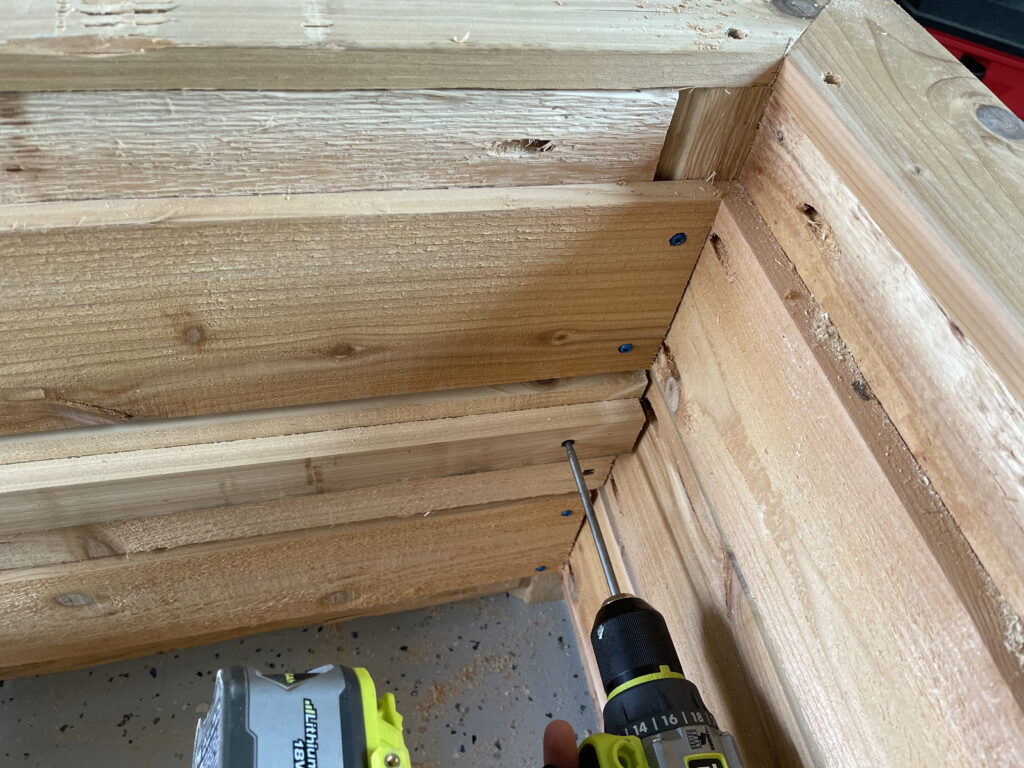
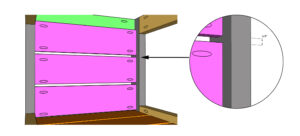
Cut the long slats to size and attach them to the inside of the planter box with 1 1/2″ outdoor wood screws and wood glue, from the back of the slats into the inside of the legs and frame. Use the same spacing as the side slats.
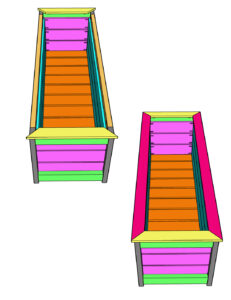
Adding the Trim
Step 1:
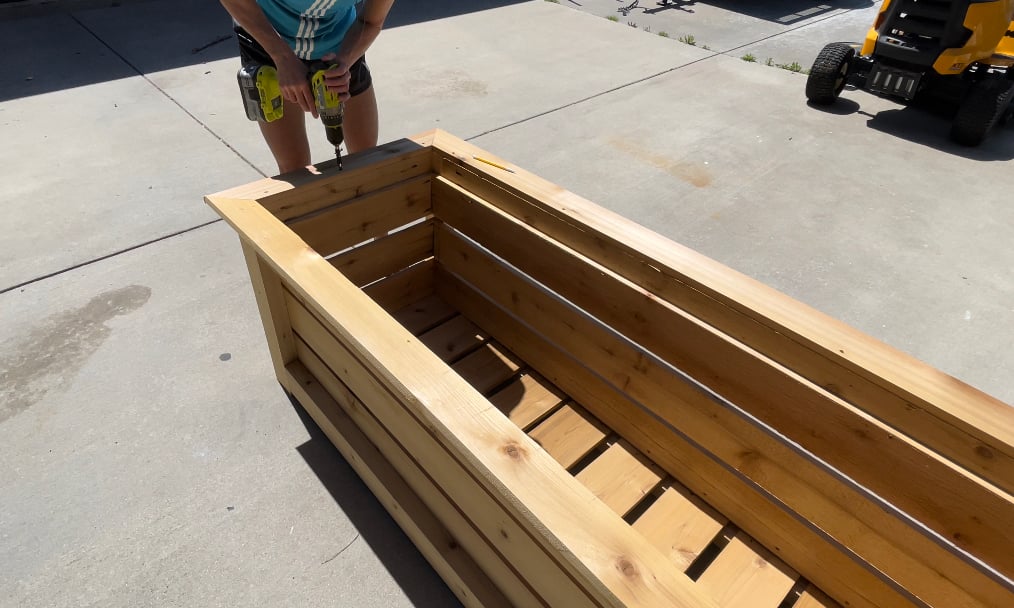
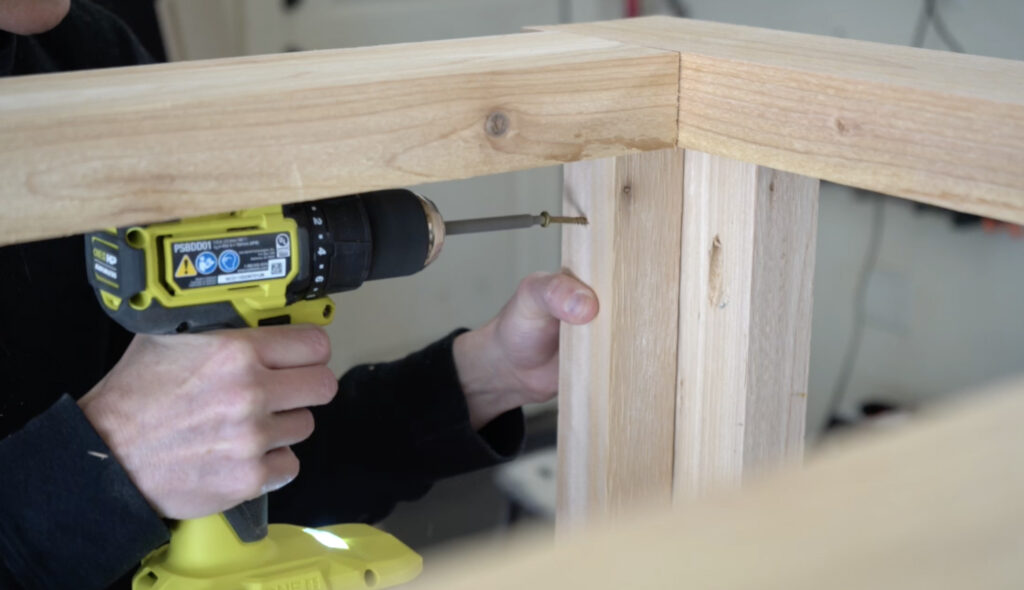
Cut the short angle trim pieces to size and attach them to the top ends of the planter box with 1 1/2″ outdoor wood screws and wood glue. Measure and cut for the long trim pieces and attach them the same way. Pop a few 1 1/4″ brad nails into the mitered corners.
Modification
These are very large planter boxes and can hold many different styles and sizes of plants. If you want the look of a large wood planter but don’t need them as deep, you can move the cleats up and attach them to the long slats.
Then, just attach the bottom slats to the cleats the same way.
The Finish
Step 1:
Fill any exposed pocket holes and screw holes, sand it down and add an outdoor finish for weather resistance.
Step 2:
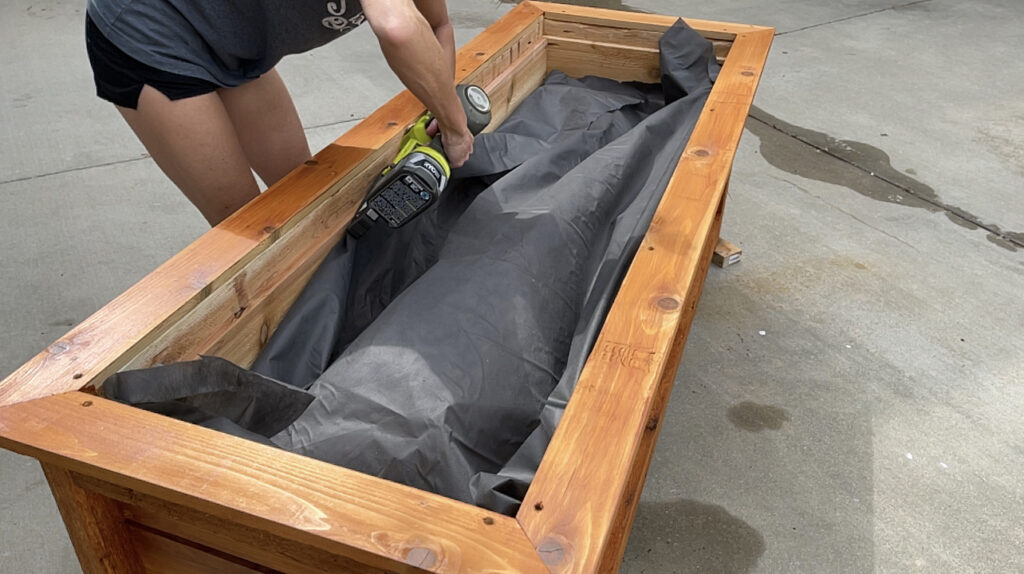
I used landscape fabric to line the inside of the raised planter box and attached the fabric to the inside and the bottom of the planter, with my 18 gauge staple gun and 5/8″ staples.
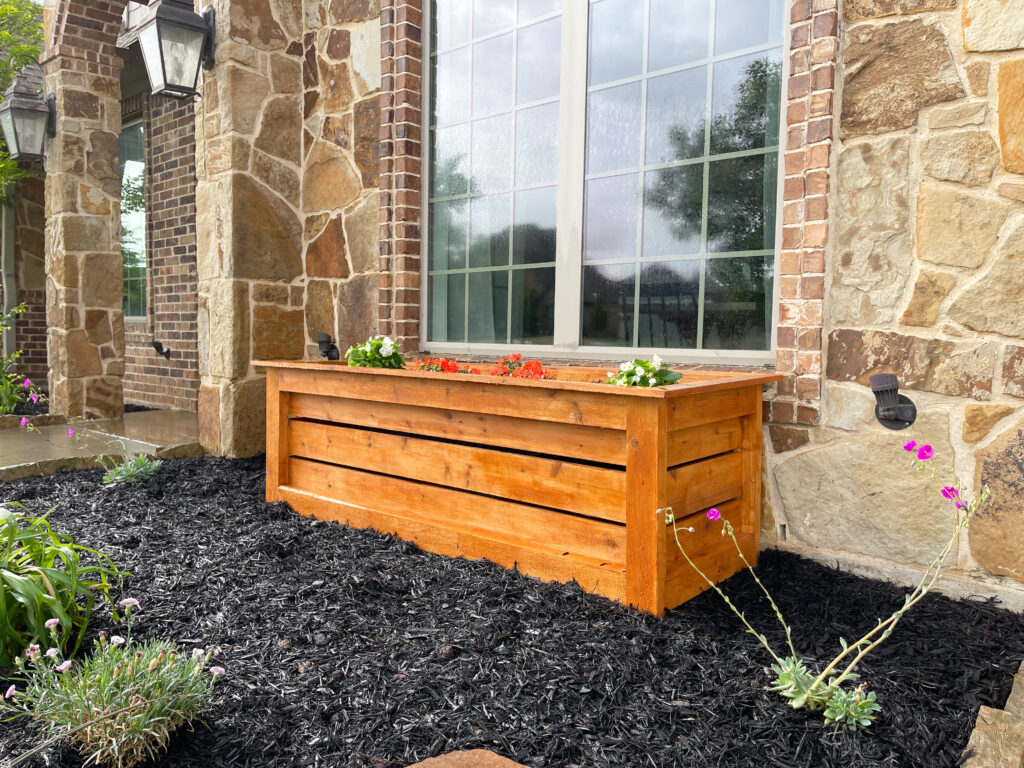
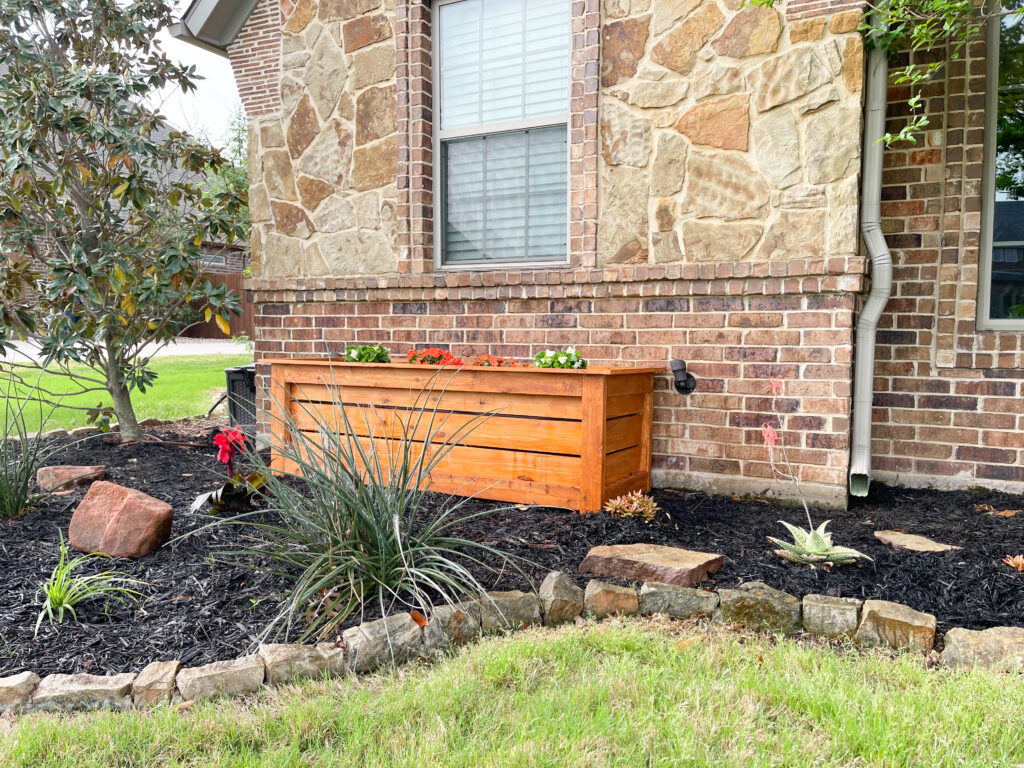
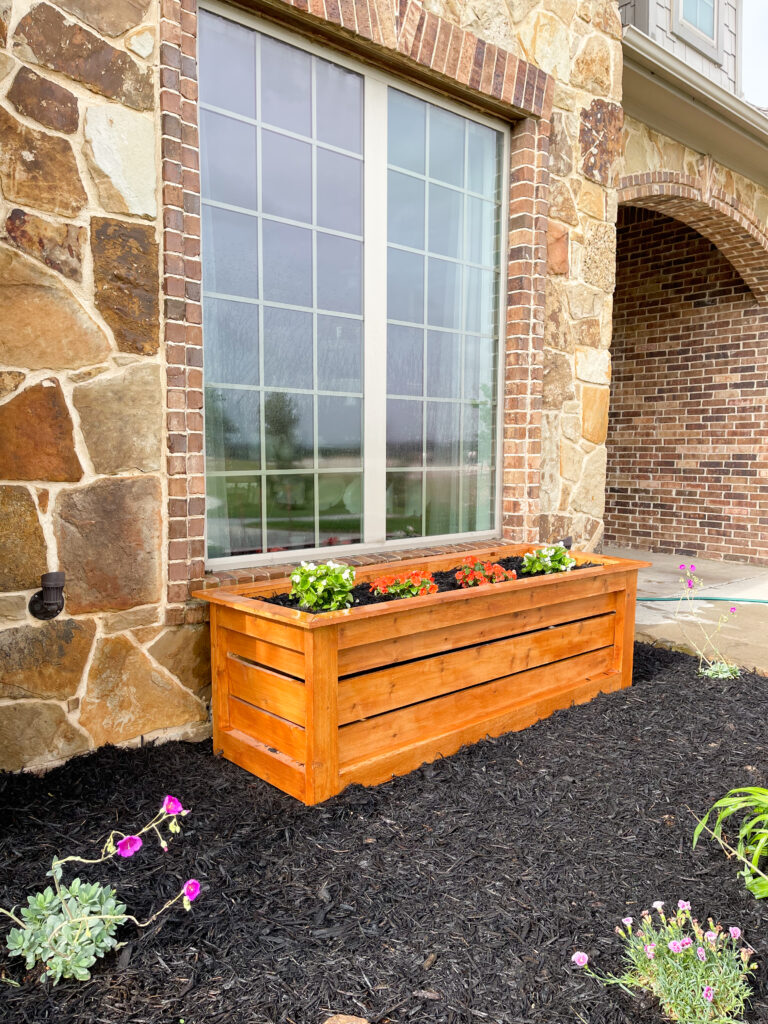


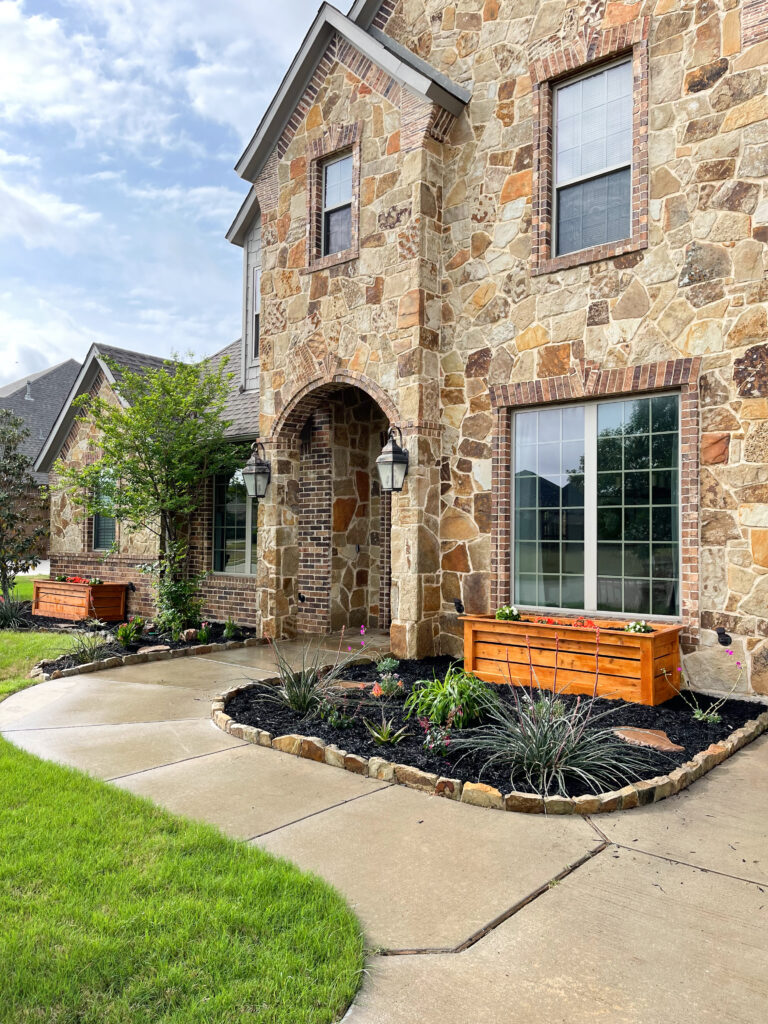
I am so in love my my new garden boxes! They were so easy to build and they add so much character to the front of my home!Make sure to share your builds with us on social media and use #shanty2chic so we can share them too!
Happy Building!
Check out some of our other outdoor projects!

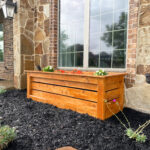
DIY Cedar Planter Box
Tools
- Miter Saw
- Drill
- Kreg Jig
- Nailer
- Sander
Supply List
- 9 1x6x8 Cedar Planks or Fence Pickets
- 2 1x4x8 Cedar Planks or Fence Pickets
- 6 2x4x8 Cedar
- 1 1/4" Pocket Hole Screws
- 2 1/2" Pocket Hole Screws
- 1 1/2" Outdoor Wood Screws
- 1 1/4" Brad Nails
- Wood Glue
Instructions
Cut List
- Make your cuts.


Building the Frame
- Cut the frame pieces to size. Drill 1 1/2" pocket holes at both ends of each long, horizontal frame pieces. Attach them to two legs with 2 1/2" pocket hole screws and wood glue. There should be a 1 1/4" space at the bottom of the legs. Build two long frame assemblies.

- Cut the short frame pieces to size and drill 1 1 /2" pocket holes at both ends of each piece. Attach them to the long frame assemblies with 2 1/2" pocket hole screws and wood glue.

- Cut the short cleats to size and attach them flush with the bottom of the short frame pieces with 2 1/2" outdoor wood screws and wood glue. Note: If you don't need a deep planter box you can attach the cleats higher. Check out the post on our site for more detailed instructions.

- Cut the long cleats to size and attach them flush with the bottom of the long frame pieces with 2 1/2" wood screws and wood glue.


Attaching the Slats
- Cut the bottom slat pieces to size, spread them out evenly over the cleats and attach them to the cleats with 1 1/2" outdoor wood screws and wood glue.

- Cut the side slat pieces to size and drill 3/4" pocket hole screws at both ends. Attach them to the inside of the legs with 1 1/4" pocket hole screws and wood glue.

- Cut the long slats to size and attach them to the inside of the planter box with 1 1/2" outdoor wood screws and wood glue, from the back of the slats into the inside of the legs and frame. Use the same spacing as the side slats.

Adding the Trim
- Cut the short trim pieces to size and attach them to the top ends of the planter box with 1 1/2" outdoor wood screws and wood glue. Measure and cut for the long trim pieces and attach them the same way. Pop a few 1 1/4" brad nails into the mitered corners.

The Finish
- Fill any exposed pocket holes and screw holes, sand it down and add an outdoor finish. You can check out our video and post to see how we prepped the planter box for planting!Make sure to share your builds with us on social media and use #shanty2chic so we can share them too!Happy Building!

This is a wonderful DIY project that beautifully combines simplicity, functionality, and style. The planter box design is clean, versatile, and perfect for enhancing patios, balconies, or garden spaces. The step-by-step instructions make it an enjoyable project for both beginners and experienced DIY enthusiasts.
Outdoor projects like this benefit greatly from using quality wood materials that offer strength and durability in different weather conditions. For those planning similar woodworking or landscaping projects, https://www.plywoodbazar.com is a useful platform for exploring a wide range of plywood, boards, laminates, and other interior and exterior materials.
Thank you for sharing such a practical and inspiring DIY tutorial. It’s a great project for anyone looking to add a personal touch to their outdoor space.
This is a very practical and attractive outdoor project. A planter box like this is a great way to add greenery while also enhancing the overall look of patios, balconies, or garden spaces. I appreciate how the design feels sturdy, simple, and easy to customize for different areas. It’s always inspiring to see outdoor décor ideas alongside broader material and design trends here: https://plywoodbazar.com/ A smart and versatile DIY build.
This planter box design is simple, functional, and perfect for both indoor and outdoor use. Projects like this really depend on proper material selection and finishing, especially when exposed to moisture and varying weather conditions. Using well-treated or moisture-resistant boards can help maintain durability and structural stability over time. We’ve come across useful material insights on platforms like https://plywoodbazar.com/
for similar outdoor and interior applications. Very practical and well-executed build!
I absolutely love this DIY planter box! The instructions are super clear, and the design is so charming. I can’t wait to give this a try in my backyard! Thanks for sharing such a great project!
I absolutely love this DIY planter box idea! The design is so stylish and it looks achievable even for someone with limited woodworking skills. I can’t wait to try this out in my garden. Thank you for sharing such a great tutorial!