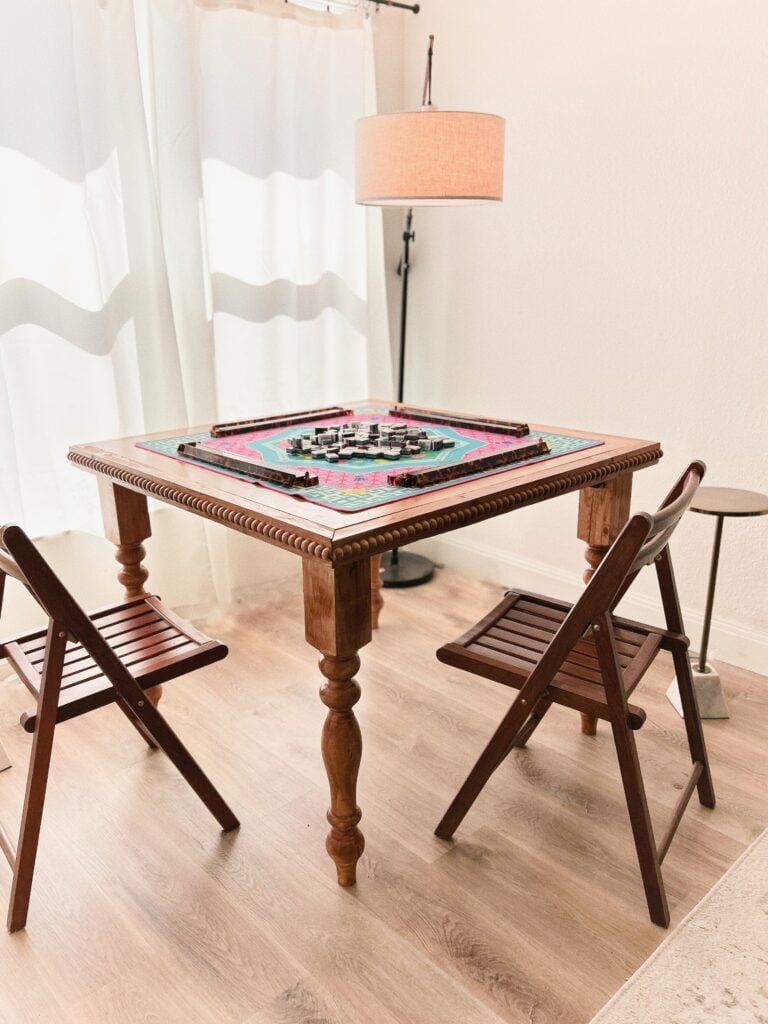
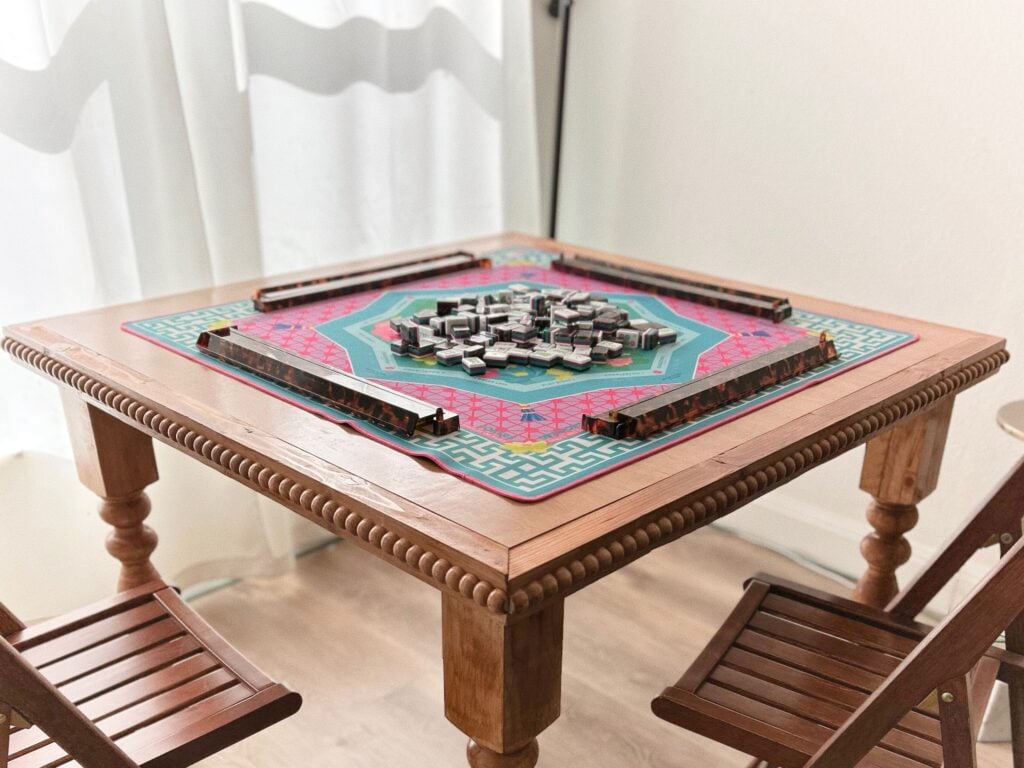
We never build things for ourselves… until today! I’ve really gotten into the Mahjong craze lately, and I wanted a cute table just for me. This DIY Portable Mahjong Tableis perfect for game night, small spaces, or anywhere you want to rack and roll in style. It folds flat for easy storage, it’s sturdy enough for serious play, and of course-it’s totally Shanty-2-Chic.
Check out the how-to video HERE!
Let’s get to work!
Table of Contents
🪚 Supplies + Tools
Lumber
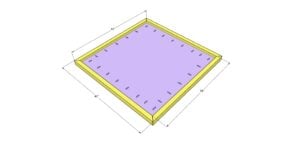
- ¾″ plywood (for tabletop)
- 2×4 boards ripped to 2″ wide (for trim)
- Scrap plywood (for foot pads)
Hardware & Materials
- Folding table leg hinges (linked above)
- 4 turned wood legs (find them here on Amazon!)
- 1¼″ Kreg screws (for foot pads and hinges)
- 1½″ pocket hole screws (for trim)
- Wood glue
- Beaded wood trim (optional but adorable!)
- Varathane Early American stain
- Polycrylic or top coat of choice
Tools
- Kreg Rebel Pocket-Hole Joiner (or any ¾″ pocket hole jig)
- Kreg 20V Brushless Drill
- Miter saw (for 45° trim cuts)
- Nail gun
- Sander
🪵 How to Build a DIY Mahjong Table
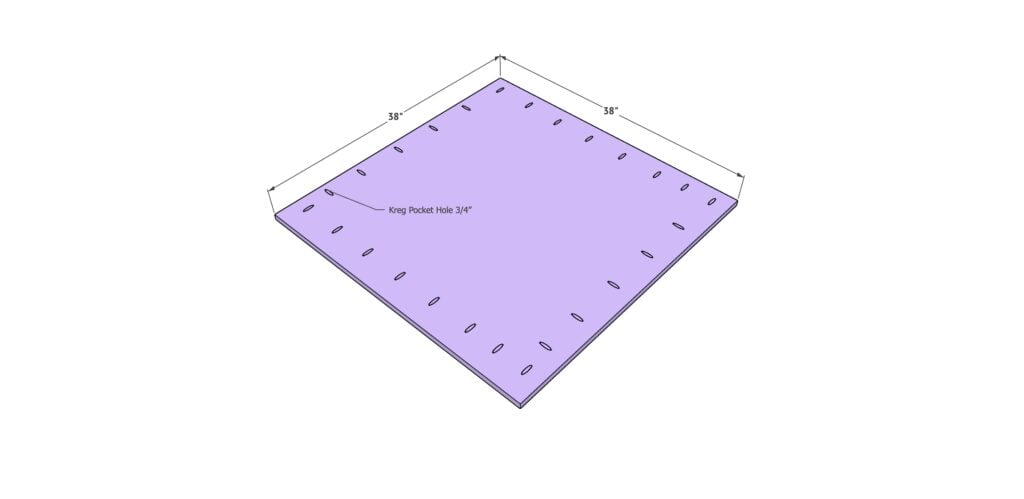
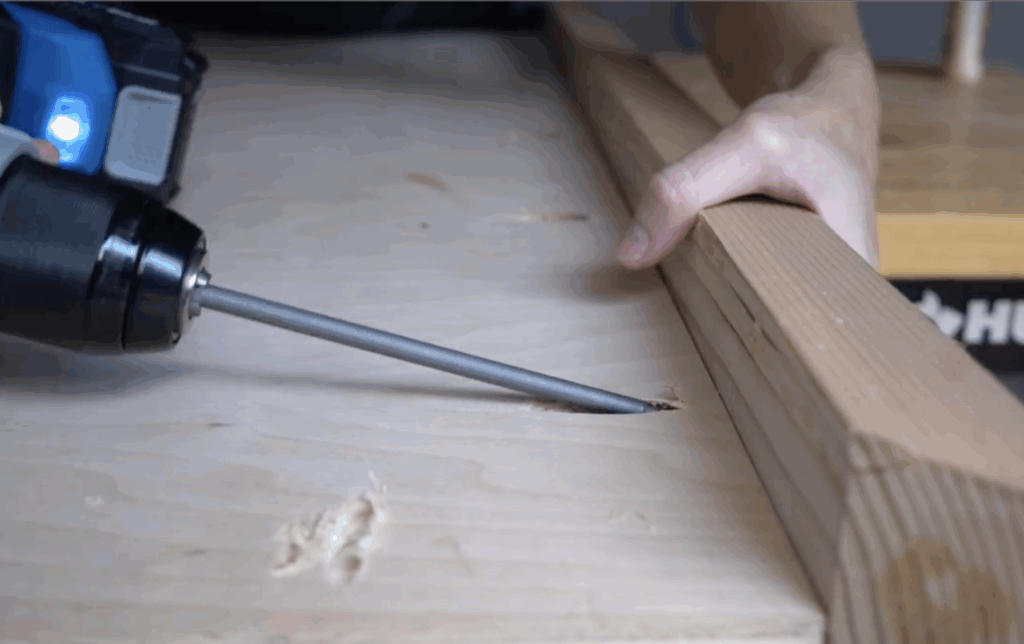
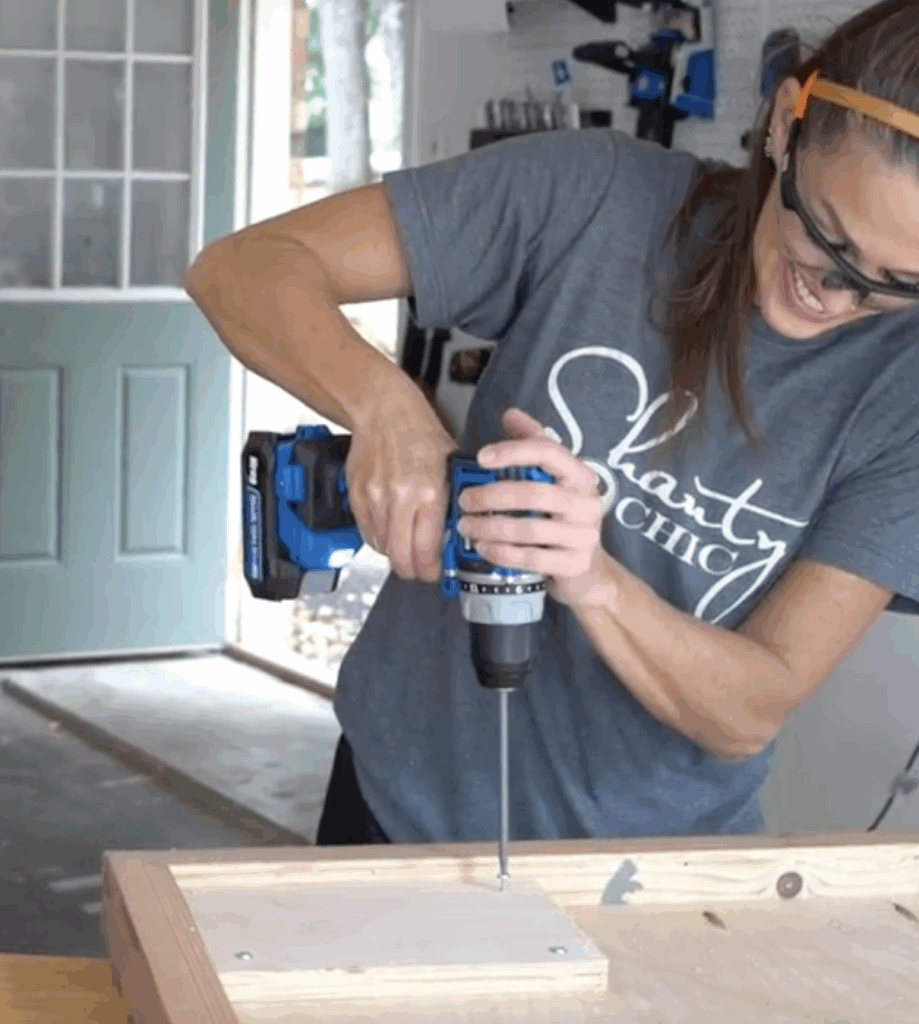
Step 1: Drill Pocket Holes
Start with your ¾″ plywood tabletop. Use your Kreg Rebel Pocket-Hole Joiner to drill ¾″ pocket holes along the underside where the trim will attach. We used the new battery-powered Rebel-it’s compact, portable, and perfect for tabletop projects. No more wrangling full sheets through the Foreman!
Our New Favorite Tool: The Kreg Rebel Pocket-Hole Joiner
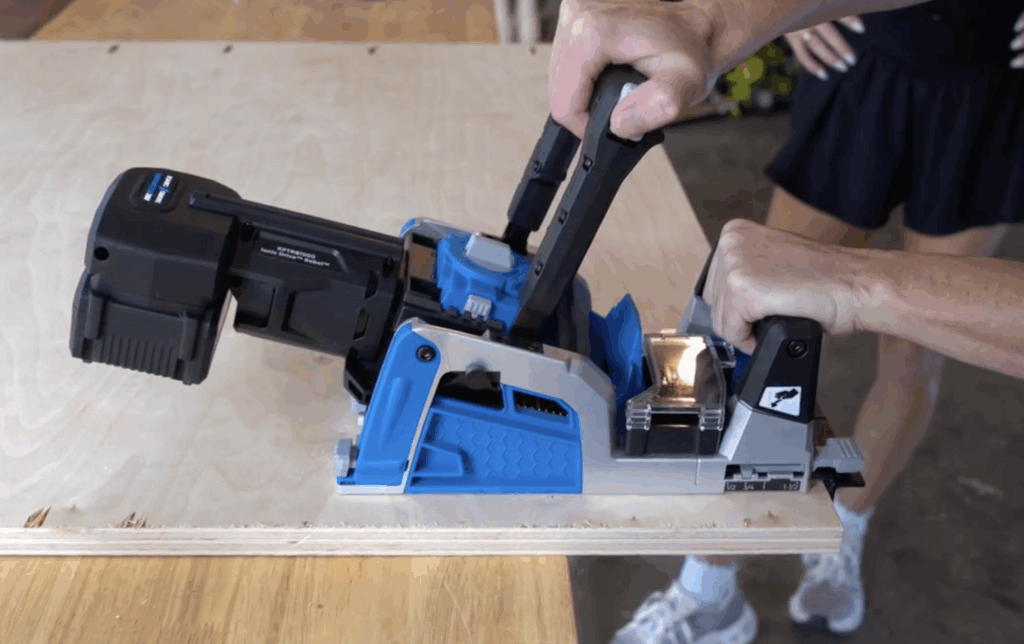
Y’all, meet our new obsession – the Kreg Rebel Pocket-Hole Joiner!
We’ve been long-time fans of the Kreg Foreman, but this little guy is a total game changer. It’s like the Foreman’s younger, cooler cousin who’s ready to work anywhere.
The Rebel is battery powered, totally portable, and small enough to sit right on your workbench. That means no more wrestling big boards through a machine – you can just bring the jig to your project. It’s fast, easy, and drills those perfect pocket holes every single time.
We love that it still has the built-in material stops and depth settings we’re used to (we set ours to ¾″ for this build). Just pull the lever, drill, and boom – pocket holes for days.
If you’re looking to up your DIY game or want a setup that doesn’t take over your whole shop, the Rebel is definitely worth checking out.
Compact, powerful, and totally Shanty-approved. 💪
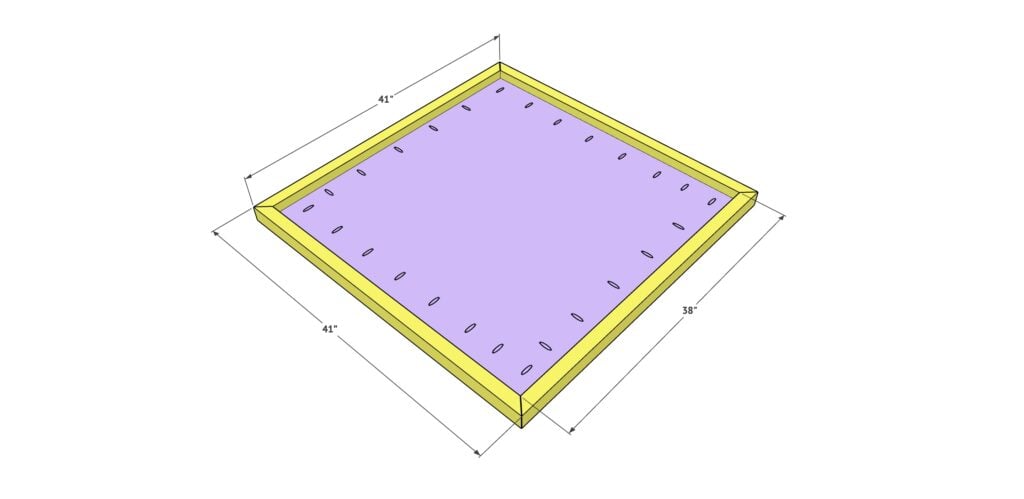
Step 2: Cut and Attach Trim
Rip your 2×4 boards down to 2″ wide, then miter each end at 45°. Add a bead of wood glue to each edge of the plywood and attach the trim pieces using 1½″ pocket hole screws. We actually salvaged wood from my old kitchen table for this step-reduce, reuse, recycle! Clamp each corner tight for a clean fit.
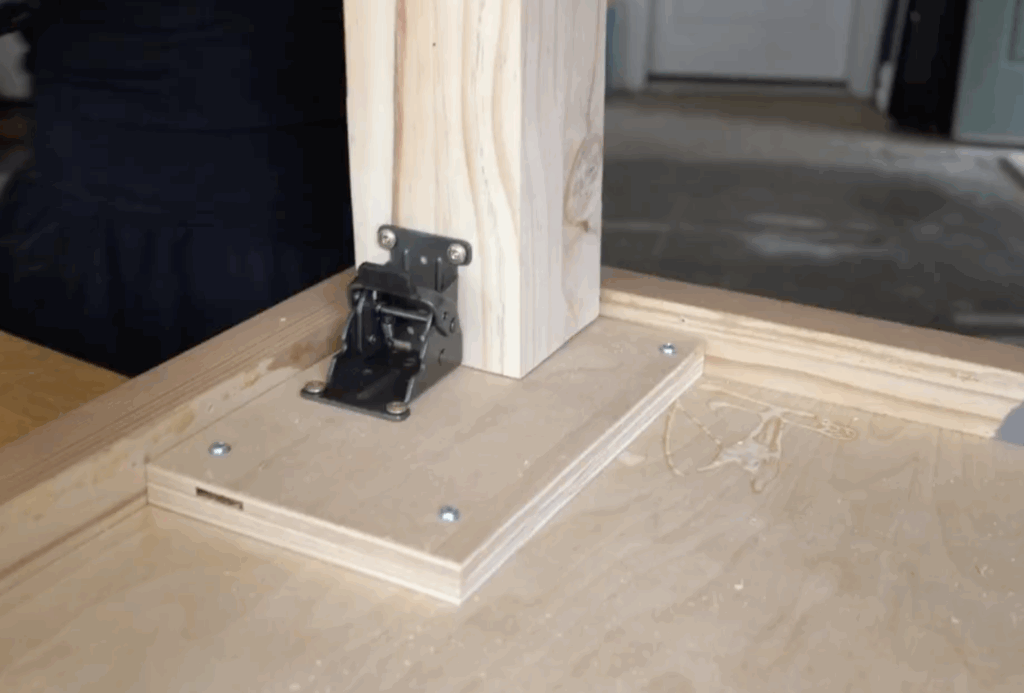
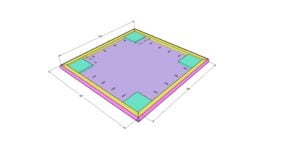
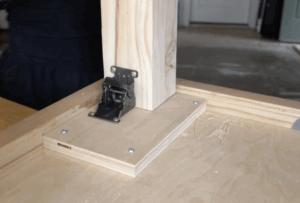
Step 3: Add Foot Pads
Before attaching the folding legs, glue and screw small plywood foot pads underneath each corner. These give the hinges something solid to bite into and help the legs stay stable during those intense Mahjong rounds! Use 1¼″ Kreg screws to secure each pad in place.
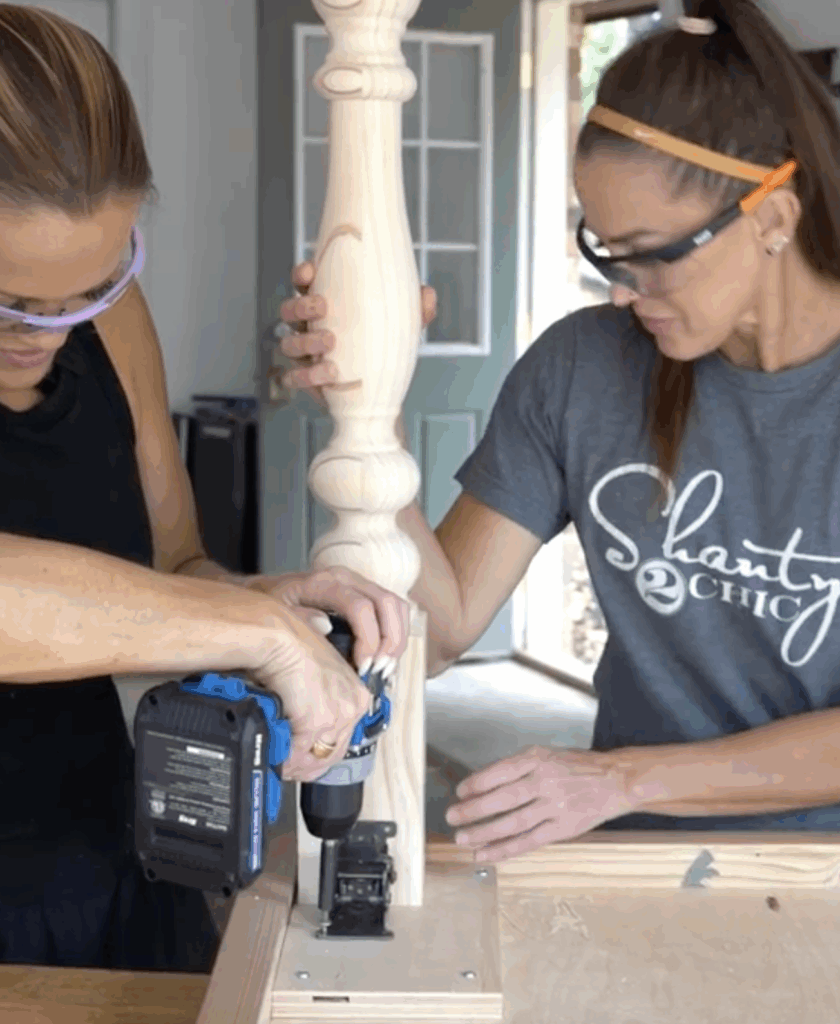
Step 4: Attach Folding Legs
Time for the fun part-the folding legs! You can see them on Amazon HERE! These are heavy-duty folding hinges that make the table super portable and easy to store. You can see them HERE on Amazon! Line up each hinge so the leg folds in the right direction (follow the hinge orientation). Attach them with 1¼″ screws, and make sure all four fold flat when you’re done.
Tip: The foot pads should run the same direction the leg folds. This gives it a stronger anchor and keeps your table sturdy.
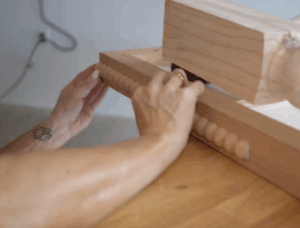
Step 5: Add Decorative Trim
To give this table some Shanty charm, I added a beaded wood trim around the edges. A little wood glue and a few brad nails are all it takes! This small detail totally transforms it from a simple game table into something special.

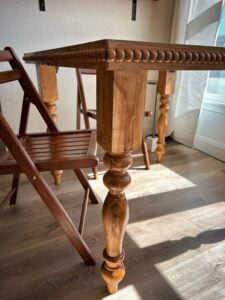
Step 6: Stain + Finish
Once your build is complete, sand everything smooth and wipe away the dust. I finished mine with Varathane Early American stain for that warm, classic tone we love. Seal it with a clear topcoat for protection and let it cure fully before using.

🀄 Game Night Ready
I love how this Mahjong table turned out! The folding legs make it easy to store, the stain color gives it a timeless look, and that beaded trim just ties it all together. It’s perfect for Mahjong-or any game night with friends.

No cracks in this table, y’all. 😉
Make sure to subscribe to our YouTube channel so you don’t miss our next build. And if you make your own Mahjong table, tag us-we love seeing your Shanty-style creations!
🔗 Want the Printable Plans?
Download the PDF plan with detailed measurements and step-by-step diagrams here.
DIY Portable Mahjong Table
Tools
- – Kreg Rebel Pocket-Hole Joiner
- – Kreg 20V Brushless Drill
- Miter Saw
- – Nail gun
- Sander
- – Clamps
Supply List
- – ¾″ plywood 48″ x 48″ cut to size
- – 2×4 boards ripped to 2″ wide ends mitered at 45°
- – Beaded wood trim approx. 170″ total length
- – Folding leg hinges
- – Scrap plywood for foot pads
- – 1¼″ Kreg screws
- – 1½″ pocket hole screws
- – Wood glue
- – Brad nails
- – Varathane Early American stain
- – Clear topcoat or polycrylic
Instructions
- Start with your ¾″ plywood tabletop. Use the Kreg Rebel Pocket-Hole Joiner to drill ¾″ pocket holes along all four sides of the underside where the trim will attach.

- Rip your 2×4 boards down to 2″ wide, then miter each end at 45°. Apply wood glue to each edge of the plywood and attach the trim pieces using 1½″ pocket hole screws.
- Before attaching the folding legs, glue and screw small plywood foot pads underneath each corner. These provide extra strength for the hinge screws and help keep the table stable.
- Attach the folding leg hinges with 1¼″ screws, making sure each leg folds in the correct direction and lays flat when folded.

- Attach the decorative beaded wood trim around the tabletop edges. Apply a thin bead of wood glue, position the trim in place, and secure it with brad nails.

- Sand the entire table smooth, wipe away dust, and apply Varathane Early American stain. Seal with a clear topcoat or polycrylic and let it cure fully before use.


Notes


This is a really thoughtful design for a portable gaming table. The foldable concept combined with a sturdy wooden structure makes it both practical and visually appealing. It’s impressive how the design balances portability with durability, which is often a challenge in furniture projects like this.
From an interior industry perspective, projects like this highlight how adaptable furniture solutions are becoming increasingly important, especially for multifunctional spaces in homes and hospitality settings. Smart woodworking and material choices can make compact furniture both functional and long-lasting. We’ve been following similar material and furniture trends across interior applications as well: https://plywoodbazar.com/