Hey there! Hope everyone had a great weekend! I got busy building these cuties!
 They were quick, easy and only $15 each! They are HUGE and a lot of BANG for your Buck;)
Here’s how you can build your own! (My purchases and cuts are based on 3 frames). ***I suggest measuring as you go, especially on the moulding cuts. Boards tend to vary.)
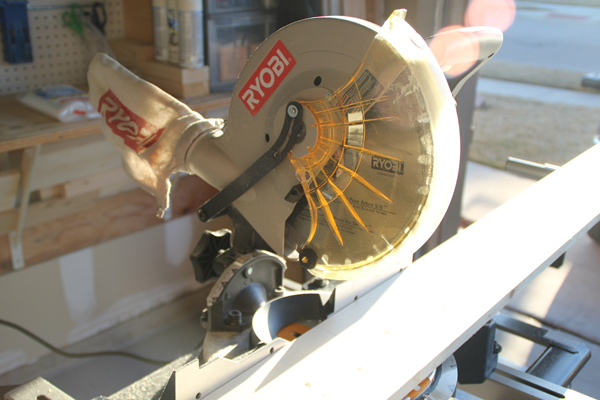 I purchased 2 – 1×6″ white wood boards and cut 9 @ 16 1/4″ with my miter saw.
If you don’t have a Compound Miter saw, no worries! This is a very simple miter-job that can be done with this inexpensive hand saw and miter box!
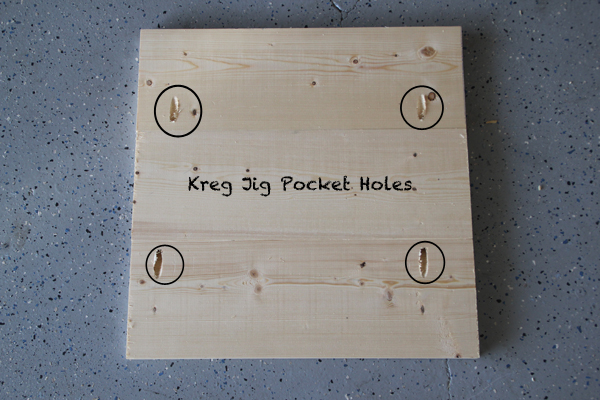
Next, I used my Kreg Jig Pocket Hole System to drill pocket holes into 6 of the 1×6 boards.
 I drilled my 1 1/4″ pocket hole screws from each end of a 1×6 without pocket holes forming a pallet of 3 – 1×6 boards.
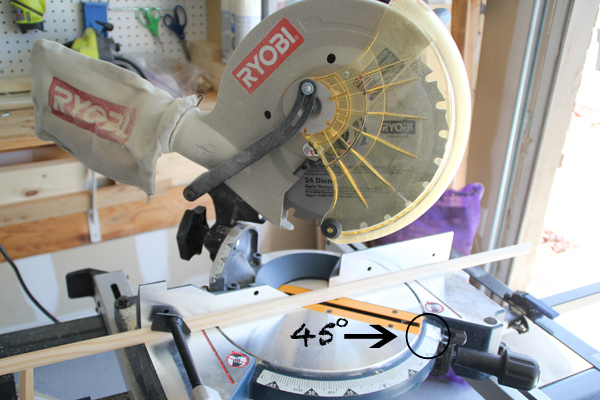
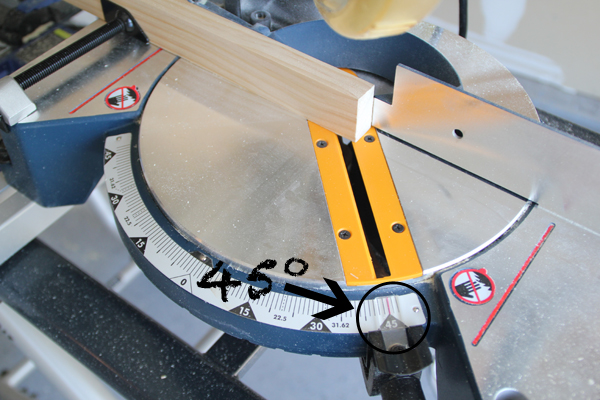 I purchased 3 – 1×2″ @ 8 ft. Select Pine boards for the outside trim. I made 12 – 45 degree miter cuts at 18″ long point to long point. (If you are not familiar with long point to long point, it refers to the measurement from the longest point on one end of the board to the longest point on the opposite end). The ends will not be parallel, meaning that you will have to slide your miter from right to left to make your cuts on each board.
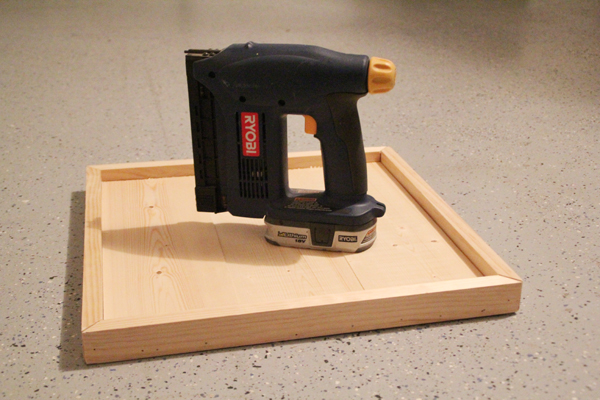 I used my Brad Nailer to attache the 1×2 trim to the pallet. (I also ran a thin line of Gorilla Glue wood glue at each joint for added strength)!
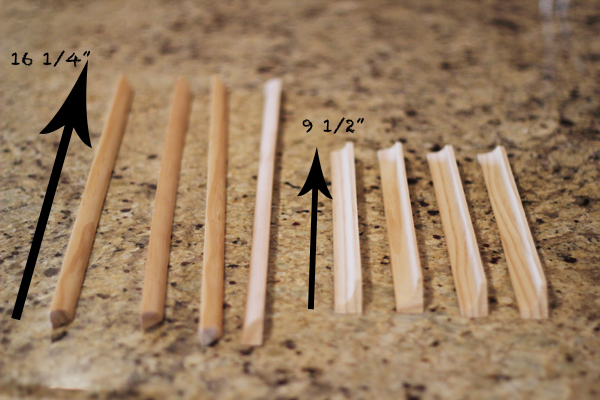 Now for some fun:) I purchased 17 ft. of Quarter Round and made 12 – 45 degree miter cuts at 16 1/4″ (long point to long point). I also purchased 10ft. of Cove Moulding and made 12 – 45 degree miter cuts at 9 1/2″ (long point to long point).
 ***When cutting your moulding pieces, you will need to cut both ends of the board. You can not finish one piece and use the mitered edge of the scrap piece. You need to make a fresh cut and then cut the other end.***
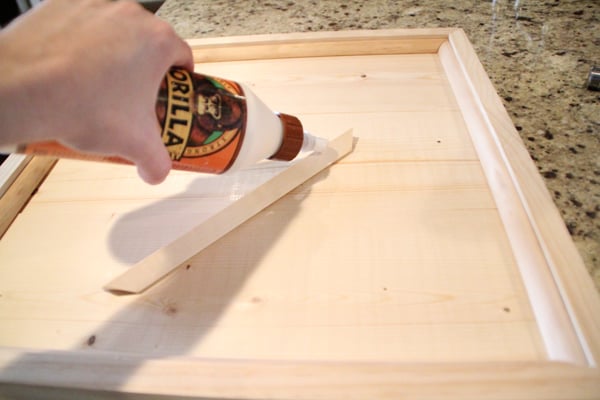
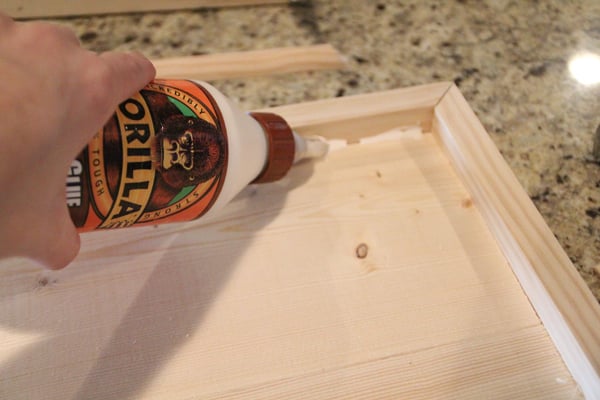 Apply Gorilla Glue Wood Glue along the edges where the 1×2 trim and pallet meet and then lay your quarter round moulding down.
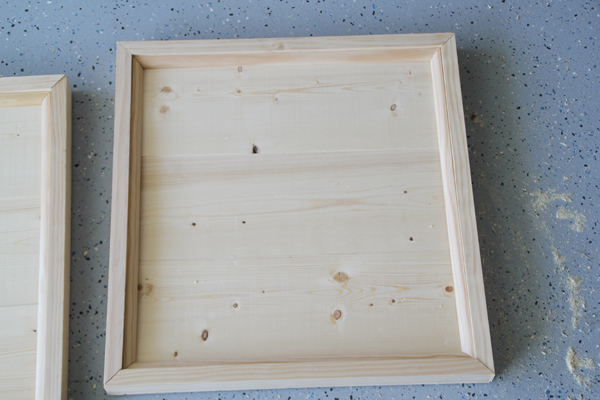 After installing quarter round.
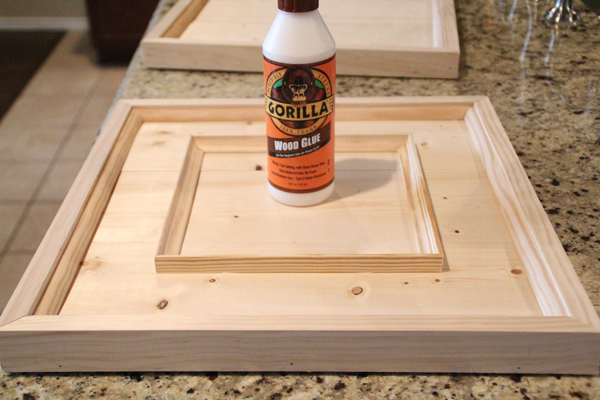
Now, apply a thin line of Gorilla Glue wood glue to the back of each cove moulding piece and arrange them in the center of the pallet forming a square frame.
 Let it dry:)
 Once the glue dried, I applied one coat of Dark Walnut stain to each frame. I used a foam brush to apply, let it dry for about 5-10 minutes and then wiped it with a clean cloth. You do not need to remove all of the excess stain when wiping. Just use the cloth to blend it well.
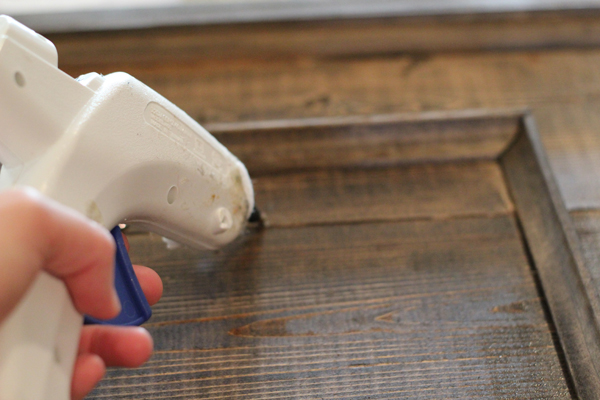
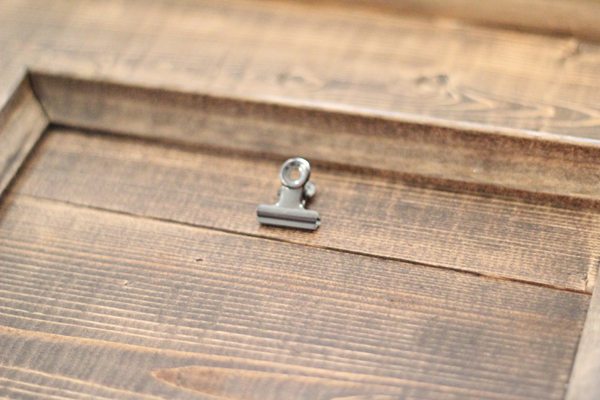
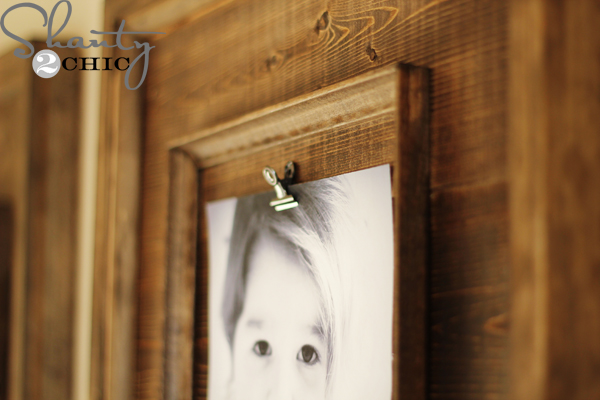
I purchased these super cute bull clips at Hobby Lobby and hot glued one in the center of each square frame.
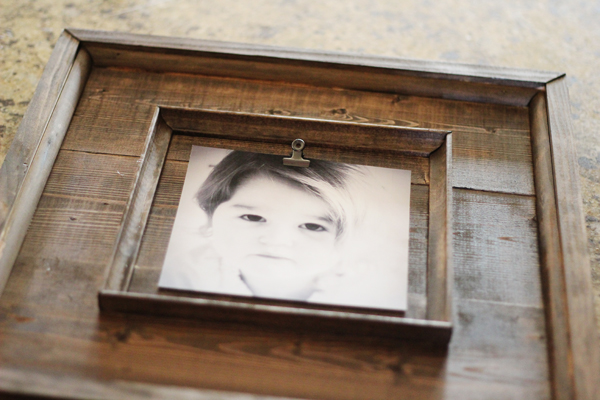 And added a cute picture to each frame:) And, that’s it!!!

I used sawtooth hangers to hang the frames and used anchors to secure them to the wall! I am so in LOVE with these cuties! At only $15 each and about a day of work, you can’t lose! I want them all over my house now;)
If you love my DIY Wooden Frames, I would love your pins! Thanks so much for stopping by!
~Ashley


Can you sell ?
My Husban doesn’t have time to make me the frames ?
I need 4
I know that woodprix has the best woodworking plans ever.
One problem is wood expands and contracts across it’s grain so when you glue a strip with grain running it’s length to the larger piece you will not allow the larger piece to move and it will split.
Hi friend. Did you try to make it with WoodPrix?? Check WoodPrix’s plans for that
My husband used these plans from WoodPrix’s plans and he’s very satisfied. However. I love Yours !
Alojamiento: En hoteles, con baño privado.
HELLO, I was wondering if you sell these frames. It listed at $15 so I was a little unclear if this is something I can purchase from you.
Hi! Thank you for this wonderful idea. I have a few questions. This is my first project and am new to measurements. I don’t have the tools you used either. If I go to Home Depot what are the measurements I tell them. Once again I apologize but I am new to this DIY. I am very excited to try this though.
Also I am a little confused with the part that you made holes and not sure what to do after. Thank you ????
I absolutely love these frames! I have 4 copper-glazed craftsman style tiles that would look so awesome them. They are 8″x8″. Would they fit?
I love this project, it was my first. Here is how they turn out
???????? Use the plans at www. WoodworkPlans.info for this project like I did – highly recommended you check those out too. They are detailed and super easy to read and understand unlike several others I found online. The amount of plans there is mind-boggling… there’s like 16,000 plans or something like that for tons of different projects. Definitely enough to keep me busy with projects for many more years to come haha???????
☁☁☁☁☁
☁ ? ☁
☁ ☁
☁???????☁
☁ ? ? ☁
☁?????☁
☁☁☁☁☁
?
?
I made it too. Just used WoodPrix’s plans instructions for that 🙂
excellent
I love these so much! They look like something you would find at a high end store!
Thank you so much Dria!
Is there a printer friendly version of this?
I’m sorry there isn’t! I will see what I can do to make that happen in the future:)
Thank you for another great weekend project! I has so much scrap wood left – I was able to make 4 frames instead of 3! Bravo for great instructions as well.