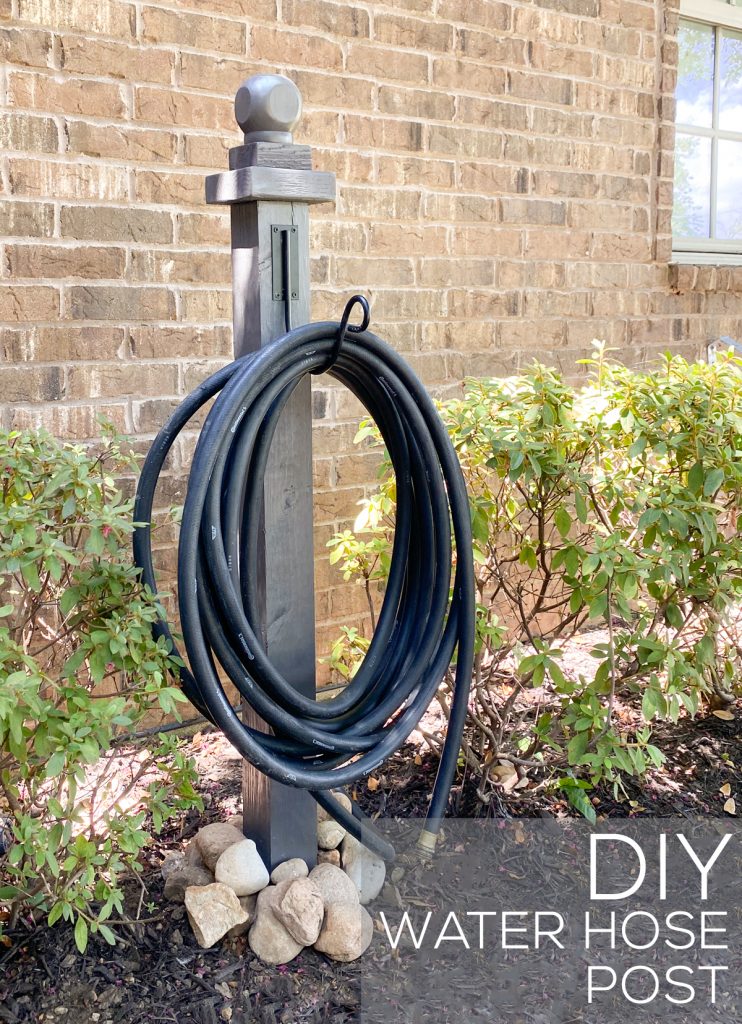
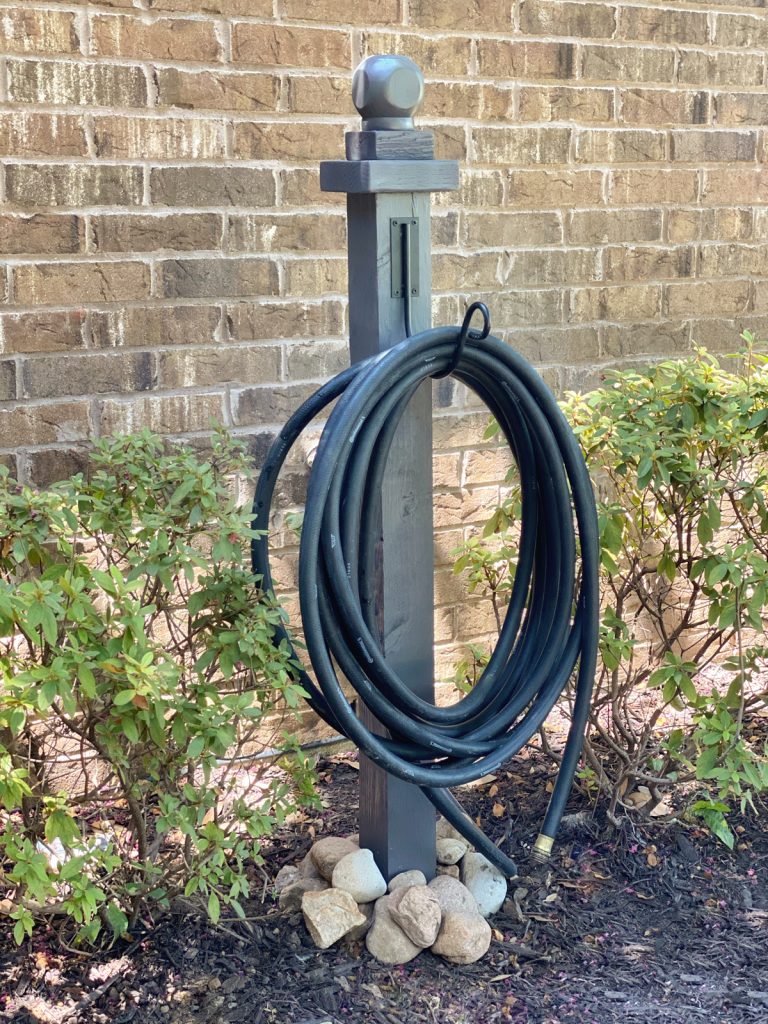
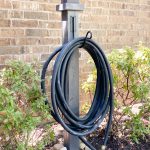
Hey guys! We hope you are all staying safe and healthy! If you are like us, you have been spending A LOT more time outside in the yard. One tool we use all the time is a water hose, and nothing drives me more crazy than seeing it laying on the ground in a big mess… just ask my kids! So, I decided to make a new post to hold my water hose, and I love it so much. This is such an easy and inexpensive project, and the paint I used on the finish looks so great with the rest of the house. I teamed up with Krylon for this project, and couldn’t be happier with the results! Look at how cute this DIY Water Hose Post turned out!
You can grab the printable plans for this quick project at the bottom of this post!
It’s so easy to build!
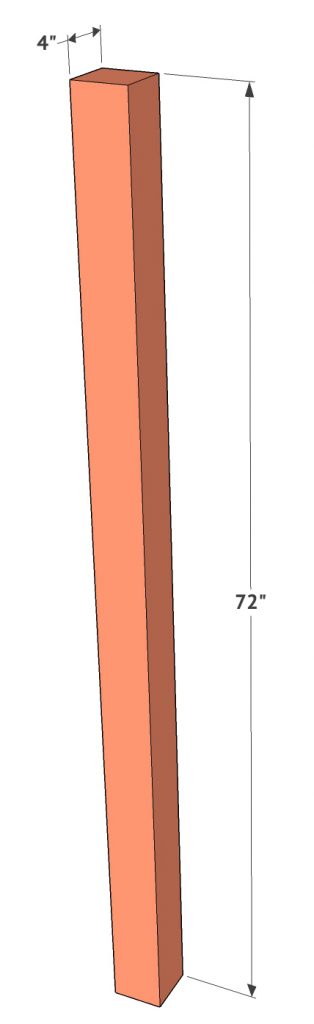
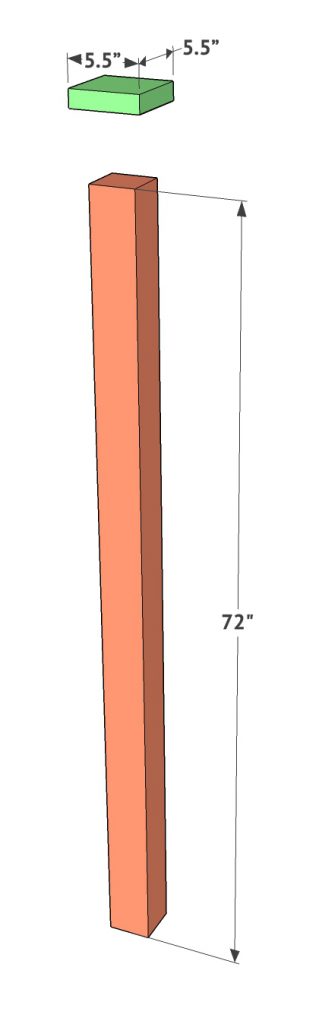
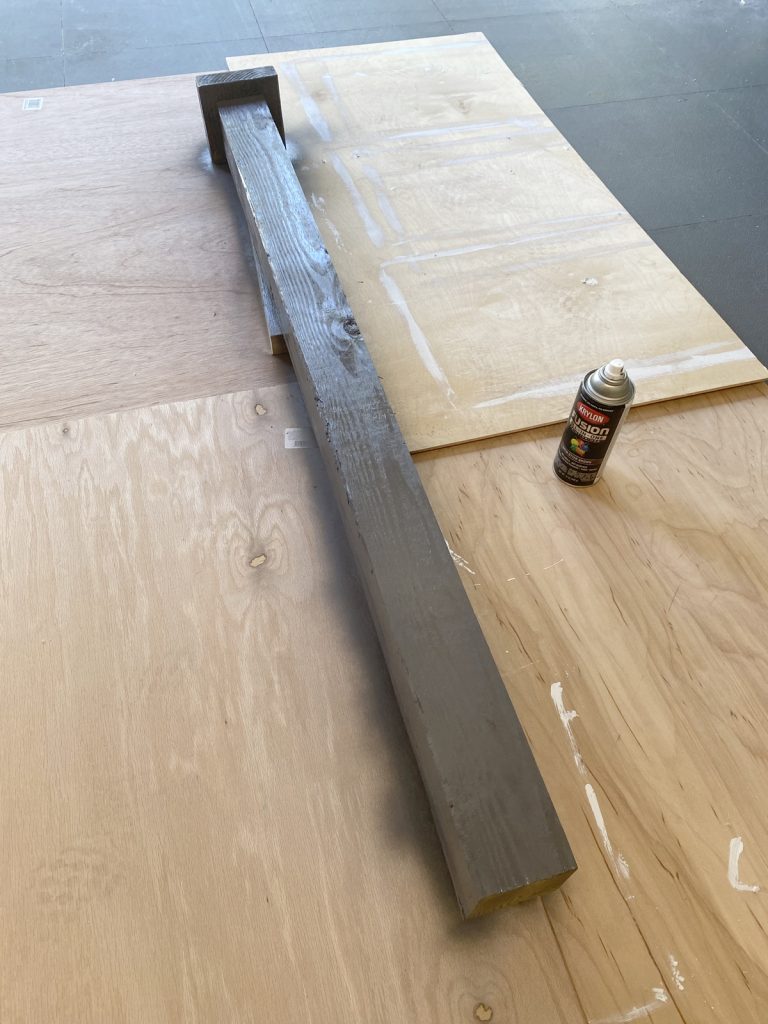
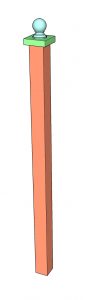
The post is a 4×4 pressure treated lumber fencing post. This comes in 6’ pieces, which is the perfect length for this project. The top of the post is a scrap of 2×6 pressure treated lumber. Some stores sell this in small 4’ pieces if you don’t have a scrap. Cut the 2×6 to a square.

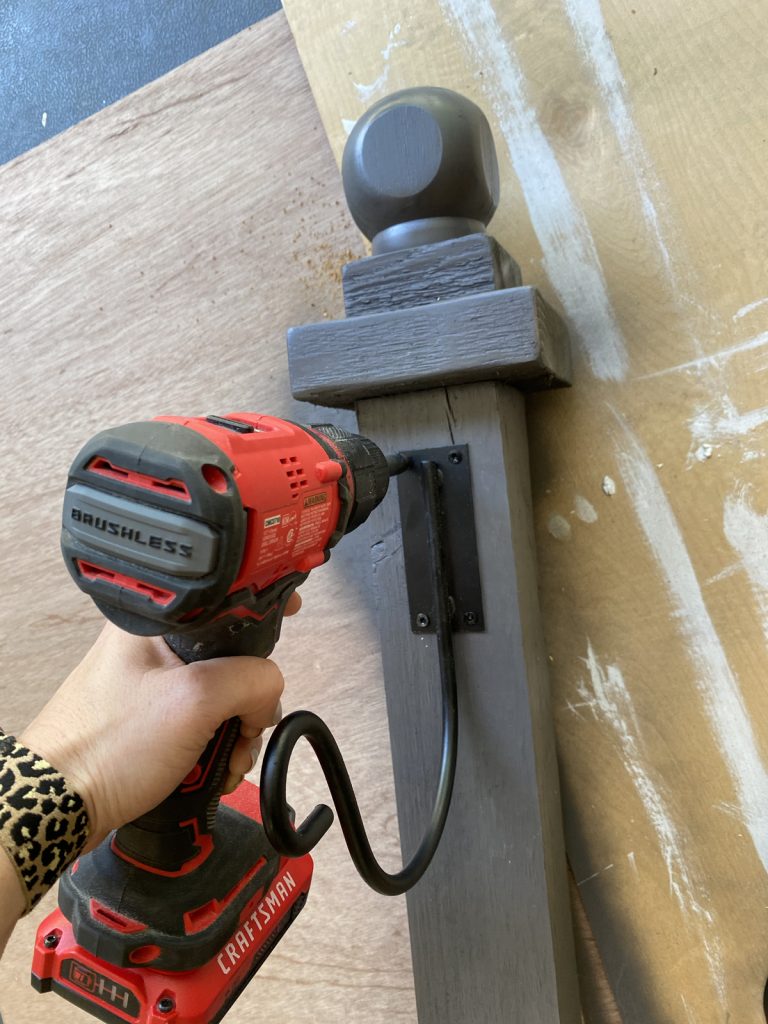
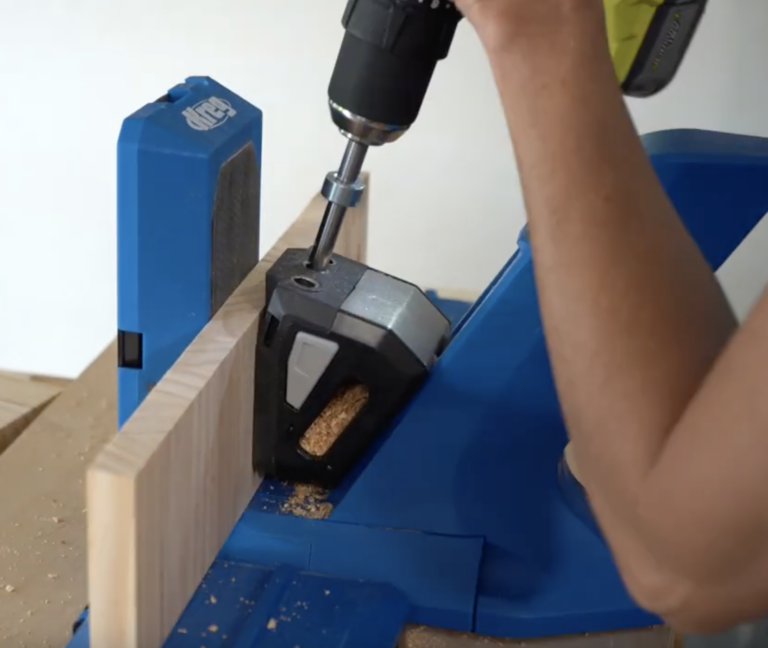
Attach the top square to the top of the post using wood glue and 2.5” outdoor wood screws through the top of the square and into the post. Make sure to line up the top square on the center of the post.
Next, add your finial. This is an outdoor fencing finial. There are several different styles to choose from. Drill a small pilot hole in the center of the top of the square and attach the finial by turning it into place with the attached screw. I also like to add wood glue in between the two pieces.

Now let’s talk about the finish! I LOVE this spray paint I used. It’s Krylon Fusion All-In-One spray paint. I used the color called Otter Brown and it’s a satin finish. It’s actually more of a warm grey in my opinion, which is perfect for the tones on the outside of my house.
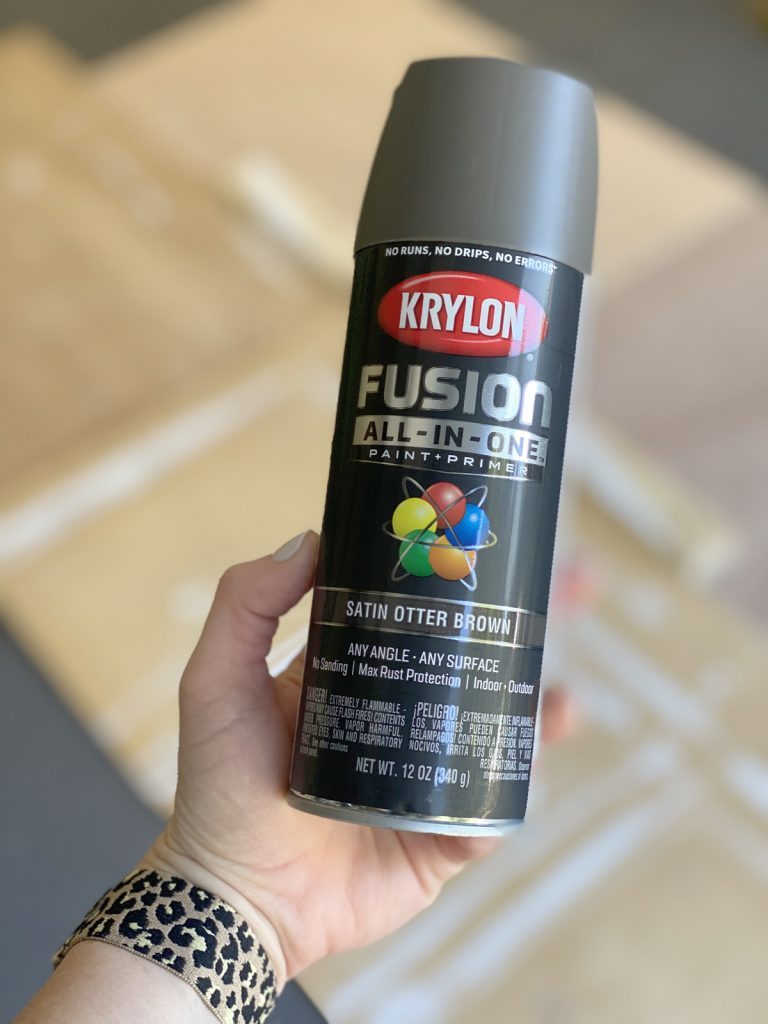
The Fusion All-In-One goes on thick and I only had to use one coat on my post. I love that it’s great to use on both indoor and outdoor projects. It also provides maximum rust protection which is perfect for lots of different outdoor projects! I also love that it doesn’t require any sanding or priming… Yes, please! You can check out all the colors HERE. There are so many!
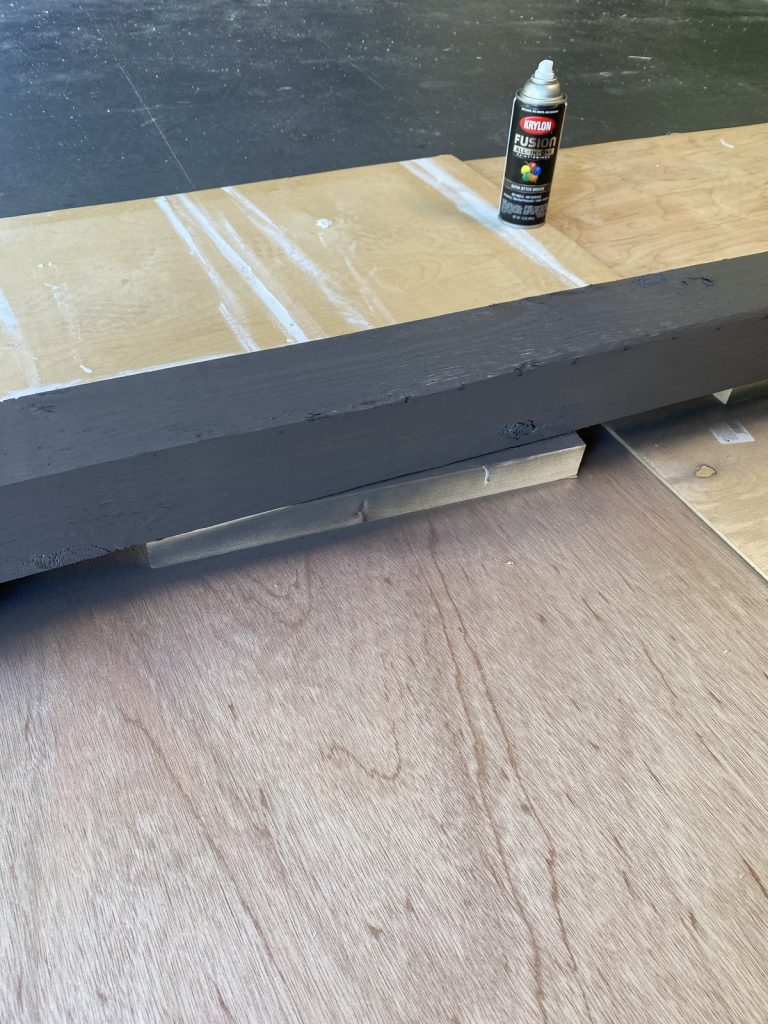
I like to set my projects on scrap wood pieces to hold them off the ground while I paint each side.
Mine dried super quick!
I found the best hook for my hose on Amazon. You can find it here! I used my drill to attach it to the top and front of the post.
I used a post hole digger to dig a hole and set my post in place. I love how it turned out! How cute is it??
DIY Water Hose Post
Instructions
- The post is a 4×4 pressure treated lumber fencing post. This comes in 6’ pieces, which is the perfect length for this project. The top of the post is a scrap of 2×6 pressure treated lumber. Some stores sell this in small 4’ pieces if you don’t have a scrap. Cut the 2×6 to a square.

- Attach the top square to the top of the post using wood glue and 2.5” outdoor wood screws through the top of the square and into the post. Make sure to line up the top square on the center of the post.

- Next, add your finial. This is an outdoor fencing finial. There are several different styles to choose from. Drill a small pilot hole in the center of the top of the square and attach the finial by turning it into place with the attached screw. I also like to add wood glue in between the two pieces.


I teamed up with Krylon for this project, but all words and opinions are entirely my own. Be sure to check out the whole line of Fusion All-In-One paint HERE and send us photos of your water hose posts!
For more Krylon inspiration visit HERE!
You can also follow Krylon on Instagram and Facebook for more inspiration!


This is a clever and practical DIY project! Turning an everyday garden necessity into an attractive outdoor feature is a great idea, and the finished water hose post blends functionality with style. The tutorial is well explained, making it easy for homeowners to recreate the project with confidence.
Outdoor DIY projects like this benefit greatly from using durable materials that can withstand changing weather conditions while maintaining their appearance. For anyone looking to explore quality plywood, boards, laminates, and other woodworking materials for home improvement projects, **https://www.plywoodbazar.com** is a valuable resource to consider.
Thank you for sharing such a creative and useful project. It’s a great example of how small DIY upgrades can make a big difference in the overall look of an outdoor space.
English gardens are lacking such diy projects. Let’s create these UK diy tutorials and typing quotes for all users who are browsing from the UK. I am also willing to learn more about Krylon inspiration.
how deep did you dig the hole?
Great post! ?I thought you had to let pressure treated wood go for a while before painting. Is this not true?