Learn how to build this easy DIY Console Table for about $100 with free plans by Shanty2Chic! This is an easy build and you only need 3 tools!
I’m a sucker for a console table and this one is one of my favorites! I’ve been needing something for the back-side of my couch to break up the room a bit. It’s a very open room that opens to the entry way so this table was a great way to separate the spaces!
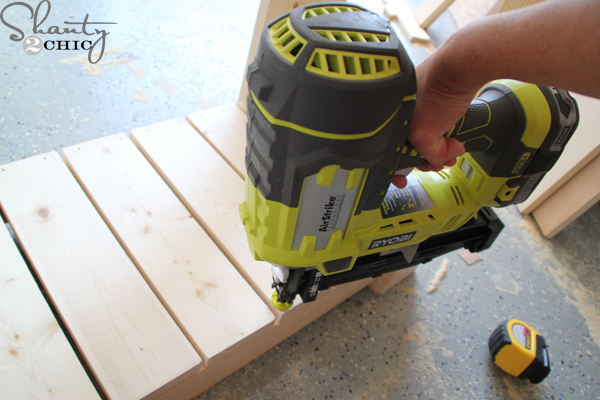
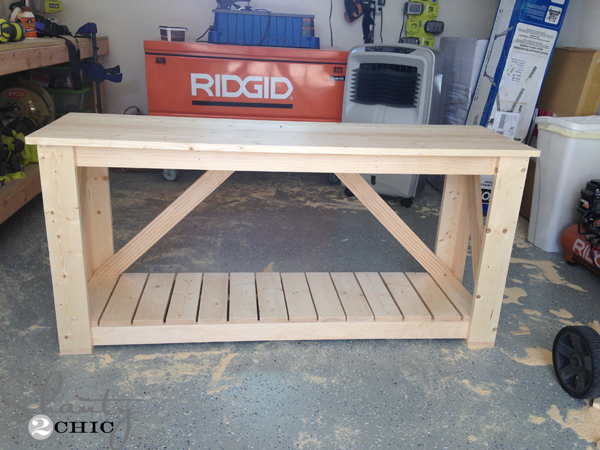
It is so incredibly easy to build and I assembled the whole thing with my Ryobi Airstrike finish nailer! It’s 4 1/2″ feet long and would work great in so many areas of your home – oh and it only cost me about $100 including the casters 🙂
As always, we’ve got the FREE printable plans for you! You can click HERE or the image below to print them.
I’ve also got the step-by-step tutorial for you! Here we go 🙂
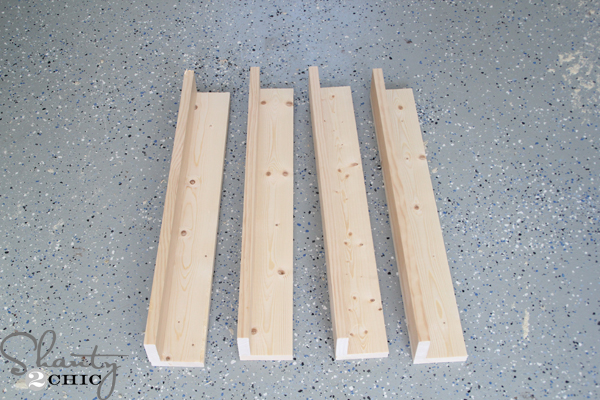
I started by attaching the 1×3 and 1×4 pieces, with Gorilla Wood Glue and my 16 gauge finish nailer.
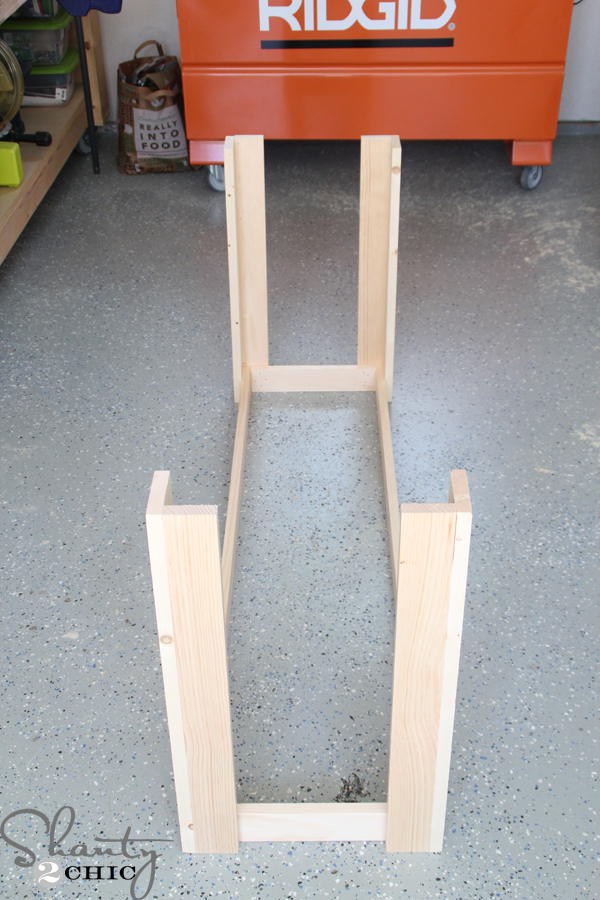
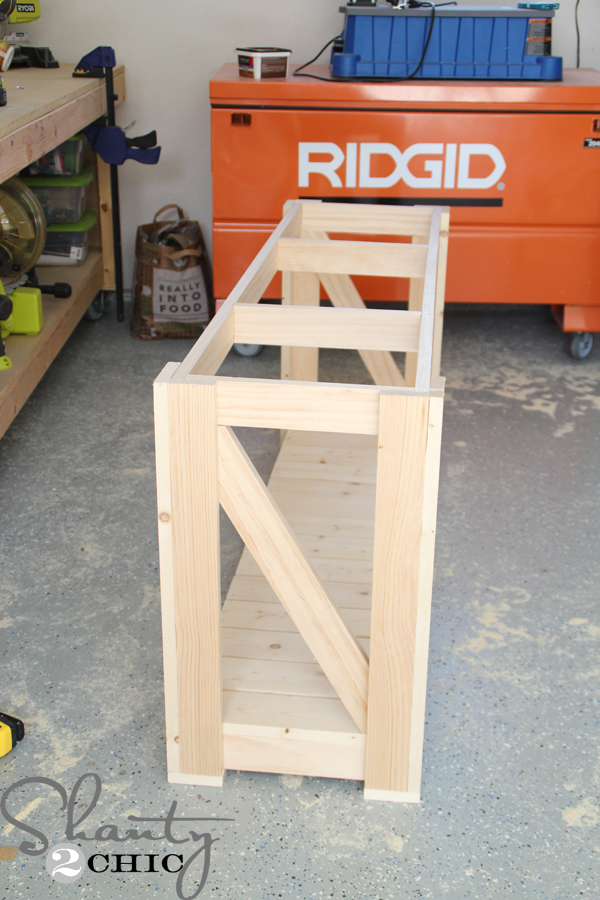
Next, I attached the bottom of the legs to the bottom frame – the bottom of the legs will be flush with the bottom of the frame.
Then, I attached the top frame the same way. I drove my nails from the inside of the frames into the legs to hide the nail holes.
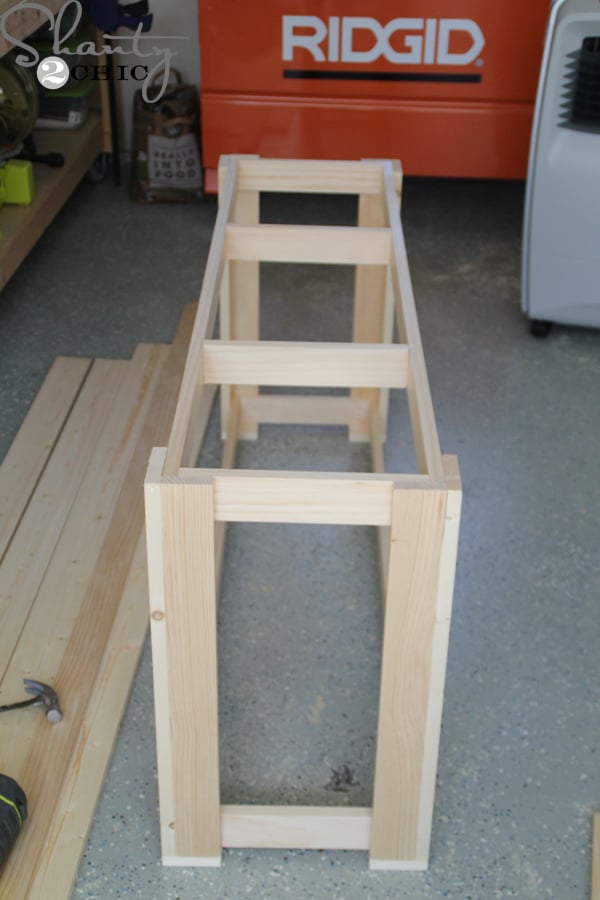
After cutting the bottom slats, I attached them to the bottom frame. The ends of the slats will be flush with the edges of the bottom frame. I used wood glue and 1 1/4″ nails here.

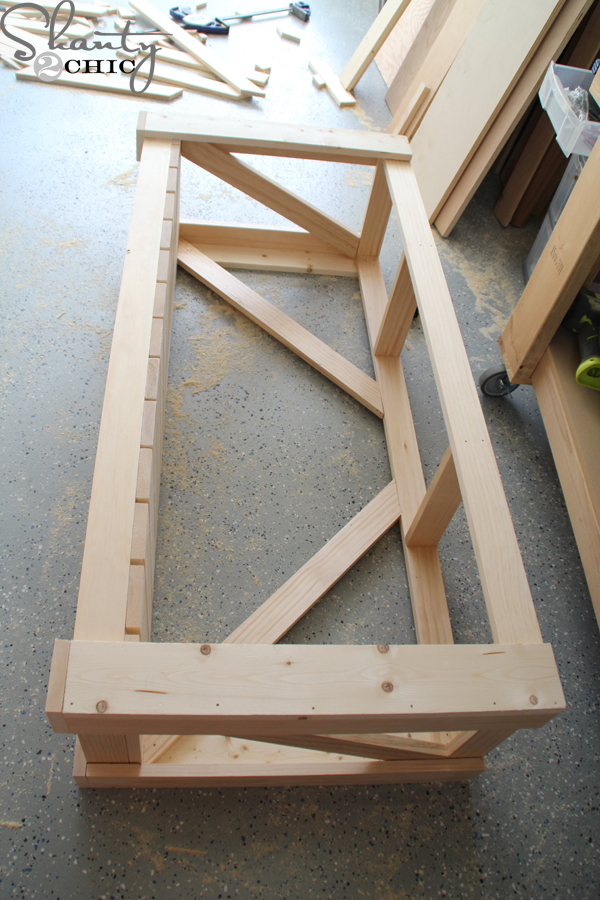
Halfway done 🙂
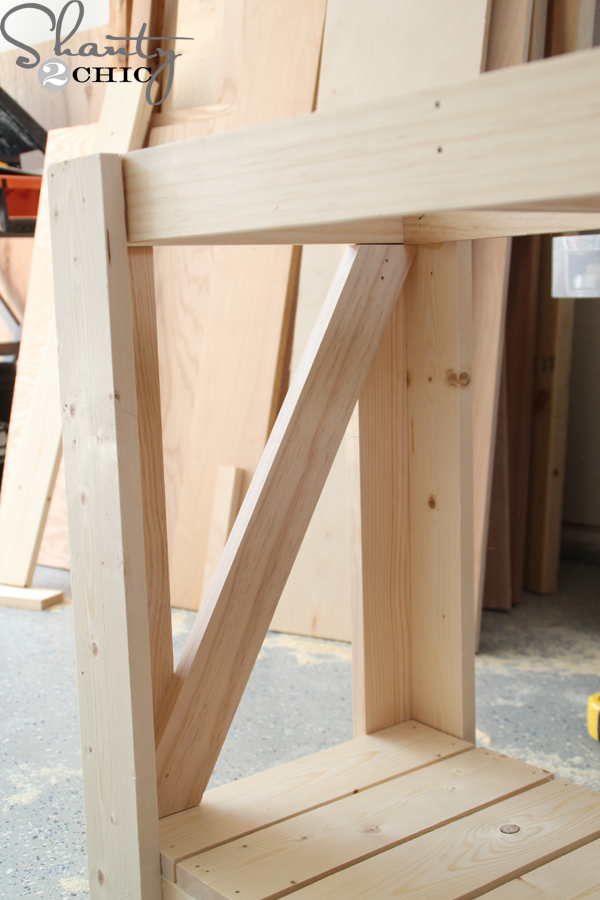
I attached the side angle pieces from the inside of the console table into the legs.
Notice the direction the angles are going. This is important so that the back pieces fit properly.

Next, I attached the back angle pieces the same way. The best way to install the back pieces is to make sure the outside edges are flush with the inside of the table legs. Then, the pieces will split center. I nailed through the bottom of the angle piece into the top frame.
Ready for the top!
I attached the top slats with wood glue and my finish nailer. I nailed from the top of the table into the top frame, making sure to also attach them to the center supports.

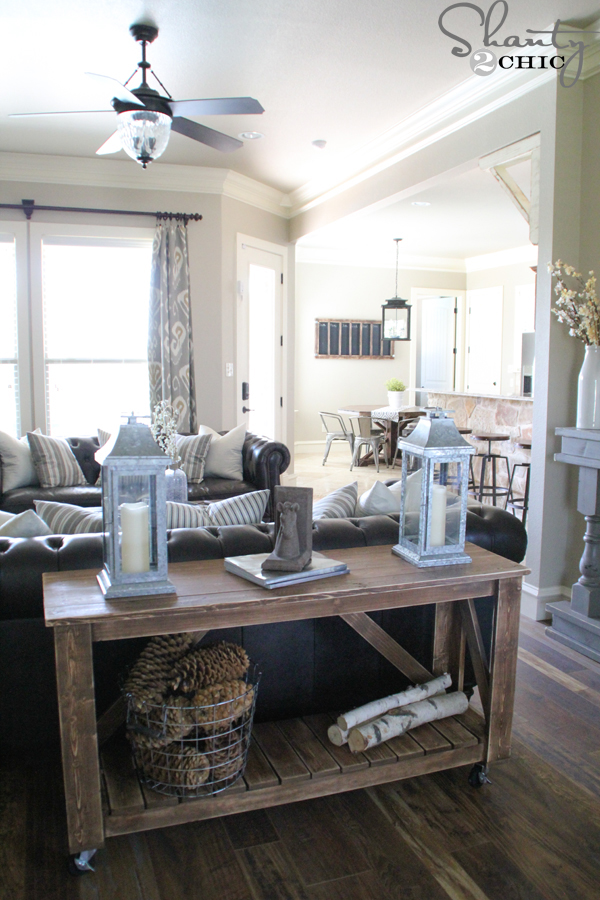
For the finish, I applied one coat of Varathane Early American. I wiped it on with a clean cloth, let it sit for 5 minutes and then blended it with a fresh clean cloth.
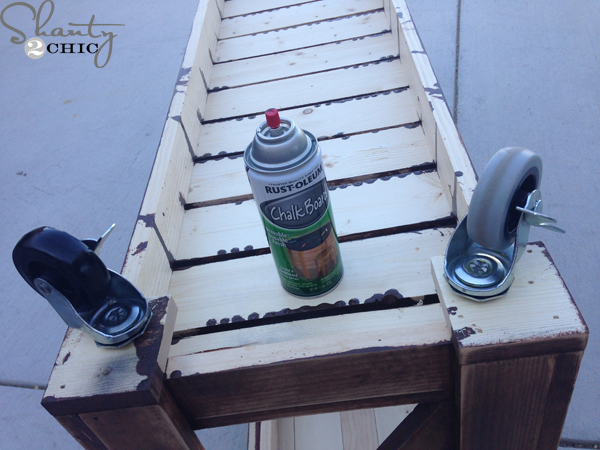
I bought these 3″ locking casters from Home Depot. I wanted black casters (gray works perfectly though) so I spray painted the wheels with Rust-Oleum Chalkboard spray paint. I like to use the Chalkboard paint because it’s a great flat paint. To attach the casters, I predrilled a pilot hole a little bit wider than the bolt on the casters and secured it with a washer and bolt. You will need to purchase the washers and bolts separately from the casters.
That was it!! I designed this to coordinate with my Rolling Ottomans 🙂
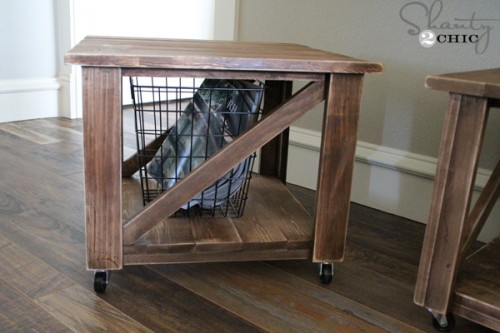
You can get the plans for these HERE!
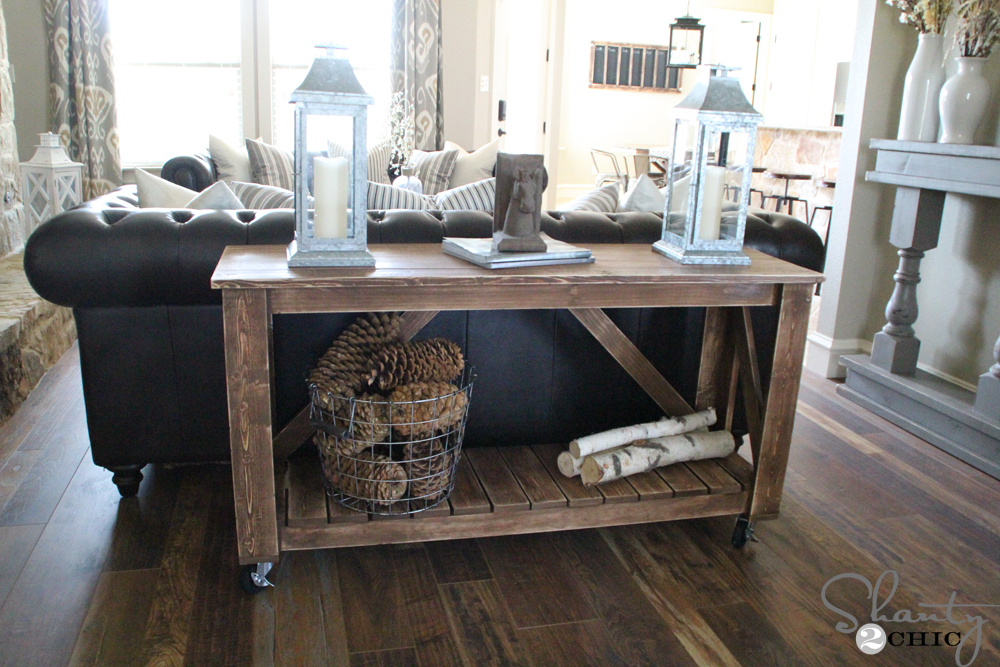
I LOVE it 🙂 It makes the perfect table for the back of my couch!


Great work
Questioning the bottom of the table the legs look like they have an additional piece??
Beautiful!! Where are the curtains from?
Has anyone added a shelf to this? I would love to build this but I wonder if the design would be supportive of a shelf?
Same question here! Would love as a shoe rack combined with an entry way table.
Can you use the 18GA Brad nailer for this project or has to be the larger finish nails?
What are the ending dimensions of the table? Thanks!
Oh and I will not be putting it on casters to prevent my dog from moving it around when he adjusts.