Hey guys!!! I’m super excited to show you what I’ve been working on to upgrade our shop and garage floors!
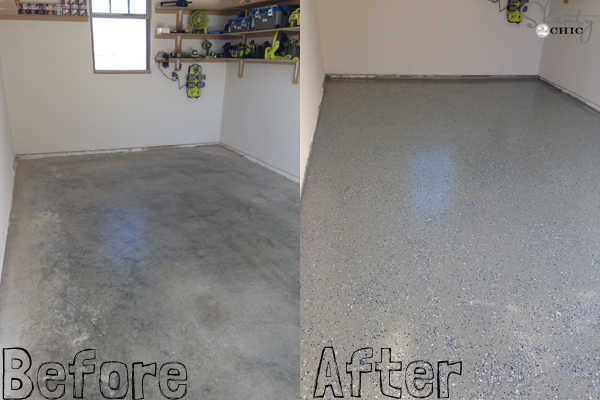 It’s super easy and an inexpensive way to make your garage and/or shop look like a million bucks!
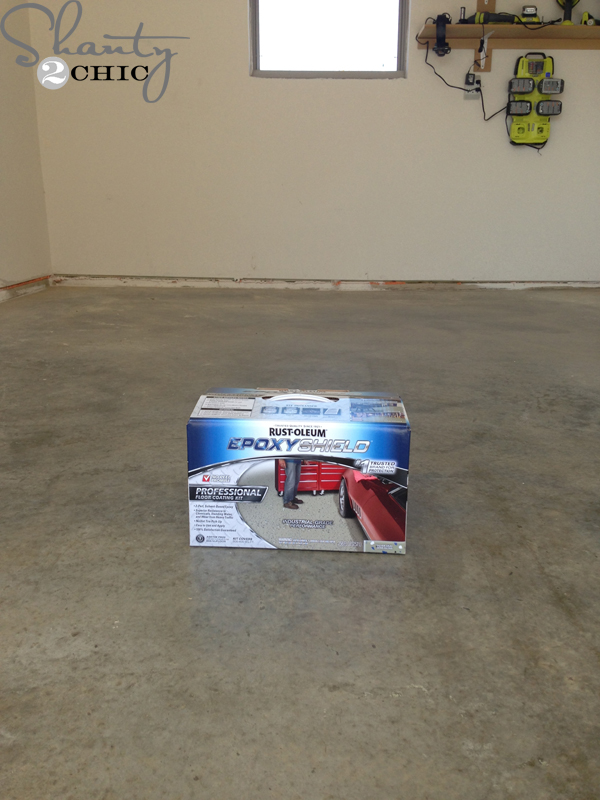 Whit and I are forever fans of the Rust-Oleum Epoxy Shield floor coating. So much that – I applied it to my previous garage, Whit applied it to hers and now, I’m applying it to my shop and garage in our new home! You can check out the first time that I applied it HERE!
This is a super easy and inexpensive way to really give your garage and/or shop a nice upgrade! Here’s just how easy it is!
 The first step is to wet the garage floor. You don’t want puddles so I spray my water hose all over and push the puddled water out the garage door with a squeegee.
 Next, you just pour the etching salt (comes with the kit) into a watering can filled with 2 gallons of water. Let the salt dissolve and then pour it over a 4’x4′ area. Start at the back of the garage so you can work your way outside. You will hear a little fizz sound when the etching salt and water hit the concrete – it’s cleaning your floor 🙂 Just use an iron bristle brush and lightly scrub over the 4’x4′ area. Rinse with water and squeegee it out and move to the next 4’x4′ area and repeat until you do the entire floor. It’s a VERY EASY process!
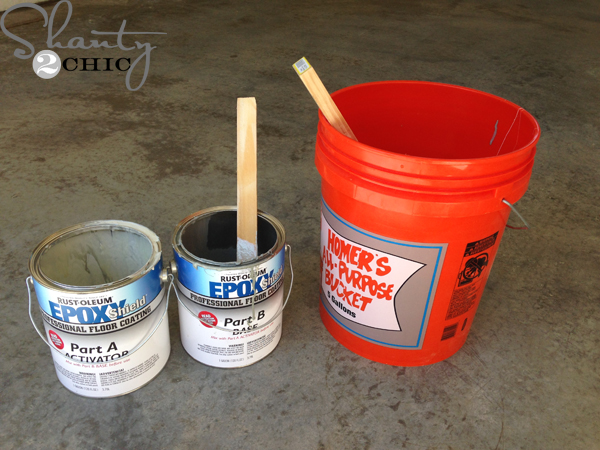 Once the floor is completely dry (mine took about 45 minutes to dry) you can mix the epoxy! Your kit will have a part A and part B in separate gallons. *Note – I used 1 gallon of each for a 1 car garage and it was plenty. If you are doing a 2 car, use 2 kits and 3 for a 3 car garage. It’s easy to mix, just pour part B into a large bucket and then pour part A into part B. Mix it all together and let it sit for the designated time according to the instructions. I had to wait 30 minutes – it is based on the temperature in your area.
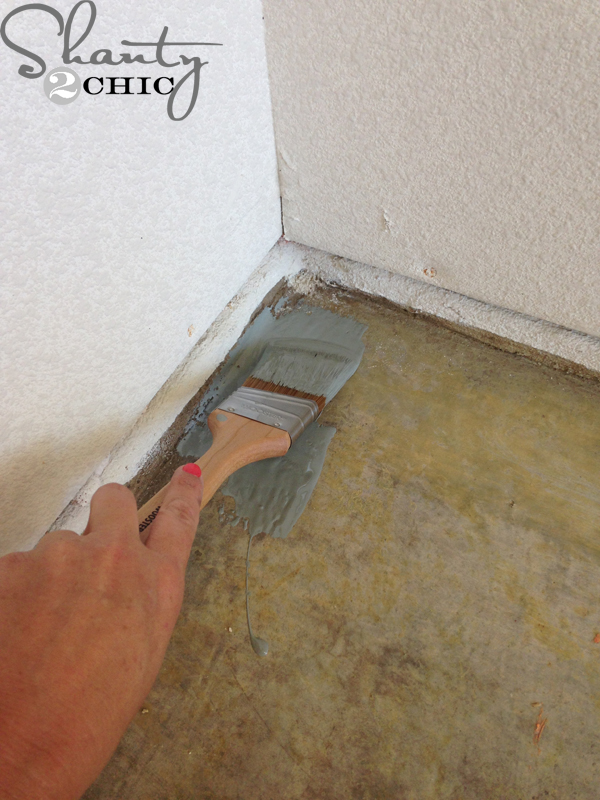 Once the time has passed, start by cutting in on all the edges in your garage. I used a 2″ angled brush for this part.
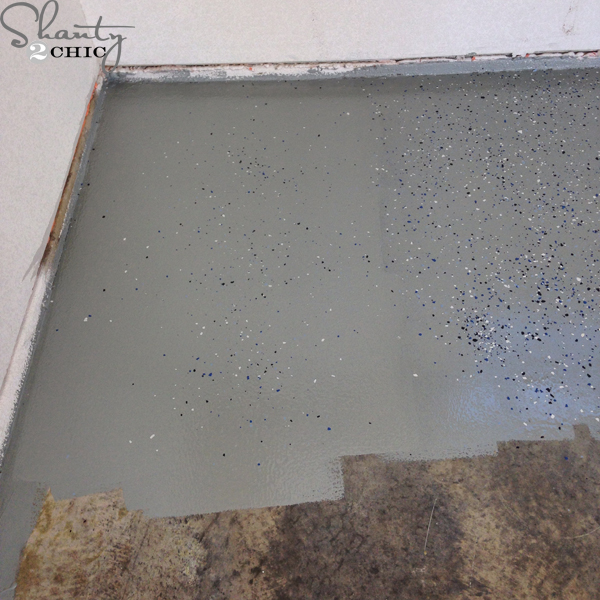 Finally, just using a roller brush, you will paint on a 4’x4′ area and then immediately sprinkle the paint chips over that area (paint chips are also included in the kit). In this picture, you can see that I finished an area to the right and worked my way to the left and I’m sprinkling the paint chips. You can use as many as you prefer, there is plenty to cover the flooring.
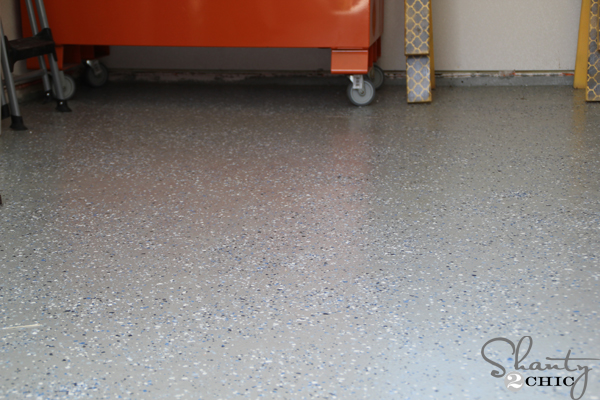 That was it! You will need to wait at least 24-hours before using the garage but make sure it is completely dry. Mine took about 18 hours before we could walk on it.


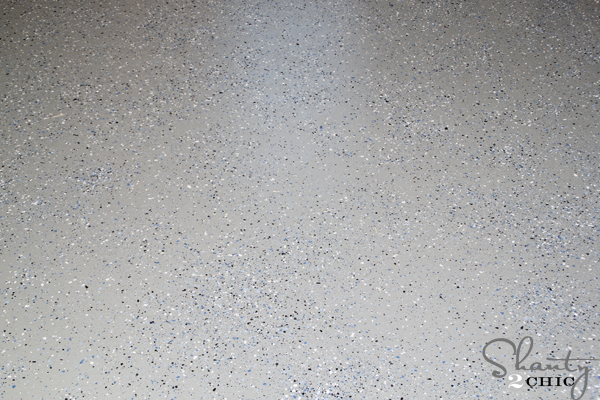 This is the perfect weekend project for spring!! Not only does it look nice, it’s so much easier to keep the floor clean! My husband LOVES this flooring too and can’t wait to apply it to our main garage!
So, who wants to win Rust-Oleum Epoxy Shield for their home? There’s lots of ways to enter below 🙂 Good luck!!!
a Rafflecopter giveaway


Awesome I would love this for our garage!! I have a three car garage though so that will definitely take a while:)
Awesome I would love this for our garage!! I have a three car garage though so that will definitely take a while:)
I’d love to do this to have a finished garage. It looks so nice and makes the space more usable.
I’d love to do this to have a finished garage. It looks so nice and makes the space more usable.
It’s already on my list in our new house. Like the day we close this is happening!
My wonderful husband finished the garage two
years ago for my Valentine’s Day present. He insulated, hung up sheet rock,
added light fixtures, and painted both the ceiling and walls. He also purchase
shelves to store everything. Prior to that, it was unfinished and depressing to
come home to this eye-sore. it’s so pretty that I teased him and said it needed
art since it was another room of the house, not just a garage. Lo and behold, I
picked up some large art pieces at yard sales. Now it’s a fully functional
welcome room (AKA garage) with plenty of space. It’s beautiful blue on the
walls – my fav color! It makes want to do the happy dance every time I come
home. Now if the floor could be as pretty as the walls…
I’ve done a lot of painting and staining projects and my floors show it!!
My old floor is hard to clean
I’ve been wanting to try this stuff for a long time! This spring we’re planning a massive yard sale/garage purge, and I’m hoping to do it afterwards. One question – our garage floor isn’t terribly level. Does it matter???
I would love to win! Your blog is my all-time favorite!
This would be great motivation to clean up and organize the garage!!
Need to do this!
Cant wait to do mine!
My husband would love me forever!! 🙂 (Well he better anyways!)
I would actually use this for my large concrete storm cellar. Tornado season is starting here in OK and we have a large cellar that needs a little love.