Hey guys! We are back with the free plans for this Industrial Farmhouse Bench that we built to match our Industrial Farmhouse Table! We built this cutie, for our friend Rachel, on our latest #shantyhousecrash! You can watch the crash and how we build this bench HERE or click below!
If you missed the full room transformation you can watch that HERE. The how-to build the Industrial Farmhouse Table video, you can click HERE to watch it 🙂
We built this bench with only 8 boards bringing the total cost to about $40 in lumber (here in Texas). The hardware looks nice but it was an inexpensive “hack” that, in total, cost us about $5! More on that later!
Make sure to download the FREE PRINTABLE PLANS HERE! And follow along below to for the tutorial!
The first step was to rip all of the edges off of the 2x boards. We ripped the 2×6 boards to 5″ and the 2×4 boards to 3″. As we mention in the plans, this is not a necessary step. We do this so that we have smooth joints between the planks and we like the overall look of clean, straight edges. If you choose not to rip the edges, make sure that you adjust the measurements accordingly.
Once we made our cuts, we used our Kreg Jig to drill 1 1/2″ pocket holes into two of the 2×6 boards. Refer to the plans for pocket hole placement. You can find the Kreg Jig model that we love, HERE on Amazon and you can watch our How to Use a Kreg Jig video, HERE.
Once the planks were cut, we attached them with 2 1/2″ pocket hole screws.
To finish the bench top, we attach the breadboards with 2 1/2″ pocket hole screws from the planks, into the breadboards.
Now for the bench legs!
We made the cuts for our legs and then drilled 1 1/2″ pocket holes into the short apron pieces. Then attached the legs to the short aprons. The pocket holes should face out (up).
We attached the short aprons to the legs with 2 1/2″ pocket hole screws and wood glue. Notice the pocket hole placement 🙂
Next, cut the leg runners, drill 1 1/2″ pocket holes and attach them between the bench legs with wood glue and 2 1/2″ pocket hole screws. If you have a small Kreg Jig bit or a right angle drill, you can use pocket holes here. If you don’t, just use 2 1/2″ Spax screws and attach the runners from the outside of the bench legs into the runners. This will leave screw holes but they can be easily covered with decorative hardware 🙂
Now, you should have two leg bases that look like this! Notice the screw hole on the outside of the leg…we will cover that up later 🙂
Cut the long apron pieces, drill 1 1/2″ pocket holes into the ends and attach them to the leg bases with 2 1/2″ pocket hole screws and wood glue.
Once the long aprons are in place, measure and cut the short runner to fit. Drill 3/4″ pocket holes into each end and attach it to the top of the leg runners with 1 1/4″ pocket hole screws and wood glue. The top of the short runner should be flush with the top of the leg runners.
Now, cut the long runner to size and place it under (the bench is upside down) the short runner. The long runner should extend so that it is resting on top of the leg runners.
Hold the long runner in place with clamps and attach it with 1 1/4″ Spax screws and wood glue.
Almost done! Now place the bench base on top of the bottom of the bench top.
Center the base over the bench top and attach it with 2″ Spax screws from the bottom of the aprons into the planked top.
Flip it over and test it out 🙂
We used one coat of Briarsmoke stain by Varathane. Just wipe it on with a clean cloth, let it sit for about 5 minutes, then blend it in with a new clean cloth. It should take about an hour to dry. You can find Varathane stain HERE on Amazon.
Once the stain dried, we brushed on one coat of Triple Thick Polyurethane to protect the finish! We love this stuff because one coat equals 3 coats – which allows us to clean messes off the surface with a damp cloth!
To finish the bench off and give it that Industrial look, we spray painted a few framing angles that we found at Home Depot and attached them to the top corners of the bench with hex screws (that we also spray painted)! To cover the screw holes on the bottom we attached washers and hex screws (also spray painted). We used Rust-Oleum Carbon Mist Universal Spray paint and you can find it HERE on Amazon.
That was it!
Total cost for the bench and table: $115!!! Total cost in lumber for this entire room, chalkboard, bench, table and the planked wall was under $400!!!
Want to know where we got the other items in this space. Click the links below!
Terrariums on the table: HERE
Stems: HERE
Table Runner: HERE
Chandelier: HERE
Chairs: HERE
Rug: HERE
HOME sign: Free Printables coming soon 🙂
You can check out the other videos to this #shantyhousecrash by clicking the links below!
Planked WallIndustrial Farmhouse Table
Chalkboard: Coming next week!
Check out our previous #shantyhousecrash video below!
Become a VIP Insider
Stay up-to-date on all the new project, free plans and new products available for you!

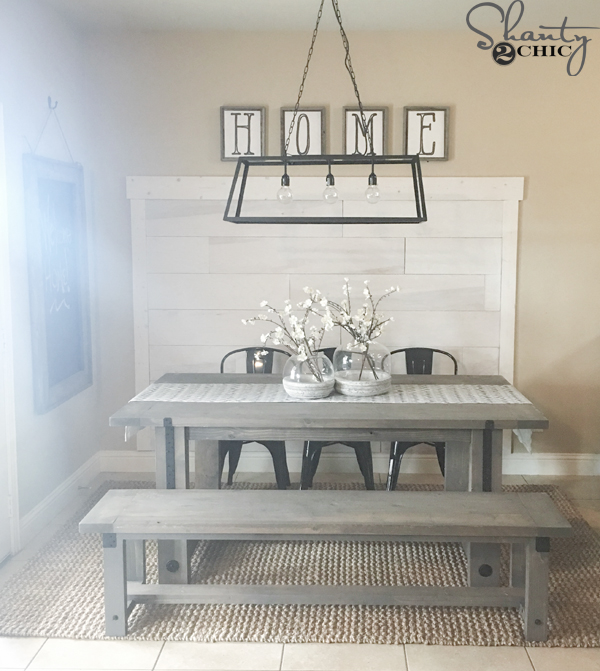 We built this bench with only 8 boards bringing the total cost to about $40 in lumber (here in Texas). The hardware looks nice but it was an inexpensive “hack” that, in total, cost us about $5! More on that later!
Make sure to download the FREE PRINTABLE PLANS HERE! And follow along below to for the tutorial!
We built this bench with only 8 boards bringing the total cost to about $40 in lumber (here in Texas). The hardware looks nice but it was an inexpensive “hack” that, in total, cost us about $5! More on that later!
Make sure to download the FREE PRINTABLE PLANS HERE! And follow along below to for the tutorial!
 The first step was to rip all of the edges off of the 2x boards. We ripped the 2×6 boards to 5″ and the 2×4 boards to 3″. As we mention in the plans, this is not a necessary step. We do this so that we have smooth joints between the planks and we like the overall look of clean, straight edges. If you choose not to rip the edges, make sure that you adjust the measurements accordingly.
 Once we made our cuts, we used our Kreg Jig to drill 1 1/2″ pocket holes into two of the 2×6 boards. Refer to the plans for pocket hole placement. You can find the Kreg Jig model that we love, HERE on Amazon and you can watch our How to Use a Kreg Jig video, HERE.
 Once the planks were cut, we attached them with 2 1/2″ pocket hole screws.
 To finish the bench top, we attach the breadboards with 2 1/2″ pocket hole screws from the planks, into the breadboards.
Now for the bench legs!
To finish the bench top, we attach the breadboards with 2 1/2″ pocket hole screws from the planks, into the breadboards.
Now for the bench legs!
 We made the cuts for our legs and then drilled 1 1/2″ pocket holes into the short apron pieces. Then attached the legs to the short aprons. The pocket holes should face out (up).
 We attached the short aprons to the legs with 2 1/2″ pocket hole screws and wood glue. Notice the pocket hole placement 🙂
 Now, you should have two leg bases that look like this! Notice the screw hole on the outside of the leg…we will cover that up later 🙂
 Cut the long apron pieces, drill 1 1/2″ pocket holes into the ends and attach them to the leg bases with 2 1/2″ pocket hole screws and wood glue.
 Once the long aprons are in place, measure and cut the short runner to fit. Drill 3/4″ pocket holes into each end and attach it to the top of the leg runners with 1 1/4″ pocket hole screws and wood glue. The top of the short runner should be flush with the top of the leg runners.
 Now, cut the long runner to size and place it under (the bench is upside down) the short runner. The long runner should extend so that it is resting on top of the leg runners.
 Hold the long runner in place with clamps and attach it with 1 1/4″ Spax screws and wood glue.
 Almost done! Now place the bench base on top of the bottom of the bench top.
 Center the base over the bench top and attach it with 2″ Spax screws from the bottom of the aprons into the planked top.
 Flip it over and test it out 🙂
 We used one coat of Briarsmoke stain by Varathane. Just wipe it on with a clean cloth, let it sit for about 5 minutes, then blend it in with a new clean cloth. It should take about an hour to dry. You can find Varathane stain HERE on Amazon.
 Once the stain dried, we brushed on one coat of Triple Thick Polyurethane to protect the finish! We love this stuff because one coat equals 3 coats – which allows us to clean messes off the surface with a damp cloth!
 To finish the bench off and give it that Industrial look, we spray painted a few framing angles that we found at Home Depot and attached them to the top corners of the bench with hex screws (that we also spray painted)! To cover the screw holes on the bottom we attached washers and hex screws (also spray painted). We used Rust-Oleum Carbon Mist Universal Spray paint and you can find it HERE on Amazon.
 That was it!
 Total cost for the bench and table: $115!!! Total cost in lumber for this entire room, chalkboard, bench, table and the planked wall was under $400!!!
Want to know where we got the other items in this space. Click the links below!
Terrariums on the table: HERE
Stems: HERE
Table Runner: HERE
Chandelier: HERE
Chairs: HERE
Rug: HERE
HOME sign: Free Printables coming soon 🙂
You can check out the other videos to this #shantyhousecrash by clicking the links below!
Planked Wall
Industrial Farmhouse Table
Chalkboard: Coming next week!
Check out our previous #shantyhousecrash video below!
Total cost for the bench and table: $115!!! Total cost in lumber for this entire room, chalkboard, bench, table and the planked wall was under $400!!!
Want to know where we got the other items in this space. Click the links below!
Terrariums on the table: HERE
Stems: HERE
Table Runner: HERE
Chandelier: HERE
Chairs: HERE
Rug: HERE
HOME sign: Free Printables coming soon 🙂
You can check out the other videos to this #shantyhousecrash by clicking the links below!
Planked Wall
Industrial Farmhouse Table
Chalkboard: Coming next week!
Check out our previous #shantyhousecrash video below!

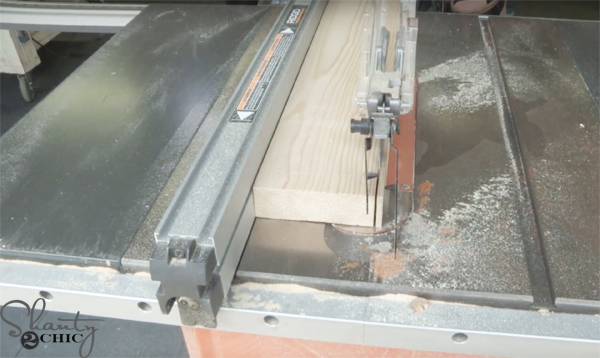 The first step was to rip all of the edges off of the 2x boards. We ripped the 2×6 boards to 5″ and the 2×4 boards to 3″. As we mention in the plans, this is not a necessary step. We do this so that we have smooth joints between the planks and we like the overall look of clean, straight edges. If you choose not to rip the edges, make sure that you adjust the measurements accordingly.
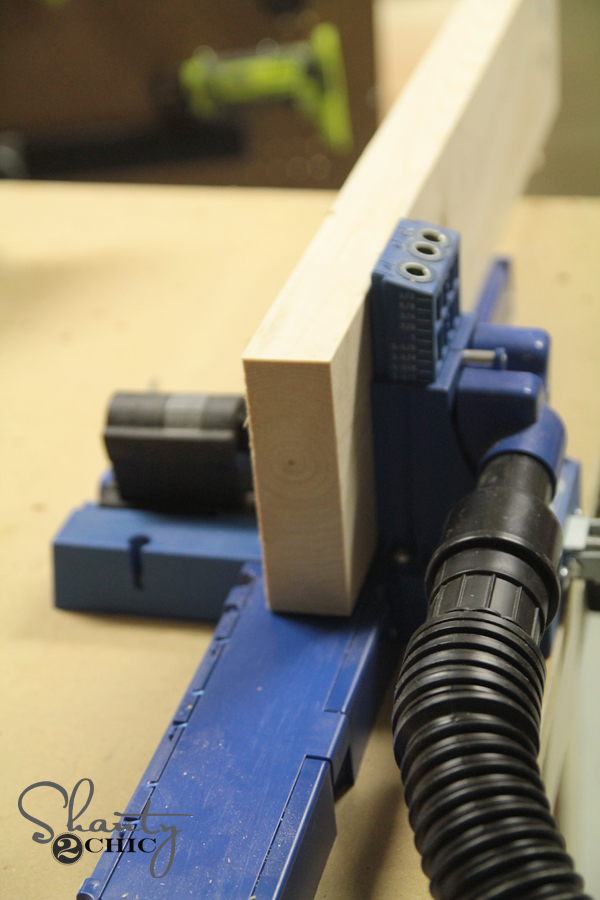 Once we made our cuts, we used our Kreg Jig to drill 1 1/2″ pocket holes into two of the 2×6 boards. Refer to the plans for pocket hole placement. You can find the Kreg Jig model that we love, HERE on Amazon and you can watch our How to Use a Kreg Jig video, HERE.
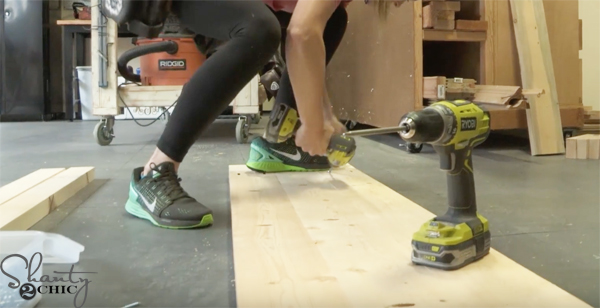 Once the planks were cut, we attached them with 2 1/2″ pocket hole screws.
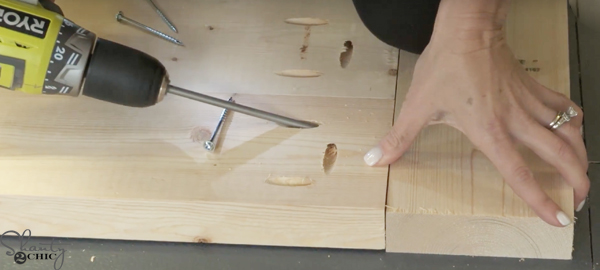 To finish the bench top, we attach the breadboards with 2 1/2″ pocket hole screws from the planks, into the breadboards.
Now for the bench legs!
To finish the bench top, we attach the breadboards with 2 1/2″ pocket hole screws from the planks, into the breadboards.
Now for the bench legs!
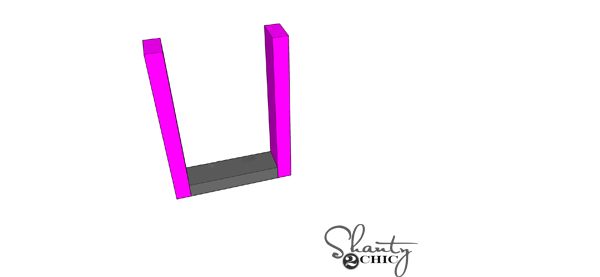 We made the cuts for our legs and then drilled 1 1/2″ pocket holes into the short apron pieces. Then attached the legs to the short aprons. The pocket holes should face out (up).
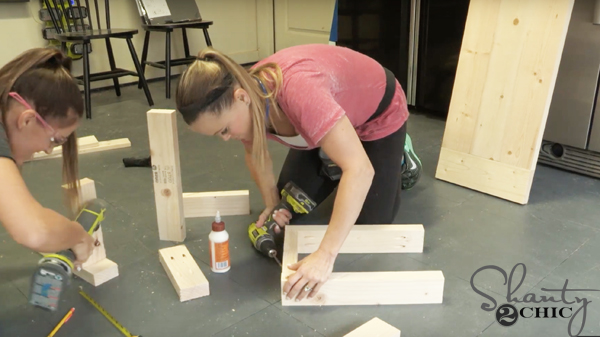 We attached the short aprons to the legs with 2 1/2″ pocket hole screws and wood glue. Notice the pocket hole placement 🙂
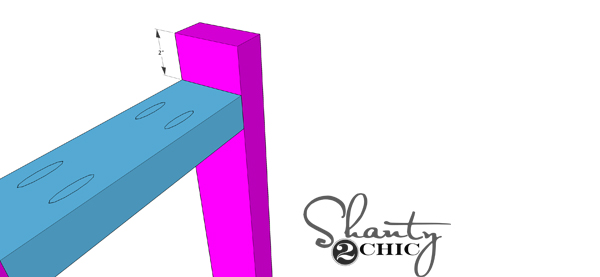 Next, cut the leg runners, drill 1 1/2″ pocket holes and attach them between the bench legs with wood glue and 2 1/2″ pocket hole screws. If you have a small Kreg Jig bit or a right angle drill, you can use pocket holes here. If you don’t, just use 2 1/2″ Spax screws and attach the runners from the outside of the bench legs into the runners. This will leave screw holes but they can be easily covered with decorative hardware 🙂
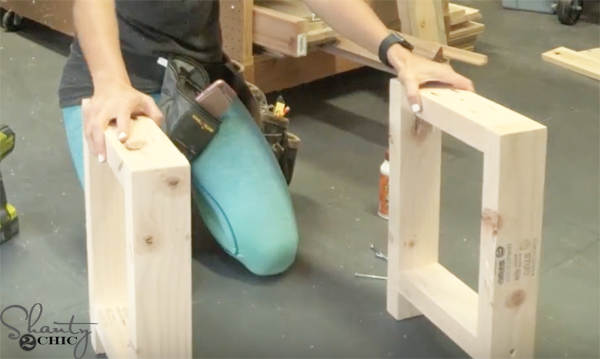 Now, you should have two leg bases that look like this! Notice the screw hole on the outside of the leg…we will cover that up later 🙂
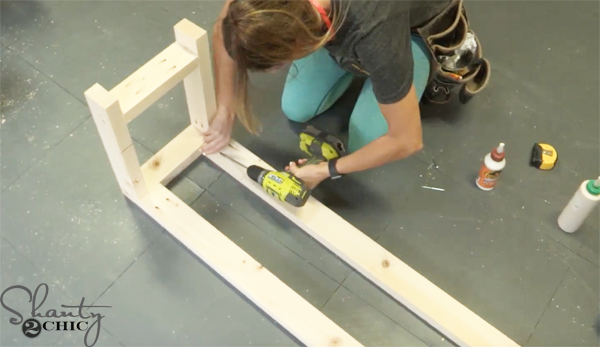 Cut the long apron pieces, drill 1 1/2″ pocket holes into the ends and attach them to the leg bases with 2 1/2″ pocket hole screws and wood glue.
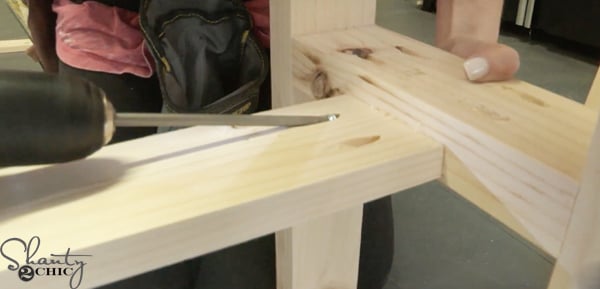 Once the long aprons are in place, measure and cut the short runner to fit. Drill 3/4″ pocket holes into each end and attach it to the top of the leg runners with 1 1/4″ pocket hole screws and wood glue. The top of the short runner should be flush with the top of the leg runners.
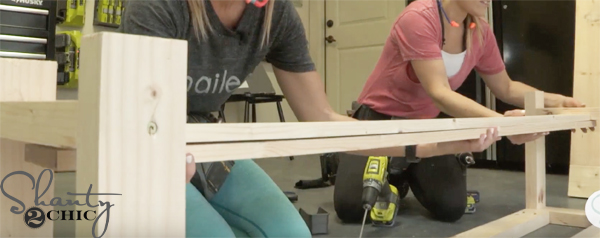 Now, cut the long runner to size and place it under (the bench is upside down) the short runner. The long runner should extend so that it is resting on top of the leg runners.
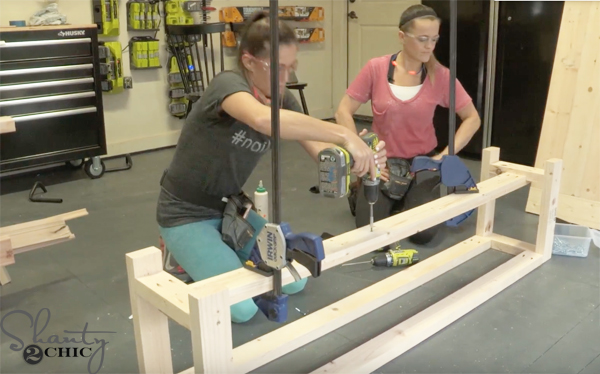 Hold the long runner in place with clamps and attach it with 1 1/4″ Spax screws and wood glue.
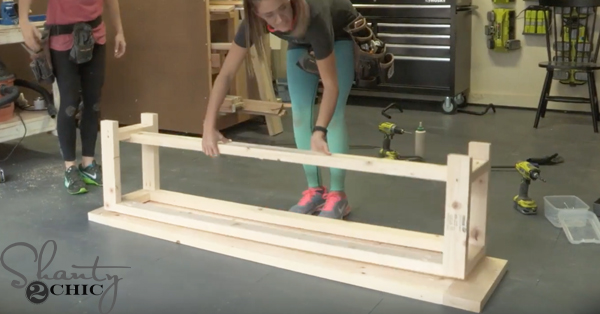 Almost done! Now place the bench base on top of the bottom of the bench top.
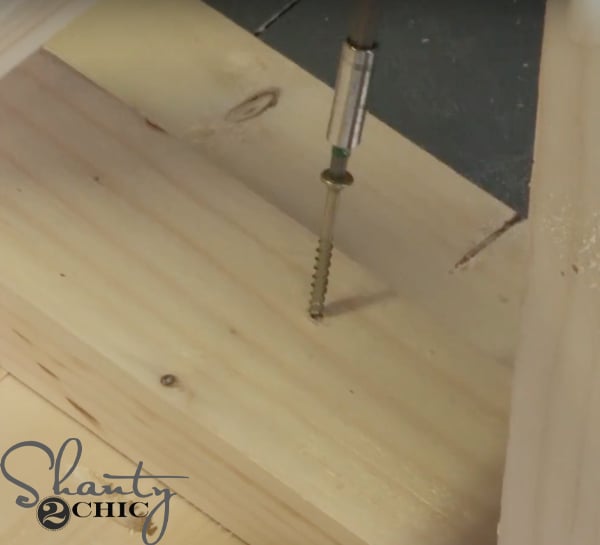 Center the base over the bench top and attach it with 2″ Spax screws from the bottom of the aprons into the planked top.
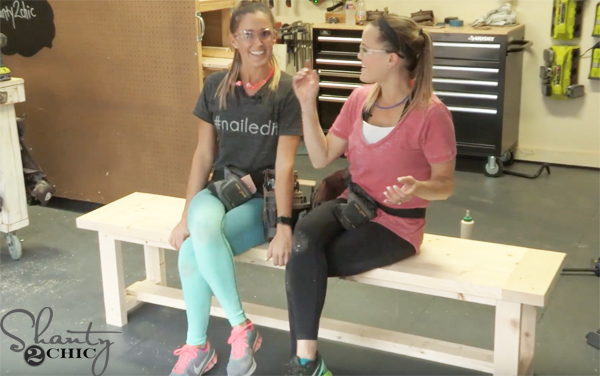 Flip it over and test it out 🙂
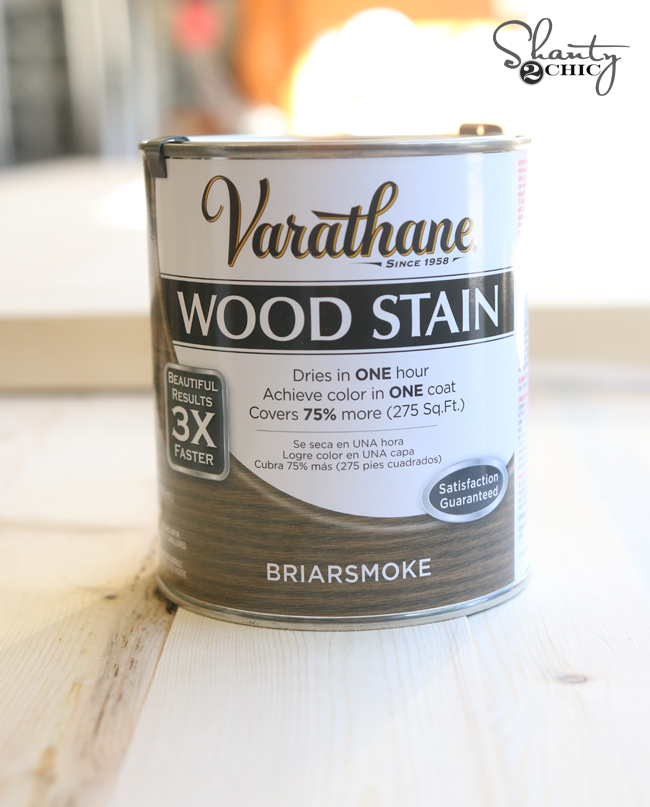 We used one coat of Briarsmoke stain by Varathane. Just wipe it on with a clean cloth, let it sit for about 5 minutes, then blend it in with a new clean cloth. It should take about an hour to dry. You can find Varathane stain HERE on Amazon.
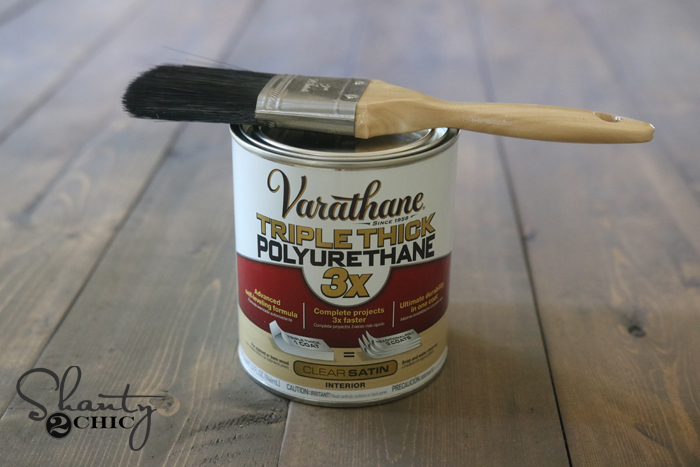 Once the stain dried, we brushed on one coat of Triple Thick Polyurethane to protect the finish! We love this stuff because one coat equals 3 coats – which allows us to clean messes off the surface with a damp cloth!
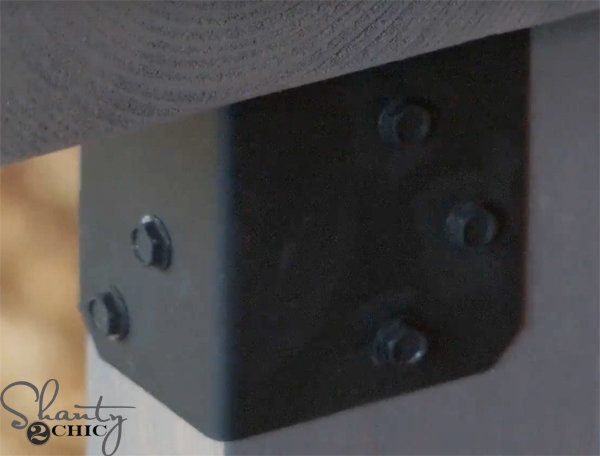 To finish the bench off and give it that Industrial look, we spray painted a few framing angles that we found at Home Depot and attached them to the top corners of the bench with hex screws (that we also spray painted)! To cover the screw holes on the bottom we attached washers and hex screws (also spray painted). We used Rust-Oleum Carbon Mist Universal Spray paint and you can find it HERE on Amazon.
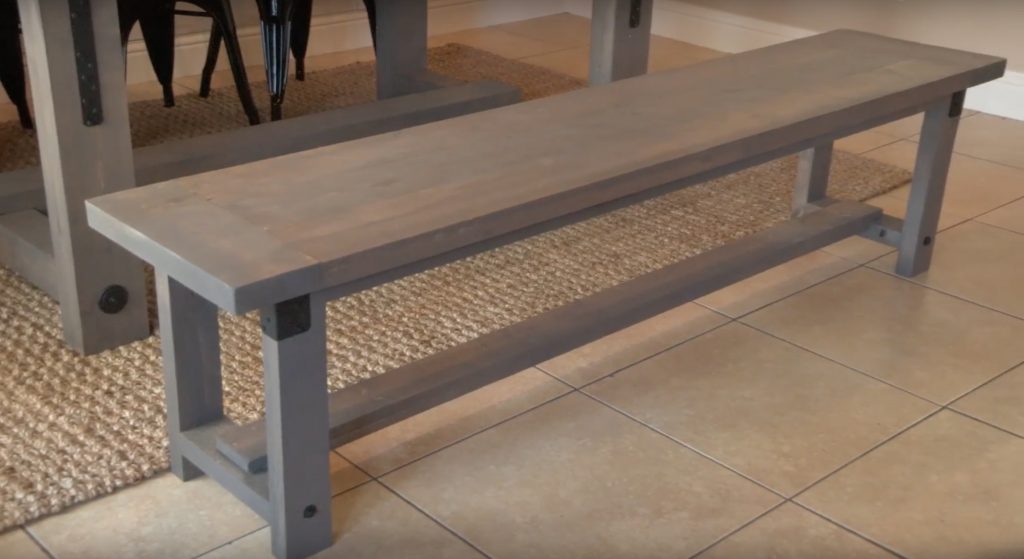 That was it!
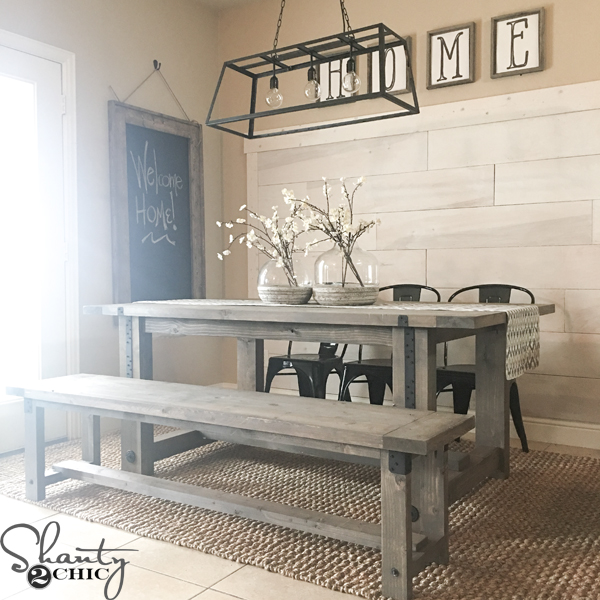 Total cost for the bench and table: $115!!! Total cost in lumber for this entire room, chalkboard, bench, table and the planked wall was under $400!!!
Want to know where we got the other items in this space. Click the links below!
Terrariums on the table: HERE
Stems: HERE
Table Runner: HERE
Chandelier: HERE
Chairs: HERE
Rug: HERE
HOME sign: Free Printables coming soon 🙂
You can check out the other videos to this #shantyhousecrash by clicking the links below!
Planked Wall
Industrial Farmhouse Table
Chalkboard: Coming next week!
Check out our previous #shantyhousecrash video below!
Total cost for the bench and table: $115!!! Total cost in lumber for this entire room, chalkboard, bench, table and the planked wall was under $400!!!
Want to know where we got the other items in this space. Click the links below!
Terrariums on the table: HERE
Stems: HERE
Table Runner: HERE
Chandelier: HERE
Chairs: HERE
Rug: HERE
HOME sign: Free Printables coming soon 🙂
You can check out the other videos to this #shantyhousecrash by clicking the links below!
Planked Wall
Industrial Farmhouse Table
Chalkboard: Coming next week!
Check out our previous #shantyhousecrash video below!
