Hey friends!
Thanks so much for all of your sweet comments and shares on my new bedroom desk I shared on Monday! We always love reading your comments! I have been busy, busy redecorating my bedroom. Today I am going to share my new roman shades and window panels I made for the room!

I have given tutorials on both of these types of window treatments before!
I did the same basic steps, but modified them just a bit by adding 2 fabrics.
You can see my DIY Roman Shade Tutorial HERE. This is a very simple tutorial to create great, working roman shades. I use mine everyday, and they have held up for years!
I found my fabrics at Fabric.com. I actually ran across the fabric at Joann’s first, but was able to get it MUCH cheaper at Fabric.com. I ordered it and received it within 3 days with free shipping… Woohoo!
My main fabric is a Robert Allen linen duck fabric. It has the look of a linen, without all the wrinkle! It is also much thicker than linen, which is great for window treatments.
My other fabric is called Premier Prints Gotcha Summerland Grey. I love the mix of this more modern print with the traditional linen fabric. It’s a perfect combo for me!
I used a blackout liner for both the shades and panels, and my room is very dark with everything closed up. I got mine on sale at Joann’s for around $2 a yard.
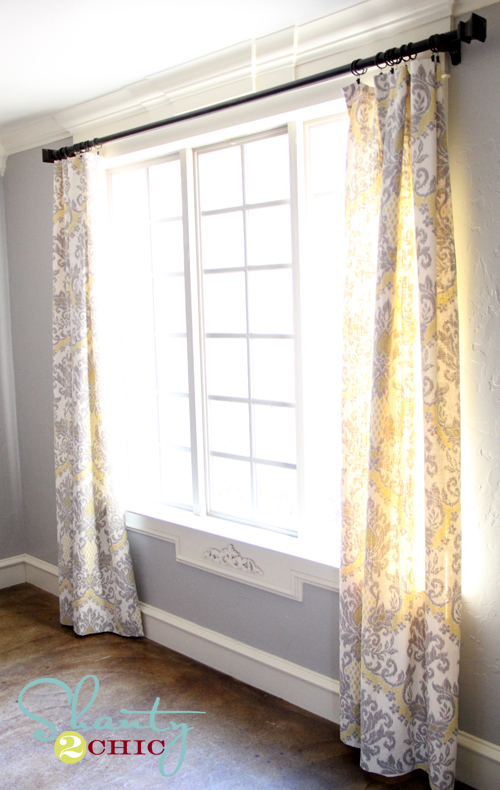
Here are a few pics of how my roman shades turned out!


I added a 7″ strip of fabric to each side before starting the shade. That is how I achieved the look… Super simple!
For my panels I used my Lined Window Panel Tutorial you can see HERE!
Both of these projects are really simple, and only require straight stitches. It may be time for some of you to dust off your machines! 😉
Here are a few pictures of my window panels…


And a few from around the bedroom…


Hope you love it as much as I do! It has been work, but so worth it!
Thanks so much for stopping by, and let me know if you have any questions!!
~Whitney

Just wondering what color and brand of paint you use on the walls in your house? Every room I have seen in your pictures looks great. I have been searching for great colors for my house to cover up the trash can grey the previous owner had painted our walls.
I’m so excited to give this a shot! I have to tell you, I love your carpet (I know this post is about windows but your carpet is lovely). Would you mind sharing the color or brand? Many thanks!
Hi Whitney. I am new to Pinterest and came across your site. I love to see what you do so easily. A question for you…our old TV went out so we got a new one. Now I am left with a perfectly good wooden tv that has a big space for the old tv, and a two door cabinet on the bottom. I was wondering how I might put shelves in the big opening and use it for my sewing/craft/exercise room for storage and organization. If you have any places to point me for ideas, I would so appreciate it. Sincerely, Debra P.S. love your Bible verses too.
Congratulations on being announced as a finalist in the Country Living Blue Ribbon blogger awards!
Thank you so much Susan!! We are so excited!! 😉
Whitney, I love your tutorial on both the Roman Shade and the Lined Window Panels! I have made several since for my average size windows, but now I’m having trouble finding long enough, unpainted wood dowels for my wider windows… do you have another resource other than Lowes or Home Depot? Neither carry dowels over 4 feet long in our area. You guys are wonderful! I always look forward to what new project you girls come up with!
Blessings!
Thank you so much Jerri! You might try looking online… I did run into the same problem with dowels and the hardware stores are the longest I found. Let me know if you have any luck!! 😉
okay you are amazing! Can I just like come hang out with you & your sister for a day so you guys can teach me how to build things and decorate? (since I’m a visual kinda girl) Or here’s a better idea: you can just come decorate my home. 😉 So beautiful & classy.
Hahaha this made me smile! Sounds like a plan to us! 😉
Im having to pray for forgiveness as we speak for the room envy I am having!!!!! LOL
I have every bit of your bedding in my cart on Pottery Barn’s website. Im also planning a trip to Atlanta to the IKEA store since they refuse to ship me that throw for some reason. I just have to go to the checkout and reason with myself that this is all logical….that by having this bedding my room will be magically transformed. There will be no clothes scattered everywhere. No cords of flat irons and blow dryers. No broken headboard (don’t ask). No dirty socks under the bed. No closet with no closet door on it. Yes, I believe I will go get my Discover card. Hahahaha
Brooke… This comment totally made me laugh! You are funny! I can’t say my room is always this spotless, but it does clean up well for pictures 😉 You will not be disappointed in the bedding! I love PB bedding, and this is my fav quilt so far. It’s also not too pricey which made me love it even more! Good luck with your room… And your scattered clothes and cords! I’m right there with you!! (plus toys, bottles and diapers!) Thanks so much!!
Thank you so much for posting this! I had forgotten about your shades from a while back, and I was just looking at PB last night to buy some for my 9 feet long windows in the kitchen. $250/per shade and they weren’t nearly long enough! It got me thinking what I could make, but this is completely perfect and customizable. Thank you so much again!!
That’s awesome Marion!! Good luck with them, and I would love to see photos when you get them finished up! 😉
I love your bed frame, was it a DIY or a purchase?
Hi Frances! It was a purchase before I knew how to build ;-). I got it at Rooms to Go, but I don’t think they carry it anymore! Sorry I can’t be more help! Thanks so much!!
I’m so in love with your bedroom. Seriously cutest ever!! Can you do a source list for your bedroom by chance? I really love your bedding!
Ange…I love PB bedding. It washes so good and always holds up for me! Here is the quilt I bought in Ivory… http://www.potterybarn.com/products/pb-essential-quilt-sham/?pkey=csolid-quilts-shams I also bought some matching shams you see at the front of the pillows in that same line. The duvet cover and Euro shams are from this line… http://www.potterybarn.com/products/pb-essentials-duvet-cover-sham-ivory/?pkey=cduvet-covers-shams I lay the wrinkle throw on top of it. That is $19 at Ikea. Hope this helps! 🙂
Where are those lamps from?
TJ Maxx… Thanks for asking!
I love your bedroom!! Looks fabulous!!
Thank you Lauren!!!
I’m in love with your bedspread. Where did you get it?
Pottery Barn! It’s the essentials quilt in Ivory. Hope this helps!
just saw this! Thanks. You are amazing
Great Job! I love the look and the fabrics! Thanks for the tip on where to buy fabric cheaper. I have been needing some for some new pillows!
Thanks so much Mindi!! I appreciate it! 😉
Love it! Beautiful headboard too! <3
welivedhappilyeverafter.blogspot.com